Velo Pro - Heating Dri Eaz - Free user manual and instructions
Find the device manual for free Velo Pro Dri Eaz in PDF.

| Product Type | Compact Drying Fan |
| Brand | Dri Eaz |
| Model | Velo Pro |
| Dimensions (L × W × H) | 61 × 45.7 × 22.9 cm |
| Weight | 9.6 kg |
| Power Supply | 115 V ~, 60 Hz |
| Current Draw | 1.2 to 1.9 A |
| Power | 185 W |
| Airflow | 500 to 885 CFM (850 to 1504 CMH) |
| Static Pressure | 1.65 in H₂O |
| Sound Level | 69 dB (average) |
| Cord Length | 5.5 m |
| Controls | On/Off switch, variable speed with digital display (current and hours) |
| Safety | Built-in ground fault circuit interrupter, overload circuit breaker, protected GFCI outlets |
| Main Functions | Multiple positions (horizontal, vertical, tilted with kickstand), concentrated airflow for drying |
| Maintenance | Clean exterior with mild detergent, disassemble for interior cleaning (see manual) |
| Spare parts and repairability | Use only parts authorized by Legend Brands; contact an authorized Dri-Eaz distributor |
| General Information | ETL tested to UL and CSA standards; stackable for transport and storage; warranty upon registration |
Frequently Asked Questions - Velo Pro Dri Eaz
User questions about Velo Pro Dri Eaz
0 question about this device. Answer the ones you know or ask your own.
Ask a new question about this device
Download the instructions for your Heating in PDF format for free! Find your manual Velo Pro - Dri Eaz and take your electronic device back in hand. On this page are published all the documents necessary for the use of your device. Velo Pro by Dri Eaz.
USER MANUAL Velo Pro Dri Eaz
15180 Josh Wilson Road, Burlington, WA 98233, USA
Phone: +1 800-932-3030 Fax: +1 360-757-7950 LegendBrandsRestoration.com
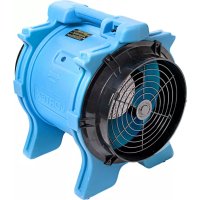
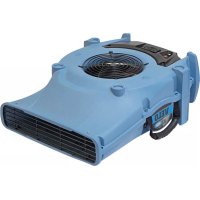
The Velo and Velo Pro Airmovers use a patented housing design to produce concentrated, broad-path airflow to accelerate the evaporation of moisture from materials for drying.
Patents: http://www.LBpatents.com
READ AND UNDERSTAND THESE INSTRUCTIONS


WARNING! To reduce the risk of fire or electric shock, do not use this fan with any solid-state speed control device.
WARNING! Unit must be grounded. Do
not use with an extension cord. Connect only to an outlet provided with a ground fault interrupting device.
WARNING! Never operate a unit with a damaged power cord, as this may lead to electrical or fire hazards. If power cord is damaged, it must be replaced by a cord of the same type and amperage rating.
WARNING! Do not touch grills when unit is operating. WARNING! Do not allow children to play with or around the unit. Be sure the unit is inaccessible to children when not attended.
WARNING! Always operate the unit on a stable, level surface so it cannot fall and cause injury.
WARNING! Do not operate any fan with a damaged cord or plug. Discard fan or return to an authorized service facility for examination and/or repair.
WARNING! Do not run cord under carpeting. Do not cover cord with throw rugs, runners, or similar coverings. Do not route cord under furniture or appliances. Arrange cord away from traffic area to avoid creating a trip hazard.
NOTICE: Keep motor dry. For indoor use only.
NOTICE: Unplug when not in use or when moving unit.
NOTICE: Do not alter or modify your Velo in any way. Use only replacement parts authorized by Legend Brands, Inc. Modifications or use of unapproved parts could create a hazard and will void your warranty. Contact your authorized Dri-Eaz distributor for assistance.
BEFORE YOU BEGIN
Warranty registration
Please visit warranty.legendbrandsrestoration.com to register your purchase. If you determine service is
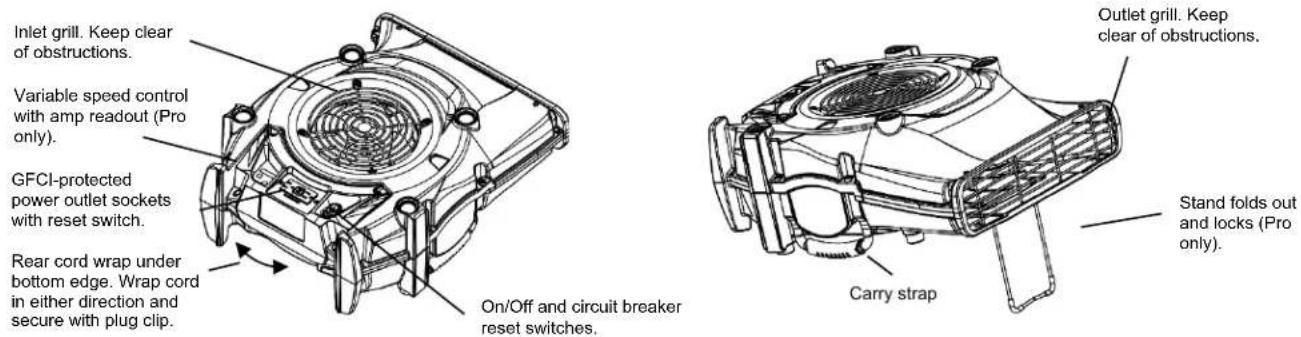
Fig. A: Parts Identification
text_image
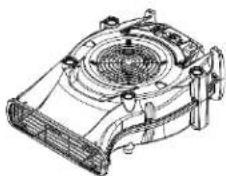
Inlet grill. Keep clear of obstructions. Variable speed control with amp readout (Pro only). GFCI-protected power outlet sockets with reset switch. Rear cord wrap under bottom edge. Wrap cord in either direction and secure with plug clip. On/Off and circuit breaker reset switches. Carry strap Outlet grill. Keep clear of obstructions. Stand folds out and locks (Pro only).Fig. B: Operating Positions
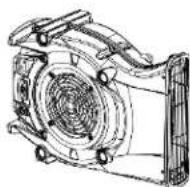
natural_image
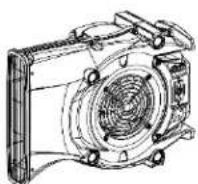
Technical line drawing of a mechanical fan or housing component (no text or symbols visible)Horizontal (for horizontal surfaces)
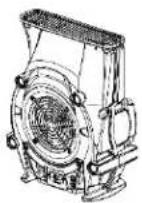
natural_image
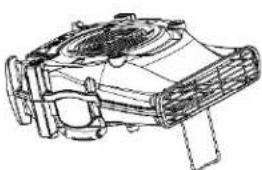
Technical line drawing of a mechanical component with no visible text or symbolsWith stand for stairwells and wall drying (Pro only)
Left edge (for wall drying)
Right edge (for wall drying)
Vertical
(for walls and ceilings)
required, have your equipment model, serial number and original proof of purchase available and call your distributor for assistance with obtaining a return material authorization (RMA).
OPERATING INSTRUCTIONS
Note that the Velo can be placed in a variety of positions for drying and air circulation. See Fig. B for details.
- Unwrap the cord and plug the unit into a standard 115V GFCI-protected outlet. CAUTION: Be sure switch is in the off position before connecting unit to power outlet.
- Direct the Velo outlet toward the surface to be dried. TIP: On the Velo Pro, the airflow may be adjusted by pressing the Up or Down arrow on the speed control (Fig. D). A digital readout shows the approximate amp draw. Use this value to maximize the number of Velos you can place on a single circuit.
- When surface is dry to the touch, switch the unit off and reposition the unit in the next area to be dried.
- When finished, unplug the unit and re-wrap the cord in the cord wrap.
For additional instructions about the use of airmovers for restorative drying, see Tech Tips under Resources on www.LegendBrandsRestoration.com.
Electrical safety devices
Circuit breaker: If the circuit breaker detects overload or short circuit conditions, the breaker will automatically shut off the electrical supply. If this occurs, check the power cable carefully for any damage and ensure it is plugged into a properly grounded outlet. Press the Circuit Breaker Reset Switch (Fig. A) to reestablish the electrical supply.
Ground Fault Circuit Interrupter: If the GFCI device detects a ground fault, it will automatically shut off the electrical supply. If this should occur, check the power cable carefully for damage and ensure it is plugged into a properly grounded outlet. Press the GFCI reset button (Fig. A) to reestablish the electrical supply.
TRANSPORT AND STORAGE
Always use the handle to load or carry the unit.
Wrap cord in either direction under front Cord Wrap tab and rear bottom edge (Fig. A). Pull cord snug and secure with plug clip.
Units may be stacked for transport and storage.
When transporting in a vehicle, secure the unit(s) carefully to prevent sliding and damage to the unit and/or injury to vehicle occupants.
Keep unit dry. Do not expose the unit to rain or snow.
MAINTENANCE
WARNING: Unplug unit before performing any maintenance.
Before each use
Inspect the power cord. If cord is damaged, do not use. Always grasp the plug (not the cord) to unplug.
As needed
The exterior may be cleaned with a mild solution of detergent. Ensure housing is completely dry before use. To clean interior, see Fig. C for instructions.
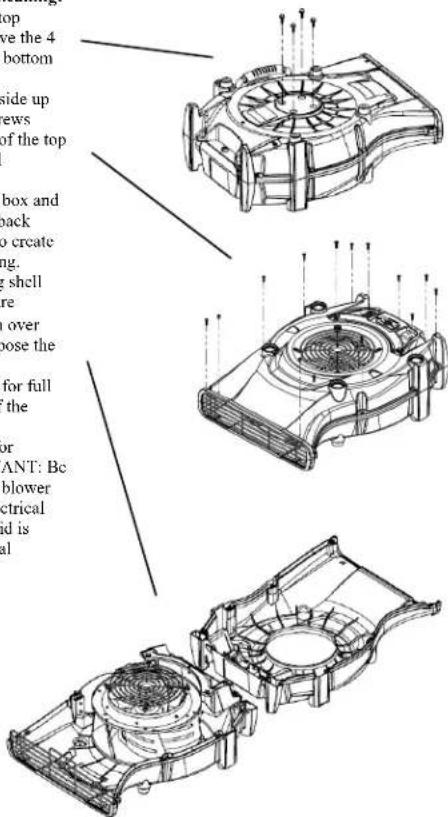
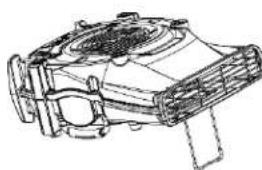
Fig. C: Disassembly
To disassemble for cleaning: 1. Lay the unit on its top (upside down). Remove the 4 blower bolts from the bottom of the unit.
-
Turn the unit right side up and remove the 14 screws around the perimeter of the top housing and electrical enclosure.
-
Open the electrical box and feed the blower cord back through the opening to create slack inside the housing.
-
Lift the top housing shell and electrical enclosure together and flip them over next to the base to expose the inside of the housing.
-
Lift the blower out for full access to the inside of the housing.
-
Reverse the steps for reassembly. IMPORTANT: Be sure to pull any slack blower cord back into the electrical enclosure before the lid is placed on the electrical enclosure.
text_image
top ve the 4 bottom side up ews of the top box and back to create ing. shell re over pose the for full the or ANT: Be blower etrical id is alFig. D (Pro only)
Variable speed control with amp and total unit hours display
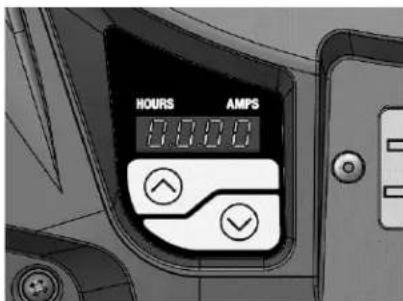
text_image
HOURS AMPS 0:00:00FOR SERVICE CALL YOUR LOCAL DISTRIBUTOR or the Legend Brands Service Department at 800-932-3030.
Be sure to visit warranty.legendbrandsrestoration.com to register your purchase. Your registration will help us provide you with updated product information as needed.

WARNING: This product and other substances that may become airborne from its use contain
chemicals, including lead, known to the State of California to cause cancer, birth defects, or other reproductive harm. For more information, go to P65Warnings.ca.gov
SPECIFICATIONS
| Model | Velo 2-Speed | Velo Pro |
| Weight | 19.3 lbs. | 8.8 kg | 21.2 lbs. | 9.6 kg |
| Dimensions (D × W × H) | 24 × 18 × 9 in.61 × 45.7 × 22.9 cm | 24 × 18 × 9 in.61 × 45.7 × 22.9 cm |
| Amp draw (115V) | 1.7 amps (low)2.1 amps (high) | 1.2–1.9 amps |
| Velos per 15 amp circuit | Up to 7 Up to 10 | |
| Power | 190.0W (low)241.5W (high) | 185W |
| Air movement | 511 CFM (low)885 CFM (high) | 500–885 CFM850–1504 CMH |
| Static pressure | 1.28 in.(low)1.7 in. (high) | 1.65 in. (H2O) |
| Sound level (avg.) | 59.9 dB (low)71.5 dB (high)) | 69 dB |
| Control | Two speed rocker switch | On/Off switch with variable speed |
| Cord length | 18 ft. | 5.5 m | 18 ft. | 5.5 m |
| Fan | 6 blades 6 blades | |
| Construction | Injection molded housing; steel wire inlet and outlet grills. | Injection molded housing; steel wire inlet and outlet grills. |
| Safety | ETL tested to UL and CSA standards | ETL tested to UL and CSA standards |
| Specifications are subject to change without notice. Some values may be approximate. | ||
natural_image
Technical line drawing of a mechanical fan or compressor assembly (no text or symbols visible)natural_image
Technical line drawing of a mechanical component with no visible text or symbolsHorizontal (para superficies horizontales)
natural_image
Technical line drawing of a mechanical component with no visible text or symbolsnatural_image
Technical line drawing of a mechanical component with no visible text or symbols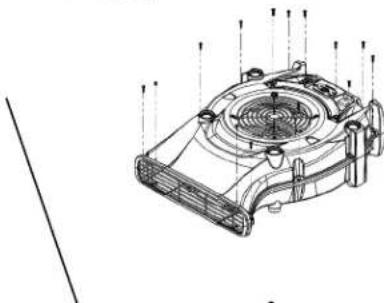
natural_image
Technical line drawing of a mechanical component with internal structure and mounting holes (no text or symbols)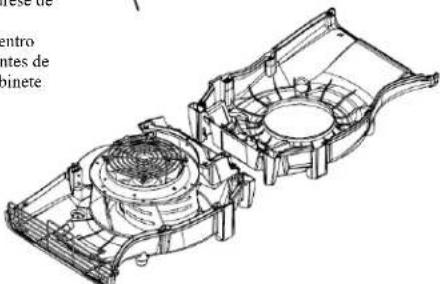
natural_image
Technical line drawing of a mechanical assembly with internal components (no text or symbols)Fig. D: Modelo Pro:
15180 Josh Wilson Road, Burlington, WA 98233, É.-U.
Tél. : +1 800-932-3030 Téléc. : +1 360-757-7950 LegendBrandsRestoration.com