MW623 - Sander Toolcraft - Free user manual and instructions
Find the device manual for free MW623 Toolcraft in PDF.
| Product Type | Cordless multi-tool (oscillating) |
| Brand | Toolcraft |
| Model | MW623 |
| Dimensions | 240 x 165 x 170 mm |
| Weight | 1.6 kg |
| Power supply | 20 V DC lithium-ion battery (not included in solo version) |
| Vibration frequency | 11000 - 21000 min⁻¹ (adjustable from 1 to 6) |
| Sound pressure level | LpA = 79.2 dB(A); KpA = 3 dB(A) |
| Sound power level | LwA = 90.2 dB(A); KwA = 3 dB(A) |
| Vibration (EN 62841) | 4.851 m/s²; uncertainty K = 1.5 m/s² |
| Operating/storage temperature | 0 °C to 40 °C; 0 % to 85 % RH |
| Intended use | Sawing, cutting, dry grinding of wood, plastic, light metals, plasterboard, metal elements |
| Package contents | Tool only, abrasive paper holder, sandpaper, wood saw blade, scraper, instruction manual |
| Tool mounting | Quick clamping for compatible tools (e.g., item no. 1574786) |
| Cleaning | Dry cloth, long-bristled brush, vacuum cleaner; no abrasive or chemical products |
| Maintenance | No user-serviceable parts; repair by a specialist |
| Safety | Mandatory wearing of safety glasses, dust mask, hearing protection; remove the battery before any adjustment or cleaning |
| Spare parts | Compatible conventional tools (e.g., blade, sandpaper) available under item no. 1574786 |
| Compliance | Directives 2006/42/EC, 2014/30/EU, 2011/65/EU; standards EN 62841-1, EN 62841-2-4, EN 55014-1/2 |
| Warranty | Warranty void if instructions not followed |
Frequently Asked Questions - MW623 Toolcraft
User questions about MW623 Toolcraft
0 question about this device. Answer the ones you know or ask your own.
Ask a new question about this device
Download the instructions for your Sander in PDF format for free! Find your manual MW623 - Toolcraft and take your electronic device back in hand. On this page are published all the documents necessary for the use of your device. MW623 by Toolcraft.
USER MANUAL MW623 Toolcraft
GB Original Instructions
TC 20V Cordless multi-purpose tool
Item No. 2331501 Page 16 - 29
www.business.conrad.at
text_image
Technical diagram of a handheld device with numbered parts labeled 1 to 4natural_image
Black-handled analog saw blade with cutouts and a 32mm thickness label (no other text or symbols visible)natural_image
Three-panel black-and-white photo showing a hand using a crimping tool to adjust a small component, with no visible text or symbols.natural_image
Close-up of a mechanical component with a circular end and curved arrow indicating rotation (no text or symbols)natural_image
Close-up of a hand holding a black electronic device with a curved arrow pointing to a component (no visible text or symbols)natural_image
Close-up of a hand holding a black electronic device with a white arrow pointing to the component (no visible text or symbols)natural_image
Close-up of a hand holding a black electronic device with a white arrow pointing to a component (no visible text or symbols)8. Bedienung
natural_image
Close-up of a black flip phone with a white arrow pointing to the left side of the screen (no text or symbols visible)natural_image
Close-up of a car interior showing a directional arrow and a small circular button (no text or symbols visible)TOOLCRAFT 20 V5,0 A ALG-1100
- Introduction......17
- Explanation of symbols....18
- Intended use....18
- Delivery content....19
- Safety information....19
a) General safety instructions....19
b) Personal safety....20
c) General safety warnings for power tools....21
d) Power tool safety warnings....22
e) Workstation safety 22
f) Specific safety instructions for multi-purpose tools....22
g) Residual risks 23
- Components and controls....23
- Installation....24
a) Attaching/replacing an insertion tool....24
b) Inserting/removing the battery 25
- Operation....26
a) Switching on and off 26
b) Setting the vibration frequency....26
- Troubleshooting 26
- Cleaning and maintenance....27
a) Maintenance....27
b) Cleaning 27
- Disposal....28
- Technical data....28
- Declaration of Conformity (DOC)....29
1. Introduction
Dear customer,
Thank you for purchasing this product.
This product complies with statutory, national and European regulations.
To ensure that the product remains in this state and to guarantee safe operation, always follow the information in these original operating instructions.

These original operating instructions are part of this product. They contain important information on setting up and using the product. Do not give this product to a third party without the operating instructions. Keep these operating instructions in a safe place for future reference.
If there are any technical questions, please contact:
www.conrad.com/contact
2. Explanation of symbols

The icon with the exclamation mark in a triangle indicates particular hazards associated with handling, use or operation.

The arrow symbol indicates special information and tips on how to use the product.

Read the original operating instructions carefully before first use.

Wear a dust mask
3. Intended use
This device is designed for sawing, cutting and sanding.
It can be used on the following materials: Wood, plastic, light and non-ferrous metals, drywall elements, tiles and fixing elements made of metal (e.g. nails, screws, etc.). A suitable insertion tool should be used for each application.
This appliance is designed for use in private premises. Commercial use is not permitted.
The product must only be used in dry, indoor areas.
For safety and approval purposes, do not rebuild and/or modify this product. Using the product for purposes other than those described above may damage the product. In addition, improper use can cause hazards such as injury, a short circuit, fire, etc.
Read through these original operating instructions carefully and keep them in a safe place. Only make this product available to third parties together with its original operating instructions.
All company and product names contained herein are trademarks of their respective owners. All rights reserved.
4. Delivery content
- Cordless multi-purpose tool (standalone version without battery and charger)
- Sandpaper receptacle, sandpaper, wood saw blade, scraper
• Original operating instructions
Up-to-date original operating instructions
Download the latest original operating instructions at www.conrad.com/downloads or scan the QR code shown. Follow the instructions on the website.

5. Safety information
Read the original operating instructions and safety information carefully. If you do not follow the safety instructions and information on proper handling in these original operating instructions, we will assume no liability for any resulting personal injury or damage to property. Such cases will invalidate the warranty/guarantee.

a) General safety instructions
- Observe all safety information, instructions, drawings and specifications that are supplied with this tool. Failure to do so may cause fire and/or injury.
- Do not allow people who have not read or understood these original operating instructions to use the product.
- Keep these original operating instructions in a safe place so that you can refer to them at any time.
- The product is not a toy and should be kept out of the reach of children! The product must be placed, used and stored in areas that are inaccessible to children.
- Children must be supervised to make sure they do not play with the device.
- If it is no longer possible to operate the product safely, stop using it and prevent unauthorised use. Safe operation can no longer be guaranteed if the product:
- is visibly damaged,
- is no longer working properly,
- has been stored for extended periods in poor ambient conditions or
- has been subjected to any serious transport-related stress.
- Handle the product carefully. Jolts, impacts or a fall even from a low height may damage the product.

- Do not leave packaging material lying around carelessly. It may become a dangerous plaything for children.
- Pay attention to all additional safety information in the individual sections of these original operating instructions.
- Consult a technician if you are not sure how to use or handle the product, or if you have concerns about safety.
- Maintenance, modifications and repairs must be carried out by a technician or a specialist repair centre.
- If you have questions which remain unanswered by these original operating instructions, contact our technical support service or other technical personnel.
- The product must be operated under the supervision of qualified personnel in schools, educational facilities, hobby and DIY workshops.
• Always observe all relevant national regulations (e.g. occupational safety measures).
b) Personal safety
- Do not use the tool when you are tired or under the influence of drugs, alcohol or medication. A moment of carelessness can cause serious injuries.
- Always use the tool carefully. Avoid the familiarisation effect if you have already worked with the tool a lot. Always observe the safety instructions and stay alert at all times. A moment of carelessness can result in serious accidents.
- Use personal protective equipment. Always wear protective goggles, sturdy shoes, long trousers, ear defenders, breathing protection and if necessary, gloves. Never work barefoot or wearing sandals.
- Wear appropriate clothing. Do not wear jewellery. Hair, jewellery or clothing can be caught in moving parts – risk of injury! Use a hair net or similar if you have long hair and wear close-fitting clothes when using the product.
- Prevent unintentional switching on of the tool. Always make sure that the on/off switch is switched off when you store, pick up or carry the device and before you connect or remove the battery from the device. Do not carry the tool with your finger on the on/off switch.
- Remove any adjusting tools, e.g. spanners, before turning the appliance on. The tool could spin out of control or seize up when switched on and cause injuries.
- Make sure you are stood firmly on the ground while working and avoid an abnormal posture. This makes it much easier to control the tool in unforeseen circumstances.
- If a mechanism for connecting a suction unit is provided, ensure it is properly connected and used. Using such a device can reduce dust related hazards.

c) General safety warnings for power tools
- Do not overload power tools. Only use power tools for their intended purpose. A suitable tool does the job better and, more importantly, more safely.
- Check the on/off switch before each use. Using the tool with a damaged on/off switch hinders control of the tool and is therefore very dangerous.
- Always remove the battery before adjusting or storing the appliance, or changing attachments/accessories. This prevents you from turning the appliance on by accident.
- Keep power tools out of the reach of children. Do not allow people who are unfamiliar with the appliance and/or have not read and understood these original operating instructions to use it. Power tools are very dangerous in the hands of inexperienced users.
- Service the tool regularly and check for signs of damage, dirt, incorrect settings, wear and tear or other issues that may present a hazard. Ensure that damaged devices are repaired by a specialist before use. Poorly maintained tools often lead to accidents.
- Do not use the tool with worn or dirty insertion tools. Only use suitable insertion tools. Blunt or unsuitable insertion tools can get caught easily and lead to a loss of control over the tool.
- Use the tool and its accessories only for the specified purpose and in accordance with these original operating instructions. Also pay attention to the working conditions and the task that you plan to carry out. Improper use can lead to hazardous situations.
- Only use accessories and attachments that are compatible with the slots on the device.
- Never attempt to switch off safety mechanisms.
- Do not use the device on wet materials.
- Switch the device off immediately if the drive becomes blocked.
- Keep the handles and surfaces of the tool dry, clean and free of oil or lubricants. Slipping during operation will lead to a loss of control and accidents.
- Hold the tool firmly. A sudden stop of the drive transfers the kinetic energy to the tool itself. This may cause the tool to fall out of your hands – risk of injury!
- Condensation may form when the product is brought from a cold room into a warm one (e.g. during transportation). This can damage the product!
For this reason, allow the product to warm up to room temperature before using it or inserting the battery. This may take several hours.

d) Power tool safety warnings
- Only use batteries that are specifically designed for this power tool. Using other batteries might result in injury and/or fire hazards.
- Observe the safety and handling instructions in the original operating instructions of the battery and its charging device.
- Never leave the appliance unattended when it is connected to the battery. Remove the battery before moving away from the appliance.
e) Workstation safety
- Keep your workstation clean. Keep the work area well lit. A disorganised workstation or poor lighting can cause accidents.
- Keep children and other people away from the workstation! Distractions can cause accidents.
- Ensure that your working area is well ventilated.
- Never use the product next to or near flammable liquids or gases, air/gas mixtures (petrol vapours) or flammable solids/dust. Sparks may be generated when the product is used – risk of fire or explosion!
f) Specific safety instructions for multi-purpose tools
- Always hold the multi-purpose tool by the insulated handles. The insertion tool could come into contact with hidden power lines and energise the metal parts of the appliance. Risk of electric shock!
- Keep body parts away from the insertion tool during operation.
- Never touch the rotating insertion tool. Risk of injury! The insertion tool continues to move for a short period after the device is switched off.
- Never reach under or behind the workpiece while working. Your hands could come into contact with the moving insertion tool protruding from the workpiece and sustain an injury.
- Wait until the motor has come to a complete standstill before placing the multi-purpose tool on a surface.
- Fix the workpiece in place with suitable means. Never hold the workpiece in your hands or resting on your legs.
- Working with materials that contain asbestos, lead paints and certain types of wood or metal may generate dust that is dangerous to your health. Contact with and inhalation of this dust is dangerous to the operator and nearby persons. For this reason, wear safety goggles and a dust mask and ensure appropriate dust extraction.
- Only use the multi-purpose tool on dry materials. If moisture enters an electrical appliance, it increases the risk of short circuits and electrical shock.

g) Residual risks
This appliance complies with technical regulations and relevant safety regulations. However, the following may still occur during use:
- Danger to the life and limbs of the user or other people.
- Damage to the appliance.
- Damage to other property.
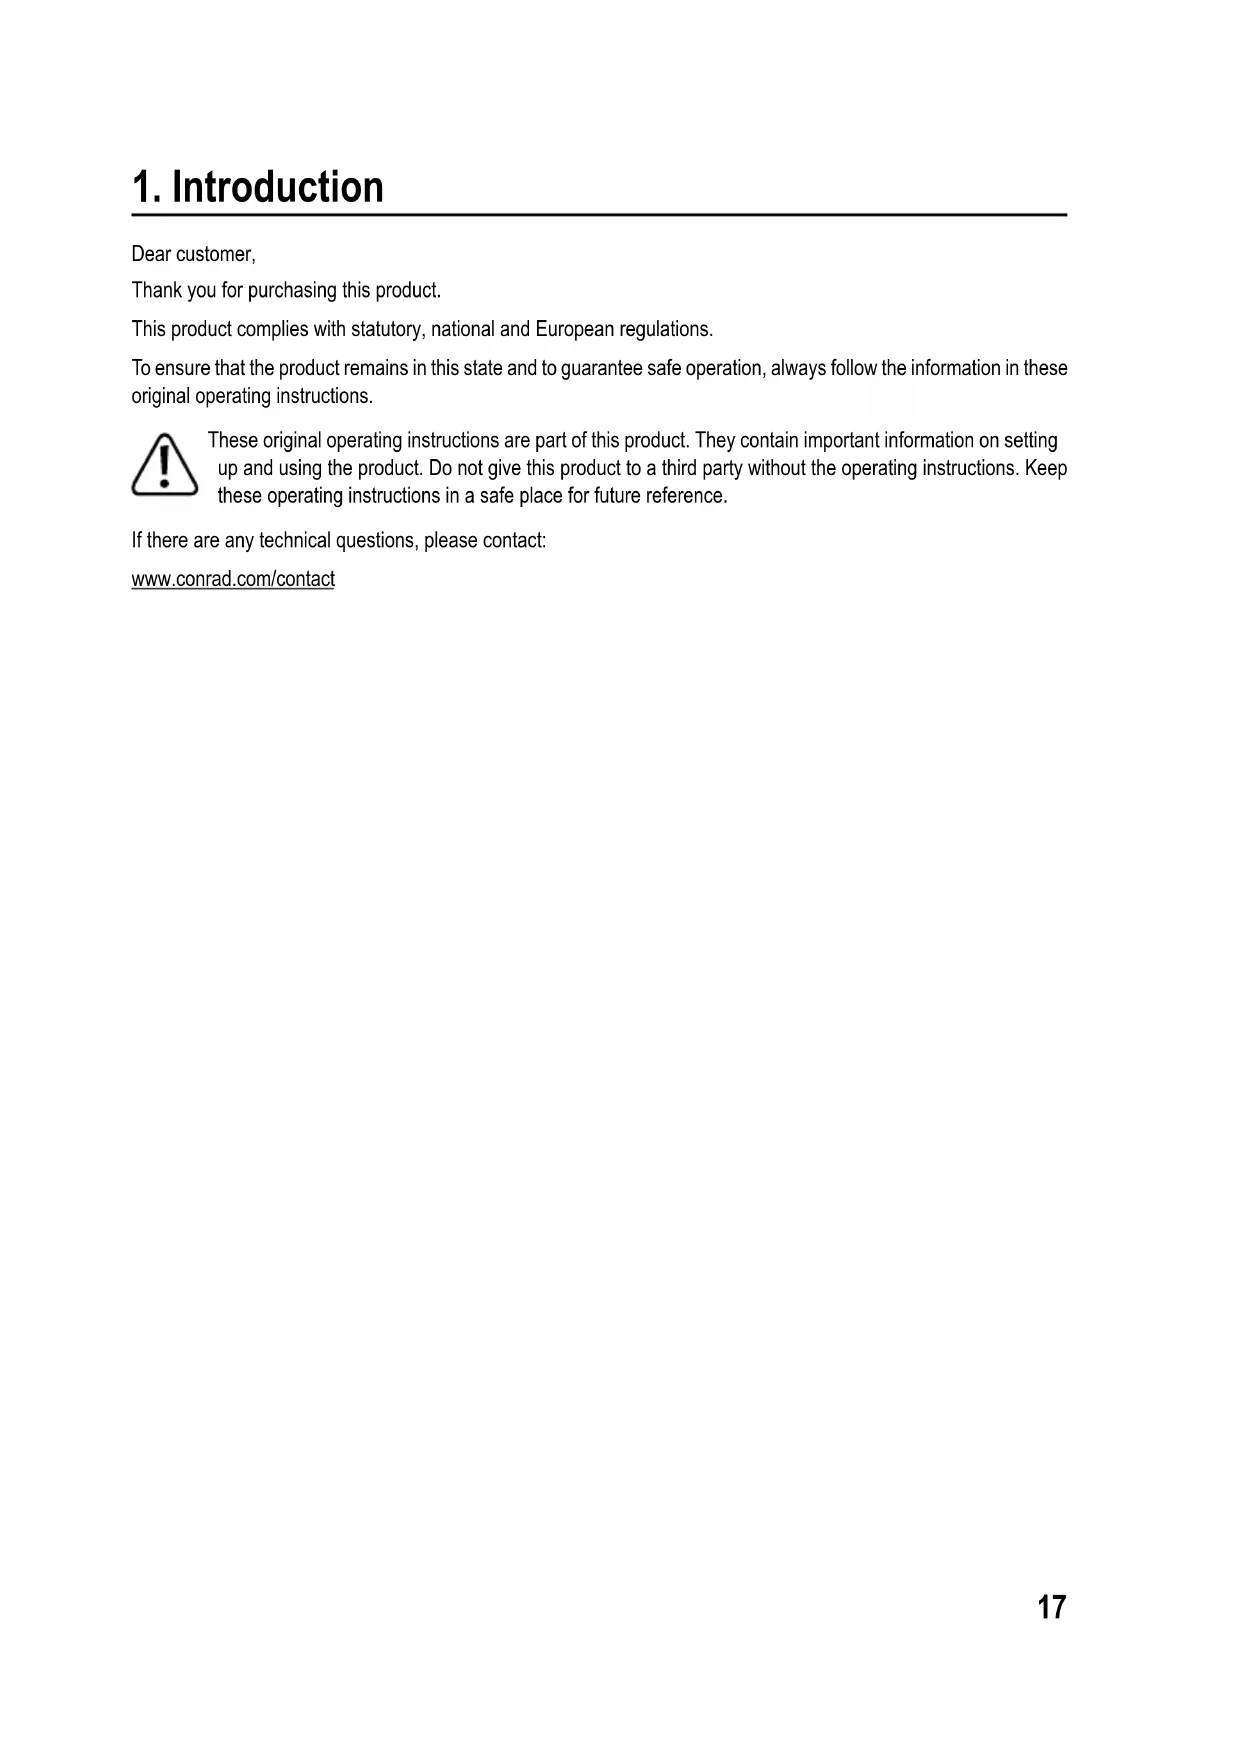
6. Components and controls
text_image
Technical diagram of a handheld device with numbered parts labeled 1 to 41 Quick release
2 On/off switch
3 Tool holder
4 Vibration frequency controller
7. Installation

Always remove the battery before attempting any installation or adjustment work or changing tools or accessories. Inadvertent operation of the on/off switch (2) can cause injury.
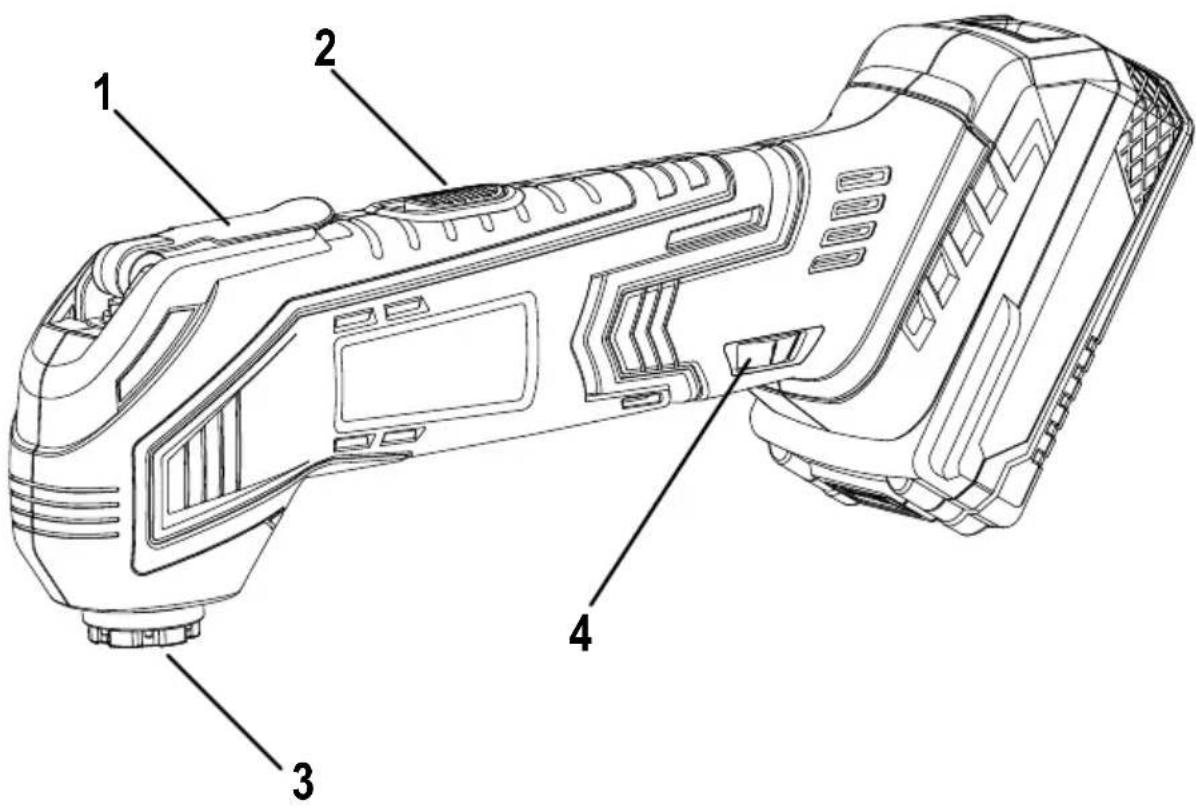
a) Attaching/replacing an insertion tool

All commercially available insertion tools with the tool holder shape shown in the illustration can be used. For example, suitable insertion tools can be ordered using item no. 1574786.

natural_image
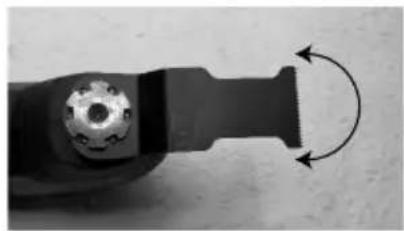
Black mechanical tool with threaded base and cutouts, no visible text or symbols on the tool itself.- Open the quick release (1).
• The tool holder (3) is now unlocked.
- Insert the required tool into the tool holder (3).

natural_image
Three-panel black-and-white photo showing a hand holding a small mechanical component, with arrows indicating rotation and disassembly steps (no text or symbols visible)- The tool can now be locked in place in different positions.
natural_image
Close-up of a mechanical component with a circular end and curved arrow indicating rotation (no text or symbols)- Lock the tool holder again by closing the quick release (1) until it clicks into place.
- Check that the tool is firmly seated. It must be securely locked in the tool holder (3).
natural_image
Close-up of a hand holding a black electronic device with a curved arrow pointing to a component (no visible text or symbols)
The quick release must be securely closed before starting work, otherwise there is a risk of injury from a loose tool.
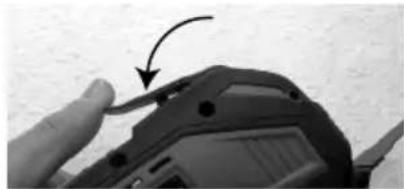
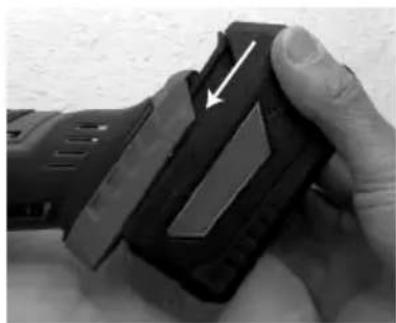
b) Inserting/removing the battery
- Slide the battery into the battery compartment on the back of the device until it clicks into place, as shown in the image.
natural_image
Close-up of a hand holding a black electronic device with a white arrow pointing to the component (no visible text or symbols)- To remove the battery, press the release button on the battery and pull it out of the battery compartment.
natural_image
Close-up of a hand holding a black electronic device with a white arrow pointing to a component (no visible text or symbols)8. Operation
a) Switching on and off
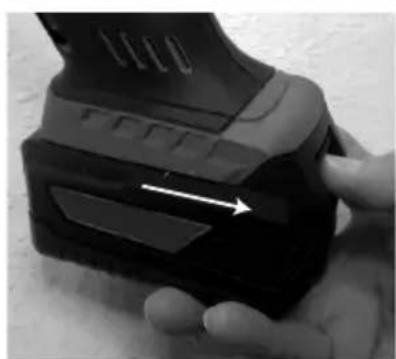
• To switch the device on, slide the on/off switch (2) forward.
- To switch the device off, slide the on/off switch (2) back to its original position.

natural_image
Close-up of a black flip phone with a white arrow pointing to the left side of the screen (no text or symbols visible)b) Setting the vibration frequency
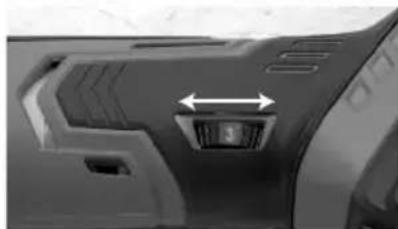
- Turn the vibration frequency controller (4) to set the vibration frequency:
The vibration frequency can be set between "1" and "6", where "1" corresponds to the lowest vibration frequency (11000 min ^-1 ) and "6" to the highest vibration frequency (21000 min ^-1 ).
natural_image
Close-up of a car interior showing a directional arrow and a small circular button (no text or symbols visible)9. Troubleshooting
The multi-purpose tool does not switch on:
- The battery is depleted. Charge the battery using the corresponding charger.
- The battery is not correctly inserted into the battery compartment on the back of the device.
The device vibrates vigorously and/or is very loud:
- The insertion tool is not attached properly to the tool holder (3). Check that the insertion tool is firmly seated.
Saw cuts are not clean / the edges of the cut are frayed.
- The saw blade is worn out or damaged and must be replaced.
- A saw blade that is unsuitable for the material or saw cut type was used.
- Protect sensitive materials (e.g. coated chipboard) with adhesive tape. The adhesive tape prevents fraying at the cutting edge. A thin block of wood can also be cut at the same time to prevent fraying at the cutting edge.
Sawing performance is poor:
• The saw blade is worn out and must be replaced.
• The vibration frequency is not set correctly.
Sanding performance is poor:
- The sand paper is worn out and must be replaced.
- The vibration frequency is not set correctly.
10. Cleaning and maintenance

Before cleaning or servicing the device, switch it off and remove the battery.
Under no circumstances should you service any of the components in the interior of the product, therefore never open/dismantle it. Repair and maintenance work (including opening the product) must be done by a technician or specialist repair centre.
Do not allow water or moisture to get inside the device.
Use a slightly damp cloth to clean the product. Do not use any aggressive cleaning agents or chemicals. Improper cleaning agents can cause discolouration on the plastic surface. Never use scouring agents, alcohol, petrol, spirits or other similar liquids to clean the product.
Wear protective gloves during maintenance and cleaning work to prevent injury from sharp edges or the insertion tool.
a) Maintenance
- Check the insertion tool for signs of wear and tear before and after each use.
- Replace the insertion tool when it becomes worn out.
- Never use insertion tools that are not suitable for the device.
b) Cleaning
• Always clean the product immediately after use to prevent dust and dirt from settling.
- Keep dust and dirt off the safety mechanisms, ventilation slots and the motor housing.
- Thorough cleaning keeps the product in a usable condition and prolongs its lifespan. A good craftsman is careful with his tools!
- Remove dust and wood shavings using a clean, long-haired brush and a vacuum cleaner. Compressed air (at a low pressure) can also be used.
- Use a dry, clean and lint-free cloth to clean the exterior of the product.
11. Disposal
Electronic devices are recyclable waste and must not be placed in household waste. At the end of its service life, dispose of the product in accordance with the applicable regulatory guidelines. Dispose of the battery as specified in the relevant original operating instructions.
12. Technical data
Rated voltage 20 V/DC
Suitable rechargeable batteries (not included)....TOOLCRAFT 20 V/5.0 Ah Li-Ion AP-1200
TOOLCRAFT 20 V/4.0 Ah Li-Ion AP-1100
TOOLCRAFT 20 V/2.0 Ah Li-Ion AP-1000
Suitable charger (not included)......TOOLCRAFT 20 V/2.3 A ALG-1000
TOOLCRAFT 20 V/5.0 A ALG-1100
Suitable insertion tools ...... e.g. item no. 1574786
Rated idle speed n_0 .....11000-21000 min ^-1
Weight 1.6 kg
Sound pressure level L_PA .....79.2 dB(A)
Standard deviation K_PA 3 dB(A)
Sound power level L_WA .....90.2 dB (A)
Standard deviation K_WA 3 dB(A)
Vibration level (in accordance with EN 62841)....4.851 m/s ^2
Uncertainty K....1.5 m/s ^2
Dimensions....240 x 165 x 170 mm
Operating and storage conditions....0 to +40 °C / 0–85 % relative humidity

Caution!
Obese level of the appliance may exceed 80 dB(A). Wear suitable ear defenders to prevent hearing damage.
The vibration emission value stated in this manual was obtained using a standardised EN 62841 test procedure. The result can be used to compare vibration levels of different electrical tools. It can also be used to obtain a preliminary estimate of your exposure to vibrations.
The specified value indicates the vibration level when the tool is used for its intended purpose. The actual vibration level may differ from the specified value if the tool is used for other purposes, if other tools are used, or if the tool has not been serviced properly. These factors can considerably increase your exposure.
For an accurate estimate of your exposure, account for the times when the appliance is switched off or not in use. These factors can considerably reduce your exposure.
Take additional safety measures to protect the user against the effects of vibration, e.g.: Maintenance of electric tool and insertion tools, keeping your hands warm, organisation of work processes.
13. Declaration of Conformity (DOC)
Conrad Electronic SE, Klaus-Conrad-Straße 1, D-92240 Hirschau, hereby declares that this product conforms to the following directives:
2006/42/EC
2014/30/EU
2011/65/EU
It was manufactured in accordance with the following standards:
EN 62841-1:2015+AC:15
EN 62841-2-4:2014
EN 55014-1:2017
EN 55014-2:2015
→ Click on the following link to read the full text of the EU Declaration of Conformity: www.conrad.com/downloads
Select a language by clicking on the corresponding flag symbol, and then enter the product order number in the search box. The original EU Declaration of Conformity is available for download in PDF format.
Page
France (email): technique@conrad-france.fr
text_image
Technical diagram of a handheld device with numbered parts labeled 1 to 4natural_image
Close-up of a black-handled saw blade with serrated edges and a cut handle (no text or symbols visible)natural_image
Three-panel black-and-white photo showing a hand holding a small mechanical component, with arrows indicating rotation and disassembly steps (no text or symbols visible)natural_image
Close-up of a mechanical component with a circular end and curved arrow indicating rotation (no text or symbols)natural_image
Close-up of a hand holding a black electronic device with a curved arrow pointing to a component (no visible text or symbols)
natural_image
Close-up of a hand holding a black electronic device with a white arrow pointing to the component (no visible text or symbols)natural_image
Close-up of a hand holding a black electronic device with a white arrow pointing to a component (no visible text or symbols)8. Utilisation
natural_image
Close-up of a black flip phone with a white arrow pointing to the left side (no text or symbols visible)natural_image
Close-up of a mechanical component with a highlighted circular feature and directional arrow (no text or symbols)9. Dépannage
Batteries adéquates (non fournies) ....TOOLCRAFT 20 V/5,0 Ah Li-Ion AP-1200
TOOLCRAFT 20 V/4,0 Ah Li-Ion AP-1100
TOOLCRAFT 20 V/2,0 Ah Li-Ion AP-1000
TOOLCRAFT 20 V5,0 A ALG
text_image
Technical diagram of a handheld device with numbered parts labeled 1 to 4natural_image
Black mechanical tool with serrated edge and cutouts, no visible text or symbols on the tool itself.- Klap de snelspanner (1) open.
natural_image
Three-panel black-and-white photo showing a hand using a crimping tool to adjust a small component, with no visible text or symbols.natural_image
Close-up of a mechanical component with a circular end and curved arrow indicating rotation (no text or symbols)natural_image
Close-up of a hand holding a black electronic device with a curved arrow pointing to a component (no visible text or symbols)
natural_image
Close-up of a hand holding a black electronic device with a white arrow pointing to the component (no visible text or symbols)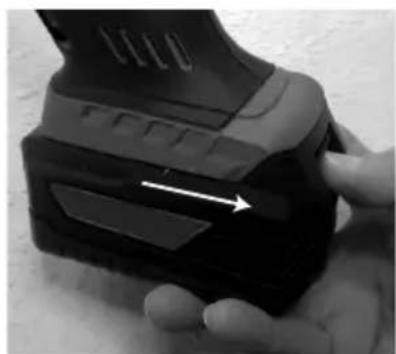
natural_image
Close-up of a hand holding a black electronic device with a white arrow pointing to a component (no visible text or symbols)8. Bediening
natural_image
Close-up of a black flip phone with a white arrow pointing to the left side of the screen (no text or symbols visible)b) Toerental instellen
natural_image
Close-up of a car interior showing a directional arrow and a small labeled component (no text or symbols visible)TOOLCRAFT 20 V5,0 A ALG-1100
GB This is a publication by Conrad Electronic SE, Klaus-Conrad-Str. 1, D-92240 Hirschau (www.conrad.com).
All rights including translation reserved. Reproduction by any method, e.g. photocopy, microfilming, or the capture in electronic data processing systems require the prior written approval by the editor. Reprinting, also in part, is prohibited. This publication represents the technical status at the time of printing.
Copyright 2021 by Conrad Electronic SE.
Copyright 2021 by Conrad Electronic SE.
Copyright 2021 by Conrad Electronic SE.