
RCX1500 - Receiver ROTEL - Free user manual and instructions
Find the device manual for free RCX1500 ROTEL in PDF.

| Product Type | Integrated audio/video receiver with amplifier, tuner, and CD player |
| Brand | Rotel |
| Model | RCX1500 |
| Output Power | 2 x 100 watts (20 Hz - 20 kHz, THD < 0.03%, 8 ohms) |
| Total harmonic distortion (amplifier) | < 0.2% (20 Hz - 20 kHz, 8 ohms) |
| Minimum speaker impedance | 4 ohms |
| Frequency response (AUX2) | 10 Hz - 40 kHz (± 3 dB) |
| Signal-to-noise ratio (AUX2, A-weighted IHF) | 92 dB |
| Supported audio formats | CD-DA, MP3, WMA, AAC, FLAC, WAV, AIFF, AU, Real Audio, OGG Vorbis |
| Network connectivity | Wi-Fi 802.11b/g (via USB dongle), wired Ethernet (via USB LAN adapter) |
| Audio inputs | USB (front), analog AUX (RCA), digital AUX (coaxial and optical), preamp output (RCA) |
| Outputs | Speakers (2 pairs of terminals), headphone (3.5 mm jack), preamp (RCA) |
| Radio reception | FM (RDS), DAB, Internet Radio (via RotelRadio portal) |
| CD player | CD, CD-R, CD-RW, MP3/WMA files |
| Radio presets | 30 per band (FM, DAB, Internet) - total 90 |
| Power supply | 120 V / 60 Hz (USA) or 230 V / 50 Hz (CE) - depending on factory configuration |
| Power consumption | 140 W |
| Dimensions (height) | 132.6 mm (front panel) - width and depth not communicated |
| Safety | Compliant with FCC Class B, CE standards; mains disconnection via accessible power cord |
| Maintenance and cleaning | Dry cloth or vacuum (no liquid); do not block ventilation openings |
| Spare parts and repairability | No user-serviceable parts; contact an authorized Rotel technician |
| General information | Class B digital device; compatible with iPod/iPhone via USB; firmware update via Internet |
Frequently Asked Questions - RCX1500 ROTEL
User questions about RCX1500 ROTEL
0 question about this device. Answer the ones you know or ask your own.
Ask a new question about this device
Download the instructions for your Receiver in PDF format for free! Find your manual RCX1500 - ROTEL and take your electronic device back in hand. On this page are published all the documents necessary for the use of your device. RCX1500 by ROTEL.
USER MANUAL RCX1500 ROTEL
natural_image
Pure electrical circuit lines without any symbolsROTEL®

RCX-1500
Stereo Compact Disc Receiver Receptor Estereofónico con Reproductor de Discos Compactos Incorporado Ampli-tuner lecteur de CD Multimedia-Audio-Receiver Stereo CD-speler/Tuner-Versterker Sintoamplificatore/Lettore CD
Стерео CD-ресивер
CD-receiver
Owner's Manual
This symbol is to alert the user to the presence of uninsulated dangerous voltages inside the product's enclosure that may constitute a risk of electric shock.

This symbol is to alert the user to important operating and maintenance (service) instructions in this manual and literature accompanying the product.
APPLICABLE FOR USA, CANADA OR WHERE APPROVED FOR THE USAGE
CAUTION: TO PREVENT ELECTRIC SHOCK, MATCH WIDE BLADE OF PLUG TO WIDE SLOT. INSERT FULLY.
ATTENTION: POUR EVITER LES CHOCS ELECTRIQUES, INTRODUIRE LA LAME LA PLUS LARGE DE LA FICHE DANS LA BORNE CORRESPONDANTE DE LA PRISE ET POUSSER JUSQU AU FOND.
This Class B digital apparatus complies with Canadian ICES-003.
Rotel products are designed to comply with international directives on the Restriction of Hazardous Substances (RoHS) in electrical and electronic equipment and the disposal of Waste Electrical and Electronic Equipment (WEEE). The crossed wheelie bin symbol indicates compliance and that the products must be appropriately recycled or processed in accordance with these directives.
IMPORTANT FOR LASER PRODUCTS
-
CLASS 1 LASER PRODUCT
-
DANGER: Visible laser radiation when open and interlock failed or bypassed.
Avoid direct exposure to beam.
- CAUTION: Do not open the top cover. There are no user serviceable parts inside the player; leave all servicing to qualified service personnel.
WARNING!
To reduce the risk of electrical shock, fires, etc.:
- Do not remove screws, covers or cabinet.
- Do not expose the unit to rain or moisture.
- Do not touch the power cord or plug with wet hands
| CAUTION | -LASER RADIATION WHEN OPEN.DO NOT STARE INTO BEAM. |
| ATTENTION | -RAYONNEMENT LASER EN CAS D'OUVERTURE,NE PAS RESIGERAR DANS LE FABGEAU. |
| VORSIGHT | -LASERSTRALUNG, WENNA ARDECHING GEÖFFENET,NICHT IN DEN STRAHL BUNKEN. |
| ADVERSEL | -LASERSTRALING VED ABNING,SE IKE IND ISTRÄLEN. |
| ADVERSEL | -LASERSTRALING NAR JHNSEL APNES,STIRR IKE INV ISTRÄLEN. |
| VIRNING | -LASERSTRALING NAR DENNA DEL AÑ ÖPPNAD,STRA EUN ISTRÄLEN. |
| VARO! | AVATTASSA OLET ALTINA LASERSATELY LYLE,ALA TULOTA SATESEN. |
| 注意 | - 当打光这里会时映荧光,请不要直接激光。 |
| 注意 | - ここを開くとレーザー光が出す。レーザー光をのずきますないでください。 |


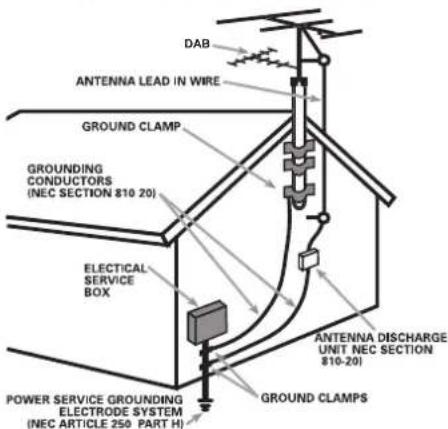
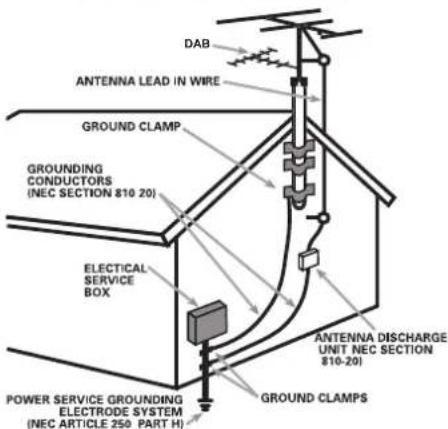
ANTENNA GROUNDING ACCORDING TO NATIONAL ELECTRICAL CODE INSTRUCTIONS SECTION 810: "RADIO AND TELEVISION EQUIPMENT"
The COMPUTER I/O connection should be handled by authorized persons only.
FCC Information
This equipment has been tested and found to comply with the limits for a Class B digital device, pursuant to Part 15 of the FCC Rules. These limits are designed to provide reasonable protection against harmful interference in a residential installation. This equipment generates, uses and can radiate radio frequency energy and, if not installed and used in accordance with the instruction, may cause harmful interference to radio communications.
However, there is no guarantee that interference will not occur in a particular installation. If this equipment does cause harmful interference to radio or television reception, which can be determined by turning the equipment off and on, the user is encouraged to try to correct the interference by one or more of the following measures:
- Reorient or relocate the receiving antenna.(TV, radio, etc.)
- Increase the separation between the equipment and receiver
- Connect the equipment to an outlet on circuit different from that to which the receiver is connected.
- Consult the dealer or an experienced radio/TV technician for additional help.
Caution
This device complies with part 15 of the FCC Rules. Operation is subject to the following to conditions: (1) This device may not cause harmful interference, and (2) this device must accept any interference received, including interference that may cause undesired operation.
NOTE TO CATV SYSTEM INSTALLER: Call the CATV system or antenna installer's attention to Article 820-40 of the NEC. This provides guidelines for proper grounding and, in particular, specifies that the cable ground shall be connected to the grounding system of the building, as close to the point of cable entry as practical. See installation diagram.
NOTE: This equipment has been tested and found to comply with the limits for a Class B digital device, pursuant to Part 15 of the FCC Rules. These limits are designed to provide reasonable protection against interference in a residential installation. This equipment generates and can radiate radio frequency energy and, if not installed and used in accordance with the instructions, may cause interference to radio or TV communications. There is no guarantee that interference will not occur in a particular installation. If this equipment does cause interference to radio or television reception, which can be determined by turning the equipment off and on, try to correct the interference by one or more of the following measures:
- Reorient or relocate the receiving antenna.
- Increase the separation between the unit and the television tuner.
- Connect the unit to an AC power outlet on a different electrical circuit.
- Consult your authorized Rotel retailer for assistance.
Important Safety InstructionsNotice
WARNING: There are no user serviceable parts inside. Refer all servicing to qualified service personnel.
WARNING: To reduce the risk of fire or electric shock, do not expose the unit to moisture or water. Do not expose the unit to dripping or splashing. Do not place objects filled with liquids, such as vases, on the unit. Do not allow foreign objects to get into the enclosure. If the unit is exposed to moisture, or a foreign object gets into the enclosure, immediately disconnect the power cord from the wall. Take the unit to a qualified service person for inspection and necessary repairs.
Read all the instructions before connecting or operating the component.
Keep this manual so you can refer to these safety instructions.
Heed all warnings and safety information in these instructions and on the product itself. Follow all operating instructions.
Clean the enclosure only with a dry cloth or a vacuum cleaner.
Do not use this unit near water.
You must allow a minimum 10 cm or 4 inches of unobstructed clearance around the unit.
Do not place the unit on a bed, sofa, rug, or similar surface that could block the ventilation openings. If the unit is placed in a bookcase or cabinet, there must be ventilation of the cabinet to allow proper cooling.
Keep the component away from radiators, heat registers, stoves, or any other appliance that produces heat.
WARNING: The rear panel power cord connector is the mains power disconnect device. The apparatus must be located in an open area that allows access to the cord connector.
The unit must be connected to a power supply only of the type and voltage specified on the rear panel. (USA: 120 V/60Hz, EC: 230V/50Hz)
Connect the component to the power outlet only with the supplied power supply cable or an exact equivalent. Do not modify the supplied cable. A polarized plug has two blades, with one wider than the other. A grounding plug has two blades plus a third grounding prong. These are provided for your safety. Do not defeat grounding and/or polarization safety provisions. If the supplied plug does not fit your outlet, please consult an electrician for replacement of the obsolete outlet. Do not use extension cords.
The main plug of the power cord set is a disconnect device of the apparatus. In order to completely disconnect the apparatus from the supply mains, the main plug of the power cord set should be unplugged from the mains (AC) outlet. The stand-by LED indicator will not be lit up to show the power cord is unplugged. The disconnect device shall remain readily operable.
Do not route the power cord where it will be crushed, pinched, bent, exposed to heat, or damaged in any way. Pay particular attention to the power cord at the plug and where the cord exits the back of the unit.
Main plug is used as the main disconnect device and shall remain ready accessible.
The power cord should be unplugged from the wall outlet during a lightning storm or if the unit is to be left unused for a long period of time.
This apparatus shall be connected to a main socket outlet with a protective earth connection.
Use only accessories specified by the manufacturer.
Use only with a cart, stand, rack, bracket or shelf system recommended by Rotel. Use caution when moving the unit in a stand or rack to avoid injury from a tip-over.

Use Class 2 wiring for speaker connections to ensure proper installation and minimize the risk of electrical shock.
Immediately stop using the component and have it inspected and/or serviced by a qualified service agency if:
- The power supply cord or plug has been damaged
- Objects have fallen or liquid has been spilled into the unit
• The unit has been exposed to rain
• The unit shows signs of improper operation
• The unit has been dropped or damaged in any way
The batteries in remote control shall not be exposed to excessive heat such as sunshine, fire or the like.
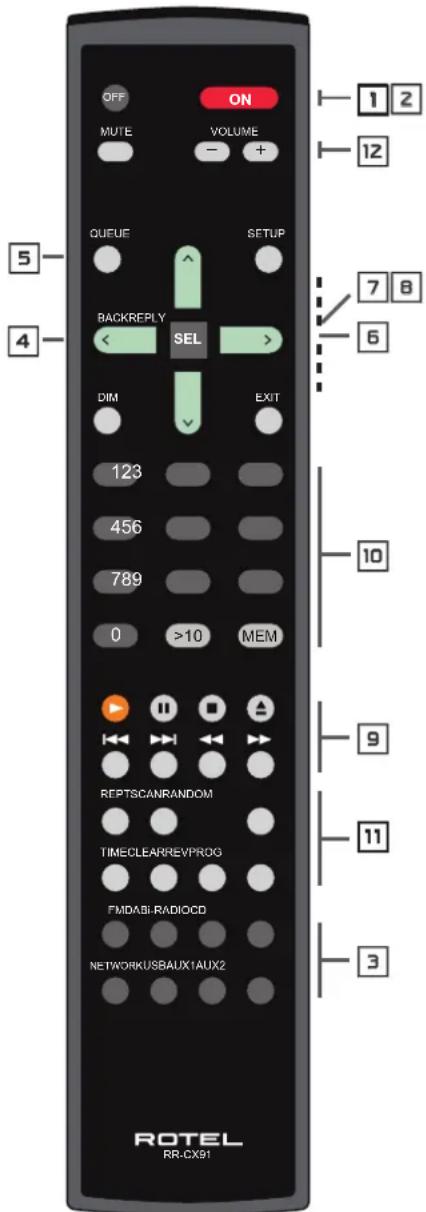
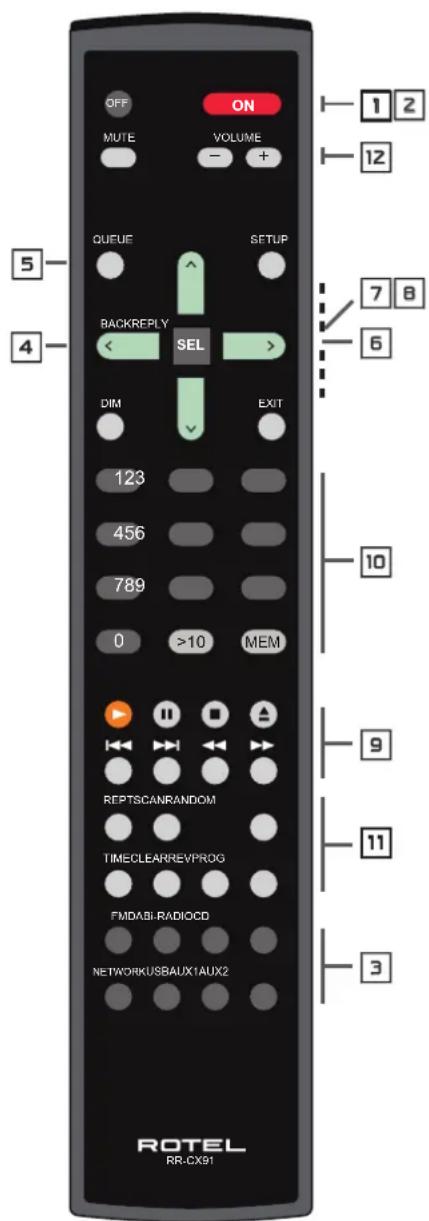
Figure 1: Controls and Connections

Button Series Function Explanation
1,2 : STANDBY mode button, are used to switch the STANDBY mode on or off.
3 : Source selection buttons, are used to switch your desire source.
4 : Back to upper level menu
5 : Call out preset/memorized list of tracks, songs, stations, etc against specified mode.
6 : To call out special Internet Radio menu on Internet Radio mode.
7,8 : Navigation keys and confirm buttons, are used to navigate and enter menus.
9 : Playback buttons, are used mainly control the playback under USB and CD mode. It has specified functions against specified modes.
10 : Numeric buttons, offer alternated numeric related selection.
11 : Extra functionality buttons, are used to set individual machine's configuration and make it more convenience for your using.
12 : Volume control buttons.
Front & Rear Interfaces
A : USB socket, is used to connect with USB music storage devices, such as MP3, USB stick Mobile,iPod/iPhone etc , can be connected directly or through USB adaptor.
B : PHONE jack, is used to connect with 3.5mm headphone.
© : Antenna connector, is used to connect with supplied DAB/FM antenna
: Analog AUX input jacks, are used to connect with other device's analog signal output
(E) : PRE OUT jacks, are used to connect with other amplifier's input and send analog signal to the amplifier.
F : Ethernet sockets, is used to connect with supplied Wi-Fi dongle or USB LAN adaptor.
⑥ : Digital AUX input jacks, are used to connect with other device's digital signal output
(H) : Computer I/O sockets, is used to connect with computer to upgrade this device firmware
①: Speaker connectors, are used to directly connect with speakers.
① : Power connector, is used to connect with AC mains and outlet.
Figure 2: Hook-up Illustration
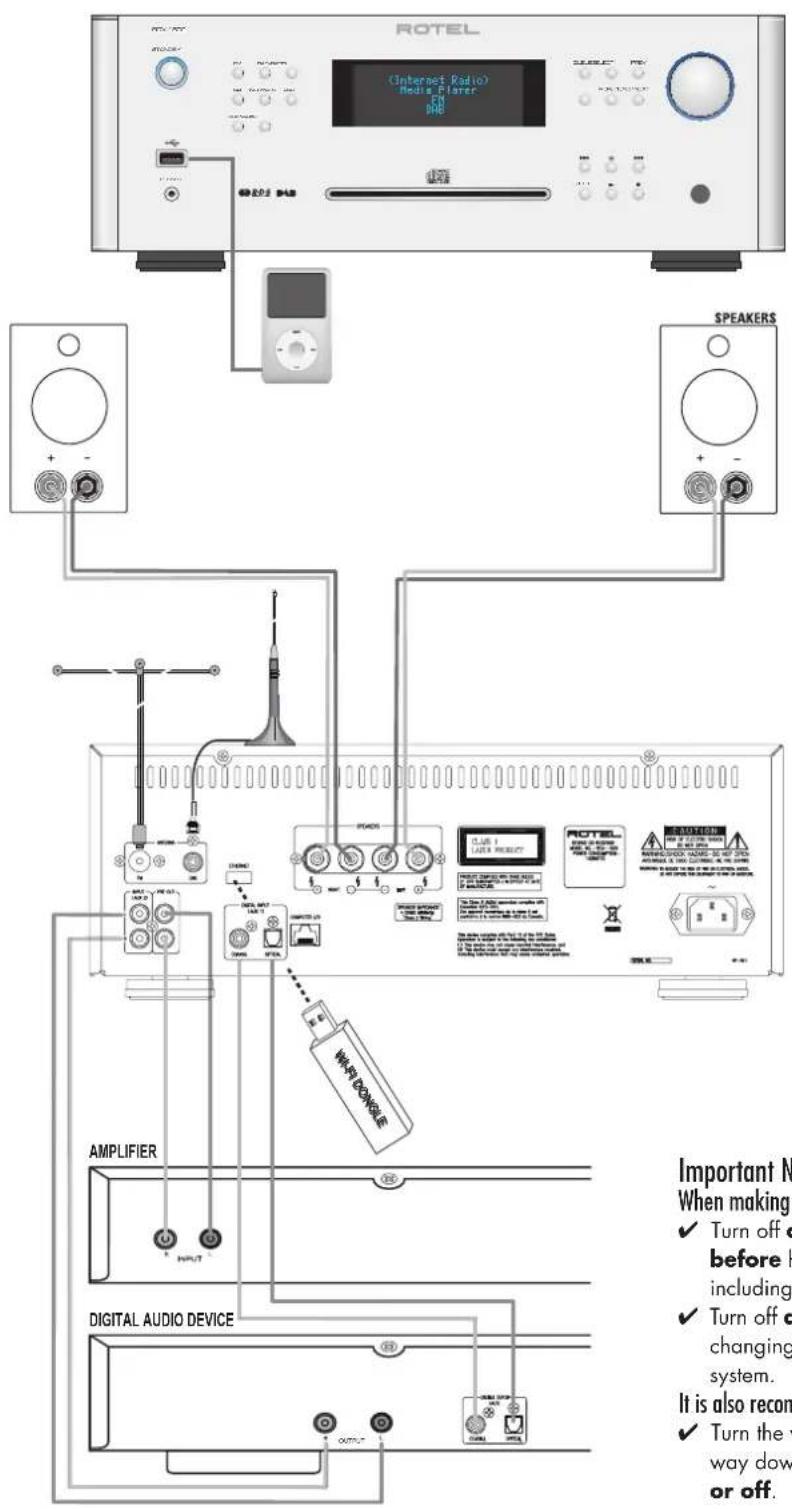
Important Notes
When making connections be sure to:
√ Turn off all the components in the system before hooking up any components, including loudspeakers.
√ Turn off all components in the system before changing any of the connections to the system.
It is also recommended that you:
√ Turn the volume control of the amplifier all the way down before the amplifier is turned on or off.
Contents
Important Safety Instructions 3
Figure 1: Controls and Connections 4-5
Figure 2: Hook-up Illustration 6
Important Notes 6
About Rotel 8
Getting Started 8
Features 8
A Few Precautions 8
Placement 8
Overview – the Rotel internet radio tuners/digital gateway products. ..... 9
DAB and FM radio 9
Internet radio 9
Network access 9
The Rotelradio website – managing your stations 9
Playback from iPods, mp3 players and flash drives 9
Playback from network servers 9
AC Power and Control 10
AC Power Input ① 10
Standby Switch and Indicator Light 10
Connection Overview 10
USB Connection A 10
PHONES Connection Ⓑ 10
DAB/FM Broadcasting © 10
ANALOG INPUT-AUX 2 ⑭ 10
PRE OUT Ⓔ 10
Network Connection F 10
DIGITAL INPUT-AUX 1 © 10
Computer I/O H 10
Speaker Connections 10
Speaker Selection 10
Speaker Wire Selection 10
Polarity and Phasing 11
Speaker Wire Connections 11
Internet Radio Quick Start 11
What you need before starting 11
First Time Connection To The Network 11
Choosing A Radio Station 12
Internet Radio Station Playing 12
Storing a radio station in a preset 12
Playing a preset radio station 12
Media Player Quick Start 13
UPnP Servers 13
Setting up UPnP Server in PC 13
Play media files using UPnP Server. 13
Clear Queue 14
Playback Mode 14
iPod/USB Connection Quick Start 14
USB Storage Device Connection 14
iPod/iPhone Connection 14
Playback Control Buttons 14
FM RADIO Quick Start 15
FM Radio Station Playing 15
Storing a radio station in a preset 15
Playing a preset radio station 15
DAB RADIO Quick Start 15
DAB Radio Station Playing 15
Storing a DAB station in a preset 15
Playing a preset DAB station 15
Radio Station Presets 15
SETTINGS OVERVIEW.... 16
Configure "My Stuff"......17
Configure "My Stations" 17
Configure "My Streams" 17
CD Control Buttons....17
PLAY Button 17
STOP Button 17
PAUSE Button 17
TRACK Buttons 17
DIRECT ACCESS Buttons 17
SEARCH Buttons 18
EJECT Button 18
Additional Features 18
PROGRAM Button 18
REVIEW Button 19
CLEAR Button 19
RANDOM Button 19
REPEAT Button 19
SCAN Button 19
TIME Button 19
Remote Unit Advanced Buttons 20
Troubleshooting 20
Glossary 21
Specifications 22
About Rotel
Our story began nearly 50 years ago. Over the decades, we have received hundreds of awards for our products and satisfied hundreds of thousands of people who take their entertainment seriously- like you!
Rotel was founded by a family whose passionate interest in music led them to manufacture high-fidelity components of uncompromising quality. Through the years, that passion has remained undiminished and the family goal of providing exceptional value for audiophiles and music lovers, regardless of their budget, is shared by all Rotel employees.
Rotel's engineers work as a close team, listening to, and fine tuning, each new product until it reaches their exacting musical standards. They are free to choose components from around the world in order to make that product the best they can. You are likely to find capacitors from the United Kingdom and Germany, semiconductors from Japan or the United States, while toroidal power transformers are manufactured in Rotel's own factory.
We all have concerns about our environment. And, as more and more electronics are produced and later discarded, it is especially important for a manufacturer to do all it can to engineer products that have a minimum negative impact on landfill sites and water tables.
At Rotel, we are proud to do our part. We have reduced the lead content in our electronics by using special RoHS solder, while our new Class D (not digital) amplifiers are up to five times more efficient than our legacy designs and still deliver power and performance. These products run cool, give minimum wasted energy, are good for the environment and give better sound too.
Finally, we have printed this brochure on recycled paper stock.
While we understand that these are small first steps, they are still important ones. And we continue to pursue new methods and materials for a cleaner and greener manufacturing process.
All of us at Rotel thank you for buying this product. We are sure it will bring you many years of enjoyment.
Getting Started
dThank you for purchasing the Rotel RCX-1500 CD Receiver. When used in a high-quality music or home theater system, your Rotel CD Receiver will provide years of musical enjoyment.
Features
Wireless or wire connection to access internet radio.
Access LAN PCs and music with 'Media Player' Mode
Connect with iPod/MP3/media music player for home • enjoyment.
Listen to DAB, FM broadcasting station.
Playback of conventional CD, MP3 or WMA encoded disc.
Two amplifier channels at 100 watts per channel.
A Few Precautions
Please read this manual carefully. In addition to basic installation and operating instructions, it provides valuable information on various RCX-1500 system configurations as well as general information that will help you get optimum performance from your system. Please contact your authorized Rotel dealer for answers to any questions you might have. In addition, all of us at Rotel welcome your questions and comments
Save the RCX-1500 shipping carton and all enclosed packing material for future use. Shipping or moving the RCX-1500 in anything other than the original packing material may result in severe damage to your unit.
Fill out and send in the owner's registration card packed with the RCX-1500. Also be sure to keep the original sales receipt. It is your best record of the date of purchase, which you will need in the event warranty service is ever required.
Placement
Place the RCX-1500 on a solid, level surface away from sunlight, heat, moisture, or vibration.
Don't stack other components or objects on top of the RCX-1500. Don't let any liquid fall into the unit.
Note the weight and size of the RCX-1500. If placing the unit on a shelf, cabinet or rack, make sure the full weight of the RCX-1500 can be supported.
The RCX-1500 generates heat during normal operation. Do not block ventilation openings. Allow a minimum of 10 cm or 4 inches of unobstructed space around the unit. If installed in a cabinet, make sure that there is adequate ventilation.
Overview – the Rotel internet radio tuners/digital gateway products.
This product does not operate without the Wi-Fi or Wired dongle being connected. We recommend that you read this introduction first. FAQs will be found on the Rotel website www.rotel.com/NA/support/FAQ.htm
This Rotel product brings together conventional radio reception facilities for FM and DAB, plus from the world of computers the ability to access literally thousands of radio stations available on the internet. In addition to this, this new range of Rotel tuners/digital gateways offers the facility to interface with personal audio players (iPods and mp3 players) and your music files stored on a network server.
These notes expand on the 'quick start' notes later in this manual.
Firstly, it does not matter if a wired or Wi-Fi network is not available to use – however it is essential that the Wi-Fi or wired dongle is inserted into its socket on the rear panel of the product for it to work. Use an extension cable to relocate the dongle if space is limited at the rear of the tuner.
Each time that the product is turned on, it will be locked into search mode for about 15/20 seconds. Once this has been accomplished other radio modes can be used.
The USB input is active from turn on.
DAB and FM radio
This is the most conventional part of the product and if you have previous experience of tuning, memorizing and selecting radio stations from the present DAB and FM radio services you will be familiar with the way the tuner is operated to receive these services. All of this is explained under relevant quick start sections. Keep in mind to select the antenna (aerial) input socket to use, find this option in the set-up menu. This does not obviate the need to install correctly designed antenna (aerials) to maximise reception on FM and DAB services.
Internet radio
Using internet radio requires the use of two additional services – access to the internet via a computer network and once this works a feed via one of the internet-based services which allows access to internet radio stations. This latter requirement is built into the tuner; we will deal with access to your network first.
Network access
The installation of computer networks are beyond the scope of these notes, so we assume that you have a working Wi-Fi network in your home. If you are using a wired network please refer to Network Config. under "Settings Overview" section. (Wired networks will provide the most reliable Ethernet streaming. Ethernet over powerline adaptors are available from 3rd parties if running an Ethernet cable is otherwise impractical.)
At start-up, the unit looks for Wi-Fi networks, and once the search has been completed you will find one or more listed networks listed in the display to choose from. You need to select the network name which applies to your installation. This will have been assigned when your network was installed and is often pre-allocated by the router central to your network. The next requirement is to enable your tuner to 'log-on' to your network and you allow this by entering the wireless 'WEP key' (or WPA, WPA2 key) appropriate to your network. It is likely that you will have used the key code when setting up a computer to log onto your network and it is often contained in the instructions for your router. This is a first-time only setting, so just carefully scroll though the alpha-numeric characters selecting the correct upper or lower case characters to create your WEP key. When completed, scroll through to and select END or simply press the REPLY button to complete the process.
You can use the Previous and Next keys of the handset to help you enter this information. Do not confuse the letter 'O' with the numeral 'O'.
When successfully logged on to your network, the tuner will automatically log in to the website where you to be able to select the area of the world that interests you and choose radio stations by country, genre and name.
Registering the radio at www.rotelradio.com will allow you to search for and save internet radio stations, as well as set up other music services when available for your region.
The Rotelradio website — managing your stations
Managing the thousands of radio stations available via the internet would be impossible without being able to organise and manage stations to suit your particular needs. Rotel have provided an easy way to accomplish this by means of a dedicated website where you can pre-select stations.
The URL for this site is http://rotelradio.com.
Like many websites you will need to register a user name and password in order to create an account on the site. Before you can do so, you will need to register the product on the site and there is a special registration key in the Rotel which you will need to copy to the website registration form. This registration key will be found under the settings>register menu. You need to be connected to the internet to access this one time only key.
After registration, the website will show the radio serial number of your Rotel unit. This is different from the serial number of your Rotel unit. The radio serial number can be found in the menu of the Rotel unit under Settings -> Version.
Note that to update the display of the Rotel to indicate your choices, you will need to power-cycle and re-select 'internet radio'. Your new list of 'My Stuff' will be updated automatically.
Playback from iPods, mp3 players and flash drives
Most iPod and mp3 players can be plugged into the USB socket on the front panel to replay the music files stored within. The display will update to show the file structure and will list the files which can be played. Files are copied to a standard flash drive will also behave in the same way.
Playback from network servers
Music playback from computers configured as music servers provides another opportunity to link replay via the Rotel unit and thus make use of the audiophile decoding stages designed into these products.
As with internet radio, a prerequisite is a working network, plus the music server connected to it. Please follow the instructions shown under 'Media Player Quick Start' later in the manual.
AC Power and Control
AC Power Input Ⓙ
Your RCX-1500 is configured at the factory for the proper AC line voltage in the country where you purchased it (USA: 120 volts/60 Hz, Europe: 230 volts/50 Hz). The AC line configuration is noted on a label on the back panel.
The RCX-1500 is supplied with the proper AC power cord. Use only this cord or an exact equivalent. Do not modify the supplied cord. Do not use an extension cord.
Be sure the power switch on the front panel of the RCX-1500 is turned off. Then, plug one end of the cord into the AC power connector on the back panel of the amplifier. Plug the other end into an appropriate AC outlet.
If you are going to be away from home for an extended period of time, it is a sensible precaution to unplug your receiver.
Standby Switch and Indicator Light 1 z
The Standby Switch is located on the left side of the front panel. The Standby Indicator ring will illuminate when the AC mains are connected. This indicates the unit is in Standby mode.
To turn the unit ON, push the Standby switch once, the front display will illuminate, indicating the unit is out of Standby mode and ready for operation.
Connection Overview
Before continuing further to other sections in the manual, please make sure all the cable connections are made properly. Refer to figure 2.
USB Connection Ⓐ
The socket on the front panel below the STANDBY switch is for USB connection. Music storage devices can be accessed by the RCX-1500 through this input. Music storage devices such as MP3 players, iPod, USB memory sticks or any other form of memory devices with USB interface can be connected to the RCX-1500 through the front USB socket. RCX-1500 will automatically search music files from the connected storage device.
NOTE: RCX-1500 use USB 2.0 standard to access music files. The unit can playback music files stored on storage devices that are compliant with USB 2.0 standard. However, it will not operate with devices that require additional drivers.
PHONES Connection Ⓑ
The socket on the front panel below the USB socket is for headphones. Plug a 3.5mm headphone jack into the socket to listen to music through headphones. Connecting headphones will automatically turn off the output to the loudspeakers.
DAB/FM Broadcasting ©
Please use supplied indoor antenna to connect the DAB and FM connector on the rear panel. To receive the best FM signal, make sure there is enough room for the T-shaped indoor antenna to fully extend. Eyelets at both ends of the T allow tacking the antenna to a wall if desired. Experiment with different positions to maximize reception.
NOTE: You must insert the Wi-Fi dongle (or wire adaptor) to the ETHERNET port on the rear panel. The unit will first search for available networks before allowing access to DAB and FM functions. If networks are not available, the unit will display "Network Error". FM and DAB functions will operate normally after the initial network search.
ANALOG INPUT-AUX 2 ©
The RCX-1500 can receive analog music signals from other sources, such as your CD players analog outputs. Connect the LEFT and RIGHT outputs of the source to the LEFT and RIGHT input of the AUX 2 Input.
PRE OUT E
The RCX-1500 can send analog signals to a second amplifier through the connectors labeled PRE OUT. Use this connection if you wish to use another power amplifier to drive your speakers.
Network Connection Ⓕ
Connect the Rotel supplied USB Wi-Fi dongle to the USB port on the RCX-1500 rear panel labeled ETHERNET. The RCX-1500 has been configured to work with the supplied USB Wi-Fi dongle. No additional software/ setup is required. The RCX-1500 is now ready to connect to your wireless LAN. Refer to Internet Radio section for detailed setup.
NOTE: Not all USB Wi-Fi/Wired dongles will operate with the RCX-1500. Please use the one supplied by Rotel.
DIGITAL INPUT-AUX 1 ©
The RCX-1500 can play digital music signal from other sources, such as your CD player's digital output. There are two connectors on the AUX 1 Digital Input area on the rear panel, labeled with coaxial and optical. Connect the coaxial or optical output of your source to the coaxial or optical input of the RCX-1500.
Computer I/O Ⓗ
This RCX-1500 can be operated from a computer with audio system control software from third-party developers. This control is accomplished by sending operating codes from the computer via a hard-wired RS-232 serial connection. In addition, RCX-1500 can be updated using special software from Rotel.
For additional information on the connections, cabling, software, and operating codes for computer control or updating of the unit, contact your authorized Rotel dealer.
Speaker Connections ①
Speaker Selection
The nominal impedance of the loudspeakers connected to each channel of the RCX-1500 should be no lower than 4 ohms.
Speaker Wire Selection
Use insulated two-conductor stranded wire to connect the unit to the speakers. The size and quality of the wire can have an audible effect on the performance of the system. Standard speaker wire will work, but can result in lower output or diminished bass response, particularly over longer distances. In general, heavier wire will improve the sound. For best performance, you may want to consider special high-quality speaker cables. Your authorized Rotel dealer can help in selection of
Polarity and Phasing
The polarity - the positive/negative orientation of the connections - for every speaker and amplifier connection must be consistent so all the speakers will be in phase. If the polarity of one connection is mistakenly reversed, bass output will be very weak and stereo imaging degraded. All wire is marked so you can identify the two conductors. There may be ribs or a stripe on the insulation with different color conductors (copper and silver). There may be polarity indications printed on the insulation. Identify the positive and negative conductors and be consistent with every speaker and amplifier connection.
Speaker Wire Connections
NOTE: The following text describes both binding post and banana plug connections. DO NOT use both connection methods in combination to connect multiple speakers.
The amplifier has two sets of color coded terminals for each amplifier channel. The speaker terminals accept bare wire, connector lugs, or "banana" type connectors (except in European Community countries where their use is not permitted).
Route the wires from the RCX-1500 to the speakers. Give yourself enough slack so you can move the components to allow access to the speaker connectors
NOTE: Be sure to note the location of the LEFT and RIGHT speaker terminals and connect your LEFT and RIGHT speakers to the correct outputs.
If you are using banana plugs, connect them to the wires and then plug into the backs of the speaker connectors. When using banana plugs, the collars of the binding post terminals should be screwed in all the way (clockwise).
If you are using terminal lugs, connect them to the wires. If you are attaching bare wires directly to the speaker connectors, separate the wire conductors and strip back the insulation from the end of each conductor. Be careful not to cut into the wire strands. Unscrew (turn counterclockwise) the binding post collar. Place the connector lug around the shaft, or insert the bundled wire into the hole in the shaft. Turn the collars clockwise to clamp the connector lug or wire firmly in place.
NOTE: Make sure there are no loose wire strands that could touch adjacent wires or connectors.
Internet Radio Quick Start
What you need before starting
Before you can use your Internet radio, you need the following:
A broadband Internet connection. •
Access point to internet through wireless LAN. (wired LAN connection • is also possible with a Rotel supplied USB Ethernet adaptor)
With wireless LAN connection, internet radio should work within 100 metres of the wireless access point, subject to the router/Wi-Fi gateway being placed in the optimum area for your location. The user can confirm the WiFi Strength under the settings menu. (Network->Settings->WiFi Strength)
Make sure that your LAN is connected properly and is able to access the internet. To access internet radio stations an internet connection is required.
First Time Connection To The Network
Plug in the USB Wi-Fi dongle to the rear USB port Ⓐ and push the STANDBY button to power up this unit. The display on the front will light up and display:
Starting ... ...
SCANNING NETWORK... ...
After a few seconds, it will start to scan for network.
If it can not find one the display will say:
NO NETWORK FOUND
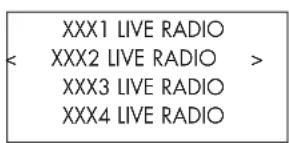
When the radio finds your network, it displays the ESSID for the access point on the screen - this is a name that is allocated to the access point by the person who set up the network - for example:
< MY NETWORK >
It is possible, and in some locations highly likely, that your unit will find more than one wireless access point if using wireless connection, in which case you can choose which one you want to connect to. Press the PREV, NEXT keys on the panel to see the ESSID for each access point the radio has found.
If the screen displays "Enter WEP key" or "Enter WPA key" then the network is using one of the encryption systems, Wired Equivalent Privacy (WEP) or Wi-Fi Protected Access (WPA) Please obtain the access code from the person who set up this wireless network, or check the user manual of your router for this information. Input the code into the unit to access the wireless LAN.
Note: If you would like to use a static IP address, or if the unit can not automatically get an IP address, then please see the 'Network config' section under the 'Settings' section at the end of the manual.
Choosing A Radio Station
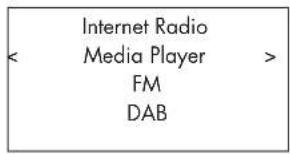
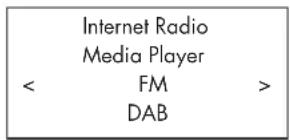
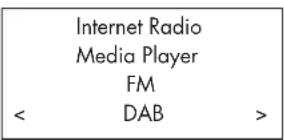
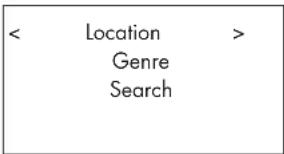
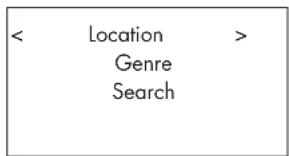
Once a network is found and the network connections made, The top-level menu will be displayed, please select "Internet Radio", the display will shows as
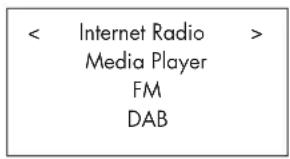
Now you can select internet radio stations to listen to through one of the options below.
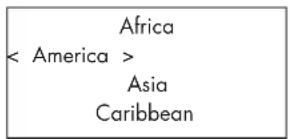
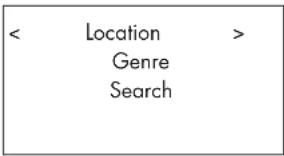
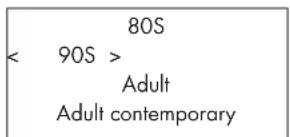
- Push the PREV, NEXT keys until the display shows the area and country you want, then press on the SELECT key.
- Push the PREV, NEXT keys until the display highlights the desired station. Push SELECT key to select..
- Wait until the unit connects to that station.

- Push PREV, NEXT keys until the display highlights the type of content desired, then press SELECT key to select.
- Push PREV, NEXT keys to highlight the station desired, then press SELECT key to select.
- Wait until the radio connects to that station.


- Push PREV, NEXT keys until the display moves to the character to input, then press the SELECT key to select.
- Repeat step 1 to input the complete keyword. Select "END" or push REPLY key to confirm the keyword.
- The display will show stations which match the keyword.
- Push PREV, NEXT keys to highlight the desired station, press SELECT key to select and connect to that station.
Note: Internet Radio stations and other music services can be easily set up at www.rotelradio.com
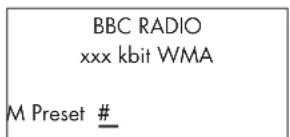
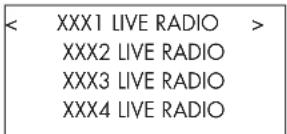
Internet Radio Station Playing
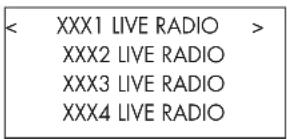
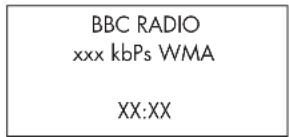
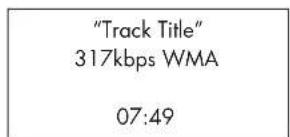
After connecting to a station, the display will show station name, type of audio file and bit rate.
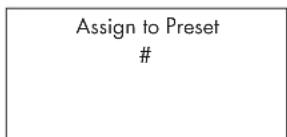
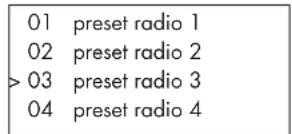
Storing a radio station in a preset (remote only)
While a radio station is playing, hold down the MEM button on the remote control, then press a number to assign, the display will show
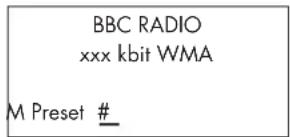
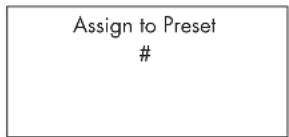
Store this current radio station into the preset number, and you can store up to 30 preset radio stations for FM/DAB/Internet Radio.
Playing a preset radio station
While a radio station is playing, you can switch to other preset stations as below:
- From the remote control, press number button 10 of the preset number for desired station. Example, push "0", then "3" for preset number 3, push "1" then "3" for preset number 13.
- Press QUEUE 5 button to call out preset number and corresponding station. Push PREV, NEXT keys to choose the station. The display will show as
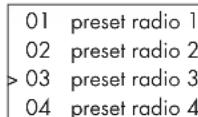
Press QUEUE button again to exit the queue menu and back to playing status.
Note: You can review stored radio stations by using the Queue feature. This will help you avoid accidentally overwriting a preset.
Media Player Quick Start
The Media Player feature allows you to play audio files (AAC, AIFF, AU, FLAC (16 bit CD quality), MP3, WAV and WMA (except lossless)) and playlists (M3U) created by your computer's Media Player, such as Window Media Player 11. It has been verified to work on Windows 2000, Windows XP and Windows Vista.
Note: File sharing may need to be enabled on your computer, and not all Media Players will allow sharing of music files. Please refer to your computer's manual for instructions.
UPnP Servers
Setting up UPnP Server in PC
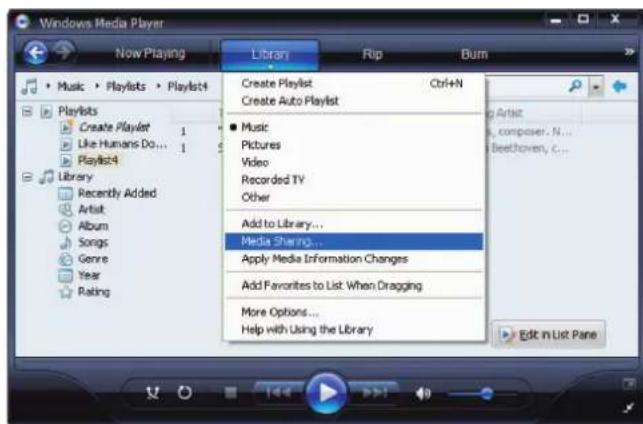
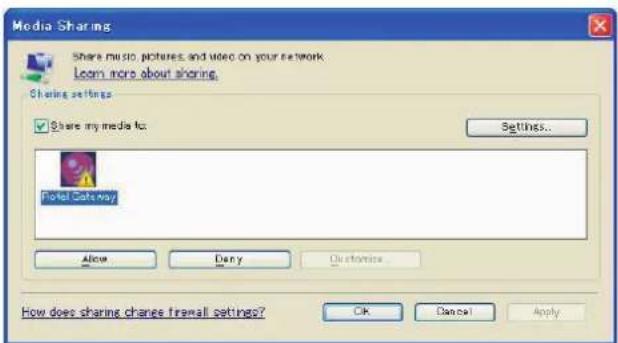
- Use Windows Media Player 11(or 12 if you use Windows 7) to setup the PC as an UPnP Sever, click the 'Library' tab from Windows Media Player 11 and select 'Media Sharing' to open the 'Media Sharing' window to set the option.
- Your PC will now prompt you that a device has attempted to connect to your UPnP server. Please click Allow button.
Note: As of this writing, Windows Media Player 11 does not support AAC decoding used by Apple as the default selection in iTunes. We recommend that you change the default import setting to WAV, AIFF, or MP3 formats for maximum compatibility across many devices. You can set Windows Media Player to mirror your iTunes folders. (In Windows Media Player, see Tools>Options>Library tab>Monitor Folders) Windows Media Player 12 (for Windows 7) does support AAC.
- Go into 'Media Player' menu, and select 'UPnP Servers' sub menu by using the PREV, NEXT and hitting SELECT. The unit will scan for all available UPnP servers. It will display '[Empty]' if no UPnP servers are found.

Play media files using UPnP Server.
- After a successful scan, all available UPnP servers will be displayed. Select your UPnP server with the PREV, NEXT keys, then press SELECT.
- RCX-1500 will list the options or folders available. This varies depending on the setup of your music server, and version of software you are using. It will typically show the following menus
![< All Music > All Artists Albums Music Playlists Folders [Search]](/content/2026/04/614885/images/12e370b685508c9d7d952300ad8037007929e60fc5566777205c169614d92ff9.jpg)
You can search for songs by scrolling through the All Music option or search for specific Artists using All Artists or specific albums using Albums. In each case, you can drill down to the song level Or you can use the [Search] function.
Enter the [Search] function and the following menu will be displayed
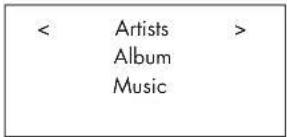
Then enter either Artists, Album or Music sub menus. You can enter a letter or letters the Artist/Album/Music starts with. Example, enter "M" in Artists, then press REPLY key to start searching. All artists in your library starting with the letter "M" will be returned.
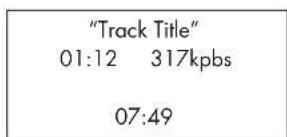
- Once the desired track is found, push to select. The selected track will be displayed on the menu as the unit attempts to connect to the music server. Before play starts, the track title, type of file, bit rate will be shown. When play starts, elapsed time will be displayed instead of file type.
Note: Using QUEUE feature: A short press on SELECT for any song or album will start that selection playing. You can also create a custom QUEUE to create a song mix by holding the SELECT button for 5 seconds. The selected track(s) will be added to the QUEUE and will be played in the order selected. Push QUEUE button to call up tracks waiting to be played. A 5 second push on the STOP button will remove specific songs from the QUEUE.
Clear Queue
You can clear QUEUE by pressing the QUEUE button and selecting [Clear Queue] or by going into QUEUE menu from the Media Player submenu.
flowchart
graph TD
    A["UPnP Server\nPlayback Mode\n<"] --> B["Queue"]
    C["> --> B"]
![< [Clear Queue] >](/content/2026/04/614885/images/25de3e921ae8b2345c3fdce4ae9a66ffe7233c662177db93d07f7c9fc0a4954e.jpg)
You can also delete individual tracks in QUEUE by selecting the track and press STOP for 5 seconds.
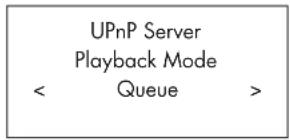
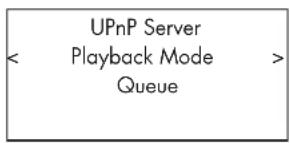
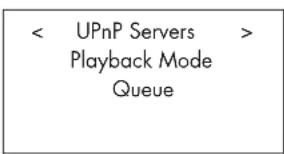
Playback Mode
flowchart
graph TD
    A["UPnP Server"] --> B["Playback Mode"]
    B --> C["Queue"]
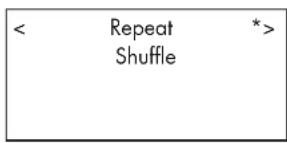
Use NEXT, PREV, keys to select 'Media Player' -> 'Playback Mode', there are 2 sub-menu, "Repeat" and "Shuffle". Select either Repeat, Shuffle or both. A mark will indicate the selection made.
REPEAT: Tracks are played one after another and will start from the first track again when the last track is finished.
SHUFFLE: Play tracks in random.
Note: If both REPEAT and SHUFFLE are on, The unit will first play the list in random, after all tracks are played one time, it will continue to play the list in random until STOP is pressed.
Note: Using shuffle feature with large music libraries may not be possible or may take an excessively long time. We recommend that you create shorter playlists in Windows Media Player and then shuffle these.
iPod/USB Connection Quick Start

USB Storage Device Connection
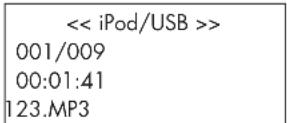
- Plug your USB storage device containing music files, or through a USB adaptor into the front panel's USB socket Ⓐ.
- Press USB button on the front panel to enter iPod/USB mode. The unit will automatically search music file from root directory. Once the directory is found, the unit will start playing. The display shows song's information, such as name, time, tracks.:
- If your music files are in sub directories, press PREV, NEXT keys to display all directories. Press SELECT to enter the desired directory. Then look for the desired music by using the PREV, NEXT keys.
- Press BACK button to return to the previous menu and select another directory.
iPod/iPhone Connection
- Apple's iPod/iPhone can be connected via the iPod's USB cable to the USB front socket.
- The iPod/iPhone will send a digital music signal to the unit. All operations can be made from the iPod/iPhone. Only simple commands can be made through the Rotel unit as explained below.
- The iPod/iPhone screen will remain active while connected to the unit. If no operations are made from the iPod/iPhone for an extended period, the screen will turn to "charging".
Playback Control Buttons 9
- Use the PLAY ▶ button to start playback.
- Use the STOP ■ button to stop playback.
- Use the PAUSE "button to pause a currently playing track or to restart a currently paused track.
- Use the BACK TRACK buttons to start playback of the previous track in the queue. Press and hold BACK TRACK(front panel) or SEARCH on the remote to fast reverse the current track.
- Use the FORWARD TRACK button ▶ to start playback of the next track in the queue. Press and hold FOWARD TRACK (front panel) or SEARCH ▶ on the remote to fast forward the current track.
- Push and hold the STOP ■ button for 5 seconds to safely remove the USB device from the unit.
FM RADIO Quick Start
Before listening to FM radio, make sure that the FM antenna © have been properly connected, and the correct FM format has been selected. Go into 'Settings' menu and select FM tuner region.
FM Radio Station Playing
- Select FM Button from the front panel, or keep pressing BACK button to return to top-level menu to enter the FM menu. The display will show as
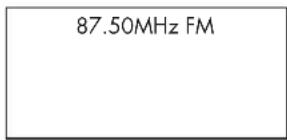
- Use the scan buttons ▶ and ◀ on the remote unit to auto search for FM stations.
- Use track buttons ▶ and ◀ on the front panel or remote to manually search for FM stations.
Storing a radio station in a preset (remote only)
While a FM station is playing, push the MEM button, then press the preset number to assign from the numeric pad 10. The following will be displayed.
Store this FM radio station into the preset number. Up to 30 preset FM radio stations may be stored.
Playing a preset radio station
When a radio station is playing, you can switch to other preset station in one of the following two ways.
- From the remote control, press the preset number of the desired station.
- Press QUEUE button to call out preset numbers and corresponding station, select the desired station with the navigation keys ☐. The display will shows as
Press QUEUE button again to exit the queue menu and back to playing status.
DAB RADIO Quick Start
Make sure that your local area can receive Digital Audio Broadcast (DAB) broadcasting signal. Before using this feature, please go to Settings Quickstart section for DAB setting to select your DAB REGION and scan available DAB stations.
After setting up, press the DAB button on the front panel, or select DAB menu from top-level menu to enter this feature.
DAB channels are categorized into ensembles, which are also known as multiplexes. Each multiplex provides a number of stations and each service contains a primary service that can contain secondary services. DAB technology allows broadcasters to transmit additional data along with the audio, which can include other audio channels, text and even images and computer data in the future.
DAB Radio Station Playing
- Select DAB Button from the front panel. Or keep pressing BACK button to return to the top-level menu, navigate to select DAB menu. The display will show as
The unit will scan for available DAB stations. Select the desired station.
Storing a DAB station in a preset (remote only)
While a DAB station is playing, hold down the MEM button, then press the preset number to be assigned from numeric pad 10 . it will store this DAB radio station into the preset number. Up to 30 preset DAB radio stations may be stored.
Playing a preset DAB station
When a radio station is playing, you can switch to other preset station in one of the following two ways.
- From the remote control, press the preset number of the desired station.
- Press QUEUE button to call out preset numbers and corresponding station, select the desired station with the navigation keys. Press QUEUE button again to exit the queue menu and back to playing status.
Radio Station Presets
FM,DAB and the Internet have 30 Pre-set Stations a total of 90 stations can be logged in the unit.
SETTINGS OVERVIEW
| Media Player | ||
| FM | ||
| DAB | ||
| < | Settings | > |
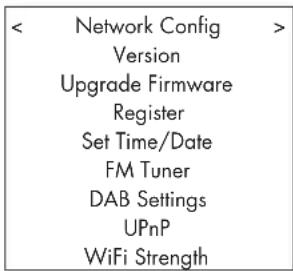
| < | Network Config | > |
| Version | ||
| Upgrade Firmware | ||
| Register | ||
| Set Time/Date | ||
| FM Tuner | ||
| DAB Settings | ||
| UPnP | ||
| WiFi Strength |
Keep pressing BACK button to back to top-level menu, select Settings menu. It contains 9 settings sub-menus. Press PREV, NEXT keys to find hidden menus.
Network Config
1. Scan for networks (only for wireless connection)
Use the PREV, NEXT keys to select this menu. After entering this menu, the display will show "Scanning", which will take a few seconds.
Once the network is found, the display will show the network ID. Push select to confirm.
< Scan for networks >
Enter network name
View Config
Edit Config
2. Enter network name (only for wireless connection)
If the unit can not find any networks, the network ESSID can be entered manually.
Use PREV, NEXT keys to select the letters of the device name then select "END" to confirm the name or hit the REPLY key on the remote or front panel.
Network Name
< END <> A BCDEFGHIJK >
NAME1
3. View Config
Show current network configuration details. Use navigation keys to see next/previous page of "Mode" -> "ESSID" -> "MAC Address" -> "IP Address" -> "Netmask" -> "Gateway" -> "DNS Servers". Display as below:
| < Mode >Auto DHCP |
| < | ESSID | > |
| XXXXXX |
4. Edit Config
This menu can be used to edit the current network configuration. This menu is useful for entering a static IP address. Select this function with the navigation keys and enter the static IP address, MAC address, DNS of the selected network.
To enter the value press SELECT then press PREV, NEXT keys. Press SELECT again to enter the value and move on to the next field. Continue until all information has been entered.
5. Signal Warning (only for wireless connection)
Select YES or NO to enable or disable warning of low Wi-Fi signal.
Version
This menu displays software and hardware information of the unit
Upgrade Firmware
Use this option to download new firmware for the internet radio from the Reciva portal on the Internet. If new firmware is available, there will be a prompt to download.
Note: At this stage, you can press the BACK button to cancel the firmware upgrade. A firmware upgrade may take several minutes, do not switch off the power to the unit or put it into standby until the operation is complete, otherwise, the unit may become permanently damaged. Upgrading can take 15 to 60 mins, depending on the speed of your internet connection.
Register
This will display a key that can be used to register the unit on the Rotel Radio Customer portal: www.rotelradio.com
Set Time/Date
Set you local time and date. Push SELECT key to start entering value, push PREV, NEXT keys to change value. Press again to confirm value entered and move on to the next field..
FM Tuner
Select the FM Tuner region with this function.
DAB Setting
There are 3 sub menus: Scan, Clear List, DAB Region. Please select the menus by using the PREV, NEXT, SELECT keys.
"Scan" will scan for all available DAB service, it will display list of service name when successful, or say "no services found" if DAB broadcasting is not available.
"Clear List" will clear available service list found by "Scan".
"DAB Region" will show regions that provide DAB service, you can select the desired region with the navigation keys.
UPnP
Use this setting if you wish to change the UPnP device name. This is the name that your music server will pickup in Media Player mode. Default name is ROTEL GATEWAY.
Use the navigation keys to select letters of the device name then select "END" or hit REPLY button to confirm the name.
DEVICE NAME
< END <> A BCDEFGHIJ >
DEVICE
WiFi Strength
Shows a percentage to indicate the WiFi strength.
Configure "My Stuff" Register an account on Rotel Radio website
A personalized menu "My Stuff" can be setup in the top level menu.
Open the website, www.rotelradio.com, from your internet browser. Please enter the registration key, this can be found in 'Settings > Register' menu. Enter this registration key into the website and follow the instructions to setup an user name and password. Remember the user name and password, you will need this to access the site.
After logging into your account, you will be able to edit your information for 'My Stations', 'My Streams', 'My Podcast' and 'My Radios'.
Follow the instructions on the website to personalize your RCX-1500 menu.
Note: The www.rotelradio.com site works best with the latest browsers such as Internet Explorer 8 and Safari 5.0. If you are having problems seeing all the icons on the website, please upgrade your browser to the latest version. This can normally be downloaded free of charge.
Configure "My Stations"
There are an enormous choice of stations that are available in the database from the website. Please follow instructions on the website to search for stations. When search results are displayed, there will be a link to 'Add to my stations', Click on this and the station selected will be added to My Stations. A new top level menu 'My Stuff' will appear on the display, with a sub-menu 'My Stations'.
After the initial registration, you can add to 'My stations' while connected to a radio station by pressing the REPLY key. The display will ask if you want to add selection to 'My stations' press the SELECT key to add selection.
Note: You may further organize your stations into FOLDERS (for instance JAZZ, ROCK, OPERA etc.) These FOLDERS will be displayed on your Rotel unit.
Configure "My Streams"
While logged into your website account, you can add your own internet radio streams to the 'My Streams' section which will be listed under 'My Account'.
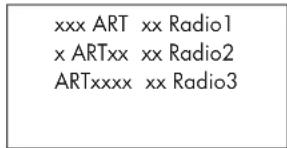
Click on 'My Streams', a prompt will appear to enter the station's name and its media stream URL. The media stream URL should be a link to the website's actual audio stream.
Note: 'My Stuff' menu and stations under 'My Stations', 'My Streams' will appear after the unit has updated the stations list. Please power OFF then ON and enter 'Internet Radio' from the top level menu for the unit to update the stations list.
CD Control Buttons
These buttons provide basic control functions for the disc transport mechanism. Except where noted, all functions are available on the RCX-1500 front panel and the IR remote control.
PLAY Button
After the disc is loaded, press the PLAY ▶ button to start playing the disc. The number of the track being played and the elapsed time will be shown in the display, along with the PLAY indicator. Normally, the disc will start playing with the first track. However, you can select a different track using the TRACK buttons or the DIRECT ACCESS buttons (see below) before pressing the PLAY button to start playing a different selection.
STOP Button
Press the STOP ■ button once to stop disc play. Press the PLAY ▶ button to resume disc play where it was stopped. If the STOP ■ button is press twice, disc play stops, the display shows STOP and programmed selections are deleted (see below). When the PLAY ▶ button is press after pressing the STOP ■ button twice, the disc begins playing from the first track.
PAUSE Button
The PAUSE "button is used to temporarily suspend play. The disc continues to spin and play will be resumed from the current position. The PAUSE indicator will light in the Display. To resume playing the disc, press the PLAY button.
TRACK Buttons
These buttons are used to select tracks on the disc. When a disc is playing, pressing the ▶TRACK button advances to the beginning of the next track. Pressing the ▶TRACK button returns to the beginning of the current track. Pressing ▶TRACK twice quickly in succession returns to the beginning of the previous track. The new track number appears in the Display. These buttons are also used to select a track before pressing the PLAY button or when memorizing tracks for the PROGRAM play mode (see below). These selections are made by continuously pressing the TRACK buttons until the desired track is reached. In PROGRAM mode, the TRACK buttons advance or reverse to the next track in the memorized selection list.
DIRECT ACCESS Buttons ☐ (remote only)
These eleven numeric buttons (labeled 1 through 0 and >10) are used to directly access a track from instead of stepping through the tracks using the TRACK Buttons. The first ten tracks on a disc can be selected by pressing the corresponding button. For example, to play the third track, press the 3 button on the remote control. To play track 10 press the 0 button. To select track numbers greater than 10 use the >10 button. For example, to select track 14, press the >10 button followed by the 4 button. To select track 23, press the >10 button twice followed by the 3 button. The number of the selected track will appear in the main numeric area at the center of the Display. The DIRECT ACCESS buttons may also be used to memorize tracks in PROGRAM mode (see PROGRAM Button section).
SEARCH Buttons (remote only)
The and buttons fast forward or fast reverse through the disc that is playing. One press of the or button will fast forward or fast reverse at 2X normal speed. Pressing the or button repeatedly will fast forward or fast reverse at 4X, then 8X, 16X and 32X normal speed. One more press of the or button, or pressing the Play button, returns the RCX-1500 to normal speed play. While the buttons are pressed, you will hear high-speed audio.
EJECT Button
When a disc is inserted into the front panel Disc Slot it is pulled into the disc transport. To eject the disc press the EJECT button on the front panel or the remote control ▲.
If you accidentally press either of these buttons, press the button again to re-load the disc.
Additional Features
These convenience features add extra functionality to the RCX-1500, including the ability to memorize a group of tracks to be played, to repeat a disc, a program, or a track over and over, to play the tracks on a disc in random order, to automatically play the first 10 seconds of each track, and to select from several available time displays.
PROGRAM Button (remote only)
This button, labeled PROG, allows you to memorize more than 20 tracks on the current disc for playback in a specific order. For example, you could instruct the RCX-1500 to play track 5, followed by track 3, followed by track 8.
Note: Programmed play lists cannot be set up with MP3 and WMA discs.
To begin a program:
- Insert a disc in the front panel slot. The RCX-1500 will read the contents of the disc. You may press the PLAY button if you would like to listen to the tracks while you program them.
- Press the PROGRAM button the remote control. The PROGRAM indicator will light up in the Display, along with "P:00" indicating that the unit is waiting for the first track to be memorized.
- To program tracks from the handheld remote control, enter the first track number using the DIRECT ACCESS buttons. Your selection will be memorized automatically and the Display indicator will change to "P:01", indicating that one track has been memorized. Continue entering the rest of your selections using the DIRECT ACCESS buttons. Note that there is no need to press the PROGRAM button as each selection is memorized as it is entered.
Once you have memorized a play list, the RCX-1500 remains in PROGRAM mode until you eject the disc or press the STOP button twice in succession. If you press the PLAY button, the memorized program will play instead of the entire disc, starting with the first selection in the memorized list.
When a PROGRAM has been memorized, most functions that would normally affect the entire disc operate on just the memorized program. For example, the TRACK buttons advance to the next track in the memorized program, not the next track on the disc. Likewise, the REPEAT button (see below) continuously plays the memorized program, not the entire disc.
Note: The Random Play feature cannot be used when using the Programmed Play feature.
REVIEW Button (remote only)
This button is used to review the memorized tracks in Program Play mode. Press the button and the first memorized track number and "Prog Review" will appear in the Display. Pressing the REVIEW button again while the track number is displayed will continue the review sequence, showing the next memorized track. Continue pressing the REVIEW button to see the complete memorized track list.
If the REVIEW button is not press again, after 5 seconds the review process is terminated and the unit resumes whatever mode it was in before you started the review process or resumes Program Play with the current track.
You may remove a selection from the Program Play list during the review procedure using the CLEAR button, as described below.
CLEAR Button (remote only)
This button allows you to remove a track selection from the memorized program play list during the review procedure described above. Follow the review procedure until the desired track number appears. Then, instead of pressing the REVIEW button to continue, remove the track by pressing the CLEAR button while the track number is displayed. You may then continue the review procedure.
RANDOM Button (remote only)
This instructs the CD player to play tracks from the entire disc in random order. Once all of the selections have been played once, the disc will stop playing, unless the REPEAT Button (see below) has been engaged, in which case the random play will continue until the STOP button is pressed. When the RANDOM button is engaged, the ☐on appears in the Display.
REPEAT Button (remote only)
This button allows you to repeat the current track or the entire disc continuously until the feature is cancelled by disengaging the REPEAT button or pressing STOP. The REPEAT button steps sequentially through the available options. Press the button once and the RCX-1500 will repeat just the current track. The icon appears in the Display. Press the button a second time and the RCX-1500 will repeat the entire disc. A second icon appears in the Display. Press the button a third time to cancel the REPEAT function. As noted above, REPEAT can be used in conjunction with the RANDOM play feature. The REPEAT and RANDOM play combination can also be used when playing CD-DA discs.
Note: The REPEAT function is automatically cancelled when the disc is ejected.
SCAN Button (remote only)
This feature automatically plays the first ten seconds of each track on the disc (or the memorized program). To activate the feature, press the SCAN button. The Icon appears in the Display. To stop scanning and resume normal operation at the current track, press the SCAN button again or press the PLAY ▶ button.
The RANDOM and SCAN play combination can also be used when playing CD-DA discs.
TIME Button (remote only)
Normally, the RCX-1500 displays the elapsed time of the currently playing track. The TIME button allows you to see alternative time displays. Pressing the button once displays the time remaining in the current track, which counts down as the track continues playing. Pressing the button a second time displays the time remaining on the entire disc (or memorized program). When the alternative time displays are selected an "R" icon appears in the display. Pressing the button a third time reverts to the standard elapsed time display.
Note: When playing MP3 and WMA discs, only the regular elapsed time and the time remaining in the current track can be displayed.
Remote Unit Advanced Buttons
Setup menu
To enter the setup menu, press the SETUP button on the remote control and you will see the following display:
1 POWER OPTION
2 DIMMER
3 FACTORY DEFAULT
4 VERSION
5 ANTENNA SELECT
6 POWER ON VOLUME
7 EXIT
POWER OPTION, There are two choices for powering up, NORMAL and QUICK. When set to NORMAL (Default) the unit consumes less power during standby mode but takes a longer time to resume operation. When set to QUICK, normal operations are started immediately after power on.
DIMMER controls the brightness of the front panel display, it can be dimmed with seven steps. You can access this control directly with the DIM button on the remote control.
FACTORY DEFAULT sets the RCX-1500 into the original state as when it left the factory. Presets and network configurations will be lost, and puts the RCX-1500 into remote code 1 (see below).
VERSION shows this unit's version.
ANTENNA SELECT choose AUTO(default), FM or DAB antenna.
POWER ON VOLUME, sets the volume level each time the unit is powered on.
EXIT returns to previous menu.
Second Remote Code
The RCX-1500 is set from the factory to operate with remote code 1. If you find that the RCX-1500 remote is conflicting with other Rotel products, you can set the RCX-1500 and the remote control to remote code 2 with the following steps:
1, While pointing the remote at the RCX-1500, press on the remote control 'FM' and '2' keys at the same time. Release the 'FM' key and continue to press the '2' key for 5 seconds. The RCX-1500 will show 'Audio Custom Code 1->2'.
-
Repeat the above procedure and press '1' key instead of '2' to change the unit back to Code 1.
-
The RCX-1500 remote keys, such as PLAY, STOP, PAUSE, use Rotel's standard codes for CD players. If you find that this is conflicting with your Rotel CD player, press 'CD' and '2' keys at the same time. Release 'CD' key and continue to press '2' key for 5 seconds. The RCX-1500 will show 'CD Custom Code 1 -> 2'.
-
Repeat step 3 above and press '1' key instead of '2' to change the unit back to Code 1.
Troubleshooting
Most difficulties in audio systems are the result of incorrect connections, or improper control settings. If you encounter problems, isolate the area of the difficulty, check the control settings, determine the cause of the fault and make the necessary changes. If you are unable to get sound from the RCX-1500, refer to the suggestions for the following conditions:
Standby Indicator Is Not Lit
The Standby Indicator should be lit whenever the RCX-1500 is plugged into the wall power outlet. If it does not light, test the power outlet with another electrical device, such as a lamp. Be sure the power outlet being used is not controlled by a switch that has been turned off.
Network Does Not Work
If you have trouble connecting the RCX-1500 to your wireless network, check your network setting carefully, these steps may help to resolve the problem.
- Confirm that a Wi-Fi network is available. Check that other computers can access the Internet using the same network.
- Check that a DHCP server is available, or that you have configured a static IP address on the unit. Please refer to Network Config section.
- Check that your network's firewall is not blocking any outgoing ports.
- Do a hard power off (unplug the AC mains) and let the unit restart the network scanning cycle.
- Make sure the RCX-1500 can receive the WiFi signal in its location. Use an USB extension cord to move the WiFi dongle up higher or to a different location to maximize reception.
No Sound
- Check the cables between the RCX-1500 output and loudspeakers, be sure they are connected properly. Refer to Fig. 2.
- Music played from Internet Radio stations are affected by the speed of your internet connection. If you find that music is cutting out regularly, contact your internet service provider.
- Make sure the station you selected is operating at the current hour. The station can be broadcasting from a different time zone.
- Please insert the Wi-Fi dongle (or wired adaptor) to the ethernet port on the rear panel even if no networks are available. After power ON, the unit will look for available networks before allowing the user to access FM and DAB features.
Glossary
Bit rate – Speed of data transfer – how many bits of information are sent each second.
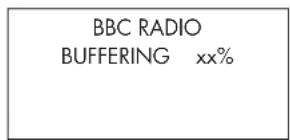
Buffering – data downloading and being assembled before playback.
Codec - [Coder/Decoder] software capable of encoding and/or decoding a digital data stream or signal.
Data Encryption – the encryption of data for security purposes. For wireless networks this is normally WEP and WPA.
DHCP [Dynamic Host Control Protocol] – A protocol for assigning IP addresses to devices on a network.
DNS Server – A remote server that provides the translation of web addresses into the corresponding numeric IP addresses.
ESSID – [Extended Service Set Identifier] The ESSID is a unique identifier for your wireless network.
Ethernet – Network technology for local area networks. Cat5 cable carries information between computers at a rate of 10/100/1000 megabits per second.
File format – The type of file e.g. a music file in the format of .mp3.
File Server – A computer or device that provides workstations on a network with controlled access to shared files.
Firmware – embedded software in a device that provides the devices with operational instructions.
Gateway –The access point from LAN to WAN.
Internet – a computer network consisting of a worldwide network of computer networks.
IP Address – is a numerical label that is assigned to devices in a computer network.
ISP – Internet service provide.
Kbps - Short for kilobits per second, a measure of data transfer speed.
LAN - [Local Area Network] a local computer network for communication between computers.
MAC – [Media Access Control] is a unique identifier assigned to network adapters or network interface cards by the manufacturer for identification.
Modem - [Modulator/Demodulator] device used to connect computers by a telephone line.
Network - A system of interconnected electronic components or computers.
Network adapter - A hardware device, installed inside computers that connect computer devices together to create a network.
Podcast – An audio file delivered via an RSS feed over the Internet to a subscriber.
Router - A device that joins multiple networks or computers together.
RSS feed – [Really Simply Syndication feed] used to publish content on the web which people can then subscribe to and receive updates.
Server – A computer that provides client computers with access to files and printers as shared resources on a computer network.
Subnet mask - A method of splitting IP networks into subgroups.
UPnP - [Universal Plug and Play] a method of auto configuration used in devices such as PCs, peripherals, wireless devices and intelligent appliances.
URL – [Uniform Resource Locator] the format of the address for a particular page of a website.
USB – [Universal Serial Bus] Connection commonly used with computer peripherals.
WAN - [Wide Area Network] computer network that spans a wider area than a local area network e.g. the Internet.
WEP – [Wired Equivalent Privacy] a wireless security protocol to prevent access to the network by "intruders" using similar wireless LAN equipment and capture of wireless LAN traffic through eavesdropping.
WPA – [WiFi Protected Access] a wireless security protocol that replaced the weaker WEP.
WiFi – [Wireless Fidelity] – a radio frequency standard that is used to connect devices, such as computers and iPods, together using a wireless connection.
Specifications
[Amplifier section]
Continuous Power Output (20-20khz,<0.3%,8 ohms) 2x100 watts
Total Harmonic Distortion (20-20khz,8 ohms) <0.2%
IM Distortion (at rated power 60Hz:7kHz=4:1) 63 dBf (mono)
Input Sens. / Impedance (AUX2) 200mV / 47 Kohms
Input Overload Level (AUX2) 2.5V
Frequency Response (AUX2) 10 - 40 kHz (±3db)
S/N Ratio (IHF A) (AUX2) 92 dB
[PREOUT section]
Output level/Impedance (AUX2) 1 V / 1K ohm
Total Harmonic Distortion 0.006%
Frequency Response (AUX2) 10 - 110 kHz (±3db)
S/N Ratio (IHF A) (AUX2) 90 dB
[FM Tuner section]
Usable Sensitivity 22.2dBf
50dB Quieting Sensitivity 27.2dBf
Signal to Noise Ratio (at 65 dBf) 63 dBf (mono), 60 dBf (stereo)
Harmonic Distortion (at 65 dBf) 0.2% (mono), 0.3% (stereo)
Frequency Response 10 Hz-15kHz, ±3dB
Stereo Separation (100Hz/1kHz/10kHz) 40dB/45dB/35dB
Output level (at 75KHz) 1.1V (at Volume 82)
Antenna Input 75 ohms unbalanced
[DAB Tuner section]
Sensitivity
-80dBm
Tuning Range
Band III (174-240MHz)
Audio Data Rate
224Kbps (Max)
Frequency Response 20 - 20KHz (± 1.0dB)
Output level (at OdBfs)
1.1V (at Volume 82)
Antenna Input 75 ohms F connector
[CD Section]
Total Harmonic Distortion (at OdBfs)
0.0045% at 1KHz
Frequency Response 20 - 20KHz (± 0.5 dB)
Channel Balance
± 0.5 dB
Phase Linearity
± 0.5 degree
Channel Separation
90dB at 1KHz
Signal to Noise Ratio
100dB
Dynamic Range
96dB
Digital to Analog Converters
Wolfson
Output Level (at 0dB)
2.2V (at Volume 82)
[General section]
Network connection
Security
802.11b/g
WEP, WPA1 (TKIP)
WPA2 (TKIP)
File formats
Real Audio, MP3, Windows
media stream, OGG
vorbis, AAC, WAV, AIFF and
AU.
Power consumption
140 watts
120V, 60Hz(USA)
230V, 50Hz(Europe)
Power Requirements (AC)
8.1 kgs
391 x 144 x 343 mm
(17 _1/4 x 35/8 x 13")
Weight (net)
132.6 mm, (51/4")
Dimensions (W x H x D)
Front panel height
All specifications are accurate at the time of printing.
Rotel reserves the right to make improvements without notice
Rotel and the Rotel HiFi logo are registered trademarks of The Rotel Co., Ltd. Tokyo, Japan.
iPod classic

iPod nano 5th generation (video camera)

iPod nano th generation (video)

iPod nano 3rd generation (video)

iPod nano 2nd generatio (aluminum)
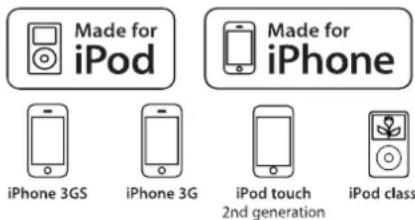
"Made for iPod" means that an electronic accessory has been designed to connect specifically to iPod and has been certified by the developer to meet Apple performance standards.
"Made for iPhone" means that an electronic accessory has been designed to connect specifically to iPhone and has been certified by the developer to meet Apple performance standards.
Apple is not responsible for the operation of this device or its compliance with safety and regulatory standards.
iPod is a trademark of Apple Inc., registered in the U.S. and other countries.
iPhone is a trademark of Apple Inc.
Windows, Windows XP, Windows 2000, Windows Vista, Windows 7, Windows Media are either registered trademarks or trademarks of Microsoft Corporation in the United States and/or other countries.
"This product includes technology owned by Microsoft Corporation and under a licence from Microsoft Licensing GP. Use or distribution of such technology outside of this product is prohibited without a license from Microsoft Corporation and/or Microsoft Licensing, GP as applicable."
PRECAUCION
This Class B digital apparatus complies with Canadian ICES-003.


Entrada Digital AUX 1 ©
Entrada Digital AUX 1 ©


< Scan for networks >
Enter network name
View Config
Edit Config
DEVICE NAME < END <> A BCDEFGHIJ > DEVICE
This Class B digital apparatus complies with Canadian ICES-003.

ANTENNA GROUNDING ACCORDING TO NATIONAL ELECTRICAL CODE INSTRUCTIONS SECTION 810: "RADIO AND TELEVISION EQUIPMENT"
Configure "My Streams" 66

| Station Name |
| END <> A BCDEFGHIJKLNO ART |
| xxx ART xx Radio1 |
| x ARTxx xx Radio2 |
| ARTxxxx xx Radio3 |

"Track Title" 01:12 317kpbs
07:49

DEVICE NAME < END <> A BCDEFGHIJ > DEVICE
Force du signal WiFi (WiFi Strength)
Configure "My Streams"
10 Hz 15 kHz, ± 3 dB
40 dB/45 dB/35 dB
75 ohms asymétrique
- 80 dBm
Bande III (174-240 MHz)
224 Kbps (maxi)
20 - 20 kHz (± 1 dB)
1,1 V (à volume 82)
75 ohms, prise F
90dB
230 volts, 50 Hz (Europe)
Poids 8,1 kg
Dimensions (L x H x P) 391 x 144 x 343 mm

iPod nano
5th generation (video camera)

iPod nano
4th generat (video)

iPod nano
3rd generation (video)

iPod nano
2nd generatio (aluminum)
This Class B digital apparatus complies with Canadian ICES-003.
LASERPRODUKT DER KLASSE 1
| CAUTION | -LASER RADIATION WHEN OPEN,DO NOT STARE INTO BEAM. |
| ATTENTION | -RAYONNEMENT LASER EN CAS D'OUAURETRE,NE PAS RESIGEROR DANS LE FAGEAU. |
| VORSIGHT | -LASERSTRALUNG WINN ARDECING GEÖFFENET,NICHT IN DEN STRAH BLIKEN. |
| ADVERSEL | -LASERSTRALING VED ABNING,BE IKE NO I STRÄLEN. |
| ADVERSEL | -LASERSTRALING NAR DEHSEL APNES,STIRR IKE NOI I STRÄLEN. |
| VIRUING | -LASERSTRALING NAR DEHNA CEL AR OPPNIC,TITA EJ NI STRÄLEN. |
| VARO! | AVATTAESSA OLET ALTTIMA LASERSATELYLE,ALA TUTOTA SATEISELN. |
| 注意 | 当打这里会出现曝光,请不要直接激光。 |
| 注意 | ここを聞くとレーザー先が出ます。レーザー先をのずき込るないでください。 |
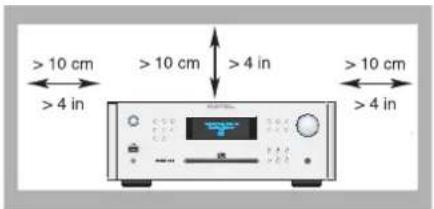

ANTENNA GROUNDING ACCORDING TO NATIONAL ELECTRICAL CODE INSTRUCTIONS SECTION 810: "RADIO AND TELEVISION EQUIPMENT"

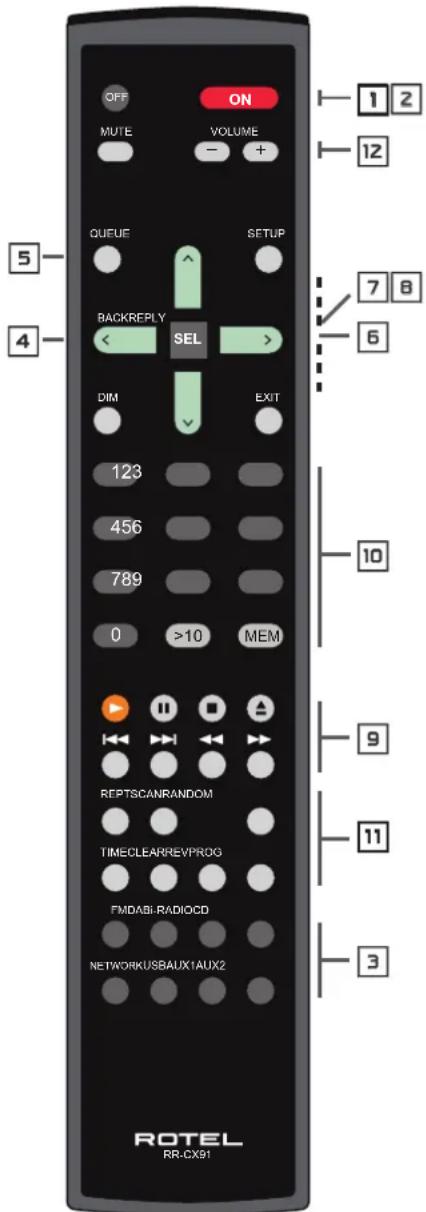
< Internet Radio >
Media Player FM
DAB
< Location > Genre Search
Africa < America > Asia Caribbean
80S < 90S > Adult Adult contemporary
Station Name END <> A BCDEFGHIJKLNO ART
xxx ART xx Radio1 x ARTxx xx Radio2 ARTxxxx xx Radio3
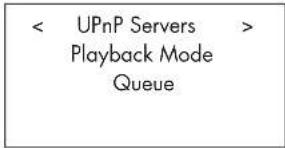
"Track Title" 01:12 317kpbs
07:49

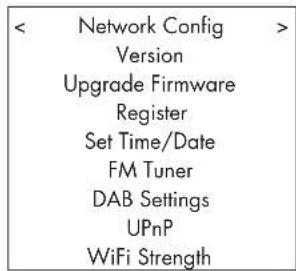
DEVICE NAME < END <> A BCDEFGHIJ > DEVICE
WiFi Strength

iPod touch
2nd generation

iPod classic

iPod nano
5th generation
(video camera)

iPod nano
th generation
(video)

iPod nano
3rd generation
(video)

iPod nano
nd generatio
(aluminum)
ALGEMENE WAARSCHUWING!!

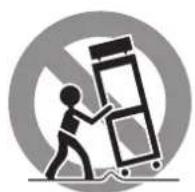


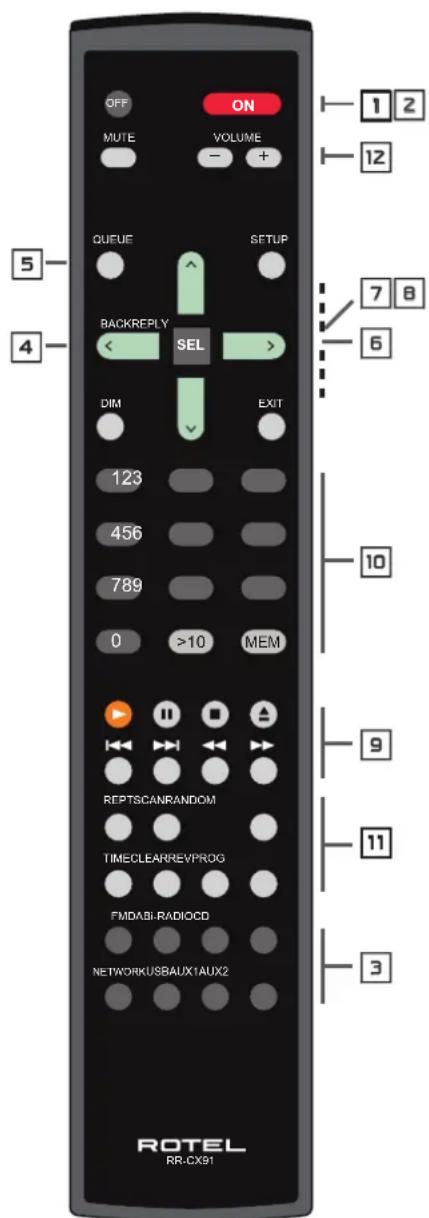
< Internet Radio >
Media Player FM
DAB
< Location > Genre Search
Africa < America > Asia Caribbean
80S < 90S > Adult Adult contemporary
Station Name END <> A BCDEFGHIJKLNO ART
xxx ART xx Radio1 x ARTxx xx Radio2 ARTxxxx xx Radio3
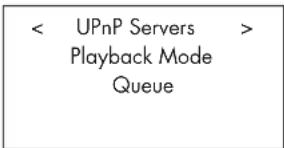

| Internet Radio | ||
| Media Player | ||
| FM | ||
| < | DAB | > |
| Media Player | ||
| FM | ||
| DAB | ||
| < | Settings | > |
| < | Network Config | > |
| Version | ||
| Upgrade Firmware | ||
| Register | ||
| Set Time/Date | ||
| FM Tuner | ||
| DAB Settings | ||
| UPnP | ||
| WiFi Strength |
DEVICE NAME < END <> A BCDEFGHIJ > DEVICE
WiFi Strength
ISP – Internet Service Provider
This Class B digital apparatus complies with Canadian ICES-003.
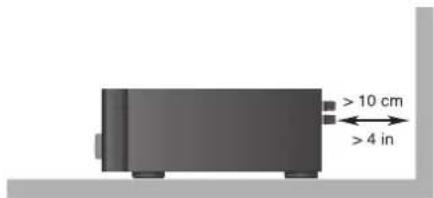
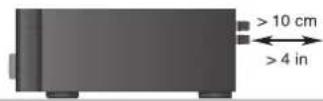
IMPIANTO DI TERRA SECONDO L'ARTICOLO 810: "APPARECCHI RADIO E TV" - NORME U.S.A.
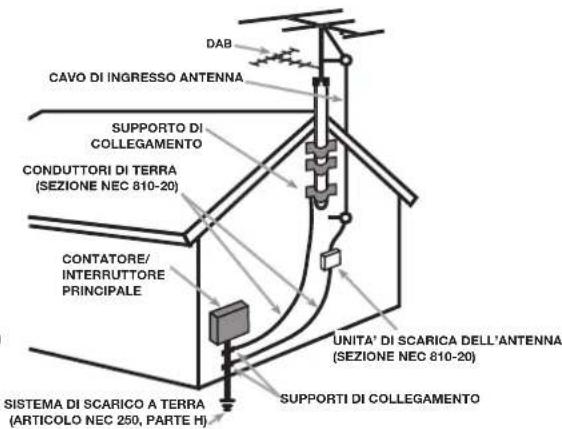

Clear Queue (cancella coda)
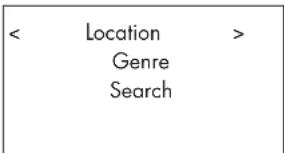
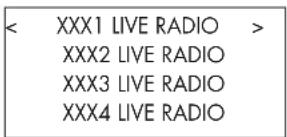
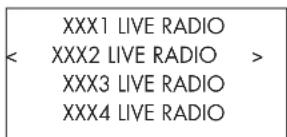
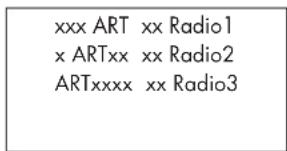

"Track Title" 01:12 317kpbs
07:49
Clear Queue (cancella coda)
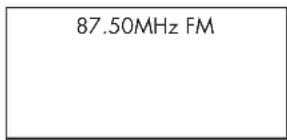
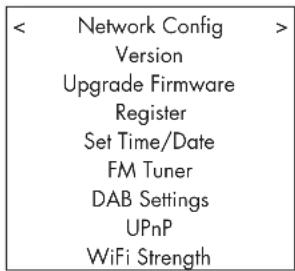
< Scan for networks >
Enter network name
View Config
Edit Config
Tasto CLEAR (solo telecomando)
Rapporto S/R (IHF A) (AUX2) 92 dB
[Sezione PREOUT]
Livello uscita/ impedenza (AUX2) 1V/ 1Kohm
Rapporto S/R (IHF A) (AUX 2) 90 dB
Dimensioni (L x A x P)
(17 _1/4 x 35/8 x 13")

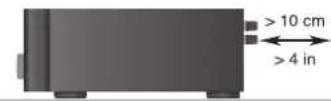

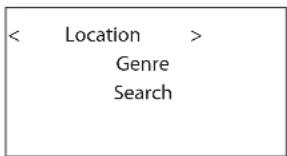
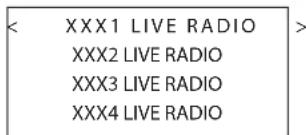
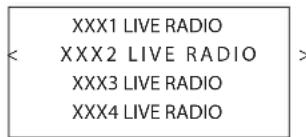
END <> A BCDEFGHIJKLNO ART
xxx ART xx Radio1
x ARTxx xx Radio2
ARTxxxx xx Radio3
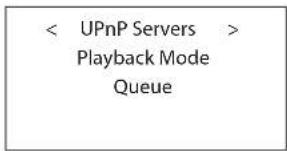
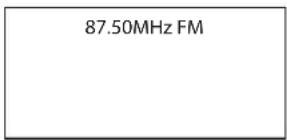
< Scan for networks >
Enter network name
View Config
Edit Config
DEVICE NAME < END <> A BCDEFGHIJ > DEVICE
Подменю WiFi Strength
0.2% 0.0045% на 1KHz

iPod touch
2nd generation

iPod classic

iPod nano
5th generation (video camera)

iPod nano
th generation
(video)

iPod nano
3rd generation
(video)

iPod nano
nd generatio
(aluminum)
This Class B digital apparatus complies with Canadian ICES-003.
VIKTIG INFORMATION FÖR LASERPRODUKT
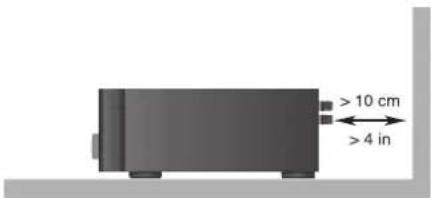
ANTENNJORDNING ENLIGT "NATIONAL ELECTRIC CODE"-FÖRESKRIFTERNA (NEC) "RADIO AND TELEVISION EQUIPMENT", ARTIKEL 810
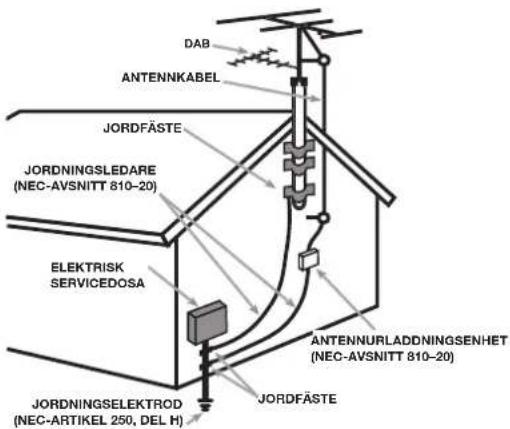
| CAUTION | -LASER RADIATION WHEN OPEN,DO NOT STARE INTO BEAM. |
| ATTENTION | -RAYONNEMENT LASER EN CAS D'OUVERTURE,NE PAS RESARDER DANS LE FABCEAU. |
| VORSIGHT | -LASERSTRALHUNG, WENN ARBECHUNG GEÖFFENET,NICHT IN DEN STRAH, BILIKEN. |
| ADVERSEL | -LASERSTRALING VED ABNING,SE IKE IND ISTRÄLEN. |
| ADVERSEL | -LASERSTRALING NAR JIKHEL, APNES,STIRR IKE INN ISTRÄLEN. |
| VARING | LASERSTRALING NER DENNA CEL AF OPPNAC,TITA EJ INISTÄLEN. |
| VARO | AVIATASSA OLET ALTIMA LASERSATELYLLE,A LA TUOTA SATEESEN. |
| 注意 - 当打开这里会出现激光.请不要直接激光.注意 - 二公要聞くとレーザー元が发出示。レーザー元をのずきますないでください。 | |
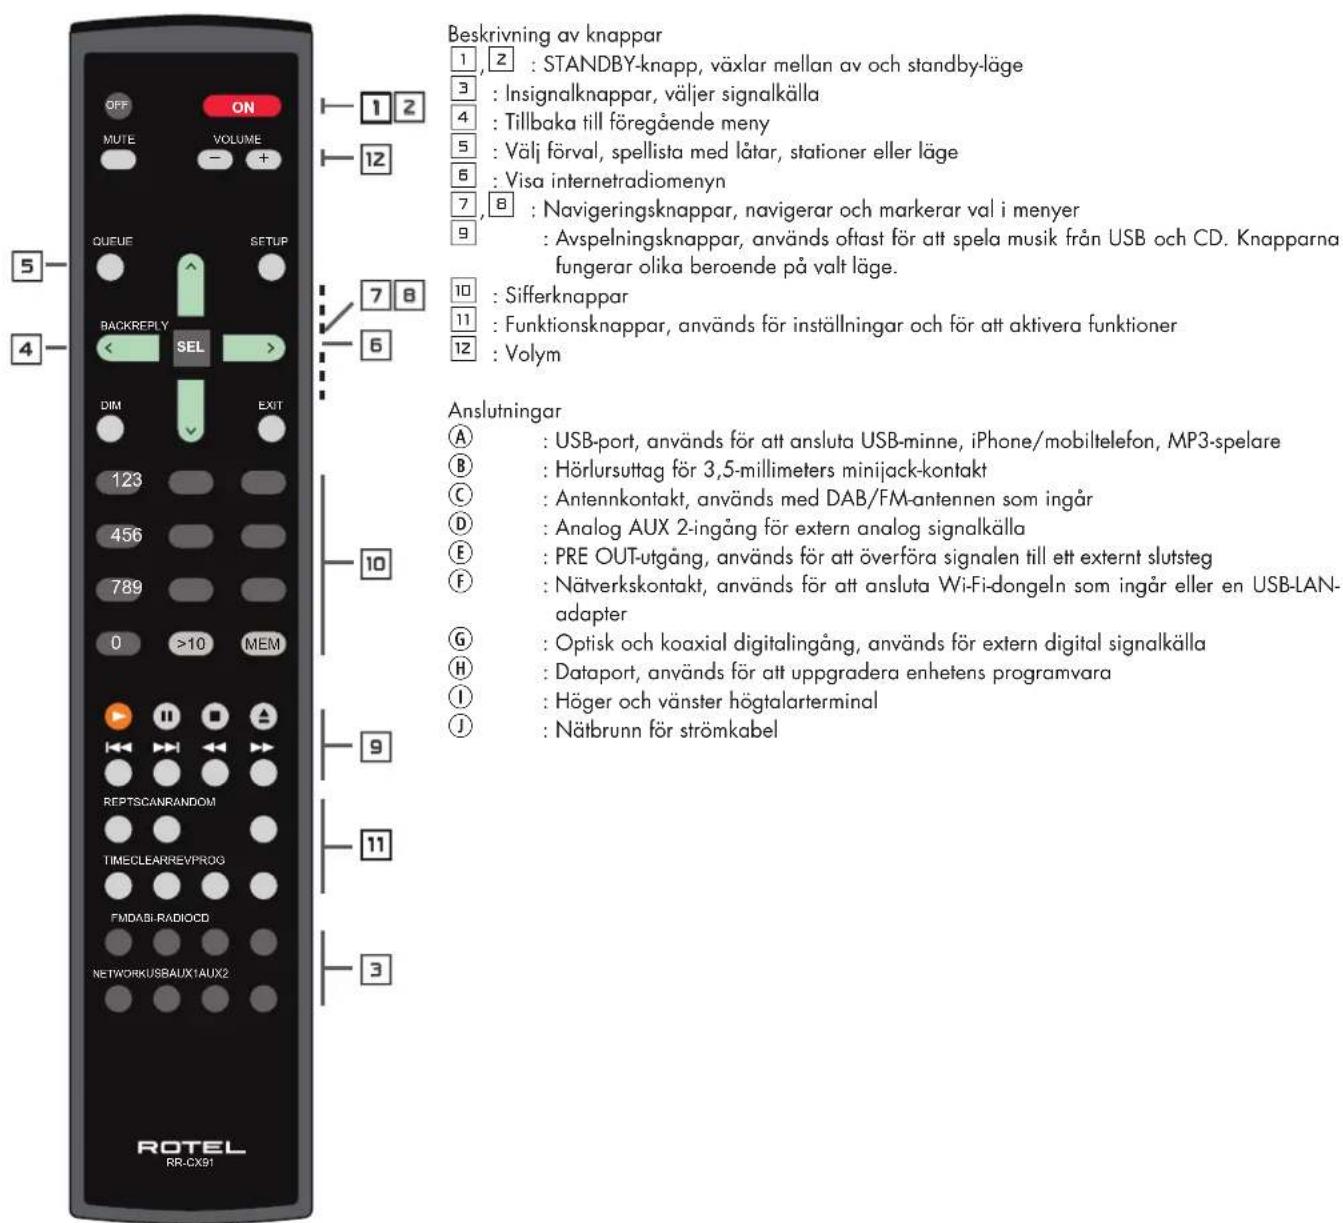
Figure 2: Inkoppling

Figure 2: Inkoppling 171
Viktigt 171
Om Rotel 173
Introduktion....173
Funktioner 173
Att tänka på 173
Placering 173
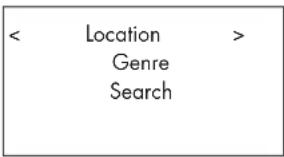
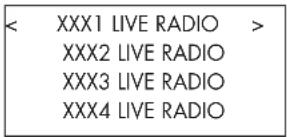
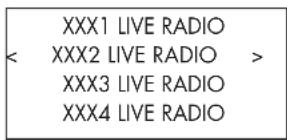
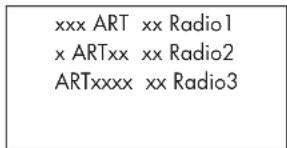


| Media Player | ||
| FM | ||
| DAB | ||
| < | Settings | > |
| < | Network Config | > |
| Version | ||
| Upgrade Firmware | ||
| Register | ||
| Set Time/Date | ||
| FM Tuner | ||
| DAB Settings | ||
| UPnP | ||
| WiFi Strength |
< Scan for networks >
Enter network name
View Config
Edit Config
2. Enter Network name (endast för trådlös anslutning)
WiFi Strength
The Rotel Co. Ltd, Tokyo, Japan.
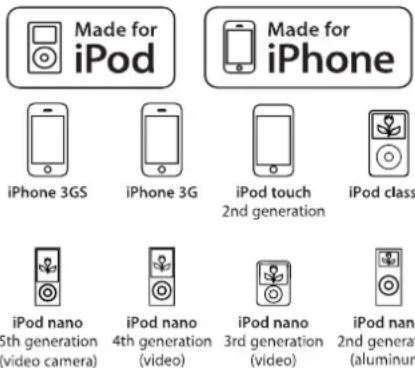
iPod classic
iPod nano
nd generatio
(aluminum)
Endo TN Building 2F.,
6-12-21, Meguro-Honcho,
Meguro-Ku, Tokyo 152-0002
Japan
Rotel of America
54 Concord Street
North Reading, MA 01864-2699
USA
Phone: +1 978-664-3820
Fax: +1 978-664-4109
Rotel Europe
Dale Road
Worthing, West Sussex BN11 2BH
England
Phone: + 44 (0)1903 221 761
Fax: +44 (0)1903 221 525
Rotel Deutschland
- ROTEL®
- RCX-1500
- APPLICABLE FOR USA, CANADA OR WHERE APPROVED FOR THE USAGE
- IMPORTANT FOR LASER PRODUCTS
- WARNING!
- FCC Information
- Caution
- Important Safety InstructionsNotice
- Button Series Function Explanation
- Front & Rear Interfaces
- Important Notes
- Contents
- About Rotel
- Getting Started
- Features
- A Few Precautions
- Placement
- Overview – the Rotel internet radio tuners/digital gateway products.
- DAB and FM radio
- Internet radio
- Network access
- The Rotelradio website — managing your stations
- Playback from iPods, mp3 players and flash drives
- Playback from network servers
- AC Power and Control
- AC Power Input Ⓙ
- Standby Switch and Indicator Light 1 z
- Connection Overview
- USB Connection Ⓐ
- PHONES Connection Ⓑ
- DAB/FM Broadcasting ©
- ANALOG INPUT-AUX 2 ©
- PRE OUT E
- Network Connection Ⓕ
- DIGITAL INPUT-AUX 1 ©
- Computer I/O Ⓗ
- Speaker Connections ①
- Speaker Selection
- Speaker Wire Selection
- Polarity and Phasing
- Speaker Wire Connections
- Internet Radio Quick Start
- What you need before starting
- First Time Connection To The Network
- NO NETWORK FOUND
- Choosing A Radio Station
- Internet Radio Station Playing
- Storing a radio station in a preset (remote only)
- Playing a preset radio station
- Media Player Quick Start
- UPnP Servers
- Setting up UPnP Server in PC
- Play media files using UPnP Server.
- Clear Queue
- Playback Mode
- iPod/USB Connection Quick Start
- USB Storage Device Connection
- iPod/iPhone Connection
- Playback Control Buttons 9
- FM RADIO Quick Start
- FM Radio Station Playing
- DAB RADIO Quick Start
- DAB Radio Station Playing
- Storing a DAB station in a preset (remote only)
- Playing a preset DAB station
- Radio Station Presets
- SETTINGS OVERVIEW
- Network Config
- Scan for networks (only for wireless connection)
- Enter network name (only for wireless connection)
- View Config
- Edit Config
- Signal Warning (only for wireless connection)
- Version
- Upgrade Firmware
- Register
- Set Time/Date
- FM Tuner
- DAB Setting
- UPnP
- WiFi Strength
- Configure "My Stuff" Register an account on Rotel Radio website
- Configure "My Stations"
- Configure "My Streams"
- CD Control Buttons
- PLAY Button
- STOP Button
- PAUSE Button
- TRACK Buttons
- DIRECT ACCESS Buttons ☐ (remote only)
- SEARCH Buttons (remote only)
- EJECT Button
- Additional Features
- PROGRAM Button (remote only)
- REVIEW Button (remote only)
- CLEAR Button (remote only)
- RANDOM Button (remote only)
- REPEAT Button (remote only)
- SCAN Button (remote only)
- TIME Button (remote only)
- Remote Unit Advanced Buttons
- Setup menu
- Second Remote Code
- Troubleshooting
- Standby Indicator Is Not Lit
- Network Does Not Work
- No Sound
- Glossary
- Specifications
- PRECAUCION
- Entrada Digital AUX 1 ©
- Force du signal WiFi (WiFi Strength)
- ALGEMENE WAARSCHUWING!!
- Clear Queue (cancella coda)
- Tasto CLEAR (solo telecomando)
- Подменю WiFi Strength
- VIKTIG INFORMATION FÖR LASERPRODUKT
- Enter Network name (endast för trådlös anslutning)
- Rotel of America
- Rotel Europe
- Rotel Deutschland
Brand : ROTEL
Model : RCX1500
Category : Receiver