CXNup 20 - Battery charger Phocos - Free user manual and instructions
Find the device manual for free CXNup 20 Phocos in PDF.

| Product Type | Solar Charge Controller |
| Brand | Phocos |
| Model | CXNup 20 |
| Dimensions (L x H x D) | 101 x 103 x 32 mm |
| Weight | 179 g |
| System Voltage | 12 / 24 V, automatic detection |
| Max. Charge Current | 20 A (in safety area) |
| Max. Discharge Current | 20 A (in safety area) |
| Supported Battery Types | Lead-acid (GEL, AGM, liquid), LiFePO4 |
| Charging Algorithm | 4-stage PWM for lead, 2-stage for LiFePO4, with temperature compensation |
| USB Port | 5.0 V; 1500 mA max |
| External Temperature Sensor | Yes (NTC), adapts charging voltage |
| Data Logger | 2 years of data (Ah charge/discharge, SOC) |
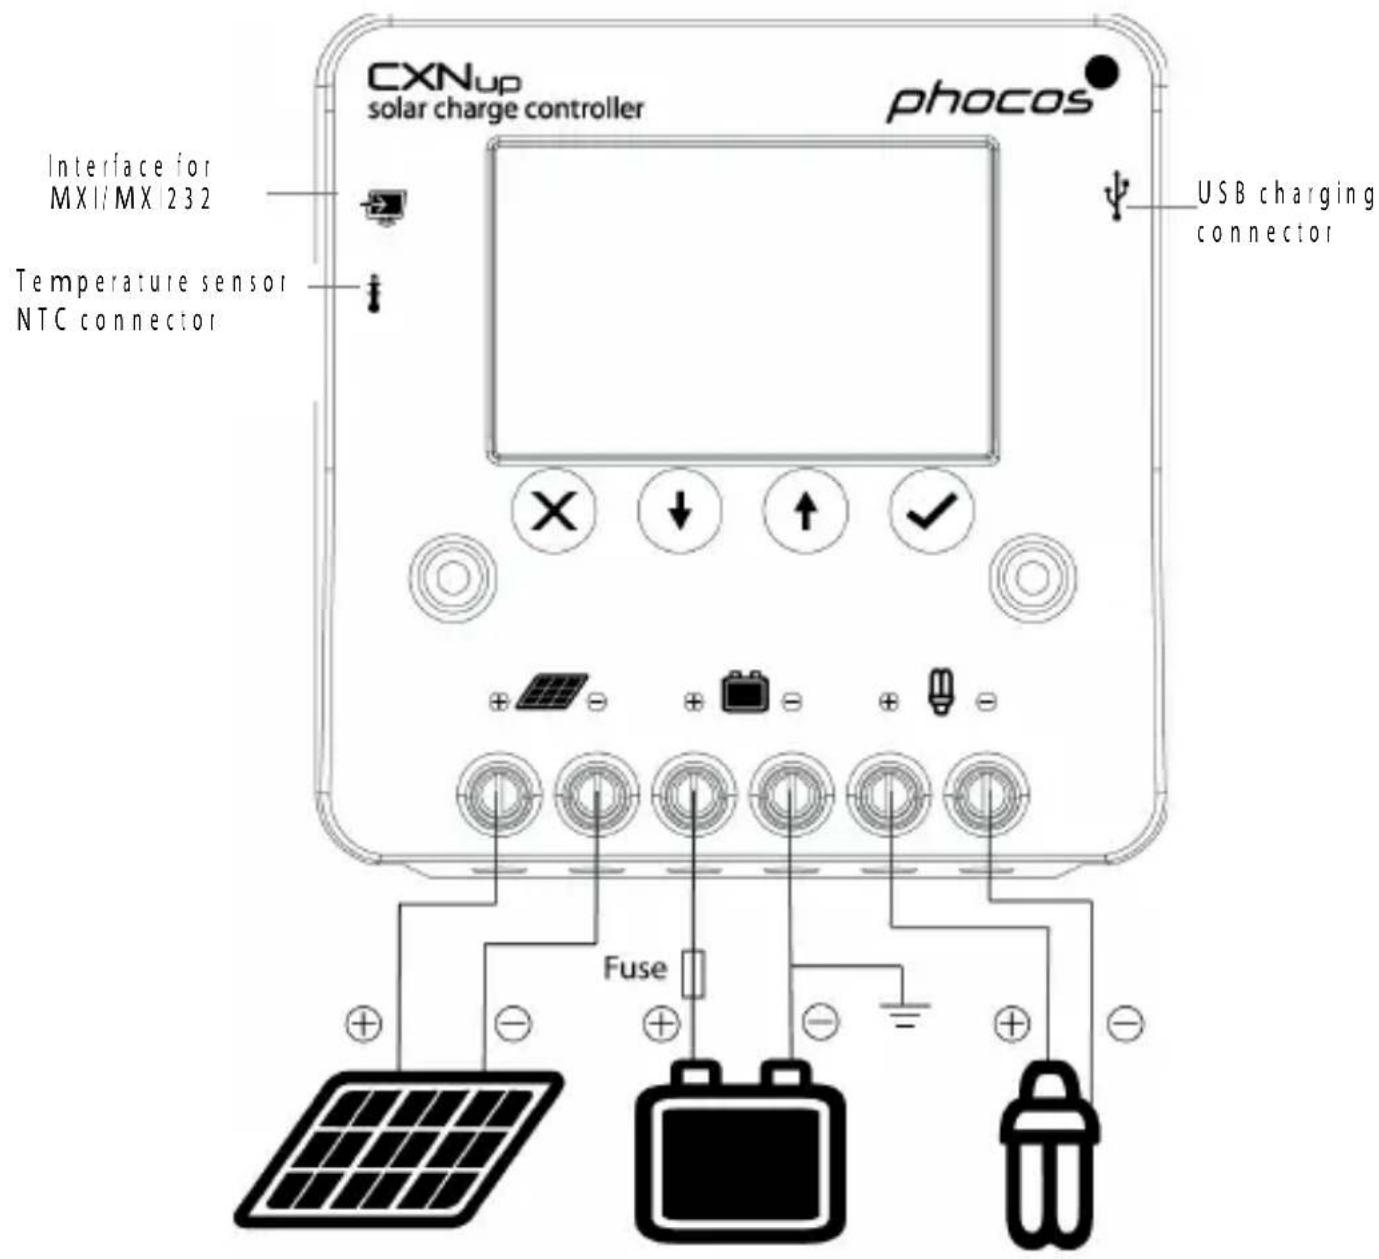
| Display | LCD screen, navigation buttons |
| Protection | Reverse polarity, short circuit, overcurrent, over/under voltage, overtemperature |
| Self-consumption at rest | < 4 mA |
| Recommended Cable Cross-section | Battery: 6 mm², panels and loads: min 6 mm² |
| Ambient Temperature | -40 to +50 °C |
| Max. Altitude | 4000 m above sea level |
| Protection Type | IP20 |
| Maintenance and Cleaning | No maintenance required; dust with a dry cloth |
| Spare parts and repairability | No user-serviceable parts; contact customer service |
Frequently Asked Questions - CXNup 20 Phocos
User questions about CXNup 20 Phocos
0 question about this device. Answer the ones you know or ask your own.
Ask a new question about this device
Download the instructions for your Battery charger in PDF format for free! Find your manual CXNup 20 - Phocos and take your electronic device back in hand. On this page are published all the documents necessary for the use of your device. CXNup 20 by Phocos.
USER MANUAL CXNup 20 Phocos
Solar charge controller
Bedienungsanleitung
User Manual
Manual del usuario
natural_image
Two empty rectangular arrows pointing right, no text or symbols present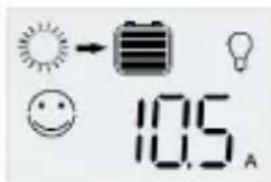
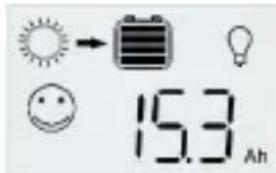
Last-Ampere-Stunden
Congratulations on buying your Phocos product! Please read the instructions carefully and thoroughly before using the product. Your new CXNup controller is a 'state-of-the-art' device which was developed in accordance with the latest available technical standards. It comes with a number of outstanding features, such as:
■User friendly LCD showing extensive system information
■Four-stage PWM charging algorithm with integrated temperature compensation for lead battery and two stage charge algorithm for LiFePO4 battery
■Full electronic protection
■Programmable nightlight function
■USB charging port
■ Datalogger information which can also be exported
■Load status indication
■Touch keys ensuring long lasting operation
IMPORTANT SAFETY INSTRUCTIONS
SAVE THESE INSTRUCTIONS
This manual contains important instructions for CXNup controller that shall be followed during installation, operation and maintenance of the charge controller.
RISK OFF FIRE: ATTACH THE TEMPERATURE SENSOR TO THE BATTERY.
Battery type: Lead acid |GEL, AGM, flooded|, LiFePO4
Nominal voltage rating of the battery: 12 or 24 V
Battery fuse: Use a fast acting fuse with an interruption rating capacity of 1000 A on the battery side. We recommend to use a fast acting melting fuse [e.g. car type fuses] as close as possible to the battery terminal. The maximum current rating should be 15 times of the nominal current of the charge controller. Respect the maximum current rating of the BMS when using LiFePO4 batteries.
Please do not disassemble or attempt to repair Phocos products. Phocos charge controllers do not contain user serviceable parts.
Please observe all instructions with regards to external fuses/breakers as indicated.
Maintenance and installation notes
When installing or working on the PV system, please disconnect the PV (isolar) modules from the charge controller first, to prevent any damages to the charge controller!
Please verify that all cable/wire connections are tightly fastened to the connectors/binding posts in order to avoid any bad or loose connections that could result in excessive heating. Please install a fuse or breaker near the battery before installing or adjusting the controller!
Please install and operate the controller in a dry environment.
High voltage risks
Operation of this device may produce high voltages which can cause severe injuries or death in case of improper installation or operation of the device.
PV modules can generate high DC voltages!
Make sure the cables are always connected to the correct terminal. An electrical shock can be lethal. In general, any electric shock can be dangerous to your health.
CE labeling
The product is CE compliant.
Description of Functions
■The charge controller protects the battery from being overcharged by the solar array and from being deep discharged by the loads. The charging characteristics include several stages which comprise automatic adaptation to the battery temperature.
■The charge controller adjusts itself automatically to 12 V or 24 V system voltage.
■The controller provides a user friendly LCD, programmable parameters, and various safety functions.
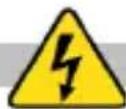
Connecting and Grounding
The controller is intended for indoor use only. Protect it from direct sunlight and place it in a dry environment. Never install it in humid rooms like bathrooms. The controller warms up during operation, and should therefore be installed on a non flammable surface only. Connect the controller by following the steps described below to avoid installation faults.
■Observe the following connection sequence when installing the system:
- Connect the battery to the charge controller - plus and minus.
- Connect the photovoltaic modules to the charge controller - plus and minus.
- Connect the load to the charge controller - plus and minus.
Follow the reverse procedure when uninstalling!
■To avoid any voltage on the wires, first connect the wire to the controller, then to the battery and to the photovoltaic modules. But for the load, first connect the wire to the load, then to the controller.
■Recommended minimum wire size: CXNup 10:4 mm ^2 ; CXNup 20:6 mm ^2 , CXNup 40:10 mm ^2
■Make sure the wire length between battery and controller is as short as possible.
■Be aware that all negative connections of the CXNup controller are common and therefore have the same electrical potential. If any grounding is required, always do this on the negative wire.
When connecting inductive loads (motors, relays, etc.), a freewheel diode must be connected in parallel to the loads in the reverse biased direction.
■Due to their high inrush currents, large inverters should always be connected directly to the battery.
REMARK: Mind the recommendations of your battery manufacturer. We strongly recommend connecting a fuse directly to the battery to protect any short-circuit at the battery wiring. The fuse must correspond to the nominal current of the charge controller: 15 A for CXNup 10, 30 A for CXNup 20 and 50 A for CXNup 40.
Starting Up the Controller
Self Test
As soon as the controller is supplied with power from the battery, it starts a self test routine. Then the display changes to normal operation.
System Voltage
The controller adjusts itself automatically to 12 V or 24 V system voltage. As soon as the voltage at the time of start-up exceeds 18 V, the controller assumes a 24 V system. If the battery voltage is not within the normal operation range at start-up, a status display according to the section ERROR DESCRIPTION occurs.
Battery Type
The controller is preset to operate with lead-acid batteries with solid electrolyte |GEL type or AGM type|. If you intend to use a lead-acid battery with liquid electrolyte, you can adjust the charging characteristics (see "Settings"). The equalization charge mode is then added. If you intend to use a LiFePO4 battery, you also can adjust the charging characteristics (see "Settings"). In case of any doubts consult your local dealer.
Recommendations for Use
The controller warms up during normal operation.
The controller does not need any maintenance or service. Remove dust with a dry tissue.
It is important that the battery gets fully charged frequently (at least monthly). Otherwise the battery will be permanently damaged.
If too much energy is being drawn during the charging process, a battery cannot be fully charged. Keep that in mind, especially if you install additional loads.
Display Functions in Normal Operation
The controller has an LCD and an acoustic warning signal.
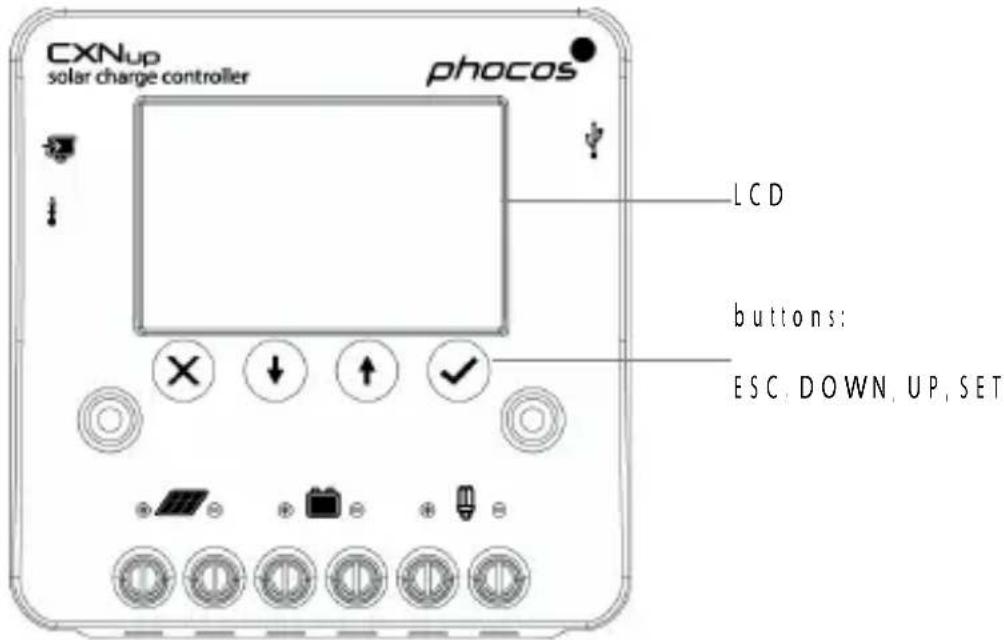
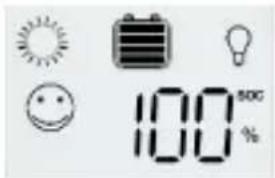
In normal operation, the controller shows the state of charge of the battery and the solar panel activity. Any change of the state of charge (SOC) to a lower status is additionally signaled acoustically.
Symbol display
| Symbol Status and function Symbol Status and function | |||
 | System OK Load OK |  | |
  | System not OK |Error or empty| Load cOn: Day and charging |  t flowing t flowing | LVD |
| Flash with °C: PWM due to OTP | |||
 | Night |  | Load over current |
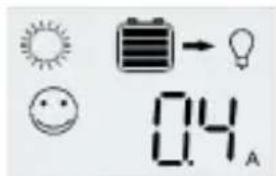
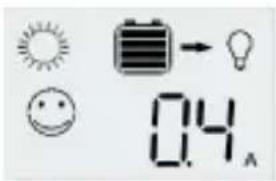
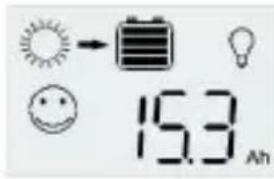
Current Value
The LCD will scroll the current values below after power up. 'SET' (✓) button can stop scrolling, pressing 'DOWN' or 'UP' button proceeds with scrolling the values.
Battery voltage
SOC

natural_image
Two empty rectangular arrows pointing right, no text or symbols present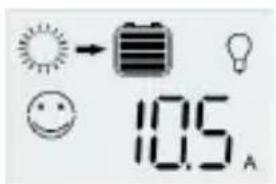
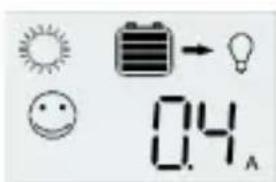
Load ampere-hours
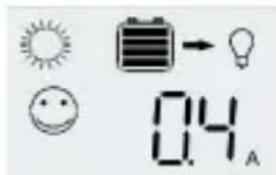
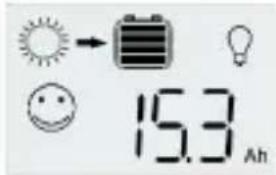
Load current
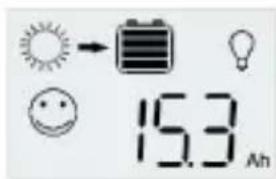
Panel ampere-hours
Charge state and acoustic signals
The percentage corresponds to the available energy until Low Voltage Disconnect with respect to a fully charged battery. A change in the state of charge (SOC) to a lower status is indicated by
an acoustic signal.

flowchart
graph LR
    A["> 90 %"] --> B["70% · 90 %"]
    B --> C["1x"]
    C --> D["30% · 70 %"]
    D --> E["3x"]
    E --> F["10% · 30 %"]
    F --> G["5x"]
    G --> H["0% · 10 %"]
    H --> I["25x"]
    I --> J["0 %"]
The loads are disconnected approx. 1 minute after a series of 25 acoustic signals.
History Data
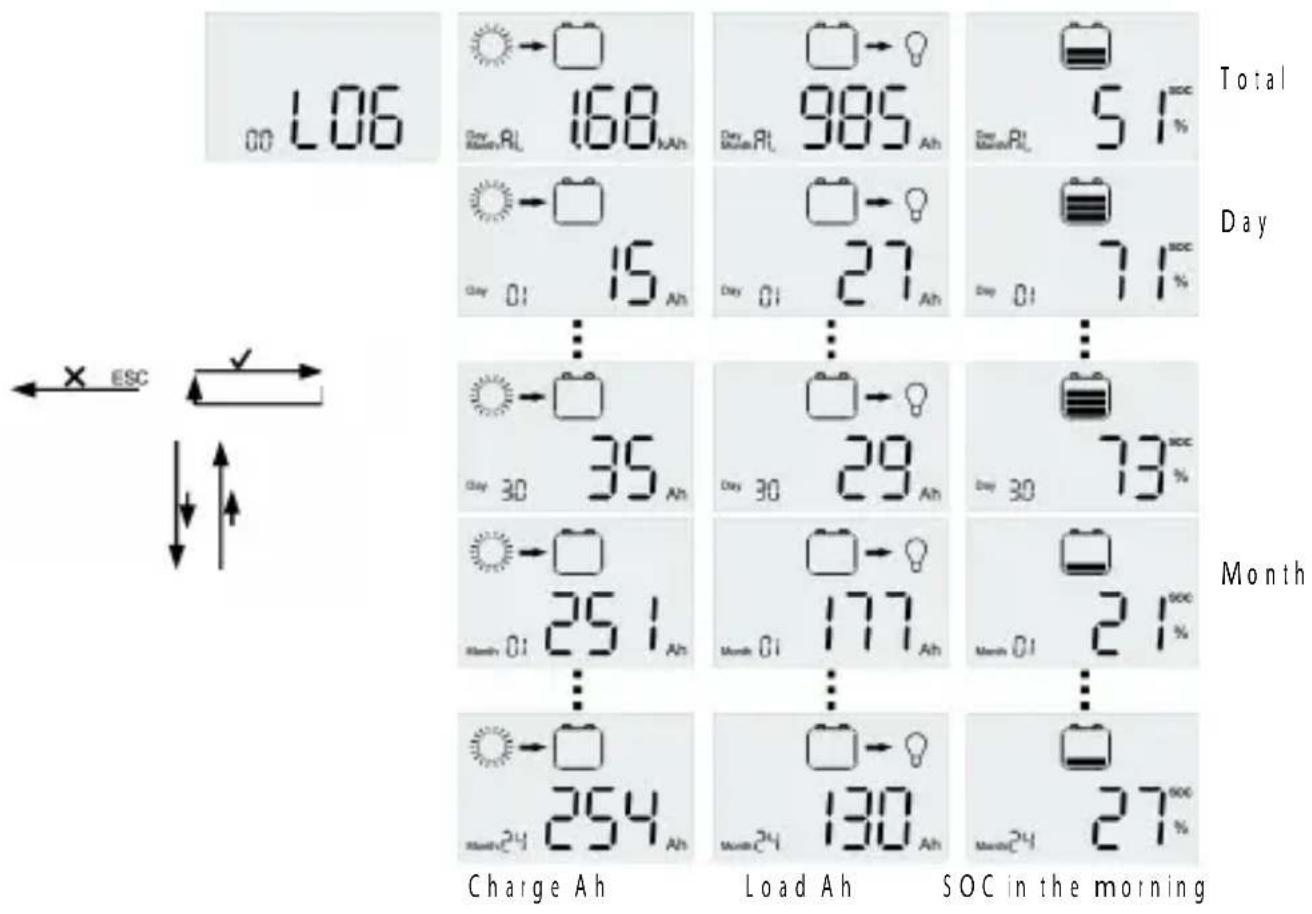
The CXNup controller has a 2 years datalogger. Push the 'ESC' (X) button when the LCD is scrolling the current values and the controller will enter the menu. Select 'LOG' with the arrow keys and press 'SET' (✓) to enter the datalogger menu. You can get the charge Ah, load Ah and SOC in the morning, as daily data for a month, monthly data for two years and total data.
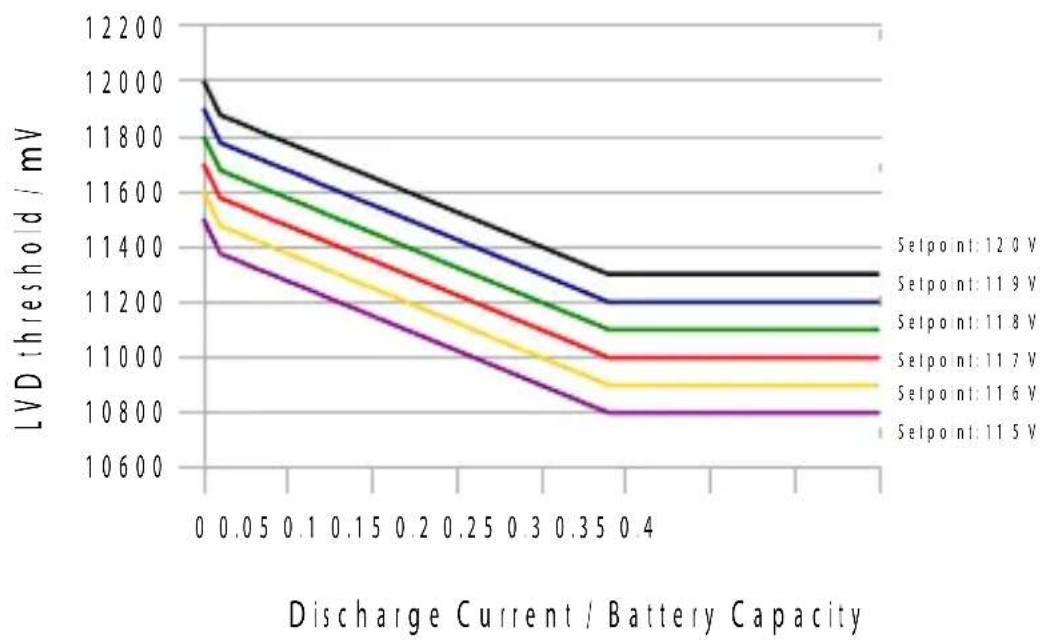
Low Voltage Disconnect Function
The controller has 2 different modes to protect the battery from being deep discharged:
Mode 1 LVD Current Adapted | SOC|: Load disconnect level at no discharge current can be set between 11.5/23.0 V and 12.0/24.0 V. The disconnect voltage depends on the voltage, discharge current and battery capacity. At nominal discharge current |0.1 C/h|: 11.15/22.3 V to 11.65/23.3 V.
Battery capacity : 10 Ah - 5000 Ah
Mode 1 LVD Current Adapted |SOC| is the standard setting.
line
| Discharge Current / Battery Capacity | Selpoint: 12.0 V | Selpoint: 11.9 V | Selpoint: 11.8 V | Selpoint: 11.7 V | Selpoint: 11.6 V | Selpoint: 11.5 V | | ------------------------------------- | ---------------- | ---------------- | ---------------- | ---------------- | ---------------- | ---------------- | | 0 | 12000 | 11900 | 11800 | 11700 | 11600 | 11500 | | 0.05 | 11900 | 11800 | 11700 | 11600 | 11500 | 11400 | | 0.1 | 11800 | 11700 | 11600 | 11500 | 11400 | 11300 | | 0.15 | 11700 | 11600 | 11500 | 11400 | 11300 | 11200 | | 0.2 | 11600 | 11500 | 11400 | 11300 | 11200 | 11100 | | 0.25 | 11500 | 11400 | 11300 | 11200 | 11100 | 11000 | | 0.3 | 11400 | 11300 | 11200 | 11100 | 11000 | 9999 | | 0.35 | 11300 | 11200 | 11100 | 11000 | 9999 | 9998 | | 0.4 | 11250 | 11250 | 11150 | 11050 | 9998 | 9997 |Mode 2 voltage: Load disconnect level can be set between 11.0/22.0 V and 11.5/23.0 V. It is appropriate if bypass loads draw current directly from the battery. This mode allows a lower disconnection point. The battery is cycled deeper, and this can shorten battery lifetime.
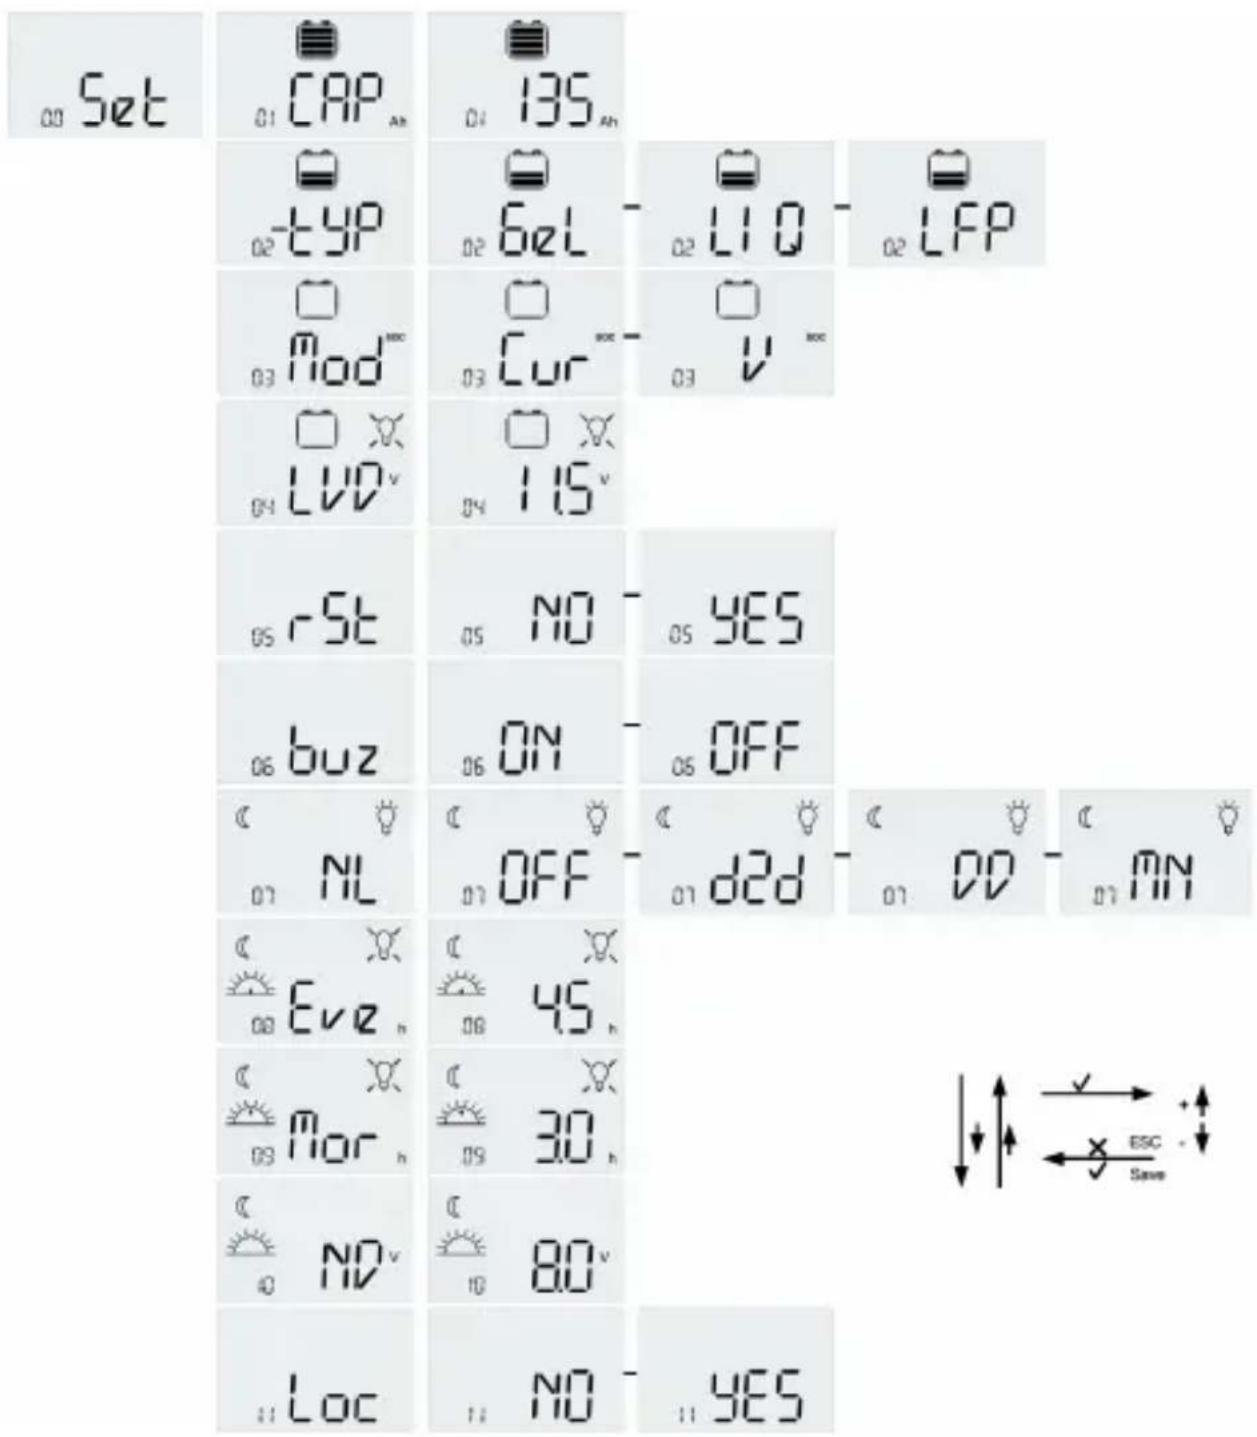
Settings
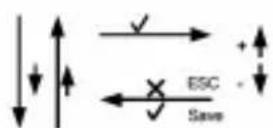
The CXNup has four buttons [ESC = X, DOWN, UP, = SET] to navigate through the menu and adjust the settings. By pushing the SET [√] button during 5 seconds you can turn the load on or off. To enter the menu, push the ESC [X] button and navigate between the 'LOG' and the 'Set' menu with the arrow buttons [UP and DOWN]. To modify settings, enter the menu 'Set' by pressing the SET [√] button. Navigate to the desired value with the arrow buttons [UP and DOWN]. Press the SET [√] button to modify the value [the selected value flashes]. Modify the value with the arrow buttons [UP and DOWN] and save the changes by pressing the SET [] √ button again [The value flashes fast for a second to acknowledge the change] or return to the 'Set' menu without saving the modified value by pressing the ESC [X] button. The following menu settings are presented by the LCD of the controller. Voltage values for 12 V systems. For 24 V systems double voltage values.
- Battery Capacity 'CAP' menu: Set Battery Capacity 5 ... 5000 Ah (standard nominal current x 10 h)
- Battery Type 'typ' menu: set battery type 'GEL', 'LIQ' and 'LFP' as Gel, Liquid, LiFePO4 battery
- LVD mode 'Mod' menu: set LVD mode as current adapted (SOC) 'CUR' [Only Battery Type: Gel / Liquid] or 'V' [fixed voltage]
- LVD menu: LVD: 11.0 V ... 11.5 V (default 11.0 V) / SOC: 11.5 V ... 12.0 V (default 11.9 V) | Only Battery Type: Gel / Liquid
- 'rSt' menu: Reset settings to factory default: YES, NO
- 'buz' menu : Buzzer ON, OFF
- 'NL menu: Night Light mode: OFF, D2D, MN [Mid of Night], DD [Dusk and Dawn]
- 'Eve' menu: Evening hours 0 h ... 20 h [default 0 h] | Only Night Light mode Mid of Night / Dusk and Dawn |
- 'Mor' menu: Morning hours 0 h ... 20 h (default 0 h) [Only Night Light mode: Mid of Night / Dusk and Dawn]
- 'ND' menu: Night detection level 1.5 V ... 10.0 V (default: 8.0 V)
- 'Loc' menu: Lock settings YES, NO
Safety Features
| PV terminals Battery terminals Load terminals | |||
| Reverse polarity Protected Buzzer warning | Protected |1| | ||
| Short-circuit |2| Protected Protected |3| Switches off immediately | |||
| Over current --- --- Switches off with a delay |4| | |||
| Reverse current Protected --- | |||
| Over voltage Max.50 V Max.50 V Switches off above 15.5/31.0 V | |||
| Under voltage --- --- Switches off | |||
| Over temperature | Reduces the charging current if over temperature occurs and switches off the load if the temperature reaches a high level. | ||
[1] The controller can protect itself, but any connected loads might be damaged.
|2 | Short-circuit: >4x - 6x nominal current.
[3] The battery must be protected by a fuse, or it might be permanently damaged in case of short-circuit.
[4] >150% nominal current: disconnects within 2 min;
200% nominal current: disconnects within 3s.
WARNING: The combination of different error conditions may cause damage to the controller. Always remove the fault condition before you continue connecting the controller!
USB Connector
USB connector for 5 V supply to small appliances like for charging cell phones, compact portable computers, small music players; with up to 1500 mA of current consumption.
Warning: Do not connect the charging device anywhere else USB negative contact is connected to load negative.
Interface and Datalogger with MX1/MX 232 and CXLink
The controller comes with one serial interface which can be connected to a PC with the optional interface adapter MX/MX|232 [see interface adapter manual for details] and the CXLink software.
The CXNup controller features a built-in datalogger. The datalogger registers up to 2 year performance data of your PV system, including charge Ah, load Ah and SOC in the morning etc. System performance can easily be analyzed with the aid of this history, thus helping the user to get to know the PV system better.
With the MX | MX1232 and CXLink application software, the CXNup datalogger can be accessed by a computer. Performance data can be read and displayed with the aid of CXLink.
External Temperature Sensor
With the temperature sensor (type NTC) the CXNup can measure the battery temperature and adjust the charging voltage accordingly and thus extend the battery lifespan.
Note: The maximum length of all sensor and data communication wires is 10 m. Longer wires will void the CE compliance and product guarantee.
Error Description
| Error Display Reason Remedy | |||
| Loads are not supplied |  | Battery is low | Load will reconnect as soon as battery is recharged. |
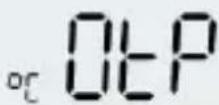 | Over temperature protection | Switch off all loads. Controller will switch on load automatically after temperature has lowered. | |
| Loads are not supplied | 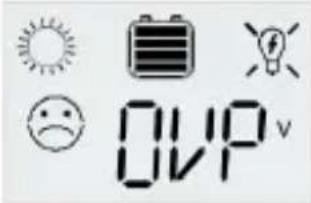 | Battery voltage too high |>15.5 / 31.0 V| | Check if other sources overcharge the battery. If not, controller is damaged. |
| Battery cables or battery fuse damaged, battery has high resistance | Check battery wires, fuse and battery. | ||
| Loads are not supplied |  | Overcurrent of loads | Switch off all loads. Remove short-circuit. Controller will switch on load automatically after max 1 minute. |
| Battery is empty after a short time | 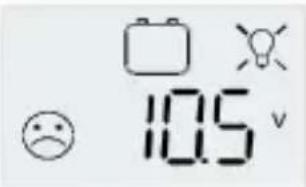 | Battery shows low capacity | Change battery |
| Battery is not being charged during the day |  | Solar array faulty or reverse polarity | Remove faulty connection / reverse polarity |
| Battery reverse polarity | 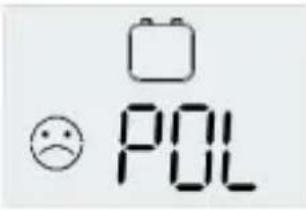 | Battery is connected with reverse polarity |Buzzer on| | Remove reverse polarity |
| Panel reverse polarity |  | Panel is connected with reverse polarity (Buzzer on) | Remove reverse polarity |
| °C Err flashing Term | 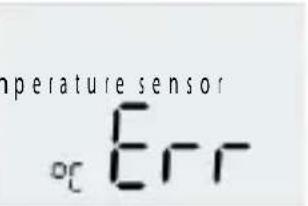 | not connected. | Connect NTC temperature sensor. |
| Loads are not supplied. | 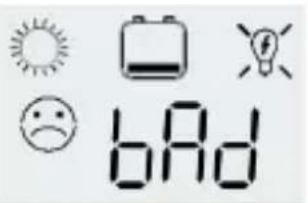 | Battery is in a bad shape. | Replace battery by a new one. |
| Loads are not supplied and no charging | 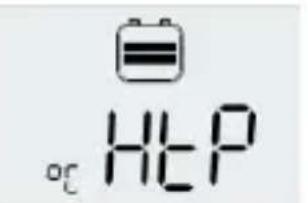 | LiFePO4 high temperature protection | Controller will switch on load automatically after LiFePO4 battery temperature has lowered. |
| Loads are not supplied and no charging | 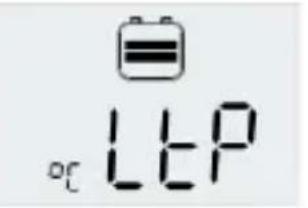 | LiFePO4 low temperature protection | Controller will switch on load automatically after LiFePO4 battery temperature rose. |
Technical Data
Note: The voltage levels before/after the slash are valid for 12 V and 24 V systems respectively.
| Technical Data CXNup 10 C | X Nup 20 CXNup 40 | |||
| System voltage 12/24 V, auto recognition | ||||
| Max. charge current 10 A** 20 A** 40 A** | ||||
| Max. load current 10 A** 20 A** 40 A** | ||||
| Charge voltage for lead acid battery | Float charge | 3.8/27.6 V (25 °C) | ||
| Main charge 14 | 4/28.8 V (25 °C), 0.5 h (daily) | |||
| Boost charge 1 | 4.4/28.8 V (25 °C), 2 h Activation: battery voltage < 12.3/24.6 V | |||
| Equalization charge | 14.8/29.6 V (25 °C), 2 h Activation: battery voltage < 12.1/24.2 V (at least once every 30 days) | |||
| Charge voltage for LiFePO4 battery | 14.0/28.0 V (Temperature limit: -20 to +60 °C) | |||
| Deep discharge protection, Cut-off voltage | 11.5-12.0/23.0-24.0 V by SOC (Only lead acid battery)11.0-11.5/22.0-23.0 V by voltage | |||
| Reconnect level 12.8/25.6 V for lead acid battery12.2/24.4 V for LiFePO4 battery | ||||
| Overvoltage protection 15.5/31.0 V | ||||
| Undervoltage protection 10.5/21.0 V | ||||
| Min. operating voltage 9 V | ||
| Max. panel voltage 30 V in 12 | V system, 50 V in 24 V system | |
| Max. battery voltage 50 V | ||
| Temperature compensation | Charge voltage for lead acid | | -25 mV/K at 12 V-50 mV/K at 24 V | |
| Id e self-consumption < 4 mA | ||
| Grounding Common negative pole (for grounding purposes) | ||
| Ambient temperature -40 to +50 °C | ||
| Max. altitude 4.000 m above sea level | ||
| Battery type Lead acid (GEL, AGM, flooded), LiFePO4 | ||
| Datalogger 2 years | ||
| USB connector 50 V; 1500 mA | ||
| External temperature sensor Yes | ||
| Max. wiresize 16 mm^2 | ||
| Dimensions (WxHxD) 101 x 103 x 32 mm | ||
| Weight 168 g | 179 g | |
| Type of protection | IP20 | |
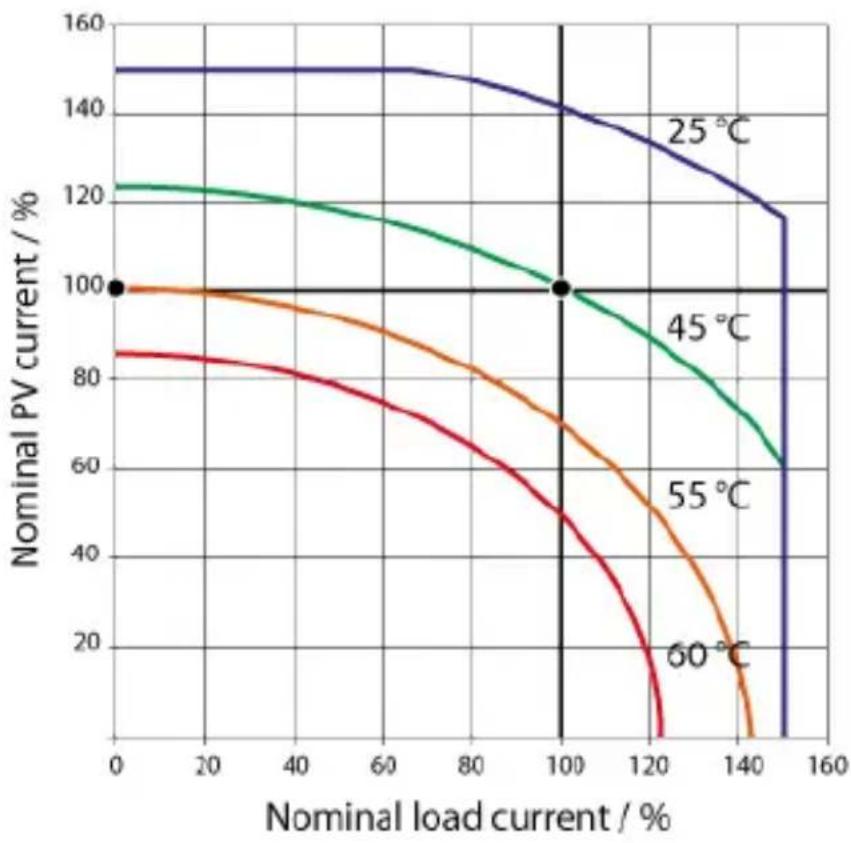
**: Please see graph of SOA (Safe Operating Area)
CXNup Safe Operating Area (SOA)
line
| Nominal load current / % | 25 °C | 45 °C | 55 °C | 60 °C | | ------------------------ | ----- | ----- | ----- | ----- | | 0 | 150 | 120 | 100 | 85 | | 100 | 140 | 100 | 100 | 70 | | 120 | 130 | 90 | 80 | 50 | | 140 | 120 | 70 | 60 | 20 | | 160 | 115 | 60 | 50 | 10 |Liability Exclusion
The manufacturer shall not be liable for damages, especially on the battery, caused by use other than as intended or as mentioned in this manual or if the recommendations of the battery manufacturer are neglected. The manufacturer shall not be liable if there has been service or repair carried out by any unauthorized person, unusual use, wrong installation, or bad system design.
Subject to change without notice. Version: 20180130
Made in China
Phocos AG
Magirus-Deutz-Str.12
89077 U|m
Germany
www.phocos.com
ISO9001

RoHS
Estimado Cliente:
natural_image
Two empty rectangular arrows pointing right, no text or symbols present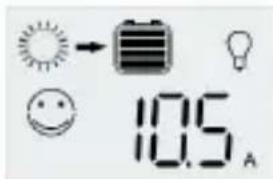
Carga amperios-
hora
Corriente del panel
Corriente de carga
Panel amperios-hora
natural_image
Two empty rectangular arrows pointing right, no text or symbols present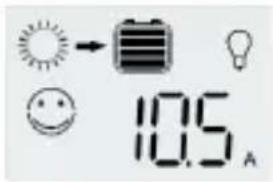
natural_image
Two empty rectangular arrows pointing right, no text or symbols present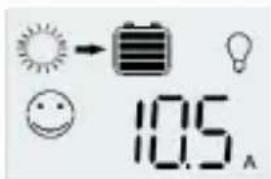
Painelda corrente