Truus Slim - Baby products Lionelo - Free user manual and instructions
Find the device manual for free Truus Slim Lionelo in PDF.

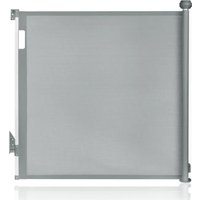
| Product type | Baby safety gate |
| Brand | Lionelo |
| Model | Truus Slim |
| Use | Indoor, doors, stairs (top or bottom) |
| Recommended age | Up to 24 months |
| Opening width | 75–85 cm; up to 105 cm with included extensions |
| Opening mechanism | Manual with button and lifting |
| Opening range | 180°; 90° opening to the left or right |
| Closing | Manual with audible click |
| Installation type | Fixing with expansion bolts and adapters with 3M tape |
| Mounting surface | Flat, resistant, stable (width > 3 cm) |
| Materials | Plastic, metal, rubber |
| Safety standards | EN 1930:2011 |
| Maintenance | Clean with a damp cloth |
| Spare parts | Extensions included; parts available from the manufacturer |
| Warranty | Terms available on the manufacturer's website |
Frequently Asked Questions - Truus Slim Lionelo
User questions about Truus Slim Lionelo
0 question about this device. Answer the ones you know or ask your own.
Ask a new question about this device
Download the instructions for your Baby products in PDF format for free! Find your manual Truus Slim - Lionelo and take your electronic device back in hand. On this page are published all the documents necessary for the use of your device. Truus Slim by Lionelo.
USER MANUAL Truus Slim Lionelo
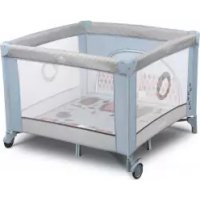
natural_image
Exterior view of a metal safety cage with vertical bars and mounting feet (no text or symbols)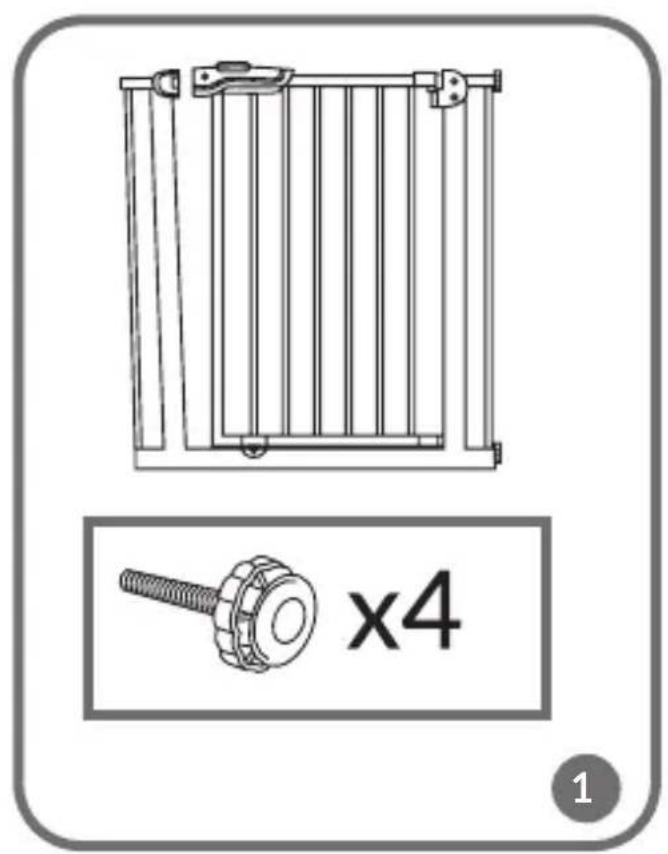
text_image
x4 1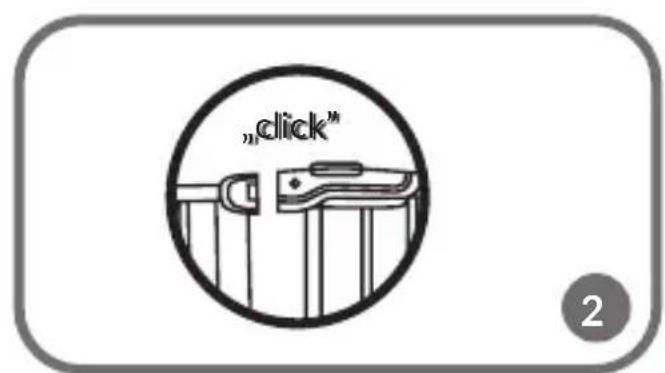
text_image
"click" 2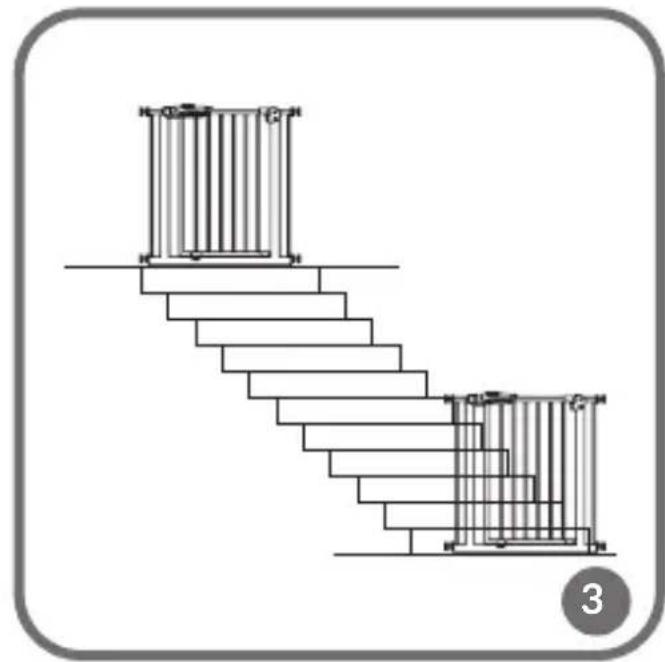
natural_image
Diagram of a staircase with vertical railings, no text or symbols present
natural_image
Technical line drawing of a mechanical device with vertical bars and mounting brackets, showing a close-up inset (no text or symbols)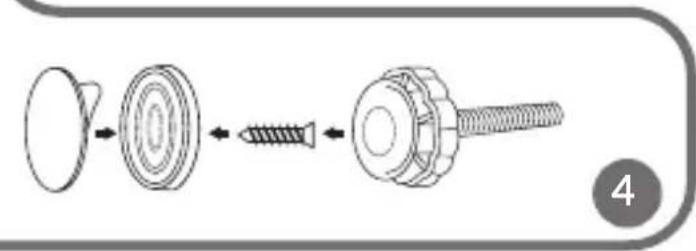
text_image
Diagram showing a mechanical assembly process with labeled parts and directional arrows indicating steps.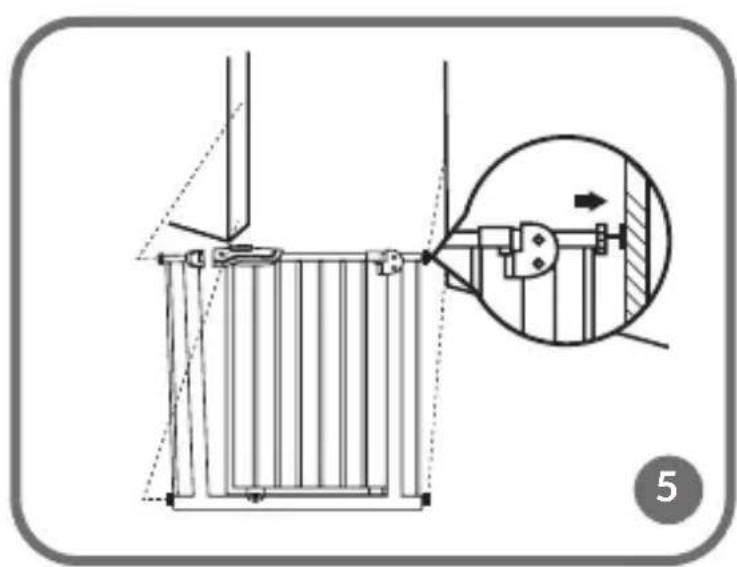
natural_image
Technical diagram of a mechanical assembly with an inset showing a close-up of a component (no text or symbols present)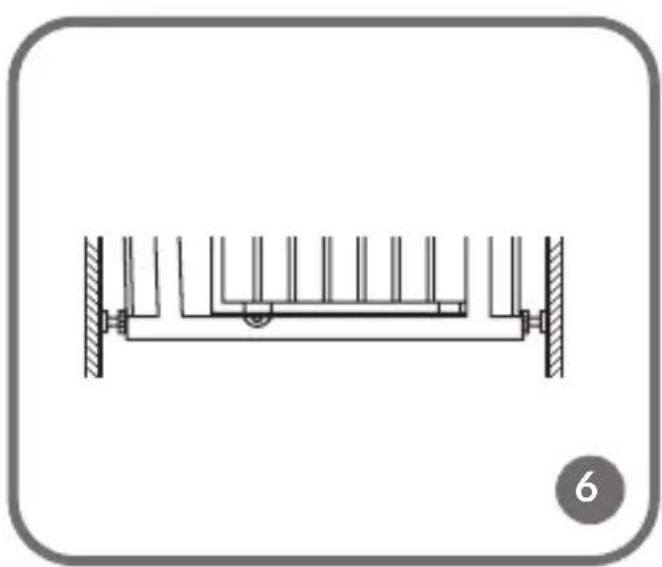
natural_image
Technical diagram of a mechanical support system with vertical supports and a central beam (no text or labels)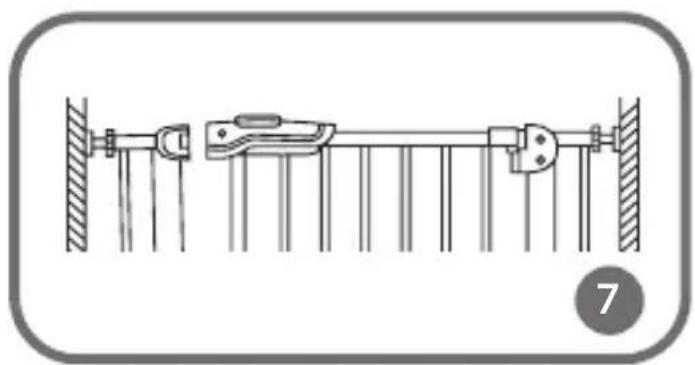
natural_image
Pure mechanical assembly diagram showing a lever mechanism with no text or symbols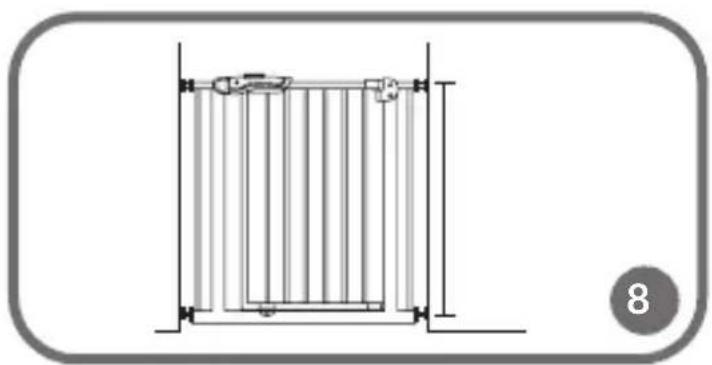
natural_image
Technical line drawing of a vertical ladder structure with no text or symbols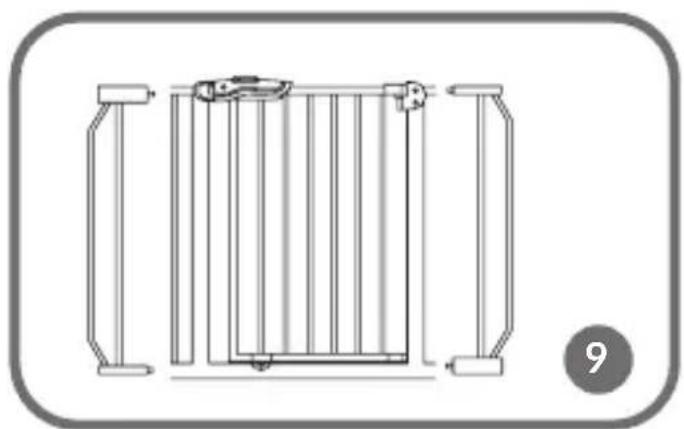
natural_image
Technical line drawing of a safety guard system with no text or symbols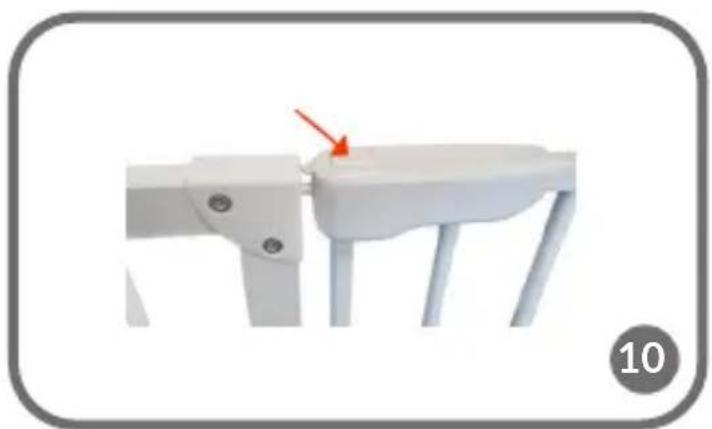
natural_image
White chair seat with a red arrow pointing to the seat area, no text or symbols visible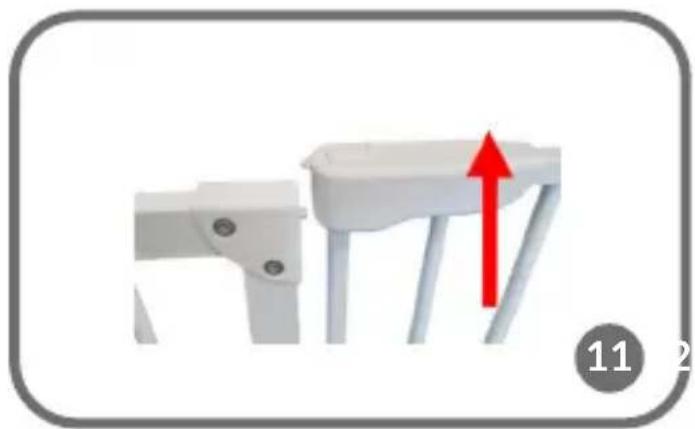
natural_image
3D diagram of a white chair with a red upward arrow indicating motion or force (no text or symbols)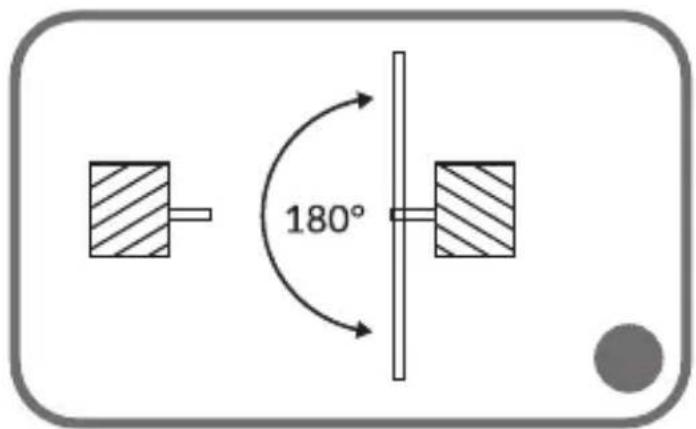
text_image
180°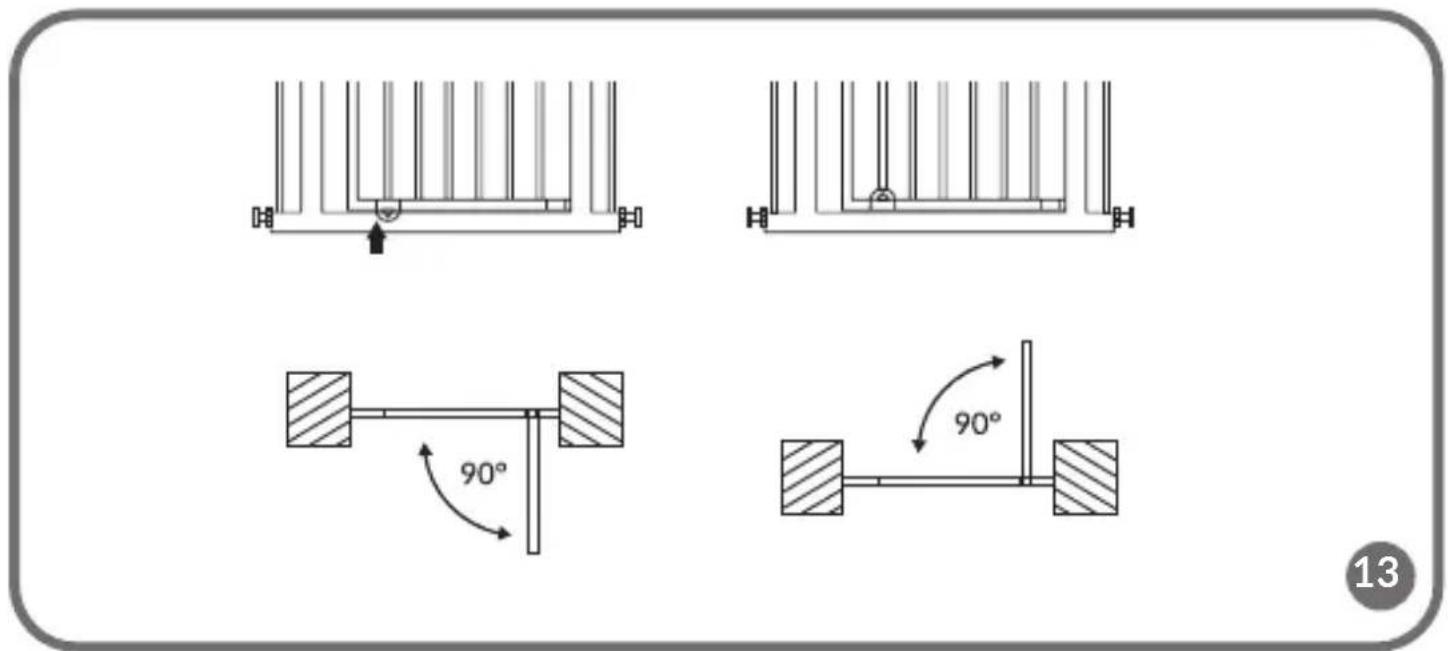
text_image
Technical diagram showing four mechanical assembly configurations with 90-degree rotation arrows and structural details.Dear Customer!
In case of any questions or comments on the purchased product, please contact us: help@lionelo.com
Before using the product, please read the included user manual carefully.
Producer:
BrandLine Group Sp. z o. o.
IMPORTANT! READ AND FOLLOW THESE INSTRUCTIONS CAREFULLY AND KEEP FOR FUTURE REFERENCE.
The barrier has a manual closing system.
WARNING! The barrier reaches its stiffness after proper assembly. Follow the instructions below to install the product correctly.
GATE INSTRUCTION
All parts (fig.1)
Note! The lock is apart when you open the carton, it is normal. Please screw the 4 width-adjusters when the lock is closed (fig.2).
Part list:
Baby gate, two extensions 10 cm each, plastic covers with 3M tape, 4 screws.
Installation places
This product is suitable for indoor places, such as bedroom, kitchen, stairs, hallways etc (fig. 3).
- A gate is suitable to installation in the passages having a width of 75 cm to 85 cm. Installation in the wider aisles require special extensions. The maximum width of the passage, which can be secured by using this barrier is 105 cm. Therefore, please use two additional extensions (10 cm each) which are included.
- Please make sure the set up surface is flat, strong and stable.
- Please make sure the set up surface is larger than 3cm.
Installation instruction
- Insert 4 expansion bolts into the mounting holes on both sides of the railing (in the lower and upper part).
- Apply 3M tape to the flat part of the adapters and attach them to a mounting surface larger than 3 ~cm in diameter with screws. Then set the railing so that the expansion bolts are inside the plastic adapter (Fig. 4).
- The screws should be tightened so that the rubber washers fit tightly to the adapters and these to the mounting surface (Fig. 5).
- Screw the bottom adjusters, let the gate stand vertical (fig. 6).
- Screw the top adjusters, let the lock close smoothly (fig. 7).
- Check the 4 adjusters, make sure the gate is setting up firmly (fig. 8).
- Extensions installation (fig. 9).
Before you use the product, make sure the rail has been properly mounted.
Gate usage instruction
Way of open:
Press the two buttons and pull down at the same time.
- Move the button indicated in the illustration (fig. 10).
- Then raise the movable element of the barrier (fig. 11).
- The gate can now be opened.
- open space 180^ (fig. 12)
- two ways open the gate can stop at 90 degree (fig. 13)
Closing:
To close the barrier, close it manually until you hear a click (fig. 2). The barrier is closed. If you are not sure if you heard a „click”, check manually that the barrier is properly closed.
WARNINGS:
- The railing is intended for children up to the age of 2.
- To prevent dangerous situations, please read this manual carefully before you start installing the railing.
- Rubber expansion bolt washers must fit tight the assembly surface. For this reason the railing is intended for flat surfaces only.
- WARNING – Safety railing must not be installed in windows.
- The product is intended for home use only.
- WARNING – Wrong installation may result in hazards.
- The product is intended for home use only.
- WARNING – Do not use the safety railing if any of its components is damaged or missing.
- If the safety railing is used downstairs, it is important that it is placed before the lowest level.
- If the child can climb the railing, please stop using the product.
- It is suggested that the safety railing is periodically checked to make sure it is safe and fully operational.
- Additional or spare parts must be purchased solely from the manufacturer or distributor.
- If the safety railing is used upstairs, it is suggested that it is not placed below the upper level.
- Before using, make sure the railing has been properly locked.
- Warning - never use without wall cups.
- Clean the product with a wet cloth.
The product has been tested and meets all the requirements of the: EN 1930:2011
All the pictures in the manual have been submitted for illustrative purposes only and are subject to change without prior notice.
Drogi Kliencie!
Detailed warranty conditions are available on the website:
Thank you for purchasing our product