Hanna - Baby products Lionelo - Free user manual and instructions
Find the device manual for free Hanna Lionelo in PDF.
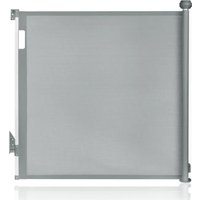
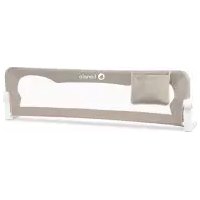
| Product type | Bed safety rail |
| Brand | Lionelo |
| Model | Hanna |
| Recommended age | 18 months to 5 years, when the child can sit up independently |
| Use | For child's bed (not as a crib substitute) |
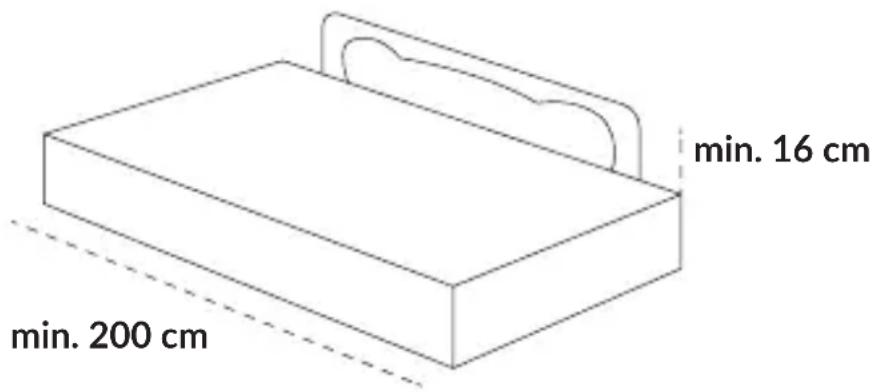
| Maximum bed height | 600 mm from floor |
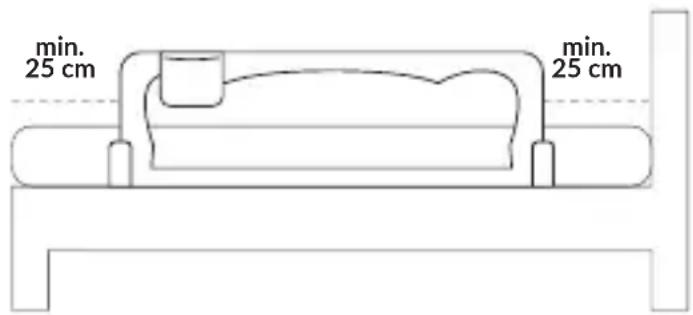
| Required safety gap | 250 mm between bed edge and rail |
| Locking mechanism | Safety buttons with latch |
| Folding function | Yes, press both buttons to lower the rail |
| Additional fixation | Safety straps (two installation modes) |
| Cover material | Washable fabric |
| Cover cleaning | Hand wash, do not iron, do not tumble dry |
| Spare parts | Available from manufacturer only |
| Safety standards | EN71-3:2019, BS 7972:2001+A1:2009 |
| Package contents | 2 large tubes, 2 small tubes, cover, 2 bases, 4 screws, 2 straps, instruction manual |
| Weight (estimated) | Approximately 2 kg |
| Power supply | None (mechanical product) |
Frequently Asked Questions - Hanna Lionelo
User questions about Hanna Lionelo
0 question about this device. Answer the ones you know or ask your own.
Ask a new question about this device
Download the instructions for your Baby products in PDF format for free! Find your manual Hanna - Lionelo and take your electronic device back in hand. On this page are published all the documents necessary for the use of your device. Hanna by Lionelo.
USER MANUAL Hanna Lionelo
natural_image
Gray and white photo of a lionelo baby crib with a pillow and blanket (no text or symbols on the main body)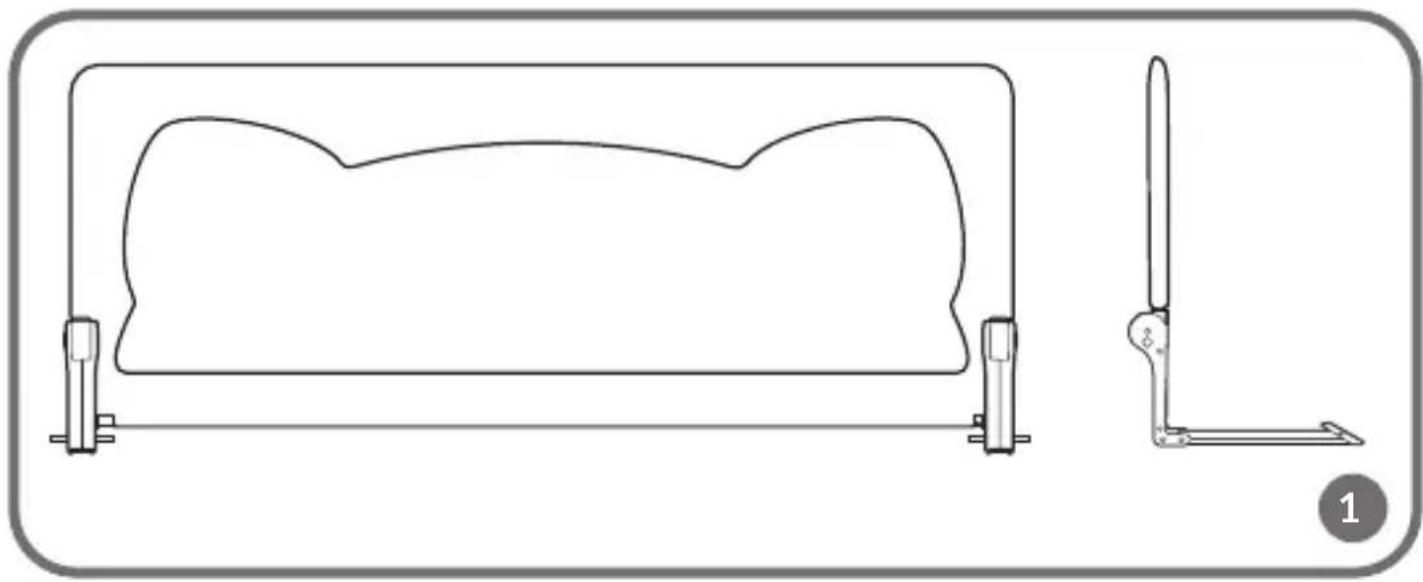
natural_image
Technical line drawing of a mechanical component with two views: top shows a curved profile, bottom shows a flat profile (no text or symbols)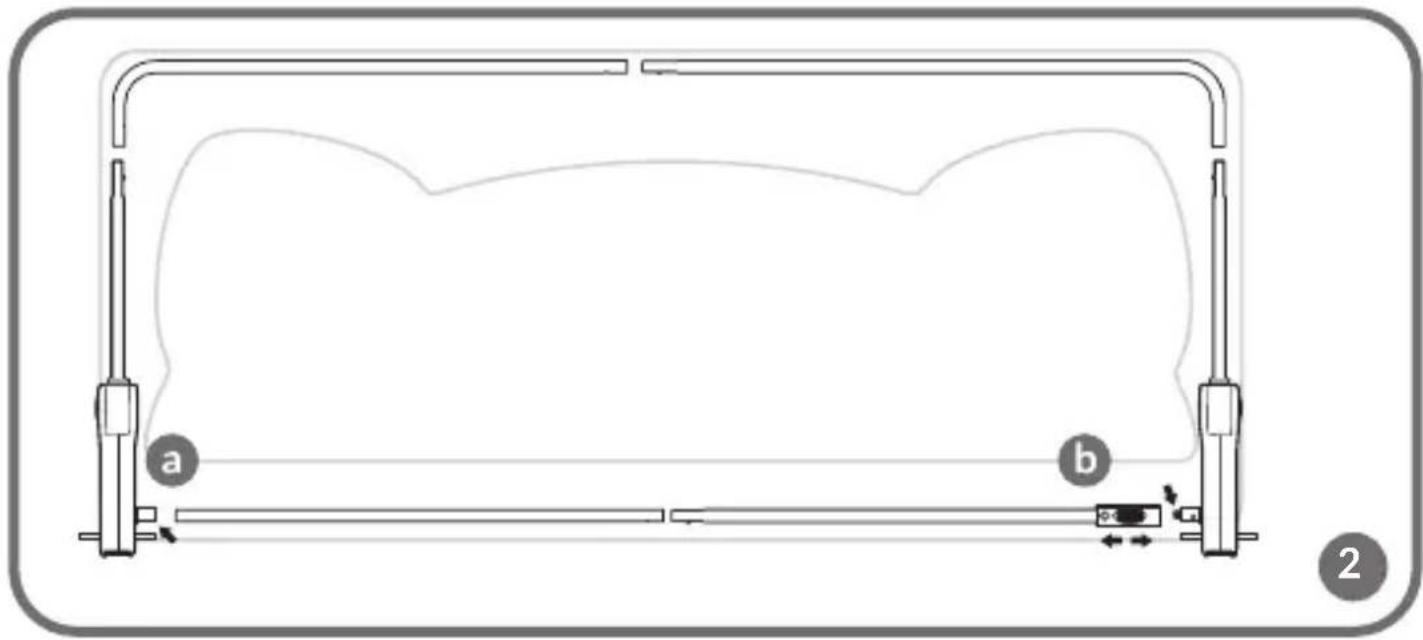
natural_image
Technical line drawing of a mechanical assembly with labeled components (a, b) and dimension arrows, no readable text or symbols beyond labels.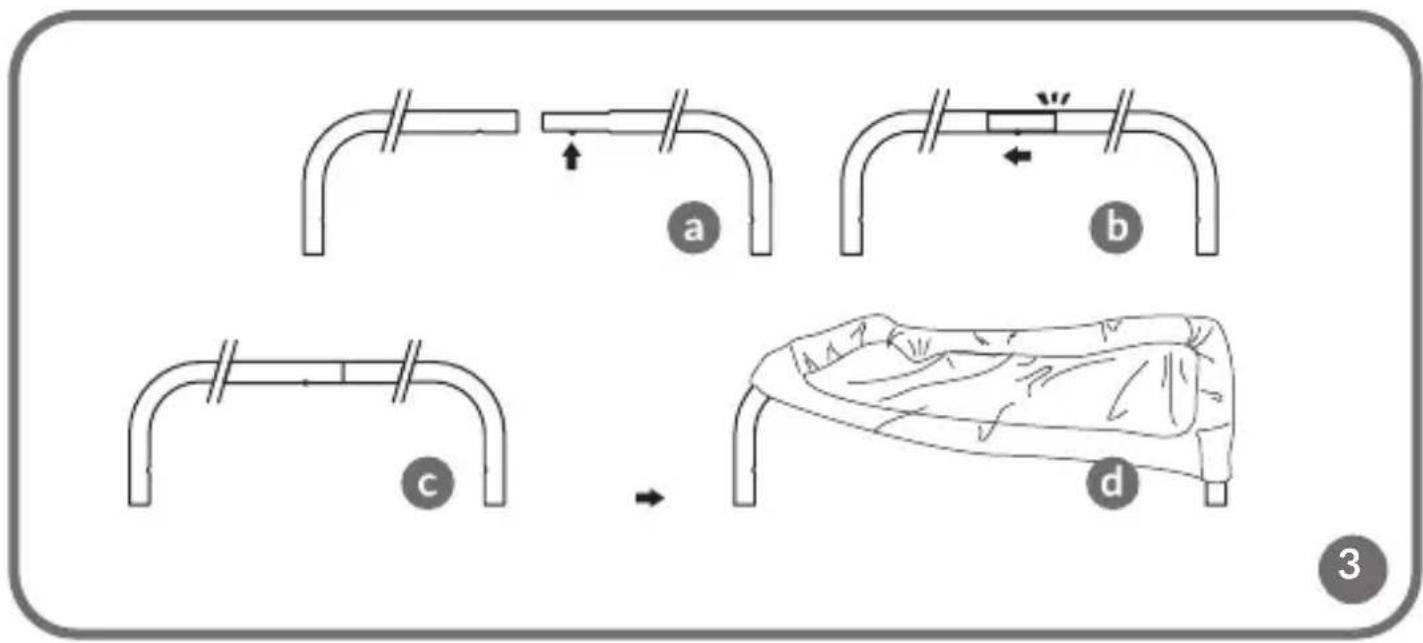
text_image
Diagram illustrating four steps of a medical procedure involving a tube, tubing, and a patient bed with labeled parts (a, b, c, d)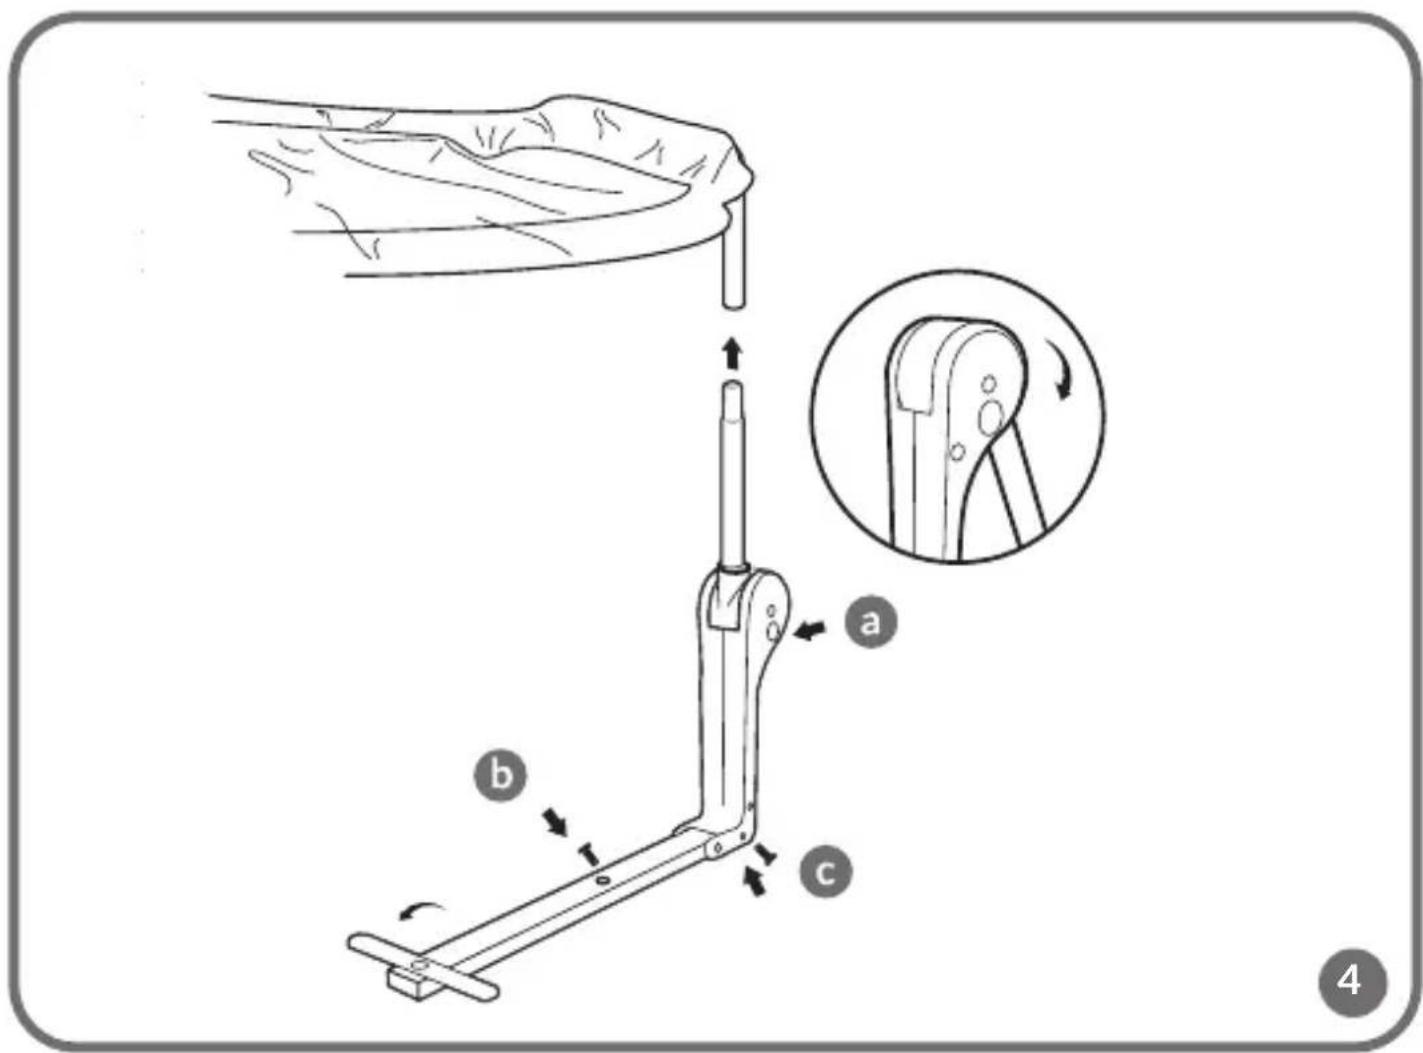
text_image
Technical diagram illustrating a mechanical assembly with labeled parts (a, b, c) and an inset showing the internal mechanism.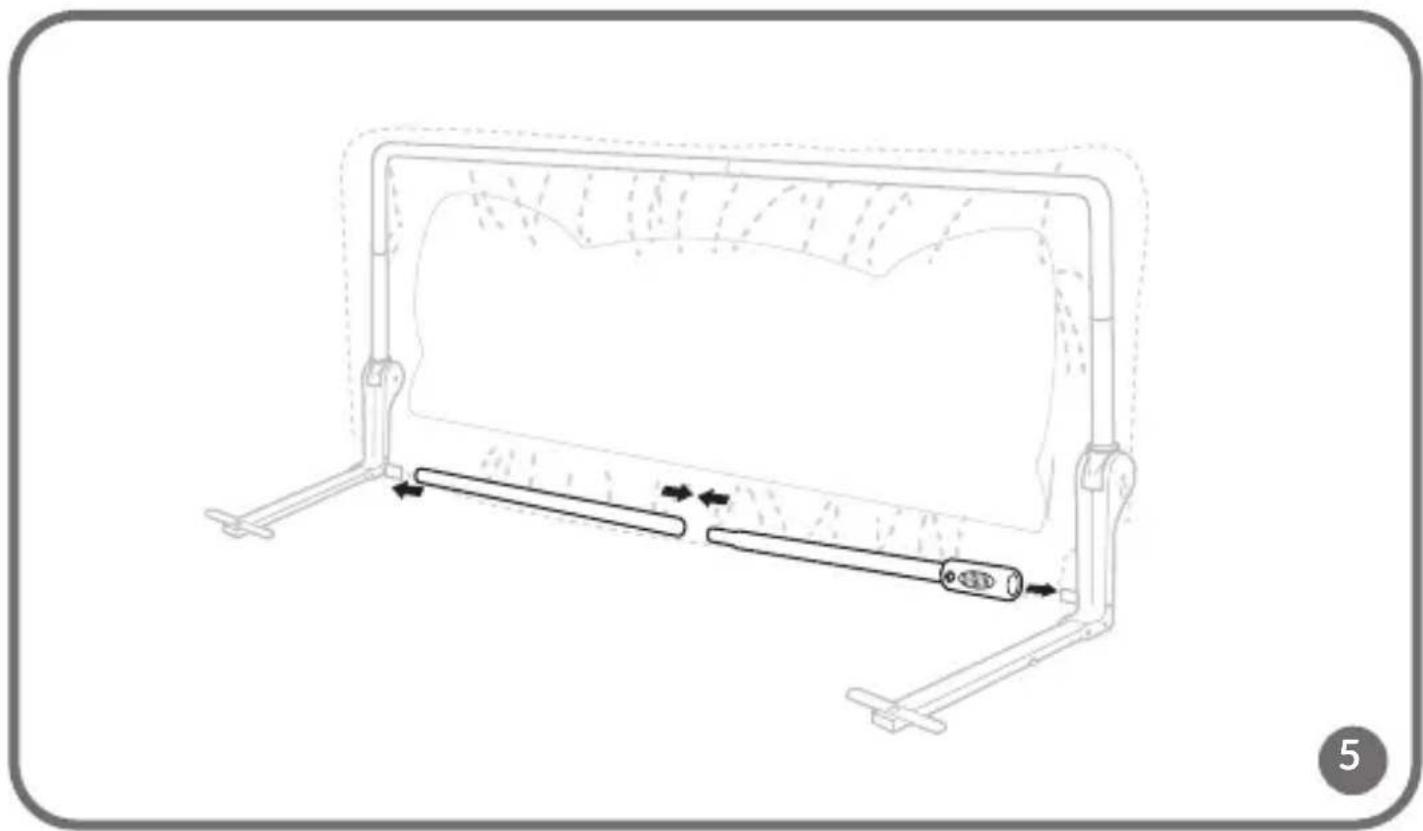
natural_image
Line drawing of a mechanical device with two horizontal bars and directional arrows indicating motion (no text or symbols)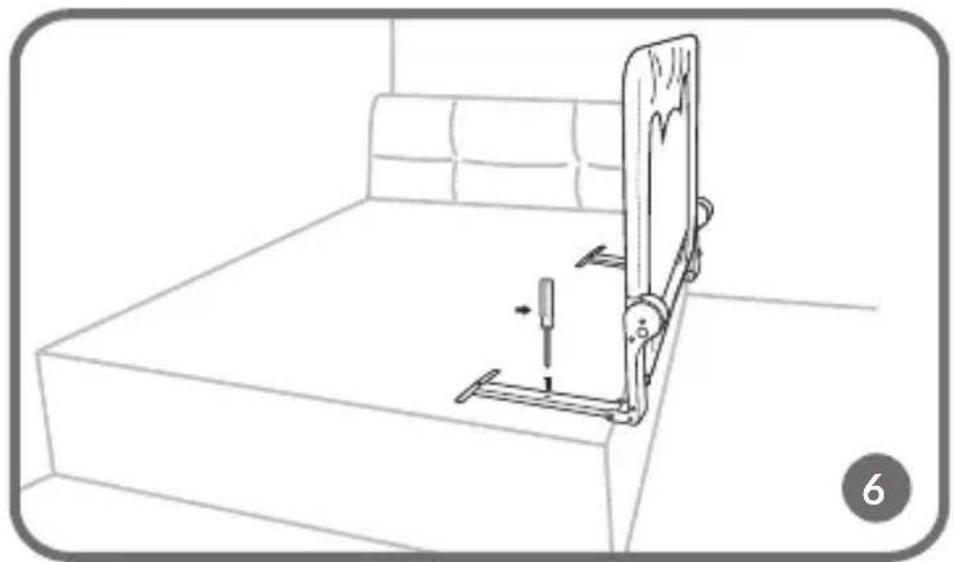
natural_image
Line drawing of a bed with a vertical arm and screwdriver inserted, no text or symbols present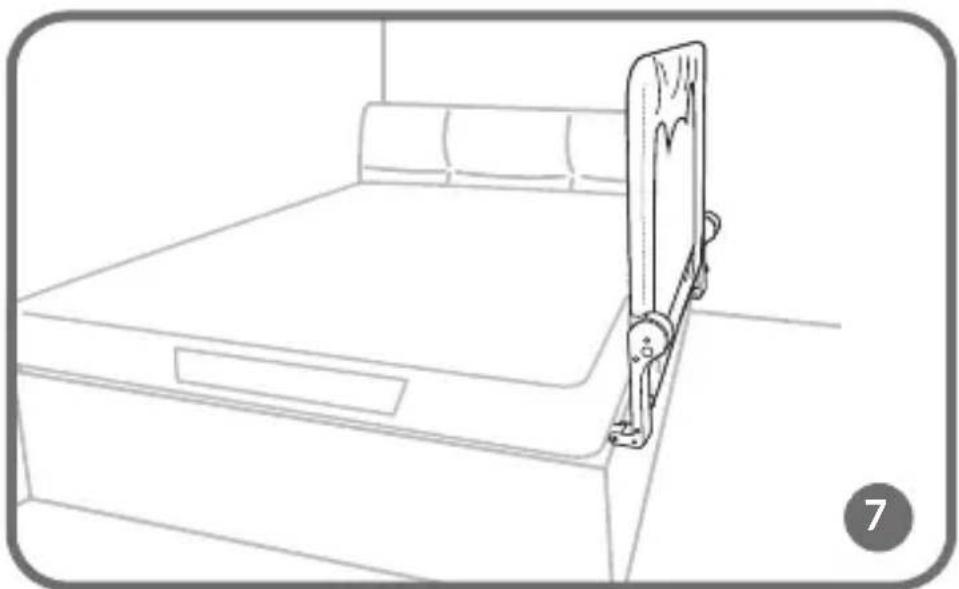
natural_image
Line drawing of a bed with a vertical stand and seat, no text or symbols present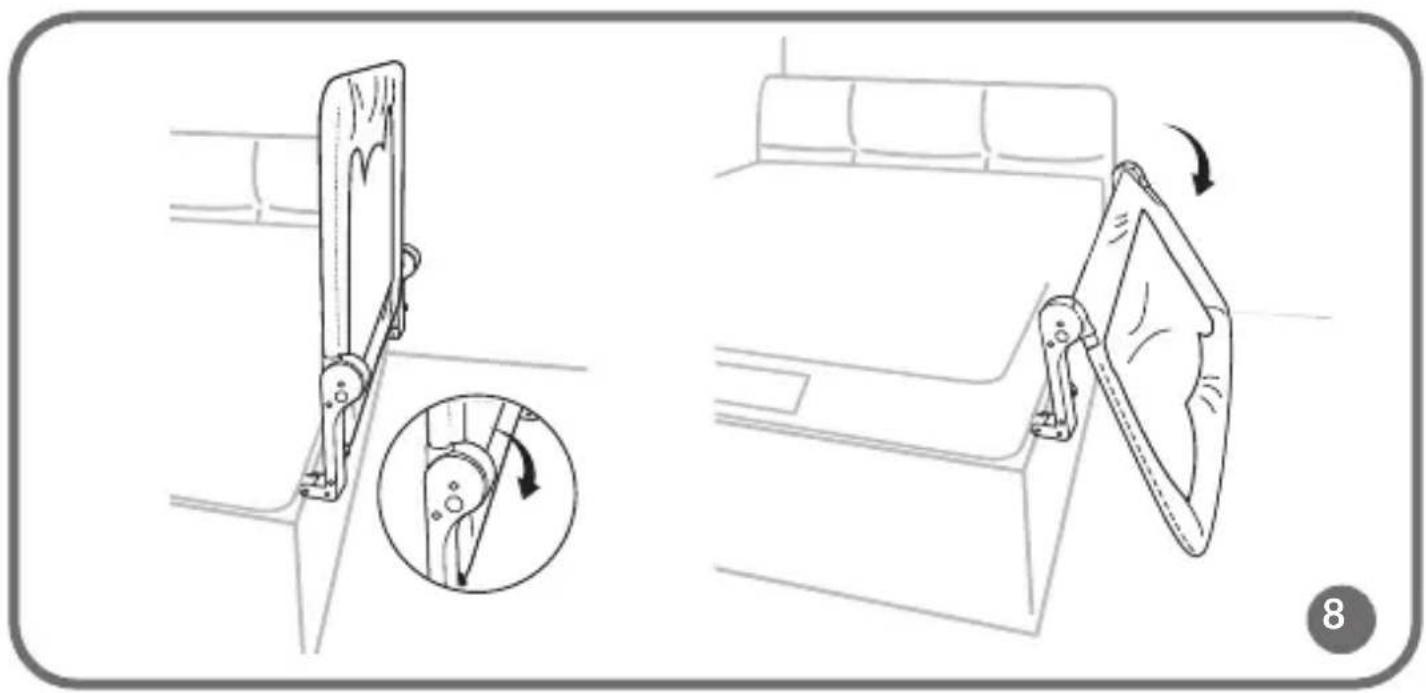
natural_image
Line drawing of a mechanical device with an inset showing a lever mechanism (no text or symbols)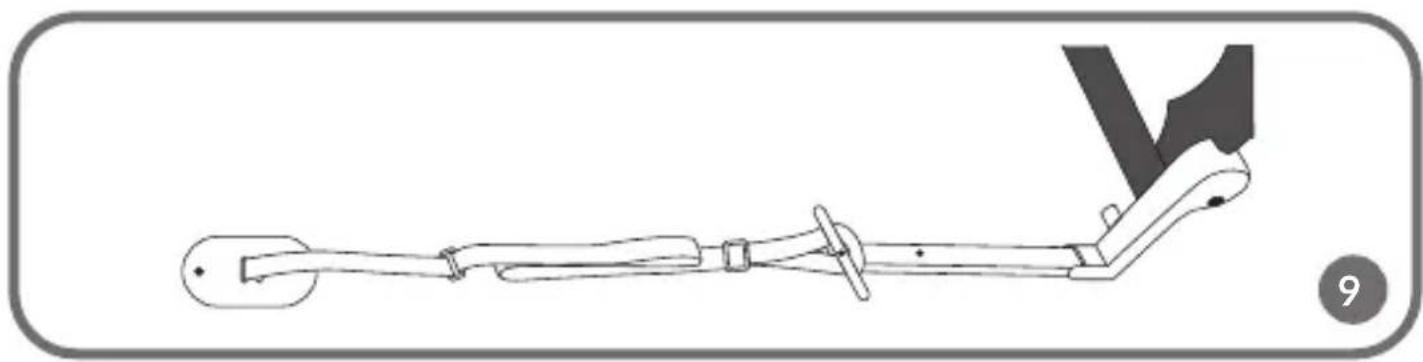
natural_image
Technical line drawing of a mechanical linkage or support system (no text or symbols)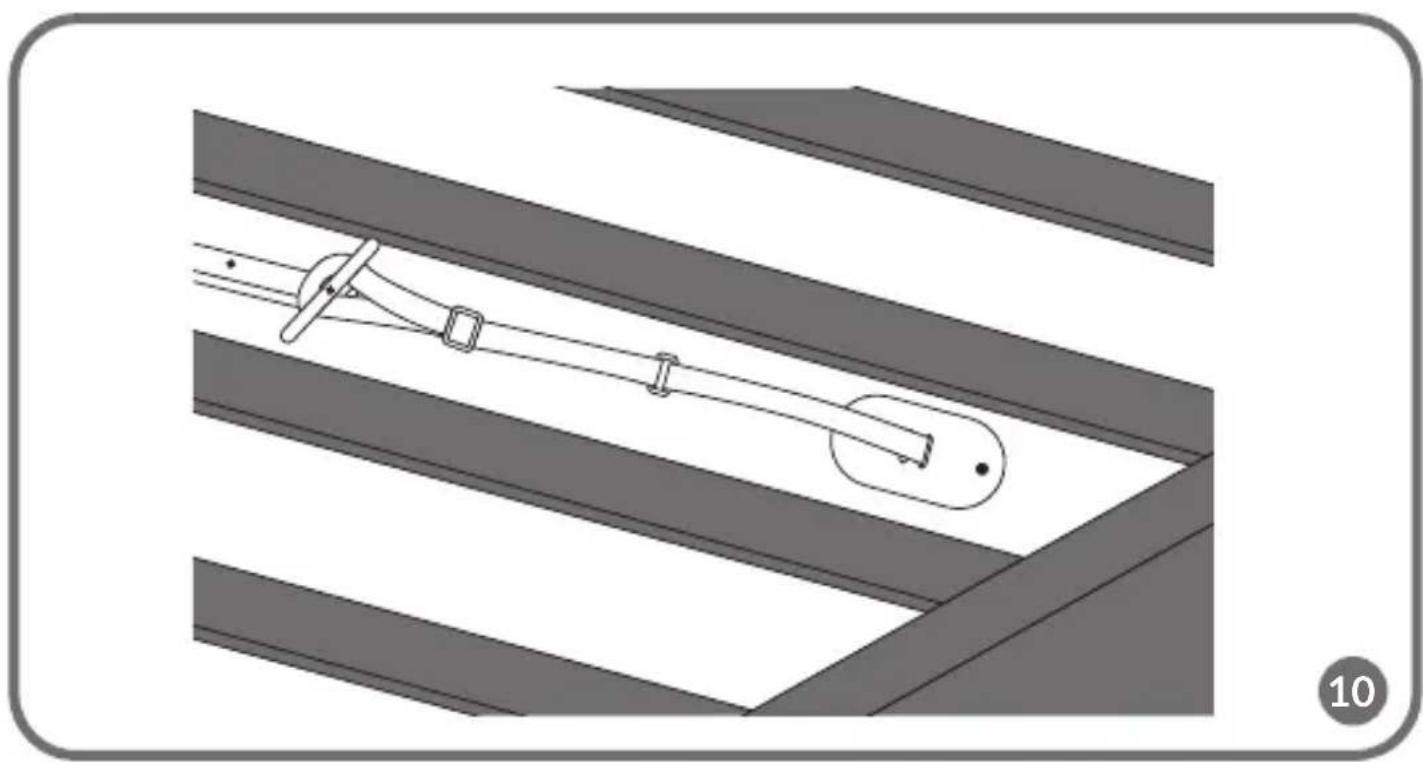
natural_image
Diagram of a mechanical linkage system with three vertical supports and a central rod, no text or symbols present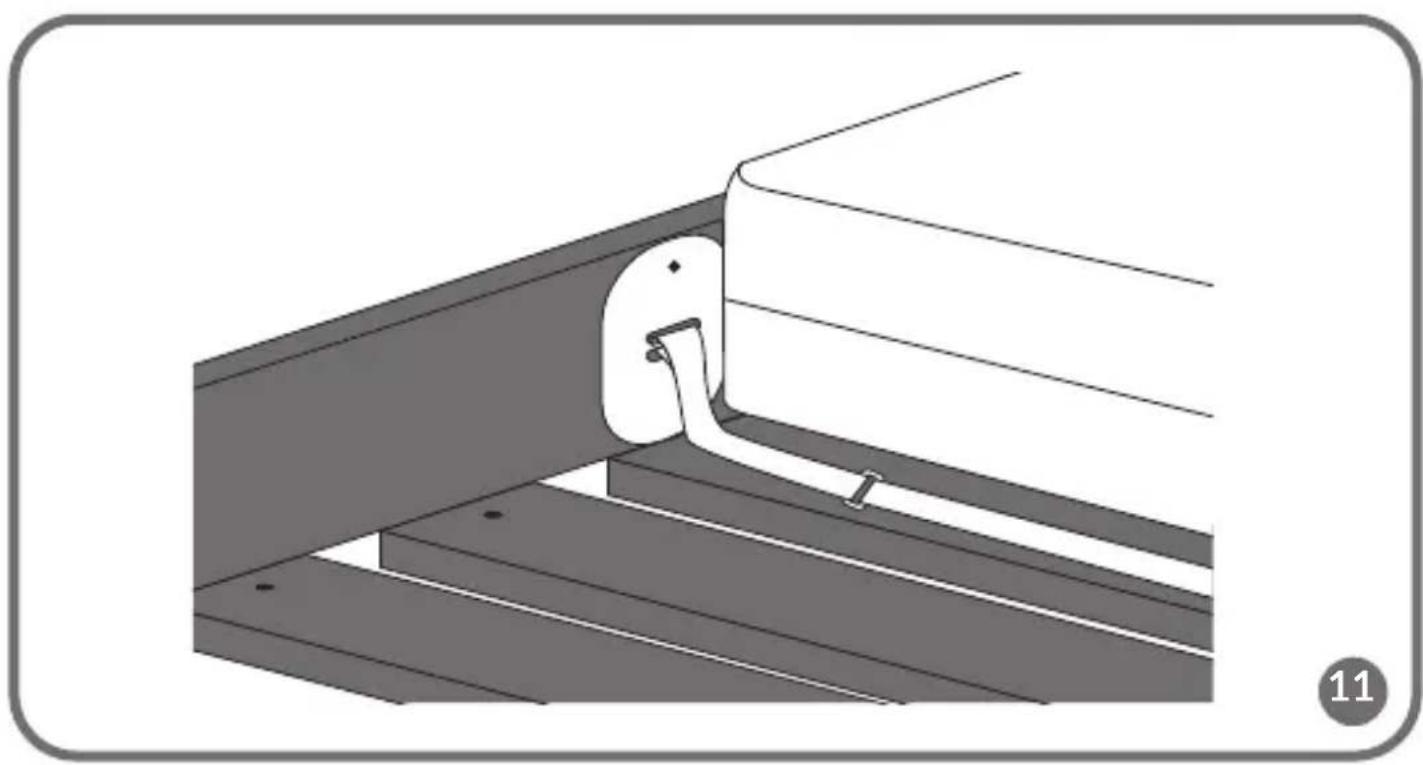
natural_image
Technical illustration of a mechanical assembly with a clamping tool inserted into a bracket (no text or symbols)Dear Customer!
In case of any questions or comments on the purchased product, please contact
us: help@lionelo.com
Before using the product, please read the included user manual carefully.
Producer:
BrandLine Group Sp. z o. o.
IMPORTANT - KEEP FOR FUTURE REFERENCE
- The bedguard is not recommended for use by children under the age of 18 months or when the child is over the age of 5 years. Use the bedguard only when the child is able to climb in and out of bed unaided.
- Bedguard should not be used as a substitute for a cot, as it cannot provide the same level of safety as a cot.
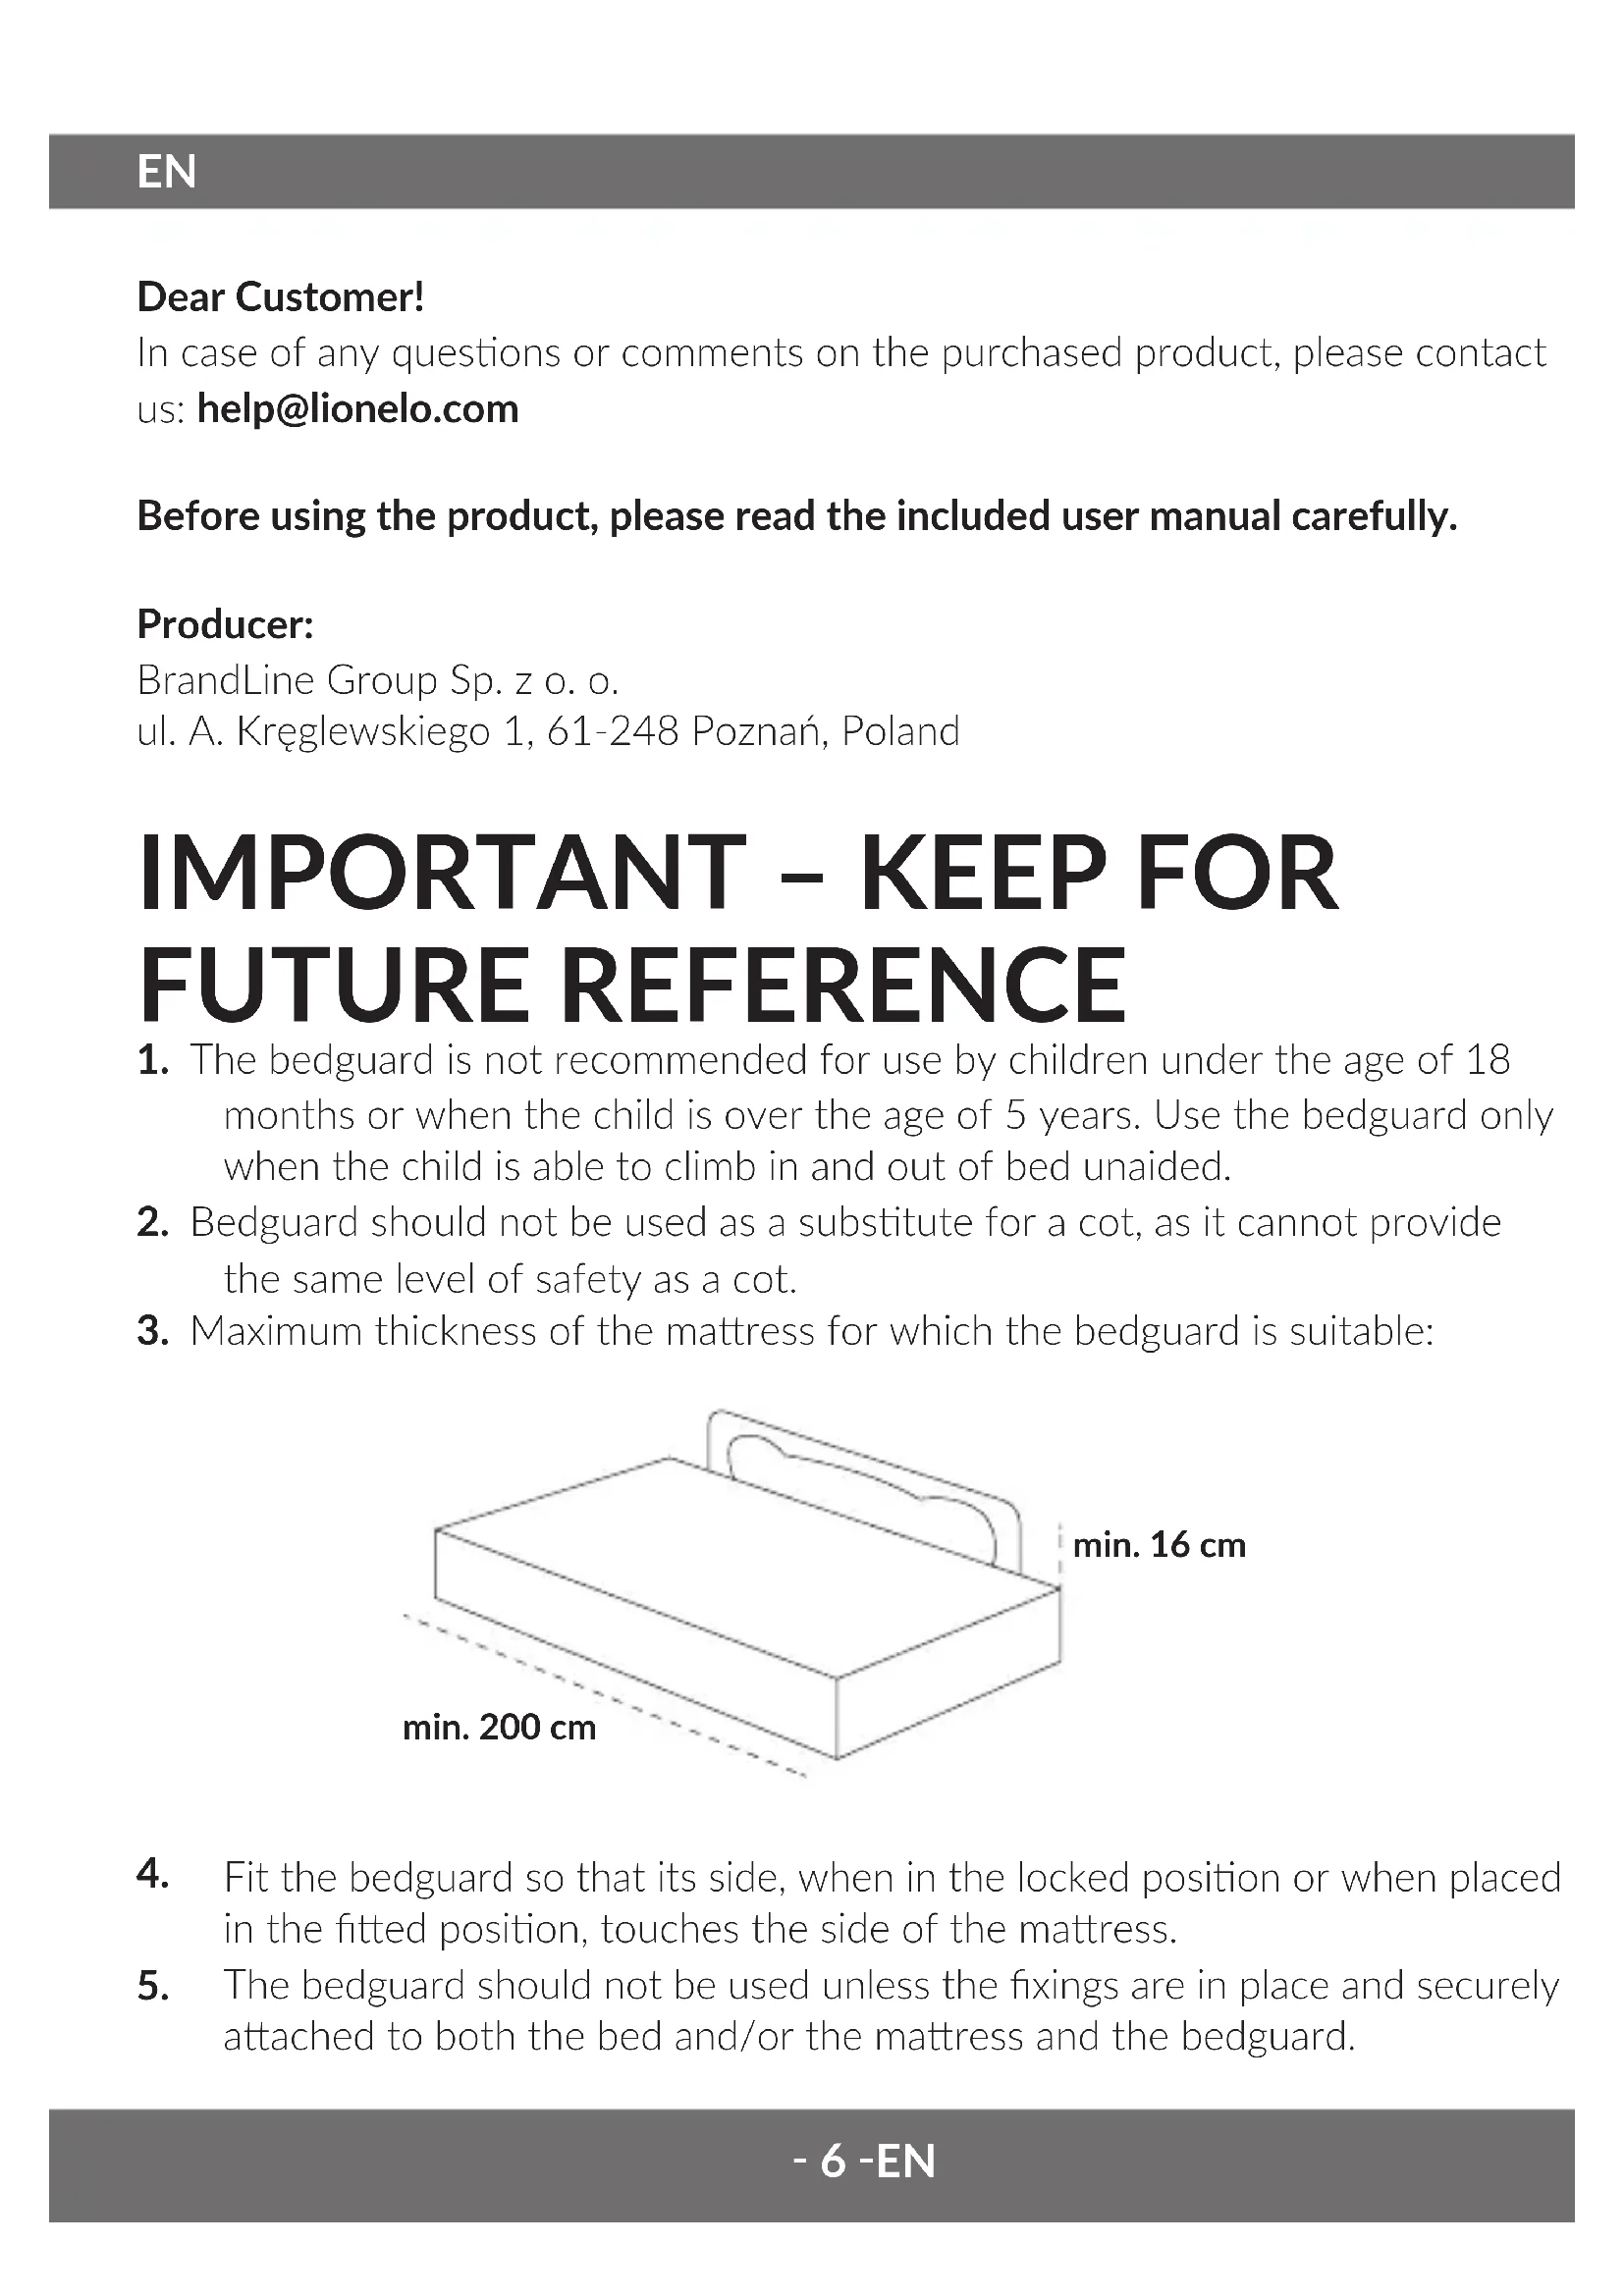
- Maximum thickness of the mattress for which the bedguard is suitable:
- Fit the bedguard so that its side, when in the locked position or when placed in the fitted position, touches the side of the mattress.
-
The bedguard should not be used unless the fixings are in place and securely attached to both the bed and/or the mattress and the bedguard.
-
Once fitted in place, the bedguard should be checked to ensure it is properly fitted and secure.
- The bedguard should be periodically checked for it's general condition with particular reference to the security of any locking mechanism and/or hinges that are used on the product.
- Additional and replacement parts should be obtained only from the manufacturer.
- The bedguard should not be used on a sleeping surface that is more than 600 mm from the floor.
- WARNING - To prevent the risk of strangulation it is essential to ensure that when the bedguard is fitted into position, there is a gap of at least 250 mm (10in), between each end of the bed and the corresponding end of the bedguard.
Bedguard (2x big tube, 2x small tube, material covering, 2x bedguard base, 4x screw), 2x belts, instructions for use.
Assembly instruction (fig. 2)
a. Small end
b. Large end
- Tubes assembly and cloth placing (fig. 3)
a. Press the lock button
b. Connect the tubes
c. Make sure the lock has been properly secured
d. Put the material on the tubes at one side
2. Base (fig. 4)
a. The button should face outwards
b. Insert the screw here
c. Insert the long screw here to stabilise the base
3. Connecting the base to the upper part (fig. 5)
Using
Remove the mattress from the bed. Then, install the safety gate on the bed. Tighten the securing screw (fig. 6, 7), and then place the mattress back.
In order to lower the protection, press the both lock buttons and fold the security barrier down (fig. 8).
Additional protection
In order to apply additional protection, attach the belts.
There are two ways of installation of the protection belts:
- Hook the belt to the protection and use the screw to attach the end to the bed board. Then tighten the belt using the adjustment feature (fig. 9).
- Hook the belt to the protection and place the end between the mattress and the bed. Then tighten the belt using the adjustment feature (fig. 10, 11).
Cleaning and washing
To wash the material covering, detach the tubes and pull them out of the base. Take the material covering off. Wash it by hand, do not iron, do not machine dry.
The product has been tested and meets all the requirements of the: BS 7972:2001+A1:2009, EN71-3:2019
All the pictures in the manual have been submitted for illustrative purposes only and are subject to change without prior notice.
All the information in the manual is subject to change without prior notice.
Drogi Kliencie!
BrandLine Group Sp. z o.o.
BrandLine Group Sp. z o.o.
Detailed warranty conditions are available on the website:
Thank you for purchasing our product