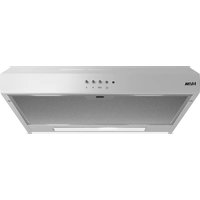
AIP790CRVS - Basket ETNA - Free user manual and instructions
Find the device manual for free AIP790CRVS ETNA in PDF.
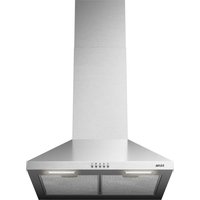
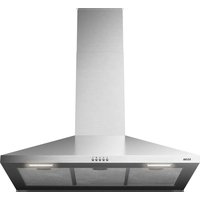
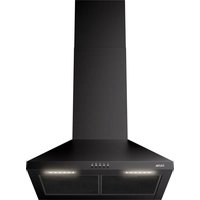
| Brand | ETNA |
| Model | AIP790CRVS |
| Product type | Chimney hood |
| Evacuation systems | Extraction to the outside or recirculation (with optional carbon filter) |
| Controls | Touch keys + wireless remote control |
| Suction speeds | 4 speeds (LED: green, orange, red, flashing red) |
| Lighting | Integrated LED, dimming possible via Etna Connected app |
| Grease filter | Metallic, dishwasher safe, clean once a month |
| Charcoal filter | Long-life (green plastic), washable every 4 months, replace after 4 washes |
| Power supply | 220-240 V, grounded power outlet |
| Minimum installation distance | 65 cm for gas hob, 55 cm for electric/induction |
| Exhaust duct diameter | 125 mm or 150 mm |
| Connectivity | Etna Connected app (scan QR), remote control included |
| Remote control battery | Type 23A, replaceable |
| Exterior maintenance | Soapy water and soft cloth, no abrasive products |
| Lighting replacement | Must be done by an authorized technician |
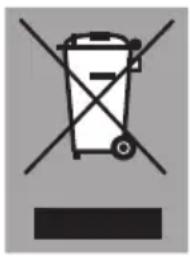
| Disposal | Appliance and packaging recyclable, do not dispose of with household waste |
| Electrical connection | Must be done by an authorized installer |
Frequently Asked Questions - AIP790CRVS ETNA
User questions about AIP790CRVS ETNA
0 question about this device. Answer the ones you know or ask your own.
Ask a new question about this device
Download the instructions for your Basket in PDF format for free! Find your manual AIP790CRVS - ETNA and take your electronic device back in hand. On this page are published all the documents necessary for the use of your device. AIP790CRVS by ETNA.
USER MANUAL AIP790CRVS ETNA
Scan the QR code or visit the website etna.nl/connected to find out how to establish a connection with your appliance.
text_image
QR code image containing encoded data, no visible human-readable texttext_image
QR code image containing encoded data, no visible human-readable textGebruikte pictogrammen - Pictogrammes utilisés - Benutzte Piktogramme Pictograms used
Belangrijk om te weten - Important à savoir - Wissenswertes - Important information
Tip - Conseil - Tipp

Uw afzuigkap
natural_image
Four white circular icons on a black background: sun, plus sign, person, and minus sign (no text or symbols beyond basic markings)Afstandsbediening
natural_image
Technical line drawing of a device with a box and panel, showing internal components and directional arrows (no text or symbols)
text_image
Diagram illustrating a mechanical or electrical setup with labeled components and directional arrows, including a meter marker.max. 135 cm
text_image
Prohibition sign with crossed-out trash bin and no text or symbolsnatural_image
Four white circular icons on a black background: sun, plus sign, person, and minus sign (no text or symbols beyond basic markings)Télécommande
text_image
Diagram showing a device with labeled components and directional arrows, possibly illustrating a physical or engineering setup.max. 135 cm
text_image
Prohibition sign with crossed-out trash bin and no text, likely indicating no waste or dischargenatural_image
Four white circular icons arranged around a central symbol: sun, plus sign, human figure, and minus sign on black background (no text or labels)Fernbedienung
text_image
Diagram showing a device with labeled components and directional arrows, possibly illustrating a physical or engineering setup.max. 135 cm
Montage der Haube
text_image
Prohibition sign with crossed-out trash bin and no text or symbols| Introduction | 4 | |
| Extraction systems 4 | ||
| Description | 5 |
Use
| Controls | 6 |
Maintenance
| Cleaning | 8 | |
| Grease filter 9 | ||
| Carbon filter 10 | ||
| Lighting | 10 |
Installation
| General | 11 |
| Electrical connection 12 | |
| Installing the cooker hood 12 |
Environmental aspects
| Disposal of the appliance and packaging 13 |
Installation
14
Introduction

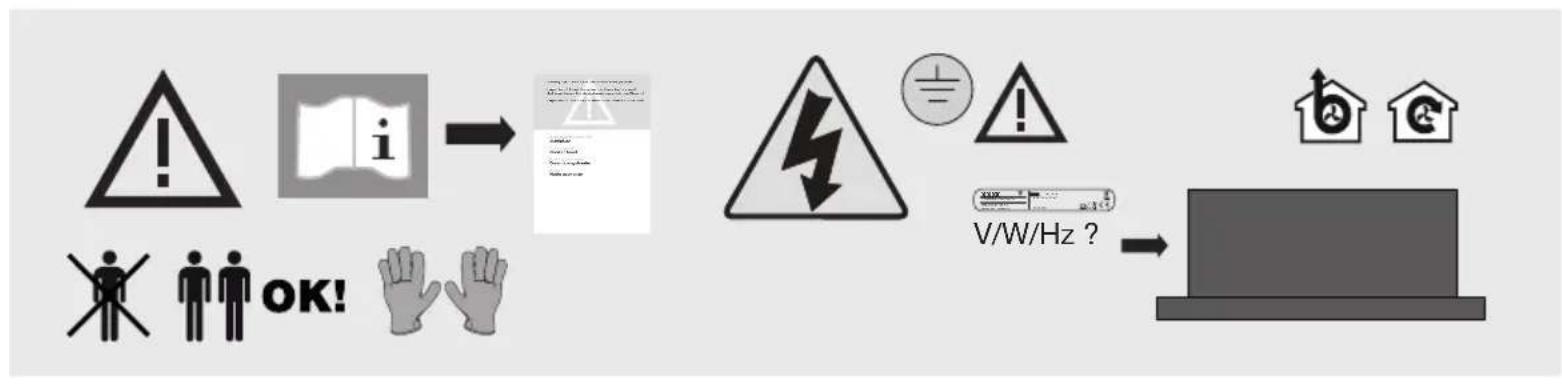
This user manual gives you a quick overview of all the possibilities offered by the appliance. You will find information on safety measures and maintaining the appliance.
Please retain this user manual and the installation guide. They may be of use to future users of the appliance.
You can find the most recent version of the instructions for use on our website.
Read the separate safety instructions before using the device!
Extraction systems
The cooker hood can be connected in two ways:
-
As a cooker hood connected to an exhaust duct. The extracted and filtered cooking vapours are removed to the outdoors.
-
As a recirculation cooker hood. The grease particles and the odour from the extracted cooking vapours are filtered. The extracted air is not removed but is returned to the kitchen. In this case, a carbon filter must be installed and a provision made for the return of the filtered air into the kitchen
Note!
The carbon filter must be ordered separately.
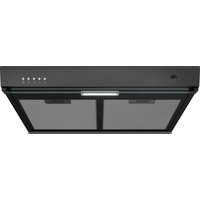
Description
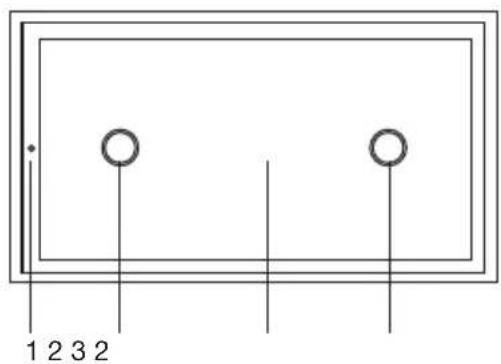
text_image
1 2 3 2- Extraction speeds LED indication
- Lighting
- Edge-extractor panel
- Lighting on/off key
- (+) increase extraction power key
- (-) decrease extraction power key
- Extraction on/off key
text_image
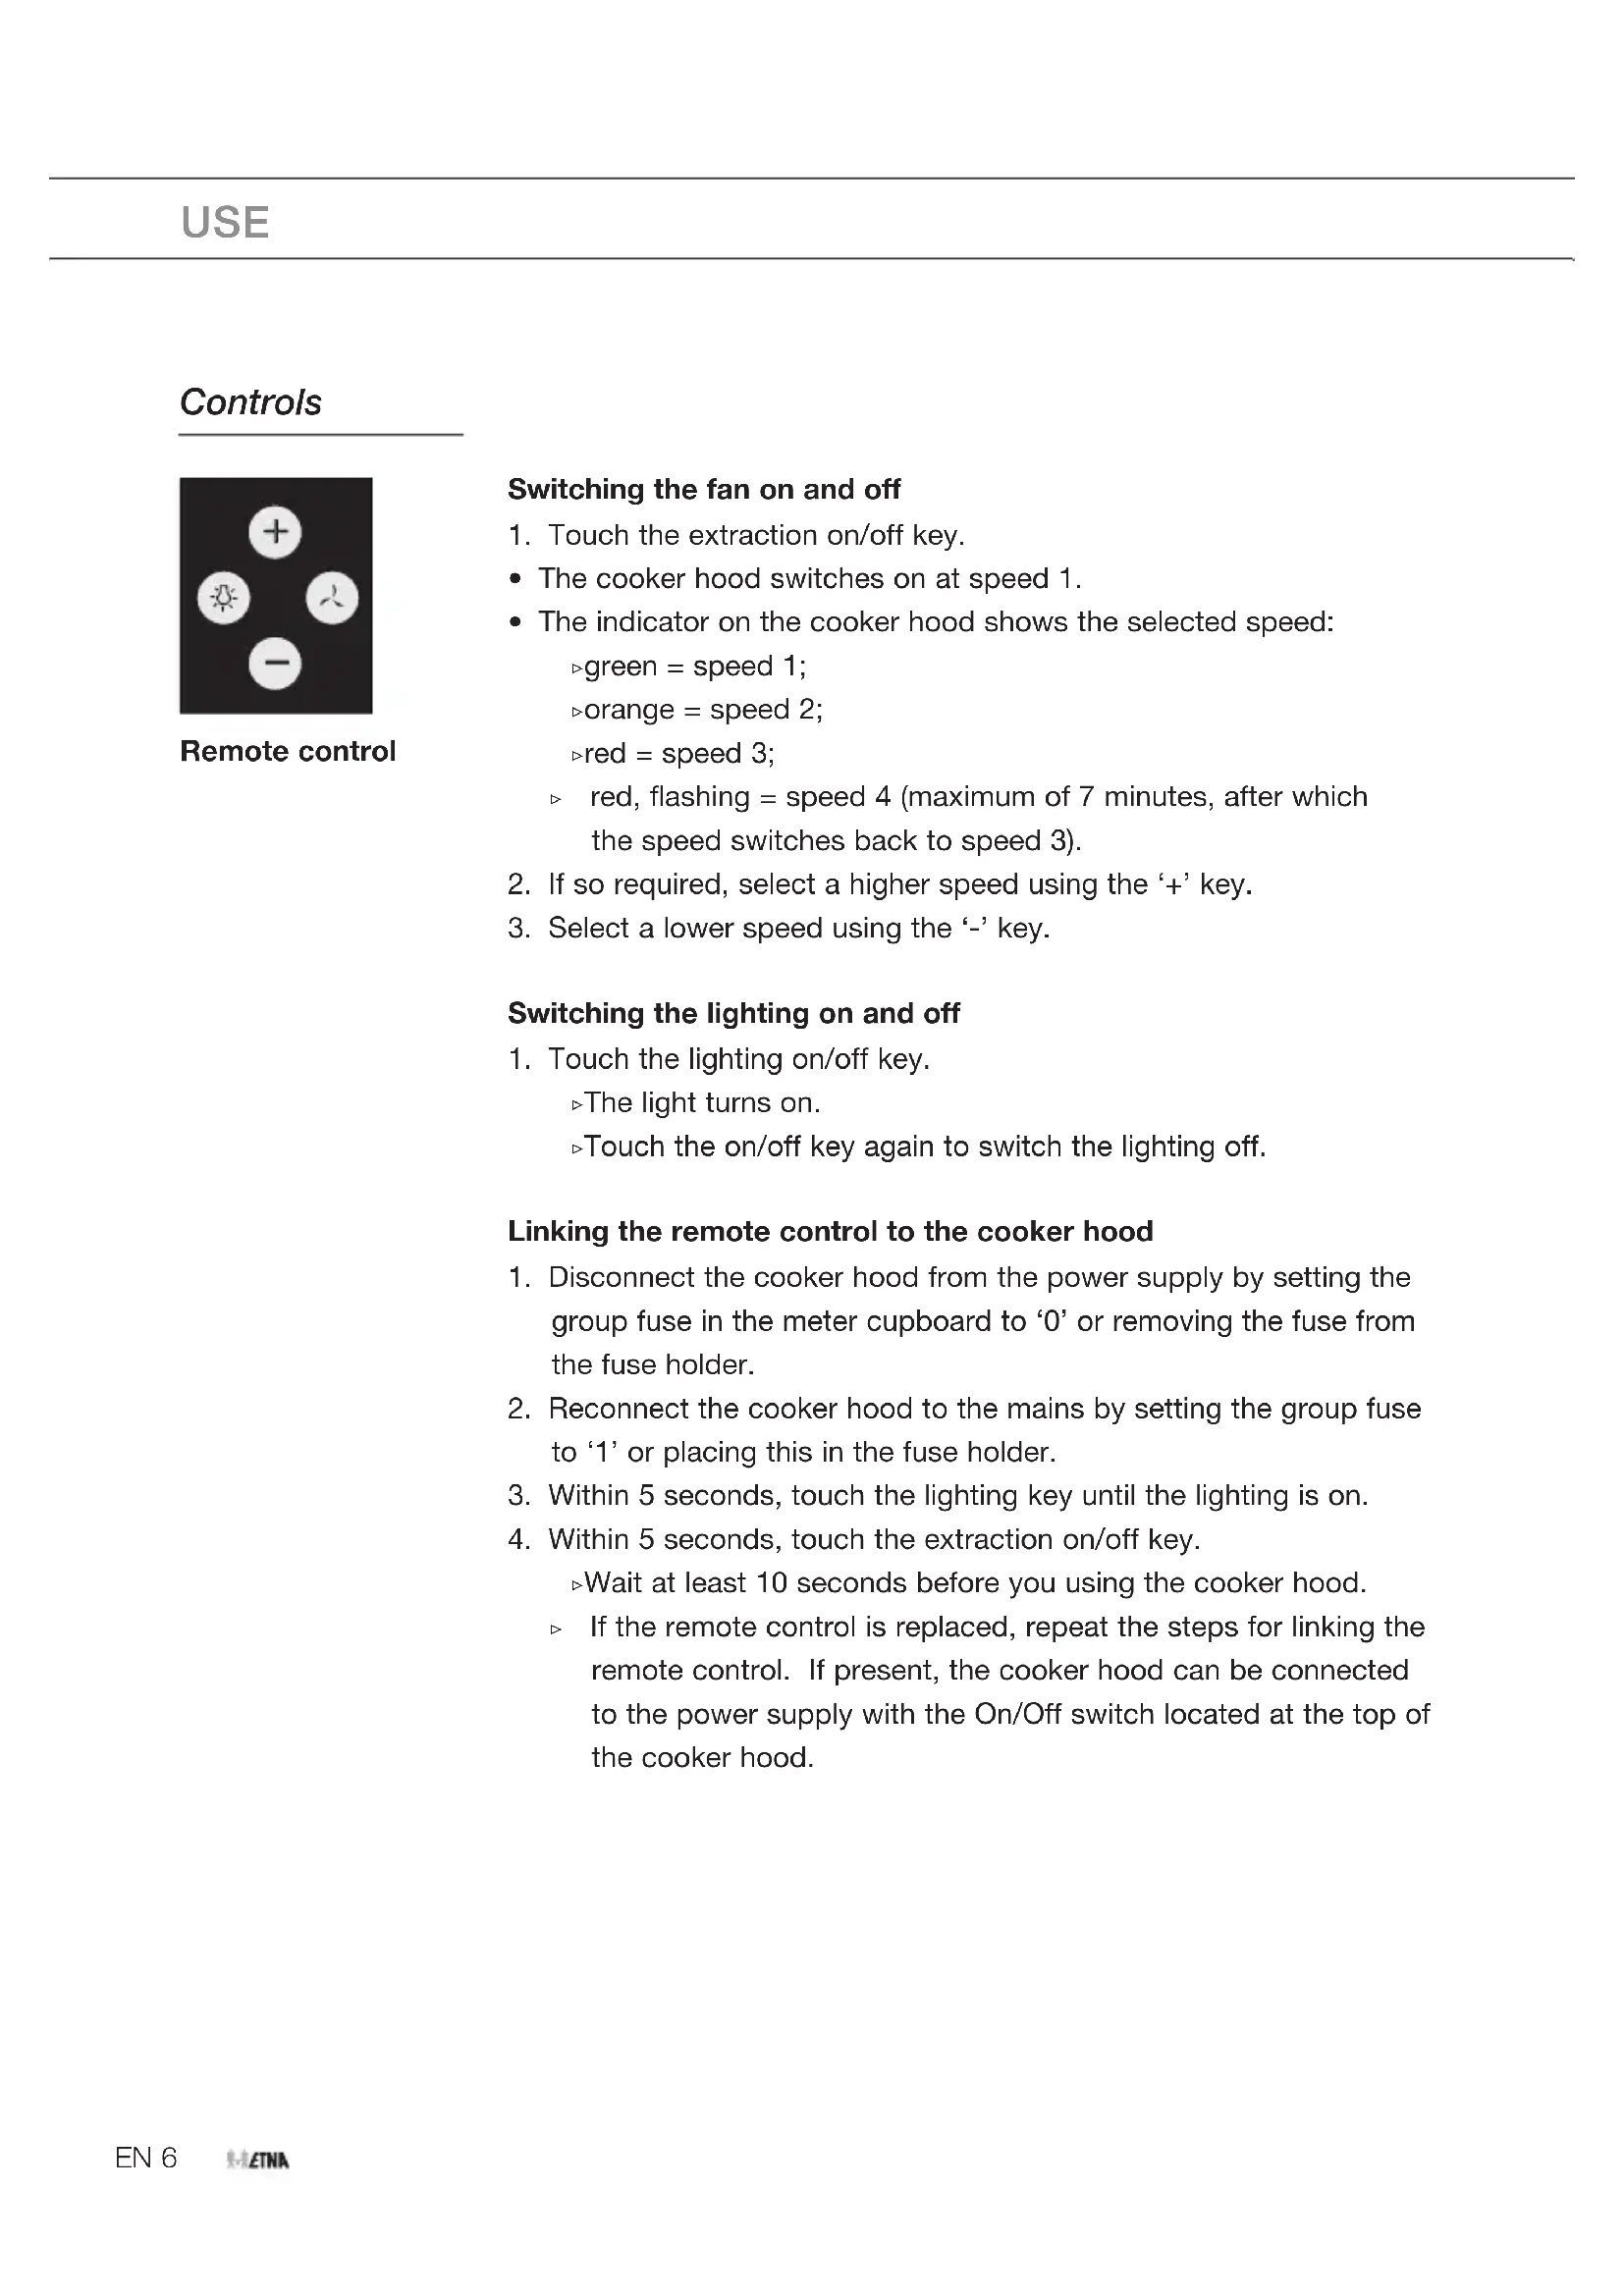
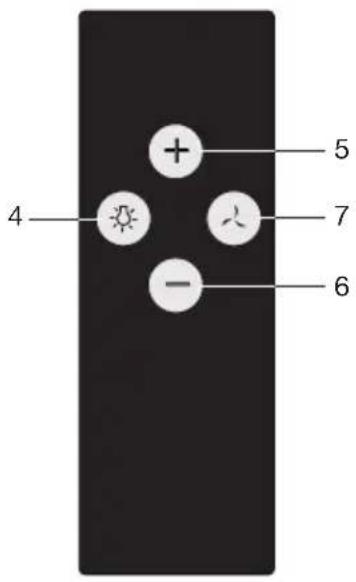
4 + 5 7 - 6Controls
natural_image
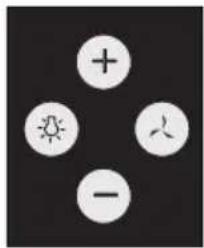
Four white circular icons arranged around a central symbol: sun, plus sign, human figure, and minus sign on black background (no text or labels)Remote control
Switching the fan on and off
- Touch the extraction on/off key.
• The cooker hood switches on at speed 1.
- The indicator on the cooker hood shows the selected speed:
$$ \triangleright \text { green } = \text { speed } 1; $$
$$ \triangleright \text { orange } = \text { speed 2 }; $$
$$ \triangleright \text { red } = \text { speed 3 }; $$
red, flashing = speed 4 (maximum of 7 minutes, after which the speed switches back to speed 3).
- If so required, select a higher speed using the '+' key.
- Select a lower speed using the '-' key.
Switching the lighting on and off
- Touch the lighting on/off key.
The light turns on.
▶Touch the on/off key again to switch the lighting off.
Linking the remote control to the cooker hood
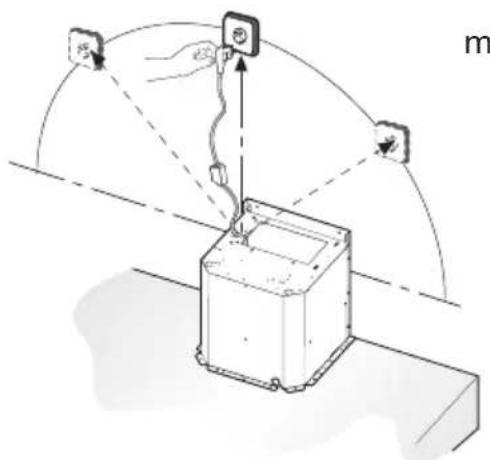
- Disconnect the cooker hood from the power supply by setting the group fuse in the meter cupboard to '0' or removing the fuse from the fuse holder.
- Reconnect the cooker hood to the mains by setting the group fuse to '1' or placing this in the fuse holder.
- Within 5 seconds, touch the lighting key until the lighting is on.
- Within 5 seconds, touch the extraction on/off key.
▶Wait at least 10 seconds before you using the cooker hood.
If the remote control is replaced, repeat the steps for linking the remote control. If present, the cooker hood can be connected to the power supply with the On/Off switch located at the top of the cooker hood.
Entering a new code for the cooker hood
When interference prevents the remote control from working properly, a new code can be entered.
- Touch the remote control's (-) and (+) keys simultaneously for at least 10 seconds.
The LED on the remote control lights.
- Once again, touch the (-) and (+) keys simultaneously within 3 seconds.
The LED on the remote control flashes 3x.
- Work through the steps for linking the remote control.
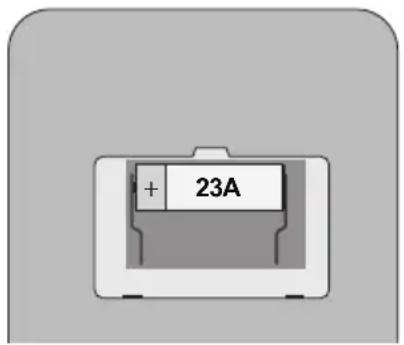
Replacing the battery
Remove the remote control's cover and replace the battery with a battery of the same type and voltage. The battery is chemical waste and must be disposed of in a responsible manner and in accordance with government regulations.
text_image
+ 23A
Via the Etna Connected app you can dim the lighting of this device continuously, set the duration of the timer to switch off the device automatically or program other functionalities yourself. Scan the QR code in the front of this manual and download the app.
Cleaning
Attention! Before performing any maintenance operation, isolate the hood from the electrical supply by unplugging the appliance or switching off your household's master switch.
The cooker hood should be cleaned regularly (at least as frequently as the grease filters are cleaned) both internally and externally. Do not use abrasive products. Do not use alcohol!
Attention! Failure to comply with the basic recommendations for cleaning the cooker hood and cleaning/replacing the filters may lead to a fire. Therefore, we recommend that you observe these instructions. The manufacturer declines all responsibility for any damage to the motor or any fire damage linked to inappropriate maintenance or failure to observe the above safety recommendations.

Cooker hood
Clean the cooker hood with soapy water and a soft cloth. Then wipe with clean water to rinse. Do not apply aggressive cleaning agents such as caustic soda. The paintwork on the cooker hood will remain shiny if it is periodically rubbed with wax.
Stainless steel canopy hoods
Do not use any sort of scourer. Treat with a stainless steel care product and polish with the structure of the stainless steel.
Metal grease filters
Metal grease filters should be cleaned once a month (or when indicated by the filter saturation indication system, if present on your model), using a neutral cleaning agent, preferably by hand or in the dishwasher on a short, low-temperature program. Place the grease filters with the openings facing downwards in the dishwasher so the water can drain out of the filter. Aluminum-colored and black grease filters become dull as a result of dishwasher cleaning agents. This is normal and does not effect the working.
Grease filter
- Before you can remove the grease filter, you must open the edge-extractor panel.
- Hook your fingers behind the panel and use your thumbs to lever it away from the edge of the extractor hood.
- Flip the edge-extractor panel downwards.
- Press the lock of the grease filter and tilt the grease filter downwards. Now you can remove the grease filter from the hood.
If present, the carbon filter is clamped on top of the grease filter. Prevent the carbon filter from falling on your hob by supporting it when installing and removing the filters.
- Clean the grease filters.
- Put the filters back into place.
- Press the edge-extractor panel into place; it works with magnets.
Carbon filter

- Remove the grease filter.
- Mount the carbon filter.
The carbon filter is clamped on top of the grease filter. Prevent the carbon filter from falling on your hob by supporting it when installing and removing the filters.
- Fit the grease filter with the carbon filter.
Important:
- The saturation of the filter depends on the intensity of use, the manner of cooking and the regularity with which the grease filters are cleaned.
- The carbon filter must be cleaned at least once every four months.
- As an odor filter, this appliance uses long-life filters, recognizable by the green plastic. This filter must be cleaned every four months.
Cleaning procedure long-life filter
- The carbon filter can be washed by hand in mild soapy water, or in the dishwasher at a maximum temperature of 65 °C . This washing cycle must be done without other dishes and without dishwasher detergent. Do not use any cleaning agents!
- Remove excess water. Be careful to avoid damaging the filter. Place the filter in the oven to dry for at least 1 hour at a maximum temperature of 80 °C. After 4 times of cleaning (or if the filtre is damaged), the filter will need to be replaced.
Lighting
This hood is fitted with a light system. This light system has to be replaced by an authorized technician. Do not attempt to replace it by yourself.
The lamp in this household appliance is only suitable for illumination of this appliance. The lamp is not suitable for household room illumination.
General
This appliance must be connected to the electric mains by an authorised installer who is familiar with the safety precautions and will carry them out. The appliance is in compliance with European guidelines.
Important information:
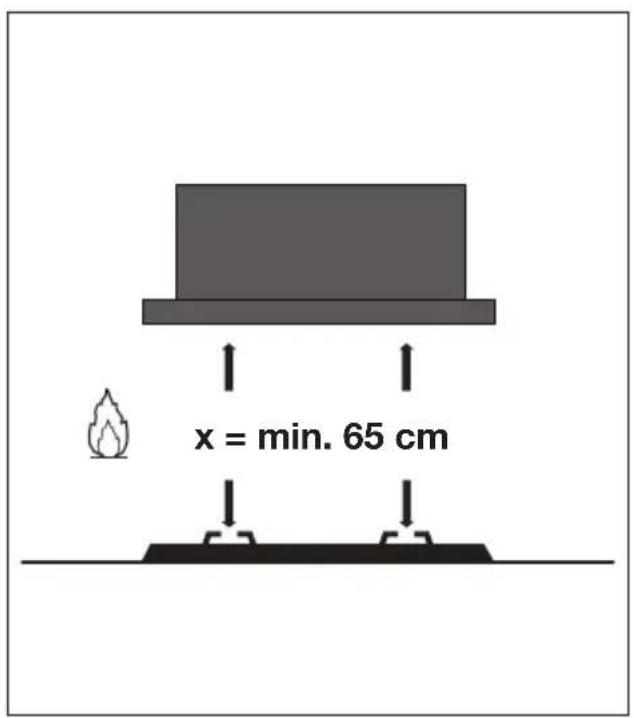
- The distance between the lowest point of the cooker hood and a gas hob must be at least 65 cm. If using an electric, ceramic or induction hob, this distance must be at least 55 cm.
- If the cooker hood is connected to an existing exhaust duct, no other appliance must be connected to the duct (such as a hot water heater or a stove).
- Consider local regulations with respect to the ventilation of gas appliances.
- The shorter the duct, and the fewer bends in it, the better the cooker hood will work.
- Check before you start drilling that no installation pipe(s) is/are present.
- The connection pipe to the cooker hood has a diameter of 125 or 150 mm. We recommend that the exhaust pipe has as large a diameter as possible.
- The enclosed installation materials are suitable for reinforced concrete and brick walls. For some types of wall you may need special plugs and screws.
Electrical connection
This appliance is fitted with an earthed plug, which should be connected to an earthed wall socket.
Check that the voltage indicated on the rating plate matches the voltage of your household supply.
The appliance should be connected to the mains as follows:
BROWN = L live
BLUE = N neutral
GREEN/YELLOW = earth
This cooker hood is fitted with a connector plug. Install the cooker hood so that the plug is accessible.
Attention!
If you are making a fixed connection, you must ensure that a double pole switch with an air gap of at least 3 mm is fitted in the supply line.
text_image
Diagram illustrating a mechanical or electrical setup with labeled components and directional arrows, including a meter marker.max. 135 cm
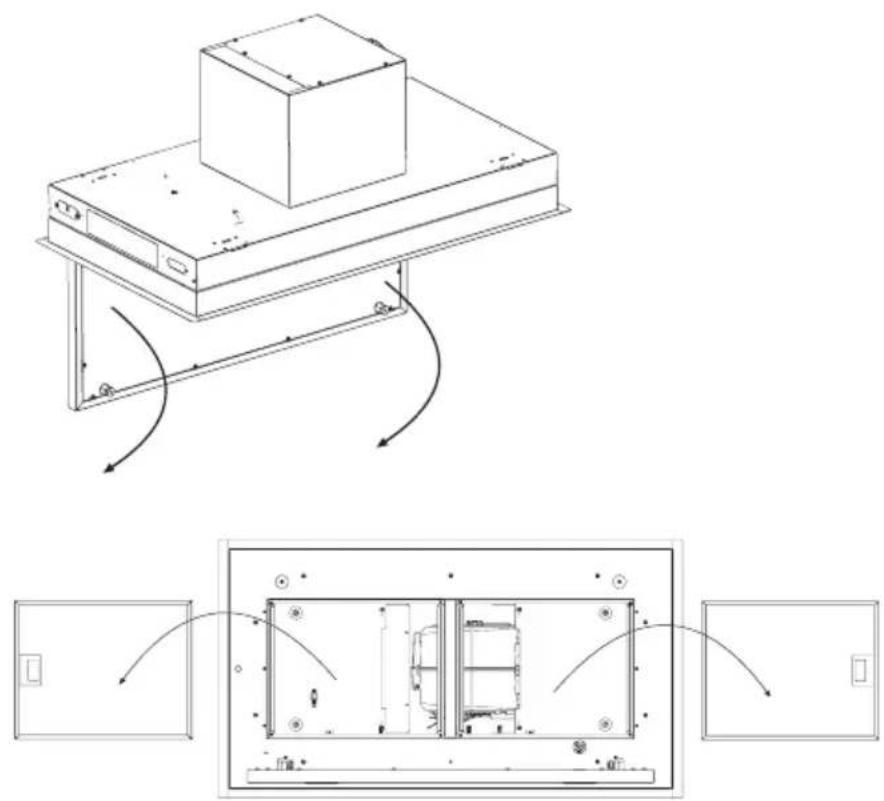
Mounting the cooker hood
The last pages of this manual show the steps for mounting the cooker hood.
Environmental aspects
This appliance was manufactured using sustainable materials. It must be disposed of responsibly at the end of its life cycle. The local authorities can provide you with the relevant information.
The packaging of this appliance is recyclable. It may have been made from:
- cardboard;
• polythene film (PE);
• CFRP-free polystyrene (PS hard foam).
You need to dispose of these materials responsibly in accordance with official regulations.
text_image
Prohibition sign with crossed-out trash bin and no text or symbolsTo draw attention to the fact that the segregated processing of household electrical appliances is compulsory, this appliance carries the symbol of a crossed-out dustbin. This means that you may not dispose of the appliance as household refuse at the end of its useful life. Instead, it should be taken to a special segregated refuse collection centre run by the local authority or to a dealer providing this service.
Segregated processing of household appliances prevents any negative impact on the environment and public health that might otherwise arise. It allows the recovery of the materials used to manufacture this appliance, thus generating considerable savings in terms of raw materials and energy.
CE
Declaration of conformity
We hereby declare that our products satisfy the applicable European directives, orders and regulations, as well as the requirements stated in the referenced standards.
flowchart
graph LR
    A["Warning Symbol"] --> B["Warning icon: i"]
    B --> C["Warning Triangle with lightning symbol"]
    C --> D["Display: V/W/Hz ?"]
    D --> E["Monitor with house icons and refresh symbol"]
text_image
x = min. 65 cm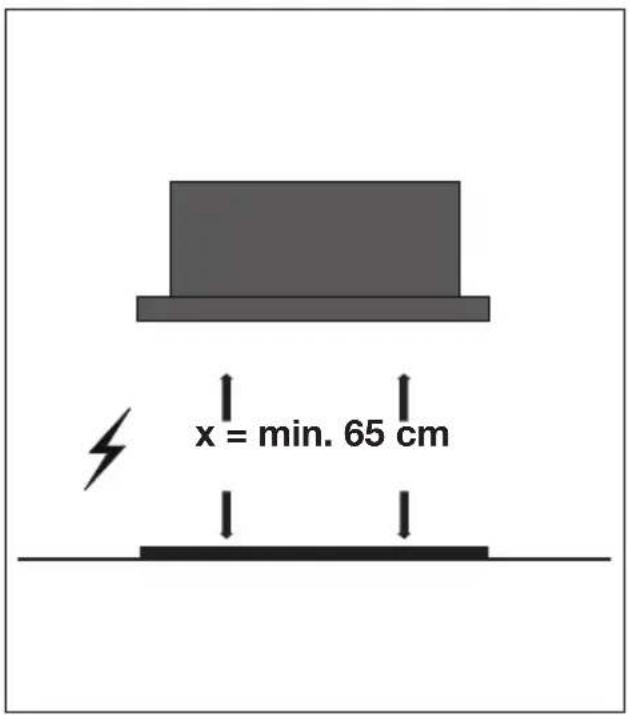
text_image
x = min. 65 cm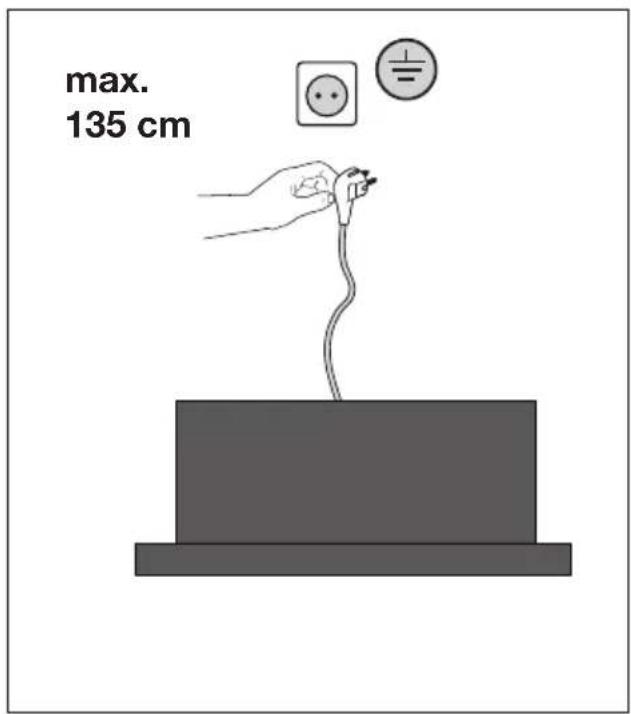
text_image
max. 135 cm
natural_image
Simple line drawings of an open box, four screws, and a prohibition symbol (no text or labels)INSTALLATIE - INSTALLATION
natural_image
Technical line drawing of a mechanical assembly with a rectangular block and conveyor belt, showing motion arrows (no text or symbols)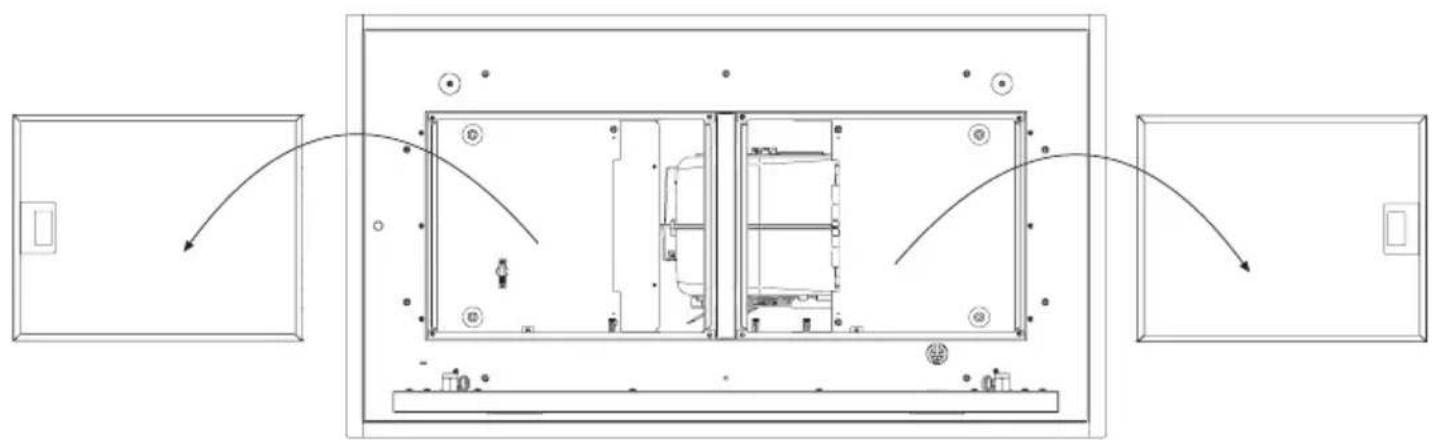
flowchart
graph TD
    A["Door 1"] --> B["Room 1"]
    B --> C["Room 2"]
    C --> D["Room 3"]
    D --> E["Room 4"]
    E --> F["Room 5"]
    F --> G["Room 6"]
    G --> H["Room 7"]
    H --> I["Room 8"]
    I --> J["Room 9"]
    J --> K["Room 10"]
    K --> L["Room 11"]
    L --> M["Room 12"]
    M --> N["Room 13"]
    N --> O["Room 14"]
    O --> P["Room 15"]
    P --> Q["Room 16"]
    Q --> R["Room 17"]
    R --> S["Room 18"]
    S --> T["Room 19"]
    T --> U["Room 20"]
    U --> V["Room 21"]
    V --> W["Room 22"]
    W --> X["Room 23"]
    X --> Y["Room 24"]
    Y --> Z["Room 25"]
text_image
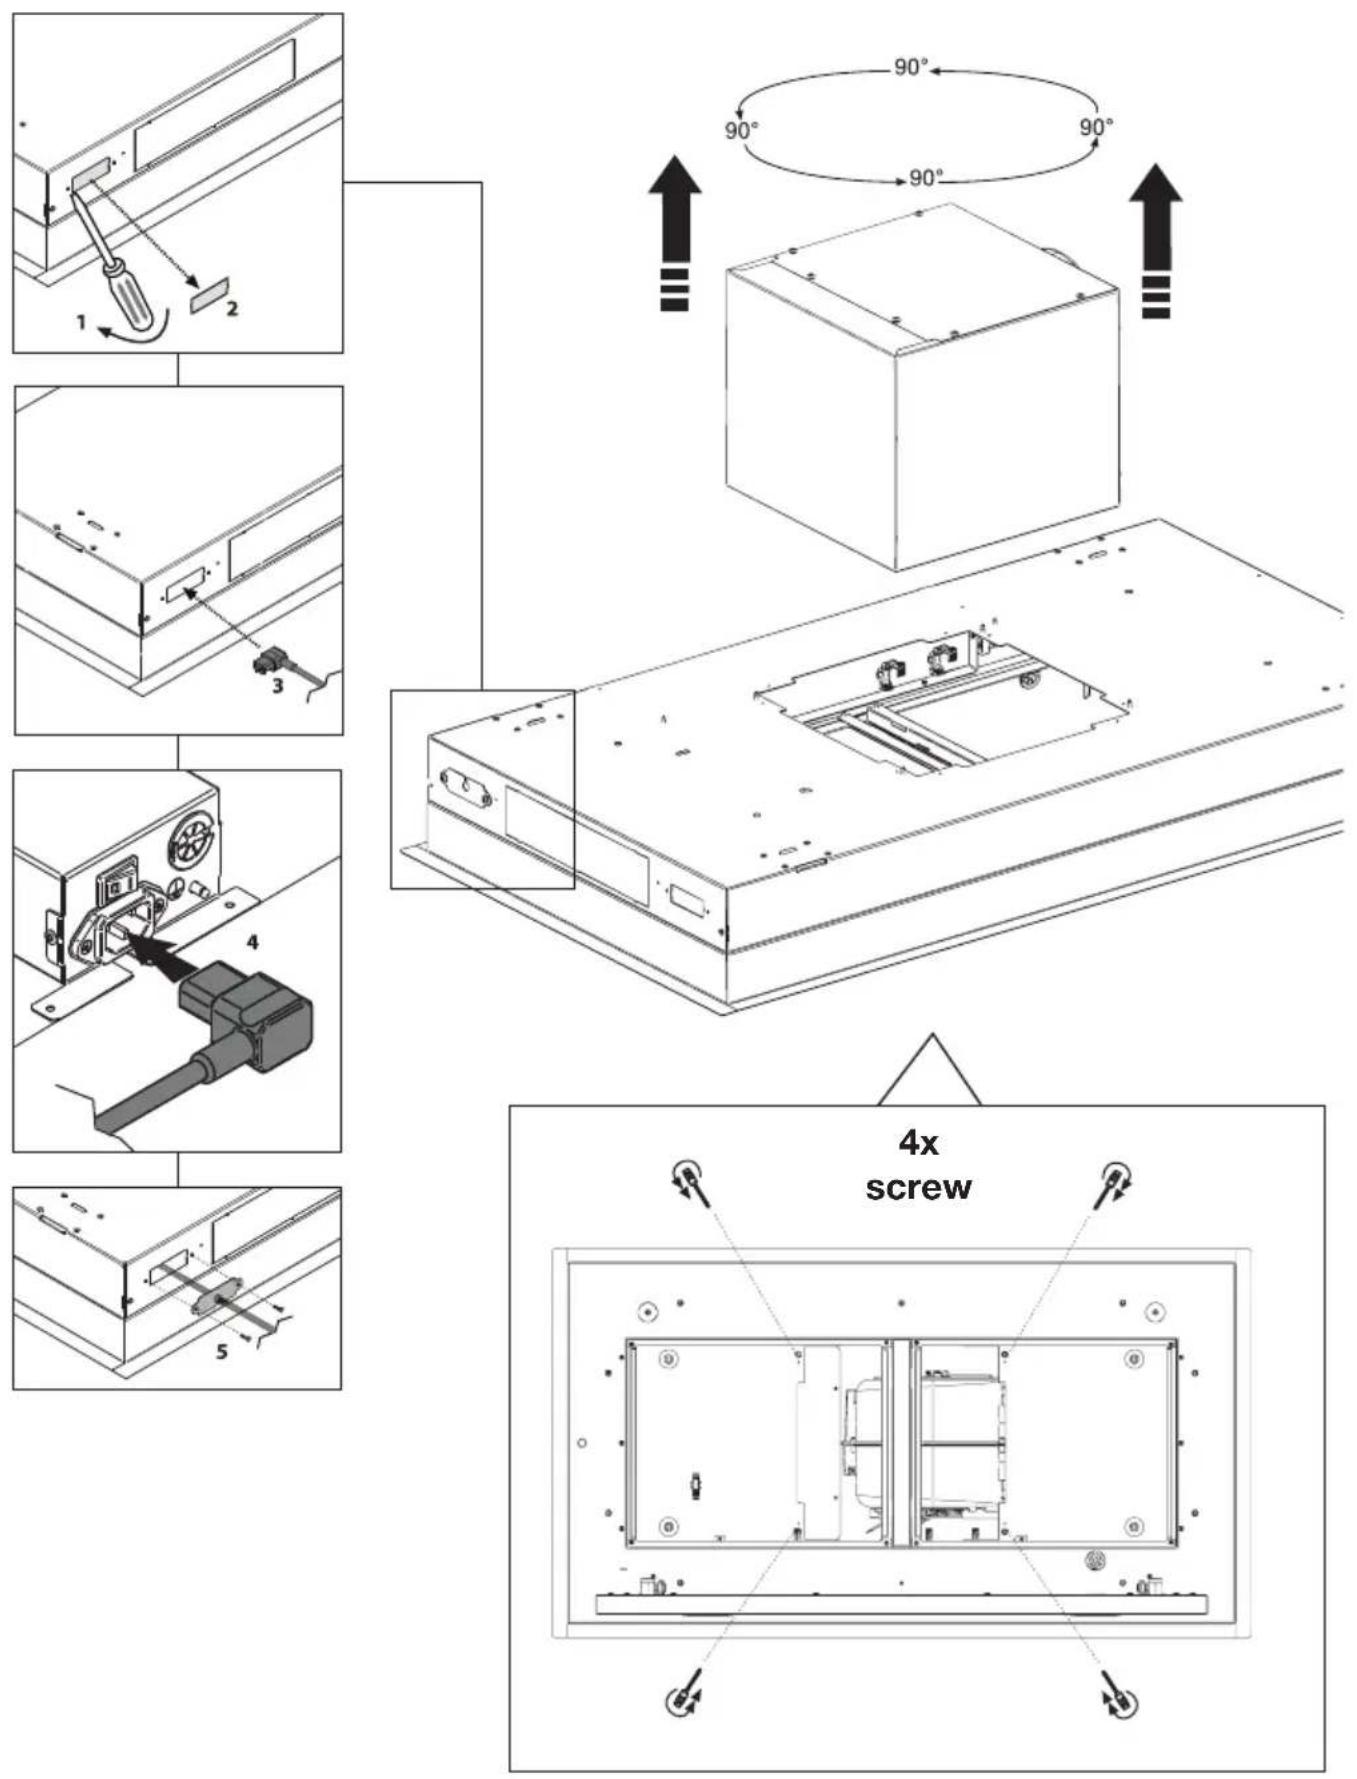
1 2 3 4 5 90° 90° 90° 90° 4x screwINSTALLATIE - INSTALLATION
Externe motor / Moteur externe / Externer Motor / External motor
text_image
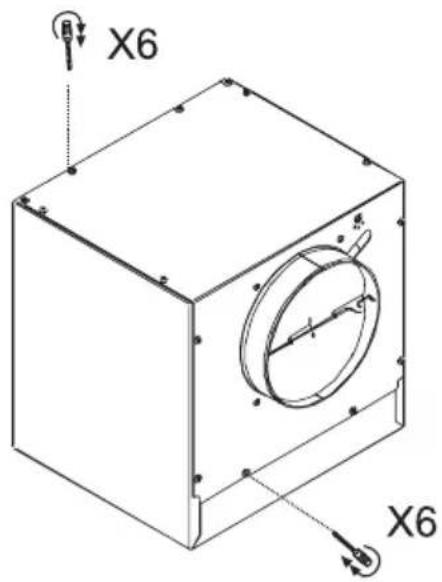
X6 X6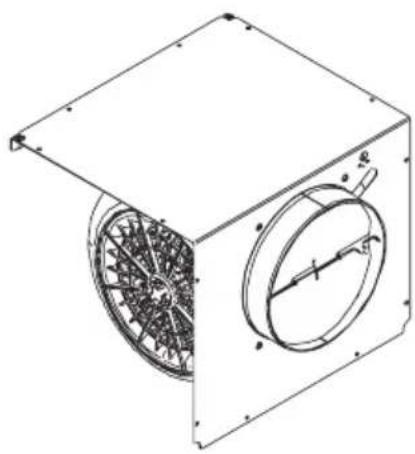
natural_image
Technical line drawing of a mechanical fan or fan assembly with internal components (no text or symbols)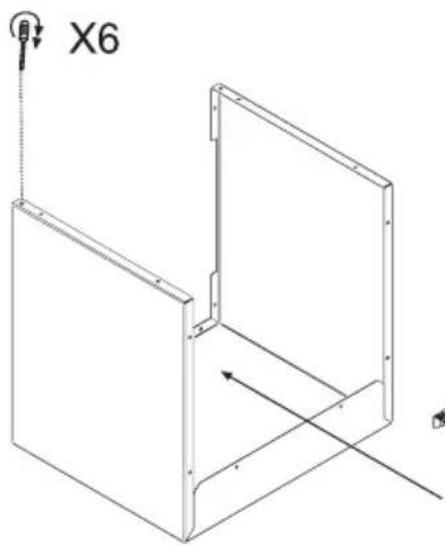
natural_image
Technical line drawing of a 3D mechanical part with X6 label and directional arrows (no text or symbols beyond labels)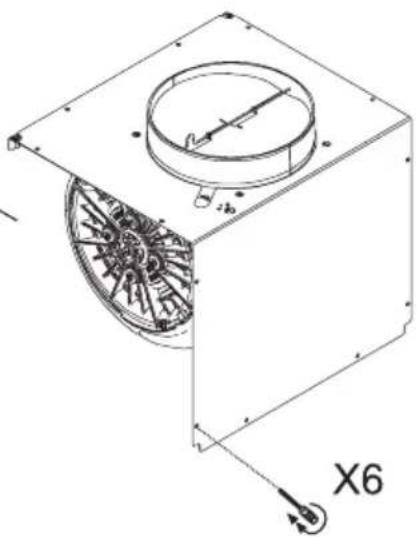
natural_image
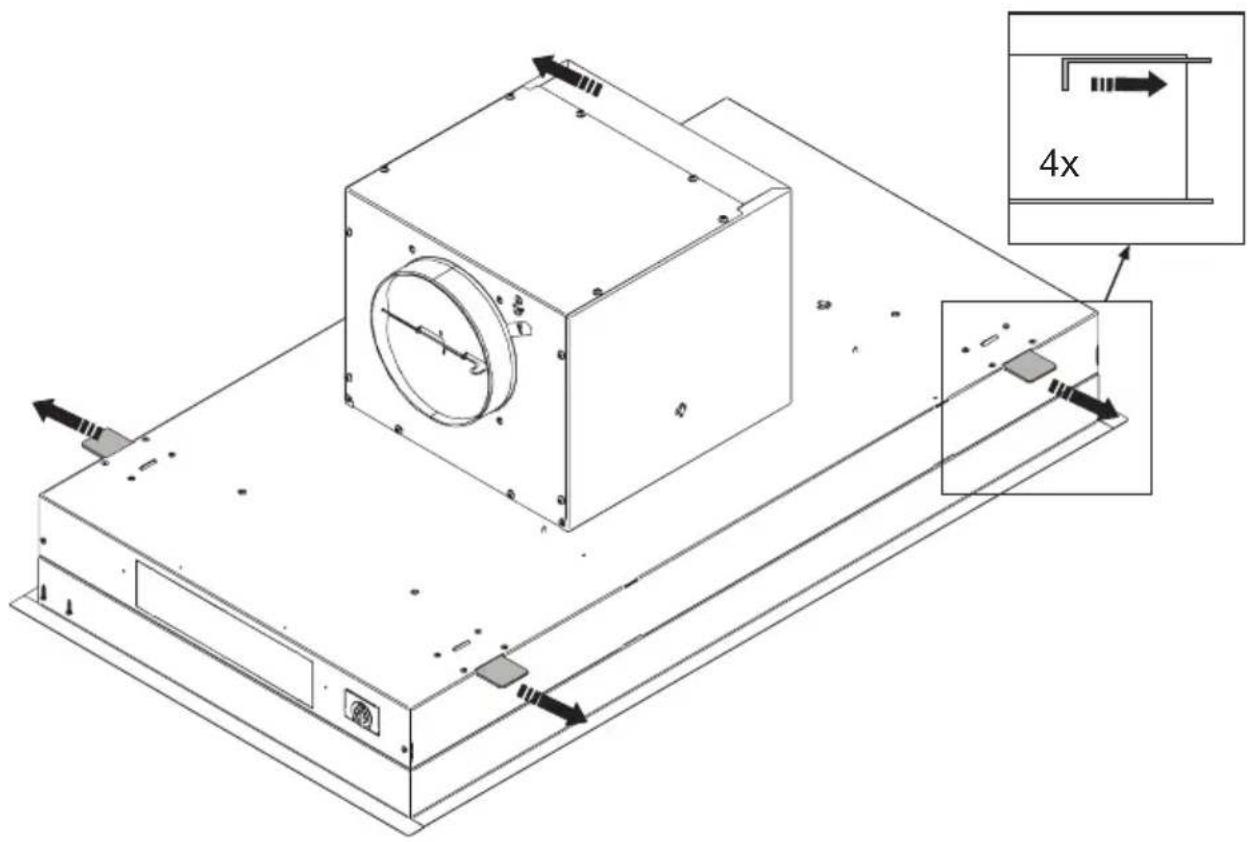
Technical line drawing of a mechanical fan or fan assembly with labeled components and directional arrow (no text or symbols beyond labels)EMP790 Externe motor / Moteur externe / Externer Motor / External motor
text_image
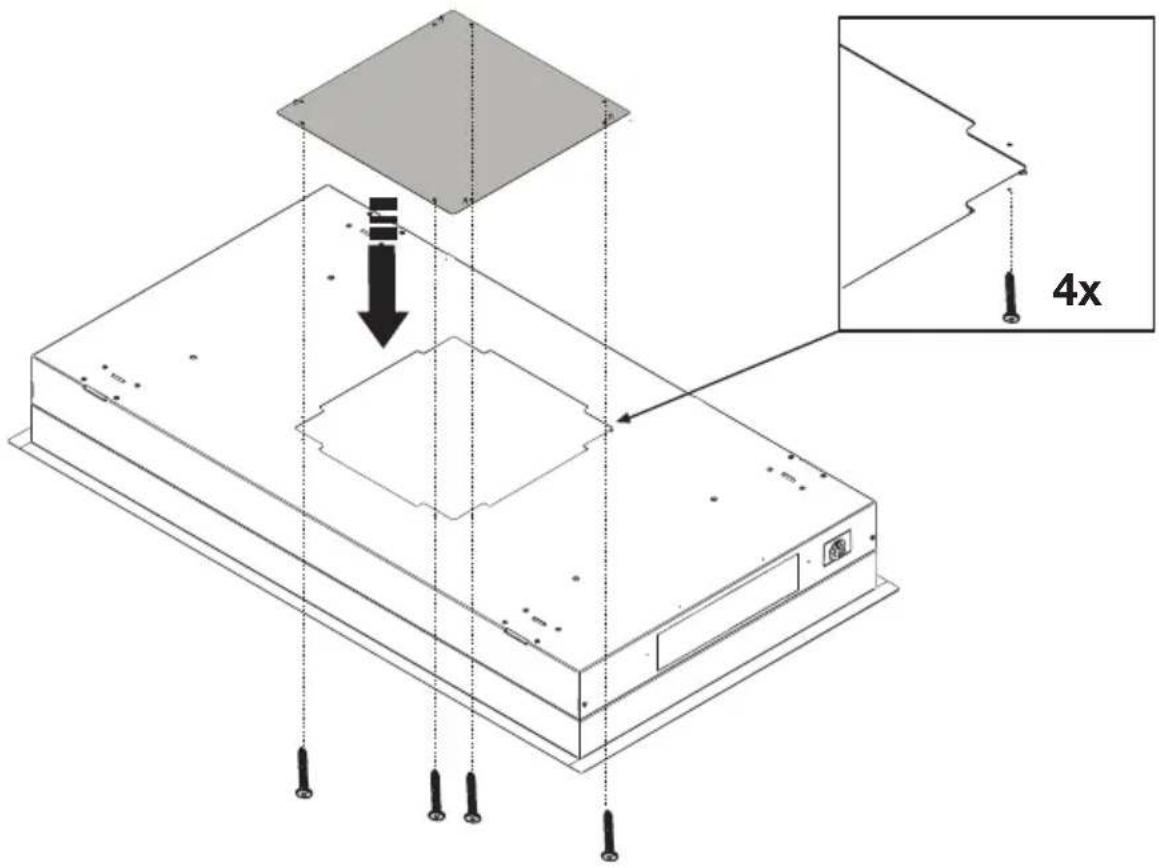
Technical diagram of a device with labeled components and 4x magnification indicator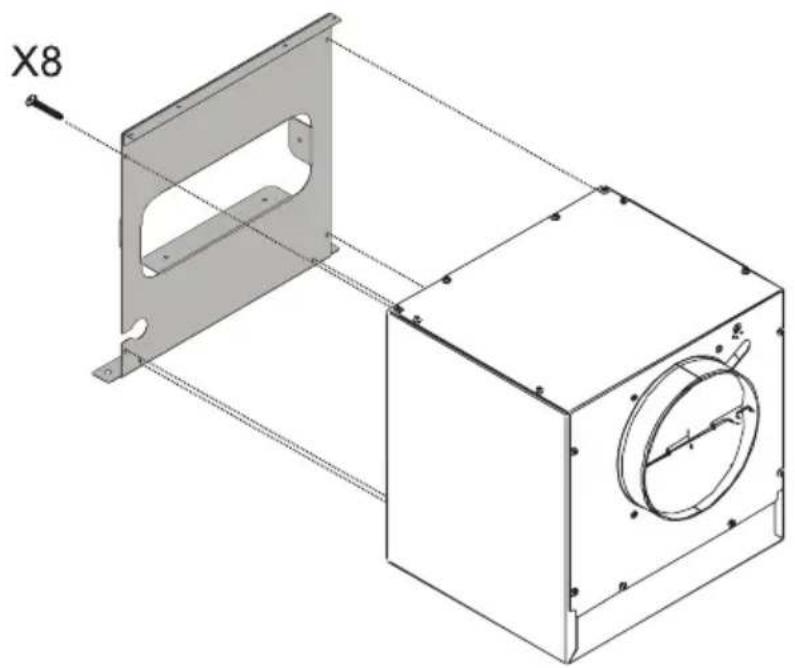
natural_image
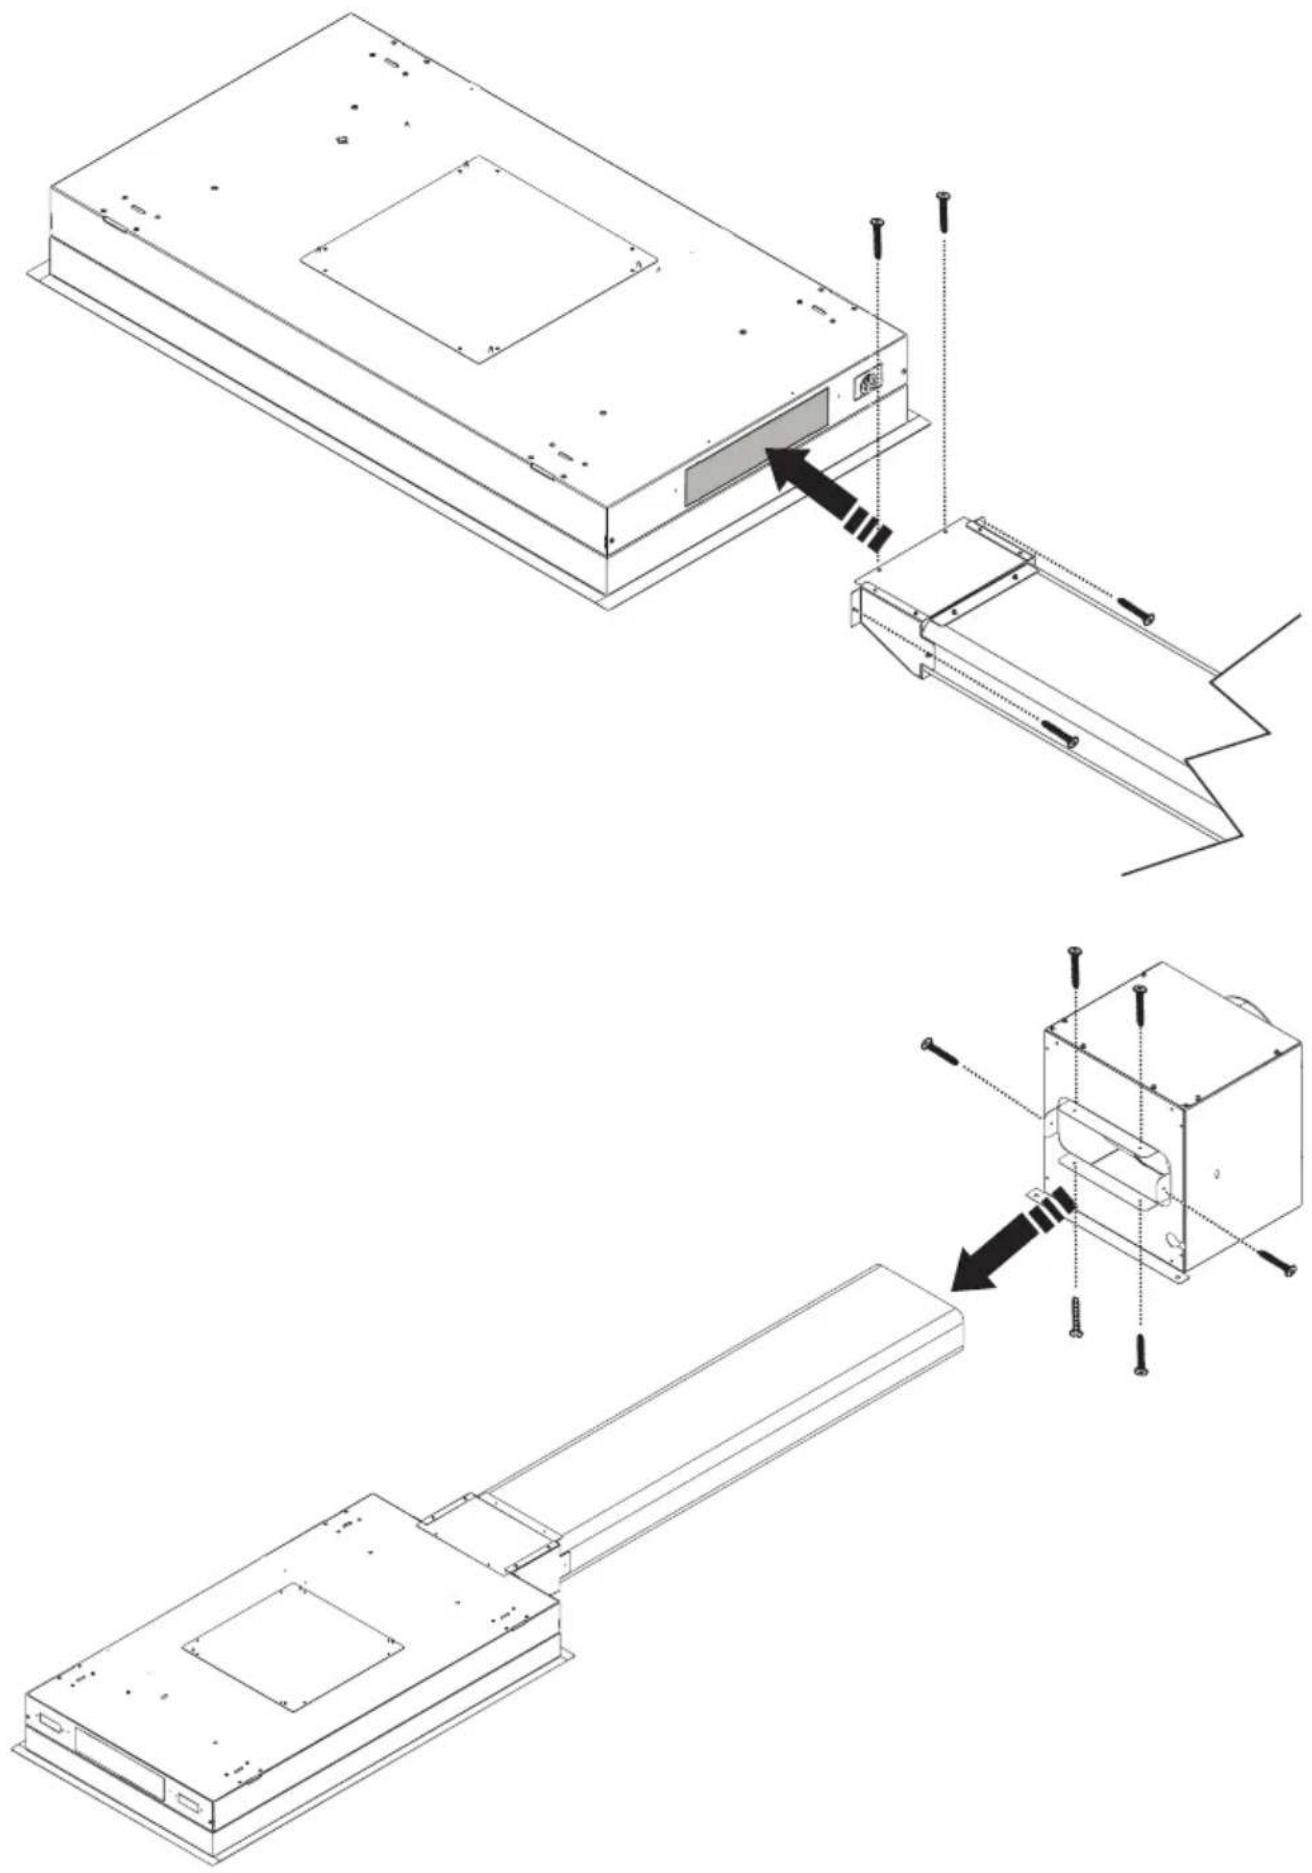
Technical drawing of a mechanical housing assembly with mounting bracket and circular component (no text or symbols)EMP790 Externe motor / Moteur externe / Externer Motor / External motor
text_image
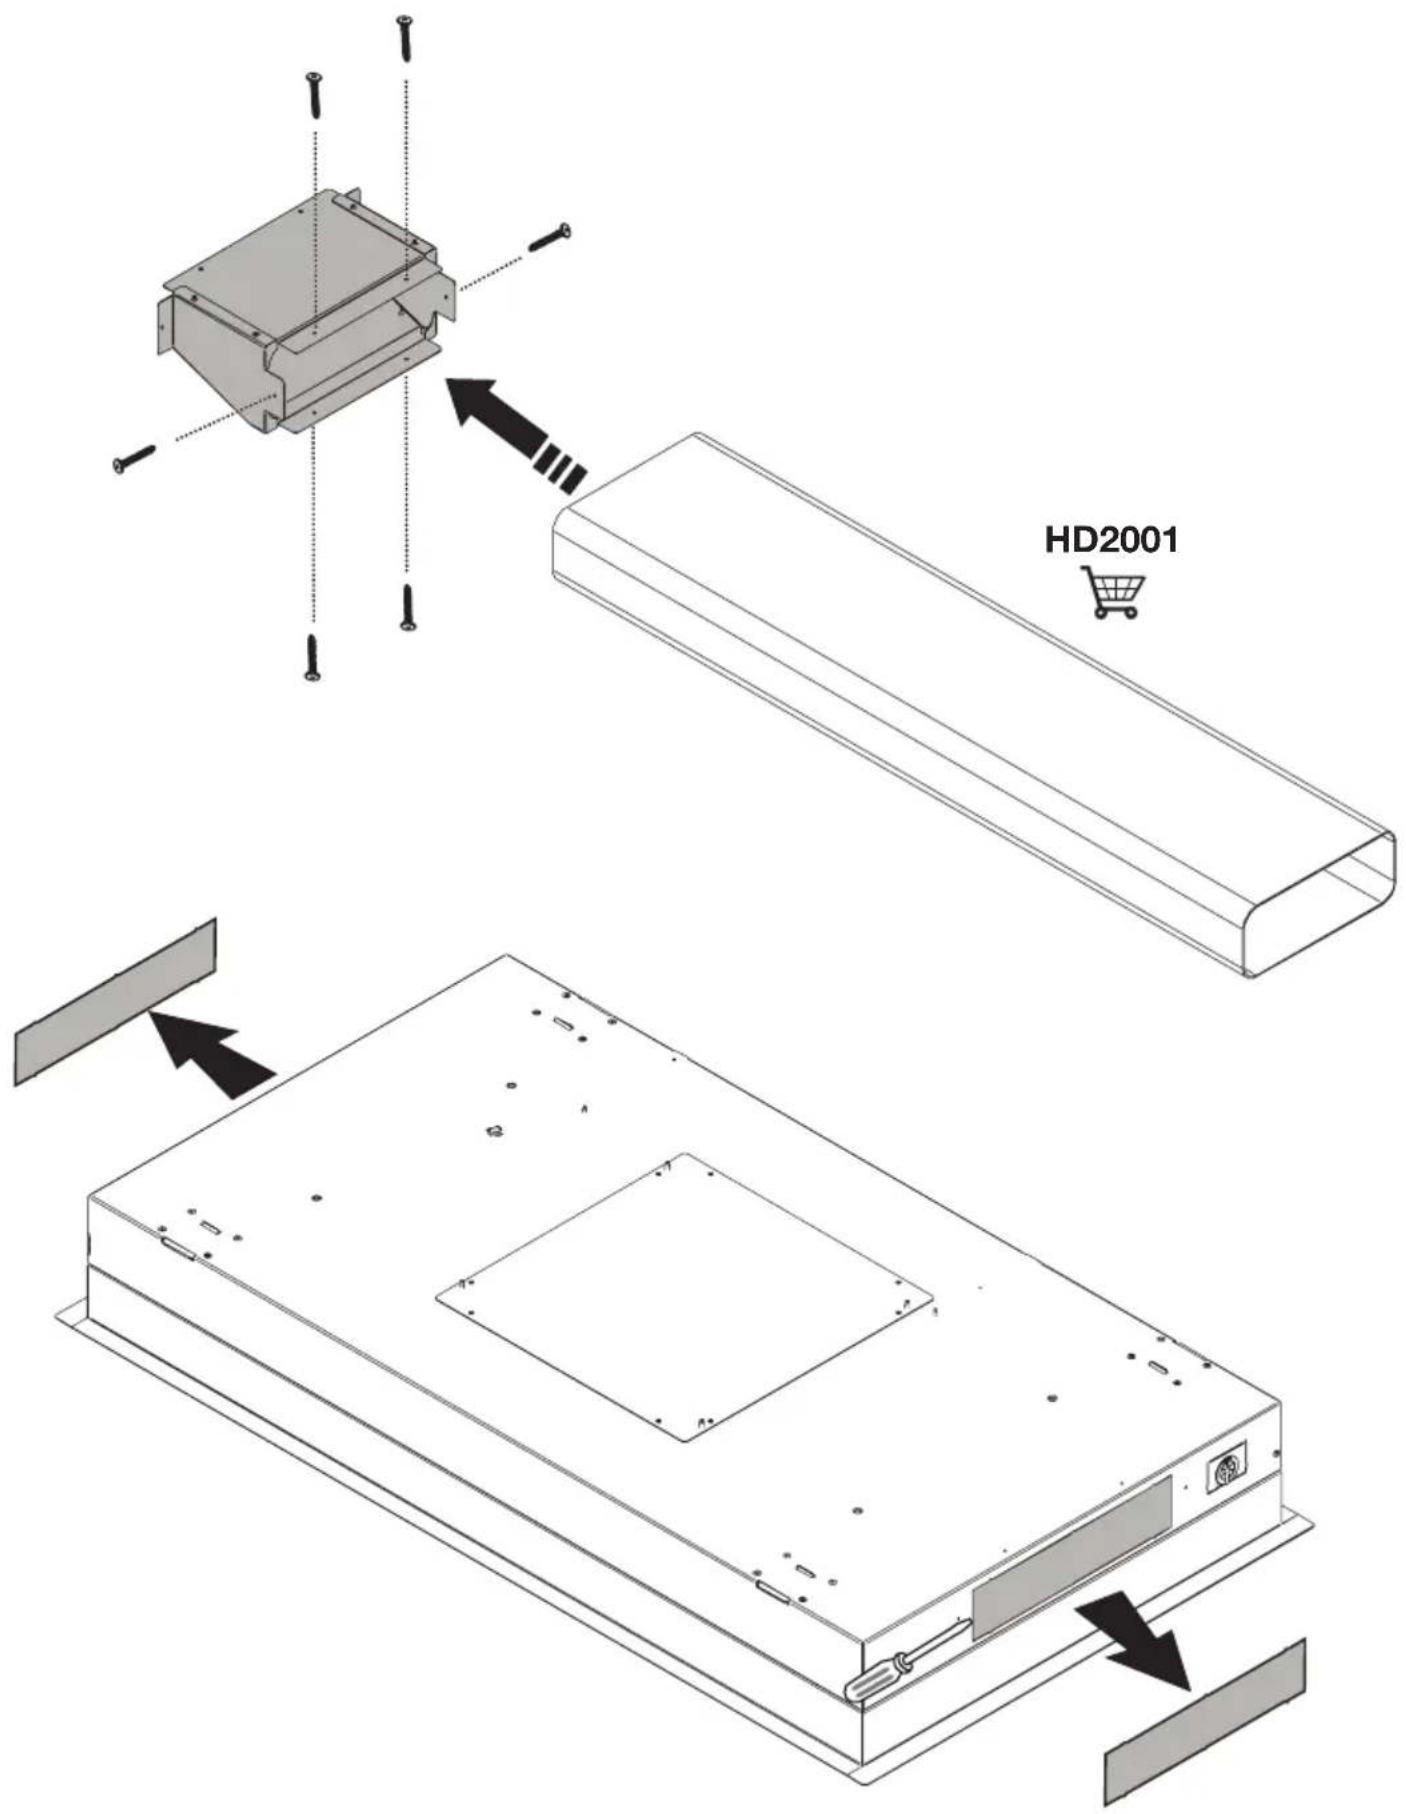
HD2001EMP790 Externe motor / Moteur externe / Externer Motor / External motor
natural_image
Technical line drawing of a device assembly showing internal components and mounting features (no text or symbols)INSTALLATIE - INSTALLATION
Montage / Montage / Montage / Mounting
text_image
Technical diagram of a mechanical assembly with labeled components and directional arrows, including a 4x dimension annotation.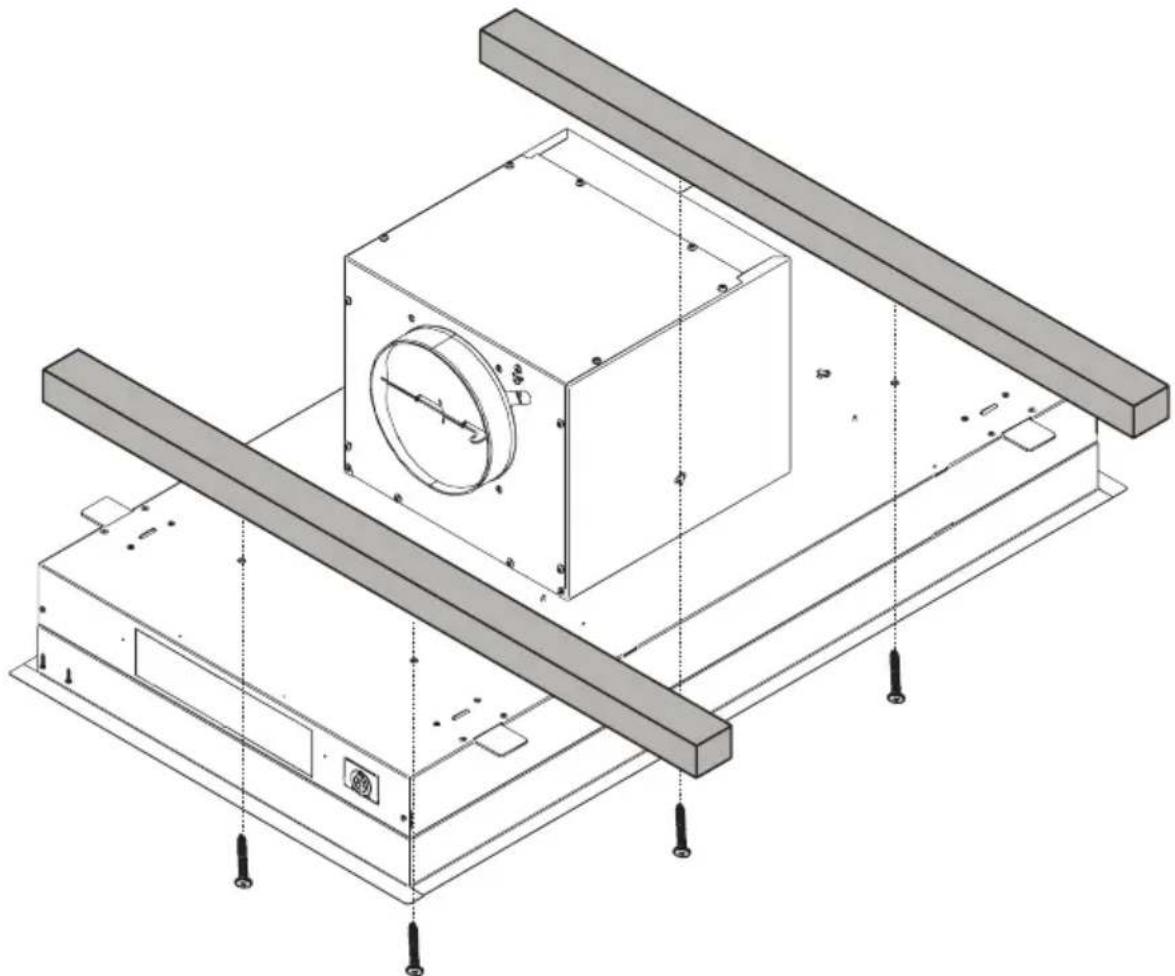
natural_image
Technical line drawing of a mechanical assembly with mounting brackets and a central circular component (no text or symbols)www.etna.nl
www.etna.be
887084