BT4 - Battery charger VOLTCRAFT - Free user manual and instructions
Find the device manual for free BT4 VOLTCRAFT in PDF.

| Product Type | 6V/12V Vehicle Battery Tester |
| Operating Voltage | 6 V/DC or 12 V/DC via vehicle battery |
| Display | 4-digit Digital |
| LED Indicators | 3 (GOOD, WEAK, BAD) |
| Audible Signal | Yes |
| Voltage Range | 4.5 to 18.5 V/DC |
| Cable Length | Approx. 50 cm with battery clamps |
| Operating Conditions | 0 to +50 °C, <80 % RH |
| Storage Conditions | -10 to +50 °C, <85 % RH |
| Functions | Battery capacity test, charging system (alternator) check, starter test |
| Maintenance and Cleaning | Dry, soft cloth; do not immerse; disconnect before cleaning |
| Safety | Wear gloves and safety goggles; avoid sparks; do not use in explosive atmosphere |
| Compliance | CE, European directives |
| Package Contents | Battery tester, user manual |
| Note | Do not open; no internal maintenance required |
Frequently Asked Questions - BT4 VOLTCRAFT
User questions about BT4 VOLTCRAFT
0 question about this device. Answer the ones you know or ask your own.
Ask a new question about this device
Download the instructions for your Battery charger in PDF format for free! Find your manual BT4 - VOLTCRAFT and take your electronic device back in hand. On this page are published all the documents necessary for the use of your device. BT4 by VOLTCRAFT.
USER MANUAL BT4 VOLTCRAFT
These Operating Instructions accompany this product. They contain important information on setting up and using the device. You should refer to these instructions, even if you are buying this product for someone else.
Please retain these Operating Instructions for future use! A list of the contents can be found in the Table of contents, with the corresponding page number, on page 22.

www.business.conrad.at
- Introduction 23
- Symbols and markings 24
- Intended use 24
- Delivery content 25
- Features and functions 25
- Operating elements 26
- Safety instructions 27
- Operation 30
- Maintenance and cleaning 39
- Disposal 39
- Technical data 40
1. INTRODUCTION
Dear customer,
By purchasing a Voltcraft® product, you have made an excellent decision, for which we wish to thank you.
Voltcraft® – This name stands for outstanding quality products in the fields of measurement, charging and network technology, products that stand out due to their professional competence, exceptional performance and permanent innovation.
Whether you are an ambitious electronics hobbyist or a professional in the field, with a product from the Voltcraft® family, you have the optimum solution at hand at all times, even for the most challenging tasks. And it gets even better: We make the sophisticated technology and reliable quality of our Voltcraft® products available to you at a nearly unbeatably low price-performance ratio. In this way, we create the basis for lengthy, good and successful cooperation.
We hope you will enjoy your new Voltcraft® product!
All company names and product names are trademarks of their respective owners. All rights reserved.
If there are any technical questions, please contact:
International: www.conrad.com/contact
United Kingdom: www.conrad-electronic.co.uk/contact
2. SYMBOLS AND MARKINGS

An exclamation mark in a triangle indicates important notes in these operating instructions that must be strictly observed.
The triangle containing a lightning symbol warns against danger of electric shock or impairment of the electrical safety of the device.

The "arrow" symbol alerts the user to the presence of important tips and notes on using the device.

This device is CE compliant and fulfills all applicable European guidelines.
3. INTENDED USE
The battery tester is intended for testing the charging status of a car battery with 6 V/DC or 12 V/DC on-board voltage systems. The battery tester is also intended for checking the charging circuit (electric alternator test) and the starter of vehicles with 12 V/DC on-board voltage system.
CE conformity has been verified and the relevant statements and documents have been deposited at the manufacturer.
Operate in dry environments only.
For safety and approval purposes (CE), you must not rebuild and/or modify this product. If you use the product for purposes other than those described above, the product may be damaged. In addition, improper use can cause hazards such as short-circuiting, fire, electric shock etc. Read the instructions carefully and keep them. Make this product available to third parties only together with its operating instructions.
This product complies with the statutory national and European requirements.
4. DELIVERY CONTENT
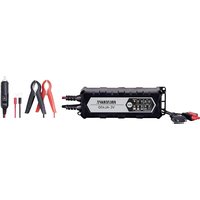
- Battery tester
- Operating instructions

Up-to-date Operating instructions:
Download the latest operating instructions from our website www.conrad.com/downloads or scan the printed QR code. Follow the instructions on the website.

5. FEATURES AND FUNCTIONS
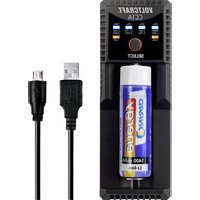
- Battery tester with positive and negative clamps
- Digital display for displaying settings and readings
- 3 LED indicator lights for displaying the battery status
- Testing the car battery under load
- Starter test (12 V)
- Checking the charging circuit (12 V)
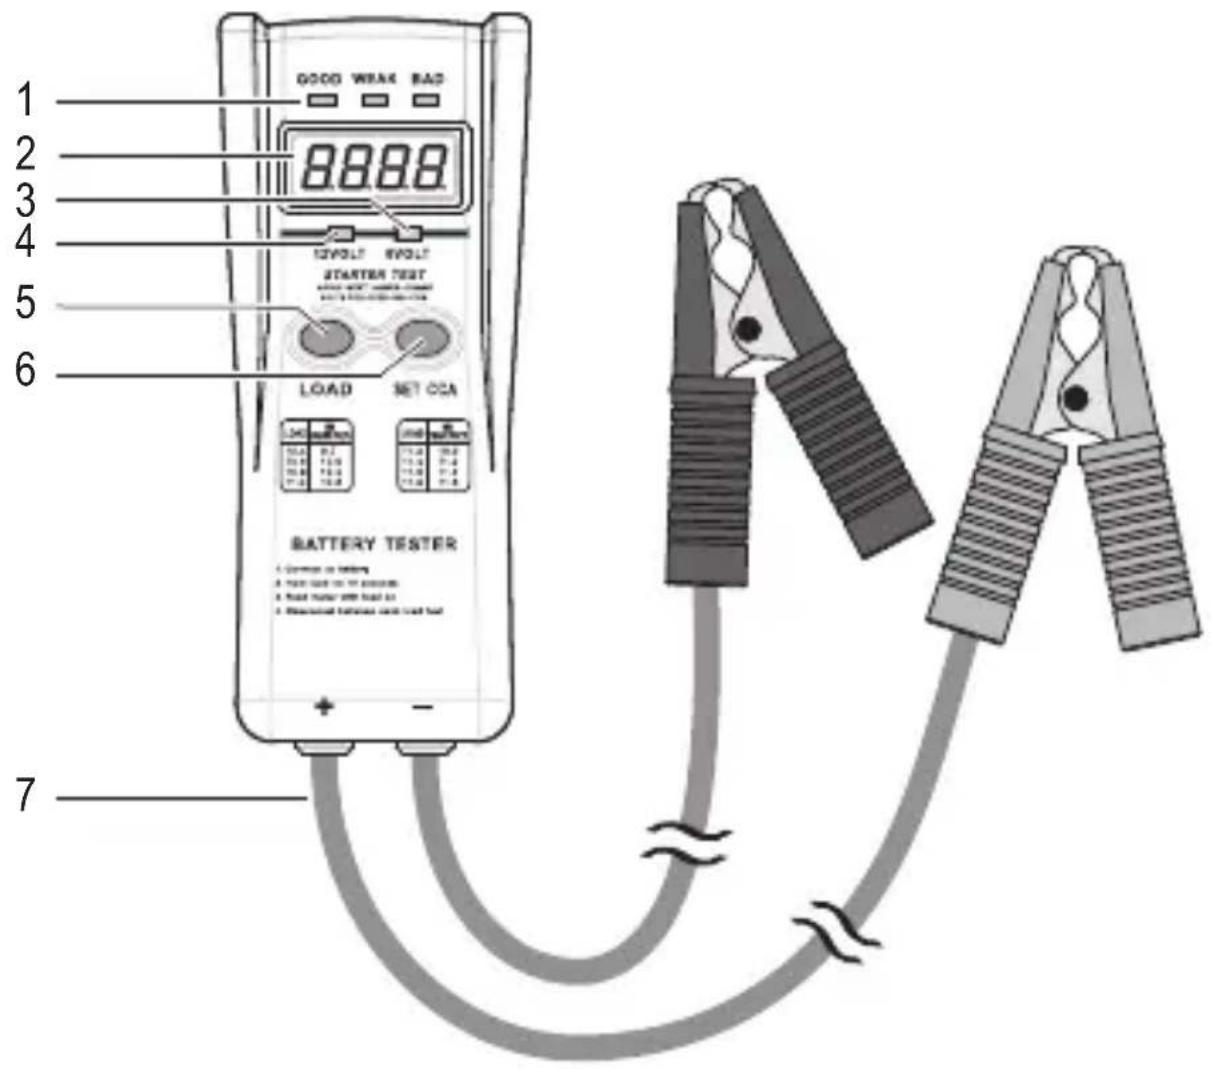
1 LED display GOOD WEAK BAD
2 Digital display
3 6VOLT LED
4 12VOLT LED
5 LOAD button
6 SET CCA button
7 Cable with terminal clamps, red positive clamp and black negative clamp
7. SAFETY INSTRUCTIONS

Read the operating instructions carefully and especially observe the safety information. If you do not follow the safety instructions and information on proper handling in this manual, we assume no liability for any resulting personal injury or damage to property. Such cases will invalidate the warranty/guarantee.
a) Persons / Product
- The device is not a toy. Keep it out of the reach of children and pets.
- Do not leave packaging material lying around carelessly. These may become dangerous playing material for children.
- Protect the product from extreme temperatures, direct sunlight, strong jolts, high humidity, moisture, flammable gases, vapours and solvents.
- Do not place the product under any mechanical stress.
-
If it is no longer possible to operate the product safely, take it out of operation and protect it from any accidental use. Safe operation can no longer be guaranteed if the product:
-
is visibly damaged,
- is no longer working properly,
- has been stored for extended periods in poor ambient conditions or
-
has been subjected to any serious transport-related stresses.
-
Please handle the product carefully. Jolts, impacts or a fall even from a low height can damage the product.
- Also refer to the safety and operating instructions of the vehicles connected to the product.
- For installations in industrial facilities, follow the accident prevention regulations for electrical systems and equipment of the government safety organization or the corresponding authority for your country.
In schools and training facilities and hobby and self-help workshops, the use of measuring devices must be monitored by trained and responsible personnel. - Never use the product immediately after it has been brought from a cold room into a warm one. The condensation generated could destroy the product. Allow the device to reach room temperature before connecting and using it. This may take several hours.
- Do not overload the product. Observe all specifications.
- Check the operation of the battery tester with a suitable and knowingly proper car battery.
- The battery tester is only intended for use with vehicles featuring a 6 and 12 V/DC on-board voltage system.
- The red positive clamp and the black negative clamp must not come in contact with each other.
- Never operate the product with wet hands.
-
Do not cover the product during use.
-
Never use the battery tester if damaged.
- Never touch any exposed metal parts of the terminal clamps during use.
- Keep the product away from ignition sources or open flames; do not smoke when handling the product. There is a risk of explosion!
- Do not operate the product near inflammable materials or gases. Risk of explosion!
- Wear protective gloves in order to protect your skin from battery acid / lead acid and oxidized terminal clamps.
- In order to avoid personal injuries or damage to the product, do not touch any moving or rotating parts of the vehicle.
- Make sure not to touch any hot parts of the vehicle. Risk of burning!
b) Miscellaneous
- Consult an expert when in doubt about operation, safety or connection of the device.
- Maintenance, modifications and repairs are to be performed exclusively by an expert or at a qualified shop.
Should you have questions concerning correct product connection or operation, or should other questions arise that this operating instructions does not address, please do not hesitate to contact our technical support or a third-party professional.
8. OPERATION

If overloaded, the product might get damaged. The warranty will get void in such a case.
The device is not suitable for use in explosive environments.
Avoid impact and strong vibrations as well as operation in direct sunlight.
Do not use the product during rain or similar weather conditions such as storm and thunderstorm.
Make sure the terminal clamps come only into contact with the respective (positive/negative) terminals of the car battery and not with any other objects.
When using car batteries that are not maintenance-free, make sure the caps are closed while connecting/disconnecting the battery tester.
Lead acid batteries generate explosive gases during normal use that could ignite by sparks. Avoid sparks/short circuits at any costs. Never short-circuit any contacts.
Caution: When connecting the terminal clamps to the battery terminals, sparks can be generated.
It is essential that you ensure sufficient ventilation. Carbon monoxide leaking while the engine is running is highly toxic. Never inhale exhaust fumes.
Always wear protective goggles when working with lead acid batteries, in order to protect your eyes from contact with lead acid.

If none of the indicators light up during testing, check the terminal clamps (7) for proper connection.
Check whether the terminals of the car battery are oxidized or dirty, as such could affect the contact with the terminal clamps of the battery tester.
a) Battery load test
This test analyzes the cold start ability of the battery. For testing, the tester draws current from the battery while measuring the voltage. The voltage of a good battery remains mostly stable. A defective battery will show a high loss of voltage. Battery size and temperature affect the testing result. For that reason, follow the instructions below.
-
Turn off the engine and any appliances connected to your vehicle. Very small appliances, such as car watches, do not have to be disconnected from the power supply.
-
Connect the terminal clamps (7) to your car battery. Connect the red positive clamp to the positive terminal of the car battery first and then connect the black negative clamp to the negative terminal. Ensure a secure connection of the terminal clamps.
-
Check the cold start current of your battery in CCA (cold cranking ampere). This value is usually printed on the battery. If the value is not printed on the battery, contact your dealer/manufacturer for more information. If you cannot find out the value, you may use the following reference values: Car batteries (36 - 100 Ah): 500 - 800 CCA, car batteries (> 100 Ah): 800 - 999 CCA, solar batteries: 300 - 500 CCA.
-
Press the CCA button (6) repeatedly until the value of your battery is being displayed. An acoustic signal sounds with each press of the button. The following values, which are in conformity with SAE standard, are available:
6V:150,200,250,300,350,400,450,500
12V:300,400,500,600,700,800,900,1000
Refer to the conversion table below in regard to cold start current values.
Conversion table of DIN/SAE/IEC/EN standards Cold start current values in CCA (Cold Cranking Ampere)
DIN SAE IEC EN
85 150 95 140
110200130180
140 250 160 230
170 300 195 280
200350225330
225400260360
255450290420
280500325480
310550355520
335600390540
365 650 420 600
395700450640
420750485680
450 800 515 760
480 850 550 790
505900580860
535 950 615 900
560 1000 645 940

The values in the table are for reference and not binding. In case of doubt, contact your dealer/manufacturer where you have bought the car battery.
- The digital display (2) of the battery tester shows the charging status. If the charging status is smaller than the battery value (12 V for 12 V batteries, 6 V for 6 V batteries), the battery must be charged. If charging does not result in a value higher than the battery value (12 V / 6 V), the battery is defective. If there is no value shown in the digital display (empty display), check for proper contact of the terminal clamps and for correct polarity (+/-). If all is correct as intended, but the digital display does not show anything, the battery is defective.
- Press the LOAD button (5) to start the battery load test. A beep sounds and the test starts. The test will take approx. 10 seconds. After that, a beep sounds indicating the completion of the test. After completion of the battery load test, the LED display (1) will show GOOD, WEAK, or BAD according to the battery status. See the table "Battery load test analysis" below. The LED display remains until you press any of the buttons on the battery tester or disconnect one of the terminal clamps from the battery.
- If the test results in a battery charge of less than 12V (for 12V batteries) or less than 6V (for 6V batteries), the digital display will show “- L -”. The battery must be charged in such a case. See bulletin 5 (e.g. battery defective, bad contact at the terminal clamps), if charging does not result in a satisfactory value. If the test results in a battery charge of more than 18.5V (for 12V batteries) or more than 9V (for 6V batteries), the digital display will show “- OL -”. This indicates that the battery is overcharged and that the load test cannot be performed.
- Remove the terminal clamps after testing. First disconnect the negative clamp and then disconnect the positive clamp.

If "Err" appears in the digital display when performing the load test, the battery tester is defective or the battery voltage is too low.
After having performed the load test five times in a row, the digital display will display "OL-L" if pressing the LOAD button one more time. In such a case, the terminal clamps must be disconnected from the battery and then be reconnected, as the battery tester will not work otherwise.
If the temperature of the battery tester is too high, the digital display will display the internal temperature of the battery tester in ^ C . The battery tester will not be ready for use in such a case. Once the battery tester has cooled down, it will be ready for use again automatically.
Effect of cold temperatures
Due to the chemical composition of car batteries, test results for a cold battery will be lower than those for a warm battery. If the internal temperature of the car battery is too low (below 4.4^ ), such effect must be compensated.
For example:
The cold start current of the car battery is 800 CCA and the internal temperature is approx. 1.6^ . That accounts for approx. 70% of the cold start current. 800CCA × 70% = 560CCA . See picture below. To compensate for the temperature difference to the CCA value, refer to the following picture that shows the approximate values.

Internal temperature of the car battery ^ C
Conduct the measurement based on this percentage value
Battery load test analysis
| LED indicator light Condition of car battery | |
| The GOOD LED lights up. | The battery capacity is okay. |
| The WEAK or BAD LED lights up, but the voltage reading displayed in the digital display remains stable. | Battery capacity not satisfactory. The battery is either defective or insufficiently charged. Determine the acid density of the battery fluid. If you are using a common battery, which is not maintenance-free, determine the acid density with an acid siphon (min. 1.20 to 1.22 kg/l). The value remaining below approx. 1.24 kg/l after charging the battery indicates that the battery is exhausted (after approx. 5 to 8 years). The battery should be replaced. A maintenance-free battery only needs to be charged and does not require checking the acid density. |
| The WEAK or BAD LED lights up, but the voltage displayed in the digital display drops. | The battery might be defective or exhaustively discharged and should therefore be replaced. Write down the voltage that is being displayed after the 10 seconds of battery load testing. A voltage recovery within a few seconds indicates the battery being defective. A slow recovery of the voltage indicates the battery being exhaustively discharged. For more detailed results, we recommend determining the acid density. |
b) Testing the charging circuit (alternator test)
This measurement is to be performed for 12 V systems only. This measurement tests the charging system of the vehicle. A permanently undercharged or overcharged car battery can cause bad battery performance or defects. Perform a load test (as described previously) before conducting this check. If the battery is in good condition, you can continue the measurement.
- Let your vehicle reach normal operating temperature. Then switch off the engine, all connected appliances and any connected battery charger.
- Connect the terminal clamps (7) to your car battery. Connect the red positive clamp to the positive terminal of the car battery first and then connect the black negative clamp to the negative terminal. Ensure a secure connection of the terminal clamps.
- Turn on the engine. Keep your engine running at a slightly high idle speed of approx. 1500 rpm (revolutions per minute).

Do not press the LOAD button when measuring.
- Check the battery voltage reading in the digital display and compare it to the following table. The table is a reference for comparing the voltage value.
| Measuring result Result analysis | |
| The voltage displayed is lower than 13.5 V. | The voltage is insufficient. Check the electric alternator. |
| The voltage displayed is between 13.5 and 15 V. | The charging circuit (electric alternator) is in good condition. |
| The voltage displayed is higher than 15 V. | The voltage is too high. Check the electric alternator. |
- Switch on the upper beam headlights and set the fan to the highest setting. Repeat steps 3 and 4. The voltage reading should not change more than by 0.1 to 0.3 Volts (V). In such a condition, the charging circuit is in good condition.
- Remove the terminal clamps after testing. First disconnect the negative clamp and then disconnect the positive clamp.
c) Starter motor test
This measurement is to be performed for 12V systems only. This measurement determines whether the starter draws too much current, which aggravates starting and reduces the lifespan of the car battery. Make sure to perform the battery load test before conducting the starter test. Only if the car battery is in good condition can the starter test be performed. Observe the voltage value determined during the battery load test.
- Let your vehicle reach normal operating temperature. Switch off the engine, all connected appliances and any connected battery charger.
- Connect the terminal clamps (7) to your car battery. Connect the red positive clamp to the positive terminal of the car battery first and then connect the black negative clamp to the negative terminal. Ensure a secure connection of the terminal clamps.
- Apply the voltage value determined during the battery load test to the starter test table below. The next lower cold start voltage is applicable for vehicles featuring an engine with a displacement of more than 5,000 ccm. For example: If the voltage determined during battery load test accounts for 11 V, use 10.3 V as minimum start voltage.
Starter test table (values in Volts)
Load voltage 10.4 10.6 10.8 11.0 11.2 11.4 11.6 11.8
Minimum starting voltage
9.7 10.0 10.3 10.6 10.9 11.2 11.4 11.6
- Start the engine and read the voltage value displayed on the digital display during the starting procedure. Compare the value to the starter test table. If the value is below the minimum start voltage stated above, the starter draws too much current. A voltage below 9V indicates current being drawn at a rate that could damage the car battery. Too high current could be caused by bad cable connections or a defective starter. It is also possible that the car battery is too small for the engine.
- Remove the terminal clamps after testing. First disconnect the negative clamp and then disconnect the positive connector.
9. NOTES ON CAR BATTERIES
- The starting force (capacity) of a fully charged battery drops to below 70% in case of temperatures below zero.
- Most of the damage caused to lead acid batteries is because of overload.
- Warmer batteries charge faster than cold batteries.
- Every battery discharges itself. The discharge current of maintenance-free batteries is one of the lowest.
- Batteries that have not been charged for longer periods of time easily sulfate (sulfur deposits on the plates), resulting in a loss of capacity.
- A charged, faultless battery features an idle speed voltage of 12.7V or more. A faulty or discharged battery features an idle speed voltage of 10.5V or less.
10. MAINTENANCE AND CLEANING
- Do not use any abrasive or chemical cleaners.
- Disconnect the terminal clamps from the car battery before each cleaning.
- Do not open the device. Apart from occasional cleaning, the device is maintenance-free.
- Do not immerse the device in water.
- Use a dry and soft cloth for cleaning.
- Make sure to clean the terminal clamps regularly. Remove any existing battery acid from the terminal clamps immediately in order to avoid corrosion.
- Remove any existing terminal grease and dirt from the terminal clamps in order to ensure good contact for the tests.
11. DISPOSAL

Electronic devices are recyclable waste and must not be disposed of in the household waste.
At the end of its service life, dispose of the product in accordance with applicable regulatory guidelines.
You thus fulfil your statutory obligations and contribute to the protection of the environment.
12. TECHNICAL DATA
Operating voltage 6 or 12 V/DC via car battery
(lead acid and non-maintenance models)
Digital display 4-digit
LED indicator lights. 3
Acoustic indicator yes
Voltage range 4.5 to 18.5 V/DC
Cable length approx. 50 cm with terminal clamps
Operating conditions. 0 to +50^, < 80% RH
Storage conditions. -10 to +50^, < 85% RH
Dimensions (W x H x D) 75 x 32 x 175 mm
Weight 281g
Page
Chere cliente, cher client,
France (email): technique@conrad-france.fr
Suisse:
www.conrad.ch
www.biz-conrad.ch
2. EXPLICATION DES SYMBOLES, INDICATIONS SIGNALÉTIQUES

Dimensions (L x H x P) 75 x 32 x 175 mm
Poids. 281 g
Pagina
2. VERKLARING VAN DE SYMBOLEN, OPSCHRIFTEN

Copyright 2016 by Conrad Electronic SE.

Legal notice
This is a publication by Conrad Electronic SE, Klaus-Conrad-Str. 1, D-92240 Hirschau (www.conrad.com).
All rights including translation reserved. Reproduction by any method, e.g. photocopy, microfilming, or the capture in electronic data processing systems require the prior written approval by the editor. Reprinting, also in part, is prohibited. This publication represents the technical status at the time of printing.
Copyright 2016 by Conrad Electronic SE.

Colofon
Copyright 2016 by Conrad Electronic SE.