
SM - Battery charger Absaar - Free user manual and instructions
Find the device manual for free SM Absaar in PDF.
| Product type | Battery charger |
| Brand | Absaar |
| Model | SM |
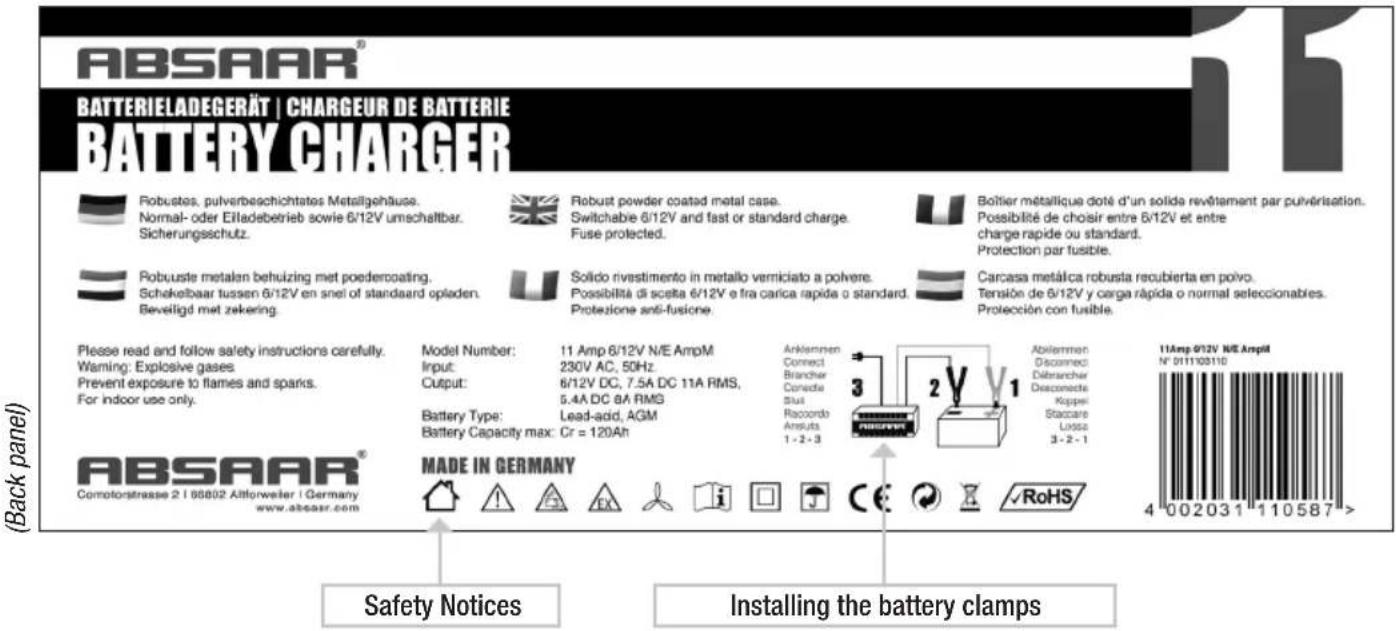
| Input voltage | 230 V AC, 50 Hz |
| Output voltage | 6 V or 12 V DC (selectable) |
| Output current | 7.5 A DC (11 A RMS) or 5.4 A DC (8 A RMS) depending on model |
| Maximum battery capacity | 120 Ah (for 12 V battery) |
| Compatible battery type | Lead-acid, AGM |
| Main features | Standard and fast charge, 6/12 V selection, fuse protection, ammeter, LED indicators (red, yellow, green), jump-start function (on certain models) |
| Charger type | Standard or automatic depending on model (A/M or N/E switch) |
| LED indicators | Red (reverse polarity or low battery), Yellow (charging), Green (full battery or maintenance charge) |
| Fuse | Replaceable flat fuse (same amperage) |
| Warranty | 2 years (manufacturing or material defects) |
| Safety standards | EN 60335-2-29, EN 55014-1, EN 61000-3-2 |
| Maintenance | Clean with a dry cloth; do not use solvents |
| Repairability | Fuse replaceable by user; other repairs by a professional |
| Included accessories | Battery clamps (red and black) with protections, spare fuse |
Frequently Asked Questions - SM Absaar
User questions about SM Absaar
0 question about this device. Answer the ones you know or ask your own.
Ask a new question about this device
Download the instructions for your Battery charger in PDF format for free! Find your manual SM - Absaar and take your electronic device back in hand. On this page are published all the documents necessary for the use of your device. SM by Absaar.
USER MANUAL SM Absaar
Read these instructions before using the charger.

MANUAL DEL USUARIO | IMPORTANTE
This user manual is designed to cover all of Absaar range of chargers and their typical functions. Your charger may vary in the values (Ah, A, V, etc) but the basic features and functions are the same. Please read the appropriate section for an explanation of a particular function like the A/M or N/E switch etc. The exact details about the charging voltage and current, and maximum battery capacity can be found on the packaging and on the products rating label.

INTRODUCCIÓN
Explanation of Symbols:
ES
EN WARNING: Explosive gases. Prevent flames and sparks!

Disconnect the supply before making or breaking the connections to the battery.
EN Class II Double Insulation.
EN Provide adequate ventilation during charging!
natural_image
Silhouette of a modern city skyline with numerous high-rise buildings (no visible text or signage)natural_image
Black-and-white silhouette of a modern city skyline with numerous skyscrapers and bridges (no text or symbols visible)MADE IN GERMANY
www.absaar.com
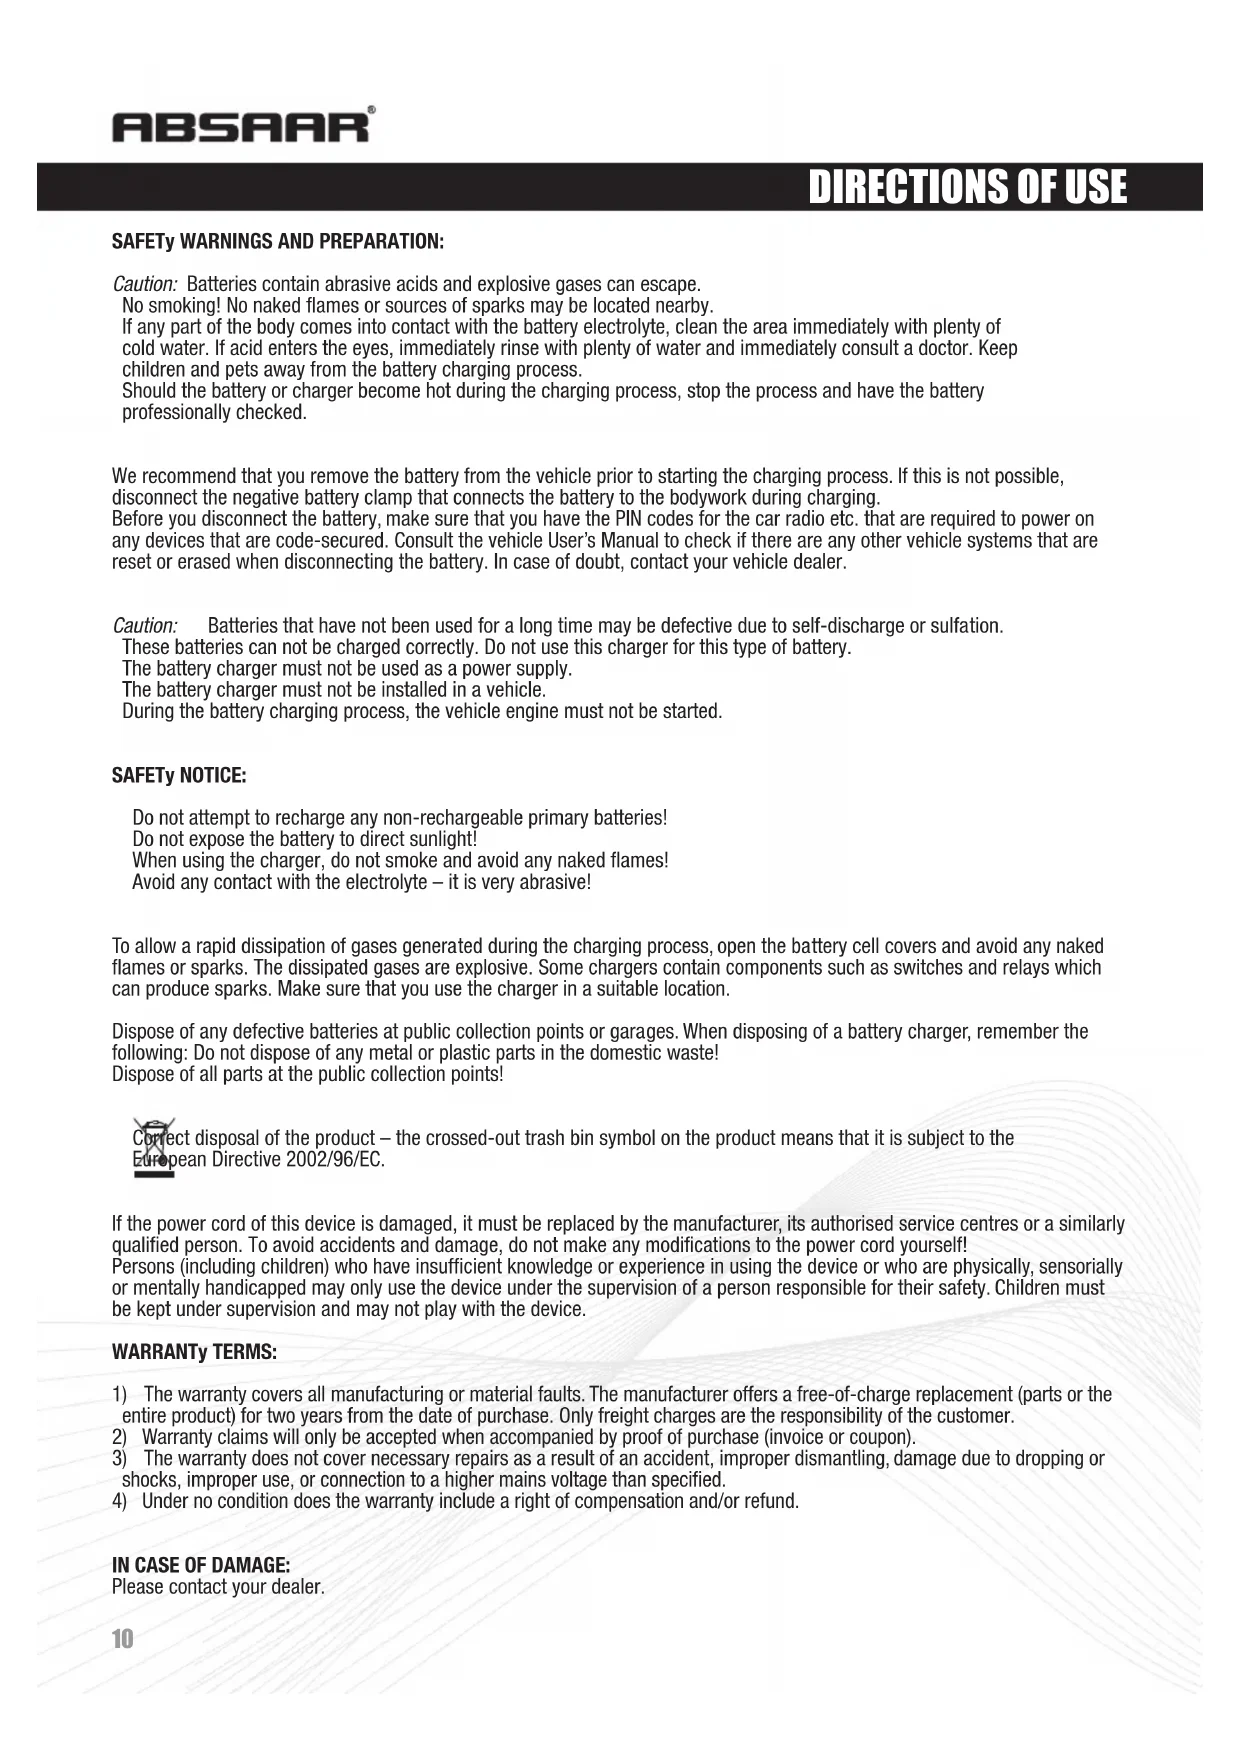
SAFETY WARNINGS AND PREPARATION:
Caution: Batteries contain abrasive acids and explosive gases can escape.
No smoking! No naked flames or sources of sparks may be located nearby.
If any part of the body comes into contact with the battery electrolyte, clean the area immediately with plenty of cold water. If acid enters the eyes, immediately rinse with plenty of water and immediately consult a doctor. Keep children and pets away from the battery charging process.
Should the battery or charger become hot during the charging process, stop the process and have the battery professionally checked.
We recommend that you remove the battery from the vehicle prior to starting the charging process. If this is not possible, disconnect the negative battery clamp that connects the battery to the bodywork during charging.
Before you disconnect the battery, make sure that you have the PIN codes for the car radio etc. that are required to power on any devices that are code-secured. Consult the vehicle User's Manual to check if there are any other vehicle systems that are reset or erased when disconnecting the battery. In case of doubt, contact your vehicle dealer.
Caution: Batteries that have not been used for a long time may be defective due to self-discharge or sulfation.
These batteries can not be charged correctly. Do not use this charger for this type of battery.
The battery charger must not be used as a power supply.
The battery charger must not be installed in a vehicle.
During the battery charging process, the vehicle engine must not be started.
SAFETY NOTICE:
Do not attempt to recharge any non-rechargeable primary batteries!
Do not expose the battery to direct sunlight!
When using the charger, do not smoke and avoid any naked flames!
Avoid any contact with the electrolyte – it is very abrasive!
To allow a rapid dissipation of gases generated during the charging process, open the battery cell covers and avoid any naked flames or sparks. The dissipated gases are explosive. Some chargers contain components such as switches and relays which can produce sparks. Make sure that you use the charger in a suitable location.
Dispose of any defective batteries at public collection points or garages. When disposing of a battery charger, remember the following: Do not dispose of any metal or plastic parts in the domestic waste!
Dispose of all parts at the public collection points!

ct disposal of the product – the crossed-out trash bin symbol on the product means that it is subject to the bean Directive 2002/96/EC.
If the power cord of this device is damaged, it must be replaced by the manufacturer, its authorised service centres or a similarly qualified person. To avoid accidents and damage, do not make any modifications to the power cord yourself!
Persons (including children) who have insufficient knowledge or experience in using the device or who are physically, sensorially or mentally handicapped may only use the device under the supervision of a person responsible for their safety. Children must be kept under supervision and may not play with the device.
WARRANTy TERMS:
1) The warranty covers all manufacturing or material faults. The manufacturer offers a free-of-charge replacement (parts or the entire product) for two years from the date of purchase. Only freight charges are the responsibility of the customer.
2) Warranty claims will only be accepted when accompanied by proof of purchase (invoice or coupon).
3) The warranty does not cover necessary repairs as a result of an accident, improper dismantling, damage due to dropping or shocks, improper use, or connection to a higher mains voltage than specified.
4) Under no condition does the warranty include a right of compensation and/or refund.
IN CASE OF DAMAGE:
Please contact your dealer.
PACKAGE CONTENTS:


The following contents are not specific to your device. They apply to all Absaar Consumer and Professional devices for a general-purpose description and understanding. Details of how to use your device are provided on the device packaging.
Before starting the charging process, make sure that all switches on your charger have been set according to the battery's specifications.

natural_image
Grid of 16 white industrial and recreational vehicle icons on black background, no text or symbols presentAPPLICATIONS
Depending on the capacity of your Absaar charger you may charge batteries of different vehicle categories. The pictograms on the packaging illustrate the types of vehicle and battery types that are compatible with your charger.
Caution: Only use your charger to charge batteries that correspond to the voltage and capacity of your charger. Please check the technical specifications of your battery or contact your battery or vehicle manufacturer in case of doubt. We assume no liability when charging unsuitable batteries.
DESCRIPTION: AMPERAGE | VOLTAGE | CAPACITY
Ampere: Your device and its packaging show the maximum current value that the charge can supply to the battery. This depends on the capacity of the battery you are going to charge. It decreases during the charging process.
Voltage: The voltage of the battery that you want to charge must correspond with the battery charger's voltage. Otherwise the charger may not be connected to the battery. Connecting the battery to the charger when the voltages do not match will cause battery damage.
Capacity: If the Ah rating of the battery falls within the Ah range of the charger, it is possible to fully recharge the empty battery within 8 to 10 hours. If the battery has a higher Ah rating you may still charge it but the charging process will take significantly longer.
CHARGING TYPE
Absaar manufactures two types of battery chargers: standard and automatic battery chargers.

Standard:
The charger must be disconnected from the battery once the charging process has finished. Please monitor the charging process and stop it manually when the battery is charged. If the charger remains connected to the battery for too long the battery will be damaged.

Automatic:
Once the charging process has finished, the charger will switch to trickle charge mode and does not have to be manually disconnected from the battery.
The trickle charge mode allows you to leave the charger connected to the battery as long as you want, making it the perfect choice for keeping the battery at a 100% charging level during the winter season when not using the vehicle.
INSTALLING THE BATTERY CLAMPS
1- Battery clamp (+), red:
Slide the red clamp insulation over the red (+) charger cable. Connect the charger cable to the battery clamp. Slide the clamp insulation back over the battery clamp.
2- Battery clamp (-), black:
Slide the black clamp insulation over the black (-) charger cable. Connect the charger cable to the battery clamp. Slide the clamp insulation back over the battery clamp.

Connecting the charger to the battery poles (follow this sequence):
- Connect the red battery clamp (+) to the positive (+) battery pole.
- Connect the black battery clamp (-) to the negative (-) battery pole.
- Use the power cord to connect the charger to a wall outlet.
To stop the charging process, perform the following steps in order:
- Unplug the power cord of the charger from the wall outlet.
- Disconnect the black battery clamp (-) from the negative (-) battery pole.
- Disconnect the red battery clamp (+) from the positive (+) battery pole.
CURRENT SELECTOR SWITCH
If your charger does not have a current selector switch:
The charger will detect the required battery charging current automatically.

A/M Switch (Automobile / Motorbike):
Depending on the battery charger type it may feature an AUTOMOBILE – MOTORBIKE switch. The Motorbike position will supply a lower charging current to charge batteries with a capacity between 5 and 15 Ah.
N/E Switch (Normal / Express Charge):
Depending on the battery charger type it may feature an NORMAL – EXPRESS switch. Setting the switch to the NORMAL position will charge the battery with a lower charging current, resulting in a longer charging time. This position is intended for batteries with very low capacities. Normal charging will extend the battery life. The EXPRESS position will supply a charging current up to the maximum current.
VOLTAGE SELECTOR SWITCH
If your charger does not have a voltage selector switch:
The charger will only supply the specified voltage.

Voltage Selector Switch (6V / 12V):
The 6 Volt / 12 Volt selector switch allows you to charge 6 Volt or 12 Volt batteries.
Please always make sure that the charger voltage and battery voltage match.
Check the battery voltage before starting the charging process. 3-cell batteries typically have a nominal voltage of 6 V. 6-cell batteries typically have a nominal voltage of 12 V.

Voltage Selector Switch (12V / 24V):
The 12 Volt / 24 Volt selector switch allows you to charge 12 Volt or 24 Volt batteries.
Please always make sure that the charger voltage and battery voltage match.
Check the battery voltage before starting the charging process.
6-cell batteries typically have a nominal voltage of 12 V.
12-cell batteries typically have a nominal voltage of 24 V.
CHARGING CURRENT INDICATOR FOR STANDARD CHARGERS


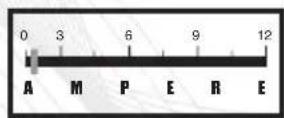
Ammeter:
The ammeter indicates the battery charging current. The charging current supplied to the battery depends on the battery status. The charging current will thus never be constant during the entire charging process but will decrease gradually as the charging level increases. When connecting the charger to an empty battery, the charging current will be high. The ammeter needle will indicate a value on the right of the gauge.
As the charging level increases, the charging current will decrease. The ammeter needle moves to the left of the gauge, indicating that the charging process has finished. The battery is fully charged. The ammeter is only an indicator for monitoring the charging cycle.
CHARGING CURRENT INDICATOR FOR STANDARD CHARGERS
LED Display:


Left LED lights up red:
The battery charger clamps have been connected with the correct polarity (+, -). The charging process will start as soon as the charger is connected to the mains. LED 1 will light up during the entire charging process.
Centre LED lights up yellow:
The charging process has started. LED 2 will also light up during the entire charging process.
Right LED lights up green:
The battery is fully charged.
CHARGING CURRENT INDICATION FOR AUTOMATIC CHARGERS
BATTERY TEST
Important: The device must not be connected to the mains using the power cord when performing the battery test.

Battery test
- Connect the red battery clamp (+) to the positive (+) battery pole.
- Connect the black battery clamp (-) to the negative (-) battery pole.
- Red LED – lights up immediately; the battery test lasts approx. 5 seconds.
- Battery test result:
Green LED: Charging level OK – lit. The battery is sufficiently charged.
Red LED: Charging level low – lit. The battery is discharged. Recharging of the battery is required! - Both LEDs (red and green) off: Battery clamps inverted!
If the battery test and charging are not possible, please: Check the battery clamp polarity (+/-) on the battery poles. Connect the battery clamps with the correct polarity. The battery test will be repeated automatically. See steps 3 to 5.

Charging the battery
CHARGING THE BATTERY
Once the battery clamps have been connected with the correct polarity (+, -) and you have connected the power cord to the mains, the charging process starts.
Note:
The no-load voltage of a discharged 12V battery must be at least 3.8 V in order for the charging process to start.
- Connect the charger to the mains using the power cord.
- The battery test is disabled while the battery is being charged.
- The yellow and green LEDs will light up during the entire charging process.
During charging, the battery charging level is monitored by an electronic circuit.
GREEN LED (bottom): The charger is connected to the mains.
YELLOW LED: The battery is being charged.
GREEN LED (top): The battery is fully charged, the charger automatically toggles to a trickle charge.
REPLACING THE FUSE

Unplug the power cord from the mains and disconnect the battery clamps from the battery before replacing the blade-type fuse.
The fuse is visible on the front panel.
Remove the defective fuse (fuse wire broken) and replace it with a fuse with the same amperage.
To remove the fuse, insert a screwdriver into the slot between the fuse and the fuse holder. Use the screwdriver as a lever.
DO NOT APPLY BRUTE FORCE WHEN REPLACING THE FUSE!
A defective fuse is excluded from the warranty.
A spare fuse is supplied with the device. You can also use standard automotive fuses as replacement fuses.

„JUMP-START“
The charger can support a weak or discharged battery when starting the car engine.
- Select the Jump-Start switch position.
- Connect the charger to the battery and to the mains as described in the User's Manual.
• We recommend that you first charge the battery for approx. 10 to 15 minutes.
- Keep the charger connected to the battery and to the mains when starting the engine.
- Start the car engine normally.
- The charger is protected against overload when starting the engine.
Depending on the current load, an automatic circuit-breaker will interrupt the circuit after approx. 10 seconds.
- We recommend that you keep the charger connected to the battery for approx. 10 to 15 minutes after starting the engine in order to minimise any voltage spikes.
- Jump-start duration is set automatically to 1 to 10 seconds.
After completing the jump-start process a circuit-breaker cuts out automatically. To perform another jump start, wait for 5 minutes and reset the circuit-breaker.

natural_image
Black-and-white silhouette of a modern city skyline with numerous skyscrapers and buildings (no text or symbols visible)MADE IN GERMANY
www.absaar.com
If the power cord of this device is damaged, it must be replaced by the manufacturer, its authorised service centres or a similarly qualified person. To avoid accidents and damage, do not make any modifications to the power cord yourself!
Persons (including children) who have insufficient knowledge or experience in using the device or who are physically, sensorially or mentally handicapped may only use the device under the supervision of a person responsible for their safety. Children must be kept under supervision and may not play with the device.
TÉRMINOS DE GARANTÍA:
natural_image
Grid of 16 white industrial and recreational vehicle icons on black background, no text or symbols presentAPLICACIONES
natural_image
Black-and-white silhouette of a modern city skyline with numerous skyscrapers (no visible text or signage)MADE IN GERMANY
www.absaar.com
AVERTISSEMENTS DE SÉCURITÉ ET PRÉPARATION:
CONDITIONS DE GARANTIE:
natural_image
Grid of 16 white industrial and recreational vehicle icons on black background, no text or symbols presentAPPLICATIONS
Commutateur N/E (Charge Normale / Express):
REPLACEMENT DU FUSIBLE

natural_image
Black-and-white silhouette of a modern city skyline with numerous skyscrapers (no text or symbols visible)MADE IN GERMANY
www.absaar.com
natural_image
Grid of 16 white industrial and recreational vehicle icons on black background, no text or symbols presentAPPLICAZIONI
natural_image
Black-and-white silhouette of a modern city skyline with numerous skyscrapers and buildings (no text or symbols visible)MADE IN GERMANY
www.absaar.com
VEILIGHEIDSWAARSCHUWINGEN EN VOORBEREIDING
natural_image
Grid of 16 white industrial and recreational vehicle icons on black background, no text or symbols presentTOEPASSINGEN
Linker led brandt rood:
natural_image
Black-and-white silhouette of a modern city skyline with numerous skyscrapers and buildings (no text or symbols visible)MADE IN GERMANY
www.absaar.com
CE
KONFORMITÄTSERKLÄRUNG / DECLARATION OF CONFORMITY / DECLARACIÓN DE CONFORMIDAD DECLARATION DE CONFORMITE / DICHIARAZIONE CE DI CONFORMITÀ / CONFORMITEITSVERKLARING
Wir, We, El fabricante, Nous, Il sottoscritto, Wij: ABSAAR GmbH
Comotorstr. 2, D-66802 Altforweiler
erklären in alleiniger Verantwortung, daß das Produkt declare under our sole responsibility that the product declara bajo su total responsabilidad que el producto déclarons sous notre seule responsabilité que le produit dichiara, sotto la sua sola responsabilità, che il prodotto verklaren, onder onze exclusieve aansprakelijkheid, dat het product
Typ/Type/ Tipo/Type/ Tipo/Type: Battery Charger, Batterieladegerät, Cargador de baterías,
Following the provisions of Directive(s):
Conformément aux dispositions de(s) Directive(s):
2006/95/EC, 2004/108/EC

- MANUAL DEL USUARIO | IMPORTANTE
- INTRODUCCIÓN
- MADE IN GERMANY
- www.absaar.com
- SAFETY WARNINGS AND PREPARATION:
- SAFETY NOTICE:
- WARRANTy TERMS:
- IN CASE OF DAMAGE:
- APPLICATIONS
- DESCRIPTION: AMPERAGE | VOLTAGE | CAPACITY
- CHARGING TYPE
- Standard:
- Automatic:
- INSTALLING THE BATTERY CLAMPS
- 1- Battery clamp (+), red:
- 2- Battery clamp (-), black:
- Connecting the charger to the battery poles (follow this sequence):
- To stop the charging process, perform the following steps in order:
- CURRENT SELECTOR SWITCH
- VOLTAGE SELECTOR SWITCH
- CHARGING CURRENT INDICATOR FOR STANDARD CHARGERS
- Ammeter:
- CHARGING CURRENT INDICATION FOR AUTOMATIC CHARGERS
- BATTERY TEST
- CHARGING THE BATTERY
- Note:
- REPLACING THE FUSE
- „JUMP-START“
- TÉRMINOS DE GARANTÍA:
- APLICACIONES
- AVERTISSEMENTS DE SÉCURITÉ ET PRÉPARATION:
- CONDITIONS DE GARANTIE:
- REPLACEMENT DU FUSIBLE
- APPLICAZIONI
- VEILIGHEIDSWAARSCHUWINGEN EN VOORBEREIDING
- TOEPASSINGEN
- CE
- KONFORMITÄTSERKLÄRUNG / DECLARATION OF CONFORMITY / DECLARACIÓN DE CONFORMIDAD DECLARATION DE CONFORMITE / DICHIARAZIONE CE DI CONFORMITÀ / CONFORMITEITSVERKLARING
Brand : Absaar
Model : SM
Category : Battery charger