Galileo Smart BK F830 - Cooker FABER - Free user manual and instructions
Find the device manual for free Galileo Smart BK F830 FABER in PDF.
Document temporarily unavailable
The manual is currently being transferred to our new server. It will be accessible again in a few hours. Thank you for your patience.
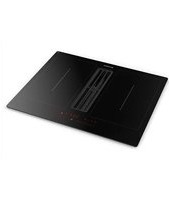
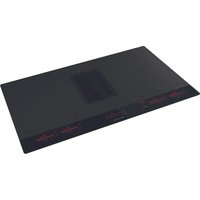
| Product type | Induction cooktop with integrated hood |
| Brand and model | Faber Galileo Smart BK F830 + Kit LL H80 |
| Dimensions (W x D) | 830 x 520 mm |
| Weight | 21 kg |
| Power supply | 220-240 V, 50 Hz ; 380-415 V, 50 Hz (three-phase) ; maximum power 7.62 kW (adjustable from 2.8 to 7.62 kW) |
| Number of cooking zones | 4 induction zones, including 2 flexible zones (bridge) |
| Power per zone | Single zone: 2100 W (Boost 3000 W) ; Bridge zone: 3000 W (Boost 3700 W) |
| Integrated hood | Motor with 9 speeds + 2 intensive, automatic mode, timer, grease and charcoal filtration |
| Main functions | Booster, keep warm, defrost, pause, bridge function, pan detection, timer (1-99 min), child lock, residual heat indicator |
| Controls | Touch controls with power bar 0-9, digital displays, user and installer menu |
| Maintenance and cleaning | Grease filters dishwasher-safe (every 2 months) ; charcoal filter regenerable in dishwasher then oven (every 3-4 months, max 8 cycles) ; clean ceramic glass with scraper and suitable products |
| Safety | Key lock (cleaning 15 seconds), child safety, auto shut-off after 20 seconds without use, pan detection, overheat protection, electronic power management (max 16 A) |
| Spare parts and repairability | Contact after-sales service for any replacement (cable, filter, electronic module) ; error codes (ER03, ER20, etc.) for diagnostics |
| General information | Manual available in several languages ; warranty and CE compliance ; estimated lifespan 10 years |
Frequently Asked Questions - Galileo Smart BK F830 FABER
User questions about Galileo Smart BK F830 FABER
0 question about this device. Answer the ones you know or ask your own.
Ask a new question about this device
Download the instructions for your Cooker in PDF format for free! Find your manual Galileo Smart BK F830 - FABER and take your electronic device back in hand. On this page are published all the documents necessary for the use of your device. Galileo Smart BK F830 by FABER.