
Iris 65 W Link - Range hood EICO - Free user manual and instructions
Find the device manual for free Iris 65 W Link EICO in PDF.
| Product type | Extractor hood |
| Brand | EICO |
| Model | Iris 65 W Link |
| Width (cm) | 65 |
| Power supply | 220-240 V ~ 50 Hz |
| Motor power (W) | 180 (estimate) |
| Lighting | LED spots (professional replacement) |
| Filter type | Washable metal filter + rechargeable activated carbon filter |
| Activated carbon capacity | Approximately 3 kg |
| Minimum distance from cooking surface | 65 cm |
| Installation mode | Wall-mounted (extraction or recirculation) |
| Material | Stainless steel |
| Net weight (kg) | 15 (estimate) |
| Noise level (dB) | 55 (estimate) |
| Power cable | H05VV-F 3x0.75 mm² |
| Filter alarm | Flashing yellow LED after 100 hours of operation |
| Alarm reset | Press for 10 seconds (hood turned off) |
| Metal filter maintenance | Every 2-3 months (hot water and mild detergent) |
| Activated carbon replacement | Approximately every 3 years (depending on usage) |
| Warranty | Refer to after-sales service |
Frequently Asked Questions - Iris 65 W Link EICO
User questions about Iris 65 W Link EICO
0 question about this device. Answer the ones you know or ask your own.
Ask a new question about this device
Download the instructions for your Range hood in PDF format for free! Find your manual Iris 65 W Link - EICO and take your electronic device back in hand. On this page are published all the documents necessary for the use of your device. Iris 65 W Link by EICO.
USER MANUAL Iris 65 W Link EICO
natural_image
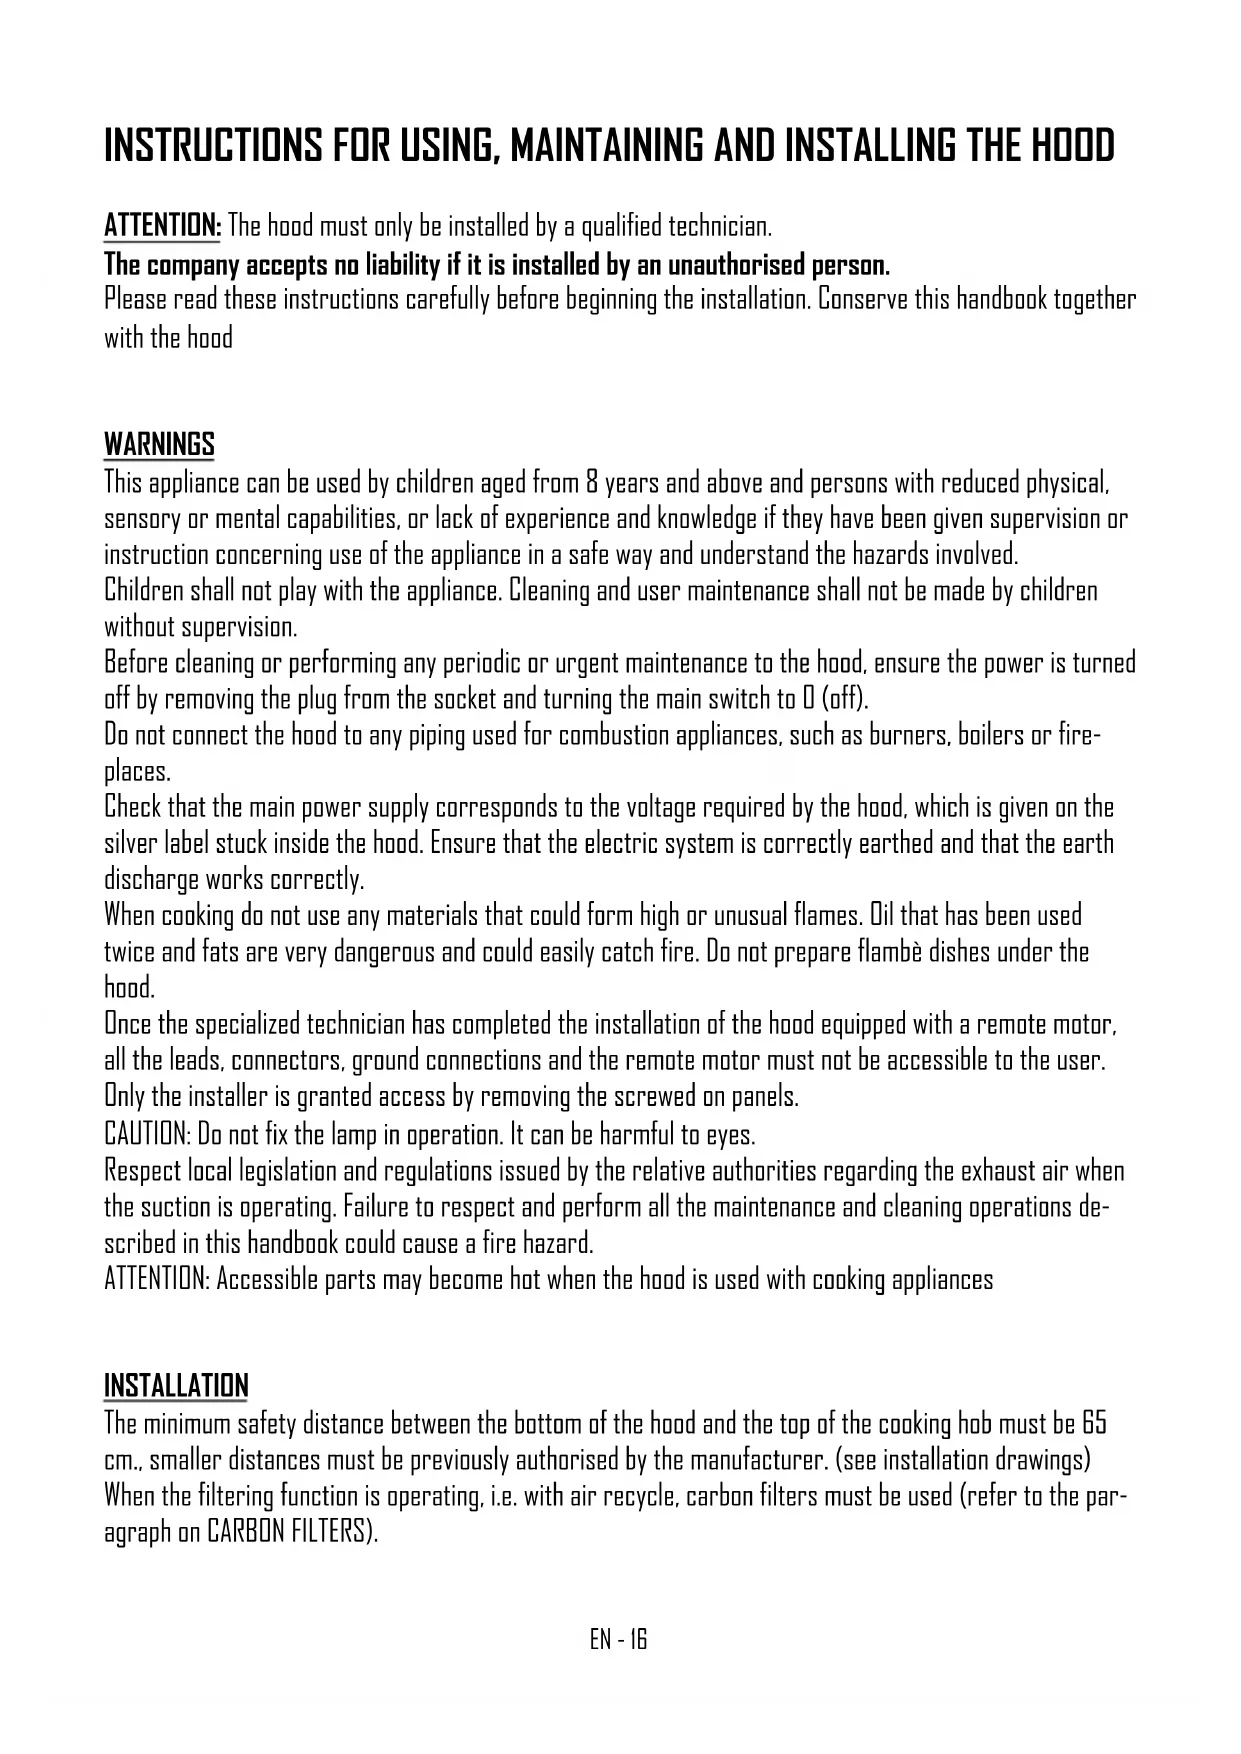
Close-up of a white circular pendant light suspended against a dark ceiling (no text or symbols visible)eico
natural_image
3D rendering of a circular mechanical component with a square frame and central hub, suspended by wires (no text or symbols visible)natural_image
3D rendering of a circular mechanical component with a square cutout and central mounting base (no text or symbols visible)natural_image
3D rendering of a circular mechanical component with a square frame and central hub, suspended by strings (no text or symbols visible)natural_image
3D rendering of a circular mechanical component with a central square frame and black brackets, suspended by vertical lines (no text or symbols visible)natural_image
3D rendering of a circular mechanical component with a square cutout and central mounting base (no text or symbols visible)INSTRUCTIONS FOR USING, MAINTAINING AND INSTALLING THE HOOD
ATTENTION: The hood must only be installed by a qualified technician.
The company accepts no liability if it is installed by an unauthorised person.
Please read these instructions carefully before beginning the installation. Conserve this handbook together with the hood
WARNINGS
This appliance can be used by children aged from 8 years and above and persons with reduced physical, sensory or mental capabilities, or lack of experience and knowledge if they have been given supervision or instruction concerning use of the appliance in a safe way and understand the hazards involved.
Children shall not play with the appliance. Cleaning and user maintenance shall not be made by children without supervision.
Before cleaning or performing any periodic or urgent maintenance to the hood, ensure the power is turned off by removing the plug from the socket and turning the main switch to 0 (off).
Do not connect the hood to any piping used for combustion appliances, such as burners, boilers or fireplaces.
Check that the main power supply corresponds to the voltage required by the hood, which is given on the silver label stuck inside the hood. Ensure that the electric system is correctly earthed and that the earth discharge works correctly.
When cooking do not use any materials that could form high or unusual flames. Oil that has been used twice and fats are very dangerous and could easily catch fire. Do not prepare flambè dishes under the hood.
Once the specialized technician has completed the installation of the hood equipped with a remote motor, all the leads, connectors, ground connections and the remote motor must not be accessible to the user.
Only the installer is granted access by removing the screwed on panels.
CAUTION: Do not fix the lamp in operation. It can be harmful to eyes.
Respect local legislation and regulations issued by the relative authorities regarding the exhaust air when the suction is operating. Failure to respect and perform all the maintenance and cleaning operations described in this handbook could cause a fire hazard.
ATTENTION: Accessible parts may become hot when the hood is used with cooking appliances
INSTALLATION
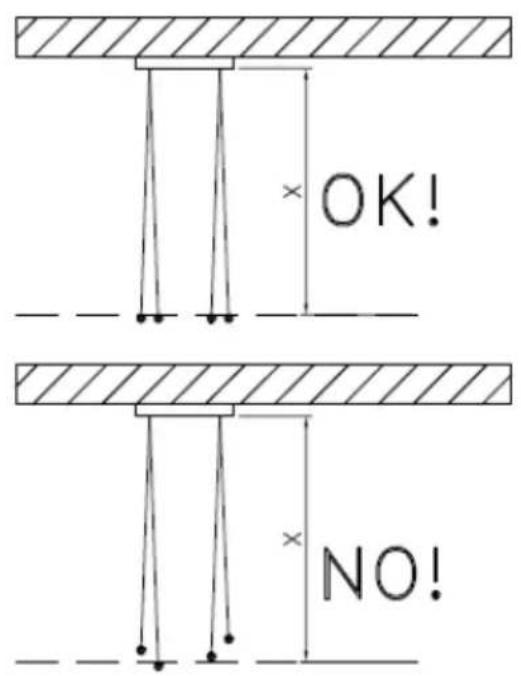
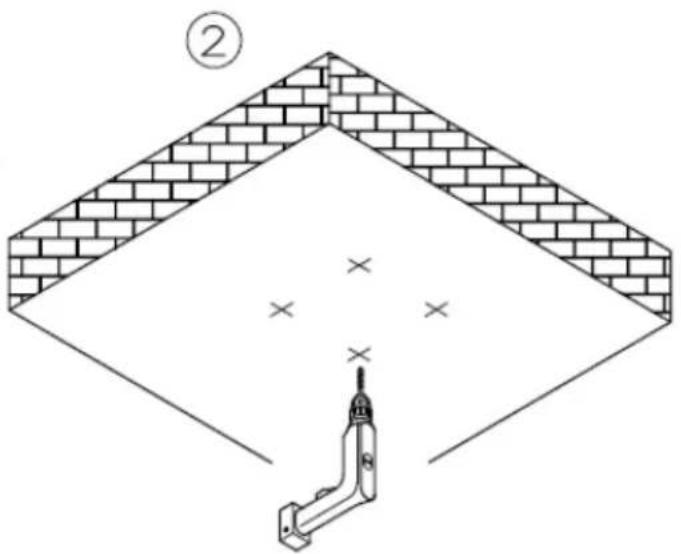
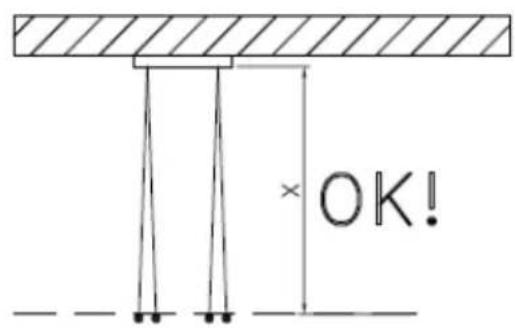
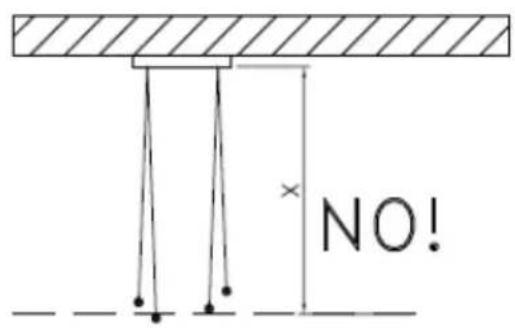
The minimum safety distance between the bottom of the hood and the top of the cooking hob must be 65 cm., smaller distances must be previously authorised by the manufacturer. (see installation drawings) When the filtering function is operating, i.e. with air recycle, carbon filters must be used (refer to the paragraph on CARBON FILTERS).
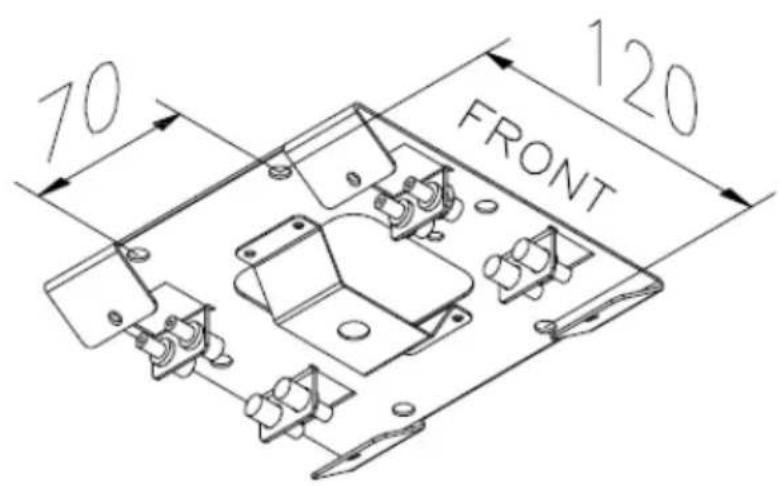
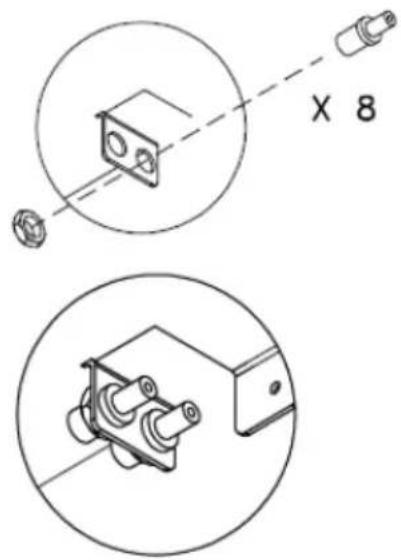
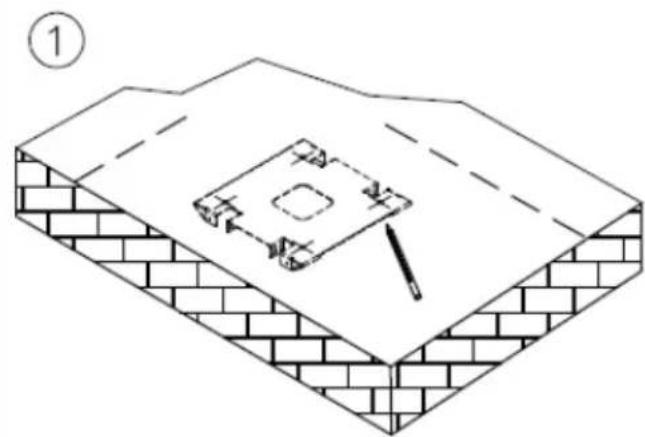
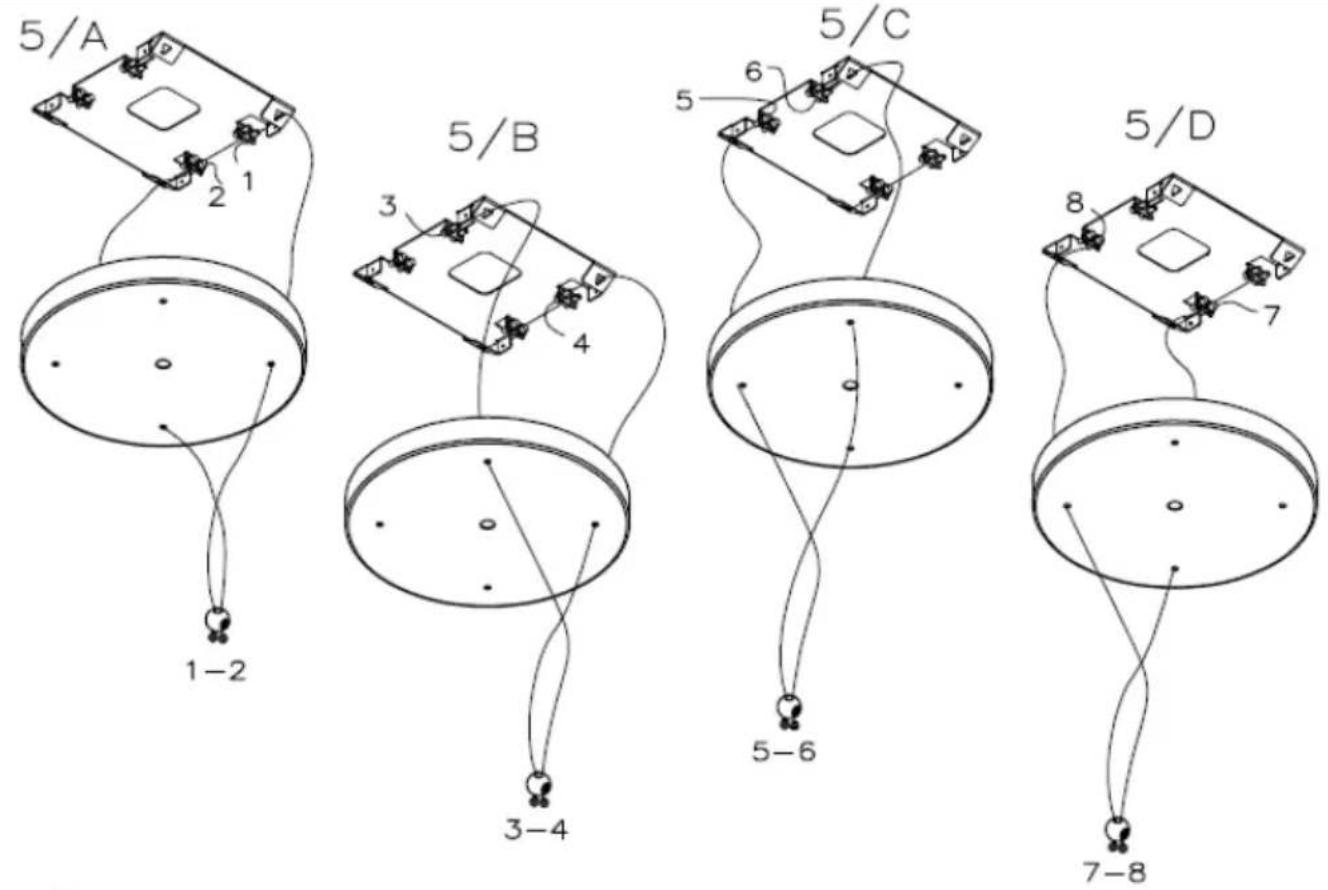
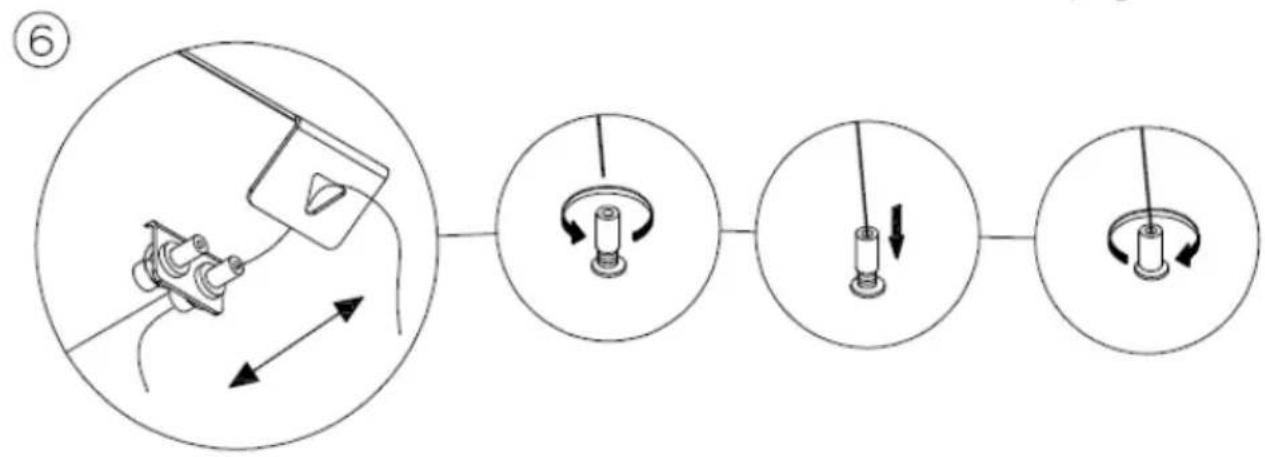
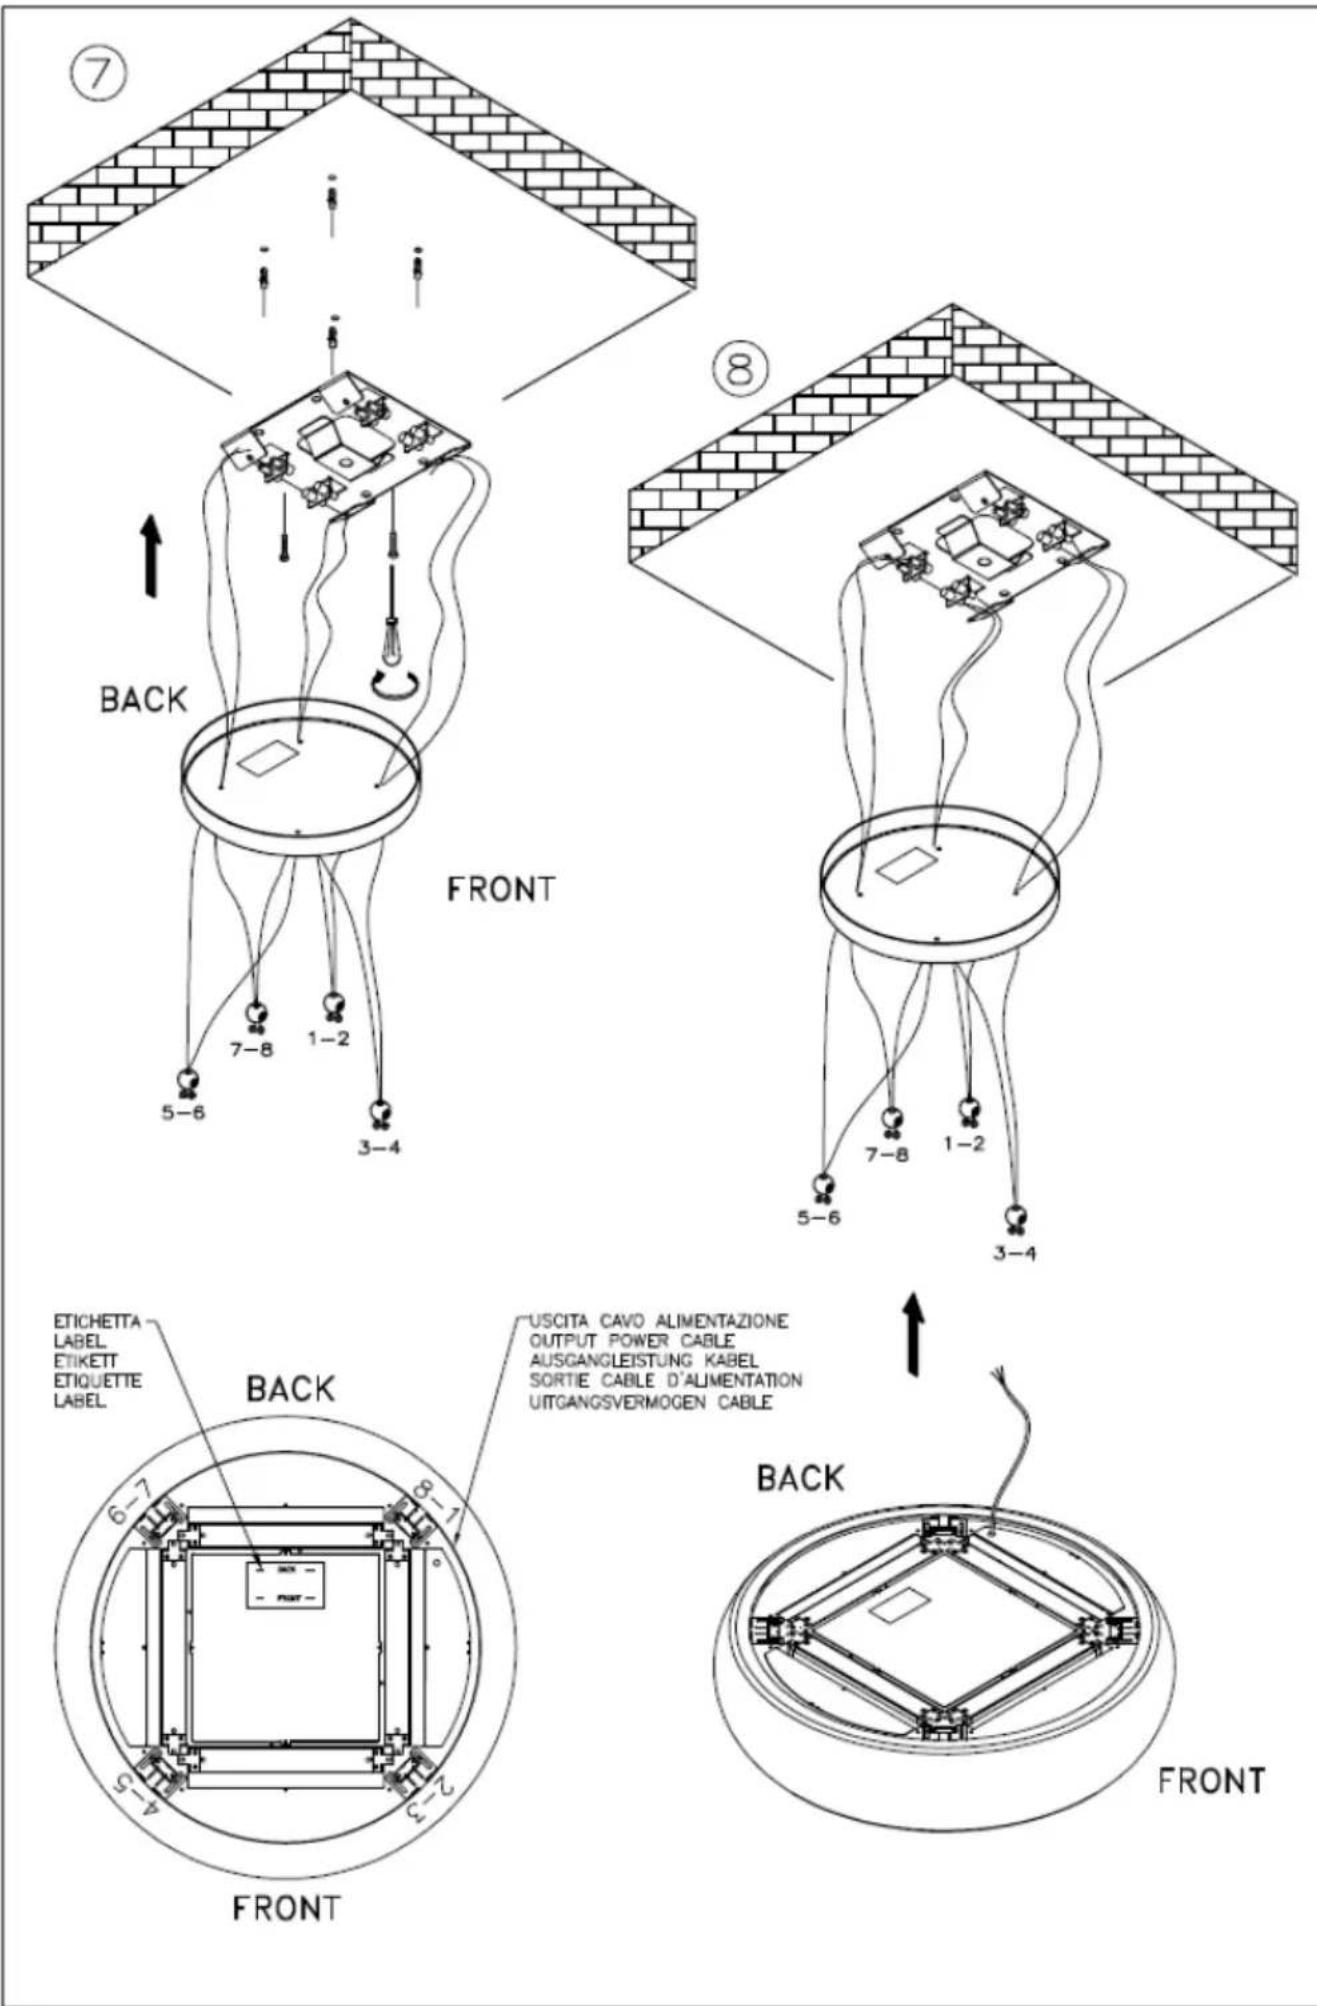
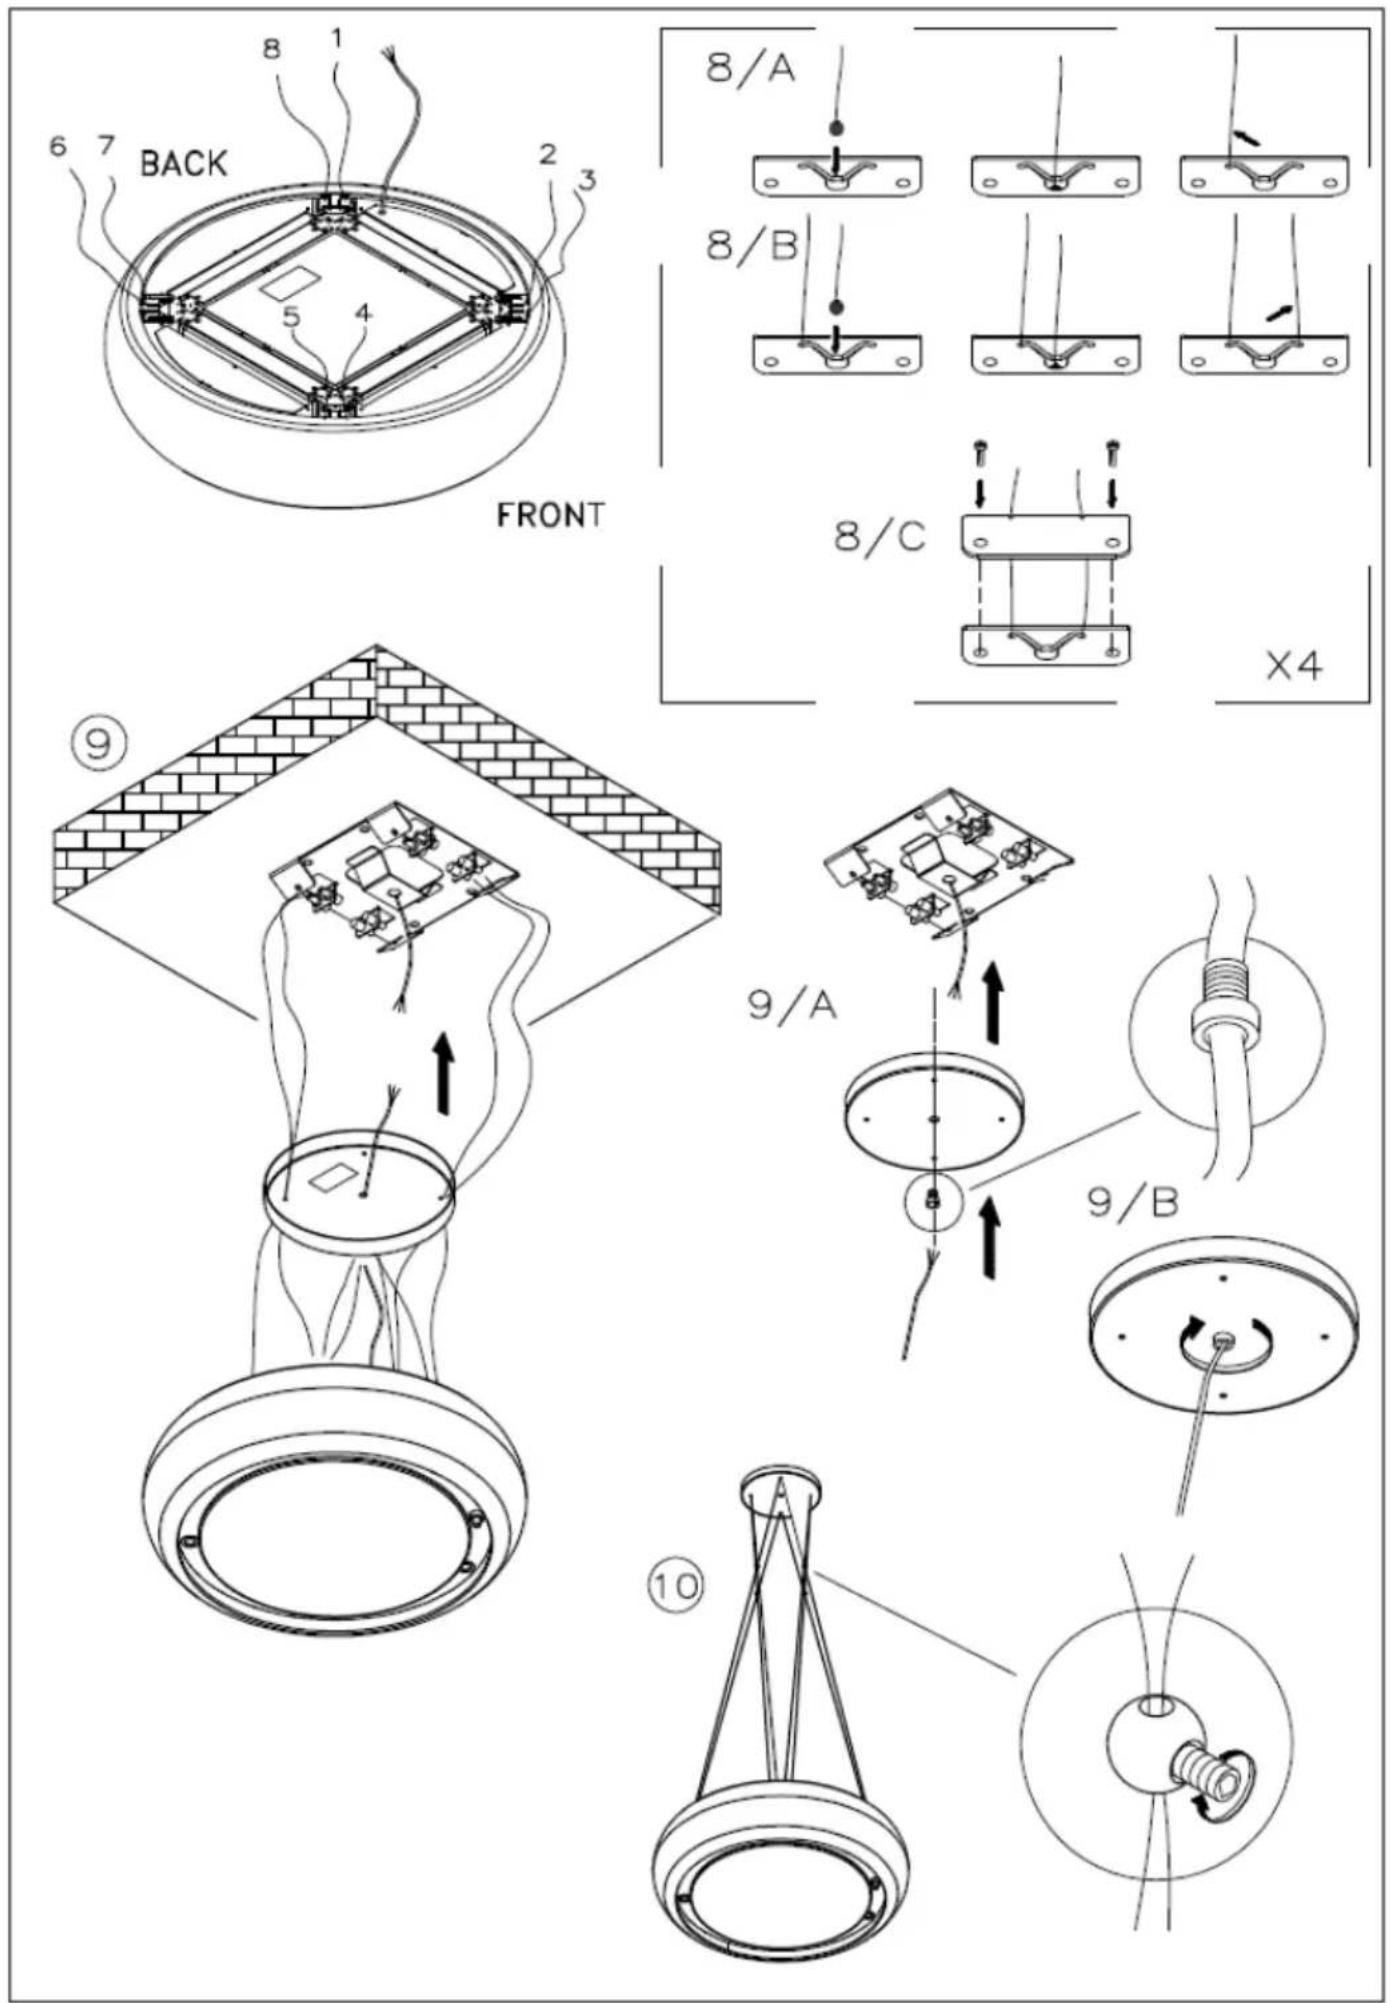
ASSEMBLY INSTRUCTIONS
Attention: Before proceeding with the installation, make sure that the screws and the anchors already supplied, are suitable for the type of wall the hood must be fixed to.
To assemble the hood use the accessories that are supplied and follow the instructions given in the enclosed handbook.
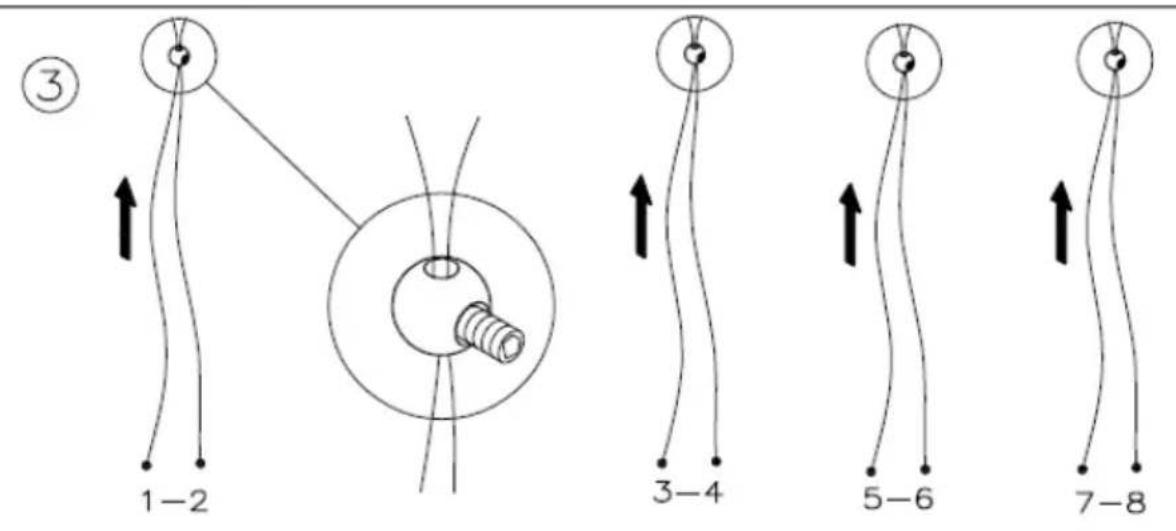
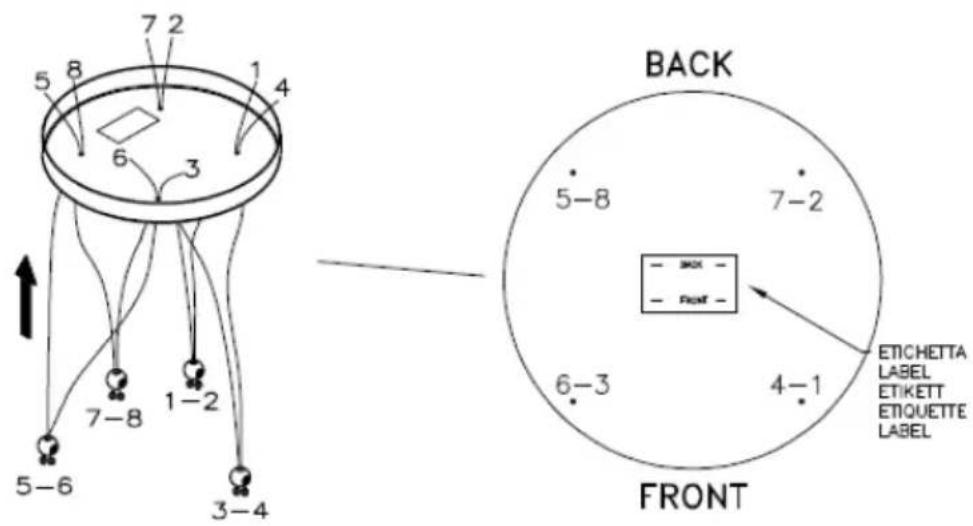
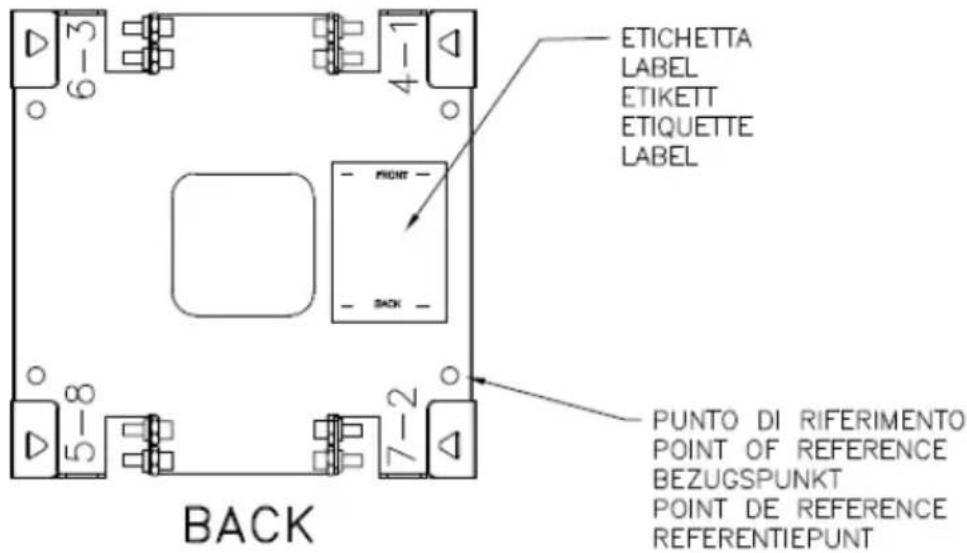
ELECTRIC WIRING
The electric wiring must be performed by a specialised electrician fully respecting current standards and legislation in force. Check that the power supply corresponds to the voltage requested by the hood, which is given on the silver label stuck inside the hood. Ensure that the wiring system conforms to current standards and the earth discharge works efficiently. Pay special attention to the hood power cable, ensure that it does not pass through any holes without a cable clamp. For direct connection to the electrical mains is necessary to provide a device that ensures disconnection from the electrical mains, with an opening distance of the contacts that allows the complete disconnection under the conditions of overvoltage category III, in accordance with the rules of installation.
The plug or omnipolar switch must be accessible when the unit is installed
If the power cord is damaged, it must be replaced by a special cord or assembly available from the manufacturer or its service agent. The cable used must be of type H05VV-F 3 x 0.75 mm2 minimum cross-section.
The manufacturer declines all responsibility if the current accident prevention standards in force are not respected, which are needed for the wiring system to operate correctly
USE AND MAINTENANCE
Before beginning any sort of cleaning or maintenance work, turn power off to the hood by turning the main switch to 0 (OFF).
Changing the light bulbs
LED spotlight replacement should only be carried out by qualified technicians using only original spare parts.
Cleaning the metal filters:
The metal filters fitted in the hood should be washed every 2-3 months, depending on how much the hood is used, using hot water and a liquid detergent that is not too aggressive. The metal filters can be removed by the special handle, unhooking the front part of the filter and pulling it downwards
Recirculation unit with activated carbon cartridges.
The recirculation unit has been designed for purifying and eliminating cooking odours.
The unit is composed of professionally inspired cartridges that contain about 3 kg of activated carbon.
This large quantity of carbon offers a high level of efficiency in removing odours and a long working life which, depending on use, may be up to three years.
The recirculation unit requires maintenance when it no longer eliminates cooking odours satisfactorily.
natural_image
3D rendering of a circular mechanical component with a square cutout and mounting holes, suspended by wires (no text or symbols visible)The activated carbon in the cartridges must be replaced periodically with new activated carbon.
Completely empty the cartridge and refill it with the same quantity of new activated carbon.
You can obtain the carbon from our service centres.
To dispose of the old carbon, refer to the instructions given on the bag containing the new carbon.
Cleaning the hood
The surfaces of the hood should be cleaned frequently, to avoid the risk of having to remove built up and encrusted deposits and stains.
For the painted or copper plated hoods just use a soft cloth with warm water and a neutral detergent. Do not pour the detergent directly onto the hood or use powdery or abrasive products
For the stainless steel hood, use special products and cloths for satin finish stainless steel (not abrasive, corrosive detergents or detergents containing chloride), ensuring to clean in the same direction as the satin finish.
Do not use aggressive products, chemical solvents or derivatives of oil distillates that could leave oily traces which could cause oxidation and polymerisation.
Condensation in the hood
Induction or glass ceramic hobs heat food up very quickly, creating cooking steam before the glass or steel surface of the hood has heated up, which causes condensation on the hood that then drips.
Another cause for condensation could be that the fume pipe is not the size we recommend (see INSTALLATION). The steam that remains inside the hood while it is cooling down condensates and drips. Therefore it is advisable to turn the hood on ten minutes before starting to cook and when you have finished, leave it on so that all the fumes in the pipe are expelled.
Furthermore, it is important to clean the filters frequently and if they are worn they should be replaced (see CLEANING THE METAL FILTERS).
The manufacturer accepts no responsibility for damage to the surface of the hood due to failure to respect these instructions.
BEDIENUNGS-, WARTUNGS- UND INSTALLATIONSHANDBUCH ABZUGSHAUBI
natural_image
3D rendering of a square mechanical component mounted on a circular base, with no visible text or symbols.natural_image
3D rendering of a square mechanical component mounted on a circular base, with no visible text or symbols.natural_image
Pure technical line drawing of a conical mechanical component with no text or symbols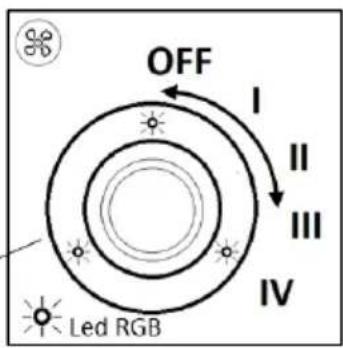
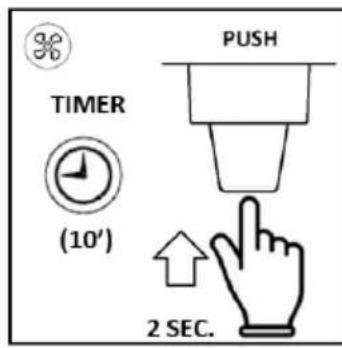
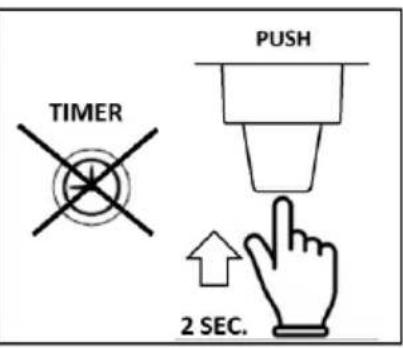
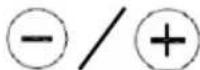
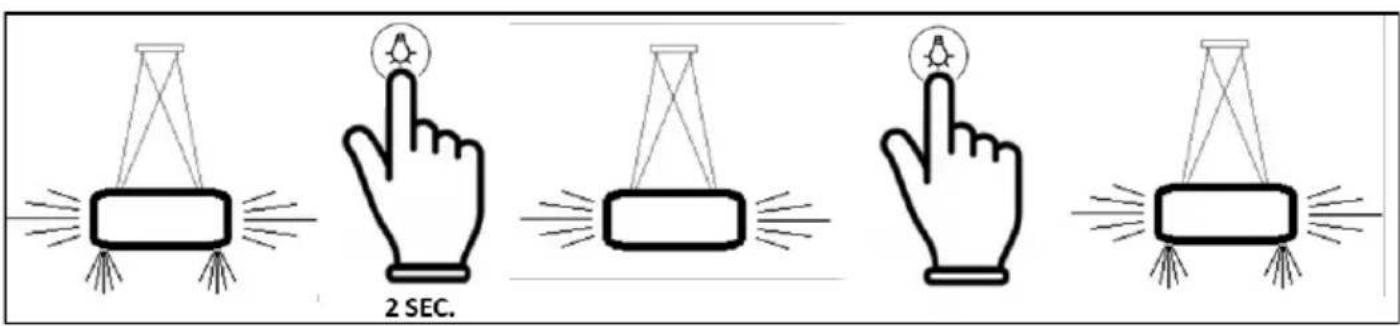
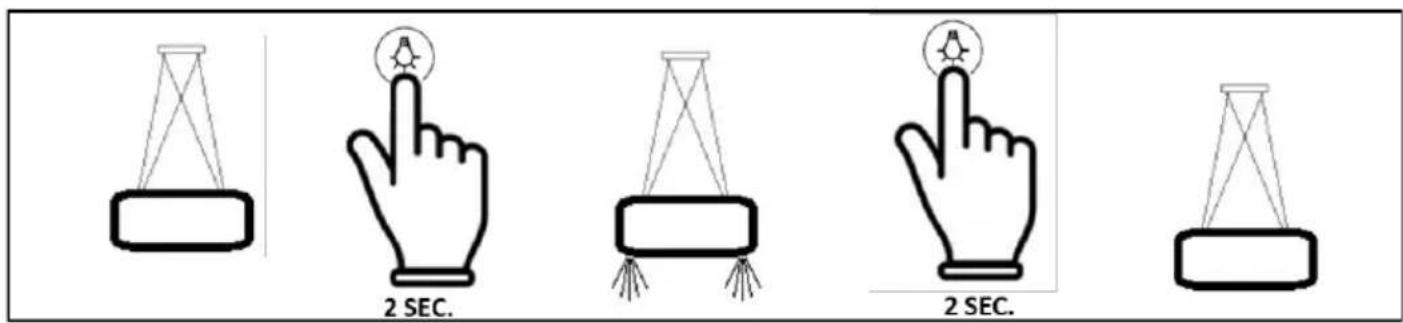
ALARM FILTRE: gult led blinker (100 timers brug)
NULSTIL: SKUBBE 10 SEC. (Emhætte slukket)
FILTERS ALARM: yellow led flashes (100h working)
RESET: PUSH 10 SEC. (with the hood turn off)
natural_image
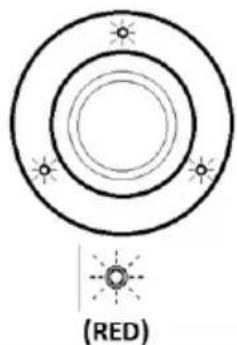
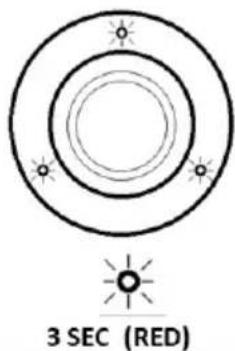
Diagram of concentric circles with radiating lines and a labeled (RED) symbol below (no text or symbols within the diagram itself)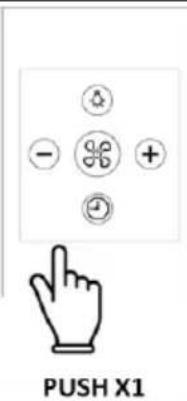
| Emhætte slukket Hold | tasten trykket nede i 5 sek. | Rødt led blinker (indlæsing) | Tryk på en hvilken som helst tast indenfor 1' | Forbindelse OK, rødt led |
| Avstängd köksflåkt Hå | intryckt i 5 sekunder. | Den röda lysdioden blinkar (självinlärning) | Tryck på annan valfri knapp inom 1 minut | Anslutning OK, röd lysdiod |
| Liesituuletin sammutettu | Pidä painettuna 5 s Punainen merkkivalo vilkkuu (oppimistila) | Paina mitä tahansa näppäintä yhden minuutin kuluessa | Yhdistyminen OK, punainen merkkivalo | |
| Avskrudd vifte Hold | inne i 5 sek. Blinkende rød | LED (tilegnelse) | Trykk på hvilken som helst knapp innen 1' | Tilknytning OK, rød LED |
| Cappa spenta Tenere | premuto per 5 sec. | Lampeggia led rosso (apprendimento) | Premere un qualun-que tasto entro 1' | Affiliazione OK, led rosso acceso fisso 3sec |
| Hood off Keep pressed for 5sec | red LED flashes (learning process) | Presser any button within 1' | Learning process OK, red LED will be on continuously for 3sec | |
| Haube ab Haube 5 | Sekunden die Taste drücken | LED red blinken (fernsteuerung anerkennung) | Drücken Sie eine beliebige Taste innerhalb von 1' | Lernvorgang OK, rote LED leuchtet 3 Sekun-den lang dauerhaft |
| Hotte arrêtée Appuyer pendant 5 sec. | LED alarme rouge qui clignote (apprentissage) | Appuyez sur n'im-porte quel bouton à moins de 1' | Apprentissage ok, la LED s'allume de manière fixe pendant 3 sec | |
| Uitgeschakelde kap kap op de toets 5 sec Het knipperen van het rode led geeft aan dat de lering van de afstandsbediening aan is | Druk op een willekeurige knop binnen 1' | Recte lering OK, blijft het led 3 seconden | ||
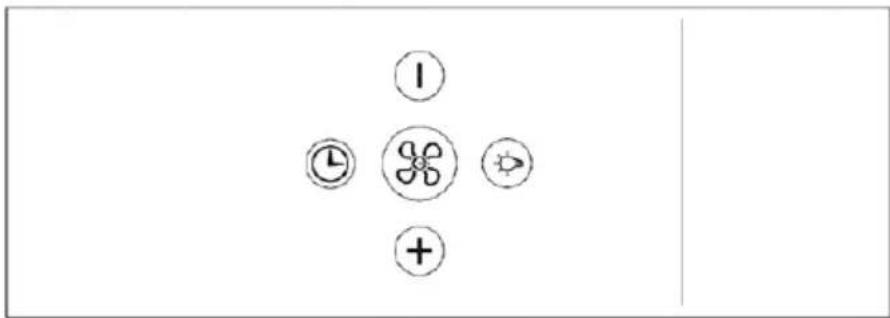


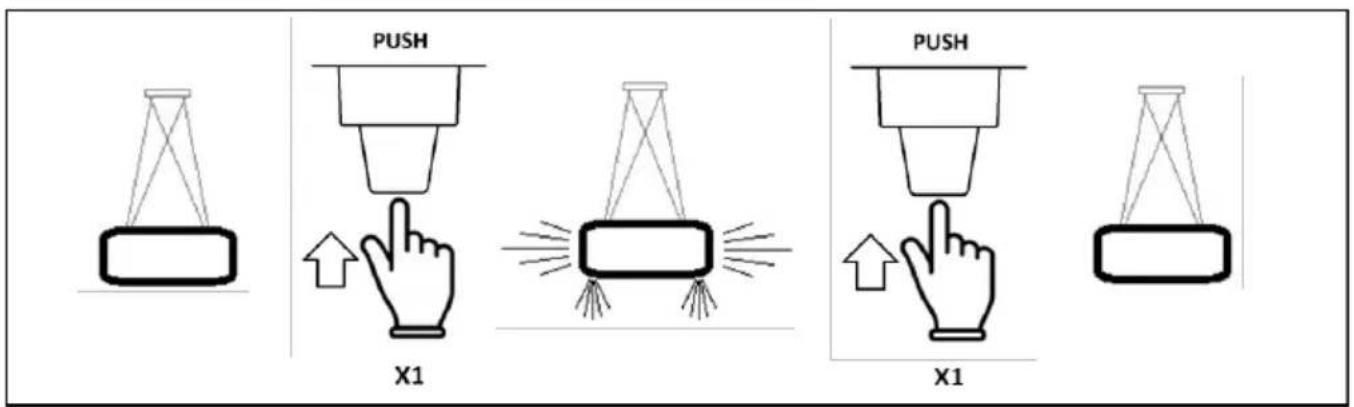
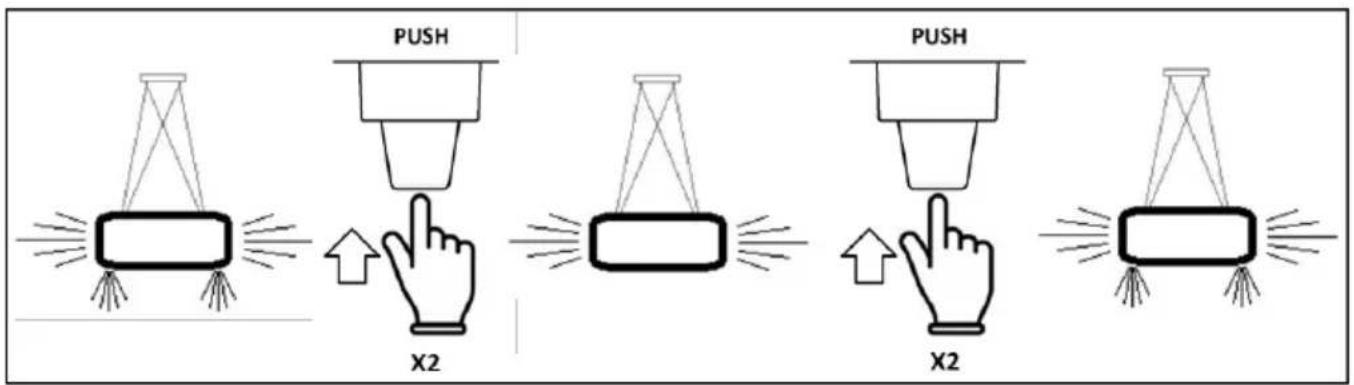
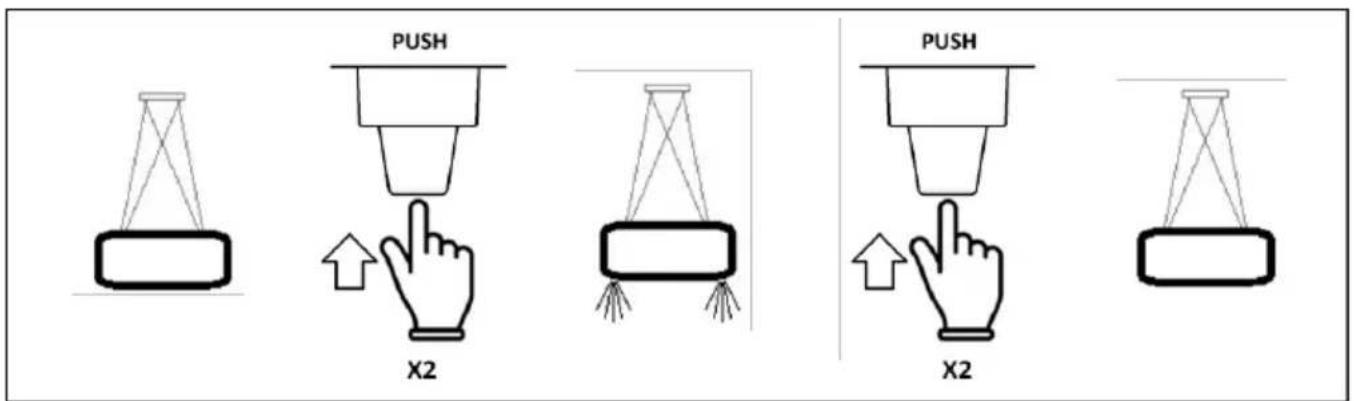
| tænding i hastighed 2 og slukning af motoren | til tænding og slukning af lys | til slukning af motoren efter 10 minutter | til at sætte motorens hastighed op eller ned |
| för att sätta på 2:a hastighet och släcka motorn | för att tända och släcka lamporna | för att stänga av motorn efter 10 min | för att öka och minska motorns hastighet |
| nopeuden valintaa 2. ja moottorin sam-muttamista varten | valojen sytyttämistä ja sammuttamista varten | moottorin sammuttamiseksi 10 min. jälkeen | moottorin nopeuden lisäämistä ja vähentämistä varten |
| for påskruing i 2.hastighet og avskruing av motoren | for påskruing og avskruing av lysene | for avskruing av motoren etter 10 min | for økning og reduksjon av moto-rhastighet |
| accensione in 2^ velocità e spegnimento del motore | accensione e spegnimento delle luci | motore spento dopo 10 min. per aumento e riduzione delle velocità motore | |
| turning on at 2nd speed and for turning the motor off | turning the lights on and off | motor off after 10 minutes | for increasing and decreasing the motor speed |
| zum Einschalten der 2. Geschwindigkeits-stufe und zum Ausschalten vom Motor. | zum Ein- und Ausschalten der Beleuchtung | zum Abschalten vom Motor nach Ablauf von 10 Minuten | zum Erhöhen und Verringern der Motorgeschwindigkeit |
| pour allumage en 2^ vitesse et extinction du moteur | pour allumage et extinction des lumières | pour extinction du moteur après 10 min | pour l'augmentation et la réduc-tion des vitesses moteur |
| voor het aandoen in 2e snelheid en voor het uitdoen van de motor | voor het in- en uitschakelen van de lampjes | die motor na 10 min. afzet voor het | verhogen of verlagen van de motorsnelheid |

natural_image
Simple line drawing of a conical structure with two triangular supports (no text or symbols)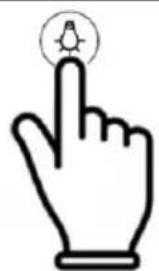
natural_image
Line drawing of a hand with a finger pointing at a circular button (no text or symbols)PUSH X1
natural_image
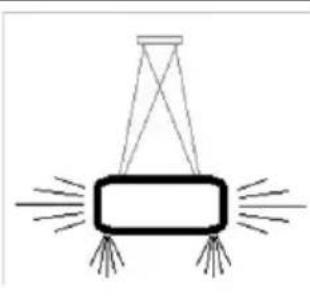
Simple line drawing of a hanging lamp with beams and spikes (no text or symbols)
natural_image
Simple line drawing of a hand with a finger pointing at a circular icon (no text or symbols)PUSH X1

④
FRONT
⑤
flowchart
graph LR
    A["Step 6: Initial mechanical assembly"] --> B["Step 1: Rotation arrow, clockwise motion"]
    B --> C["Step 2: Rotation arrow, clockwise motion"]
    C --> D["Step 3: Rotation arrow, clockwise motion"]
    D --> E["Step 4: Rotation arrow, clockwise motion"]
eico
EICO AS
Östergade 118
9700 Brønderslev


- eico
- INSTRUCTIONS FOR USING, MAINTAINING AND INSTALLING THE HOOD
- WARNINGS
- INSTALLATION
- ASSEMBLY INSTRUCTIONS
- ELECTRIC WIRING
- USE AND MAINTENANCE
- Changing the light bulbs
- Cleaning the metal filters:
- Recirculation unit with activated carbon cartridges.
- Cleaning the hood
- Condensation in the hood
- The manufacturer accepts no responsibility for damage to the surface of the hood due to failure to respect these instructions.
- BEDIENUNGS-, WARTUNGS- UND INSTALLATIONSHANDBUCH ABZUGSHAUBI
Brand : EICO
Model : Iris 65 W Link
Category : Range hood