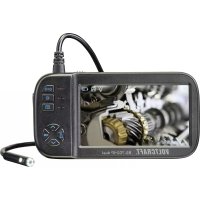
BS600SD - Endoscope VOLTCRAFT - Free user manual and instructions
Find the device manual for free BS600SD VOLTCRAFT in PDF.
| Brand | Voltcraft |
| Model | BS600SD |
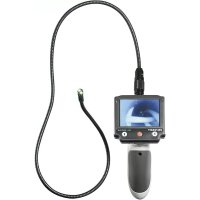
| Product type | Video endoscope with flexible gooseneck |
| Monitor | 8.9 cm (3.5") TFT, resolution 320 x 240 pixels |
| Camera resolution | 640 x 480 pixels |
| Lighting | 8 white LEDs, 1200 Lux max at 20 mm |
| Field of view | 79° (diagonal) |
| Focus | 45 - 85 mm |
| Camera head diameter | 8 mm |
| Gooseneck length | 5 m (5000 mm) |
| Min. bending radius | > 45 mm |
| Storage | Micro SD / micro SDHC card (max. 32 GB) |
| Video formats | PAL / NTSC, AVI recording |
| Power supply | 4 AA batteries (1.5 V, not included) |
| Power consumption | 450 mA max |
| Dimensions (L x H x D) | 90 x 205 x 222 mm |
| Weight | Approx. 1960 g (without accessories) |
| Operating temperature | 0 to +45 °C, 15-85% RH |
| Storage temperature | -10 to +50 °C, 15-85% RH |
| Protection rating (head) | IP67 (up to the marking on the neck) |
| Outputs | Mini USB, RCA video output |
| Included accessories | USB cable, video cable, 3 tips (magnet, hook, mirror), carrying case, user manual |
| Maintenance | Clean with a soft, dry cloth; rinse the head with clean water after use in liquids; clean the lens with a brush or cotton swab |
| Safety | Use only on de-energized installations; do not immerse the base unit; observe the bending radius |
Frequently Asked Questions - BS600SD VOLTCRAFT
User questions about BS600SD VOLTCRAFT
0 question about this device. Answer the ones you know or ask your own.
Ask a new question about this device
Download the instructions for your Endoscope in PDF format for free! Find your manual BS600SD - VOLTCRAFT and take your electronic device back in hand. On this page are published all the documents necessary for the use of your device. BS600SD by VOLTCRAFT.
USER MANUAL BS600SD VOLTCRAFT
Operating Instructions
BS-600SD Endoscope
Item No. 2250942 Page 18 - 33
Notice d'emploi
BS-600SD Endoscope
N^ de commande 2250942 Page 34 - 49
Gebruiksaanwijzing
BS-600SD Endoscoop
Bestelnr. 2250942 Pagina 50 - 65
Seite
- Introduction 19
- Operating Instructions for download 19
- Intended use 19
- Delivery content 20
- Features and functions 20
- Explanations of symbols 20
- Safety instructions 21
a) Persons / Product. 21
b) Miscellaneous 22
c) Rechargeable batteries 22
- Operating elements 23
- Inserting / replacing batteries 24
10.Insert micro SD card. 24 - Operation 25
a) Basic functions 25
b) Settings 26
c) Photo /video function. 27
d) Connection to a PC 28
e) Connection to a TV. 28
- Maintenance and care 29
- Declaration of Conformity (DOC) 29
- Disposal 30
a) Product 30
b) Batteries/rechargeable batteries 31
- Technical data 32
- Suitable accessories 33
1. INTRODUCTION
Thank you for purchasing this product.
If there are any technical questions, please contact: www.conrad.com/contact
2. OPERATING INSTRUCTIONS FOR DOWNLOAD

Use the link www.conrad.com/downloads (alternatively scan the QR code) to download the complete operating instructions (or new/current versions if available). Follow the instructions on the web page.
3. INTENDED USE
The endoscope is a visual aid for troubleshooting or inspection of voltage-free systems and installations. The lighting can be controlled at the camera point. A PAL/NTSC video output is available. Photos and videos can be stored on an optional microSD card and can be transferred to PC. The goose neck camera is water tight and can be used in watery liquids (no acids or alkaline solutions). The main unit may not be exposed to or submerged in moisture. Power supply is via four AA batteries (not included). Operation in potentially explosive areas and/or use on persons or animals is not permitted.
For safety and approval purposes, you must not rebuild and/or modify this product. If you use the product for purposes other than those described above, the product may be damaged. In addition, improper use can cause hazards such as short circuiting, fire, electric shock etc.
Read the instructions carefully and keep them. Make this product available to third parties only together with its operating instructions.
This product complies with the statutory national and European requirements.
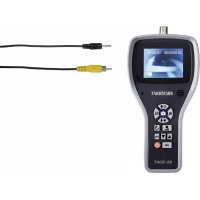
4. DELIVERY CONTENT
Endoscope · USB cable
- Goose neck with camera - 3 x attachments (magnet, hook, mirror)
- Storage case - Operating instructions
Video cable
5. FEATURES AND FUNCTIONS
- Micro SD card slot
Video and photo function - LED lamp
- Attachment consisting of magnet, hook and mirror
6. EXPLANATIONS OF SYMBOLS

This symbol warns of hazards that can lead to injury.
This symbol warns of a dangerous voltage which can lead to injuries due to electric shock.

The arrow symbol indicates special information and advice on operation.

Read the operating instructions carefully and especially observe the safety information. If you do not follow the safety instructions and information on proper handling in these operating instructions, we assume no liability for any resulting personal injury or damage to property. Such cases will invalidate the warranty/guarantee.
a) Persons / Product
- The device is not a toy. Keep it out of the reach of children and pets.
- Do not leave packaging material lying around carelessly. These may become dangerous playing material for children.
- Protect the product from extreme temperatures, direct sunlight, strong jolts, high humidity, moisture, flammable gases, vapours and solvents.
- Do not place the product under any mechanical stress.
-
If it is no longer possible to operate the product safely, take it out of operation and protect it from any accidental use. Safe operation can no longer be guaranteed if the product:
-
is visibly damaged,
- is no longer working properly,
- has been stored for extended periods in poor ambient conditions or
-
has been subjected to any serious transport-related stresses.
-
Please handle the product carefully. Jolts, impacts or a fall even from a low height can damage the product.
- Also observe the safety and operating instructions of any other devices which are connected to the product.
- This product is a precision instrument. Do not drop it or subject it to any blows.
- The basic unit is not water tight. Do not use under water.
- The endoscope is suited for inspection only in voltage-free systems. The camera head is made of metal and can cause short-circuiting.
- For safety reasons, make sure all system components are voltage-free before inspection.
- Always store the endoscope and all accessories in the case for periods of disuse.
- Sensitive surfaces (with furniture polish, etc.) may react chemically when exposed to the housing.
- For installations in industrial facilities, follow the accident prevention regulations for electrical systems and equipment of the government safety organization or the corresponding authority for your country.
- Do not operate the device immediately after transferring it from a cold to a warm room. This can cause condensation which may, under adverse circumstances, destroy the device. Leave the device turned off until it has reached room temperature.
- If you wish to charge the battery with a power adaptor, it must be compatible with the product. See Technical Data.
b) Miscellaneous
- Consult a professional if you require assistance with product operation, safety or connection.
- Maintenance work, adjustments and repairs may be carried out only by a professional or at a specialist workshop.
- If you have questions which remain unanswered by these operating instructions, contact our technical support service or other technical personnel.
c) Rechargeable batteries
- Correct polarity must be observed while inserting the (rechargeable) batteries.
- Rechargeable batteries should be removed from the device if it is not used for a long period of time to avoid damage through leaking. Leaking or damaged (rechargeable) batteries might cause acid burns when in contact with skin, Therefore use suitable protective gloves to handle corrupted (rechargeable) batteries.
- (Rechargeable) batteries must be kept out of reach of children. Do not leave (rechargeable) batteries lying around, as there is risk, that children or pets swallow them.
- All (rechargeable) batteries should be replaced at the same time. Mixing old and new (rechargeable) batteries in the device can lead to (rechargeable) battery leakage and device damage.
- (Rechargeable) batteries must not be dismantled, short-circuited or thrown into fire. Never recharge non-rechargeable batteries. There is a risk of explosion!
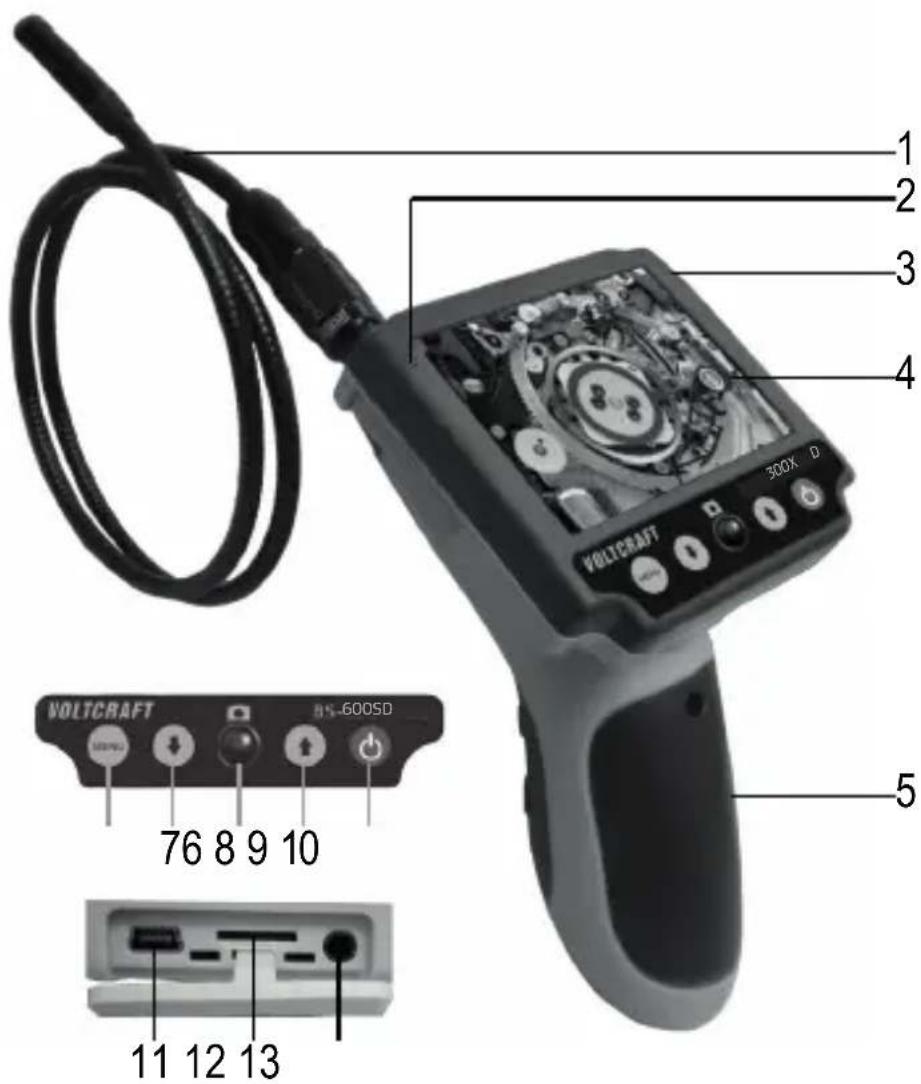
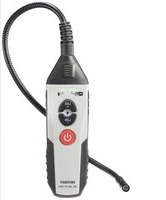
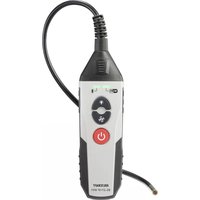
1 Goose neck
2 Battery LED
3 Power LED
4 Monitor
5 Battery compartment
6 MENU button
7 ↓ button
8 Trigger button
9↑button
10 On/off button
11 mini USB connection
12 micro SD insert
13 Video output
9. INSERTING / REPLACING BATTERIES
- Loosen the screw on the battery compartment cover using a cross-head screw driver and remove the battery compartment cover.
- Remove the battery holder from the battery compartment (5).
- Insert four type AA batteries into the battery holder and please note the polarity details in the shafts of the battery holder.
- Reinsert the battery holder into the battery compartment and please note the polarity details on the upper side of the battery holder and within the battery compartment.
- Close the battery compartment again.

Change the batteries if the goose neck camera does not work properly or the LED on the camera does not light up completely.
10. INSERT MICROSD CARD
You must first insert a microSD card (not included) to be able to use the photo /video function. Proceed as follows to do so:
- Open the cover on the right next to the monitor.
- Insert a microSD card into the microSD slot (12). The contacts of the card must point in the direction of the monitor. The card must be locked into position.
- Close the cover.
a) Basic functions
Only keep the camera head and goose neck (1) in voltage free liquid. The goose neck should not be immersed on the other side of the "IP67 max. water level" marking.
The endoscope is suited for inspection only in voltage-free systems. The camera head is made of metal and can cause short-circuiting. For safety reasons, make sure all system components are voltage-free before inspection.
Avoid heavy mechanical loads and/or vibrations. Do not exceed the minimum bending radius of 45mm .
- Press the on/off button (10) to switch on the device. The Power LED (3) is switched on. The camera picture appears on the screen.
- 8 LEDs are integrated into the camera head.
- Keep the button pressed for approximately two seconds to rotate the picture by 180^ .
- Keep the button pressed to zoom in.
Attachments
Fix one of the three attachments (magnet, hook, mirror) if needed to the narrow indentation under the camera head.
- Make sure that the attachment's fastening ring is closed before use.
Triangle attachment point
A triangle attachment point is attached above the screen. Attach it to a carrying strap if needed (not included in the delivery scope) to enable freehand operation.
b) Settings
The following buttons have the following functions within the menu.
Button Function
MENU · Select menu
- Navigate from the sub menu back to the main menu.
- Leave main menu
↓ ·Move cursor downwards
- Reduce value
Move cursor upwards
- Enlarge value
Release button Confirm selection
Video output format
- Press the MENU (6) button, to select the menu.
- Select the menu point "Setting" with the (7) or (9) buttons and press it to activate the release button (8).
- Select the "TV output" menu point and confirm your selection.
- Select the desired format (NTSC or PAL) and confirm your selection.
- Leave the menu while pressing the MENU button.
Frame rate
- Press the MENU button to select the menu.
- Select the menu point "Setting" with the or buttons and press it to activate the release button
- Select the "Frame Rate" menu point and confirm your selection.
- Select the desired frame rate (20 fps / 25 fps / 30 fps) and confirm your selection.
- Leave the menu while pressing the MENU button.
Format micro SD card
- Press the MENU button to select the menu.
- Select the menu point "Setting" with the or buttons and press it to activate the release button
- Select the "Format" menu point and confirm your selection.
- Select "YES" and confirm your selection. Subsequently the micro SD card is formatted.
- Select "NO" to interrupt the process.
Set language
- Press the MENU button to select the menu.
- Select the menu point "Setting" with the or buttons and press it to activate the release button
- Select the menu point "Language" and confirm your selection.
- Select the desired language and confirm your selection.
- Leave the menu while pressing the MENU button.
Set date /time
- Press the MENU button to select the menu.
- Select the menu point "Setting" with the or buttons and press it to activate the release button
- Select the menu point "Time/Date" and confirm your selection. The day indicator starts flashing.
- Set the date with the or buttons and confirm your selection. The month indicator starts flashing.
- Proceed in the same way to set the month, year, hours, minutes and seconds.
c) Photo /video function
Photo
- Press the MENU button to select the menu.
- Select the menu point "Camera" with the or buttons and press it to activate the release button. The photo camera symbol appears on the top left of the monitor.
- Now press the release button to take a photo.
Video
- Press the MENU button to select the menu.
- Select the menu point "DVR" with the or buttons and press it to activate the release button. The video camera symbol appears on the top left of the monitor.
- Now press the release button to record a video.
- Press the release button again to end the video recording.
Playback
- Press the MENU button to select the menu.
- Select the menu point "Playback" with the or buttons and press it to activate the release button.
- The photo/video last taken is displayed on the monitor.
- Select the desired photo/video with the or button.

The video playback is automatically started. Press the trigger button during the playback if you want to interrupt the video. Press the trigger button again to keep the video running.
d) Connection to a PC
- Open the cover on the right next to the monitor.
- Connect the mini USB plug to the appropriate socket and connect the USB A plug to a free USB interface of your computer.
- The endoscope is now used as a card reading device. This enables you to read stored data from the micro SD card on the PC.
- First disconnect the connection via the operating system before unplugging the USB cable.
e) Connection to a TV
- First set the video output format (see chapter "Settings").
- Open the cover on the right next to the monitor.
- Connect the jack plug of the video cable to the video output (13) on the endoscope and connect the cinch plug to the video input of the TV.
- As a result the picture on the monitor turns off and the camera picture is displayed on the TV. Press the MENU button to display the menu on the TV. The device is operated with the buttons on the monitor.
- Recorded videos can be played on the TV.
12. MAINTENANCE AND CARE
- The product does not require any maintenance, do not disassemble it. Maintenance or repairs may be carried out by a professional only.
- Do not clean the product if the rechargeable battery of the monitor is charged.
- First remove all the batteries/rechargeable batteries from the charging slots.
- Clean the exterior of the product using a clean, soft, dry cloth only. You can easily remove dust using a clean, soft brush or a vacuum cleaner.
- After use in liquids, always thoroughly rinse the camera neck with clean water and dry before storing the product in the case.
- To clean the camera lens, use a small brush or cotton swabs.
- Do not use any aggressive cleaning agents or chemical solutions as these may damage the housing causing discoloration and/or malfunction.
13. DECLARATION OF CONFORMITY (DOC)
Conrad Electronic SE, Klaus-Conrad-Straße 1, D-92240 Hirschau hereby declares that this product conforms to the 2014/53/EU directive.

Click on the following link to read the full text of the EU declaration of conformity: www.conrad.com/downloads
Select a language by clicking on a flag symbol and enter the product order number in the search box. You can then download the EU declaration of conformity in PDF format.
The Declaration of Conformity for this product can be found at www.conrad.com.
a) Product

All electrical and electronic equipment placed on the European market must be labelled with this symbol. This symbol indicates that this device should be disposed of separately from unsorted municipal waste at the end of its service life.
Owners of WEEE shall dispose of it separately from unsorted municipal waste. Spent batteries and accumulators, which are not enclosed by the WEEE, as well as lamps that can be removed from the WEEE in a non-destructive manner, must be removed by end users from the WEEE in a non-destructive manner before it is handed over to a collection point.
Distributors of electrical and electronic equipment are legally obliged to provide free take-back of waste. Conrad provides the following return options free of charge (more details on our website):
- at our Conrad stores
- at the collection points established by Conrad
- at the collection points of public waste disposal agencies or at the collection systems set up by manufacturers and distributors in accordance with the German Electrical and Electronic Equipment Act.
The end user is responsible for deleting personal data from the WEEE to be disposed of.
It should be noted that different obligations about the return or recycling of WEEE may apply in countries outside of Germany.
b) Batteries/rechargeable batteries
Remove any inserted batteries and dispose of them separately from the product. You as the end user are required by law (Battery Ordinance) to return all used batteries/rechargeable batteries. Disposing of them in the household waste is prohibited.

Batteries/rechargeable batteries containing hazardous substances are labelled with this symbol to indicate that disposal in household waste is forbidden. The abbreviations for heavy metals in batteries are: Cd = Cadmium, Hg = Mercury, Pb = Lead (name on batteries/rechargeable batteries, e.g. below the trash icon on the left).
Used batteries/rechargeable batteries can be returned free of charge to local collection points, our stores or battery retailers. You thus fulfil your statutory obligations and contribute to environmental protection.
Batteries/rechargeable batteries that are disposed of should be protected against short circuit and their exposed terminals should be covered completely with insulating tape before disposal. Even empty batteries/rechargeable batteries can contain residual energy that may cause them to swell, burst, catch fire or explode in the event of a short circuit.
15. TECHNICAL DATA
Operational voltage 4 x 1.5 V AA- battery (not included),
Power consumption max. 450 mA
SD card type......microSD (max. 2 GB), micro SDHC (max. 32 GB)
Monitor. 8,9 cm (3,5") TFT
Resolution 320 x 240 Pixel (Monitor), 640 x 480 Pixel (Camera)
White balance..... automatic
Exposure automatic
Video format . PAL/NTSC
Video recording format .AVI
Camera lighting 8 LEDs, white
LED lighting strength max. 1200 Lux, ± 150 Lux (at 20mm distance)
Bending radius. >45mm
Camera head 8.0 mm
Field of vision. 79^ (diagonal)
Focus. 45 - 85 mm
Goosenck measurements (L x 0).....5000 x 8 mm
Operating conditions. 0 to +45^ C , 15 - 85% RH
Storage conditions. -10 to 50^ 15-85% RH
Dimensions (W× H× D) . 90× 205× 222mm
Weight approx. 1960 g (without attachments)
Goose neck camera
Order no.: 123121
Camera : 5.5 mm
Length 1 m
Goose neck extension
Order no.: 123126 123130
Length 1 m 3 m
Miscellaneous
| Carry strap Attachments (magnet, hooks, mirror) for 9.8 mm camera | |
| Order no.: 123096 1496418 |
TABLE DES MATIÈRES
Page
France (email): technique@conrad-france.fr
Doorsnede camerakop 8,0 mm
Geichtsveld. 79^ (diagonal)
Brandpunt 45-85 mm
Zwanenhalsafmetingen (L x 0).5000 x 8 mm
Copyright 2024 by Conrad Electronic SE.
This is a publication by Conrad Electronic SE, Klaus-Conrad-Str. 1, D-92240 Hirschau (www.conrad.com).
All rights including translation reserved. Reproduction by any method, e.g. photocopy, microfilming, or the capture in electronic data processing systems require the prior written approval by the editor. Reprinting, also in part, is prohibited. This publication represent the technical status at the time of printing.
Copyright 2024 by Conrad Electronic SE.
Copyright 2024 by Conrad Electronic SE.
Copyright 2024 by Conrad Electronic SE.