Jersey - Grill plate Klarstein - Free user manual and instructions
Find the device manual for free Jersey Klarstein in PDF.
User questions about Jersey Klarstein
0 question about this device. Answer the ones you know or ask your own.
Ask a new question about this device
Download the instructions for your Grill plate in PDF format for free! Find your manual Jersey - Klarstein and take your electronic device back in hand. On this page are published all the documents necessary for the use of your device. Jersey by Klarstein.
USER MANUAL Jersey Klarstein
Berlin Brands Group UK Limited
P.O.Box 42
272 Kensington High Street
Londyn, W8 6ND
Velká Británia
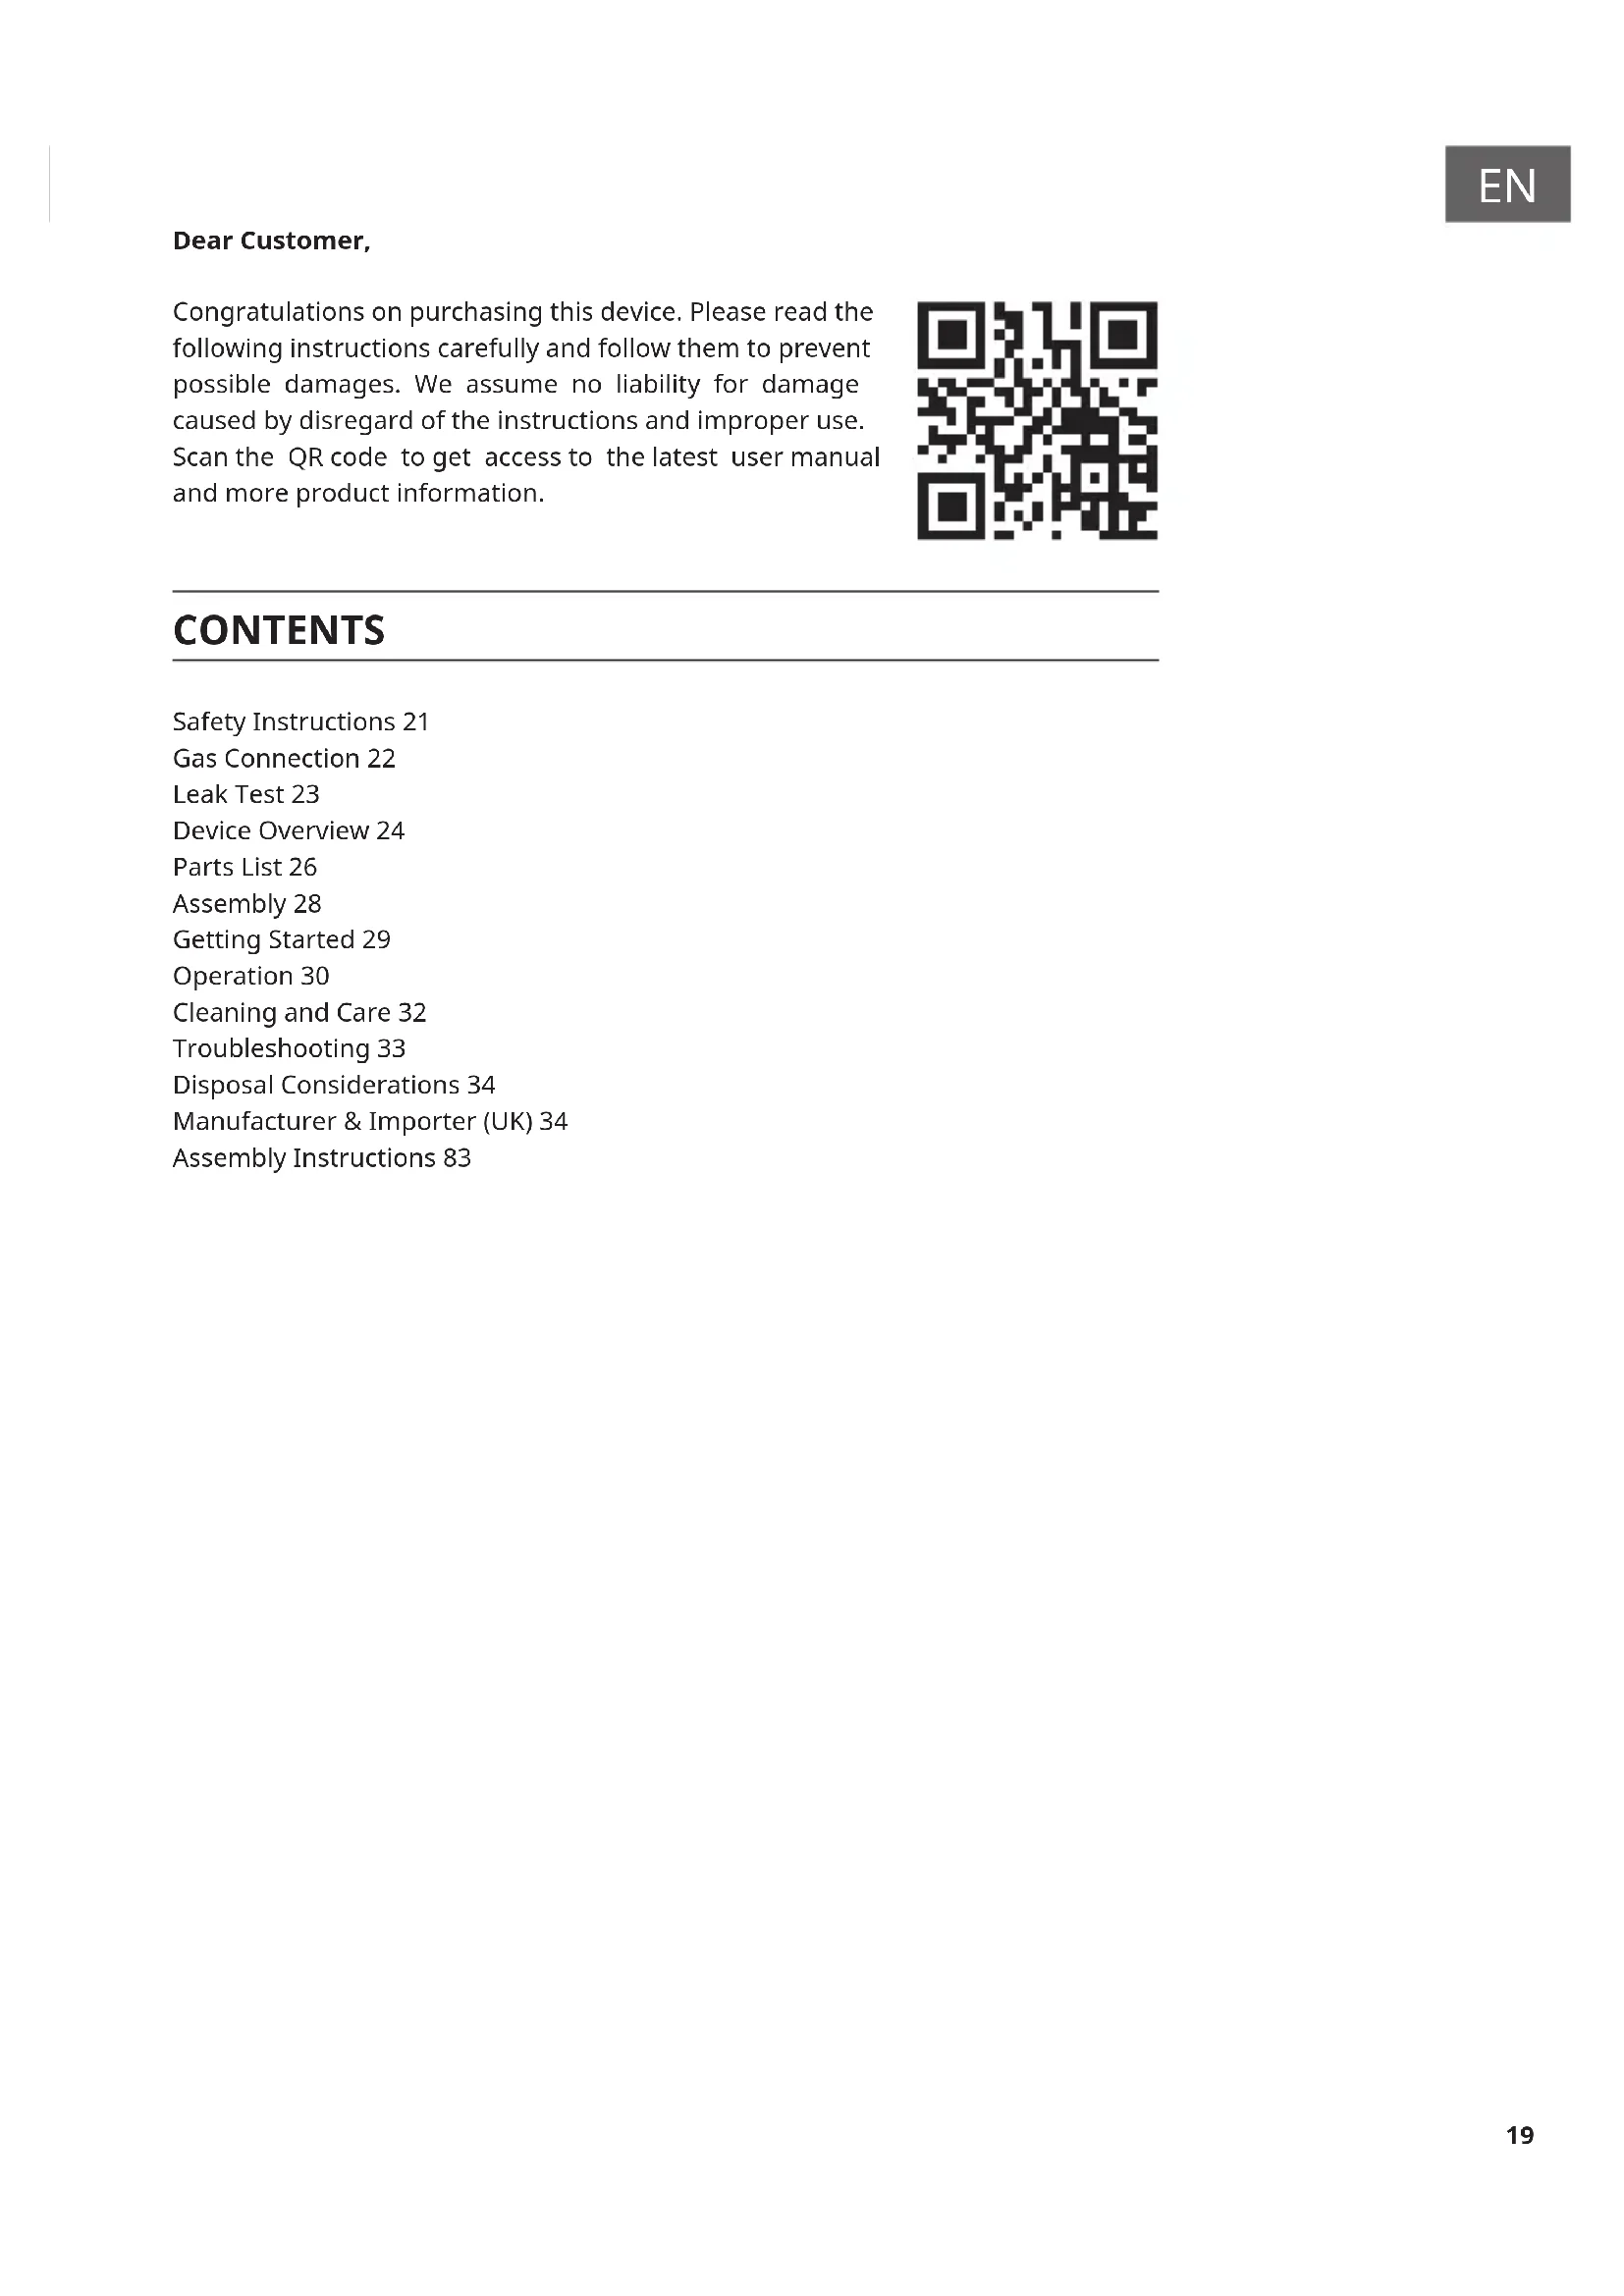
Dear Customer,
Congratulations on purchasing this device. Please read the following instructions carefully and follow them to prevent possible damages. We assume no liability for damage caused by disregard of the instructions and improper use. Scan the QR code to get access to the latest user manual and more product information.

CONTENTS
Safety Instructions 21
Gas Connection 22
Leak Test 23
Device Overview 24
Parts List 26
Assembly 28
Getting Started 29
Operation 30
Cleaning and Care 32
Troubleshooting 33
Disposal Considerations 34
Manufacturer & Importer (UK) 34
Assembly Instructions 83

KLARSTEIN
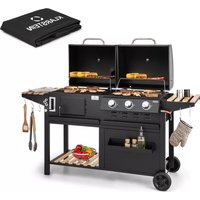
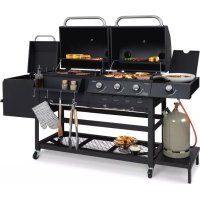
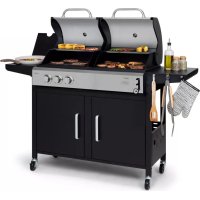
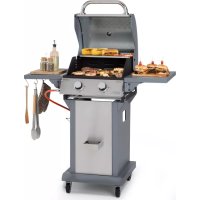
Product name: Jersey
Gas grill for outdoor use
Article number: 10045139
PIN code: 2531CS-0077
Chal-Tec GmbH, Wallstr. 16, 10179 Berlin, Germany
WWW.KLARSTEIN.DE
| Country of Destination | Appliance Category Gas | Type and Supply Pressure | Injector Size Ø Total | Nominal Heat Inputs (Hs) | |
| Grill burner | Side burner | ||||
| LU, NL, DK, FI, SE, CY, CZ, LT, MT, SK, SI, BG, IS, NO, TR, HR, RO, IT, HU, LV | I3B/P(30) | Propane, butane and mixtures: 28~30 mbar | 0.91 mm | 0.76 mm 20 | 7 kW (1506 g/h) |
| BE, FR, IT, LU, IE, GB, GR, PT, ES, CY, CZ, LT, SK, CH, SI, LV | I3+(28~30/37) | Butane (G30): 28~30 mbar | 0.91mm | 0.76 mm | |
| Propane (G31): 37 mbar | 0.91mm | 0.76 mm | |||
| AT, DE, CH, LU, SK | I3B/P(50) | Propane, butane and mixtures: 50 mbar | 0.80 mm | 0.66 mm | |
| ·WARNING: Accessible parts may be very hot. Keep young children away. ·Read the instructions before using the appliance. ·Use the appliance in well-ventilated areas. ·Any modifi cations of the appliance may be dangerous. ·Turn off the gas supply at the gas cylinder after use. | |||||
SAFETY INSTRUCTIONS
Read the operating instructions carefully before installing and commissioning the unit and keep them for future use.
- The barbecue is suitable for outdoor use only.
- The easily accessible parts of the appliance can become very hot during use. Keep small children away from the appliance and use protective gloves when handling the appliance.
- Keep the appliance away from highly flammable materials while in use.
- Do not move the unit to another location while it is in use.
- Switch off the appliance after use by turning the gas cylinder valve or the gas pressure regulator.
- Any modifications to the unit may be dangerous and may result in property damage and/or personal injury. Therefore, do not modify the appliance.
- Never place the gas bottle underneath or next to the appliance.
- The gas bottle must be installed in accordance with local regulations.
- Only use the types of propane and butane gas specified in the operating instructions.
- Never ignite a gas barbecue with petrol or comparable liquids.
- If a gas leak occurs, turn off the gas supply to the gas bottle, extinguish all open flames and open the appliance cover. Check the hose and all connections for gas leaks. Contact customer service or your local gas dealer if the leak persists. Never use open flames to check the appliance for gas leaks.
- Never disconnect the gas connection while the appliance is in use.
- Never leave the device unattended while in use. Exercise extreme caution when preparing food.
- Clean the appliance regularly. Be careful not to damage sensitive appliance components such as burners and the gas valves during cleaning.
- Check the flexible hose at least once a month and after every gas bottle change. If the hose shows cracks or other serious damage, replace it with a hose of similar length and quality.
- It is recommended that the unit be serviced at least once a year by a qualified person. Do not attempt to carry out the maintenance yourself.
- Place the appliance in a well-ventilated area.
- Replace the flexible lines either every 2 years, or when national regulations require it.
- Parts sealed by the manufacturer or the after-sales service must not be modified by the user of the appliance.
- Check the gas hose for cracks, cuts or other signs of wear before each use. If the gas hose is faulty, do not use the barbecue again until the gas hose has been replaced.
-
Changing the gas cylinders should be carried out at a safe distance from all sources of ignition, such as fire, cigarettes, open flames, etc. Make sure that the appliance is switched off when changing the gas bottle.
-
The appliance may only be used with the gas bottles specified in the product data sheet. The gas bottles used must comply with national regulations.
- Carry out a gas leakage test with soapy water before putting the appliance into operation.
- When lighting the burner, the appliance cover must be open.
- Use oven gloves and long grill utensils when using the appliance.
- Be prepared in case of fire or accident. Know the location of the first aid kit and fire extinguisher and familiarise yourself with their use.
- Keep the gas hose away from hot appliance surfaces.
- Use extreme caution when preparing food.
- Do not heat sealed glass or metal containers in the appliance. Pressure could build up inside the containers, causing an explosion and resulting in property damage and/or personal injury or damage to the appliance.
- It is recommended to wear protective gloves when using the appliance, especially when handling hot appliance components.
GAS CONNECTION
The gas connection line between the gas pressure regulator and the grill can be made using metal bellows or a gas-approved rubber hose with a maximum length of 1.5m . Gas grills that run on liquefied petroleum gas (LPG) should be connected with a gas approved rubber hose.
- If a rubber hose is used, a universal air inlet fitting is required.
- The two ends of the gas hose are connected to the grill and the gas valve respectively. Please install the rubber hose adapter directly on the main gas pipe without any adapters in between. The diameter of the gas hose is 8 - 10mm and varies depending on the adapter used. If in doubt, ask your local gas dealer which adapter and gas hose is compatible with the gas bottles available in your country. Never operate the device if you have any doubts about compatibility or if you are unsure whether the connection is properly insulated.
- Only approved gas hoses and regulators may be connected to a (refillable) gas cylinder. All components should comply with local regulations.
- Make sure that the gas hose is not twisted, kinked or bent by other objects. After installation is complete, a gas leak detection (leak test) should be performed.
- Do not expose the gas hose to high temperatures.
- It is recommended that an annual air tightness test be carried out on the gas grill.
- Before each use, make sure the rubber hose is in good condition. Replace it if it shows signs of wear or cracks.
| Gas connection with Type E adapter | Gas connection (France) |
| If a rubber hose is being used, please install the appropriate adapter (see image above) directly on the main gas pipe without any adapters in between. | When using the gas grill in France, please ensure that the appropriate adapter (see image above) is connected to the main gas line. |
LEAK TEST
- Perform the leak test each time the gas cylinder is connected or reconnected.
- Never use an open flame to check for gas leaks.
- Never smoke while performing the leak test.
- Always perform the leak test outdoors, in a well-ventilated area, and away from sources of ignition such as gasoline, open flames, sparks, or electrical equipment.
- The device must be checked regularly for gas leaks. If a smell of gas is noticeable, the leak test must be carried out immediately.
Carrying out the leak test
- Make a soapy solution of soap and water in a 1:3 ratio. The soap solution can be applied with a bottle, brush, dish soap bottle or cloth to the areas to be tested: gas cylinder valve, pressure regulator, all gas connections, hose connections and along the entire length of the connection hose.
- The gas valve must be turned to the "OFF" position when applying the soap solution. Once the soapy solution has been applied all over, turn on the gas valve to the "ON" position.
- If there is a leak at one point, soap bubbles will appear at the corresponding point.
- If there is a leak, close the gas valve immediately. Tighten the leaking connectors, open the gas valve and recheck all points.
- If the leak does not stop after several attempts, contact your local gas dealer or similarly qualified person. Do not use the grill under any circumstances while there is a leak!
DEVICE OVERVIEW
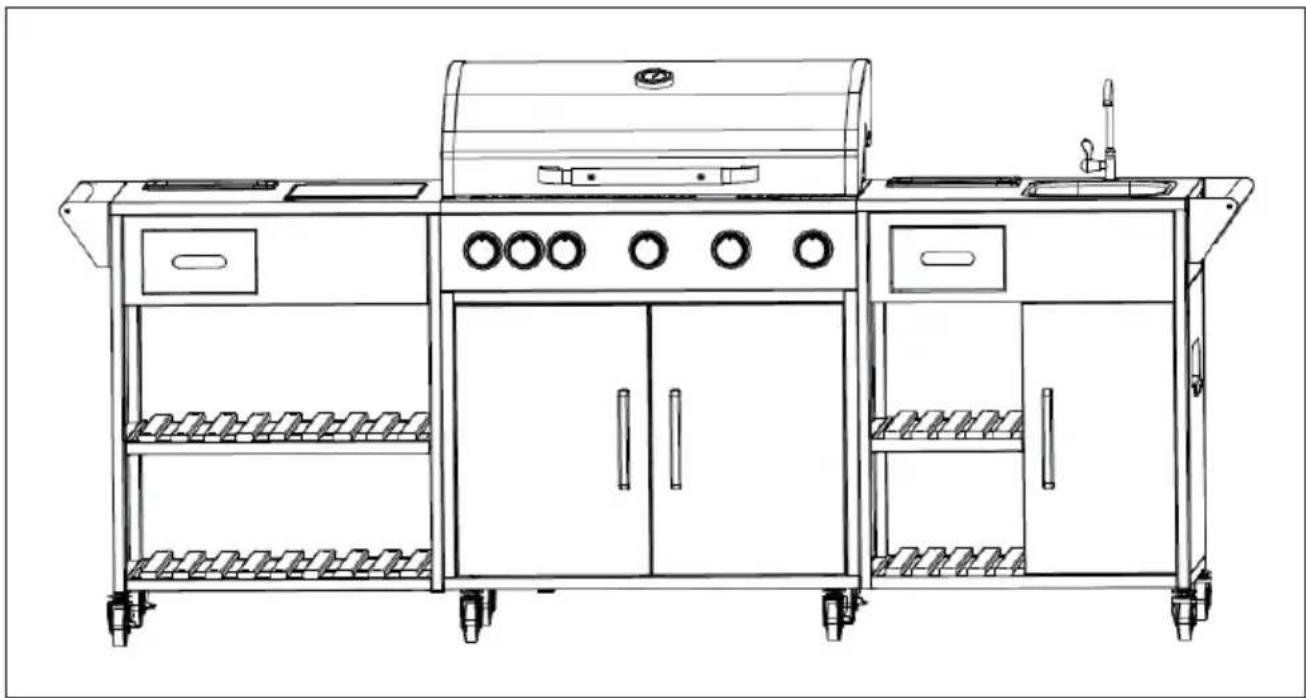
EN
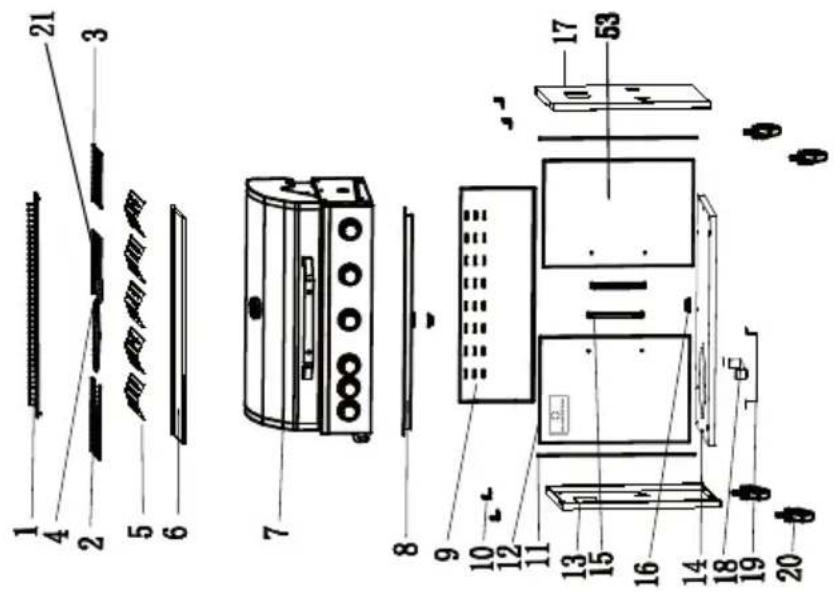
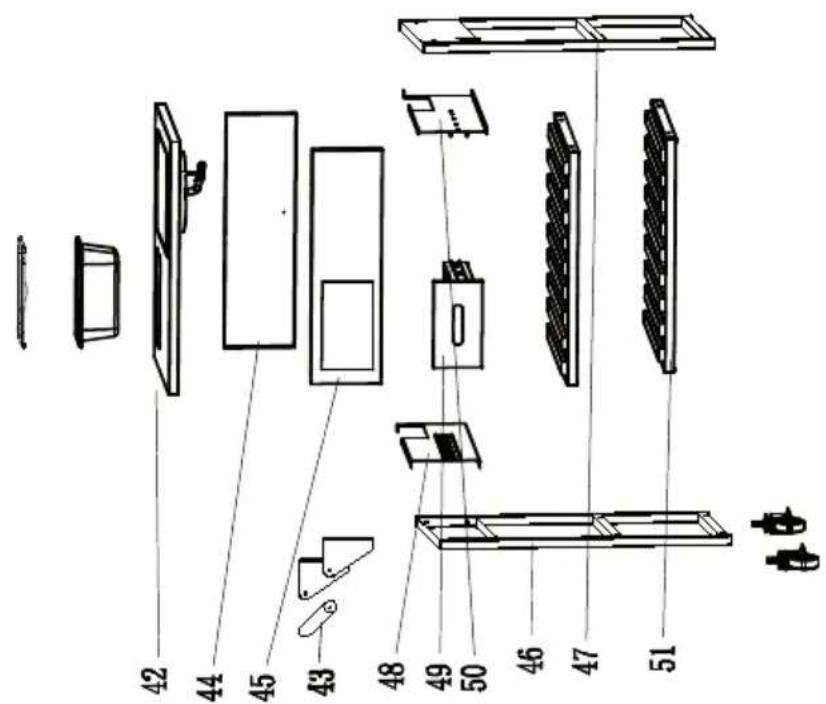
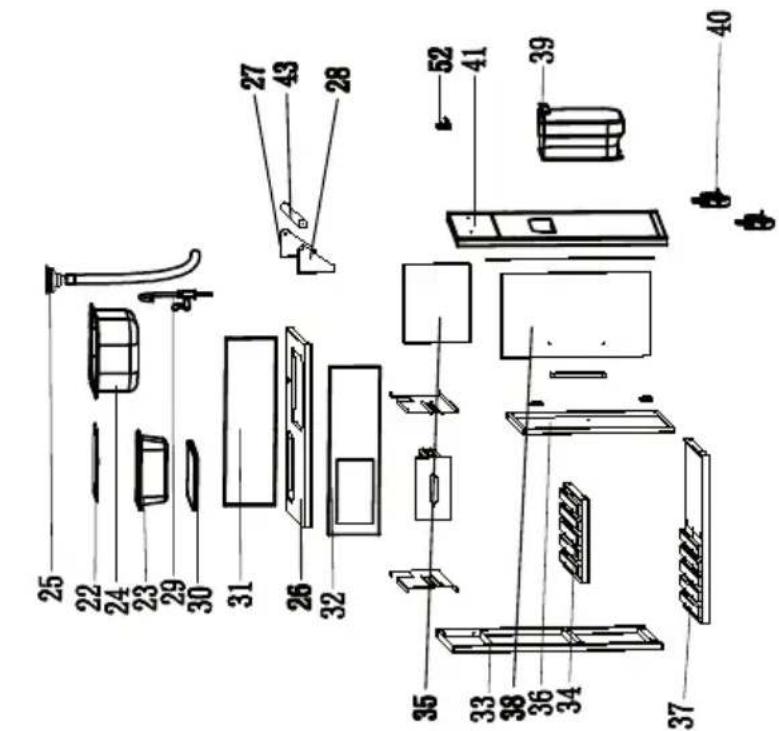
PARTS LIST
PART QTY PART QTY
Risk of injury! Although every effort has been made to remove sharp edges from the grill, you must handle all parts with care to avoid injury.
Tools needed: Either a Phillips screwdriver or a slotted screwdriver. Either a spanner or pliers.
Assembly
Read the instruction manual completely before proceeding. Find a large, clean area where you can set up the barbecue trolley. Check the list of the scope of delivery and look at the assembly pictures. The assembly of the barbecue includes many large parts. The assembly requires 2 persons.
Note: Remove the plastic cap before mounting.
GETTING STARTED
Preparation
- To use the barbecue, you need a liquid gas bottle and suitable gas pressure regulators. The gas pressure regulators should comply with the current version of the EN12864 standard and national specifications (see further instructions).
Setting up
- After purchasing the gas bottle, you can install it in your barbecue.
- Make sure that the barbecue is complete and that no appliance parts are missing. If any parts are missing, contact the customer service.
- You will need a suitable screwdriver and spanner to assemble the appliance.
- Select a suitable place to place the unit.
- The appliance should be placed securely on a flat surface of sufficient size.
- Make sure that the input and output regulators are appropriate and suitable for the gas cylinder valve and the appliance.
- If the gas pressure regulator is to be used outdoors, make sure that it is protected from the environment.
- You will need a suitable spanner to connect the gas bottle.
- When connecting the flexible hose, make sure that it is not twisted.
Connecting a gas cylinder
- When changing the gas bottle, make sure that there are no sources of ignition in the vicinity.
- Place the gas bottle on the left-hand side of the barbecue and never inside the barbecue, as the gas bottle must be in a safe position, away from any sources of heat.
- When you are ready to use the barbecue, attach the gas pressure regulator to the gas bottle and tighten it.
OPERATION
Information on how to save energy
- Reduce the opening time of the cover.
- Turn off the valve of the gas bottle as soon as the preparation process is finished.
- Preheat the appliance for 10-15 minutes only (except when using it for the first time).
- Do not preheat the appliance for longer than recommended.
- Do not set the temperature of the appliance higher than required.
- Connect the hose and the gas pressure regulator of the gas bottle to the left side of the appliance. Make sure the gas bottle is in a safe position and kept away from heat.
- Make sure the gas bottle is in a safe position and away from heat sources.
- The diameter of the gas hose is 8 - 10mm and varies depending on the adapter used. If in doubt, ask your local gas dealer for advice on which adapter and gas hose is compatible with the locally available gas cylinder in your country. Never operate the appliance if you are in doubt about compatibility or if you are unsure whether the connection is properly insulated. Only approved gas hoses and regulators may be connected to a (refi Iable) gas bottle. All components should comply with local regulations.
- The maximum length of the hose should be 1.5 metres.
CAUTION
Risk of burns! The grill cover must be open when the barbecue is ignited. Make sure that your face is not directly above the burner when lighting the barbecue.
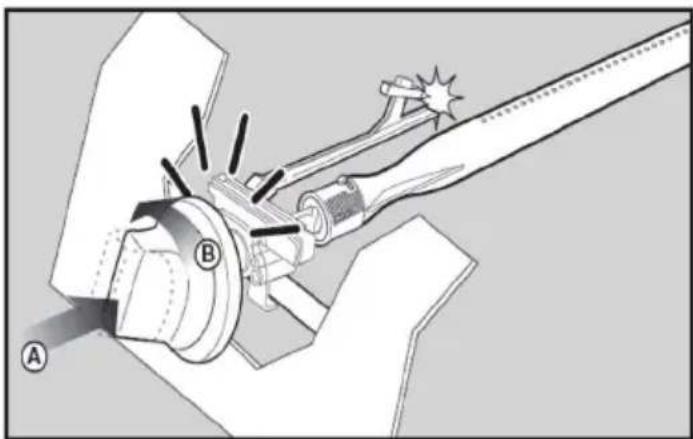
Lighting the barbecue
The burner has the following ignition procedure:
Ignition with pilot gas control (main burner or main burner with side burner or main burner with side burner and side burner):
- With all switches on the gas barbecue in the "OFF" position, turn the gas cylinder valve to the "ON" position.
- To create a spark, you must press the gas control knob (A) and hold it in this position for 3-5 seconds to allow the gas to flow and then turn it anticlockwise to "HIGH" (B).
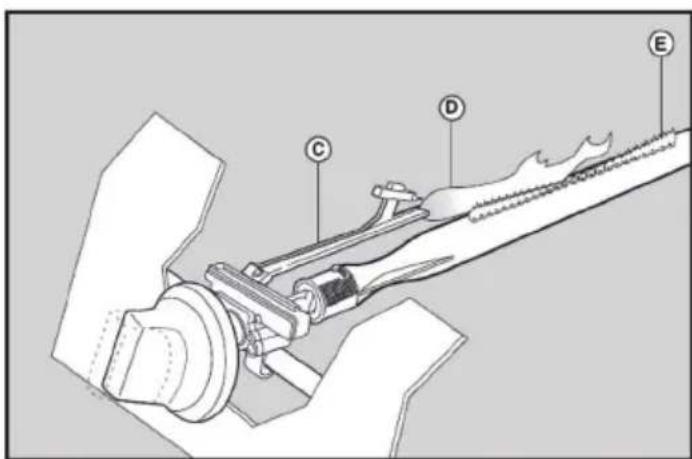
- This allows the spark to pass to the burner tube (C). You will hear a "snapping" sound from the igniter and see an orange flame coming out of the burner tube on the left side of the burner (D).
-
After the "snapping sound", keep the gas control knob pressed for another two seconds to allow the gas to flow completely through the burner tube (E) and ensure ignition.
-
When the burner is lit, adjacent burners are also lit as soon as the grill switch is turned to "HIGH".
- At the "HIGH" setting, the burner flame should be about 12 - 20mm long and the orange flame portion should be minimal.
- Turn the gas control knob fully anti-clockwise for the minimum setting.
- If you have difficulty lighting the barbecue when following the above steps, contact customer service or your local gas dealer.
- If the automatic ignition cannot be used, please remove the grill grate and heat distributor (hot plate) and turn the switch counter-clockwise to 90^ to ignite the appliance with a barbecue lighter placed 5mm from the burner hole.
- Then put the heat distributor and the grill grid back into the grill wearing protective gloves and fire- and heat-resistant protective gloves.
WARNING
Danger of fire and explosion! If the burner still will not light, turn the gas control knob to the "OFF" position and wait two minutes to allow the excess gas to dissipate before trying to light the grill again.
CLEANING AND CARE

WARNING
Danger of burns! All cleaning and maintenance must be carried out when the barbecue is cold and the gas supply to the gas cylinder has been turned off.
Service the appliance every 90 days, at least once a year is mandatory. This extends the service life of the appliance.
The appliance can be cleaned with minimal eff ort.
Storage
- The gas cylinder must be stored outdoors in a well-ventilated place and disconnected from the appliance when not in use.
- Make sure that you disconnect the connection between the gas cylinder and the appliance outdoors and that there are no sources of ignition nearby.
- After a long period of storage, check the gas barbecue for gas leaks and blockages in the burner openings before using it again.
- Follow the cleaning instructions to ensure that the barbecue is safe to use.
- Check all areas under the cover for insects and for blockages caused by insects if the barbecue has been stored outside. If blockages are present, remove them before use.
- Store the gas barbecue in a cool place.
- It may be necessary to dry the barbecue and the inside of the barbecue cover after storage, if one has been used.
- Chrome-plated heat shelves etc. should be rubbed with cooking oil before storage.
- Cover the burners with aluminium foil for storage to prevent insects and dirt deposits from getting inside the burner.
TROUBLESHOOTING
| Problem Possible reason | Solution | |
| The burner does not come on when using the ignition system. | The gas bottle is empty. | Replace with a full gas bottle. |
| Faulty pressure regulator. | Check or replace the pressure regulator. | |
| Blockage in the burner. | Check or replace the pressure regulator. | |
| Blockage in gas nozzle or hose | Clean the burner. | |
| Electrode wire loose and disconnected from electrode or ignition unit. | Reconnect the wire. | |
| Electrode or wire damaged. Faulty ignition switch. | Replace electrode or wire. | |
| The burner cannot be lit with a match. | The gas bottle is empty. | Replace with a full gas bottle. |
| Faulty pressure regulator. | Check or replace the pressure regulator. | |
| Blockage in the burner. | Check or replace the pressure regulator. | |
| Blockage in gas nozzle or hose | Clean the burner. | |
| Low Flame or Flame Retardant | The gas cylinder is too small. | Use a larger gas bottle. |
| Blockage in the burner. | Clean the burner. | |
| Blockage in gas nozzle or hose | Clean the burner. | |
| Windy conditions. | Use the barbecue in an area protected from the wind |
DISPOSAL CONSIDERATIONS
If there is a legal regulation for the disposal of electrical and electronic devices in your country, this symbol on the product or on the packaging indicates that this product must not be disposed of with household waste. Instead, it must be taken to a collection point for the recycling of electrical and electronic equipment. By disposing of it in accordance with the rules, you are protecting the environment and the health of your fellow human beings from negative consequences. For information about the recycling and disposal of this product, please contact your local authority or your household waste disposal service.
MANUFACTURER & IMPORTER (UK)
Manufacturer:
Chal-Tec GmbH, Wallstrasse 16, 10179 Berlin, Germany.
Importer for Great Britain:
Berlin Brands Group UK Limited
PO Box 42
272 Kensington High Street
London, W8 6ND
United Kingdom
Cher client, chere clientele,
Berlin Brands Group UK Limited
PO Box 42
272 Kensington High Street
London, W8 6ND
United Kingdom
Estimado cliente:
Berlin Brands Group UK Limited
PO Box 42
272 Kensington High Street
London, W8 6ND
Reino Unido
Gentile clientele,
A. X123
B. X10
C. X3
D. X1
E. X6
F. X 4
MONTAGGIO

AVERTIMENO
RICERCA DEI PROBLEMI
PRODUTTORE E IMPORTATORE (UK)
Produtlore:
Chal-Tec GmbH, Wallstraße 16, 10179 Berlin, Germania.
Berlin Brands Group UK Limited
PO Box 42
272 Kensington High Street
London, W8 6ND
United Kingdom
MONTÁZNY NÁVOD
ASSEMBLY INSTRUCTIONS
INSTRUCTIONS DE MONTAGE
INSTRUCCIONES DE MONTAJE