Gyspack OBD - Car diagnostic tool GYS - Free user manual and instructions
Find the device manual for free Gyspack OBD GYS in PDF.

User questions about Gyspack OBD GYS
0 question about this device. Answer the ones you know or ask your own.
Ask a new question about this device
Download the instructions for your Car diagnostic tool in PDF format for free! Find your manual Gyspack OBD - GYS and take your electronic device back in hand. On this page are published all the documents necessary for the use of your device. Gyspack OBD by GYS.
USER MANUAL Gyspack OBD GYS
This manual includes guidelines on the operation of your device and the precautions to follow for your own safety. Ensure it is read carefully before first use and keep it handy for future reference. These instructions should be read and understood before anyone operates the product. Any modifications or maintenance that are not specified in the manual should not be undertaken. The manufacturer is not liable for any injury or damage due to noncompliance with the instruction manual. In case of problems or uncertainties, please consult a qualified person that is able to handle the device correctly. This device should only be used for memory backup within the limits indicated on the device and manual. The safety instructions must be followed. In case of improper or unsafe use, the manufacturer cannot be held responsible.
This device may be used by children from age 8 and by persons with reduced physical, sensory or mental capabilities or lack of experience and knowledge, provided that they are under supervision or have been told how to use the device safely and are aware of the potential risks. Children must not use the device as a plaything. Cleaning and servicing tasks may not be carried out by children unless they are supervised.
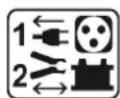
Do not use for charging non-rechargeable batteries
Do not operate the device with a damaged power supply cord or a damaged mains plug.
Never charge a frozen or damaged battery.
Do not cover the device
Do not place the device near a fire or subject it to heat or to longterm temperatures exceeding 50^
Risk of explosion or acid splashing if the clamps are short-circuited or if the 12V booster is connected to a 24V vehicle or vice versa.
Risk of explosion and fire!
A battery being charged can emit explosive gas.
- During the charge, the battery must be placed in a well ventilated area.
- Avoid flames and sparks. Do not smoke.
- Protect the electrical contacts of the battery against short-circuiting.


Acid projection hazard!
- Wear safety goggles and protective gloves.

- If your eyes or skin come into contact with battery acid, rinse the affected part of the body with plenty of water and seek immediate medical assistance.
Connection / disconnection:
- Disconnect the power supply before connecting/disconnecting the device to/from the battery.
- The terminal of the battery that is not connected to the car frame must be connected first. The other connection must be made on the car frame, far from the battery and the fuel line. The battery charger must be connected to the power supply network.
- After the starting/charging process, disconnect the booster/battery charger from the power supply network and remove the connector from the car frame and then the connector from the battery, in this order.

Connection:
Class II device (charger booster)
Class III device (booster)

Maintenance:
- The power supply cable cannot be replaced. If the cable is damaged, the device should not be used.
Service should be performed by a qualified person - Warning! Always remove the power plug from the wall socket before carrying out any work on the device.
- Under no circumstances should solvents or other aggressive cleaning agents be used.
- Clean the device's surfaces with a soft, dry cloth.
C E E A C UK CA
Regulations
The device complies with European Directive.
The certificate of compliance is available on our website.
EAC conformity mark (Eurasian Economic Commission)
- Equipment in compliance with British requirements. The British Declaration of Conformity is available on our website (see home page).
- Equipment in conformity with Moroccan standards.
The declaration C_ (CMIM) of conformity is available on our website (see cover page).

Disposal:
- This product should be disposed of at an appropriate recycling facility. Do not dispose of in domestic waste.
- The battery fitted in this device is recyclable. Please proceed according to the applicable recycling regulations.
- The battery must be removed from the device before the latter is discarded.
GENERAL DESCRIPTION
For 12V lead-acid batteries (6× 2V cells) with a capacity of 30Ah to 130Ah .
The GYSPACK OBD is designed to maintain the internal memory of your vehicle during a change of battery or any other operation involving the disconnection of the battery. This unit prevents any loss of data or the need to reprogram the on board system (Clock, radio, alarm, hands-free kit...) which can be a long process. Equipped with a cigarette lighter plug, the GYSPACK OBD is also a 12V DC power supply for Laptops, TVs, tools, etc...
Easy to carry - this product has a compartment to store cables and charger.

To get the maximum from your machine and ensure the long life of the internal battery, it is recommended the unit is charged after each use.
TEST OF THE INTERNAL BATTERY
To start the GYSPACK OBD and test the internal battery health, press the button for 3 seconds. The LEDs will light and one of these three LED will stay on showing the battery status.

<50%

<75%

100%
The red light indicates the internal battery is at less than 50% charge,
It is necessary to charge the internal battery immediately.
The yellow light indicates the internal battery is charged to between 50 and 75%
You can use the product but it is preferable to charge it as soon as possible.
The green light indicates the internal battery is fully charged.
The unit is ready to use.
To stop the unit press again the button for 3 seconds. If it doesn't turn off manually, the unit stops after 4 hours.
RECHARGE OF INTERNAL BATTERY
To charge the internal battery, the GYSPACK OBD must not be connected to a vehicle.
1 - Plug the charger of the unit into the mains supply (230V)
2 - Plug the charger into the indicated place on the front of the machine
3 - State of charge:


The red light indicates the internal battery is charging.
The green light indicates the internal battery is charged.
You can use the unit.
The yellow light indicates the internal battery is faulty.
It is necessary to replace the internal battery.

- If after 24 hours of charge the red light is still on, the internal battery is damaged. It is necessary to replace it.
- Do not try to charge the product via the cigarette lighter connection of your vehicle. The current is not stable and can damage the product or the cigarette lighter connection. For optimum charge you must use the charger delivered with the unit and plug it into the mains supply.

If the equipment or the vehicle connected to the GYSPACK OBD needs more than 4A or has a short circuit, the electronic protection of the GYSPACK OBD will switch on and cut the power supply. To use it again and enable the protection, it is necessary to disconnect the 12V DC plug or the GYSPACK OBD.
USE ON OBD PLUG
Before using this feature you must be sure that all the energy consumers of your vehicle (fan, lights, onboard computer...) are switched off:
1 - Check the internal battery of the GYPACK OBD is charged (read « Test of the internal battery»).
2 - Connect the cable with the OBD connector to the vehicle.
Check that the connector is properly plugged into the vehicle.
3 - Switch on the product.
4 - Disconnect the battery from the vehicle and put the cables on a non conducting surface.
Attention: The electrical system of the vehicle receives current from the OBD Memory Saver via the OBD plug. However, the battery terminals are still supplied with power. It is necessary to insulate them and avoid any contact with a metallic part or any conducting object which can create a short circuit.
5 - Once the battery is connected to the vehicle, disconnect the OBD plug.
6 - Charge the product after use.
USE AS A 12V POWER SUPPLY VIA THE CIGARETTE LIGHTER PLUG
This product gives you a 12V power supply via the cigarette lighter plug:
1 - Check the internal battery of the GYPACK OBD is charged (read « Test of the internal battery»).
2 - Check the equipment that you want to connect to the GYSPACK OBD is switched off then connect the unit via the cigarette lighter connection.
3 - Switch on the equipment. The GYSPACK OBD will supply the power needed.
4 - Switch off the equipment after each use, disconnect the cigarette lighter connection and plug the GYPACK OBD into the mains supply to charge it.
Important: Do not use the OBD plug as a power supply for the on board electronics (onboard computer, radio) because you can damage the internal battery.
NO WARRANTY ON THE BATTERY
The internal batteries are active components; their life depends on your use and maintenance. The internal batteries must be charged after EACH use. High temperatures will considerably reduce the battery charge. After a long period without using the Gyspack OBD, it is recommended to charge the internal batteries again before using.
For this reason the Gyspack OBD battery is not covered under the warranty.
WARRANTY
The warranty covers faulty workmanship for 2 years from the date of purchase (parts and labour).
The warranty does not cover:
- Transit damage.
- Normal wear of parts (eg. cables, clamps, etc...).
- Damages due to misuse (power supply error, dropping of equipment, disassembling).
- Environment related failures (pollution, rust, dust).
In case of failure, return the unit to your distributor together with:
- The proof of purchase (receipt etc ...)
- A description of the fault reported
He nokpbBaIte annapat.
He yctaHaBnBaTb annapaT pIOM C nCTOuHnKOM TeNla N He NOdBepraTb BbICOKIM TempepaTypam (Bblwe 50^ ) B TeueHn DJIITeJbHOro nepNoDa.
PnCK KNCJIoTHbIX 6pbI3r!
Hocnte 3aunTHbIe OUKN n nepuATKn.
Bcnyae KOHTaKaTc c rla3amn nn Koxe, npomOte 6bNbHO BODoN pOKOHcyIbTnpyTe Bpaua 6e3 npomeDJIeHna.
- 3TOT annapaT noIeKNT nepepa60tke. He Bbl6pacbIBaTb B O6uMycopoc6OpHnK.
- AkkyjTOp DaHoro annapaT noJexnT nepepa60Te. IoxaIyIcTa, cJeDyIe DeIcTBYIOzIM npabNlaM nepepa60TkN.
Heo6xOdIMO n3Bnueb aKKymyIaTOp n3 aannapata npexJe yemero OTnpaBnTB B yTNIn3aCNU.
ONHCAHNE
Дя CBNHIOBO-KNCHOTbIX aKKyMnyIaTOPOB 12 B (6 x 2 B JIeMeHToB) emKoCTbIO O T 30 Auydo 130 Au.
GYSPACK OBD pa3pa6OtaH dIy IIOdEppKn BHyTpeHHeN pAmrTH aBTOMoBuJe BO BpeM 3aMeHbI aKKyMnyIaTOPbIx
6aTapei nII BO BpeM IIO6oI dpyroI onepauu, Tpe6yIoUeI OTKnIOUeHne AK5. 3TOT annapaT no3BOJraET n36eKaTb
noTeprn daHHbIX, a TAKKe nepeIporpaMnpOBaHn6OpTOBOro KOMbIOpTePA, KOTope 3aAcTyU 6bBaET dIInTeJbHbIM
(uaCbl, paINO, CNHaJIa3aun, 6eCKoHTaKTHoe 3axnIraHne...). 5laRaOapR WkUPy npNKypnbAteJIa GYSPACK OBD moKeT
NCNoJb3OBAtBCR B KaueCTBe NcToHnka PITaHnI 12B DC dIy lambl, TeLeBn3Opa, 3NeKTpOnHCTpyMeHTOB nTd...
ДЯ yDObCTBa TpaHCnOPTnPoBKn C3aIa annapata ectb OTdeJeHne dIra Ka6JIeN i 3Y.

IyXopoWe pa60bI annapata n UTO6bl c6peueb cpoK cnYk6bl BCTpoEHHO 6aTapeH COBepweHNO Heo6xOIMO nepe3apKaTb erO neped npBbIM NCNoJb3OBaHNEM, NOcNE KaKDoR NO CnOJIb3OBaHnRA KAKDbIe 30 dHeB CnUyae HncNoJIb3OBaHnR.
TECTNPOBAHNE BCTPOEHHOI AKKUMYJATOPHOI BATAPEI
YTo6bI 3aIyCTnTb GYSPACK OBD n npOBepntb COCTOAHne BHyTpeneHne 6aTapeH, HaxMnTe B TeueHN 3 cek Ha KhoNky. CBeToNDoBJI 3aRopTcra OHIN N3 HNX OCTaHeTcB KJIIOUeHHbIM COOTBetCTBeHHO COCTOAHNO 6aTapeH:

<50%
Kpachna lamnoquka nok3bIbaeT, YTO 6aTapezapxkeHa Mehhe, Yem Ha 50%
Heo6xoDmO HemeIeHNo npe3apnTb 6aTaapeo

<75%
JKeTaa lamnocha nokaabaet,TO 3apd6aTapen MeKdy 50n75%
→AnnapaT MoXHO ICNoIb3OBA Tb, HO JeNaTeIbHo 3apAINtB eRo, KaK TOnIbKO BO3MOXHO

100%
3eHeHa JAmNoUka Noka3bBaeT, YTo 6aTapeR nonHocTbO 3apXKeHa
→AnnapaT roTOB K NcNoJIb3OBAHnIO
YTo6bI BbIKJIOHTb annapaT, HaxMMte cHOBA B TeueHn 3 cek. Ecnn annapat He 6ydt BBKIOUeH BpyHyO, OH BbIKJIOUMTCra ABtOMaTHueCKn Ype3 4 yaca.
3APRAKBA BCTPOEHHOI AKKUMYJATOPHOI BATAPEI
YTo6bI 3apAInTb BCTpoEHHyIO 6aTapeIO, annapaT GYSPACK OBD He doJIKeH 6bITb NOKIIIOueH K ABTOMo6nIO.
1-PoikIIOHTe 6JOK 3apAHOro yCTpoiCTBa K ceTn (230B)
2 - ПдклочиTe 3Y K MeCTy, уka3aHHOMу Ha nepeDHeN naHene annapaTa
→ BaTapeH O HxKHO 3aMeHHTb

- Ecnn Kpaacha NaMnocha He rachet no nCTeueHn 6oJee 24 yacOB, BHyTpeHHn aKKyMyIaTOp NOBpeKdE H COBepseHNO Heo6xOdmo ero 3aMeHnTB.
- He nbTaIteCb 3apJntb annapat uepe3 npKypnbAteIb ABTomO6nla, TK TOK 3apJkn MoKet 6bIb HeCTa6nblHbIM n NobpeJntb annapat nn npKypnbAteIb. DJI ONTImaIbHOJ 3apJkn BocNoIb3yTeCb 6loKOM 3Y, NoCTabJIIOUcMcBMeCTe C annapaTOM.

Ecnn annapat nnn aBtOMobnIb, noaCoeHHeHHb K GYSPACK OBD notpe6JrE 60nee 4A nn nnoBepraetcKopOTKOMy 3aMbKaHnIO, to cpa6oTaET 3JeKtpOnHna 3aunTa GYSPACK OBD, kOtopa Bblpy6nt nHTaHne. TTo6bl ChOBA nCpONb3ObaTb annapat n ChOBA BKlouHtB 3aunTy, Heo6xodnO tKlouHtB BnKy 12B DC nn BnKy OBD ot annapata.
NCIOJIb3OBAHHe BNJIKN OBD
Ipeenncnolb30BaHem TuaTeJIbHO npOBepbTe, yTo6bI BCE nOTpe6uTeJIN aBTOMo6nJRA (BeHTNJLrJra, CBET, 6OpTOB0KOMNBIOTep ...) He 6blIN BKNIOUoyHebl :
1 - Поберпг, Утбы Встpoehнь Akулгога pop anapapa 6bl Заржен (cM. naparpaФ « Тсюрване BстpoehногakymyIaTOpHoi 6aTapeN »)
2-CnMOUHOKOHKeTopaOBDnoDcoeHNHTeKa6eIbKaBTOMoNJIIO
→Поберпг,чтобконнжтбopбл npabINьно nodkNIOueH K abTomO6nIIO
3-BkIIOUHTe annapaT
4-OTKIIIOHTe AK5 aBTOMO6NJI IN NOLOXNTe Ka6eJIN Ha HEnpOBODHNIKOBYIO DeTJIb.
BHHMaHHe:B3JIeKTPnuecka CnCTema aBTOMo6nla NocTynae TOK n3 OSB Memory Saver Yape3 pa3bEm OBD. TeMe He MeHee, KOHHeKToPbI AK5 aBTOMo6nla PpOdoJXkaOT 6bITb POnPiTaHHbIMn. Heo6xoJMo I30JIpOBaTb nx n HeCoedINHrTb C MeTaIIInueckmN qAChTm nn KaKIM-Jn60 ToKOpPoBOdAqIm PpeDMeTOM, KOTOpbI MoR 6bl Bbl3BaTbKOpOTKoe 3aMbIkaHHe.
5 - KaK TOnbko 6aTapea ChOba NDoCoeDInHeHa K ABTOMo6nIIO,OTCoEHNHTe pa3bEm OBD
6-Pepe3aprAte annapat nocne nCnoB0aHn.
NcnoJb3OBAHHe B KauCTBE NCTOCHNA PNTAHNA 12 B YEPE3 THe3IO PNKUPNBATEJIa
3TOT annapaT moKeT 6bIb nCNoJIb3OBAH, KaK nCToUHnK pITaHnA 12 B uepe rHe3do npNkypnbateJia :
1-Пюовьт,уTO6bI BCTpoeHHa 6aTapeO OBD 6bla 3apJKeHa (cM. naparpaФ « TectipoBaHne BCTpoEHHO aKKyMyJIaTOpHoi 6aTapeN »)
2 - Поверьт,чTo6bI np6Op,КOTOB bbl XOTITE noKIOUHTb K GYSPACK OBD, BbIKIOueH (B noJIOKeHn OFF), 3aTeM coeHNITe annapaT n np6Op c nomOsbIO hHypa pnpKypnbTaTeJ
3-BkIIOHTe annapat n GYSPACK OBD 6yTe BbIaBaTb HxKhBn TOK.
4 - Послесиюльбовая ВьклочаappaT,OTcoeHHTe shHyp npKypBaTeIЯ n noKluOHTe GYSPACK OBD K cetnДгno3apdkn.
BHHMaHHe He nObl3yIte pa3bEm OBD KaK nCTouHnK ToKa IaTaN X 3JeKtpoHHbIX CnCTeM aBTOMo6nJra, KaK 6OpTOBoi KOMnbIOTeP, paAno... Bo n36ExaHne NOBpeDnTB BCTpoEHHyO 6aTaapeIo.
BATAPER HE NOKPbIBAETCRA PAAPTNEI
AkkymyIaTOPhie 6aTapei ABJIOTcA kTINBbIMN 3JemeHTAMn. CpOK IX Cnyk6bl 3aBNCNT OT Texo6CnyKuBaHnI. IocJe KaJdOrO nCnoJIb3OBaHnI NyCKOBoro yCTpoIcTBa COBepWeHHO Heo6XODIMO nepe3aprIb BHyTpEHnE aKKymyIaTOPhie 6aTapei. XpaHHe NpN BlicOKNx TemnepaTypax 3NaHTeNbHO ChnKaet 3apRd 6aTapei. B clyae npdoJokntbHoro HncNoJIb3OBaHne HAcToTeNbHO COBeTyem nepe3aprIb 6aTapei nepei nCnoJIb3OBaHnEM. Ito TOn npUHHe 6aTapei annapata Gyspack OBD He nokpbIbAEtca rapaTnei.
TAPAHTR
TapaHTnpaCnpocTpAneTcnaIIO6o3aBODCKOeΦeKTnn6paK B TeueHne 2x Jnt C DaTbI NOKyTNn3dJIINr (3aNactn npaboyacnna).
TapaHTnHe pacnpocTpahReTcHa:
- JIO6bIe NOnOMKn, Bb3BaHHbIe TpaHCnOpTnpOBKoN.
- HopmaIbHbI n3Hoc DeTaeNei (HaPnMpE: ka6eJI, 3aXIMbI n T.D.).
CnyuHnHepaBnIbHOro nCnoNb3OBAHnra (oun6ka nHTaHnra, naeHne, pa36Opka).
Cnyuany BbIXoJa n3 cTPOy n3-3a OkpykaIOUe Cpebl (3arp3HeHHe BO3dyxa, Kopp03n, nbIb).
PnBbIXoJe n3 cTpo, o6paNTecb B nyHKT NOKyKNn annapaTa C npdeBraHHeHem CneDyoUxN DOKyMeHTOB:
-ДOKуМЕТ, NOДТВЕРЖДАЮUIN NOKУПК (c DaToN): KACCOBын Ук, INHBOИС....
-ONHcAHne NIOJOMKn.
BELANGRIJKE VEILIGHEIDSINSTRUCTIES