02678 - Fitness Equipment VitalMaxx - Free user manual and instructions
Find the device manual for free 02678 VitalMaxx in PDF.
| Product type | Fitness device to strengthen abs, back, arms, legs and glutes |
| Brand | VitalMaxx |
| Model | 02678 |
| Dimensions (assembled) | 1160 x 730 x 545 mm |
| Dimensions (folded) | 1330 x 190 x 545 mm |
| Device weight | 9.6 kg |
| Max user weight | 100 kg |
| Power | 1 AA 1.5V battery (not included) |
| Display | Training computer with LCD screen |
| Functions | Time, Count, Calorie, Reps/Min, Scan |
| Materials | Steel frame, foam padding, knee pads |
| Use | Indoor, private use only |
| Safety | Safety rod for locking, adjustable foot, max 100 kg |
| Warranty | Excludes defects due to mishandling or normal wear |
| Maintenance | Clean with damp cloth and mild dish soap |
| Storage | Dry place, foldable foot to save space |
| Delivery contents | Individual parts, screw key, manual |
Frequently Asked Questions - 02678 VitalMaxx
User questions about 02678 VitalMaxx
0 question about this device. Answer the ones you know or ask your own.
Ask a new question about this device
Download the instructions for your Fitness Equipment in PDF format for free! Find your manual 02678 - VitalMaxx and take your electronic device back in hand. On this page are published all the documents necessary for the use of your device. 02678 by VitalMaxx.
USER MANUAL 02678 VitalMaxx
natural_image
3D rendered image of a stationary exercise bike with adjustable arms and wheels (no text or symbols visible)Gebrauchsanleitung
ab Seite 3
Instruction manual
starting on page 18
Mode d'emploi
www.service-shopping.de

text_image
Exploded view diagram of a mechanical assembly with numbered parts for identificationTeileliste
natural_image
Close-up of two metallic screw and washer components (no text or symbols visible)Schritt 3
Schritt 5
natural_image
Close-up of two metallic screw and nut components (no text or symbols visible)Schritt 6
natural_image
Two metallic screw fasteners and two separate washers (no text or symbols visible)natural_image
Technical line drawing of a mechanical assembly with no visible text or symbolsnatural_image
Line drawing of a hand holding a small electronic device mounted on a vertical pole (no text or symbols)natural_image
Technical line drawing of a mechanical assembly with no visible text or symbolsnatural_image
Technical line drawing of a mechanical clamp or lever assembly (no text or symbols)natural_image
Technical line drawing of a mechanical component with no visible text or symbolsnatural_image
Mechanical assembly diagram showing two connected components with mounting holes and a belt mechanism (no text or labels)natural_image
Woman performing a plank exercise using a leg presser machine (no text or symbols visible)natural_image
Woman performing a resistance exercise using a leg bridge device (no text or symbols visible)natural_image
Line drawing of a person in a dynamic pose, possibly performing a martial arts or exercise pose (no text or symbols)natural_image
Line drawing of a person in motion, possibly dancing or running (no text or symbols)natural_image
Line drawing of a person in a relaxed pose with arms raised (no text or symbols)natural_image
Line drawing of a person lying on their back in a kneeling position (no text or symbols)natural_image
Line drawing of a seated woman in a relaxed pose, no text or symbols presentnatural_image
Line drawing of a person performing a plank exercise (no text or symbols)natural_image
Line drawing of a person in a seated yoga pose (no text or symbols)Meaning of symbols in these instructions 19
Safety instructions 19
Proper use 19
Risks of injury 19
Handling the batteries properly 20
Notes on use 20
Warranty conditions 21
Product contents 22
Parts list 22
Prior to first use 24
Unpacking the device 24
Inserting/changing the battery 24
Assembling the device 24
Screws 25
Step I: Mounting the handle bar 25
Step 2: Connecting the workout computer 25
Step 3: Mounting the cover on the main frame 25
Step 4: Padding the arm rests 26
Step 5: Attaching the knee pads 26
Step 6: Securing the knee pads 26
Overview of functions 26
Operating the workout computer 27
Use 27
Before your workout 27
Workout 27
After your workout 29
Cleaning and storage 31
Cleaning 31
Storage 31
Technical data 31
Disposal 32
Dear customer,
We are delighted that you have decided to purchase a workout device from our establishment.
This workout device provides a workout for your abdomen, legs, arms, back, and buttocks – all at the same time! Simple and effective. We hope you enjoy it!
If you have any questions, please contact customer service via our website:
www.service-shopping.de

Prior to using the device for the first time, please carefully read through the operating instructions and store them in a safe place. These instructions are to accompany the device when it is passed on to others. The manufacturer and importer assume no liability in the event the data in these instructions have not been observed!
As part of ongoing development, we reserve the right to alter the product, packaging or enclosed documentation at any time.
Meaning of symbols in these instructions

All safety notices are marked with this symbol. Please carefully read through and obey the safety notices in order to avoid injury to persons and damage to property.

Tips and recommendations are marked with this symbol.
Safety instructions
Proper use
☐ This device is intended to exercise the muscles of the abdomen, back, arm, legs, and buttocks.
☐ This device is not suitable for therapeutic applications!
☐ The maximum permissible body weight of the user amounts to 100 kg.
☐ The device is only suitable for use in closed indoor areas.
☐ The device is intended for domestic, not commercial, use.
☐ Only use the device as described in these instructions. Any other use is deemed improper.

Risks of injury
Keep children and pets away from the device and packaging. There is a danger of injury and suffocation!
☐ This device is not suitable for use by persons (including children) with restricted sensory or intellectual abilities or with a lack of experience and/or knowledge unless they are supervised by a person responsible for their safety or have received instructions from that person as to how to use the device. Children must be under supervision to ensure that they do not play with the device.
☐ Do not use the device if it is damaged.
☐ Be sure to perform adequate warm up exercises before using the device (see chapter "Before your workout").
☐ Start the exercises slowly and then gradually increase the intensity. We expressly point out that using the device improperly or exercising too intensively could be hazardous to your health. For this reason, do not overdo it and do not overestimate yourself.
☐ The device may only be used by one person at a time.
☐ If you belong to a health risk group, have not exercised for a longer period of time, have a cardiovascular or orthopaedic condition, you should consult your physician before using the device. If applicable, consult your workout plan with him/her.
☐ Pregnant persons are not allowed to use the device or only after having consulted their physician.
☐ Immediately stop your workout if you feel weak or dizzy. In the event of nausea, pain in the chest or limbs, heart palpation or other symptoms, please immediately contact a physician.
☐ Make sure that the training area is well ventilated during your workout.
☐ Do not work out directly after a meal or after consuming alcohol.
☐ When working out, wear comfortable clothing and non-slip gym shoes. Do not use the device without clothing.
- Ensure that your clothing is not too wide to prevent it from catching in the device's moving parts.
☐ If you have long hair, be sure to wear it up before working out so that there is no risk of it catching in the device. Remove any jewellery.

Handling the batteries properly
Before inserting the battery, make sure that the contacts in the device and on the battery are clean and, if necessary, clean them.
☐ Only use the battery type specified in the technical data (see chapter “Technical data”).
☐ When changing batteries ensure correct polarity (+/-).
☐ Remove the battery from the device if it is used up or if you are not using the device for an extended period of time. This will prevent damage which can be caused by leakage.
☐ Immediately remove any leaking battery from the device. Clean the contacts before inserting a new battery.
☐ The battery may not be charged or reactivated with other means, may not be disassembled, disposed of in fi re, immersed in a liquid or short-circuited.

Notes on use
☐ Check the device and accessories for damages as well as wear and tear before every workout. The device may not be used if it exhibits visible damages.
Attention! The device's level of safety can only be maintained if it is checked for damages on a regular basis. For your own safety, always check the device for damages prior to using
it (cracks, holes, loose screws etc.). Defective parts must be immediately replaced by a qualified professional. The device may not be used until it has been repaired.
☐ If the device is defective, do not attempt to repair it yourself. In the event of damage, contact customer service or a professional.
☐ Only use the device if it has been properly assembled.
The safety pin for securing the base height should not be left projecting so that it will not interfere with the user's movement.
☐ Only use the accessories included.
☐ Do not subject the device to extreme temperatures, severe changes in temperature, direct sunlight or moisture.
☐ Ensure that there is enough space (at least 1 metre) on all sides of the device so that you have enough room for movement when working out.
☐ Set up the device on a level surface. If necessary, cover sensitive floors (laminate, parquet etc.) with a non-slip floor protection mat.
☐ Set up the device so that it is out of reach of children and pets.
Warranty conditions
Defects arising due to improper handling, damage or attempts at repair are excluded from the warranty. This also applies to normal wear and tear.
Product contents
Parts overview
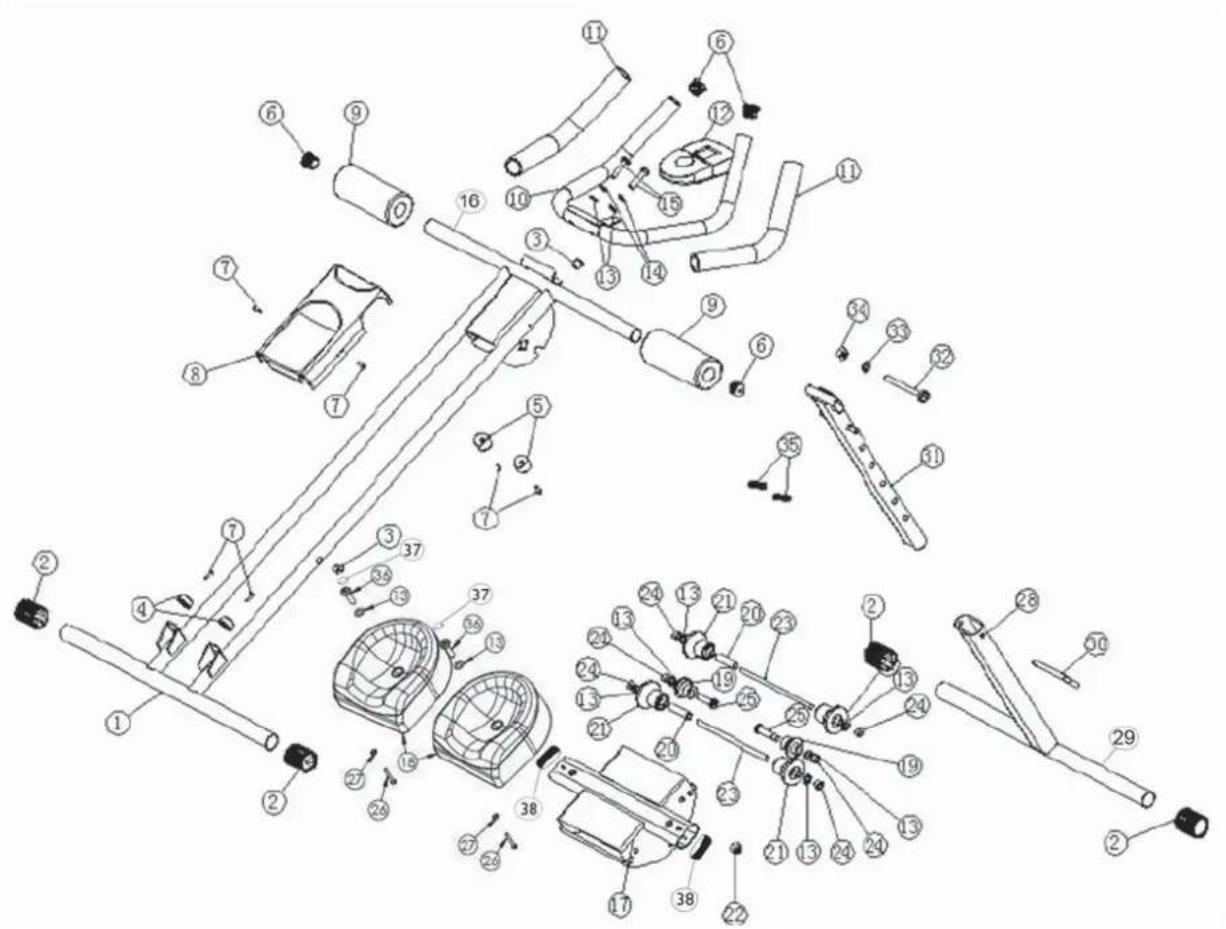
text_image
Exploded view diagram of a mechanical assembly with numbered parts for identificationParts list
| Part number | Designation Quan- | tity | Specifi cation | |||||
| 1 | M | a | i | n | f | r | a | m |
| 2 | P | r | o | t | e | c | t | i |
| 3 | P | l | u | g | 2 | |||
| 4 | b | o | t | t | o | m | s | t |
| 5 | u | p | p | e | r | s | t | o |
| 6 | P | i | p | e | c | o | v | e |
| 7 Crosshead screw 6 ST 4.0 x 15 | ||||||||
| 8 Main frame cover | l | |||||||
| 9 Foam pads for arm rests | 2 | |||||||
| 10 Handle bar 1 | ||
| 11 Foam handle 2 | ||
| 12 Workout computer 1 incl. cord | ||
| 13 Washer 8 M8 | ||
| 14 Spring washer 2 M8 | ||
| 15 Hexagon socket screw 2 M8 x 40 | ||
| 16 Main frame crossbar 1 | ||
| 17 Sledge | 1 | |
| 18 Knee pad 2 | ||
| 19 Small sledge role 2 | ||
| 20 Sleeve | 2 | |
| 21 Large sledge role 2 | ||
| 22 Electromagnet | 1 | |
| 23 Ball screw | 2 M8 x | 80 |
| 24 Nylon nut 6 M8 | ||
| 25 Hexagon socket screw 2 M8 x 45 | ||
| 26 Crosshead screw | 2 ST 4.0 x 32 | |
| 27 Washer | 2 ∅ 5.5 x ∅ 10 x 1.5 | |
| 28 Base | 1 | |
| 29 Base crossbar | 1 | |
| 30 Safety pin for securing the base height | 1 ∅ 8 | |
| 31 Perforated rail for setting the base height 1 | ||
| 32 Hexagon head bolt | 1 M10 x | 90 |
| 33 Washer | 1 | ∅ 10.4 x ∅ 20 x 1.5 |
| 34 Nylon nut | 1 M10 | |
| 35 Spring | 2 | |
| 36 Hexagon socket screw 2 M8 x 35 | ||
| 37 screw cover | 2 ∅ 20 x 8 | |
| 37 Pipe cover | 2 | |
Not shown
• Tool for fastening the screws.
Prior to fi rst use
Before using the device for the first time you must:
- Unpack the product contents,
- Insert the batteries in the workout computer,
- Assemble the device.
Unpacking the device

ATTENTION!
□ Keep children and pets away from the packaging. Danger of suffocation exists!
Unpack all parts and make sure that the product contents are complete (see chapter “Product contents”) and check for any damages from transport. If you identify damages to the components, do not use them (!), instead contact our customer service centre.
Inserting/changing the battery
You will need a 1.5 volt battery, type AA to operate the workout computer.
I. Open the battery compartment on the back of the workout computer.
2. Insert the battery. When inserting a battery, make sure the polarity is correct (+/-).
3. Change the battery as soon as the display begins to diminish.
Assembling the device

ATTENTION!
☐ Set up the device in a suitable area with adequate space on all sides.
Before assembling the device, spread out a blanket or tarp to protect your floor.
- To facilitate assembly, a parts list and graphic overview of the screws, nuts, and washers used including their respective part numbers from the parts list are provided in the chapter “Product contents”. The numbers provided in the figures of this chapter also refer to the “Part number” category on the parts list.
- Use the tool for tightening the screws.
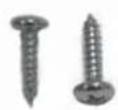
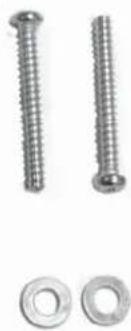
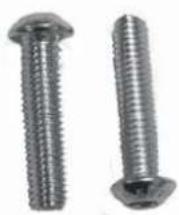
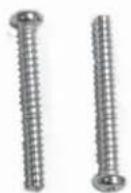
Screws
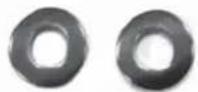
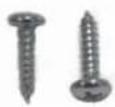
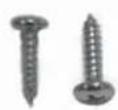
In the following picture you can see the fastening material needed to assemble the device:
Step I
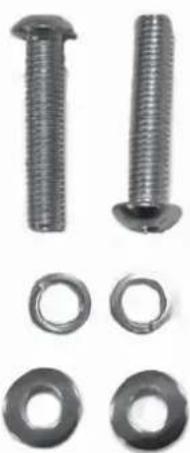
natural_image
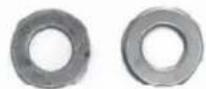
Close-up of two metallic screw and washer components (no text or symbols visible)Step 3
Step 5
natural_image
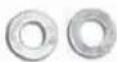
Close-up of two metallic screw and washer components (no text or symbols visible)Step 6
natural_image
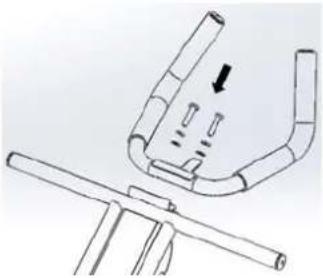
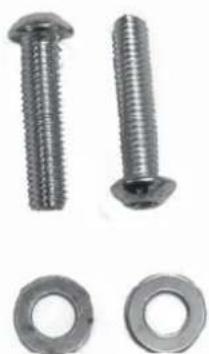
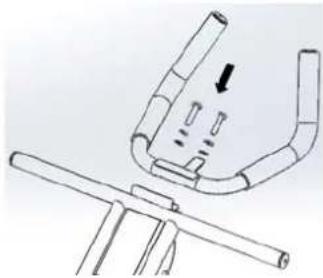
Close-up of two metallic screw screws and two separate metal washers (no text or symbols visible)Step I: Mounting the handle bar
natural_image
Technical line drawing of a mechanical component with a bracket and rod, no text or symbols presentScrew the handle bar (10) onto the main frame (1) using the larger hexagon socket screws (15), the washer (13), and the spring washer (14).
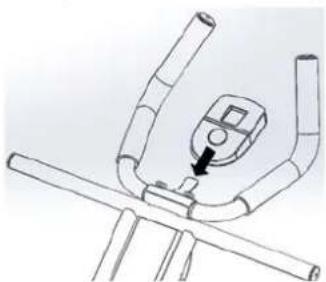
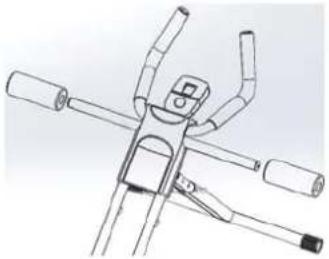
Step 2: Connecting the workout computer
natural_image
Line drawing of a hand using a pressure gauge on a vehicle chassis (no text or symbols)Mount the workout computer (12) on the designated receptacle on the main frame (1).
Connect the cords to the computer and the main frame using the plug connection.
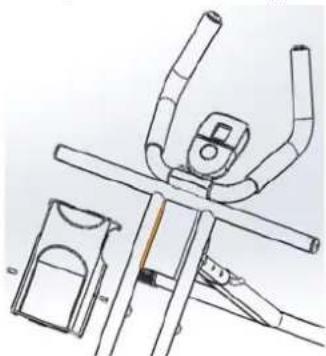
Step 3: Mounting the cover on the main frame
natural_image
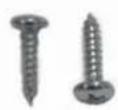
Technical line drawing of a mechanical assembly with no visible text or symbolsSecure the main frame cover (8) on the main frame (1) with the short crosshead screws (7).
Step 4: Padding the arm rests
natural_image
Technical line drawing of a mechanical clamp or bracket assembly (no text or symbols)Attach the foam pads (9) on the arm rests on the main frame.
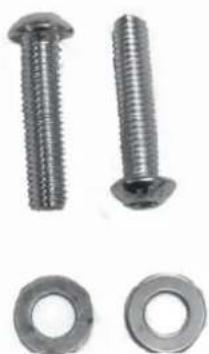
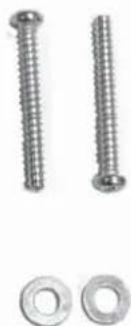
Step 5: Attaching the knee pads
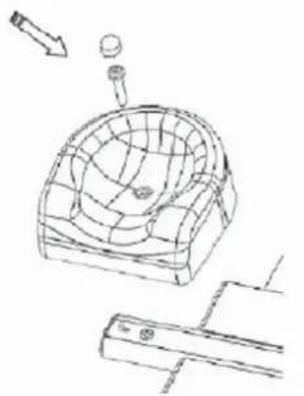
natural_image
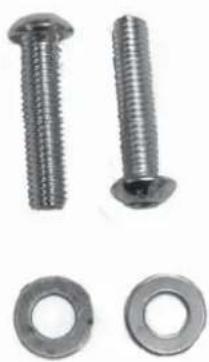
Technical line drawing of a mechanical component with a mesh structure and a tool, no visible text or symbolsScrew the two knee pads (18) onto the sledge (17) using the large hexagon socket screws (36).
Cover the hexagon socket screws with the help of the screw cover (37).
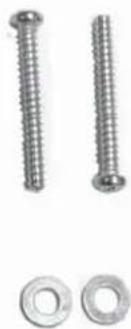
Step 6: Securing the knee pads
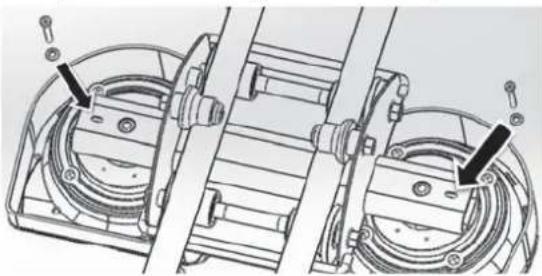
natural_image
Mechanical assembly diagram showing two connected components with mounting holes and a belt mechanism (no text or labels)Secure the knee pads (18) on the bottom side using the crosshead screws (26) and the washers (27).
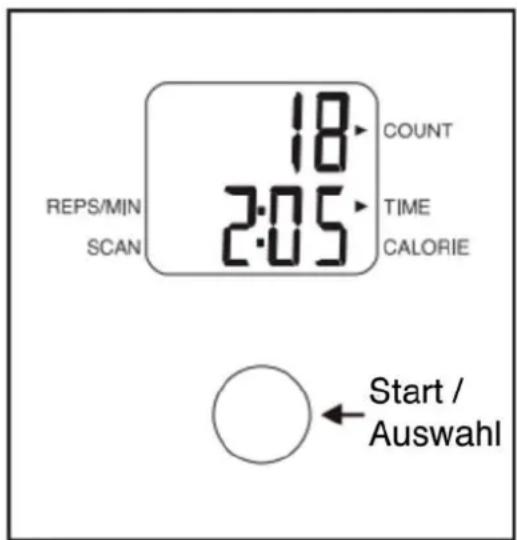
Overview of functions
| Scan | Data on the functions Time, Calorie, and Reps/Min are alternately shown in the Scan mode. |
| Time Displays the time you have spent on your workout. | |
| Count Displays the number of reps you have performed on the sledge. | |
| Calorie Displays the number of calories burnt during your workout. | |
| Reps/Min Shows you the average number of reps per minute. | |
Operating the workout computer
text_image
REPS/MIN SCAN 18 2:05 COUNT TIME CALORIE Start / AuswahlI. The display will turn on as soon as you press the start / select button or when you move the sledge with the knee pads.
-
Select one of the functions Scan, Time, Calorie or Reps/Min by repeatedly pressing the start / select button until a corresponding arrow appears on the display indicating which function you have selected. If you select one of the functions, only the corresponding function data and number of reps (Count) will be displayed. If you select Scan, data on Time, Calorie, and Reps/Min will also be alternately shown to you in addition to the number of reps (Count).
-
The clock displaying your workout time automatically runs while you workout and automatically stops as soon as the sledge has been stationary for a few seconds. The word "Stop" will appear on the display. The clock will automatically continue to run if you resume your workout.
- The display will automatically turn off after a few minutes if the workout is not continued. Your data will also remain saved when the display shuts off.
- If you would like to reset the saved data to zero, push and hold the start / select button once for a prolonged period until all data displayed is reset to zero.
Use
Before your workout

You should generally perform warm-up exercises before any athletic activity. Warm-up exercises stimulate and improve all physical and psychological performance aspects. The risk of injury is also reduced. The following exercises will warm up large muscle groups through movement.
Jogging
Run on the spot or through the room in a relaxed manner for approximately 5-10 minutes. Alternate with a few turning and hopping jumps in between running.
Workout

ATTENTION!
☐ Each time before using the device, check to make sure that it is correctly assembled, that the base has been correctly set up, and that the safety pin has been inserted in order to secure the angle of incline!
☐ Immediately stop your workout if you feel weak or dizzy. In the event of nausea, pain in the chest or limbs, heart palpation or other symptoms, please immediately contact a physician.
☐ Take adequate breaks between workouts.
☐ Wear suitable clothing for your workout (e.g. a track suit). It is important that your clothing is comfortable and breathable.
☐ Never workout on a full stomach. Do not eat at least one hour before and after your workout.
☐ Risk of injury! Do not workout if you are already tired and exhausted.
□ Always remember that the body needs plenty of liquids when performing physical activity. You should definitely satisfy the body's need for liquids.
□ Always perform warm-up exercises before beginning your workout (see chapter “Before your workout”) in order to minimise the risk of injury.
☐ After your workout, always perform stretching exercises (see chapter “After your work-out”) in order to slowly bring your cardiovascular system back down to a normal level.

- Always remember that your workout can greatly benefit your health if you follow the most important rules. The goal is not to perform a few exercises in a hurry, but to work out regularly over the long term.
• You can adjust the angle of incline of the main frame to increase the difficulty.
I. Assemble the device (see chapter "Before first use", section "Assembling the device").
-
Insert a battery in the workout computer (see chapter "Before first use", section "Inserting/changing the battery").
-
If you have not already done so, straighten the base and set up the device in a suitable area. Make sure that the base has securely locked into place before getting on the device.
-
Set the workout computer as described in the chapter "Operating the workout computer".
-
Adjust the angle of incline for the base and secure it with the safety pin. Please note: Increasing the angle of incline will increase the difficulty of your workout. We recommend that beginners set a flat angle of incline and gradually increase the level of diffi culty.
natural_image
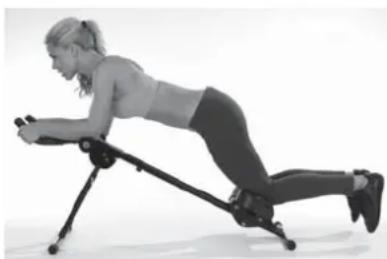
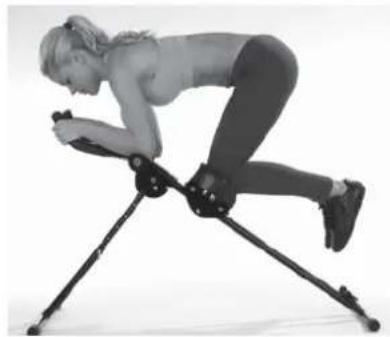
Woman performing a rowing exercise using a leg presser machine (no text or symbols visible)- Kneel on the knee pads, use your arms to support yourself on the padded arm rests and hold onto the handles.
natural_image
Person performing a seated exercise on a tripod apparatus (no text or symbols visible)- Now pull your knees to your body repeatedly and exercise the muscles of your abdomen, legs, arms, back, and buttocks at the same time.
After your workout

Perform the following stretching exercises after every workout.
Calves
natural_image
Line drawing of a person in a dynamic pose, possibly performing a martial arts or exercise pose (no text or symbols)- Lean on a wall with both hands.
- Position your right leg to the front and bend it while keeping the left leg stretched.
- Slowly push your left heel all the way down to the floor. Hold this position for approximately 15 to 20 seconds.
- Change the position of your legs and repeat the exercise.
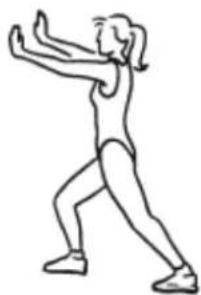
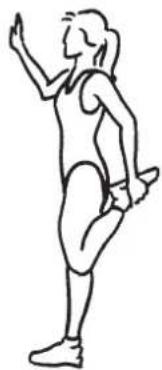
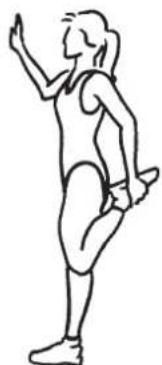
Front thighs
natural_image
Line drawing of a person in motion, possibly dancing or performing a exercise (no text or symbols)- Lean on a wall with your right hand.
- Hold your ankle with your left hand and pull your left foot up to your buttocks as shown in the figure.
- Hold this position for approximately 15 to 20 seconds.
- Repeat this exercise for the other leg.
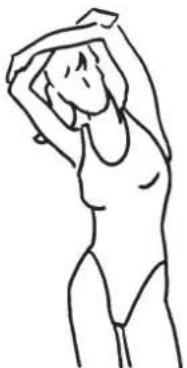
Sides

natural_image
Line drawing of a person in a relaxed pose with arms raised (no text or symbols)I. Stand up straight.
2. Position your left arm behind your head.
3. Take hold of your left elbow with your right hand.
4. Gently pull your elbow to the right and at the same time, also bend your upper body to the right in a straight line. Do not bend your hips in the process.
5. Hold this position for approximately 15 to 20 seconds.
6. Repeat the exercise for the other side.
Back
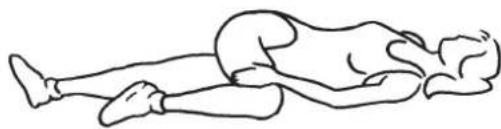
natural_image
Line drawing of a person lying on their back in a kneeling position (no text or symbols)- Lay down flat on your back.
- Cross your right leg over the left one as shown in the figure.
- Carefully push your right knee towards the floor. Make sure that your shoulders stay on the floor.
- Hold this position for approximately 15 to 30 seconds.
- Repeat this exercise for the other side.
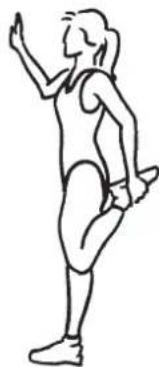
Inside of thighs
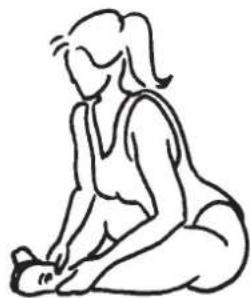
natural_image
Line drawing of a woman kneeling and performing a gentle stretch (no text or symbols)I. Sit on the floor.
2. Take hold of your heels and push the soles of your feet together.
3. With your back stretched, bend forward slightly and push your knees towards the floor.
4. Hold this position for approximately 15 to 30 seconds.
Entire leg
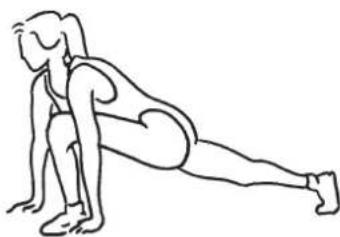
natural_image
Line drawing of a person performing a plank exercise (no text or symbols)I. Assume a squatting position and place your hands flat on the floor next to your feet in a parallel position.
2. Stretch your right leg to the back as shown in the figure. Make sure that the front foot is at a right angle to your shin.
3. Attempt to keep your back leg stretched without the knee touching the floor.
4. Hold this position for approximately 15 to 30 seconds.
5. Repeat this exercise for the other leg.
Shoulders/back
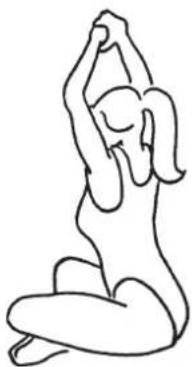
natural_image
Line drawing of a person in a seated yoga pose (no text or symbols)I. Sit on the floor with your legs crossed and back straight.
2. Clasp your hands and stretch them over your head with your arms stretched out.
3. Keep your back straight and look straight ahead.
4. Hold this position for approximately 15 to 30 seconds.
Cleaning and storage

ATTENTION!
☐ Do not spray any cleaners directly on the device.
☐ Never move the device if the safety pin has been removed or if any screws are loose!
☐ When cleaning, do not use any scouring or abrasive cleaners. They could damage the surface.
Cleaning
Only use a damp cloth and mild rinsing agent to clean the device.
Storage
- Store the device in a dry place.
- You can fold up the base for compact storage. To do so, lift the device by the arm rests, pull the base out of its locked position and fold it down.
Technical data
M o d e l :
Product number: Z 02678
Maximum user weight: 100 kg
Net weight: 9.6 kg
Expanded size: 1160 x 730 x 545 mm
Collapsed size: 1330 x 190 x 545 mm
Workout computer
Model: KE95898
Voltage supply: 1.5 volt DC, (1x 1.5 V battery, type AA)
H
CE
Disposal

The packaging material can be recycled. Dispose of the packaging in an environmentally-friendly manner and make it available for the recyclable material collection-service.
Dispose of the device in an environmental-friendly manner. The device does not belong in the household garbage. Dispose of it at a recycling centre for old electrical and electronic appliances.
For more information, please contact the local administration in your community.

The battery must be removed and disposed of separately before disposing of the device. To protect the environment, batteries and storage batteries may not be disposed of together with normal household waste. Instead they must be turned in at collection points. Also be sure to observe applicable legal regulations on battery disposal.
FR
Sommaire
www.service-shopping.de

text_image
Exploded view diagram of a bicycle frame assembly with numbered parts for identificationListe de pièces
natural_image
Two metallic screw-like nuts with threaded ends and flanges (no text or symbols visible)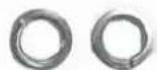
Étape 3
Étape 5
Étape 6
natural_image
Simple line drawing of a mechanical component with a bracket and rod, no text or symbols presentnatural_image
Line drawing of a person using a device on a stationary chair (no text or symbols)natural_image
Technical line drawing of a mechanical assembly with no visible text or symbolsnatural_image
Technical line drawing of a mechanical clamp or bracket assembly (no text or symbols)natural_image
Technical line drawing of a mechanical component with internal grid structure and mounting bracket (no text or symbols)natural_image
Mechanical assembly diagram showing two rotating components with mounting holes and shafts (no text or labels)natural_image
Woman performing a row exercise using a leg presser machine (no text or symbols visible)natural_image
Person performing a stretching exercise using a balance scale (no text or symbols visible)natural_image
Line drawing of a person in a dynamic pose, possibly performing a martial arts or exercise pose (no text or symbols)Avant de la cuisse
natural_image
Line drawing of a person in athletic attire performing a jumping motion (no text or symbols)natural_image
Line drawing of a person in a relaxed pose with arms raised (no text or symbols)natural_image
Line drawing of a person lying on their back in a kneeling position (no text or symbols)natural_image
Line drawing of a woman kneeling and performing a gentle stretch (no text or symbols)natural_image
Line drawing of a person performing a plank exercise (no text or symbols)natural_image
Line drawing of a person in a seated yoga pose with one arm raised (no text or symbols)www.service-shopping.de

text_image
Exploded view diagram of a bicycle frame assembly with numbered parts for identificationnatural_image
Close-up of two metallic screw and washer components with separate washers (no text or symbols visible)Stap 3
Stap 5
natural_image
Close-up of two metallic screw and nut components (no text or symbols visible)Stap 6
natural_image
Two metallic screw and washer components (no text or symbols visible)Stap I: Grijpstang bevestigen
natural_image
Technical line drawing of a mechanical component with no visible text or symbolsnatural_image
Line drawing of a mechanical device with lever and handle (no text or symbols)natural_image
Technical line drawing of a mechanical device with arms and legs (no text or symbols)natural_image
Technical line drawing of a mechanical clamp or bracket assembly (no text or symbols)natural_image
Technical line drawing of a golf net with a gear and base, showing no text or symbolsnatural_image
Mechanical assembly diagram showing two rotating components with mounting holes and connecting rods (no text or labels)natural_image
Woman performing a rowing exercise using a leg presser machine (no text or symbols visible)natural_image
Woman performing a seated exercise on a tripod, no text or symbols visiblenatural_image
Line drawing of a person in a dynamic pose, possibly performing a martial arts or exercise pose (no text or symbols)Voorkant bovendij
natural_image
Line drawing of a person in a dynamic pose, possibly dancing or jumping (no text or symbols)Zijkanten