Face Contour 06161 - Massage device Maxxmee - Free user manual and instructions
Find the device manual for free Face Contour 06161 Maxxmee in PDF.

| Brand | Maxxmee |
| Model | Face Contour 06161 |
| Product Type | Facial Massage Device |
| Power Supply | 3.7 V DC, built-in Li-ion batteries |
| Battery Capacity | 2000 mAh |
| Charging Time | Approx. 3 to 4 hours |
| Battery Life | Approx. 2 hours (fully charged) |
| Plate Temperature Range | -1°C to +44°C |
| Main Functions | Massage (vibration), cryolipolysis (cold), heat (blood circulation) |
| Operating Modes | Massage (green light), cold phase (blue light), heat phase (red light) |
| Contact Plate Material | Metal |
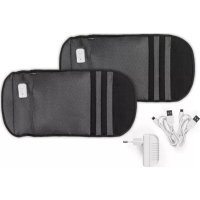
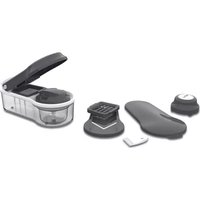
| Package Contents | Device, stand, fixing clip, USB cable (USB A to micro-B), storage pouch, instruction manual |
| Charging Stand Included | Yes, with slot for USB cable |
| USB Cable Included | Yes (USB A male to micro-B) |
| Storage Pouch Included | Yes |
| Intended Use | Face, neck and décolleté (except eye area and thyroid area) |
| Cleaning and Maintenance | Clean with a damp cloth, do not immerse, dry after cleaning |
| Protection Rating | Do not use in water or under shower |
| Safety | Automatic shut-off after 5 minutes per phase, overheat protection |
| Customer Service | www.dspro.de/kundenservice |
| Article Number | 06161 |
| Module Number | BG-F-0866 |
Frequently Asked Questions - Face Contour 06161 Maxxmee
User questions about Face Contour 06161 Maxxmee
0 question about this device. Answer the ones you know or ask your own.
Ask a new question about this device
Download the instructions for your Massage device in PDF format for free! Find your manual Face Contour 06161 - Maxxmee and take your electronic device back in hand. On this page are published all the documents necessary for the use of your device. Face Contour 06161 by Maxxmee.
USER MANUAL Face Contour 06161 Maxxmee
When May The Device Not Be Used? 12
Safety Notices 12
Charging Up the Battery 14
How It Works 15
Use 15
Cleaning and Storage 17
Troubleshooting 17
Disposal 18
Technical Data 18

ITEMS SUPPLIED
(Picture A)
1 Face Contour device 1x
2 Holder 1x
3 Attachment clip for a cloth or pad 1 x
4 USB cable (A connector to Micro B connector) 1 x
5 Storage bag 1 x
Operating instructions 1 x
Check the items supplied for completeness and the components for transport damage. If you find any damage, do not use the device but contact our customer service department.
Remove any possible films, stickers or transport protection from the device.
Never remove the rating plate and any possible warnings!

A USB mains adapter is also required.
AT A GLANCE
(Picture B)
6 Device head
7 Light
8 Ventilation openings
9 Operating button
10 Charging socket
11 Charge control lamp
12 Metal plate

Dear Customer,
We are delighted that you have chosen the MAXXMEE Face Contour. This device helps you to define your face contours and tighten the skin on your face, neck and neckline. You should use it in particular on strained, irritated or saggy skin.
If you have any questions about the device and about spare parts/accessories, contact the customer service department via our website: www.dspro.de/kundenservice
We hope you have a lot of fun with your MAXXMEE Face Contour.
Information About the Operating Instructions
Before using the device for the first time, please read through these operating instructions carefully and keep them for future reference and other users. They form an integral part of the device. The manufacturer and importer do not accept any liability if the information in these operating instructions is not complied with.
SYMBOLS
Danger symbols: These symbols indicate possible dangers. Read the associated safety notices carefully and follow them.

Supplementary information

Read operating instructions before use!

Symbol for direct current
SIGNAL WORDS
DANGER warns of serious injuries and danger to life
WARNING warns of possible serious injuries and danger to life
NOTICE warns of material damage
INTENDED USE
This device is intended to be used for massage, cold and heat treatment of the skin and the tissue beneath it. It is designed for use on the face, neck and neckline.
The device cannot be used to lose weight.
The device is not designed for medical or therapeutic purposes.
The device is for personal use only and is not intended for commercial applications.
Use the device only for the intended purpose and as described in the operating instructions. Any other use is deemed to be improper.
The warranty does not cover faults caused by incorrect handling, damage, assembly or attempted repairs. The same applies to normal wear and tear.
EN
WHEN MAY THE DEVICE NOT BE USED?
This device should not be used by people (including children) with impaired sensory or mental faculties or who do not have adequate experience and/or knowledge of such devices, unless they are supervised by a person responsible for their safety, or have received instructions from such a person on how to use the device. There is a danger of injury from using it incorrectly!
The device may not be used by people who are insensitive to heat or cold and may not be used by other vulnerable people who are unable to react to overheating or undercooling.
The following people may use the device only after consultation with their doctor:
people who wear a pacemaker or similar medical implants;
people with heart disease or who suffer from epilepsy;
women who are pregnant or have just given birth;
people who are very sensitive to the cold, e.g. because of hives, Raynaud's syndrome, chillblains;
people who are sensitive or allergic to isopropyl glycol, fructose, glycerol;
people who are sensitive to light or are taking medication which may cause sensitivity to light of the skin;
people who have circulation problems on the face, neck or neckline;
people who suffer from nerve pain, e.g. due to postherpetic neuralgia;
people who belong to a risk group or who have concerns about their health.
If you are unsure whether the device may be used, consult a responsible doctor.
Do not use the device on regions which have recently been operated on or are scarred.
Do not use the device on body parts with no feeling.
Do not use the device on or in the immediate vicinity of injured, infected, inflamed, (sun-)burnt or very sensitive skin, swelling, skin irritations, acne, birthmarks, warts or with rosacea.
Do not use the device if you have an illness/dental problems.
SAFETYNOTICES
4
DANGER - Danger of Electric Shock
If the device falls into water while it is connected to the mains power, pull the mains adapter out of the plug socket immediately! Only after this should you pull the device out of the water and dispose of it.
- Never touch the device and the connecting cable with wet hands when these components are connected to the mains power.
The device must always be disconnected from the mains power before it is cleaned.
#
WARNING - Danger from Rechargeable Batteries
The device with a built-in battery must not be taken apart, thrown into a fire or exposed to high temperatures of over +40^ . The battery could ignite or explode.
Make sure that the device cannot get wet. Do not immerse in water! Never use while bathing or showering! Do not use the device if liquid has got into it. The battery could ignite or explode.

WARNING - Danger of Injury
- Keep children and animals away from plastic bags and films. There is a danger of suffocation.
Children must be supervised to ensure that they do not play with the device. There is a danger of injury from using it incorrectly! - Stop using the device if you experience skin redness or discolouration that lasts for more than 24 hours.
If the colour of the skin changes on the hand with which you are holding the device, stop using the device immediately! Persistent use could result in hand-arm vibration syndrome.
Do not use the device if there is visible damage to the device or the connecting cable, the device has malfunctioned or fallen into water. Have it checked in a specialist workshop before using it again. - Do not make any modifications to the device or the connecting cable. It may only be taken apart and / or repaired by the manufacturer, customer service department or a similarly qualified person (e.g. specialist workshop) in order to avoid any hazards.
If the battery has leaked, do not allow your skin, eyes and mucous membranes to come into contact with the battery acid. If you touch battery acid, rinse the affected areas with abundant clear water straight away and get medical assistance immediately. There is a danger of burns from battery acid.
Make sure that the connecting cable does not present a trip hazard.
NOTICE - Risk of Damage to Material and Property
Store the device only in closed rooms.
Do not leave the device switched on unattended.
- Keep the device away from combustible materials and substances.
Do not cover the device during operation and ensure there is sufficient circulation of air. One exception is attaching a thin cloth or pad to the device head (see "Use" - "Attaching a Cloth or Pad to the Device Head").
Protect the device from: impacts, direct sunlight, sub-zero temperatures.
Do not place heavy objects on the device or its connecting cable.
Lay the connecting cable in such a way that it is not squashed, bent or laid over sharp edges and does not come into contact with hot surfaces.
In the event of damage / faults, switch the device off / disconnect it from the mains power immediately.
Pull the mains adapter out of the plug socket before a thunderstorm.
Use only original accessories from the manufacturer in order to guarantee that there is no interference that may prevent the device from working and to avoid possible damage.
EN
CHARGING UP THE BATTERY
Please Note!
A USB mains adapter is required to charge up the battery. Note the power supply specifications (see "Technical Data").
Only charge the battery when the charge control lamp is flashing fast.
When the device is connected to a power source, it cannot be switched on.
Only connect the USB mains adapter to a properly installed plug socket. The plug socket must also be readily accessible after connection so that the connection to the mains can quickly be isolated. The mains voltage must match the data on the rating plate of the USB mains adapter.
Unwind the USB cable fully before connecting it.
The device should not be charged on a computer, because the high charging current could damage the computer.
If the charge control lamp (11) is flashing fast, the battery is weak and should be charged.
- Switch off the device.
- Plug the Micro B connector of the USB cable (4) into the charging socket (10) on the device and the A connector into the socket of a USB mains adapter (not supplied with the device).
-
Connect the USB mains adapter to a plug socket. The charging process begins. The charge control lamp flashes slowly while the battery is charging.
-
As soon as the charge control lamp is permanently lit, the battery is full. Remove the USB mains adapter from the plug socket and remove the USB cable from the device.
Using the Holder
The device can be placed down and charged in the holder (2) that is supplied with it. There is a slot in the bottom of the holder for receiving the Micro B connector of the USB cable (4).
- Plug the Micro B connector at the "top" edge into the slot and push it as far as it will go into the middle of the holder. (Picture C)
- Plug the A connector of the USB cable into the socket of a USB mains adapter (not supplied with the device).
- Connect the mains adapter to a plug socket.
- Place the device in the holder and press it down. If the Micro B connector fits in the charging socket correctly, the charge control lamp (11) flashes slowly and the battery is charged. (Picture D)
- As soon as the charge control lamp is permanently lit, the battery is full. Remove the USB mains adapter from the plug socket.
HOW IT WORKS
Cold Phase
The cold phase of the device is based on the principle of cryolipolysis, breaking down fat cells with a cold treatment. The metal plate (12) of the device at a temperature of approx. -1^ is placed on the area of unwanted fat. This causes the metabolism of the fat cells to stop and they die.
Massaging the treated area squashes down the dead fat cells and they are transported into the healthy fat tissue. From there they are flushed out via the lymph vessels and blood vessels over the course of around 3 to 6 weeks.
For this massage purpose, the metal plate vibrates gently during the cold treatment.

After the treatment, you may experience a feeling akin to aching muscles for a few days. This is normal and not a cause for concern.
Heat Phase
Following the cold phase, the device automatically switches over to the heat phase in which the metal plate reaches a temperature of approx. +44^ with gentle vibration. This supports blood flow and therefore the flushing out of the dead fat cells.
The heat phase can also be used to improve the appearance of a defined jawline.
Massage Phase
After the device is switched on, it starts with a massage. The vibration of the metal plate (12) is designed to expand the intercellular spaces in the skin so that the vibrations can have a massaging, regenerative, tightening and purging effect deep into the skin and tissue.
This phase is capable of reducing swelling and rings under the eyes and improving the structure of the skin.
EN
USE
Please Note!
For reasons of hygiene, the device should only be used by one person and cleaned after each use (see "Cleaning and Storage"). Keep the device clean.
If you experience an unpleasant sensation while you are using the device, stop applying it immediately!
Leave out the area of the eyes and the area of the thyroid glands.
- Do not use the device on one area of skin for longer than 5 minutes per phase per day so that no strain is placed on the skin and tissue.
With the exception of the area of the eyes, the device can be used to treat the whole face as well as the neck and the neckline. We recommend starting with a 2-minute application time per phase and gradually increasing the time up to 5 minutes.
Before treatment, clean the face and dry it well in the usual way. If necessary, apply a little moisturising cream. Do not use too much cream so that excess cream which is not absorbed by the skin cannot get into the device and damage it.
Attaching a Cloth or Pad to the Device Head
If the metal plate (12) is perceived to be too cold or too warm, we recommend attaching a cloth or pad as a buffer to the head of the device (6):
- Remove the attachment clip (3) from the head of the device.
- Place a cloth or pad on the metal plate and press the attachment clip onto the head of the device to fix the cloth / pad in place. (Picture E)
EN
Operating the Device
- Switch on the device using the operating button (9) and set the operating mode you want:
Press 1x Massage: green light + massage

can help to reduce skin sagging, swelling and rings under the eyes

Press 2× Cold phase:
blue light + cold (-1^) + vibration
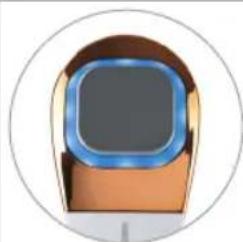
to stimulate the breakdown of fat cells

Press 3× Heat phase: red light +heat (+44^) + vibration
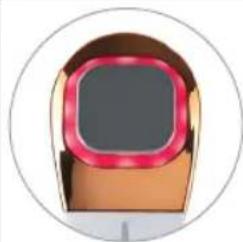
to support skin circulation and the flushing out of the fat cells after the cold phase; can prevent wrinkles

Press 4× Off

The device automatically switches to the next phase after 5 minutes and switches off after the end of the heat phase (red light).
- Depending on which operating mode is selected, treat the skin as described below.
Procedure During the Massage (Green Light) and Heat Phase (Red Light)
Place the metal plate (12) on the area which is to be treated and guide it over the skin in a slow flowing motion. Treat the individual areas as follows:
- Rings under the eyes: Start at the bridge of the nose and stroke under the eyes out towards the cheeks. (Picture F)
- Cheeks: Stroke outwards from the cheekbones. Repeat this process below the cheekbones. (Picture G)
- Forehead: Start in the middle of the forehead at the level of the eyebrows and move outwards towards your hairline. (Picture H)
- Chin: Start below the bottom lip and move downwards towards the jaw. (Picture I)
- Jawline: Stroke from the middle of the chin along the jawline out towards the ears. (Picture J)
- Neck: Short sharp strokes from the bottom up towards the jaw. (Picture K)
- Neckline: Small circular movements from the inside outwards. (Picture L)
Procedure During the Cold Phase (Blue Light)
- During the cold phase, process the area to be treated gradually from bottom to top (with a double chin from the neck to the chin). When you do this, hold the metal plate in one place for approx. 1 minute, or as long as it is not too uncomfortable, then move on to the next place. (Picture M)
After the cold phase, carry out the heat phase (red light) on the treated area or gently rub and massage it
to support the breakdown of the fat cells.

The skin may temporarily go a slightly reddish colour due to the cold.
CLEANING AND STORAGE
Please Note!
No liquid must be allowed to enter the device. Never immerse the device in water!
The device must be switched off and disconnected from the mains power during cleaning.
- Do not use any sharp or abrasive cleaning agents or cleaning pads to clean the device. These may damage the surfaces.
- Wipe down the metal plate (12) and if necessary the other device parts with a damp cloth. Then wipe down with a dry cloth.
- Store the device out of the reach of children and animals in a dry place that is protected from dirt and direct sunlight.
- Keep it in the storage bag (5) if it is not being used for a prolonged period.
EN
TROUBLESHOOTING
If the device does not work properly, check whether you are able to rectify the problem yourself. If the problem cannot be solved with the steps below, contact the customer service department.

Do not attempt to repair an electrical device yourself!
The device does not work.
The battery is weak and needs to be charged.
Follow the instructions in the "Charging Up the Battery" chapter.
The device is connected to the mains power.
Pull the USB cable out of the charging socket.
The battery should be charged, but the charge control lamp is not flashing.
The Micro B connector is not plugged correctly in the charging socket.
Plug the Micro B connector as far as it will go into the charging socket or press it down if the device is in the holder.
The mains adapter is not inserted correctly in the plug socket.
Correct the fit.
The device is not connected to the mains adapter correctly.
Correct the connection.
The plug socket is defective.
Try another plug socket.
There is no mains voltage.
- Check the fuse of the electrical distributor (fuse box).
EN
MAXMEE
DISPOSAL

Dispose of the packaging material in an environmentally friendly manner so that it can be recycled.

This device is governed by the European Directive 2012/19/EU on waste electrical and electronic equipment (WEEE). Do not dispose of the device with a built-in battery as normal domestic waste, but rather in an environmentally friendly manner via an officially approved waste disposal company.
TECHNICAL DATA
Article number: 06161
Model number: BG-F-0866
Power supply: 3.7 V DC; Li-ion battery; 2000 mAh
Charge time: approx. 3 - 4 hours
Operating time: approx. 2 hours (when the battery is fully charged)
Temperature of metal plate: -1 to +44°C
ID of operating instructions: Z 06161 M DS V1 0320 md
C E
All rights reserved.
SOMMAIRE
Composition 19
Apercu general 19
Symboles 20
Chere cliente, cher client,
WAARSCHUWING - Gevaardoor accu's
De contactdoos is defect.