
Visitor 1V - Doorbells Bea-fon - Free user manual and instructions
Find the device manual for free Visitor 1V Bea-fon in PDF.
| Product type | Smart doorbell |
| Brand | Bea-fon |
| Model | Visitor 1V |
| Power supply | 5 V DC via power adapter (included) or built-in rechargeable battery |
| Connection | Wi-Fi 2.4 GHz |
| App | Beafon Home (iOS/Android) |
| Main functions | Two-way audio, PIR motion detection, night vision, recording on SD card (128 GB max) or cloud, real-time notifications, volume and ringtone adjustment |
| Motion detection | PIR sensor |
| Night vision | Yes, infrared LED |
| Local storage | SD card up to 128 GB (not included) |
| Compatibility | iOS and Android |
| Box contents | Doorbell, chime, mounting bracket, power adapter, screws, wall plugs, double-sided adhesive tape, nameplate, screwdriver, manual |
| Certifications | CE, RoHS |
| Safety | Star security screw for fixing, RED compliance |
| Maintenance and cleaning | Clean with a soft, dry cloth; avoid abrasive products |
| Spare parts and repairability | SD card, power adapter, screws; professional repair recommended |
| General information | Manufacturer: Bea-fon Mobile GmbH, Austria |
Frequently Asked Questions - Visitor 1V Bea-fon
User questions about Visitor 1V Bea-fon
0 question about this device. Answer the ones you know or ask your own.
Ask a new question about this device
Download the instructions for your Doorbells in PDF format for free! Find your manual Visitor 1V - Bea-fon and take your electronic device back in hand. On this page are published all the documents necessary for the use of your device. Visitor 1V by Bea-fon.
USER MANUAL Visitor 1V Bea-fon
Website: www.beafon.com
Please note the EU General Data Protection Regulation (GDPR)
Surveillance and privacy laws vary by jurisdiction.
Before using this product, review all relevant laws in your jurisdiction to ensure that your use does not violate any applicable laws
Bea-fon Mobile GmbH assumes no responsibility for the consequences of false using.
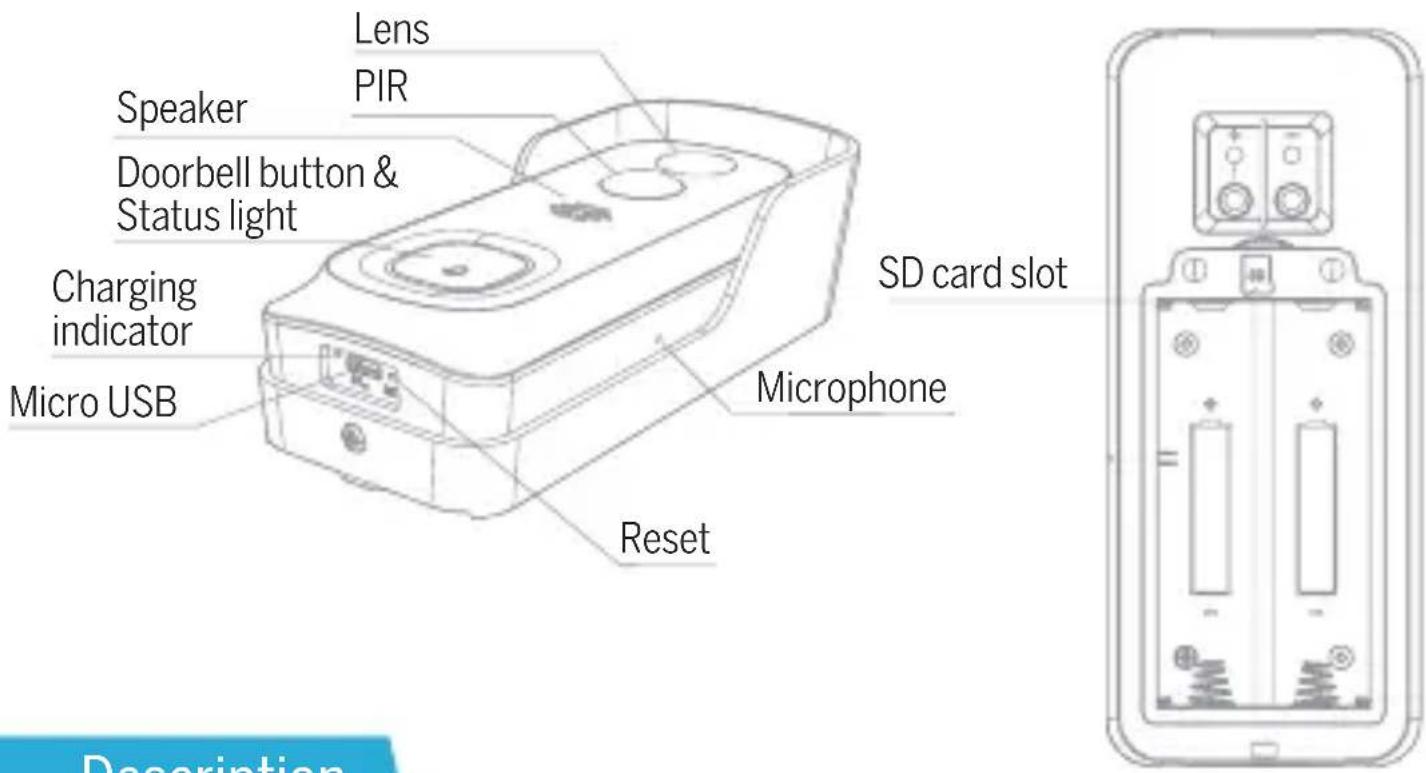
Description
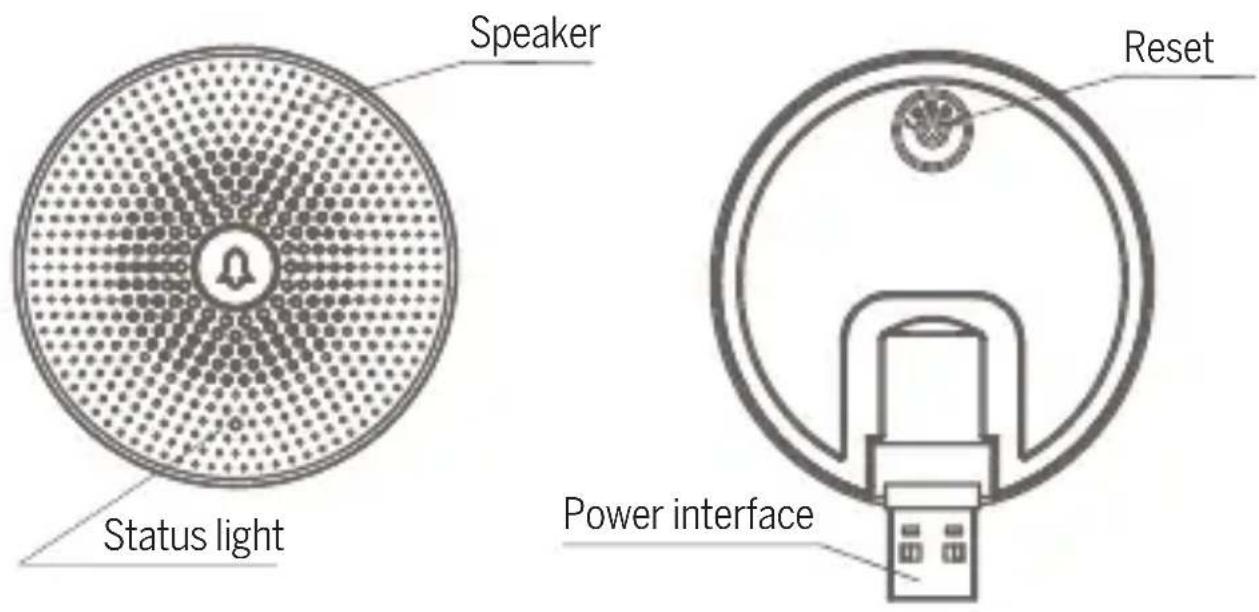
Power Port DC 5V +-10%
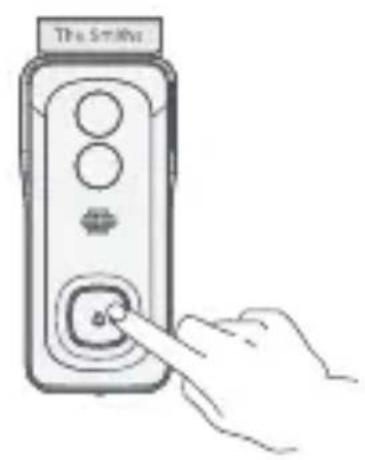
Doorbell button Press the button to activate the doorbell
Status light Red light solids on: the camera network is abnormal
- Red light blinking: awaiting WiFi connection, or currently connecting (faster blinking)
- Blue light solids on: camera running correctly
Microphone Captures sound for your video
SD card slot Supports local SD Card storage (Max.128G)
Reset Press and hold on for 5 seconds with pin to reset the
doorbell (unable to unbind the bell from account)
Charging indicator Red indicator solids on: battery is charging
Blue indicator solids on: charging completed
Install
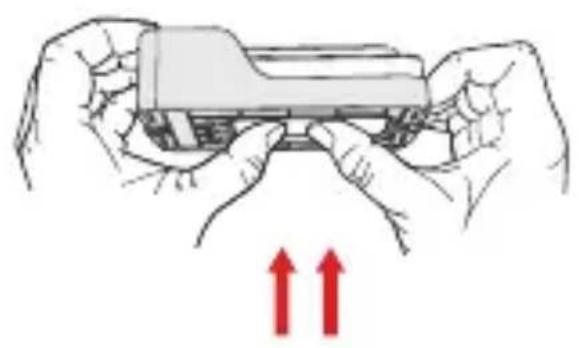
-
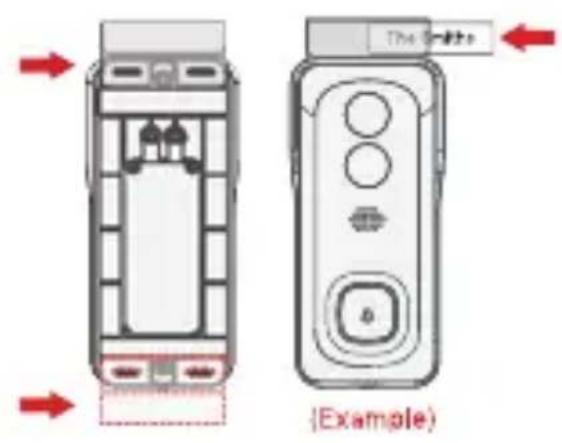
Dismount the bracket by pushing from the back of your doorbell. Please remove the insulation film in the battery cell.
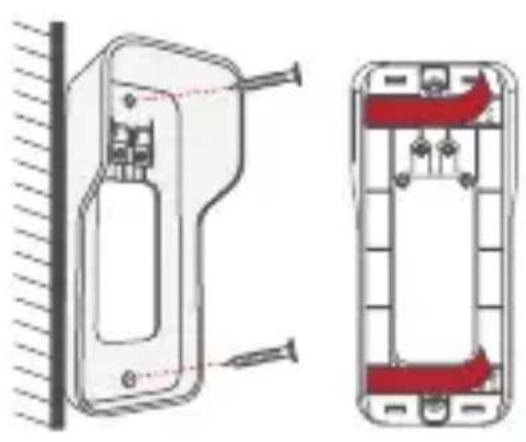
-
Bracket installation: Mount the bracket on the wall with screws & anchors or the double-side adhesive tape.
-
(Optional) The nameplate holder can be mounted on the top rear/bottom rearof the bracket, prior to bracket installation.
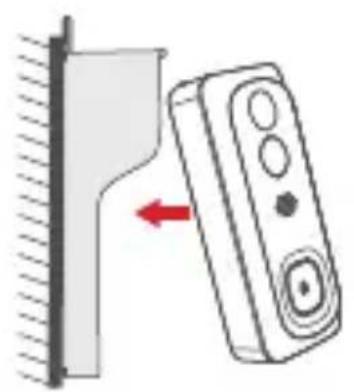
- Mount your doorbell to the fixed bracket. Make sure it reaches the bottom where you can hear a click.
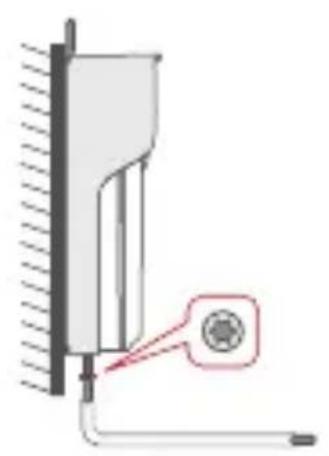
- Secure your doorbell with the provided star-shape security screw and screw driver.
- All set, congratulations!
Now you can press the doorbell button to try it out.
Connect
Download
Beafon Home App is available for both iOS and Android OS.
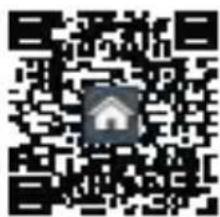
Search the name „Beafon Home App“ in App Store or Google Play, or scan the QR-Code to download the App.
Support


Add device
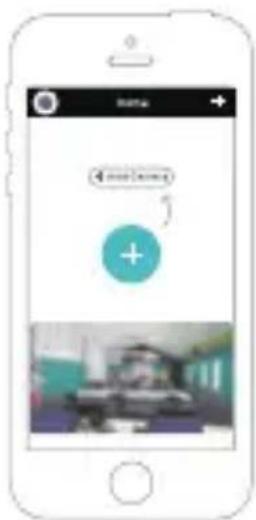
Log in the Beafon Home App, select „Add Device“, and add the smart doorbell to the APP according to the screen tips (make the smart doorbell close to the router when configuring).
NOTE: If you need to re-select the WiFi network, please press and hold the „RESET“ button for 5 seconds, the device will restart, and the indicator will be flashing red.
FAQ
Q: The camera cannot be previewed properly?
A: Check whether the network is normal, you can place the camera close to the router, if not, it is better to reset the camera and add it again.
Q: Why is it still in the list of devices after resetting?
A: The reseted camera only resets the network configuration of the camera, but cannot change the configuration in the App, remove the camera in your account, need to add again.
Q: How to cut the camera network to other router?
A: First remove and reset the camera in your App account and then configure your camera again by the App.
Q: Why doesn't the camera identify the SD card?
A: It is recommended to plug in SD card after power cut. Confirm whether the SD card is normally available and the format is FAT32. And the TF card can't be identified when the internet environment is not good.
Q: Why I can't get the notifications with my cell phone App?
A: Please confirm that the App has been running on the phone, and the relevant reminder function has been opened; Message notification and authority confirmation in the mobile phone system have been opened.
Functions
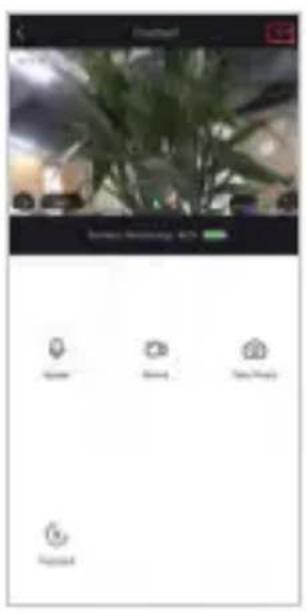
Remote wake-up
The camera will be in a sleep mode to save power; you can have a preview in App.
Full-duplex audio
You can see and hear the vistor in your App from the camera.
PIR
When the camera detects someone stopping by, it sends an alarm message to your cell phone.
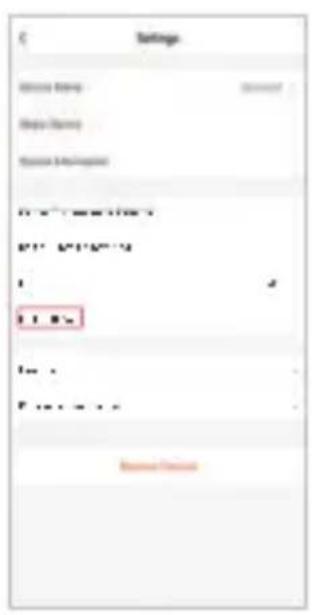
Low battery alarm
You can set a low-battery alarm threshold in your phone App. The threshold is set to a minimum of 10% and a maximum of 50% . When the battery power of the camera is lower than the set threshold, the App will have a reminder.
Record
Using SD card or Opening the Cloud-Storage Service, to keep recording for every moment.
Day & Night
Powerful night vision means no interruptions, even in complete darkness.

Day Night

Wireless chime
Description
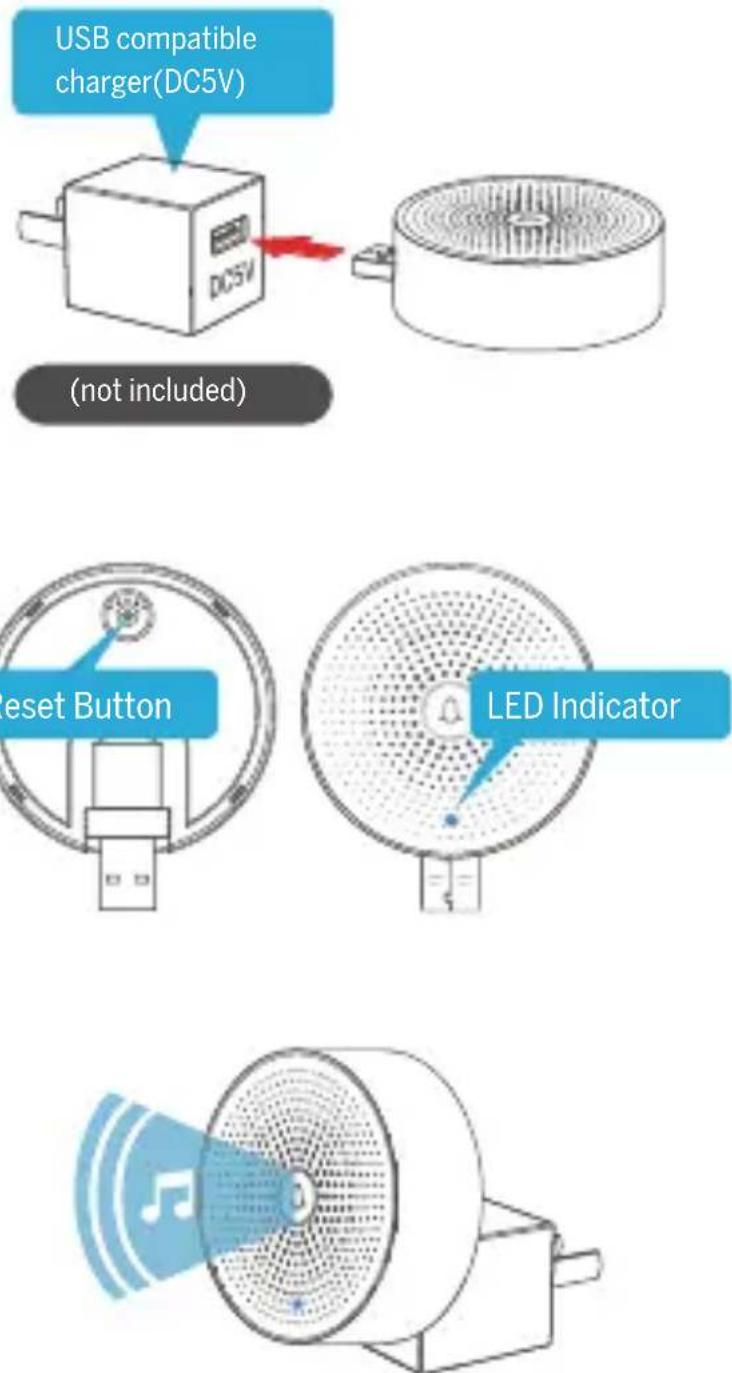
Mini USB DC 5V +- 10% (USB power supply)
Reset Press the RESET for 5s to restore Factory Settings; Click the RESET button to pair the doorbell
Status light Blue light blinking:Awaiting for configuration; Blue light solids on:Configuration completed
Functions
Change Ringtone You can choose your own ringtone among the four ringtones.
Adjust Volume Volume of the chime can be adjusted by sliding he volume of your smartphone.
Paring the chime
PAIR VIA PRESSING RINGING BUTTON
Note: Doorbell and Chime have been configured before leaving the factory. If the chime isn't paired by default, please use the following instructions to pair it manually with the doorbell camera.
Step 1
Supply power to your Chime and Doorbeell.
Step 2
A short press on the RESET button on the Chime, and you will see the indicator flashes blue, indicating device is in pairing mode.
Step 3
Press the doorbell button, and the Chime will sound to react. Pairing succeeds, and the Chime indicator will be in soild blue.
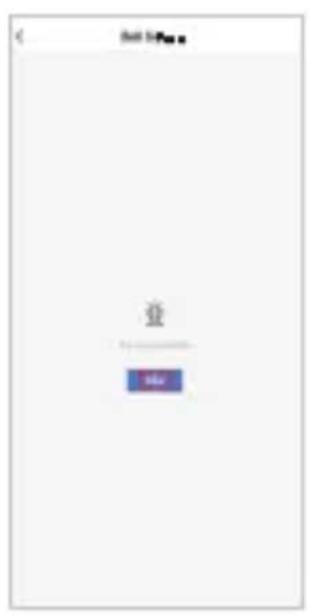
PAIR VIA BEAFON HOME APP
Step 1
Click the , “ at the preview interface when you have added your doorbell.
Step 2
Click the „RESET“ button, the blue light blinks and enter the configuration mode.
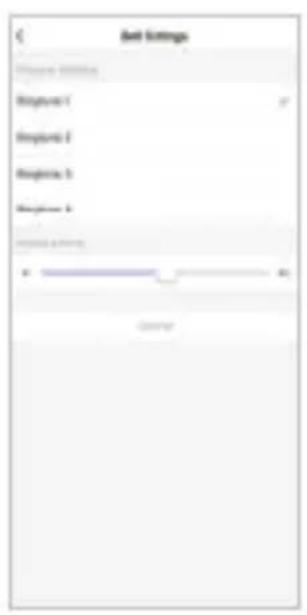
Step 3
Enter the „Settings“ of your App, press „Bell Setting“.
Step 4
Press „Bind“ button, the device will be connected in about 2s.
Step 5
Select the ringtone, adjust the volume.
Step 6
Complete the configuration, the blue light is on.
Note:
If the configuration fails, please press the „RESET“ button for 5 seconds to reset your chime and click the „RESET“ button. then add it again.
Declaration of conformity
Website: www.beafon.com
Shenzhen POCE Technology Co.,Ltd. H Building, Hogfa Science and Technology Park, Tangtou,
Shiyan, Bao an District, Shenzhen, China has issued the following EU-type examination certificates (Zertifikat Nr.: POCE191029056RCW)
Bay Area Compliance Laboratories Corp. (Kunshan) No.248 Chenghu Road, Kunshan, Jiangsu province, China has issued the following EU-report for RoHS (Report Nr.: SZ4200713-1018E)
The object of the declaration described above complies with the relevant harmonization legislation of the Union:
EU Directive 2014/30/EU, EU Radio Equipment Directive 2014/53/EU (RED) and RoHS Directive(EU) 2015/863 amending Annex II to Directive 2011/65/EU
The manufacturer / importer is solely responsible for issuing this declaration of conformity:
Test standards:
Radio Equipment Directive 2014/53/EU
| Essential Requirement Harmonized Standards Test Report Number | ||
| EMC | ETSI EN 301489-1 V2.2.3 ETSI EN 301489-17 V3.2.0 | POCE191029066TRS |
| Radio ETSI EN 300 328 V2.2.2 POCE191029059QRW | ||
| Health EN 62311:2008 POCE191029058NRW | ||
| Safety EN 62368-1:2014+A11:2017 | POCE191029066TRS | |
For the correctness:

Bay Area Compliance Laboratories Corp. (Kunshan) No.248 Chenghu Road, Kunshan, Jiangsu, China.—Informe: SZ4200713-1018E