B024DPU08 - Switch Tripp Lite - Free user manual and instructions
Find the device manual for free B024DPU08 Tripp Lite in PDF.
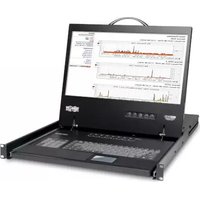
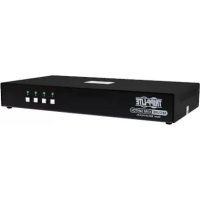
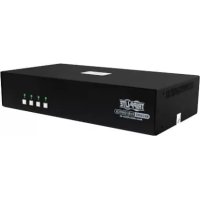
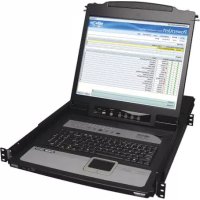
| Product Type | 1U Rack-Mount DisplayPort/USB 3.0 KVM Switch |
| Available Models | B024-DPU08 (8 ports) and B024-DPU16 (16 ports) |
| Number of Ports | 8 or 16 DisplayPort/USB/audio ports |
| Maximum Video Resolution | 4K (DisplayPort 1.4) |
| Console Connectivity | 2 DisplayPort ports, 2 USB 3.0 ports, 1 HDMI port, front/rear audio jacks |
| Computer Connectivity | 8 or 16 sets of DisplayPort + USB 3.0 + audio ports |
| USB Hub | 2 front USB 3.1 Gen 1 Type-A ports |
| Power | External AC adapter (included) |
| Grounding | Grounding terminal (required) |
| Rack Mounting | Yes, 1U with included brackets |
| Switching Methods | Front panel buttons, OSD, hotkeys, RS-232 |
| On-Screen Display (OSD) | Yes, activate by double-pressing Scroll Lock |
| Operating System Compatibility | Windows, Mac, Sun/Linux |
| Mouse Emulation | Enable/disable via hotkeys |
| Auto Scan | Yes, adjustable interval (default 5 s) |
| Firmware Upgrade | Via dedicated front port |
| Warranty | 1 year (limited) |
| Approximate Dimensions (W x D x H) | 44 x 30 x 4.4 cm (1U standard) |
| Approximate Weight | 2.5 kg |
| Included Accessories | 2 DisplayPort cables, 2 USB 3.0 cables, 2 audio cables, firmware upgrade cable, AC adapter, mounting hardware |
Frequently Asked Questions - B024DPU08 Tripp Lite
User questions about B024DPU08 Tripp Lite
0 question about this device. Answer the ones you know or ask your own.
Ask a new question about this device
Download the instructions for your Switch in PDF format for free! Find your manual B024DPU08 - Tripp Lite and take your electronic device back in hand. On this page are published all the documents necessary for the use of your device. B024DPU08 by Tripp Lite.
USER MANUAL B024DPU08 Tripp Lite
Register your product today and be automatically entered to win an ISOBAR ^® surge protector in our monthly drawing!
tripplite.com/warranty


text_image
TRIPP·LITE
1111 W. 35th Street, Chicago, IL 60609 USA • tripplite.com/support
Copyright © 2021 Tripp Lite. All rights reserved.
Package Contents
- 8- or 16-Port 4K DisplayPort/USB 3.0 KVM Switch
• DisplayPort 1.4 Cables (x2) - USB 3.0 Cables (x2)
- Audio Cables (x2)
- Firmware Upgrade Cable
- Foot Pads (x4)
- Power Adapter
- Mounting Hardware
- Quick Start Guide
Optional Accessories
• P580-Series DisplayPort Cables
• UR022-Series USB 2.0 Reversible A/B Cables
• P312-Series 3.5 mm Mini Stereo Audio Cables
• P783-0XX-DP DisplayPort/USB/Audio Custom KVM Cables Kits
• P134-000 DisplayPort to DVI Adapter
Product Features
B024-DPU08 Front View

text_image
TRIPP-LITE KVM SWITCH 8-PORT DISPLAY/PU60 Model: B924-DPU60 1 2 K/M RESET 1 2 3 4 5 6 7 8 AUTO SCAN 4 6 8 F/M UPGUASE 3 5 USB USB USB POWERB024-DPU16 Front View

text_image
TRIPP-LITE KVM SWITCH 16-PORT DISPLAY/PORT Model: B924-DPU18 K/M RESET 1 2 3 4 5 6 7 8 9 10 11 12 13 14 15 16 AUTO SCAN 1 2 4 6 8 3 5 71 Port Selection Buttons
2 Port LEDs
3 Firmware Upgrade Recovery Switch
4 Audio Jack
5 Firmware Upgrade Port
6 USB 3.1 Gen 1 Peripheral Ports
7 Reset Button
8 Power LED
B024-DPU08 Rear View

text_image
9 10 11 USB CPU 8 USB CPU 7 USB CPU 6 USB CPU 5 USB CPU 4 USB CPU 3 USB CPU 2 USB CPU 1 12 13B024-DPU16 Rear View

text_image
9 10 11 USB CPU 16 USB CPU 15 USB CPU 14 USB CPU 13 USB CPU 12 USB CPU 11 USB CPU 10 USB CPU 9 USB CPU 8 USB CPU 7 USB CPU 6 USB CPU 5 USB CPU 4 USB CPU 3 USB CPU 2 USB CPU 1 12 139 Grounding Terminal
10 Power Jack
11 Audio Jack
12 Console Ports
13 KVM Ports
Installation
Rack Mounting - Front
Note: Unless otherwise specified, rack screws mentioned in the following steps are user-supplied. If you need additional screws, contact your rack dealer.
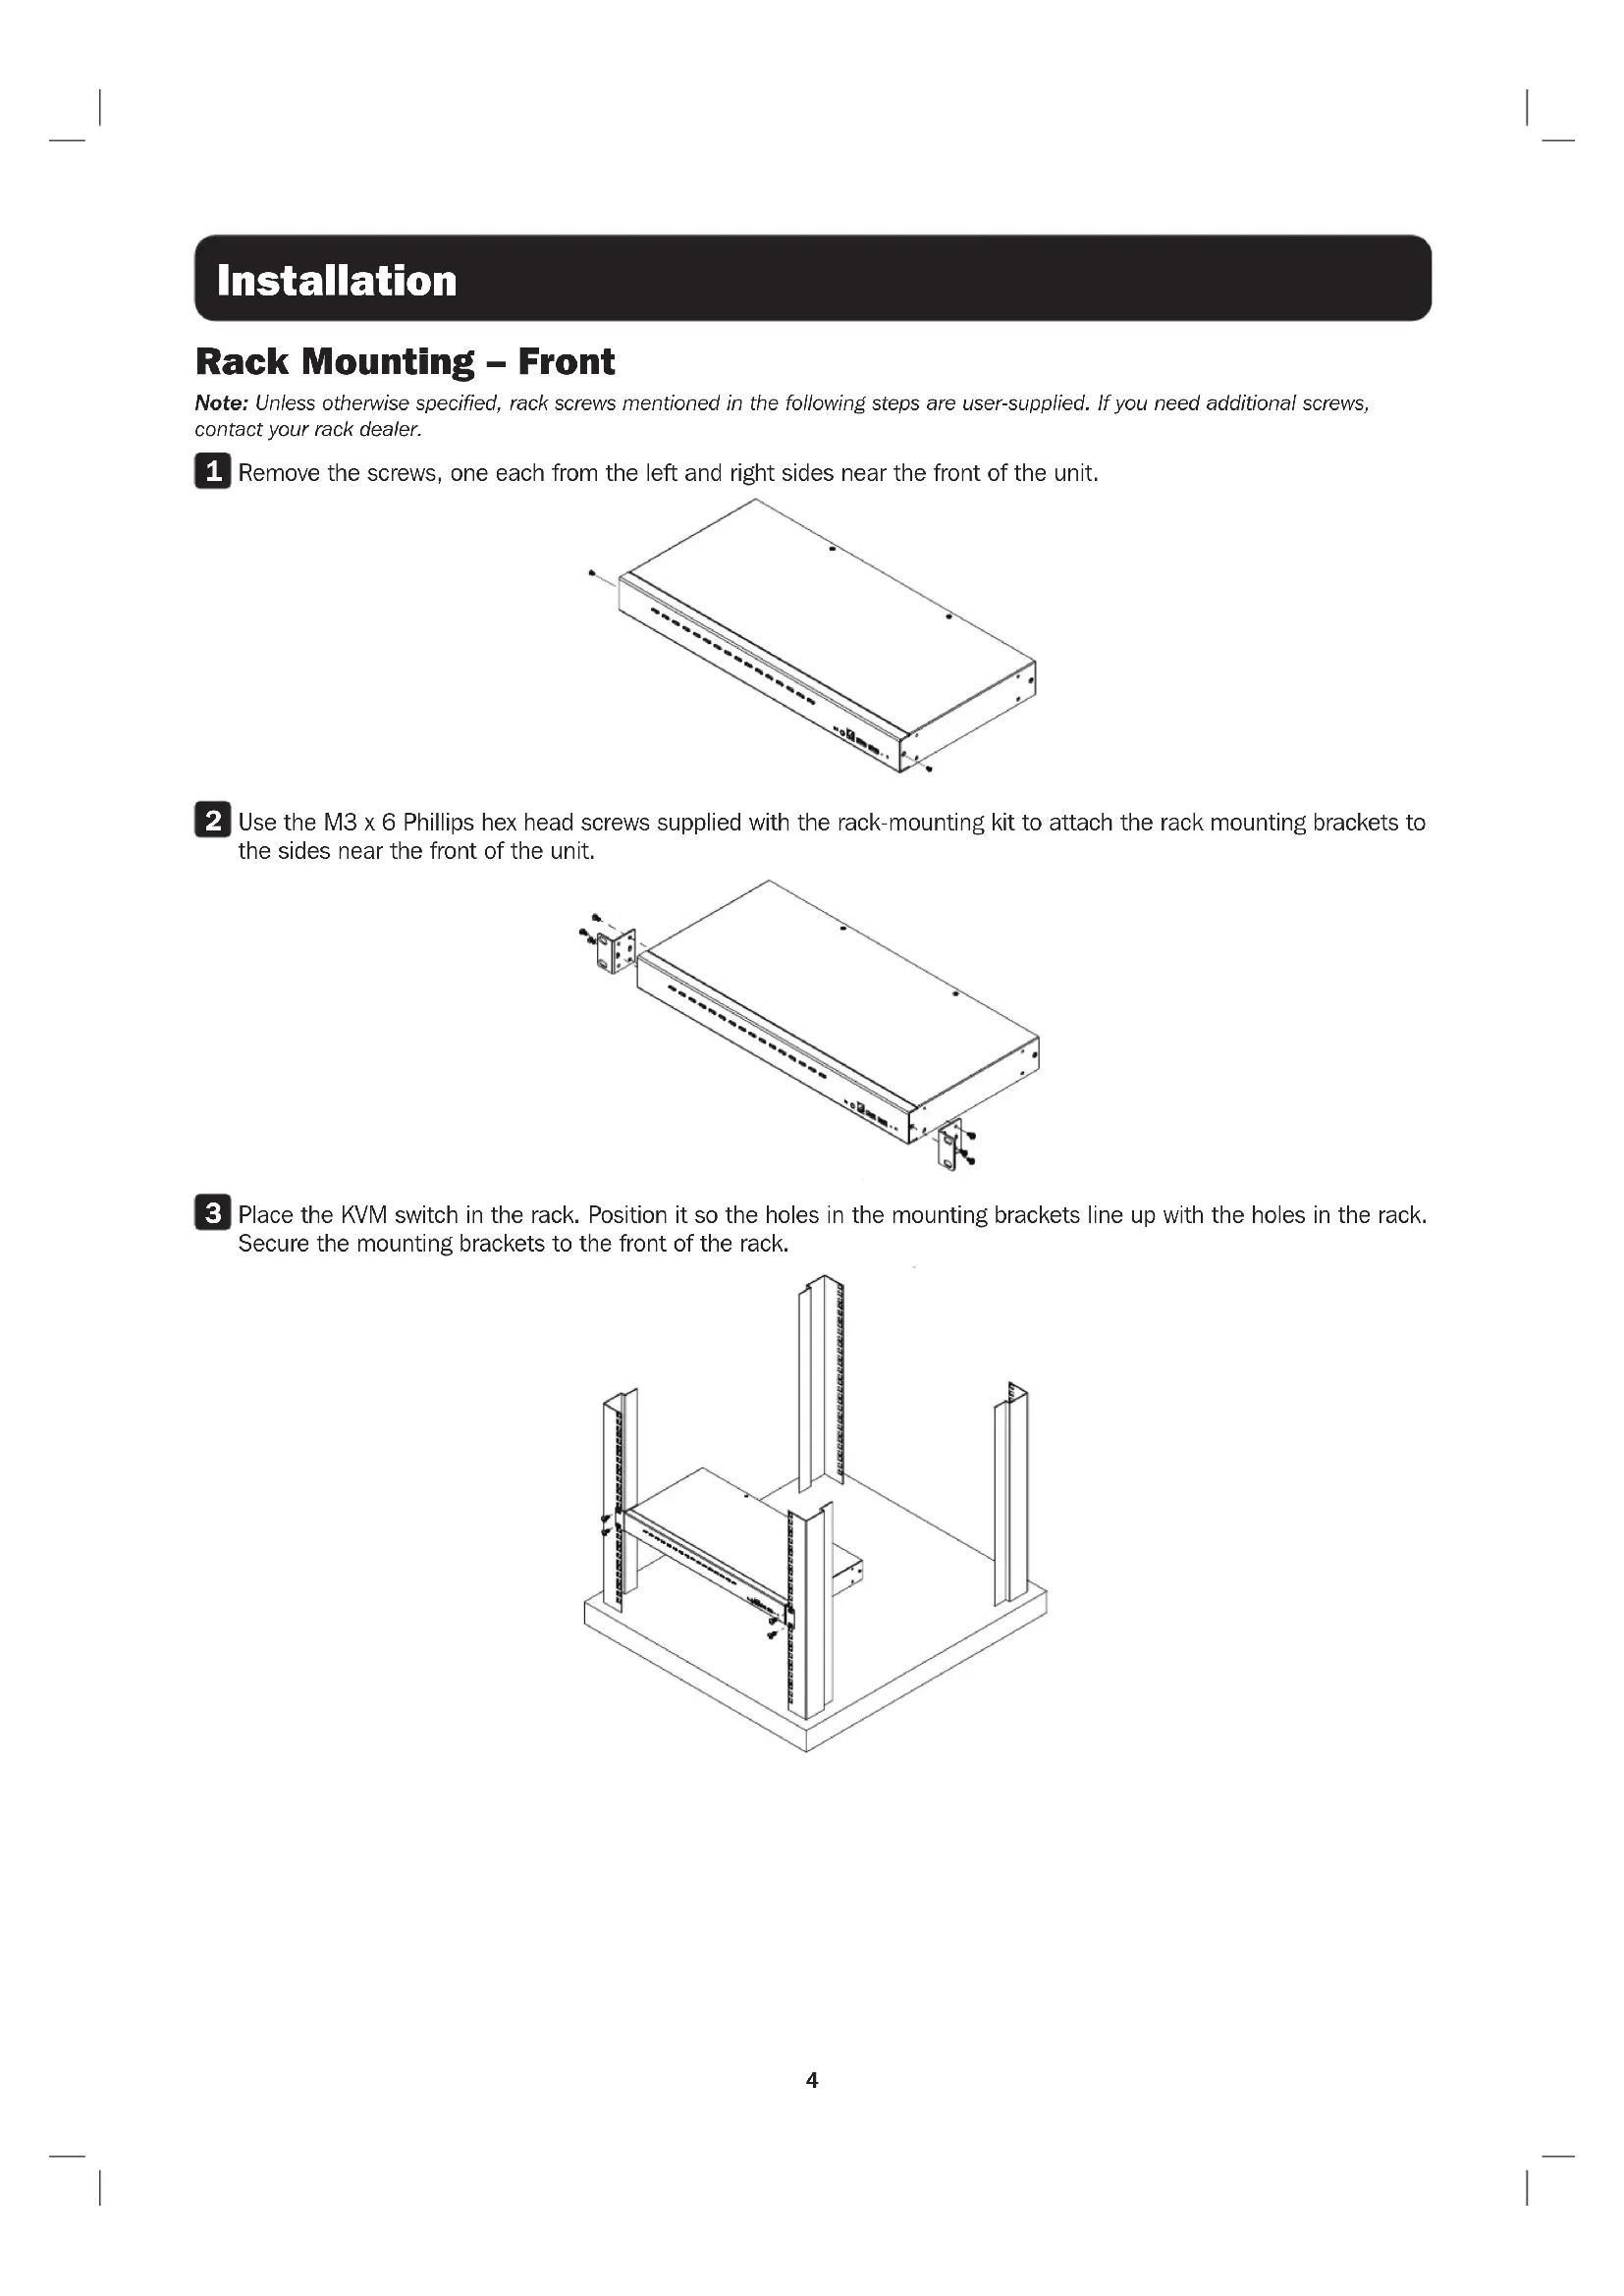
1 Remove the screws, one each from the left and right sides near the front of the unit.
natural_image
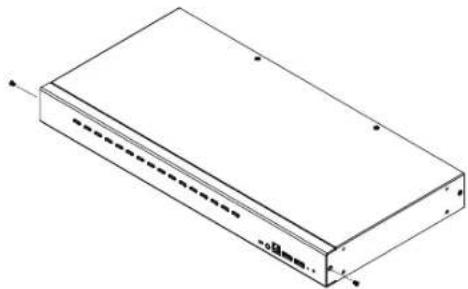
Isometric line drawing of a rectangular electronic device with no text or symbols2 Use the M3 x 6 Phillips hex head screws supplied with the rack-mounting kit to attach the rack mounting brackets to the sides near the front of the unit.
natural_image
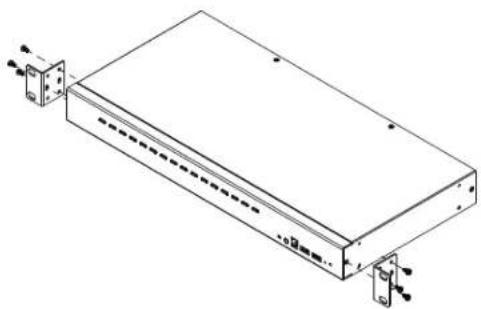
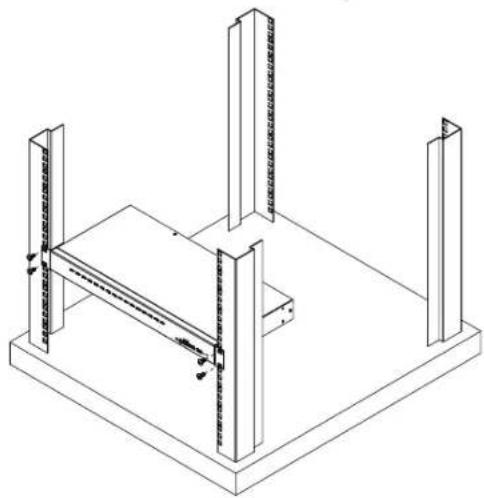
Isometric line drawing of a rectangular electronic device with mounting brackets and connectors (no text or symbols)3 Place the KVM switch in the rack. Position it so the holes in the mounting brackets line up with the holes in the rack. Secure the mounting brackets to the front of the rack.
natural_image
Isometric technical drawing of a structural support frame with vertical supports and a central horizontal beam (no text or symbols)Installation
Single-Stage Installation
text_image
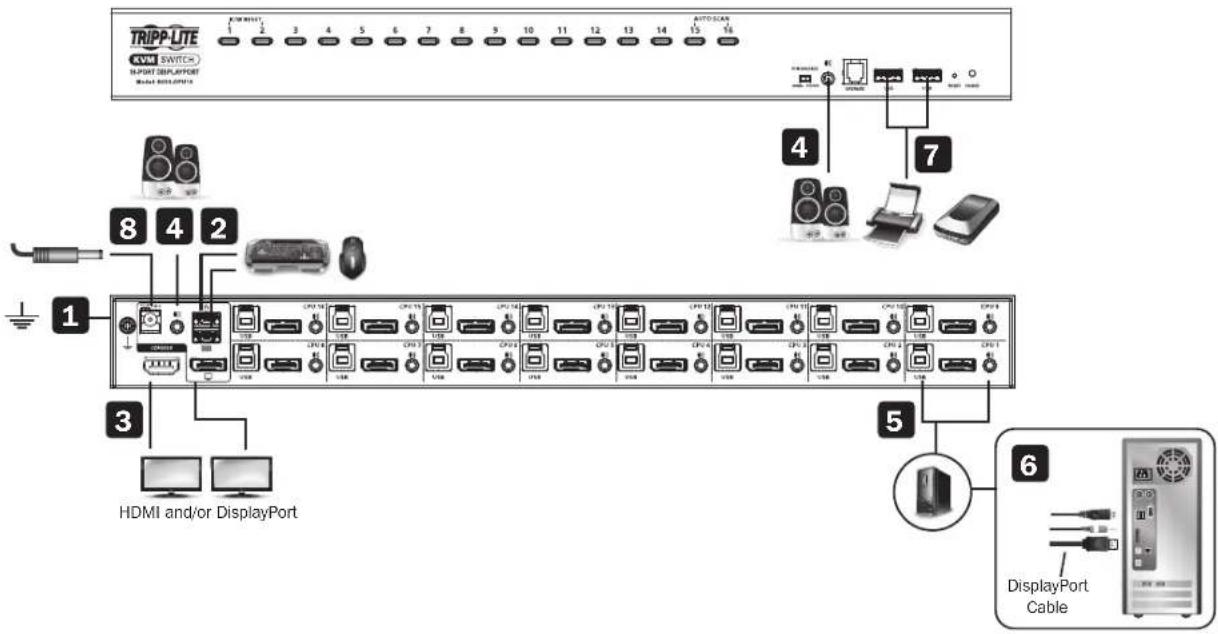
TRIPP-LITE AVM SWITCH IMPORT DESPORT HDMI 1 2 3 4 5 6 7 8 9 10 11 12 13 14 15 16 AUTO-SCAN 4 7 HDMI and/or DisplayPort 5 6 DisplayPort CableTo install the switch, refer to the installation diagram and perform the following steps:
1 Ground the B024-DPU08 / B024-DPU16 by connecting one end of a grounding wire to the Grounding Terminal and the other end to a suitable grounded object.
Note: Do not omit this step. Proper grounding helps to prevent damage to the unit from power surges or static electricity.
2 Plug your USB keyboard and USB mouse into the USB console ports from the console ports section located on the unit's rear panel.
3 Plug your DisplayPort and/or HDMI monitor(s) into the DisplayPort and/or HDMI console port(s) from the console ports section located on the unit's rear panel and power on the monitor(s).
Note: The B024-DPU08 / B024-DPU16 displays the same source content on both the DisplayPort and HDMI monitors when DisplayPort and HDMI console ports are plugged in simultaneously.
4 Plug your speakers into the audio jacks located on the unit's front and rear panel. Speakers plugged into the front panel have priority over those plugged into the rear panel.
5 Use the provided cable sets (DisplayPort cable, USB 3.0 cable and audio cable) with this package. Plug the DisplayPort connector into any available DisplayPort port in the KVM ports section of the switch (CPU 1, CPU 2, etc.), and then plug the USB 3.0 cable and audio cable into their corresponding ports.
Note: Verify that all the connectors are in the same KVM ports section (all in CPU 1, all in CPU 2, etc.).
6 Plug the other ends of the DisplayPort cable, USB 3.0 cable and audio cable into their respective ports on the computer. Repeat steps 5 and 6 for other PCs you are installing.
7 (Optional) Plug your USB peripherals into the USB Type-A ports in the USB 3.1 Gen 1 peripheral hub section located on the unit's front panel.
8 Plug the power adapter that came with your switch into an AC power source, then plug the power adapter cable into the switch's power jack. The B024-DPU08 / B024-DPU16 is now on.
9 Power on the computers.
Operation
The B024-DPU08 / B024-DPU16 provides four port selection methods to access the computers on the installation: Manual Switching, an On-Screen Display (OSD) menu system, Hotkeys, and RS-232 commands. For detailed information, please refer to the B024-DPU08 / B024-DPU16 Owner's Manual, available at tripplite.com/support/downloads.
Manual Switching
Use the front panel pushbuttons to manually switch to a port.
OSD (Port Switching)
text_image
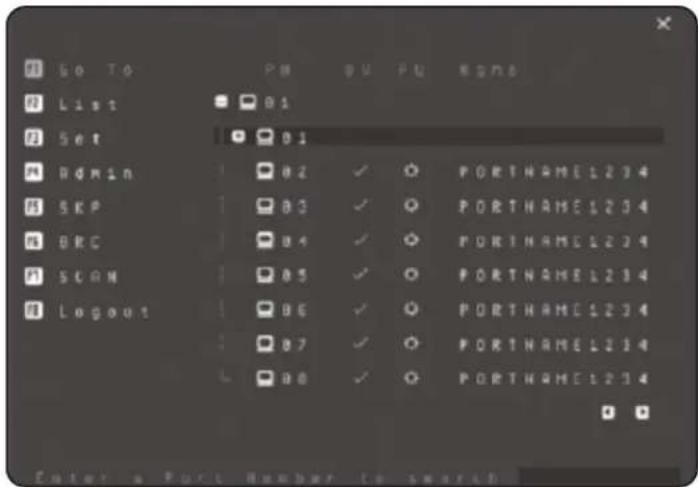
Go To List Set ROMIN SKP BRC SCAN Logout PM 00 PM BSN6 01 01 02 ✓ ○ PORTNAME1234 03 ✓ ○ PORTNAME1234 04 ✓ ○ PORTNAME1234 05 ✓ ○ PORTNAME1234 06 ✓ ○ PORTNAME1234 07 ✓ ○ PORTNAME1234 08 ✓ ○ PORTNAME1234 Enter a Port Number to searchThe on-screen display (OSD) is a mouse-and-keyboard enabled, menu-driven method to handle computer control and switching operations. All procedures start from the OSD main screen.
Default OSD Hotkey: Press the [Scroll Lock] key twice to display the OSD. If this is the first time the OSD is being run or if the password function has not been set, simply press [Enter].
To log in as an administrator, use default username and password: administrator / password. For more information, refer to the B024-DPU08 / B024-DPU16 Owner's Manual, available at tripplite.com/support/downloads.
Operation
Hotkey Setting Mode (HSM)
Hotkey Setting Mode is used to set functions on the switch. Follow the steps below to invoke HSM and perform a hotkey function.
- Press and hold down the [Num Lock] key.
- Press and release the [-] key.
-
Release the [Num Lock] key.
-
Press the hotkey to perform the desired function. Refer to the table below for the function.
HSM Summary Table
| Key Function | |
| [Port ID][Enter] Switches the KVM, audio and USB focus directly to the computer that corresponds to that Port ID (B024-DPU08: 1-8 / B024-DPU16: 1-16). | |
| [Port ID][K][Enter] Switches the KVM and audio focus directly to the computer that corresponds to that Port ID (B024-DPU08: 1-8 / B024-DPU16: 1-16). | |
| [Port ID][U][Enter] Switches only the USB focus directly to the computer that corresponds to that Port ID (B024-DPU08: 1-8 / B024-DPU16: 1-16).Note: This hotkey function works on single-stage installation only. | |
| [A][Enter] Starts Auto | Scan. The KVM focus cycles from port to port at the default 5-second interval. |
| [F1] Sets the port OS | to Windows. |
| [F2] Sets the port OS | to Mac. |
| [F3] Sets the port OS | to Sun. |
| [M] Enables / disables | mouse emulation. |
Warranty & Product Registration
1-Year Limited Warranty
TRIPP LITE warrants its products to be free from defects in materials and workmanship for a period of one (1) year from the date of initial purchase. TRIPP LITE's obligation under this warranty is limited to repairing or replacing (at its sole option) any such defective products. To obtain service under this warranty, you must obtain a Returned Material Authorization (RMA) number from TRIPP LITE or an authorized TRIPP LITE service center. Products must be returned to TRIPP LITE or an authorized TRIPP LITE service center with transportation charges prepaid and must be accompanied by a brief description of the problem encountered and proof of date and place of purchase. This warranty does not apply to equipment which has been damaged by accident, negligence or misapplication or has been altered or modified in any way.
EXCEPT AS PROVIDED HEREIN, TRIPP LITE MAKES NO WARRANTIES, EXPRESS OR IMPLIED, INCLUDING WARRANTIES OF MERCHANTABILITY AND FITNESS FOR A PARTICULAR PURPOSE. Some states do not permit limitation or exclusion of implied warranties; therefore, the aforesaid limitation(s) or exclusion(s) may not apply to the purchaser.
EXCEPT AS PROVIDED ABOVE, IN NO EVENT WILL TRIPP LITE BE LIABLE FOR DIRECT, INDIRECT, SPECIAL, INCIDENTAL OR CONSEQUENTIAL DAMAGES ARISING OUT OF THE USE OF THIS PRODUCT, EVEN IF ADVISED OF THE POSSIBILITY OF SUCH DAMAGE. Specifically, TRIPP LITE is not liable for any costs, such as lost profits or revenue, loss of equipment, loss of use of equipment, loss of software, loss of data, costs of substitutes, claims by third parties, or otherwise.
PRODUCT REGISTRATION
Visit tripplite.com/warranty today to register your new Tripp Lite product. You'll be automatically entered into a drawing for a chance to win a FREE Tripp Lite product!*
* No purchase necessary. Void where prohibited. Some restrictions apply. See website for details.
WEEE Compliance Information for Tripp Lite Customers and Recyclers (European Union)

Under the Waste Electrical and Electronic Equipment (WEEE) Directive and implementing regulations, when customers buy new electrical and electronic equipment from Tripp Lite they are entitled to:
- Send old equipment for recycling on a one-for-one, like-for-like basis (this varies depending on the country)
- Send the new equipment back for recycling when this ultimately becomes waste
WARNING
Use of this equipment in life support applications where failure of this equipment can reasonably be expected to cause the failure of the life support equipment or to significantly affect its safety or effectiveness is not recommended.
Tripp Lite has a policy of continuous improvement. Specifications are subject to change without notice. Photos and illustrations may differ slightly from actual products.

text_image
TRIPP·LITE
1111 W. 35th Street, Chicago, IL 60609 USA • tripplite.com/support
1111 W. 35th Street, Chicago, IL 60609 EE UU • tripplite.com/support
text_image
9 10 11 USB CPU 8 USB CPU 7 USB CPU 6 USB CPU 5 USB CPU 4 USB CPU 3 USB CPU 2 USB CPU 1 12 13Vista Posterior del B024-DPU16

text_image
9 10 11 USB CPU 16 USB CPU 15 USB CPU 14 USB CPU 13 USB CPU 12 USB CPU 11 USB CPU 10 USB CPU 9 USB CPU 8 USB CPU 7 USB CPU 6 USB CPU 5 USB CPU 4 USB CPU 3 USB CPU 2 USB CPU 1 12 13natural_image
Isometric line drawing of a rectangular electronic device with no text or symbolsnatural_image
Isometric line drawing of a rectangular electronic device with mounting brackets and connectors (no text or symbols)natural_image
Isometric line drawing of a structural support frame with vertical supports and a central horizontal beam (no text or symbols)Instalación
1111 W. 35th Street, Chicago, IL 60609 EE UU • tripplite.com/support
1111 W. 35th Street, Chicago, IL 60609 USA • tripplite.com/support
text_image
9 10 11 USB CPU 8 USB CPU 7 USB CPU 6 USB CPU 5 USB CPU 4 USB CPU 3 USB CPU 2 USB CPU 1 12 13text_image
9 10 11 CPU 12 USB CPU 8 USB CPU 7 USB CPU 6 USB CPU 5 USB CPU 4 USB CPU 3 USB CPU 2 USB CPU 1natural_image
Isometric line drawing of a rectangular electronic device with no text or symbolsnatural_image
Isometric line drawing of a rectangular electronic device with mounting brackets and connectors (no text or symbols)natural_image
Isometric technical drawing of a structural support frame with vertical supports and a central horizontal beam (no text or symbols)Installation
1111 W. 35th Street, Chicago, IL 60609 USA • tripplite.com/support
1111 W. 35th Street, Chicago, IL 60609 USA • tripplite.com/support
text_image
9 10 11 USB CPU 5 USB CPU 7 USB CPU 6 USB CPU 5 USB CPU 4 USB CPU 3 USB CPU 2 USB CPU 1 12 13text_image
9 10 11 CPU 12 CPU 13 CPU 14 CPU 15 CPU 16 CPU 17 CPU 18 CPU 19 CPU 20 CPU 21 CPU 22 CPU 23 CPU 24 CPU 25 CPU 26 CPU 27 CPU 28 CPU 29 CPU 30 CPU 31 CPU 32 CPU 33 CPU 34 CPU 35 CPU 36 CPU 37 CPU 38 CPU 39 CPU 40 CPU 41 CPU 42 CPU 43 CPU 44 CPU 45 CPU 46 CPU 47 CPU 48 CPU 49 CPU 50 CPU 51 CPU 52 CPU 53 CPU 54 CPU 55 CPU 56 CPU 57 CPU 58 CPU 59 CPU 60 CPU 61 CPU 62 CPU 63 CPU 64 CPU 65 CPU 66 CPU 67 CPU 68 CPU 69 CPU 70 CPU 71 CPU 72 CPU 73 CPU 74 CPU 75 CPU 76 CPU 77 CPU 78 CPU 79 CPU 80 CPU 81 CPU 82 CPU 83 CPU 84 CPU 85 CPU 86 CPU 87 CPU 88 CPU 89 CPU 90natural_image
Isometric line drawing of a rectangular electronic device with no text or symbolsnatural_image
Isometric line drawing of a rectangular electronic device with mounting brackets and a central panel (no text or symbols)natural_image
Isometric line drawing of a structural support frame with vertical supports and a central horizontal beam (no text or symbols)Установка

1111 W. 35th Street, Chicago, IL 60609 USA • tripplite.com/support
Kurzanleitung
1111 W. 35th Street, Chicago, IL 60609 USA • tripplite.com/support
text_image
9 10 11 USB CPU 8 USB CPU 7 USB CPU 6 USB CPU 5 USB CPU 4 USB CPU 3 USB CPU 2 USB CPU 1 12 13text_image
9 10 11 USB CPU 16 USB CPU 15 USB CPU 14 USB CPU 13 USB CPU 12 USB CPU 11 USB CPU 10 USB CPU 9 USB CPU 8 USB CPU 7 USB CPU 6 USB CPU 5 USB CPU 4 USB CPU 3 USB CPU 2 USB CPU 1 12 13natural_image
Isometric line drawing of a rectangular electronic device with no text or symbolsnatural_image
Isometric line drawing of a rectangular electronic device with mounting brackets and connectors (no text or symbols)natural_image
Isometric line drawing of a structural support frame with vertical supports and a central horizontal beam (no text or symbols)Installation
Einstufige Installation

text_image
TRIPP-LITE AVMI SWITCH IMPORT DESPORT HDMI UND/oder DisplayPort 1 2 3 4 5 6 7 8 9 10 11 12 13 14 15 16 4 7 5 6 Display- Port-Kabel
1111 W. 35th Street, Chicago, IL 60609 USA • tripplite.com/support