Doc Eco 3 - Electric scooter NILOX - Free user manual and instructions
Find the device manual for free Doc Eco 3 NILOX in PDF.
| Product type | Foldable electric scooter |
| Brand | Nilox |
| Model | Doc Eco 3 |
| Dimensions (folded) | 860 x 320 x 135 mm |
| Weight | 7.9 kg |
| Frame material | Aluminum |
| Wheel dimensions | Not specified (solid tires) |
| Battery | Lithium, rechargeable |
| Range | Variable according to weight, terrain, maintenance |
| Charging time | About 3-4 hours (charger 100-240V) |
| Maximum speed | Not specified (electric assistance) |
| Motor | Electric, integrated in rear wheel |
| Brakes | Rear foot brake + electronic brake |
| Folding | Yes, with loop and quick release |
| Lighting | Front light and rear light |
| Maximum user capacity | Not specified (recommended max weight in manual) |
| Included accessories | Charger, manual, key, front/rear lights |
| Maintenance | Lubricate every 3 months at folding point; clean with damp cloth |
| Warranty | 2 years (consumers), 1 year (professionals) |
| Operating temperature | Above -5°C |
| Certification | CE |
Frequently Asked Questions - Doc Eco 3 NILOX
User questions about Doc Eco 3 NILOX
0 question about this device. Answer the ones you know or ask your own.
Ask a new question about this device
Download the instructions for your Electric scooter in PDF format for free! Find your manual Doc Eco 3 - NILOX and take your electronic device back in hand. On this page are published all the documents necessary for the use of your device. Doc Eco 3 by NILOX.
USER MANUAL Doc Eco 3 NILOX
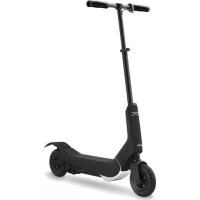
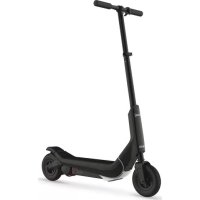
natural_image
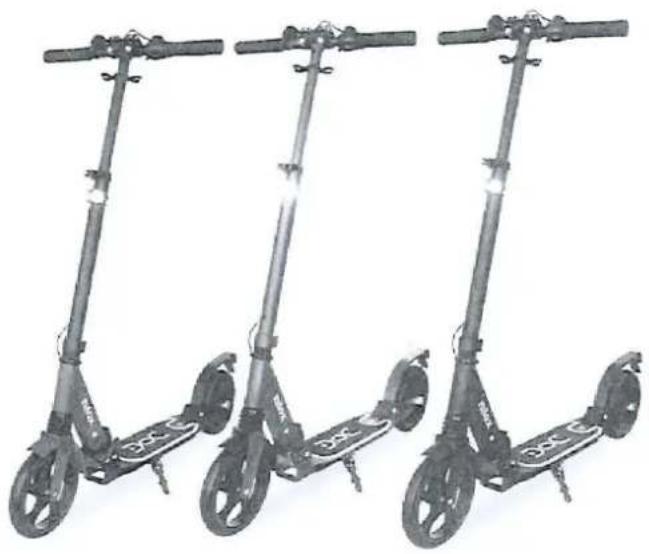
Three black and olive green electric scooters displayed side by side, no visible text or symbols on the scooters themselves.EN
USER MANUAL
Thank you for purchasing a NILOX DOC ECO 3 electric scooter.
Please read this manual carefully before using the product and store it in a safe place for future reference.
1. Introduction
This product is a foldable assisted electric scooter. It can accelerate by being pushed and decelerate using the foot brake or the brake on the handlebars.
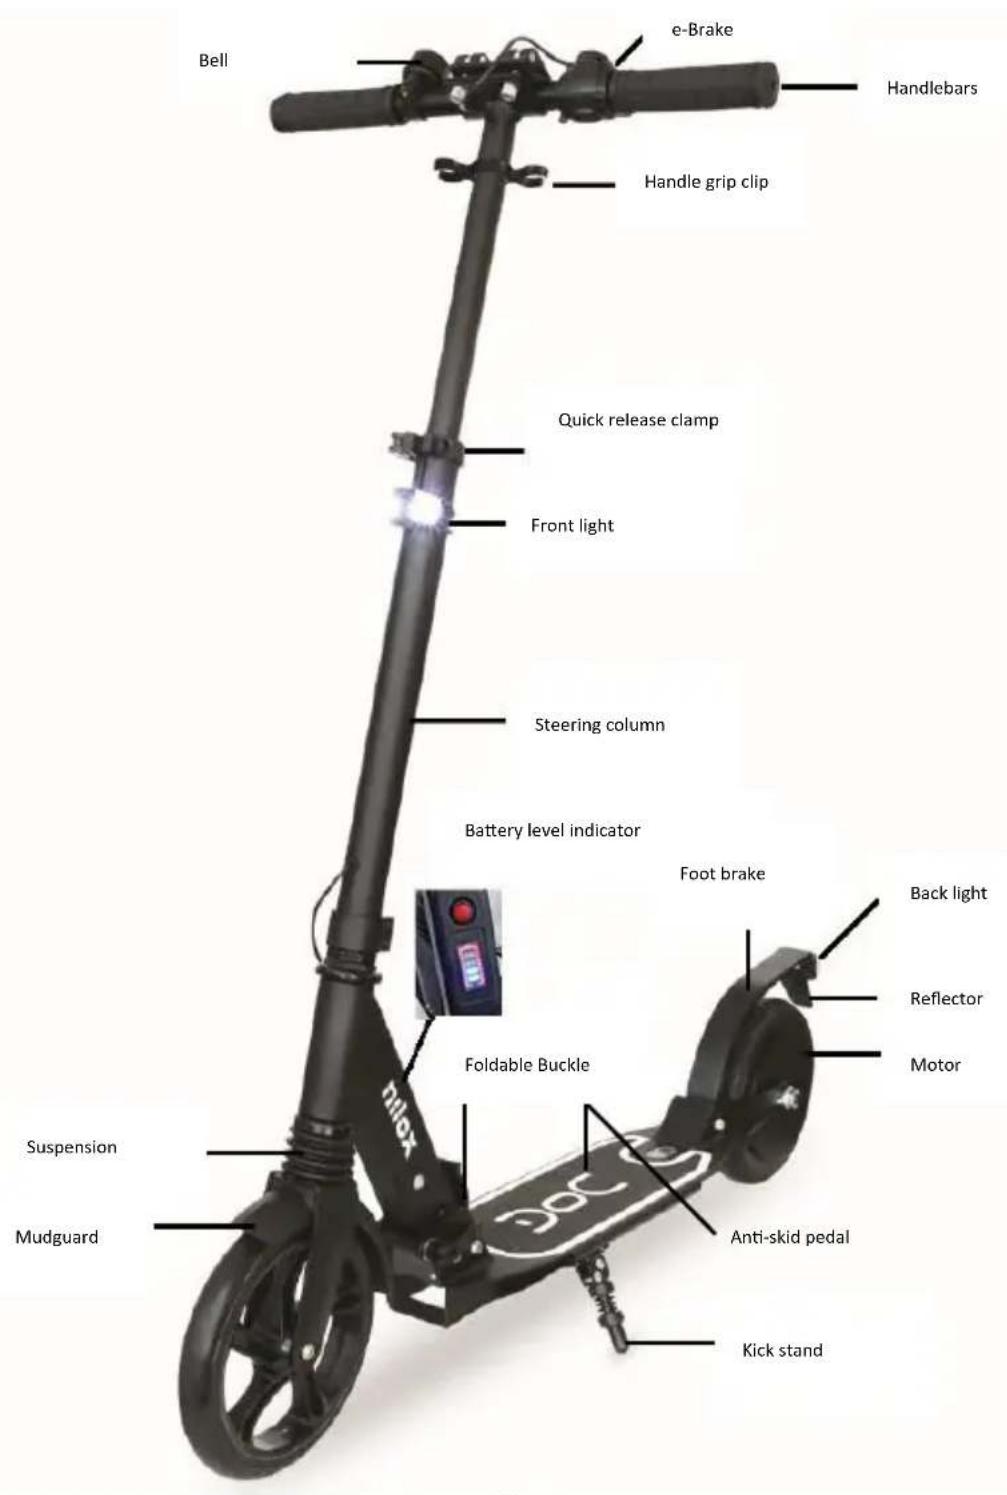
2. Introduction to product parts
3. Warnings
- Only use the battery supplied.
- This is not a toy. This product should be used by adults or minors with AM licences.
- Check the current traffic regulations relating to scooters where the Doc Eco 3 is used.
- Ensure that all parts of the Doc Eco 3 are secured (for example that the screws on the handlebars are tight)
- Always wear comfortable clothing that does not restrict movement and use personal protection equipment: on hands/wrists, knees, head and elbows.
- Do not transport objects when riding the scooter
- When riding the scooter pay attention to other people and objects around you and keep a safe distance
- Ensure that both feet are positioned correctly on the deck.
- We recommend not to accelerate or stop suddenly to avoid losing control of the scooter
- Do not do any stunts.
- Do not get on and off the scooter while it is moving.
- Respect the maximum rider weight requirement
- It is forbidden using the product in adverse weather conditions (for example rain, hail or snow) to avoid damage to the electrical circuits or motor. In addition avoid using Doc Eco 3
on slippery surfaces or on gravel or sand. Do not get on and of the Doc Eco 3 on steep paths or when going up or down hill.
- Do not use the Doc Eco 3 in temperatures below -5°.
- Do not use the Doc Eco 3 with the kick bar lowered.
- The foot brake may overheat in the event of prolonged use therefore do not touch it until it has cooled down, likewise do not touch the motor after use.
- The Doc Eco 3 is intended to be used by only one person at a time.
- Using the Doc Eco 3 is not recommended for people with limited motor skills, those with impaired psychological status or pregnant women.
- When using the Doc Eco 3 for the first time first try it in an open area away from dangers to practice safely.
- Do not use in flammable environments.
- The manufacturer, importer and distributor are not liable for any damage caused to persons or things in the event of improper use of the Doc Eco 3.
- Do not attempt to repair the product by yourself, in the event of malfunction contact your dealer.
- Disconnect from the power supply before cleaning.
- To clean it wipe with a damp cloth or use a solution suitable for cleaning similar devices. Do not immerse in water or try to clean it with jets of water.
- To preserve the battery, it must be charged every 30 days even if the Doc Eco 3 is not used, otherwise the battery loses efficiency at the expense of autonomy.
- The maximum travel distance when charged can vary according to various factors such as the rider's weight, the gradient of the journey, surface characteristics and correct battery maintenance.
3. Assembling the scooter
natural_image
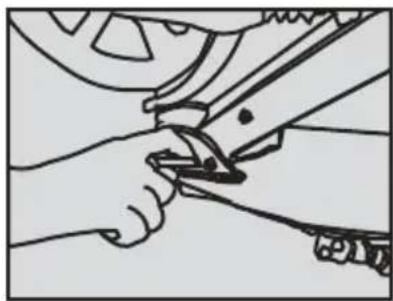
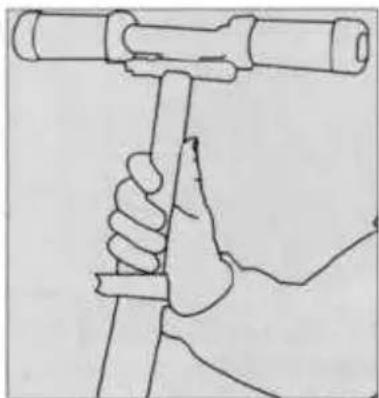
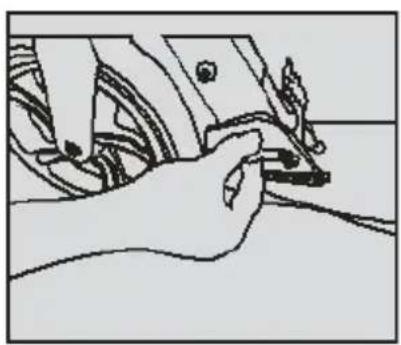
Illustration of hands using a tool to adjust or install a mechanical component (no text or symbols visible)3.1 Loosen the handle with your hand and press the release lever.
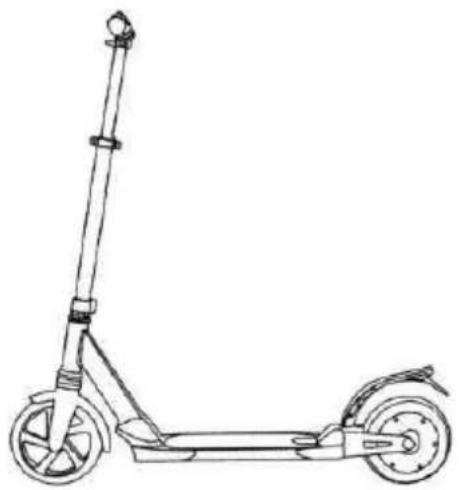
natural_image
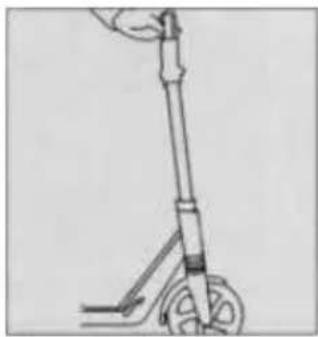
Line drawing of a scooter with wheels and handle (no text or symbols)3.2 Open the steering column, press the foot plate with your left foot to stabilise it and lift the steering column.
natural_image
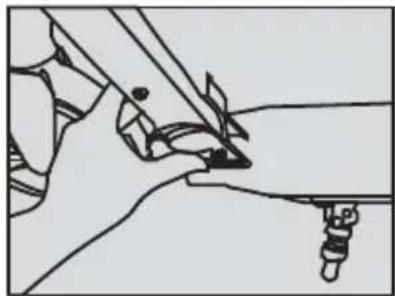
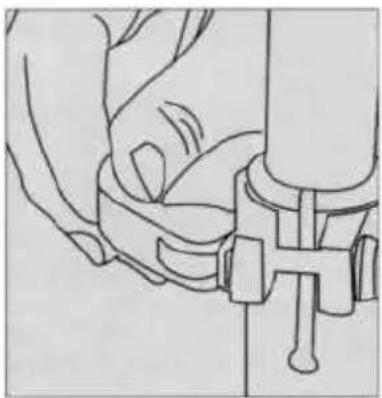
Line drawing of a mechanical component with no visible text or symbols3.3 Lock the clamp to set the handlebars.
natural_image
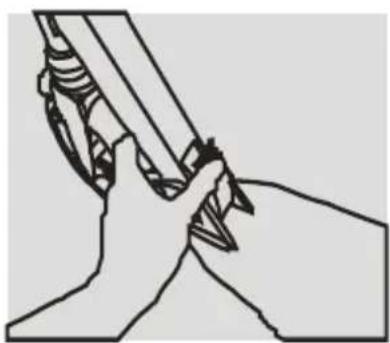
Line drawing of hands operating a mechanical clamp or clamp device (no text or symbols present)3.4 Remove the handle grips from the clips and insert them into the fixed part of the handlebars.
natural_image
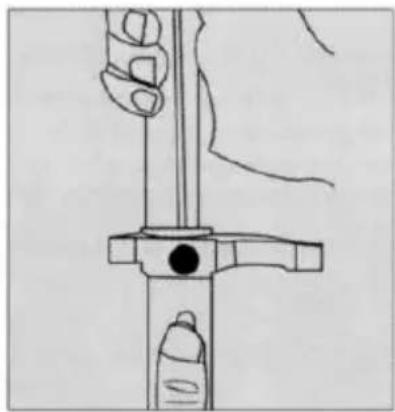
Line drawing of a hand holding a cylindrical object with a handle, no text or symbols present3.5 Adjust the height with one hand, hold the T column with the other hand and clamp it into the right position.
natural_image
Line drawing of a hand fastening a mechanical component (no text or symbols)3.6 Close the clamp.

natural_image
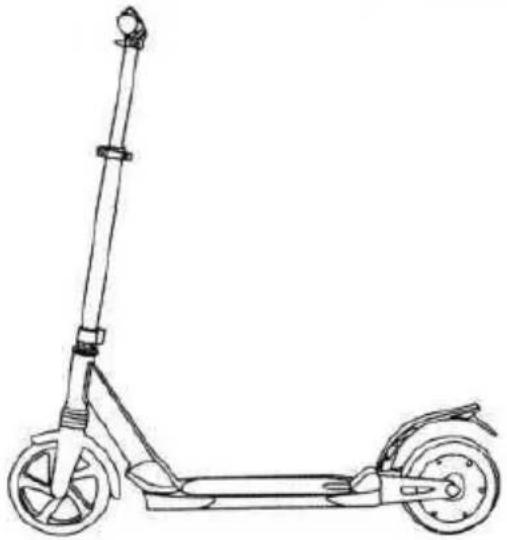
Line drawing of a scooter with extended wheels and a single side-mounted stick (no text or symbols)The scooter must be assembled according to the steps indicated in the above diagrams.
Please ensure safety during assembly.
4. Folding the scooter

natural_image
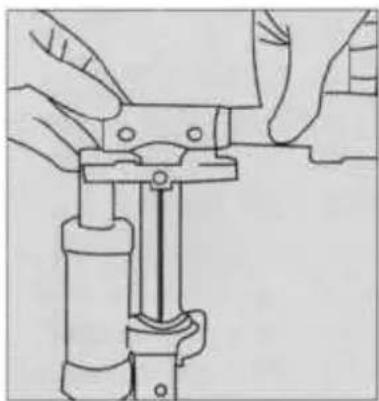
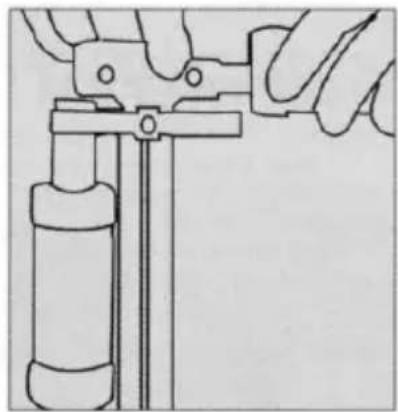
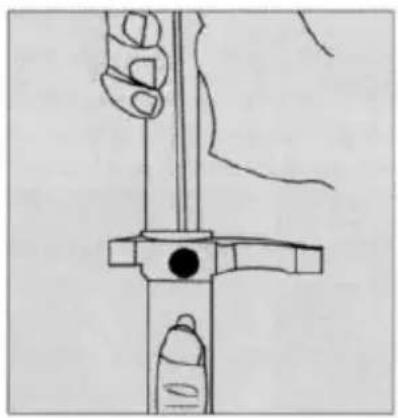
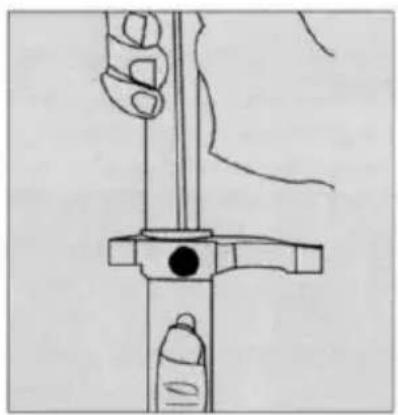
Technical line drawing of a mechanical assembly with a hand adjusting a bolt (no text or symbols)4.1 Loosen the quick release clamp
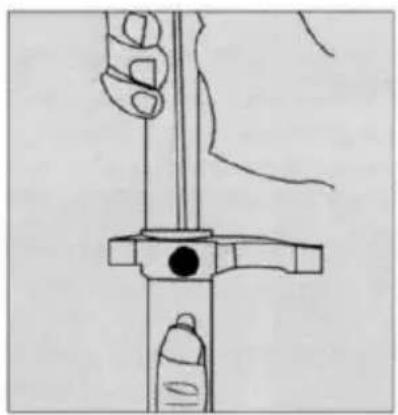
natural_image
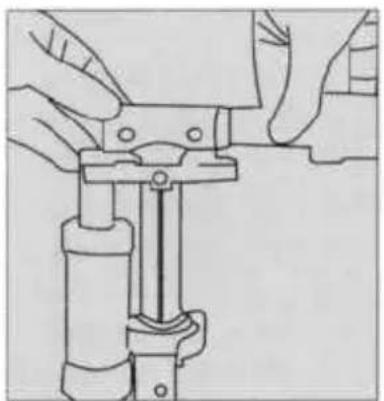
Line drawing of a hand holding a vertical tool with a circular head and handle, no text or symbols present4.2 Push the button and lower the steering column as much as possible
natural_image
Illustration of a hand using a tool to adjust or install a cylindrical component (no text or symbols visible)4.3 Remove the handle grips from the handlebars and attach them to the clips.
natural_image
Line drawing of a hand using a tool to adjust or install a component (no text or symbols visible)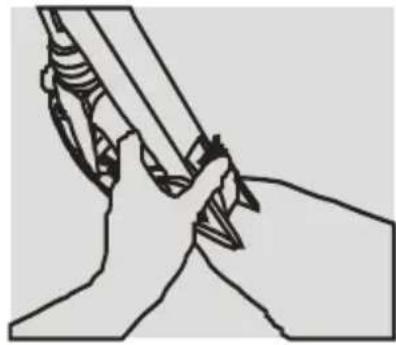
natural_image
Illustration of hands holding a tool or device with a pen-like object inserted (no text or symbols visible)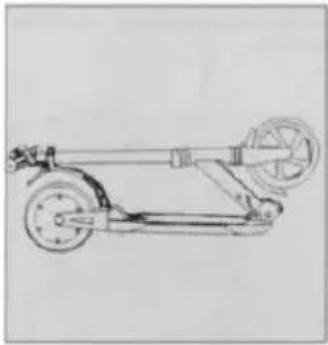
natural_image
Line drawing of a scooter with wheels and suspension mechanism (no text or symbols)4.4 Loosen the handle
4.5 Gently push the steering coloumn backwards until you hear a click to fold.
4.6 Folded view of the scooter.
5. Introduction on how to use it
| Battery indicator | Battery capacity |
| "4 Bars" | Battery charged |
| "3 Bars" | Around 75% |
| "2 Bars" | Around 50% |
| “1 Bar” | Below 25% recharge the scooter. |
With low battery level the scooter will emit a sound indicating that DOC Eco 3 must be recharged.
Hold the handlebars with both hands and place one foot on the plate, push the other foot off the ground to accelerate. Repeat again to accelerate further. To slow-down push the foot brake at the back, take your foot off the brake when you reach the required speed, at this time the scooter will return to the previous speed. To deactivate the motor use the e-brake.
6. Battery and charger
6.1. Lithium battery
Fully charge the battery when you first use the Doc Eco 3
6.1.1. When the battery is running low recharge it immediately to avoid damaging it and limiting autonomy.
6.1.2. If the scooter is not used for a long time, charge it at least once a month.
6.1.3. If the battery capacity is lower than the protection status and the scoter does not work contact your dealer immediately.
6.2. Recharging
The battery charger supplied has a charging protection function. Power is automatically cut off when the battery is 100% charged. Damage caused by water, collisions and other factors are not covered by the warranty.
6.2.1. Open the rubber cover on the charging port on the lower part of the foot plate of the scooter and insert the power input connector into the charging port.
6.2.2. Insert the charger input plug into the power outlet (AC100V-240V\~).
6.2.3. . If the indicator on the charger is red the battery is charging; when it turns green the battery is fully charged.
6.2.4. When charging the battery always place it in a dry and ventilated place.
7. Care and Maintenance
Lubrification: a small quantity of white grease or lubricant must be applied to the steering column folding mechanism every three months.
Wheels: this product is fitted with solid wheels. If a wheel needs to be replaced due to obvious wear or damage, please contact the service centre to replace it with an original one. Always check the wheels are tightened.
Positioning and daily care:
Do not leave the scooter in the sun or in humid places for long periods; clean it with a dry or damp cloth.
8. Doc Eco 3 Parameters
| Model | Doc Eco 3 |
| Dimensions | 860*320*135 mm when folded |
| Weight | 7.9 Kg |
| Frame material | Aluminium |
| Wheel dimensions | 8" |
| Colour | Back, Grey, Camo |
| Engine Power | 150 W |
| Maximum speed* | 12 Km/h |
| Maximum autonomy* | 10 km |
| Maximum gradient | 5° |
| Battery Capacity | 21.6 V =2500 m Ah |
| Recharge parameters | Input 100-240V~25.2 V 1 A-- |
| Recharge time | 3-4 hours |
| Maxim Rider Weight | 100 Kg |
- Rider weight of 60 kg
9. Warranty (Validity and Limitations)
- The warranty validity period for consumers, i.e. those that purchase items for purposes unrelated to their professional or business activity. For those that purchase items using a VAT Code for purposes related to their professional activity, the legal assurances provided 1 year from delivery as the law states.
- The warranty is valid in the event the product has a material or manufacturing defect.
Consumers are not entitled to the warranty in the following cases:
- lack of proof of purchase (invoice or receipt).
- attempts to repair parts and/or changes carried out by unauthorised parties
- using accessories or items that are not supplied with the product;
- normal wear and tear of the product;
- accidental damage and falls;
- improper use of the product
10. Package contents
| Accessory | Quantity |
| Doc Eco 3 | 1 |
| Power supply | 1 |
| Manual | 1 |
| Front and back lights | 1 |
| Key | 1 |
Note: The performance and parameters of the product supplied are subject to change without notice. The company reserves the right to the final interpretation of all terms and conditions in this manual.
ENVIRONMENTAL INFORMATION

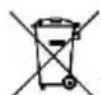
This product may contain substances that can be harmful to the environment and human health if not disposed of properly. We therefore provide you with the following information to prevent the release of such substances and to optimize the use of natural resources. The electrical and electronic components should not be disposed of in the normal household waste but should be properly and correctly collected and treated. The crossed-out wheelie bin symbol on the product and on this page indicates the need to properly dispose of the product at the end of its lifespan. In this way you can avoid non-specific treatment of the substances contained in these products, or improper use of parts of these which can have harmful consequences for the environment and human health. Moreover, you can contribute to the recovery, recycling and reuse of many of the materials in these products. This is why the manufacturers and distributors of Electrical and Electronic Equipment (EEE) organize proper collection and disposal of the equipment themselves. At the end of the product's lifespan, please contact your dealer for instructions
regarding disposal. When purchasing this product your distributor will inform you of the possibility to replace your old device with a new one, on condition that the type of product and its functions are the same. If the dimensions are not over 25 cm, the EEE (Electrical and Electronic Equipment) can be returned without any equivalent product purchase obligation. Disposal of the product in any other way will be liable to the penalties provided by the laws in force in the country where the product is disposed of. Moreover, we suggest the following measures to protect the environment: recycling the inner and outer packaging supplied with the product and disposing of used batteries (if contained in the product) correctly. With your help, we can reduce the amount of natural resources used in the manufacture of EEE (Electrical and Electronic Equipment), minimize use of landfills for product disposal and improve quality of life by preventing the release of potentially dangerous substances into the environment.
BATTERY INSTALLATION AND REPLACEMENT
The product contains a battery that could be replaced during the lifespan of the product itself. Dispose of the battery contained in the product correctly at the end of its lifespan (for instance when it can no longer be charged) by placing it in an appropriate battery disposal container separate from the generic unsorted waste. Collection and recycling of batteries helps protect the environment and preserve natural resources, allowing recovery of valuable materials.
EU Declaration of Conformity
This declaration of conformity is issued under the sole responsibility of the manufacturer:
Manufacturer: EXHIBO S.p.A. - Via Leonardo da Vinci, 6 - 20854 Vedano al Lambro (MB)
Name and address of the person authorized to carry out the technical dossier: EXHIBO S.p.A. - Via Leonardo da Vinci, 6 - 20854 Vedano al Lambro (MB)
Description: Electric scooter
Brand: NILOX Model: DOC ECO 3
natural_image
Three identical electric scooters displayed side by side, no visible text or symbols on the scooters themselves.The object of the declaration complies with all the relevant provisions of the following Directives
Directive 2006/42/CE
Directive 2014/30/UE
Directive 2015/863/UE
Applied standards
EN 60204-1:2006+A1:2009
EN 60335-1:2012+A11:2014+A13:2017
EN 55014-1:2017
EN 55014-2:2015
IEC 62778:2014
Directive RoHS 2015/863/EU
Regulation 1272/2013
Signed in the name and on behalf of
CE
Place: Vedano al Lambro
Date: 18/10/2019
Role: Managing Director
Name: Luca Maragliano Caranza
Signature:
Distributed by Nilox
Produced and imported by
natural_image
Three black and olive green electric scooters displayed side by side, no visible text or symbols on the scooters themselves.IT
MANUALE D'USO
natural_image
Illustration of hands using a tool to adjust or install a mechanical component (no text or symbols visible)natural_image
Line drawing of a scooter with wheels and handle (no text or symbols)natural_image
Illustration of a hand using a tool to interact with a mechanical component (no text or symbols visible)natural_image
Line drawing of hands operating a mechanical clamp or clamp device (no text or symbols present)natural_image
Line drawing of a hand holding a tool with a cylindrical object above, no text or symbols presentnatural_image
Line drawing of a hand adjusting a mechanical clamp or bracket (no text or symbols)natural_image
Line drawing of a scooter with extended boom and two wheels (no text or symbols)natural_image
Diagram of a hand adjusting a mechanical component with a circular bolt and shaft (no text or symbols)4.1 Allentare la fibbia
natural_image
Line drawing of a hand holding a tool with a circular head and handle (no text or symbols)natural_image
Illustration of a hand using a tool to adjust or install a cylindrical component (no text or symbols visible)natural_image
Illustration of a hand using a tool to adjust or install a component (no text or symbols visible)natural_image
Illustration of hands holding a tool or device, no text or symbols presentnatural_image
Line drawing of a scooter or scooter with wheels and suspension components (no text or symbols)natural_image
Three identical electric scooters displayed side by side, no visible text or symbols on the scooters themselves.Distribuito da Nilox
natural_image
Three black and olive green electric scooters displayed side by side, no visible text or symbols on the scooters themselves.
natural_image
Illustration of hands using a tool to adjust or install a mechanical component (no text or symbols visible)natural_image
Line drawing of a scooter with wheels and handle (no text or symbols)natural_image
Line drawing of a mechanical assembly or tool interacting with a surface (no text or symbols)natural_image
Line drawing of hands operating a mechanical clamp or clamp device (no text or symbols present)natural_image
Line drawing of a hand holding a tool with a cylindrical object above (no text or symbols)natural_image
Line drawing of a hand fastening a mechanical clamp or bracket (no text or symbols)3.6 Fijar el cierre

natural_image
Line drawing of a scooter with extended wheels and a single suspension rod (no text or symbols)natural_image
Technical line drawing of a mechanical assembly with a hand adjusting a bolt (no text or symbols)4.1 Aflojar la hebilla
natural_image
Line drawing of a hand holding a tool with a circular head and handle, no text or symbols presentnatural_image
Illustration of a hand using a tool to adjust or install a cylindrical component (no text or symbols visible)natural_image
Illustration of a hand using a tool to adjust or install a component (no text or symbols visible)4.4 Aflojar el mango
natural_image
Illustration of hands holding a tool or device with a pen, no text or symbols presentnatural_image
Line drawing of a scooter with wheels and suspension (no text or symbols)•Peso conductor 60 kg
natural_image
Three identical electric scooters displayed side by side, no visible text or symbols on the scooters themselves.natural_image
Three black and olive green DCC scooters displayed side by side, no visible text or symbols on the scooters themselves.DE
BEDIENUNGSANLEITUNG
natural_image
Illustration of hands using a tool to adjust or install a mechanical component (no text or symbols visible)natural_image
Line drawing of a scooter with wheels and handle (no text or symbols)natural_image
Line drawing of a hand operating a tool with a screwdriver (no text or symbols)natural_image
Line drawing of hands operating a mechanical clamp or clamp device (no text or symbols present)natural_image
Line drawing of a hand holding a tool with a cylindrical object above (no text or symbols)natural_image
Line drawing of a hand fastening a mechanical component (no text or symbols)natural_image
Line drawing of a scooter with extended wheels and a single leg (no text or symbols)natural_image
Technical line drawing of a mechanical assembly with a hand adjusting a component (no text or symbols)natural_image
Line drawing of a hand holding a tool with a circular head and handle, no text or symbols presentnatural_image
Line drawing of a hand using a tool to adjust or install a cylindrical component (no text or symbols present)natural_image
Illustration of a hand using a tool to adjust or install a component (no text or symbols visible)natural_image
Illustration of hands holding a tool or device with a pen, no text or symbols presentnatural_image
Line drawing of a scooter chassis with wheels and steering wheel (no text or symbols)natural_image
Three identical electric scooters arranged in a row, each with visible wheels and front brackets (no text or symbols)natural_image
Three black and olive green electric scooters displayed side by side, no visible text or symbols on the scooters themselves.FR
MANUEL D'UTILISATION
natural_image
Illustration of hands using a tool to adjust or install a mechanical component (no text or symbols visible)natural_image
Line drawing of a scooter with wheels and handle (no text or symbols)natural_image
Line drawing of a mechanical assembly with no visible text or symbolsnatural_image
Line drawing of hands operating a mechanical clamp or clamp device (no text or symbols present)natural_image
Line drawing of a hand holding a tool with a cylindrical object above (no text or symbols)natural_image
Line drawing of a hand fastening a mechanical clamp or bracket (no text or symbols)3.6 Fixer la fermeture
natural_image
Line drawing of a scooter with extended wheels and a vertical pole (no text or symbols)natural_image
Technical line drawing of a mechanical assembly with a hand adjusting a component (no text or symbols)natural_image
Line drawing of a hand holding a vertical tool with a handle, no text or symbols presentnatural_image
Illustration of a hand using a tool to adjust or install a cylindrical component (no text or symbols visible)natural_image
Line drawing of a hand holding a small object with wires, no text or symbols presentnatural_image
Illustration of hands holding a tool or device with a pen, no text or symbols presentnatural_image
Line drawing of a scooter with wheels and wheel rim (no text or symbols)4.6 Trottinette version pliable.
natural_image
Three identical electric scooters displayed side by side, no visible text or symbols on the scooters themselves.Directive 2006/42/CE
Directive 2014/30/UE
Directive 2015/863/UE
Normes appliquées
EN 60204-1:2006+A1:2009
EN 60335-1:2012+A11:2014+A13:2017
EN 55014-1:2017
EN 55014-2:2015
IEC 62778:2014
Directive RoHS 2015/863/EU
Position: Managing Director
Nom: Luca Maragliano Caranza
Signature:
Distribué par Nilox
natural_image
Three black and olive green electric scooters displayed side by side, no visible text or symbols on the scooters themselves.PT
natural_image
Line drawing of hands using a tool to cut or adjust a mechanical component (no text or symbols)natural_image
Line drawing of a scooter with wheels and handle (no text or symbols)natural_image
Line drawing of a hand operating a tool on a surface, with no visible text or symbols3.3 Trave a alça para fixar o guiador.
natural_image
Line drawing of hands operating a mechanical clamp or clamp device (no text or symbols present)natural_image
Line drawing of a hand holding a tool with a cylindrical object above (no text or symbols)natural_image
Line drawing of a hand fastening a mechanical clamp or bracket (no text or symbols)3.6 Fixe o fecho
natural_image
Line drawing of a scooter with extended boom and wheels (no text or symbols)natural_image
Technical line drawing of a mechanical assembly with a hand adjusting a component (no text or symbols)4.1 Solte o fecho
natural_image
Line drawing of a hand holding a tool with a circular head and handle, no text or symbols presentnatural_image
Illustration of a hand using a tool to adjust or install a cylindrical component (no text or symbols visible)natural_image
Line drawing of a hand holding a small object with wires, no text or symbols presentnatural_image
Illustration of hands holding a tool or device with a pen, no text or symbols presentnatural_image
Line drawing of a scooter with wheels and suspension components (no text or symbols)natural_image
Three identical electric scooters with visible wheels and side brackets, arranged in a row (no text or symbols)Cargo: Managing Director
natural_image
Three black and olive green electric scooters displayed side by side, no visible text or symbols on the scooters themselves.