
940EVCP2 - Remote control CHAMBERLAIN - Free user manual and instructions
Find the device manual for free 940EVCP2 CHAMBERLAIN in PDF.

| Product Type | Wireless keyless entry (numeric keypad) for garage door opener |
| Brand | Chamberlain |
| Model | 940EVCP2 (also 940EV, 940EV-P2, 940EVC) |
| Power Supply | 9V battery (type 10A25) |
| Compatibility | Chamberlain garage door openers manufactured after January 1, 1993 |
| Number of programmable PINs | Up to 24 permanent PINs and 24 temporary PINs |
| Main Functions | PIN programming and modification, temporary PIN (by hours or openings), one-button close, operation with ENTER button |
| Installation | Wall mounting at a minimum height of 1.5 m (5 ft), out of reach of children |
| Indicator Light | Keypad LEDs blink during programming and for 15 seconds after activation |
| Spare Parts | 10A25 battery, keypad cover (41D621), battery cover (41D541) |
| Maintenance | Replace battery when keypad lighting dims or does not light up |
| Safety | Install out of reach of children; never let children use; operate door only when visible and clear |
| Warranty | 1 year from date of purchase |
| Certifications | Compliant with FCC Part 15 and IC RSS-210 |
Frequently Asked Questions - 940EVCP2 CHAMBERLAIN
User questions about 940EVCP2 CHAMBERLAIN
0 question about this device. Answer the ones you know or ask your own.
Ask a new question about this device
Download the instructions for your Remote control in PDF format for free! Find your manual 940EVCP2 - CHAMBERLAIN and take your electronic device back in hand. On this page are published all the documents necessary for the use of your device. 940EVCP2 by CHAMBERLAIN.
USER MANUAL 940EVCP2 CHAMBERLAIN
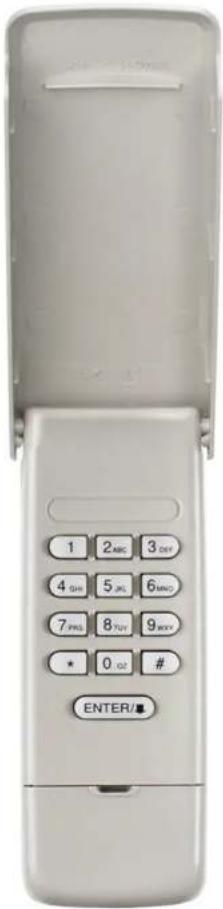
Wireless Keyless Entry
MODELS 940EV, 940EV-P2, 940EVC, AND 940EVC-P2
Introduction 2
Programming 3-6
Program PIN ....3
Change an Existing PIN .....4
Program a Temporary PIN - Number of Hours ....5
Program a Temporary PIN - Number of Openings .....6
Installation 7
Operation 8
FAQs 9
text_image
1 2ABC 3DEF 4 GH 5 JL 6MND 7 PRS 8 TOT 9 MXP * 0 GT # ENTER/■Introduction

For use with Chamberlain garage door openers manufactured after January 1, 1993. The garage door opener activates when the 4-digit Personal Identification Number (PIN) and ENTER button are pressed on the Keyless Entry.
Install the battery and program the Keyless Entry prior to installation. Make sure the garage door opener has a working light bulb because it is a programming indicator.

WARNING: This product can expose you to chemicals including lead, which are known to the State of California to cause cancer or birth defects or other reproductive harm. For more information go to www.P65Warnings.ca.gov
WARNING
To prevent possible SERIOUS INJURY or DEATH from a moving gate or garage door:
• Install Keyless Entry Control within sight of garage door, out of reach of small children at a minimum height of 5 feet (1.5 m) above floors, landings, steps or any other adjacent walking surface, and away from ALL moving parts of door.
- ALWAYS keep remote controls out of reach of children. NEVER permit children to operate, or play with remote controls.
- Activate gate or door ONLY when it can be seen clearly, is properly adjusted, and there are no obstructions to door travel.
- ALWAYS keep gate or garage door in sight until completely closed. NEVER permit anyone to cross path of moving gate or door.
GETTING STARTED
Locate the Learn button on the garage door opener. NOTE: Your garage door opener may look different.

text_image
Learn LED OR Learn LED OR OR Learn LED Red/Orange Purple Yellow Learn LEDProgramming

PROGRAM PIN
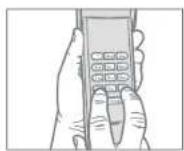
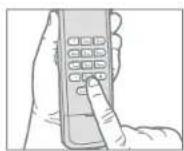
1 Press and hold the * and # buttons until the lights on the keypad stop blinking.
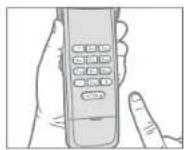
2 Enter a 4-digit personal identification number (PIN) of your choice, then press the # button.
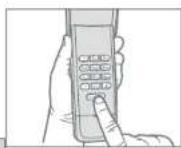
3 Press and release the ENTER button on the Keyless Entry the number of times that corresponds with your garage door opener type:
| GARAGE DOOR OPENER TYPE # OF | PRESSES |
| Yellow Learn Button (315 and 390 MHz Security+2.0®) | 1 |
| Purple Learn Button (315 MHz Security+®) | 2 |
| Red/Orange Learn Button (390 MHz Security+®) | 3 |
| Green Learn Button (390 MHz Billion Code) 4 |
4 Press and release the 0 button.
5 Press and release the Learn button on the garage door opener. The Learn LED will light.
Within 30 seconds...
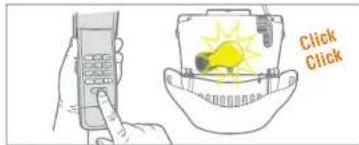
6 Enter your 4-digit PIN, then press and release the ENTER button until the garage door opener lights flash or two clicks are heard.
text_image
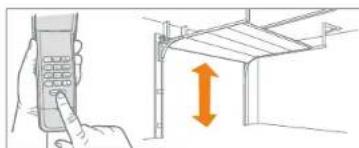
Click Click7 To test, enter your PIN, then press the ENTER button. The garage door opener will activate.
natural_image
Illustration of a hand holding a mobile phone and pointing at a roof structure with an upward arrow (no text or symbols)To program the Keyless Entry to more than one garage door opener, repeat the programming steps using a new PIN for each additional garage door opener.
Programming
CHANGE AN EXISTING PIN
1 Enter the programmed PIN that you want to change.
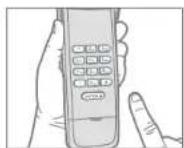
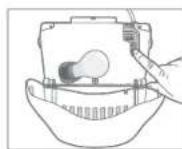
2 Press and hold the # button until the light bulb on the garage door opener blinks twice.
natural_image
Illustration of a hand holding a mobile phone and a light bulb inside a helmet (no text or symbols)3 Enter the new 4-digit PIN of your choice, then press the ENTER button. The light bulb on the garage door opener will blink once.
natural_image
Illustration showing a hand holding a mobile phone and a warning light inside a helmet (no text or symbols)4 To test, enter the new PIN, then press the ENTER button. The garage door opener will activate.
natural_image
Illustration of a hand using a mobile phone to interact with a wall-mounted panel, showing a vertical orange arrow (no text or symbols present)Programming
PROGRAM A TEMPORARY PIN - NUMBER OF HOURS
NOTE: This feature is not available on garage door openers that have a green Learn button or an external receiver.
A temporary 4-digit PIN can be programmed to allow access to visitors. Each programmed PIN can program one temporary PIN. The temporary PIN can be set for a number of hours or a number of door openings. The temporary PIN cannot be the same as any previously programmed PIN.
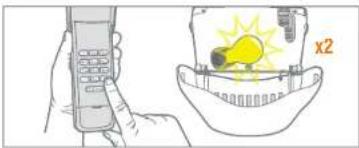
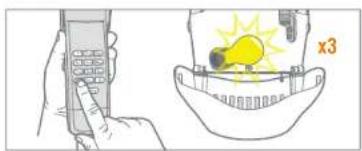
1 Enter any programmed PIN, then press and hold the * button until the garage door opener light bulb flashes 3 times.
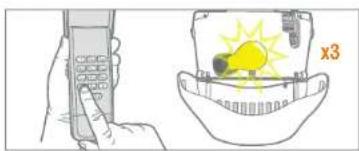
natural_image
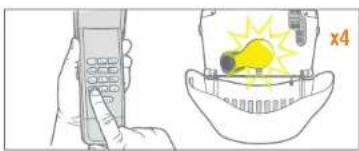
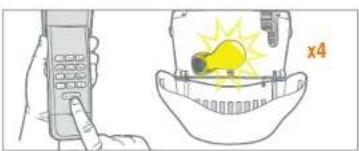
Illustration showing a hand holding a mobile phone and a helmet with a sun icon (no text or symbols)2 Enter the temporary 4-digit PIN of your choice, then press the * button. The garage door opener light bulb will flash 4 times.
natural_image
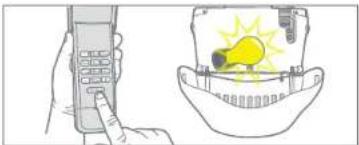
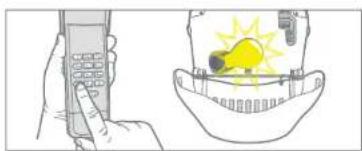
Illustration of a hand holding a mobile phone and a helmet with a light bulb (no text or symbols)3 Press the number of hours the temporary PIN will work (up to 255). Then press the * button. The garage door opener light bulb will flash once.
natural_image
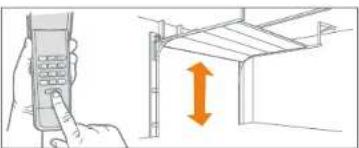
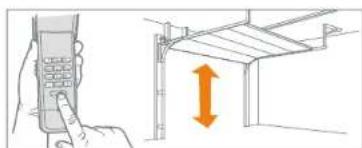
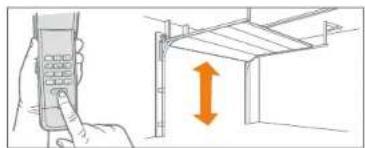
Illustration showing a hand holding a mobile phone and a person wearing a hard hat with a lightbulb (no text or symbols)4 To test, press the temporary PIN, then press the ENTER button. The garage door opener will activate.
natural_image
Illustration of a hand using a handheld device to press or install a roof structure with an orange double-headed arrow (no text or symbols)Programming
PROGRAM A TEMPORARY PIN - NUMBER OF OPENINGS
NOTE: This feature is not available on garage door openers that have a green Learn button or an external receiver.
A temporary 4-digit PIN can be programmed to allow access to visitors. Each programmed PIN can program one temporary PIN. The temporary PIN can be set for a number of hours or a number of door openings. The temporary PIN cannot be the same as any previously programmed PIN.
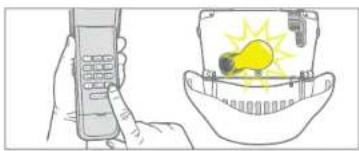
1 Enter any programmed PIN, then press and hold the * button until the garage door opener light bulb flashes 3 times.
natural_image
Illustration showing a hand holding a mobile phone and a light bulb inside a bowl (no text or symbols)4 To test, press the temporary PIN, then press the ENTER button. The garage door opener will activate. If the temporary PIN was set for a number of openings, the test will use up one opening.
natural_image
Illustration of a hand holding a mobile phone next to a structural frame with an upward arrow (no text or symbols)2 Enter the temporary 4-digit PIN of your choice, then press the ENTER button. The garage door opener light bulb will flash 4 times.
natural_image
Illustration showing a hand pointing at a mobile phone and a light bulb inside a bowl (no text or symbols)3 Press the number of openings the temporary PIN will work (up to 255). Then press the # button. The garage door opener light bulb will flash once.
natural_image
Illustration of a hand holding a mobile phone and a light bulb with a lit fuse, next to a helmet (no text or symbols)Installation
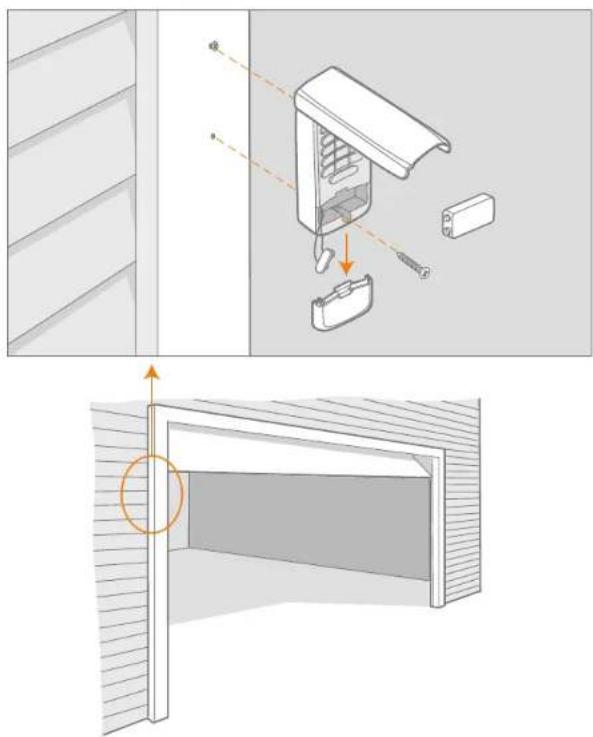
1 Select a location to mount the Keyless Entry at a minimum height of 5 feet (1.5 m) out of reach of children.
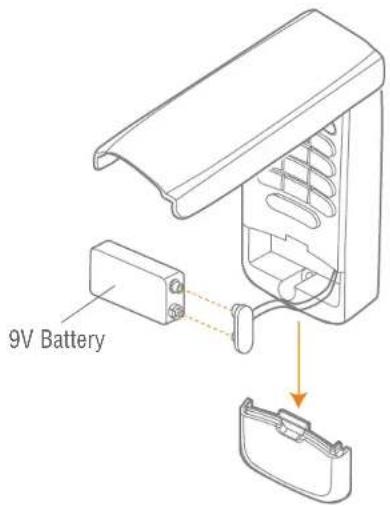
2 Remove battery cover and battery.
3 Mark the top mounting hole and drill 1/8 inch (3.2 mm) pilot hole.
4 Install the top screw, allowing 1/8 inch (3.2 mm) to protrude above the surface. Position the Keyless Entry over the top screw.
5 Mark the bottom hole and drill 1/8 inch (3.2 mm) pilot hole. Install the bottom screw. Do not overtighten to avoid cracking the plastic housing.
6 Reinstall battery and replace cover.

natural_image
Architectural diagram showing a door opening with a close-up of the interior wall and a close-up of the door (no text or symbols present)Operation
The garage door opener activates when the PIN and ENTER button are pressed. The keypad will blink for 15 seconds, during that time the ENTER button can be used to stop, start or reverse the door.
If the wrong number is accidentally pressed, press the correct PIN then the ENTER button. The Keyless Entry will transmit only the last four digits that were pressed before the ENTER button.
ONE BUTTON CLOSE
The Keyless Entry has a feature that allows the door to be closed using the ENTER button instead of a PIN.
NOTE: This feature is not available on garage door openers manufactured prior to 2006 or an external receiver.
natural_image
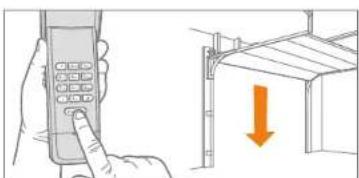
Illustration of a hand holding a mobile phone and a building with a downward arrow (no text or symbols)To deactivate the one button close feature:
Press and hold the 1 and 9 buttons for 10 seconds. The keypad will blink four times when the one button close feature is deactivated.
To activate the one button close feature:
Press and hold the 1 and 9 buttons for 10 seconds. The keypad will blink twice when the one button close feature is activated.
BATTERY
WARNING
To prevent possible SERIOUS INJURY or DEATH:
- NEVER allow small children near batteries.
- If battery is swallowed, immediately notify doctor.
Replace the battery when the keypad becomes dim or does not light after a button is pressed.
Dispose of old battery properly.
text_image
9V BatteryFAQs

Why won't my keypad work?
- Did the keypad lights come on when you entered your PIN? If the keypad lights do not turn on when you press a button, it indicates that the battery needs to be replaced. Replace with a 9V battery.
- Try reprogramming the Keyless Entry to the garage door opener.
- Make sure the Keyless Entry is compatible with your garage door opener (Chamberlain garage door openers manufactured after January 1, 1993).
• If the solutions above did not work, replace the Keyless Entry.
How many PINs can I program to the Keyless Entry?
The Keyless Entry will program up to 24 PINs and up to 24 temporary PINs.
Can I use the same PIN to activate multiple garage doors?
No, you cannot use the same PIN number twice. The Keyless Entry will overwrite the original programming if the PIN is programmed a second time.
Why don't the keypad lights turn on when I press a button?
If the keypad lights do not turn on when you press a button, it indicates that the battery needs to be replaced. Replace with a 9V battery.
What garage door openers are compatible with the Keyless Entry?
The Keyless Entry is only compatible with Chamberlain garage door openers manufactured after January 1, 1993.
Why does the door close when I just press the ENTER button?
The Keyless Entry has a "One Button Close" feature that allows the door to be closed using the ENTER button instead of a PIN. If you do not want this feature activated, press and hold the 1 and 9 buttons for 10 seconds. The keypad will blink four times when the one button close feature is deactivated.
What if I enter the wrong PIN?
If the wrong number is accidentally pressed, press the correct PIN then the ENTER button. The Keyless Entry will transmit only the last four digits that were pressed before the ENTER button.
WARRANTY
ONE YEAR LIMITED WARRANTY
The Chamberlain Group, Inc. warrants to the first consumer purchaser of this product that it is free from defect in materials and/or workmanship for a period of 1 year from the date of purchase.

REPLACEMENT PARTS
Battery 10A25
Keypad Cover 41D621
Battery Cover 41D541
NOTICE: To comply with FCC and or Industry Canada rules (IC), adjustment or modifications of this receiver and/or transmitter are prohibited, except for changing the code setting or replacing the battery. THERE ARE NO OTHER USER SERVICEABLE PARTS.
This device complies with Part 15 of the FCC rules and IC RSS-210. Operation is subject to the following two conditions: (1) this device may not cause harmful interference, and (2) this device must accept any interference received, including interference that may cause undesired operation.
www.chamberlain.com
© 2017, The Chamberlain Group, Inc. All Rights Reserved
114A5071B
CHAMBERLAIN®
text_image
Click Clicknatural_image
Illustration of a hand holding a mobile phone next to a structural frame with an orange double-headed arrow indicating vertical displacement (no text or symbols present)natural_image
Illustration of a hand holding a mobile phone and a light bulb inside a helmet (no text or symbols)natural_image
Illustration showing a mobile phone and a light bulb inside a helmet (no text or symbols)natural_image
Illustration showing a hand inserting a phone into a wall-mounted panel with an orange double-headed arrow indicating vertical displacement (no text or symbols present)Programmation
PROGRAMMATION D'UN NIP TEMPORAIRE - NOMBRE D'HEURES
natural_image
Illustration showing a hand holding a mobile phone and a light bulb inside a bowl, with no visible text or symbols.2
text_image
Diagram showing a hand holding a mobile phone and a hand holding a light bulb, with an inset illustrating the concept of lighting or illumination.3
natural_image
Illustration showing a hand holding a mobile phone and a close-up of a person's head with a light bulb and switch (no text or symbols)4
natural_image
Illustration of a hand holding a mobile phone and pointing at a structural frame with an upward arrow (no text or symbols)Programmation
PROGRAMMATION D'UN NIP TEMPORAIRE - NOMBRE D'OUVERTURES
text_image
Diagram showing a hand holding a mobile phone and a light bulb with 'x3' label, illustrating a wireless device operation.natural_image
Illustration showing a hand using a mobile phone and a helmet with a lightbulb (no text or symbols)natural_image
Illustration of a hand holding a mobile phone next to a structural frame with an orange double-headed arrow indicating vertical displacement (no text or symbols present)3 Entrez le nombre
natural_image
Illustration of a hand holding a mobile phone and a helmet with a lightbulb (no text or symbols)Installation

natural_image
Diagram of a refrigerator interior with labeled parts and a hand pointing to the door (no text or symbols present)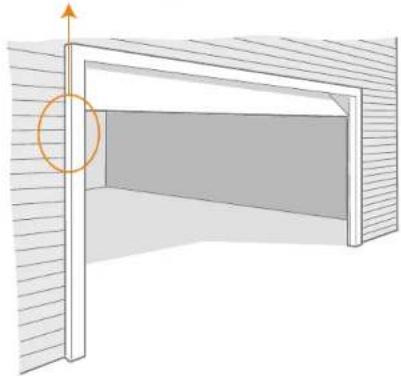
natural_image
Diagram of a door with an arrow indicating upward motion, showing interior wall and window (no text or symbols)Fonctionnement

natural_image
Illustration of a hand holding a mobile phone and a door with an orange arrow indicating downward motion (no text or symbols)GARANTIE LIMITÉE D'UN AN
text_image
Click Clicknatural_image
Illustration of a hand holding a mobile phone and pointing at a roof structure with an upward arrow (no text or symbols)| TIPO DE ABRE-PUERTAS N | ^0 DE VECES |
| Botón “Learn” amarillo (315 y 390 MHz Security+ 2.0®) | 1 |
| Botón “Learn” Púrpura (315 MHz Security+®) | 2 |
| Botón “Learn” rojo o anaranjado (390 MHz Security+®) | 3 |
| Botón “Learn” verde (390 MHz Billion Code) 4 |
natural_image
Illustration of a hand holding a mobile phone and a light bulb inside a helmet (no text or symbols)natural_image
Illustration showing a mobile phone and a light bulb inside a helmet (no text or symbols)natural_image
Illustration of a hand holding a mobile phone and pointing at a structural frame with an orange double-headed arrow (no text or symbols)Programación
text_image
Diagram showing a hand holding a mobile phone and a light bulb with 'x3' label, alongside a separate illustration of a helmet with warning symbols.natural_image
Illustration showing a hand holding a mobile phone and a helmet with a yellow lightbulb (no text or symbols)natural_image
Illustration of a hand holding a mobile phone and pointing at a wall-mounted panel with an orange double-headed arrow (no text or symbols)Programación
text_image
Diagram showing a hand holding a mobile phone and a close-up of a light bulb inside a helmet with 'x3' labelnatural_image
Illustration showing a hand holding a mobile phone and a close-up of a light bulb inside a helmet (no text or symbols)natural_image
Illustration of a hand holding a mobile phone and a light bulb inside a helmet (no text or symbols)natural_image
Illustration showing a hand using a mobile phone to press down a wall-mounted panel, with an orange double-headed arrow indicating vertical motion (no text or symbols present)Instalación
natural_image
Architectural diagram showing a door opening with a close-up of the interior wall and a close-up of the door (no text or symbols present)Operación

natural_image
Illustration of a hand holding a mobile phone and a door with a downward arrow (no text or symbols)© 2017, The Chamberlain Group, Inc.