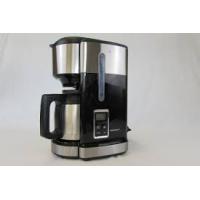
SKACD 1000 A1 - Coffee machine SILVERCREST - Free user manual and instructions
Find the device manual for free SKACD 1000 A1 SILVERCREST in PDF.


User questions about SKACD 1000 A1 SILVERCREST
0 question about this device. Answer the ones you know or ask your own.
Ask a new question about this device
Download the instructions for your Coffee machine in PDF format for free! Find your manual SKACD 1000 A1 - SILVERCREST and take your electronic device back in hand. On this page are published all the documents necessary for the use of your device. SKACD 1000 A1 by SILVERCREST.
USER MANUAL SKACD 1000 A1 SILVERCREST
Operating instructions
FR BE
Before reading, unfold the page containing the illustrations and familiarise yourself with all functions of the device.
| FR/BE | Mode d'emploi | Page 1 |
| NL/BE | Gebruiksaanwijzing | Pagina 15 |
| DE/AT/CH | Bedienungsanleitung | Seite 29 |
| GB | Operating instructions | Page 43 |
Sommaire
Introduction 2
Droits d'auteur 2
Installation et raccordement. 6
Opération 7
Installation et raccordement
DANGER - RISQUE DE CHOC ÉLECTRIQUE!
WAARSCHUWING - LETSELGEVAAR!
WAARSCHUWING - LETSELGEVAAR!
Safety instructions 45
Items supplied 47
Description. 47
Operating components. 47
Preparation 48
Unpacking 48
Disposal of the packaging. 48
Setting up and connecting to the power supply 48
Operation 49
Before the first usage 49
Filling with ground coffee. 50
Filling with water 50
Switching On and Off 51
Cleaning and Care 51
Cleaning the appliance 51
Scale removal 52
Storage 53
Troubleshooting 53
Disposal of the appliance. 53
Technical data 53
Notes on the Declaration of Conformity 54
Importer. 54
Warranty. 54
Service 55
Introduction
Congratulations on the purchase of your new appliance.
You have clearly decided in favour of a quality product. These operating instructions are a component of the product. They supply you with important information for the intended use, safety and disposal. Before using the product, please familiarise yourself with all of the operating and safety instructions. Use the appliance only as described and only for the purposes indicated. Additionally, pass these instructions on to whoever might acquire the appliance at a future date.
Copyright
This documentation is copyright protected.
Any copying or reproduction, including as extracts, as well as the reproduction of images, also in an altered state, is only permitted with the written authorisation of the manufacturer.
Intended Use
This coffee maker is intended exclusively for brewing coffee.
This coffee maker is intended exclusively for use in private households. Do not use it commercially!

WARNING
Risks from unintended use!
Risks can be engendered by the appliance if it is used for unintended purposes and/or for other types of use.
Use the appliance exclusively for its intended purposes.
Observe the procedures described in these operating instructions.
Claims of any kind resulting from damage caused by improper use, incompetent repairs, unauthorised modifications or the use of non-approved spare parts will not be acknowledged.
The operator alone bears the risk.
Safety instructions
In this chapter you will be given important safety information regarding the handling of the appliance.
This appliance complies with the statutory safety regulations. Incorrect usage can, however, lead to personal injury and property damage.
For safe handling of the appliance pay heed to the following safety information:

- Connect the coffee machine only to correctly installed and earthed power sockets. Ensure that the voltage supplied through the power socket tallies completely with the details given on the appliance rating plate.
- Remove the plug from the mains power socket when you move the coffee machine, fill it with water, if it malfunctions, before cleaning it and when it is not in use.
Ensure that the power cable can never become wet or damp during operation. Lay the cable so that it cannot be trapped or otherwise damaged. - To avoid potential risks, arrange for a defective appliance to be checked and possibly repaired by qualified technicians, or contact our Customer Service Department.
To avoid risks, arrange for defective plugs and/or cables to be replaced at once by qualified technicians or our Customer Service Department.
Do not fold or crush the power cable.
Before use check the appliance for signs of visible external damage. Do not put into operation an appliance that is damaged or has been dropped. - Under no circumstance may the coffee machine be submersed in liquids. Do not expose the appliance to humidity and do not use it outdoors. Should liquids permeate into the housing, unplug the appliance from the mains power source immediately and arrange for it to be repaired by a qualified technician.
- Never touch the coffee machine, the power cable or the plug when your hands are wet.
To disconnect, always remove the plug itself from the mains power socket, do not pull on the power cable.
WARNING - RISK OF INJURY!
NEVER use the glass jug of the coffee machine in a microwave oven.
This appliance is not intended for use by individuals (including children) with restricted physical, physiological or intellectual abilities or deficiencies in experience and/or knowledge unless they are supervised by a person responsible for their safety or receive from this person instruction in how the appliance is to be used.
Children should be supervised to ensure that they do not play with the appliance.
- NEVER touch the hot surfaces of the coffee machine, especially the keepwarm plate and the glass jug.
Warning about escaping steam. Risk of scalding! Please follow the safety instructions
- Do not hold your hands in the rising steam.
- Always close the lid before switching on, there exists a risk of scalds from escaping steam and hot water.
Do not move the coffee machine during the brewing process.
- Remove the jug first when the brewing process is complete and the filter has fully drained itself.
Lay the power cable in such a way that no one can tread on or trip over it.
WARNING - PROPERTY DAMAGE!
Do not leave the coffee machine unattended when it is in use.
NEVER operate the coffee machine without mains water and NEVER fill it to more than the Max. marking.
- Do not use an external timing switch or a separate remote control system to operate the appliance.
- Ensure that the appliance, the power cable and the plug do not come into contact with hot plates or open flames.
Items supplied
This appliance is supplied with the following components as standard:
- Coffee machine
Glass jug - Measuring spoon
- Operating Manual
NOTICE
- Check the contents to ensure everything has been supplied, and for signs of visible damage.
If the delivery is incomplete, or it has been damaged due to defective packaging or transportation, contact the Service Hotline (see chapter Service).
Description
You can prepare hot filter coffee with the coffee machine. The brewed coffee can be kept warm in the jug by leaving it on the keep-warm plate with the appliance switched on.
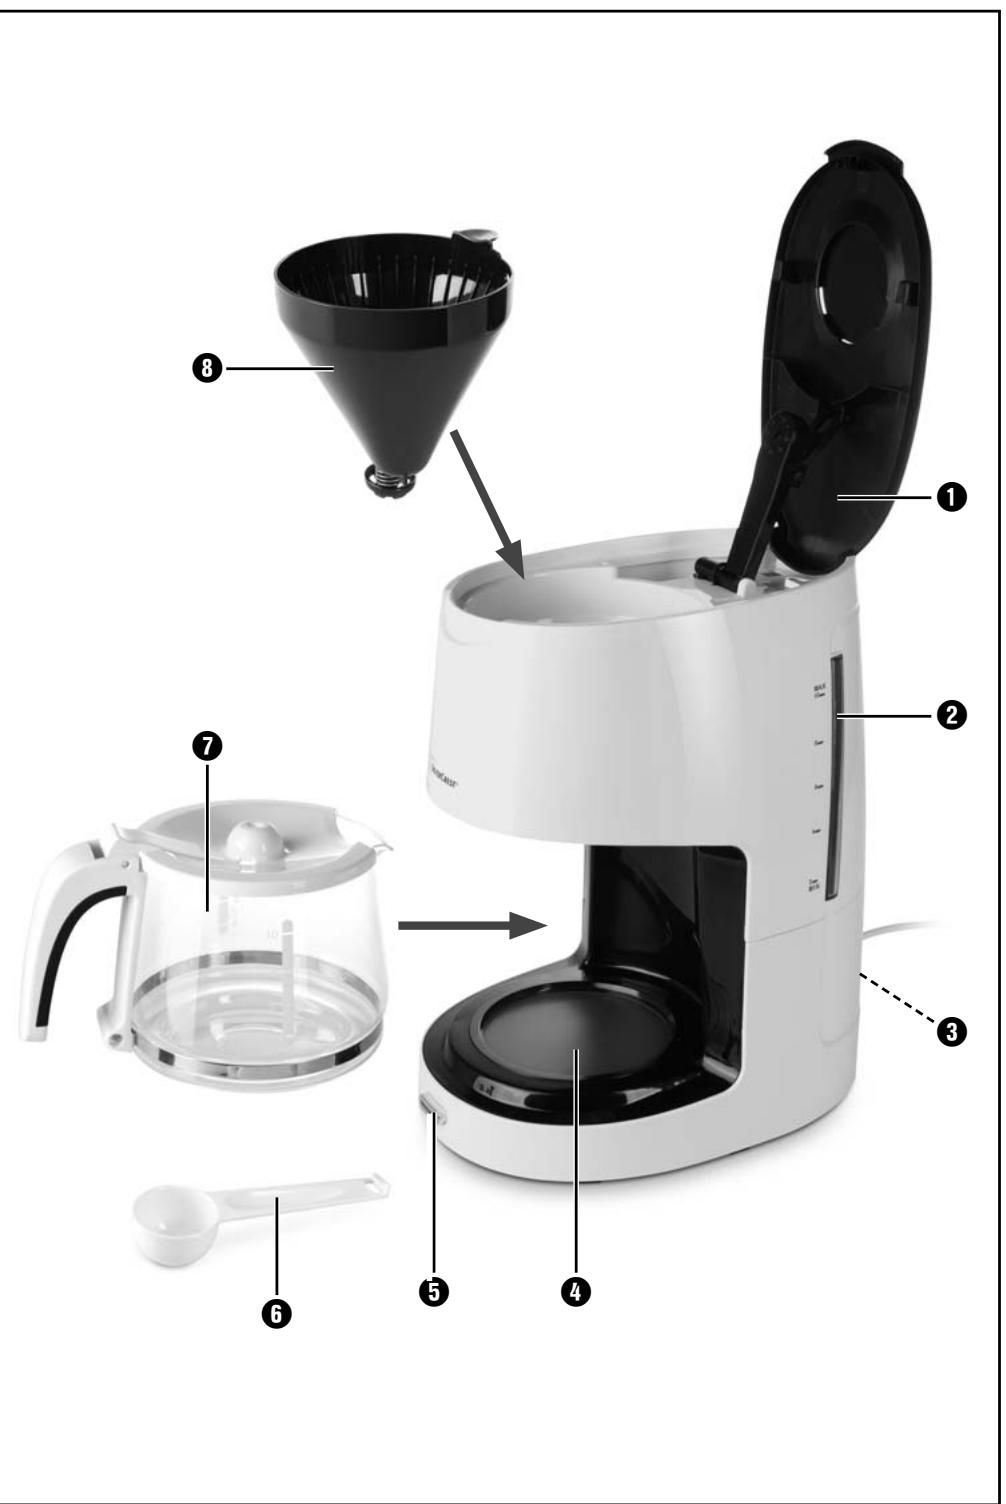
Operating components
1 Lid
Water tank with water level indicator
3 Cable stowage compartment
4 Keep-warm plate
On/Off switch with integrated control lamp
6 Measuring spoon
Glass jug
Filter holder
Preparation
Unpacking
Remove all components of the appliance and the operating manual from the carton.
Remove all packing material.
Disposal of the packaging
The packaging protects the appliance against transport damage. The packaging materials are selected from the point of view of their environmental friendliness and disposal technology and are therefore recyclable.

The recirculation of packaging into the material circuit saves on raw material and reduces the amount of waste generated. Dispose of packaging material that is no longer needed as per the regionally established regulations.
NOTICE
If possible, preserve the appliance's original packaging during the warranty period so that, in the event of a warranty claim, you can pack the appliance ideally for its return.
Setting up and connecting to the power supply

Under no circumstances should the appliance be located close to water, especially to filled sinks and other waterfilled vessels. Use the coffee machine only on a thoroughly dry surface. The proximity of water presents a danger, even when the appliance is switched off. After use, always disconnect the plug from the mains power socket.
WARNING - PROPERTY DAMAGE!
- Never locate the coffee machine close to sources of heat.
To avoid damage to the appliance and the location area, use the coffee machine only on a flat and heat-resistant surface.
1) Place the appliance on a dry and heat-resistant surface.
2) Place the glass jug ⑦ on the keep-warm plate ④ in the appliance.
3) Finally, insert the plug into the power socket.
Operation
Before the first usage
WARNING - PROPERTY DAMAGE!
- Never fill the water tank ② with a total volume of more than 10 cups of water. Never pour less than 2 cups of water in the water tank ②. Doing so may damage the coffee maker. Use the water level indicator on the water tank ②.
- Disconnect the coffee machine immediately after use. The appliance is completely free of electrical power ONLY when it is unplugged.
- Fill the water tank ② with water only. Otherwise, the coffee maker may be damaged.
1) Carefully rinse the glass jug with mains water.
2) Remove the filter holder 8.
3) Pour water into the water tank. Empty the water tank, in that you carefully tip the appliance over a sink and pour the water out. Then carefully dry the appliance.
4) Rinse the filter holder 8 with clean water and place it back into the appliance.
5) Fill the glass jug with 10 cups of water.
6) Completely fill the water tank 2 with the water.
7) Close the lid 1, ensuring that it engages.
8) Place the emptied glass jug ⑦ onto the keep-warm plate ④.
9) Insert the plug into a mains power socket.
10) Switch the coffee machine on with the On/Off switch ⑤. The integrated control lamp glows. Wait until the brewing process is complete.
11) Switch the coffee machine off with the On/Off switch ⑤. The integrated control lamp goes out.
12) Empty the glass jug ⑦ and clean it as described in the section "Cleaning and Care".
13) Wait until the appliance has cooled down.
Filling with ground coffee
1) Open the lid ①.
2) Place a paper filter bag (size 1 × 4 ) with folded over sides into the filter holder.
3) Fill it with the required amount of coffee powder using the measuring spoon ⑥.
NOTICE
- Fill it with approx one levelled measuring spoon of ground coffee for each cup of filter coffee. Should you prefer a weaker coffee, reduce the amount of ground coffee being used.
Filling with water
WARNING - HEALTH RISK!
Use only drinking water for preparing the coffee!
NOTICE
When brewing coffee some water is lost: a part of the water evaporates as steam and some water always remains in the coffee powder. For this reason, the level indicators on the water tank 2 and on the glass jug 7 are slightly different. The amount of water in the water tank 2 is, in respect of the markings, always somewhat more than the same marking on the glass jug 7.
The lid 1 is still open after filling it with coffee powder.
1) Fill the glass jug 7 with water.
WARNING - PROPERTY DAMAGE!
- Never fill the water tank ② with a total volume of more than 10 cups of water. Never pour less than 2 cups of water into the water tank ②. Use the water level indicator on the water tank ②.
2) Pour the amount of water into the water tank ② appropriate to the desired amount of brewed coffee. For this, use the water level indicator on the water tank ②.
3) Close the lid 1, ensuring that it engages.
Switching On and Off
1) When you are ready to switch the coffee machine on, press the On/Off switch ⑤. The integrated control lamp glows. The brewing process begins.
2) When you are ready to switch the coffee machine off, press the On/Off switch 5 once again. The integrated control lamp extinguishes.
3) Disconnect the plug from the mains power socket if you are intending to discontinue using the coffee machine.
NOTICE
If you do not switch the coffee machine off after the brewing process is complete, the coffee will be kept warm on the keep-warm plate 4.
NOTICE
- Wait for at least 10 minutes, after you have switched the coffee machine off, before you start a new brew.
Cleaning and Care
Cleaning the appliance
In order to obtain an optimal taste result from every brewing process you should clean the coffee machine after every use.

Before cleaning, ALWAYS remove the plug from the mains power socket! There is the risk of receiving an electric shock!
- Do not open any part of the housing. There are no user-serviceable elements inside. An open housing will create the risk of a potentially fatal electrical shock.

NEVER submerse the appliance in water or other liquids! This would incur the risk of a potentially fatal electrical shock should liquids come into contact with powered components.

WARNING - RISK OF INJURY!
Let the appliance cool sufficiently before cleaning it. Risk of Burns!
WARNING - PROPERTY DAMAGE!
-
Do not use abrasive or aggressive cleaning materials. These could attack the upper surfaces and irreparably damage the appliance.
Do not use sharp or pointed objects to remove soiling. These could damage the appliance. -
Disconnect the plug from the mains power socket.
Wipe the housing of the coffee machine with a damp cloth. For stubborn soiling use a mild detergent on the cloth.
Clean the glass jug 7, the filter holder 8 and the measuring spoon 6 with warm water. If need be, use also a mild detergent. Afterwards, rinse all parts with clean water to ensure that all detergent residues are washed away.
Dry the appliance and all parts well before re-use.
Scale removal
The mineral content (hardness) in the water causes, over a period of time, a calcification of the coffee machine. This calcification impairs the appliance in its function and diminishes the quality of the brewed filter coffee.
NOTICE
Enquire at your local waterworks about the hardness level of your mains water. The need for decalcification comes early in hard water areas, somewhat later in soft water areas. Use a decalcifier designed for household appliances and pay heed to the usage instructions.
1) Switch the coffee machine off and allow it to cool down completely.
2) Use a commercial descaling product for coffee machines: Mix the descaling agent with water. Thereby, pay heed to the usage instructions supplied with the descaling product.
3) Fill the water tank ② to the 8-cup marking with the descaler and water mixture.
4) Place the glass jug 7 on the keep-warm plate 4.
5) Switch the coffee machine on with the On/Off switch ⑤.
6) Wait until the brewing process is complete. Switch the coffee machine off and disconnect the plug from the mains power socket.
7) Carefully rinse the glass jug with water.
8) Fill the water tank 2 with drinking water.
9) Empty the water tank 2 again, in that you gently tip the appliance over the sink. Thereby ensure that the filter holder 3 does not fall out.
10) To finish, carry out two brewing processes with just drinking water, as described in the section "Before the first usage".
When completed, you can continue to use the coffee machine.
Storage
Clean the appliance thoroughly before putting it into storage.
If you do not intend to use the appliance for an extended period, slide the power cable into the cable storage compartment 3 at the rear of the coffee machine. Secure the plug in the holes above the cable storage compartment 4.
Store the appliance at a clean and dry location.
Troubleshooting
| Problem | Cause | Remedy |
| The appliance does not function. | The plug is not inserted into a mains power socket. | Insert the plug into a mains power socket. |
| The appliance is not switched on. | Switch the appliance on. | |
| The appliance is defective. | In this case, contact Customer Services. | |
| The quality of the brewed coffee is deteriorating. | The coffee machine is calcified. | Decalcify the coffee machine. |
Disposal of the appliance
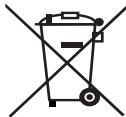
Do not dispose of this appliance in your normal domestic waste. This product is subject to the provisions of European Directive 2002/96/EC.
Dispose of the appliance through an approved disposal centre or at your community waste facility. Pay heed to the currently applicable regulations. In case of doubt, consult your local disposal facility.
Technical data
| Power supply | 220 - 240 V ~, 50 Hz |
| Nominal performance | 1000 W |
| Filter bag size | 1 x 4 |
Notes on the Declaration of Conformity
This appliance complies, in regard to conformance with basic requirements and other relevant regulations, with the EMV Directive 2004/108/EC, as well as the Directive for Low Voltage Devices 2006/95/EC.
The complete original declaration of conformity can be obtained from the importer.
CE
Importer
KOMPERNASS GMBH
BURGSTRASSE 21
44867 BOCHUM, GERMANY
www.kompernass.com
Warranty
The warranty for this appliance is for 3 years from the date of purchase. This appliance has been manufactured with care and meticulously examined before delivery.
Please retain your receipt as proof of purchase. In the case of a warranty claim, please contact our service department by telephone. Only in this way can a post-free despatch for your goods be assured.
NOTICE
The warranty applies only to material or manufacturing faults, it does not apply to transport damage, normal wear and tear or damage to fragile parts, such as switches.
This appliance is intended solely for private domestic use, not for commercial applications. If this product has been subjected to improper or inappropriate handling, abuse, or modifications not carried out by one of our authorised sales and service outlets, the warranty will be considered void.
This warranty does not affect your statutory rights. The warranty period is not extended by repairs made under the warranty. This applies also to replaced and repaired parts.
Damages and defects extant at the time of purchase must be reported immediately after unpacking, resp. no later than two days after the date of purchase.
Repairs carried out after lapse of the warranty period are subject to charge.
Service
GB Service Great Britain
Tel.: 0871 5000 720 (£ 0.10/Min.)
E-Mail: kompernass@lidl.co.uk
IAN 72023