Startpack PRO 12.24V XL - Battery charger GYS - Free user manual and instructions
Find the device manual for free Startpack PRO 12.24V XL GYS in PDF.


User questions about Startpack PRO 12.24V XL GYS
0 question about this device. Answer the ones you know or ask your own.
Ask a new question about this device
Download the instructions for your Battery charger in PDF format for free! Find your manual Startpack PRO 12.24V XL - GYS and take your electronic device back in hand. On this page are published all the documents necessary for the use of your device. Startpack PRO 12.24V XL by GYS.
USER MANUAL Startpack PRO 12.24V XL GYS
FR 02-10 / 65-68
EN 11-19 / 65-68
DE 20-28/65-68
ES 29-37/65-68
RU 38-46 / 65-68
NL 47-56/65-68
IT 57-64/65-68
STARTPACK PRO 12.24 XL
INSTRUCTIONS DE SÉCURITÉ

ANOMALIES, CAUSES, REMÉDES
CONDITIONS DE GARANTIE
This manual contains safety and operating instructions. Please read it carefully before using the device for the first time and keep it in a safe place for future reference. Read and understand the following safety recommendations before using or servicing the unit. Any change or servicing that is not specified in the instruction manual must not be undertaken. The manufacturer is not liable for any injury or damage caused due to non-compliance with the instructions featured in this manual. In the event of problems or uncertainties, please consult a qualified person who can handle the device correctly.. This machine should only be used for starting operations comprised within the limits indicated on the machine and in the instruction manual. The operator must observe the safety precautions. In case of inadequate or unsafe use, the manufacturer cannot be held liable for damage or injury. Device suitable for indoor use only. Do not expose to rain or excessive moisture.
This unit can be used by children aged 8 or over and by people with reduced physical, sensory or mental capabilities or lack of experience or knowledge, if they are properly monitored or if instructions for using the equipment safely have been read and risks made aware of. Children must not play with the product. Cleaning and maintenance should not be performed by an unsupervised child.
Do not use to charge small batteries or non rechargeable batteries. Do not operate the device with a damaged power supply cord or a damaged mains plug.
Never use on a frozen or damaged battery.
Do not cover the device.
Do not place the unit near a heat source/direct sunlight and durably high temperatures (above 50^ )
Do not obstruct the machine's air intake, which facilitates air circulation. Check the installation chapter before using the device.
The operating of the device and the applicable restrictions to its use are explained below in this manual.
Fire and explosion risks!
A charging battery can emit explosive gases.
- During the charge, the battery must be placed in a well ventilated area.
- Avoid flames and sparks. Do not smoke near the device.
- Protect the battery's electrical contact surfaces against short-circuits




Risk of acid dispersion!

- Wear protective goggles and gloves.
- In case of contact with the eyes or the skin, rinse with water immediately and seek medical attention as soon as possible.
Connection / disconnection:
- Disconnect the power supply before connecting/disconnecting the device to/from the battery.
- The terminal of the battery that is not connected to the car frame must be connected first. The other connection must be made on the car frame, far from the battery and the fuel line. The battery charger must be connected to the power supply network.
Connection:
Class III (booster)
- This charger is fuse protected
Maintenance:
Service should be performed by a qualified person
- Warning! Always remove the power plug from the wall socket before carrying out any work on the device.
- If the internal fuse is melted, it must be replaced by the manufacturer or an equally qualified person to prevent danger.
- Do not use solvents or any agressive cleaning products.
- Clean the device's surfaces with a dry cloth.
CE EAC UK CA
Regulations :
- The Machine is compliant with European directives.
The declaration of conformity is available on our website. - EAC Conformity marking (Eurasian Economic Community).
- Equipment in compliance with British requirements. The British Declaration of Conformity is available on our website (see home page).
- Equipment in conformity with Moroccan standards. The declaration C_ (CMIM) of conformity is available on our website (see cover page).
#

Waste management:
- This product should be disposed of at an appropriate recycling facility. Do not throw away in a domestic bin.
- This device's battery is recyclable. Please comply with the applicable waste management laws.
- The battery must be removed from the booster before being thrown away
- The device must absolutely be disconnected from the power supply network before removing the battery.
DESCRIPTION
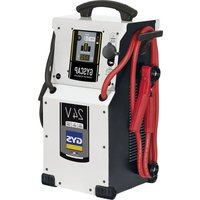
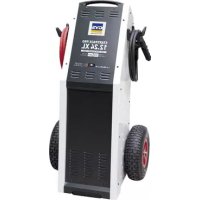
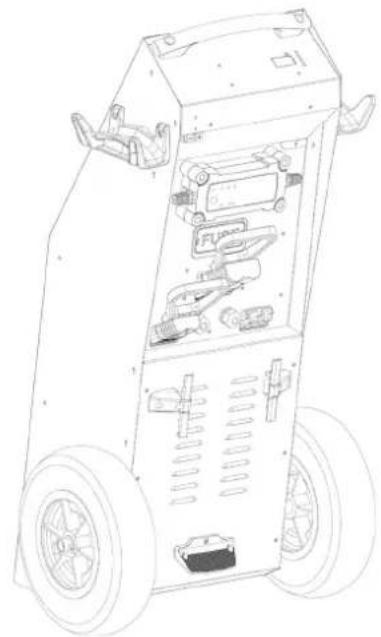
This booster pack is designed to start all common batteries including lead-acid, electrolyte or gel batteries, 12V and 24V. The STARTPACK PRO 12.24 XL works with two 12V high performance batteries.
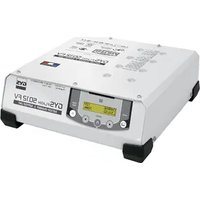
For the best performance from the device and to preserve the internal batteries, it is recommended to connect the STARTPACK PRO 12.24 XL to the mains via the GYSFLASH 6.12 XL and to set the voltage connector to 12V after each use.
ASSEMBLY

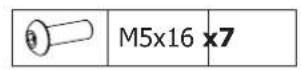
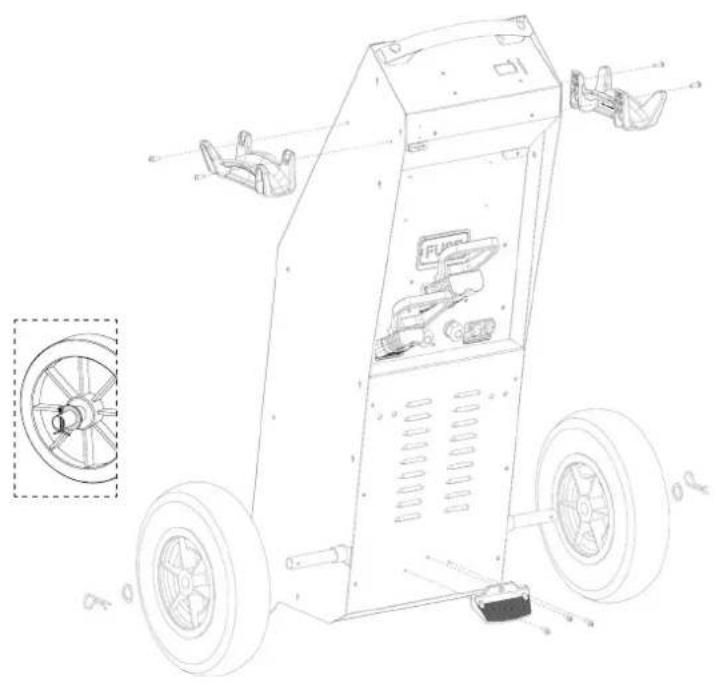
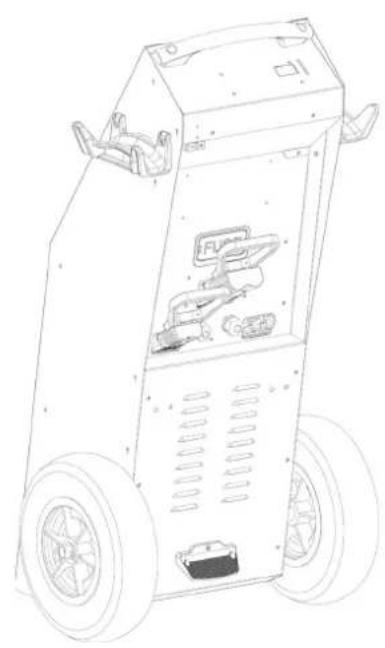

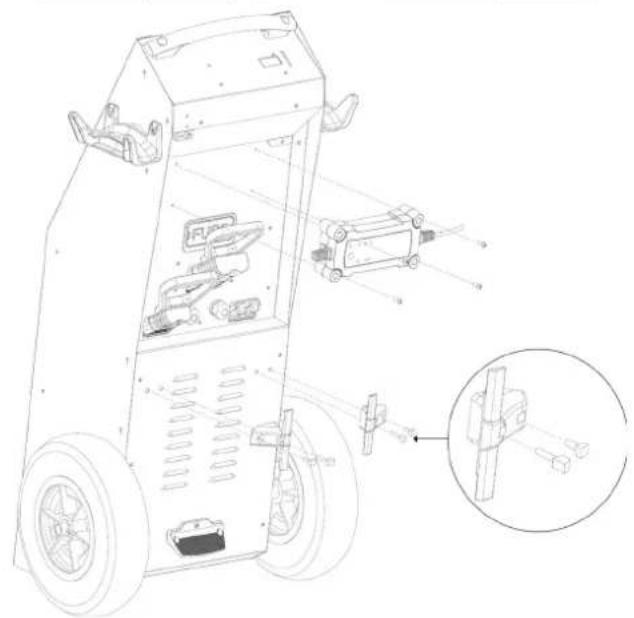
The GYSFLASH 6.12 XL and the power supply cable can be fitted on the STARTPACK PRO 12.24 XL or kept separated (screws included).

When using the STARTPACK PRO 12.24 XL outdoors, the power supply cable is not weather proof .

USE IN STARTER MODE
VERIFICATION OF THE INTERNAL BATTERIES STATE OF HEALTH
| · Disconnect the power supply cable. | |
| · Check the internal batteries by pressing the power button for 10 seconds. | |
| · The state of the internal batteries is displayed for 10 secs. · The batteries are fully charged when the green led switches on. - Green led : The start is possible. - Orange led : The start is possible but not recommended. Perform a charge. - Red led : The start is impossible. Perform a charge. |
START
| 12V 24V | Plug the selector on 12V or 24V depending on the vehicle to start. |
| ↓ | Connect the red clamp to the positive terminal (+) and the black clamp to the negative terminal (-) of the battery. |
| ERROR | In case of polarity inversion, the STARTPACK PRO 12.24 XL will signal it by : buzzer + red LED light on. |
| Switch the STARTPACK PRO 12.24 XL on by pressing the power button for 3 secs. | |
| BBB | ·The digital display shows the voltage of the vehicle's battery. |
| SOS | For a 12 V vehicle: ·If the voltage > 11 V, the STARTPACK PRO 12.24 XL is ready to start: → Proceed to the next step described below. ·If the voltage is < 11 V, the STARTPACK PRO 12.24 XL signals a voltage error: - The vehicle battery is in a poor state of health. - 6V or 24 V battery. - Voltage selector is not properly connected. → See page 17. If the vehicle battery voltage is still < 11 V after checking: → Refer to «Functions of the 'SOS' mode». |
| For 24 V vehicle: ·If the voltage is > 22 V, the STARTPACK PRO 12.24 XL is waiting to start: → Proceed to the next step described below. ·If the voltage is < 22 V, the STARTPACK PRO 12.24 XL signals a voltage error: - The vehicle battery is in a bad state of health. - 6V or 12 V battery. - Voltage selector is not properly connected. → See page 17. If the vehicle battery voltage is still < 22 V after checking: → Refer to «Functions of the 'SOS' mode». | |
| START | Turn the vehicle's ignition (6 s max), to close the contactor and activate the start function. |
| 6s max | nb: if your engine doesn't start, wait 3 minutes between each attempt. A vehicle that does not start after the third attempt may have a problem other than a faulty battery: e.g. alternator, glowplug... |
| ·Once the vehicle has started, switch the STARTPACK PRO 12.24 XL off. After a start or heavy battery consumption, the red led switches on to signal that the batteries must be recharged. | |
| ·Disconnect the black clamp then the red clamp from the vehicle. | |
| ·Plug the machine, using the GYSFLASH 6.12 XL, on a 230V 50/60Hz plug to charge the STARTPACK PRO 12.24 XL's internal batteries. |
SOS' MODE FUNCTIONS
The 'SOS' mode has two functions:
1. Starting vehicles with deeply discharged batteries.
The STARTPACK PRO 12XL indicates a voltage error and after checking the vehicle battery voltage is always < 11V (12 V) or < 22V (24 V). In this case a forced start must be carried out:

- Press the 'SOS' button. The 'SOS' LED lights up.
- Press the START button. The STARTPACK starts a 120 s countdown.

6s max
- Turn the key to your vehicle within this time (6 s max).
nb : if your engine doesn't start, wait 3 minutes between each attempt .
A vehicle that does not start after the third attempt may have a problem other than a battery in poor condition: alternator, glow plug, etc.
2. Starting vehicles that require a lot of running time
Some vehicles need a very long time before starting up (helicopter, bio-gas buses...). It is necessary to increase the start times beforehand (by default they are set to 20 s and 120 s in 'SOS' mode).
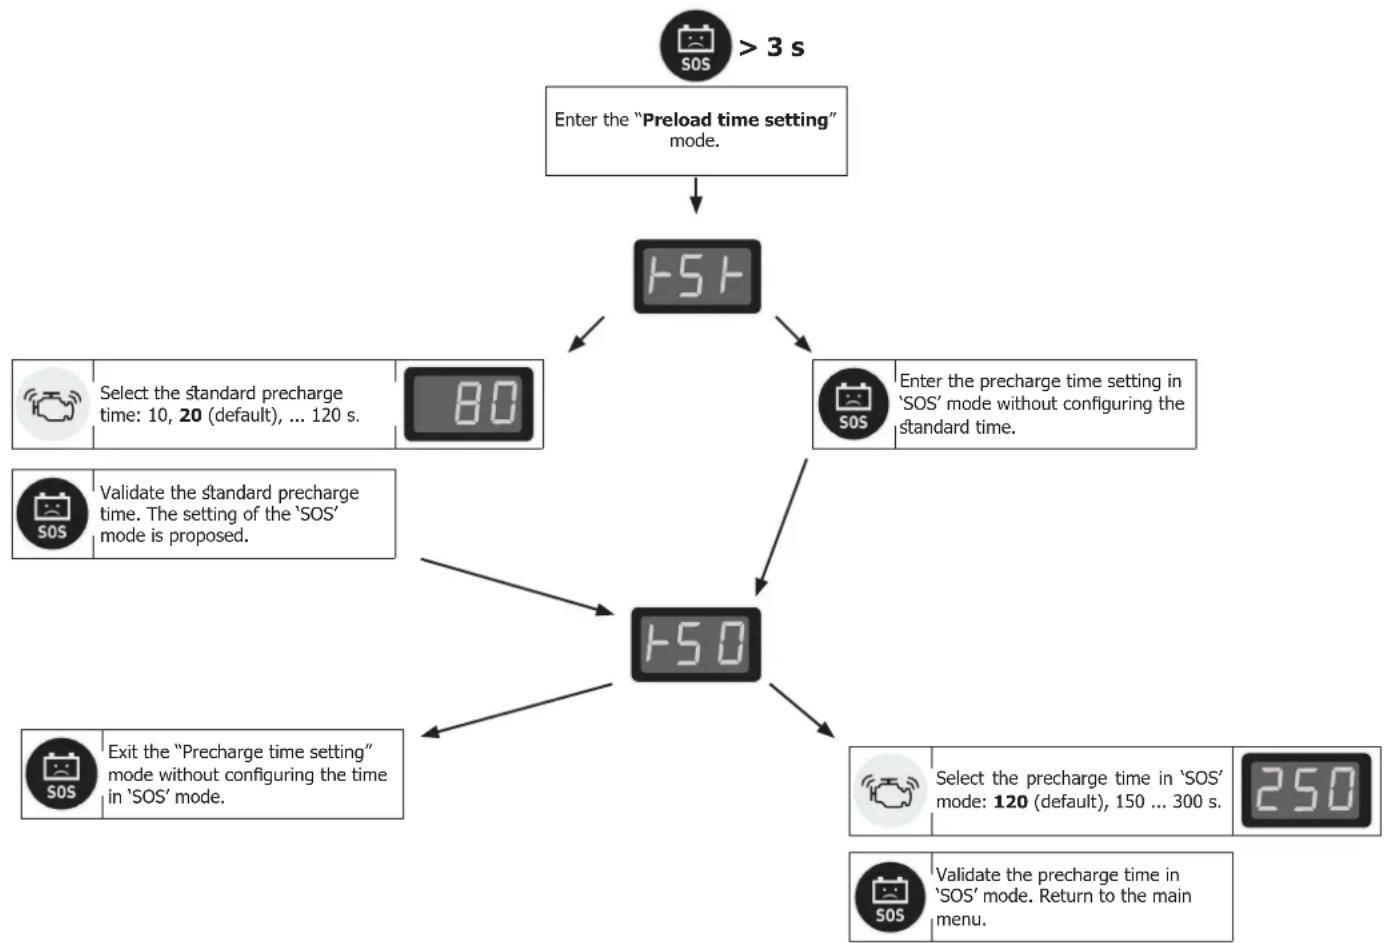

In SOS mode, there are no more protections (on the 12V / 24V voltage, in case of polarity reversal...).
The time setting can damage the battery:
- if the preheating time is too long, the battery can be deeply discharged.
- in the event of too violent a start due to a defect other than the battery.
USE IN CHARGER MODE (CHARGE INTERNAL BATTERIES)
For the STARTPACK PRO 12.24 XL to be always operational and deliver maximum starting power, it is recommended to charge it after each use and to keep on charge until next used.
The STARTPACK PRO 12.24 XL is fitted with an autonomous charger which charges and maintains the internal batteries at 100% and without the need for monitoring (Floating System).
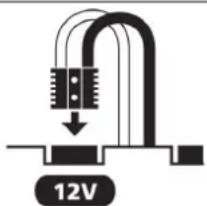
- Put the voltage selector on 12V.
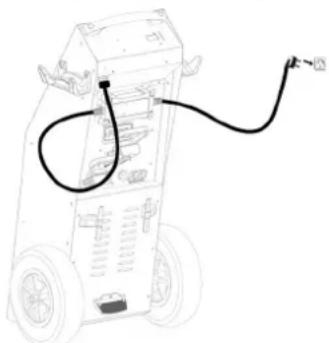
- Connect the GYSFLASH 6.12 XL cable to the STARTPACK PRO 12.24 XL.
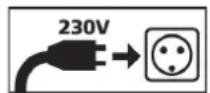
- Connect the GYSFLASH 6.12 XL to a 230V 50/60Hz mains socket.
The charge starts automatically.
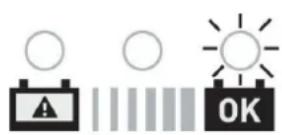
- The STARTPACK PRO 12.24 XL displays the state of charge :
- Red indicator : the batteries are damaged ;
- Orange indicator : the batteries are charging;
- Green indicator : the batteries are charged.
After the charge, keep the machine connected to the mains.
For further details about the charge, see the GYSFLASH 6.12 XL instruction manual.
INTERNAL BATTERIES : RECOMMENDATIONS AND MAINTENANCE
These high performance batteries require the user to be extra careful. Observing the following recommendations will lengthen the batteries' lifetime.
- Charge the machine after each use.
- Do not use an external charger other than the one supplied with the machine.
- Set the voltage selector on 12V during the charge.
- Never connect the red clamp to a battery's negative terminal and the black clamp (-) on the engine. This would short circuit the STARTPACK PRO 12.24 XL's batteries.
- Wait 3 minutes before each start attempt. This allows the device to cool down and the batteries' voltage to recover. Not waiting long enough between each attempt reduces the chances of a successful start at the next attempt (power loss).
INTERNAL BATTERIES REPLACEMENT

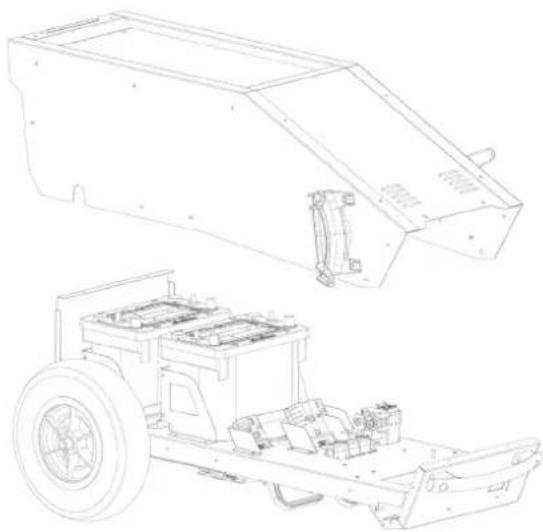
Position the product horizontally :
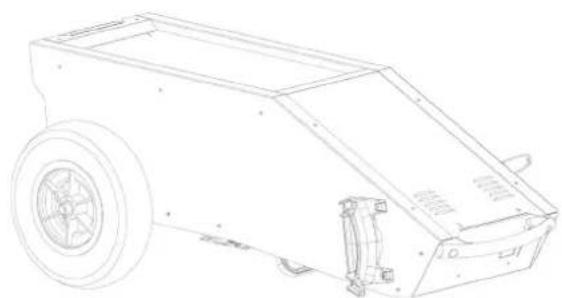

Once the casing is removed, disconnect the batteries. Disconnect the cables using a 3/8 and 5/16 nut wrench with a 15 Newton torque wrench.
Batteries polarity :
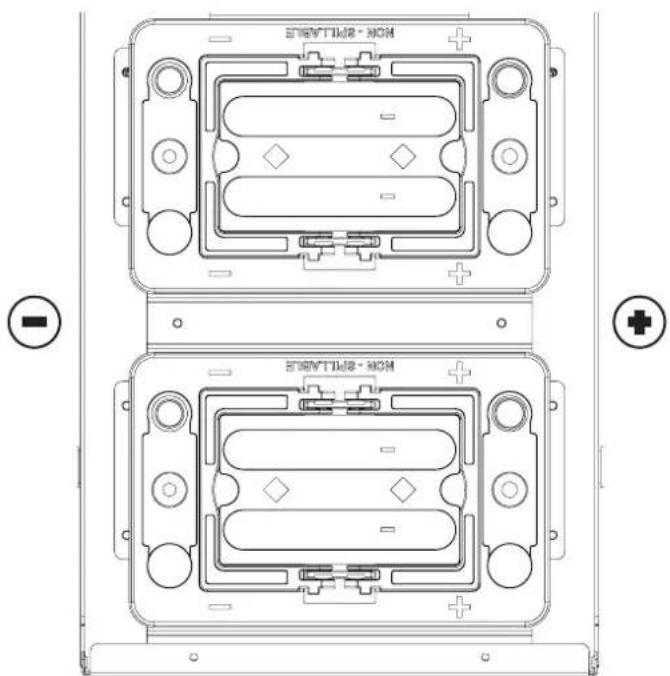

Unscrew the 16 metal casing screws marked with a dash :

The batteries must be recycled in accordance with local laws and regulations.
Place the new batteries and connect the cable with respect to the polarity using a torque wrench (15 N tightening torque).

When installing new batteries, please ensure the correct polarity is observed in the following order:
- Connect the black cable to the negative terminal (-).
- Connect the red cable to the positive terminal (+)
Battery characteristics
| Battery | K PRO 12.24 XL |
| Reference | 12V-50Ah |
| Type | lery |
| Voltage (V) | |
| Capacity (Ah) | Ah |
| Dimensions cm) | 60 x 170 x 207 |
| Article code |
TROUBLESHOOTING
| Symptoms Causes Remedies | |||
| STARTER MODE | The STARTPACK PRO 12.24 XL does not start : The red led is on. Alarm beep. | The voltage selector is unplugged. | Plug the selector on 12V or 24V depending on the vehicle to start. |
| The selected voltage is not adapted to the vehicle. | |||
| Polarity reversal | Check the battery polarity. Red clamp to the battery's (+) and black clamp to the battery's (-). | ||
| The STARTPACK PRO 12.24 XL does not start : No led is on. No alarm beep. | The battery voltage is < 4V. | Put the STARTPACK PRO 12.24 XL on charge. | |
| The vehicle requires too much starting current. | |||
| The batteries are faulty. | Put the STARTPACK PRO 12.24 XL on charge to attempt a battery recovery. | ||
| Several start attempts without waiting between each attempt. | Wait 3 minutes between each start attempt. Let the batteries rest. | ||
| Polarity reversal. Check the | battery polarity. | ||
| CHARGER MODE | The GYSFLASH 6.12 XL's green led is on. The GYSFLASH 6.12 XL's orange led is on. | The charge is in progress. | Wait for the STARTPACK PRO 12.24 XL's green led to switch on. |
| The voltage selector's leds blink alternatively. | The voltage selector is unplugged. | Set the voltage selector on 12V for an optimal charge. | |
| The GYSFLASH 6.12 XL's green led is on. The STARTPACK PRO 12.24 XL does not enter charge mode. | The connection is interrupted. | Check the GYSFLASH 6.12 XL's power supply as well as the charging cable connected to the STARTPACK PRO 12.24 XL. | |
BATTERY NOT COVERED BY THE WARRANTY
The STARTPACK PRO 12.24 XL works with two 12V high performance batteries which MUST be recharged after each use. If this recommendation is not followed, the batteries may permanently deteriorate.
For this reason, the STARTPACK PRO 12.24 XL batteries are not covered by the warranty.
WARRANTY
The warranty covers faulty workmanship for 2 years from the date of purchase (parts and labour).
The warranty does not cover:
- Transit damage.
Normal wear of parts (eg.: cables, clamps, etc.). - Damages due to misuse (power supply error, dropping of equipment, disassembling).
- Environment related failures (pollution, rust, dust).
In case of failure, return the unit to your distributor together with:
- The proof of purchase (receipt etc ...)
- A description of the fault reported
He haKpbBaIte annapaT.
He yctaHaBnBaTb aInpaT pIOM C nCTOChNKoM TeIpa I He NOdBepraT bBICOKIM Tempepatypam (Bblwe 50^ ) B TeueHIN DInTeJbHorO nepNoDa.
He nepekepbiaTe BeHTnlaCIOHbIe OTBepCTn. Ipeed nCIOJIb3OBAHNem O3HaKOMbTecb C pa3dELOM «YCTaHOBka» INHCTpykUH.
Iprnncn pa60tb, a TaKxe orpaHnueHn npn ero nCnoJb3OBAHN, ONNCaHb daJeB 3TOHnHCTpykun.

Pnck noxapa n B3pbBa!
Ipn 3apJe 6aTape MoKeT BbInyCTnTb B3pbIBOONacHbI ra3.
Bo Bpem 3apn AKBdoJxHa 6bITb nOmeeHa B Xopoio npOBetpnaEMOM MeCTe.
- I36eaiTe pIaMeHn n NcKp. He Kypntb.
3aunntte nobepxnoctn 6atapen OT 3neKtpnueckoro KOHTaKaTbO n36exkaHne KOpOTkoRo 3aMbikaHna.

PnCK KNCIoTHbIX 6pbI3r!
Hocnte 3aunTHbIe Oukn n nepuATKn.
B clyuae KOHTaKTa C rla3amn nn KoxeN 6bHNo npomoyte BODOn n 6e3 npomeDJIeHn o6paTntecb K BpaCy.
Поdkлочен / OTKлочен :
- OTKJIIOHTe IODaCy NITaHnI nepei Tem KaK NOdKJIIOUaTb NN OTKJIIOUaTb COeINHeHnI K 6aTapee.
- Chauana PodKlouHte KJIeMMy AK5, He coeDInHeHHyU c shaccn. BToPoE podCoeINHeHne DOJXHO 6bITb OcyuIeCTBJeHo Ha Shaccn KaK MoJxHO daJIbIe OT AK5 n OT Tpy6OpiBOoB TOJIINBHOn CnCTeMbI. 3aTeM, PodKlouHte 3apJdHoe UcTPOIcTBOK CeTN.
HENCIPABHOCTN, INX PPNHbI N UCTPAHEHNE
ANOMALIES, CAUSES, REMÉDES
CONDITIONS DE GARANTIE
This manual contains safety and operating instructions.
Read it carefully before using the device for the first time and keep it in a safe place for future reference.
This machine should only be used for charging operations comprised within the limits indicated on the machine and in the instruction manual. The operator must respect the safety precautions. In case of inadequate or unsafe use, the manufacturer cannot be held liable.
This unit can be used by children aged of at least 8 years and by people with reduced physical, sensory or mental capabilities or lack of experience or knowledge, if they are properly monitored or if instructions for using the equipment safely was given to them and if they have been made aware of the risks. Children must no play with the product. Cleaning and maintenance should not be performed by unsupervised children.
Do not use to charge small batteries or non rechargeable batteries. Do not operate the device with a damaged power supply cord or a damaged mains plug.
Do not use the device if the charging cable appears to be damaged or assembled incorrectly in order to avoid any risk of short circuiting the battery.
The operating mode of the automatic charger and the restrictions applicable to its use are explained below in this manual.
Fire and explosion risks!
A charging battery can emit explosive gases.
- During the charge, the battery must be placed in a well ventilated area.
- Avoid flames and sparks. Do not smoke.


Connection / disconnection:
- Ensure that the charger's power supply is disconnected before plugging or unplugging the connections on the battery.
- Always ensure the Red clamp is connected to the «+» battery terminal first. If it is necessary to connect the black clamp to the vehicle chassis, make sure it is a safe distance from the battery and the fuel/exhaust pipe. The charger must be connected to the mains.
- After charging, disconnect the charger from the mains, then disconnect the clamp from the car body and then disconnect the clamp from the battery, in the indicated order.

Connection:
Class II device
- The connection to the power supply must be carried out in compliance with national standards.
Maintenance:

- If the power cable is damaged, it must be replaced by the manufacturer, its after sales service or an equally qualified person to prevent danger.

Regulations:
- Machine compliant with European directives.
- The certificate of compliance is available on our website.
EAC Conformity marking (Eurasian Economic Community)
UK Declaration of Conformity is available on our website (see home page).
- Equipment in conformity with Moroccan standards.
- The declaration C_ (CMIM) of conformity is available on our website (see cover page).

Waste management:
- This product should be disposed of at an appropriate recycling facility. Do not throw away in a domestic bin.
GENERAL DESCRIPTION
The GYSFLASH 6.12 is ideal to charge most lead-acid batteries, often used for cars and many other vehicles. These batteries can be of many types eg: GEL (gel electrolyte), AGM (absorbed glass mat), WET, MF (Maintenance Free), CA (Calcium)...
This charger has been designed to charge 12V batteries (6*2V elements) from 1.2 Ah to 125 Ah, or for floating charge up to 170 Ah.
STARTUP
- Connect the charger to the battery using the proper accessory (clamps, lugs, etc...).
-
Plug the charger to the mains (single phase 220-240Vac 50-60Hz).
-
Select the mode by pressing the button. After roughly 5 seconds, the charge starts automatically.
- During the charge, the device indicates the charge's progress. When the indicator OK blinks, the battery is ready to start the vehicle. Once the indicator OK stays on, the battery is completely charged.
- The charge can be interrupted at any time by unplugging the mains plug or pressing the button.
- After charging, disconnect the charger from the mains, then disconnect the charger's connections from the battery.
CHARGE MODES
- Modes and Options:

CHARGE mode (14.4V/0.8A):
Mode designed for lead-acid batteries, 12V from 1.2 Ah to 15Ah. 8 step automatic maintenance cycle.

CHARGE mode (14.4V/6A) :
Mode designed for lead-acid batteries, 12V from 15 Ah to 125 Ah and up to 170 Ah for floating charge. 8 step automatic maintenance cycle.

COLD/AGM Option (14.7V) :
Modifies the charging voltage at 14.7V to charge the battery during cold weather (Less than 5^ ) or for some AGM batteries or batteries with caps.
REFRESH Option (15.8V):

Option which add an extra step (step 7) to the charge cycle to restore deeply discharged batteries.
A: this option is not recommended for charging sealed batteries.
Recommendation: Check the battery's water level and if necessary, perform with a Refresh charge.
- Charging curve :
The GYSFLASH 6.12 use an 8 step charging curve which guarantees optimal performance for your battery.
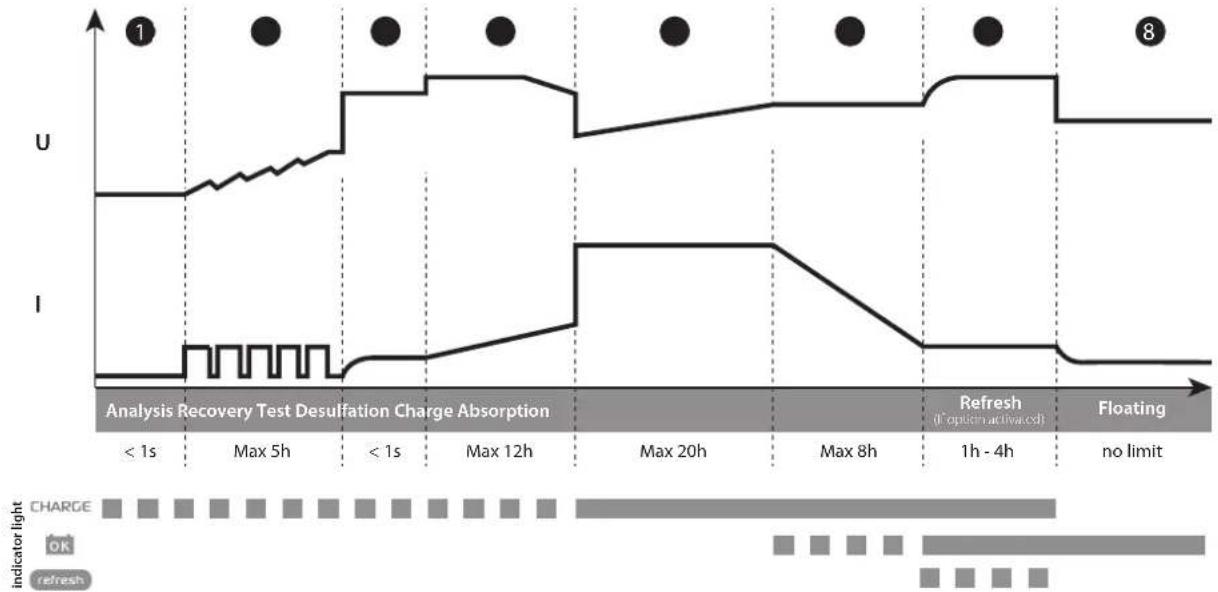
Step 1 : Analysis
Analyses the battery state (charge level, polarity inversion, wrong battery...)
Step 5: Charge (0.8A 6A)
Fast charge with maximum current that can reach 80% charge level.
Step 2:Recovery (0.5A 3A)
Damaged elements recovery due to an extended deep discharge algorithm.
Step 6 : Absorption (14.4V or 14.7V with AGM option)
Constant voltage charge to reach a 100% charge level.
Step 3: Test
Sulfated battery test.
Step 7: Refresh (option 15.8V)
If the refresh option has bene selected, the charger will inject an additional current that will generate some gas, thus reconditioning the battery's cells. During this phase, the battery may loose a small amount of water.
Step 4: Desulfation (15.8V)
Battery desulfation algorithm.
Step 8 : Floating charge (13.6V)
Maintains battery charge level at its maximum.

Estimated charge time
| Battery capacity | 2Ah | 8Ah | 15Ah |
| Charging time 20% >>> 80% | 2h | 6h | 11h |
| 20Ah | 50Ah | 125Ah |
| 3h | 6h | 14h |

If the motorbike is fitted with a 12V plug, the GYSFLASH 6.12 can charge the battery via this plug with the CAN-BUS system, without switching the dashboard on. In this setup, connect the cigarette lighter adapter on the charger and on the motorbike's 12V socket then follow the «start up » procedure on the previous page. In certain cases, it is possible that the charge will only start 2 minutes after performing the connections.
- Protections :

The GYSFLASH 6.12 has several features to protect it against short-circuits or polarity inversion. It has an anti-spark feature which prevents sparks whilst connecting the device to the battery. This charger has double insulation and is compatible with vehicle's onboard electronics.
The GYSFLASH 6.12 is fitted with an integrated temperature probe that ensures that the charging current is adapted to the ambient temperature to prevent internal electronics' overheating.
TROUBLESHOOTING
| Symptoms Causes Remedies | |||
| 1 | The indicator !blinks. | ·Polarity inversion ·Battery voltage is too high ·Clamps in short-circuit | ·Check that the clamps are properly connected. ·Check that it is a 12V battery. |
| 2 | The indicator !is on. | Charge failure, battery non recoverable. | Change the battery and press ➔ to restart a charge. |
| 3 | The indicator !stays on even after pres-sing the ➔ button. | Thermal protection. | Ambient temperature is too high (>50°C), cool the room and let the charger cool down. |
| 4 | The indicator !blinks. | Charger in sleep mode. | Press the button ➔ or connect a battery to the charger to exit sleep mode. |
| 5 | The indicator !stays on. | Charge interrupted by pressing the ➔ button. | Press ➔ again to restart the charge. |
WARRANTY
The warranty covers faulty workmanship for 2 years from the date of purchase (parts and labour).
The warranty does not cover:
- Transit damage.
- Normal wear of parts (eg.: cables, clamps, etc.).
- Damages due to misuse (power supply error, dropping of equipment, disassembling).
- Environment related failures (pollution, rust, dust).
In case of failure, return the unit to your distributor together with:
- The proof of purchase (receipt etc ...)
- A description of the fault reported
SICHERHEITSHINWEISE

PerlaMeHTaIaIaIaIaIaIaIaIaIaIaIaIaIaIaIaIaIaIaIaIaIaIaIaIaIaIaIaIaIaIaIaIaIaIaIaIaIaIaIaIaIaIaIaIaIaIaIaIaIaIa
- AnnapaT COOTBETCTByeT DnpeKtNBam Ebpocoi03a.
-ДeКларачи COOTBETCTBnЯ ectb Ha Hauem caYTe. - 3нak coOTbETCTBnA EAC (Ebpa3nCKoe 3KOHOMnueckoe coo6ueeCTBO)
UK CA 3aBHeHne O COOTBeTCTBnI DJIe BeIKo6pTuHn DoCTynHO Ha Hauem Be6-caTe (cM. rIaNHyIO cTpaHnCu).
- Tobap COOTBECTBYET HopMaM MapOKKO.
-Декларачи G (CMIM)doCTynHa Дя сkaЧиВаньЯ Ha haWeM caIte (cM Ha TITyIbHOn CTpaHnIe).
yTnIn3aun:
- 3TOT annapat noIeJNT nepepa60Tke. He BbIbpaCbIbTaB B o6uH Mycopoc6OpHNK.
ONHCAHNE
HENCIPABHOCTN, INX PPNHbI N UCTPAHEHNE