Delta 87510 - Air purifier UNOLD - Free user manual and instructions
Find the device manual for free Delta 87510 UNOLD in PDF.
User questions about Delta 87510 UNOLD
0 question about this device. Answer the ones you know or ask your own.
Ask a new question about this device
Download the instructions for your Air purifier in PDF format for free! Find your manual Delta 87510 - UNOLD and take your electronic device back in hand. On this page are published all the documents necessary for the use of your device. Delta 87510 by UNOLD.
USER MANUAL Delta 87510 UNOLD
natural_image
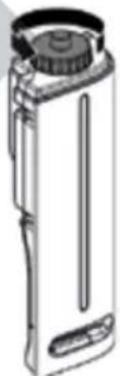
White UNOLD water purifier device with gray branding and no visible text or symbols on the bodyBedienungsanleitung
Instructions for use | Notice d'utilisation Gebruiksaanwijzing | Istruzioni per l'uso Instrucciones de uso | Instrukcja obsługi Modell 87510
Impressum:
natural_image
Modern kitchen appliance with digital display and bucket containing food items (no visible text or symbols)
natural_image
Modern industrial bread machine with control panel and side bowl of milk, accompanied by small kitchen utensils (no visible text or symbols)UNOLD®
Care + Style

natural_image
Product photo of a red and black electric toothbrush with a curling tool, accompanied by a small gear clip (no text or symbols visible)
natural_image
Close-up of a metallic mechanical device with a cable and adjustment lever (no visible text or symbols)UNOLD®
Fan + Heat
natural_image
Close-up of a desktop electric fan with visible blades and base (no text or symbols)
natural_image
Red electric fan with a circular grille and control panel (no visible text or symbols)INHALTSVERZEICHNIS
Instructions for use Model 87510
Foreword....37
Symbols used in this document....37
Technical data....38
For your safety....38
Properties of your air purifier 42
Glossary....43
Explanation of the buttons....44
Before first use....47
Air humidification 47
Installing and removing the filter......49
Anti-tip device....50
Remote control....51
The ideal location....51
Operation....52
Cleaning and care....54
Cleaning intervals 54
Pre-filter (filter no. 3)....55
Carbon filter and catalyst filter
(filter no. 2) 55
HEPA filter system (filter no. 1) ..... 55
Ioniser....56
Sensor....56
Water tank 56
Cleaning humidifier and humidifier
holder....57
Descaling the humidifier 58
Finish cleaning 59
Troubleshooting 60
Guarantee Conditions 61
Waste Disposal/Environmental Protection .. 61
Service 36
natural_image
Technical line drawing of a mechanical device with an arrow indicating direction (no text or symbols)A

natural_image
Front view of a modular device with grid layout and control panel (no text or symbols visible)B
natural_image
Diagram of a mechanical component with an arrow indicating upward motion (no text or symbols)C
natural_image
Diagram of a refrigerator with a circular fan and directional arrow, next to a rectangular storage unit (no text or symbols)D
natural_image
Diagram of a device casing with internal panel and mounting bracket, showing no text or symbols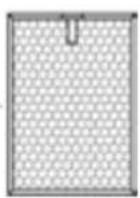
E
natural_image
Technical diagram of a device with internal structure and grid layout, no visible text or symbolsF
natural_image
Line drawing of a mechanical device with a hand holding a lever and an arrow indicating motion (no text or symbols)G
KIPPSCHUTZ
HEPA-FILTER (FILTER NR. 1)
natural_image
Cross-sectional diagram of a mechanical component with internal layered structure (no text or symbols)text_image
Technical diagram showing a vertical dimension with an arrow pointing to a circular component, possibly indicating measurement or alignment.WASSERTANK
natural_image
Illustration of a device with a handle and label 'A' (no text or symbols on the device itself)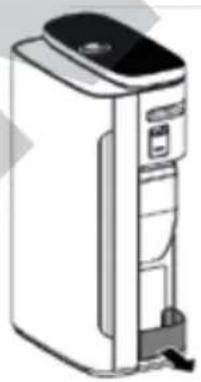
natural_image
Illustration of a white industrial water purifier with control panel and side arm (no text or symbols)B
natural_image
Isometric technical diagram of a mechanical assembly with an upward arrow indicating motion (no text or symbols present)C
natural_image
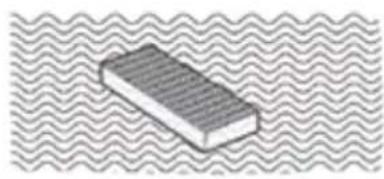
Isometric view of a rectangular object with horizontal grooves, set against a wavy background (no text or symbols)natural_image
Illustration of a hand washing a tooth in a sink with a tool, no text or symbols presentE
Thank you for having chosen a quality product from the Unold range. Please read the instruction manual carefully. This will allow you to familiarise yourself quickly with all functions of your new air purifier (hereinafter referred to as "appliance").
Please make sure that all persons who use, clean or maintain the appliance have read the instructions and adhere to them. When handing over the appliance to a new owner, always include the instruction manual.
If you have any queries that are not answered in this document, or if you encounter technical problems, please contact our customer service department or your dealer.
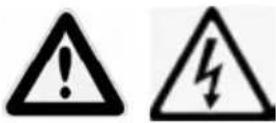
SYMBOLS USED IN THIS DOCUMENT

This symbol points to possible dangers that may result in injury or damage to the appliance.

This symbol indicates that the appliance must not be covered with objects.

This symbol indicates that the appliance must only be used indoors.
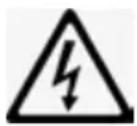
This symbol warns of the risk of electric shock or short circuit.
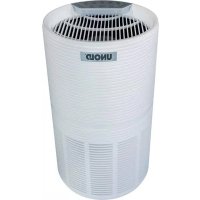
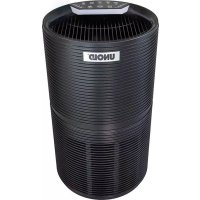
TECHNICAL DATA
Power: 95 Watt, 220–240 V\~, 50/60 Hz
Material: Plastic
Dimensions: approx. 39,5 x 23 x 62 cm W/D/H
Weight: approx. 10.3 kg
Power cord: approx. 150 cm
Noise level: approx. 30 dB(A)–55 dB(A)
CADR rating: 480 m ^3 /h
Maximum room size: approx. 100 m


Features:
4-stage filter system, composed of a pre-filter and a combination of cold catalyst filter, a cellular carbon filter and a HEPA filter system. UV feature can be activated for sterilisation, option to activate an ioniser, up to 8 hours timer feature, low-volume night mode with approx. 35 dB(A)
Degree of protection: 11
Equipment features, technology, colours and design are subject to change without notice.
FOR YOUR SAFETY
Please read this instruction manual carefully and keep it for future reference!
Persons in household
- The appliance has been designed for household use and is not a medical device.
-
This appliance can be used by children aged 8 years or more and persons with reduced physical, sensory or mental capabilities or lack of experience and knowledge, provided they are supervised or have been instructed in the safe use of the appliance and understand the hazards involved.
-
Children must not play with the appliance.
-
Children from the age of 8 may be permitted to clean or maintain the appliance, provided they are supervised.
-
Keep the appliance and its power cord out of the reach of children under the age of 8.
-
Do not connect the appliance to an external timer or remotely controlled power system.
-
Never use the appliance while under the influence of medication or alcohol or if your sensory capacity is reduced.
-
Use the appliance only under supervision if children or vulnerable people are in the same room.
-
If you suffer from a severe respiratory illness or disease of the lungs, consult your doctor before using the appliance.
-
The appliance has been designed for household use or use in similar environments, such as
■ tea kitchens in offices, shops, or other workplaces,
- farms,
■ kitchenettes for guests in hotels, motels, hostels,
■ holiday homes, etc.
Safe handling of electricity
- Connect the appliance to an alternating current source as specified on the type plate.
- Connect the appliance to a grounded power socket only. Ask an electrician if you have any questions.
- Never immerse the appliance, the power cord or the plug in water or another liquid.
- Do not use power supply units, extension cords or other attached devices that exceed the recommended power rating (220 V\~, 5A AC). Otherwise, there is a risk of overheating and fire. We recommend that you operate the appliance only while connected to a single power socket instead of a power strip. Please ask a professional if you have any questions.
- Never touch the appliance, the power cord or the plug with wet hands – risk of electric shock!
-
Never operate the appliance with an electronic speed controller to avoid the risk of a fire.
-
Regularly check the appliance, the power cord and the plug for wear and damage. If the power cord or other parts of the appliance are damaged, return the appliance for inspection and repair to our customer service department. Improper repair can result in serious hazards to the user and shall void all warranty.
- If the power cord of the appliance is defective, return the appliance to our customer service department or have it replaced by a qualified electrician.
- Never pull on the power cord to avoid damage to the inside of the power cord.
- To unplug the power cord from the power socket, always pull at the plug and never at the cable.
- Always disconnect the plug from the power socket before cleaning the appliance and installing or disassembling the appliance and when the appliance is not in use or during a thunderstorm.
- Do not wrap the power cord around the appliance.
- Not suitable for use in moist and/or hot environments such as bathrooms, indoor swimming pools or kitchens.
- Immediately switch off the appliance and disconnect the power plug from the socket if you notice unusual noises or odours at the appliance or the appliance runs unusually hot.
- Unplug the appliance from the power socket after use, before cleaning and whenever performing maintenance.
- Also disconnect the plug from the power socket before taking the appliance out of service for an extended period..
Information on how to set up and use the appliance safely
- The appliance must only be used indoors.
- Make sure to route the power cord such that it does not pose a trip hazard.
- Never route the power cord under carpets, rugs or other textiles.
- Never shift or move the appliance during operation.
- Make sure to keep the power cord away from heaters, stoves, ovens and other heat sources.
-
Never stick objects such as fingers, needles, pens, etc. through the openings and into the interior of the appliance – risk of injury!
-
To avoid damage to the appliance, never sit on the appliance and never place any objects on top of the appliance. Never place any containers filled with water near the appliance.
- Do not set down the appliance upside down. There is liquid inside the appliance that may cause damage. Never place any containers filled with water near the appliance.
- If the filter catches fire, there is a risk of irreversible damage to human beings and/or fatal injury. Do not use the filter for cleaning fuel or for other purposes.
- Never tap against the appliance, especially not against the air inlets and outlets.
- This appliance is not suited as a substitute for regular room ventilation, exhaust hoods or other air extraction systems.
- Never use the appliance close to gas-powered devices, heaters, stoves or open flames.
- Also, never use the appliance in a room that contains remnants of insecticide aerosols, smoke from incense sticks or other oily or chemical vapours. Ventilate such rooms sufficiently before you switch on the appliance.
- Never place the appliance under an air conditioner to prevent the appliance from being penetrated by condensation that may drip from the air conditioner.
- The vents must never be covered by furniture, walls or other objects. Unobstructed air circulation must be ensured at all times. The front and the top require at least 30 ~cm of clearance to other objects, while the clearance on the rear must be 20 ~cm .
- Make sure to keep the remote control out of the reach of children.
- Caution: The two protrusions on the sides of the control panel are no handles! The handles are located slightly lower on either side of the housing.
- Do not switch on the appliance unless all filters have been installed properly.
- Never fill any fragrances, essential oils or similar agents into the water tank. This will cause damage to the appliance.
-
To avoid damage to the appliance, do not use the appliance with accessories made by other manufacturers. Use only filters made by our company.
-
Caution: The appliance is not capable of filtering carbon monoxide or radon gas. It must not be used to purify the air in the aftermath of accidents involving ashes or chemicals.
- Never use the appliance in rooms with an exceedingly high concentration of oxygen (e.g. laboratory rooms).
The manufacturer will not be liable in the event of incorrect assembly, improper or incorrect use or if repairs are carried out by unauthorized third parties.


This appliance is suitable for air purification in private indoor rooms. The appliance is not suitable for industrial or commercial use.
The packaging must be removed from the filter prior to initial use. To avoid damage to the appliance, do not use the appliance until the packaging has been removed.
Never open the motor housing of the appliance – risk of electric shock!
Never cover the appliance during operation!
PROPERTIES OF YOUR AIR PURIFIER
The air purifiers made by UNOLD® provide for clean room air without much effort and without the need for any chemicals.
The use of an air filter is recommended especially for people suffering from allergies or asthma and for areas with substantial particulate matter pollution. The appliance is capable of filtering out such pollutants as pollen, particulate matter, household dust, bacteria, viruses, mould spores, skin and animal dander as well as odours. The timer feature also makes it possible to let the appliances run safely over night, allowing the user to breathe clean air while sleeping.

Important: The appliance is no substitute for and can only be viewed as a complement to such safety rules as those applicable during the COVID-19 pandemic (social distancing, hand washing, mask wearing, and ventilating). Observe the following instructions on safety, the location and safe use as air purification may otherwise be ineffective and as the appliance may otherwise sustain damage or even pose a danger to the user.
GLOSSARY
Carbon filter: Working like a sponge, the carbon filter filters and
catalyses particles and gases. This type of filter must be replaced on a regular basis to prevent any deterioration in filtering performance. This appliance houses a cold catalyst filter that has been combined with this filter.
Antibacterial cotton filter: Aside from catching particles with a size of up to 5 micrometres, this filter has been treated with an antibacterial agent that will filter out up to 99% of all bacteria. The filter housed in this appliance has been combined with the HEPA filter system.
CADR Clean Air Delivery Rate. This figure indicates the volume of air purified from particles of a certain size per minute
HEPA filter system: High Efficiency Particulate Air Filter - made up of fibres that are interwoven in a structureless pattern, this filter is capable of filtering even the smallest particles, bacteria and viruses out of the air. In this appliance, this filter that has been combined with the cotton filter.
Ioniser: The ioniser ionises the air flowing past it, giving
the air a negative charge. The ions will adhere to particles, adding to their weight and causing them to sink to the bottom.
Catalyst filter: This filter is capable of filtering harmful gases,
such as formaldehyde, carbon monoxide, TVOC (total volatile organic compounds) or ammonium, out of the air. This appliance houses a cold catalyst filter that has been combined with the carbon filter.
PM 2,5: This refers to particulate matter with a diameter
| of less than 2.5 micrometers. This particulate matter may be harmful to health due to its size. In indoor rooms, particulate matter may be released by, for example, laser printer toner, tobacco smoke or older vacuum cleaners. |
TVOC: Total volatile organic compounds. These include,
| for instance, vapours emanating from benzene, formaldehyde or solvents. These can form in rooms if emitted from furniture surfaces, textiles or electronics. |
UV feature:
| This sterilisation feature can be activated as necessary and can kill bacteria and viruses and remove stale odours with the help of 365 nanometre UV light. |
Pre-filter:
| Coated with aluminium, the pre-filter filters, for instance, dust, skin dander, pollen and other suspended matter larger than 5 micrometres out of the air. It can be cleaned and reused. |
EXPLANATION OF THE BUTTONS

ON/OFF button (On/Off)
Switching oven on/off. When connected to the power supply, the appliance is in standby mode, and the indicator is lit red. Press the "ON" button once to switch the appliance on. Indicator lit green. Another press of this button will switch the appliance back to standby mode.

"Auto" button
When this button is pressed, the ioniser and the UV feature will start operating. The appliance checks air quality automatically and adjusts the output of the appliance accordingly. Note: When you press the “Speed” button in auto mode, the appliance will exit auto mode.

Timer button (time selector)
Use this button to select the desired operating time of the appliance.
After this time has elapsed, the appliance will switch off. The operating time increases by one hour with every press of this button. Press and hold this button until the desired time lights up. A maximum of 12 hours is possible. If you press past 12 hours, the appliance will switch off. The lit button symbol will tell you if the timer feature has been activated.
Ionizer button (ioniser)
For switching the ioniser on and off. The lit button symbol will tell you if this feature has been activated.

Sterilize button (sterilisation)
For switching the UV feature on and off. The lit button symbol will tell you if this feature has been activated.
Reset button / "Change Filter" indicator
The filters need to be replaced, respectively, every 320 hours (filter no. 1) and every 1,500 hours (filters no. 2 and no. 3). Filter no. 1 must be changed when the “Change Filter” indicator flashes. When finished, press and hold the reset button for 5 seconds to reset this interval indicator. When the indicator is lit permanently, filters no. 2 and no. 3 must be replaced at the same time. When finished, press and hold the reset button for 5 seconds to reset this interval indicator. The following section explains how to change the filters.
You can also press this button during operation to read the current total operating time of the appliance on the display. The display shows the thousand digit first followed by the hundred and the ten digit.

Sleep button (night mode)
To afford the user restful sleep, a 5 second press of this button will cause the appliance to run at the lowest power level and with the lighting turned off. This makes it possible to reduce both the noise level and power consumption. Press any button to exit sleep mode.

Child Lock button (button lock)
Keeps the appliance from being operated inadvertently, e.g. by children. Set up the device as desired and press this button. Now, no
further button presses will be possible, and the appliance will run in the selected mode. To deactivate the button lock, press this button again and hold it down for 5 seconds.
Speed buttons

You can use the + and - buttons to select the desired speed of the appliance. The appliance will then only operate at the desired level and without any input from the sensor. The lower the speed, the greater the efficiency of the air purification, as the amount of stirred-up particles will be lower at lower speeds.
Speed control is used to adjust the cleaning efficiency to the size of the room. The larger the room, the higher the level you should select.
Water tank indicator
When this indicator comes on, the water tank for the humidifier must be refilled, as described in the section “Air humidification”.
Light sensitivity button
When set to auto mode, the appliance will switch to sleep mode 2 minutes after it was switched on if the ambient light decreases (approx. 5 times darker). When the ambient light increases (approx. 5 times brighter), the appliance will exit this mode after 3 minutes and will return to "Auto" mode.
Air quality status indicator
Colour indicator showing the current air quality:
Green = very good, Blue = good, Yellow = poor, Red = polluted
BEFORE FIRST USE
- Remove all packaging and transport safety devices. Keep the packaging material away from children. Choke hazard! Dispose of the packaging material according to the applicable statutory waste disposal regulations.
- Inspect the appliance for damage. If there is visible damage, do not operate the appliance; instead, contact our customer service department.
- Check whether all accessories listed in this manual have been shipped with your appliance.
- Before putting the appliance into operation, you must remove the packaging from the filter. To do so proceed as described in the section “Installing and removing the filter”.

When the appliance is used for the first time, and after prolonged storage, there might be some minor odour.
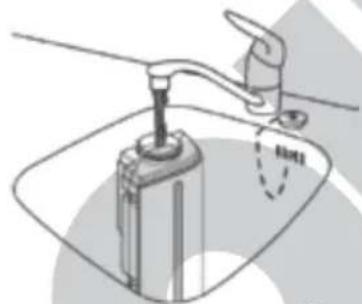
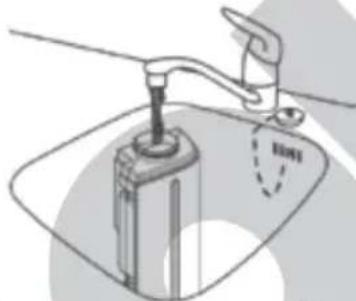
AIR HUMIDIFICATION
Equipped with an evaporation feature, the appliance provides for optimum room humidification. This feature is activated automatically as soon as the water tank has been filled with water. The amount of the evaporated water varies with the speed selected for the appliance, with a higher speed generating a greater amount of evaporation. If the water level drops, the “Add Water” indicator will flash while the appliance continues to run. The indicator will not be lit permanently and the appliance will not turn off until the water tank is drained completely.
Caution: Never fill any fragrances, essential oils or similar agents into the water tank. This will cause damage to the appliance.
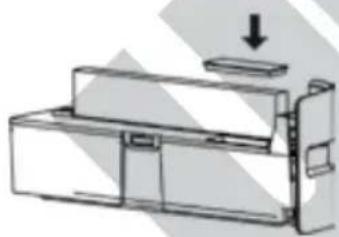
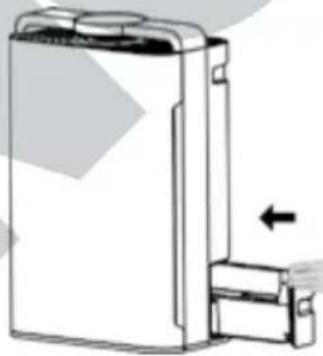
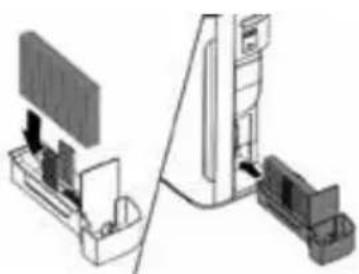
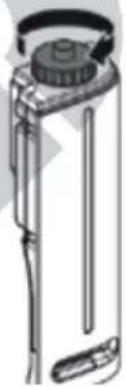
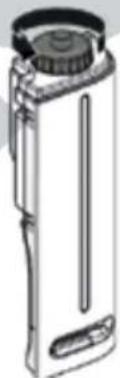
- Pull the water tank out for the appliance from the side (A).
- Remove all packaging and any transport safety devices from the humidifier (B). Keep the packaging material away from children. Choke hazard! Dispose of the packaging material according to the applicable statutory waste disposal regulations.
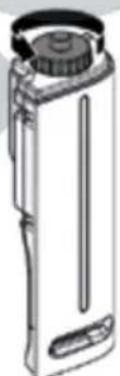
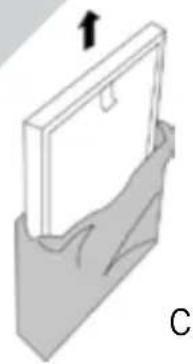
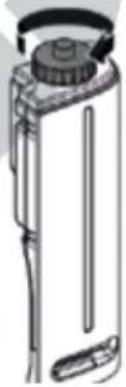
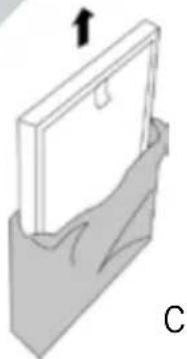
- Insert the humidifier into the water tank (C).
- Remove the small plastic lid from the water tank (D).
-
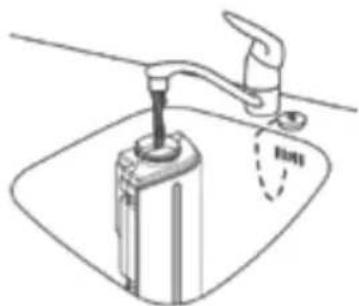
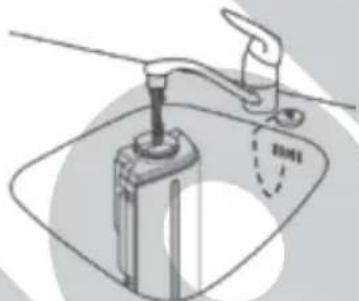
Fill no more than 1 litre of clear tap water through the opening until the water tank is filled to approx. 80 % (E). Do not use hot, ice cold or distilled water.
-
Now, close the lid again (F).
- Slide the water tank back into the appliance (G). Note: There is a small cassette with anti-limescale filter beads in the water tank, which help prevent premature limescale build-up, but they do not replace descaling.
natural_image
Diagram of a device with a paperclip and arrow indicating motion (no text or symbols)A
natural_image
Diagram of a mechanical component with an upward arrow indicating force or direction (no text or symbols)B
natural_image
Line drawing of a mechanical device with a transparent screen and side panel (no text or symbols)C
natural_image
Line drawing of a mechanical device with an upward arrow indicating motion (no text or symbols)D
natural_image
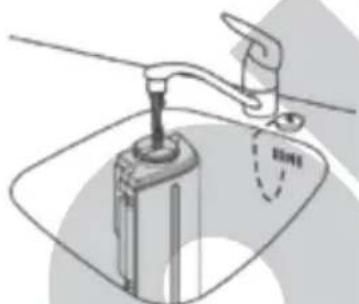
Illustration of a faucet with a drop falling into a water-filled storage cabinet (no text or symbols)E
natural_image
Technical line drawing of a mechanical device with an arrow indicating downward motion (no text or symbols)F
natural_image
Diagram of a device with a left-pointing arrow indicating movement or force (no text or symbols present)G
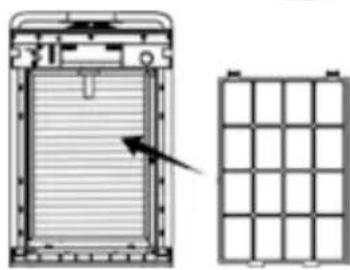
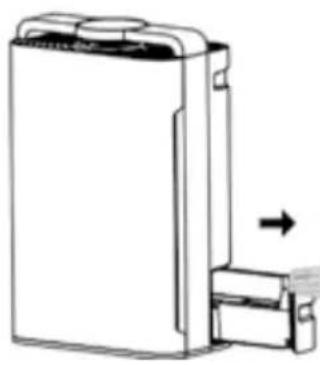
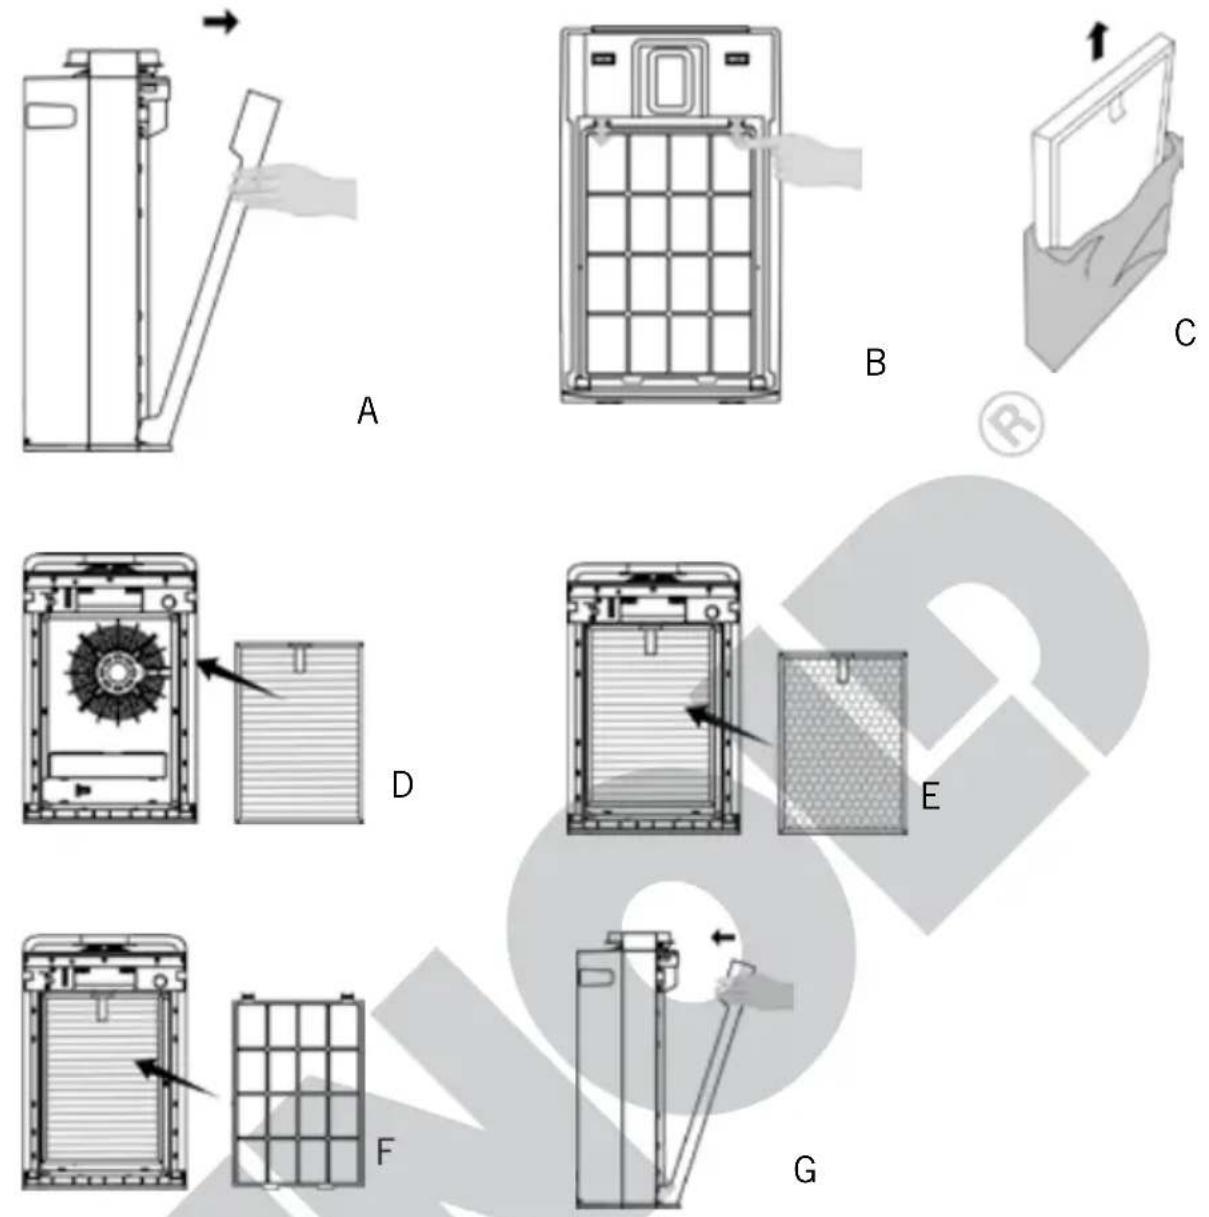
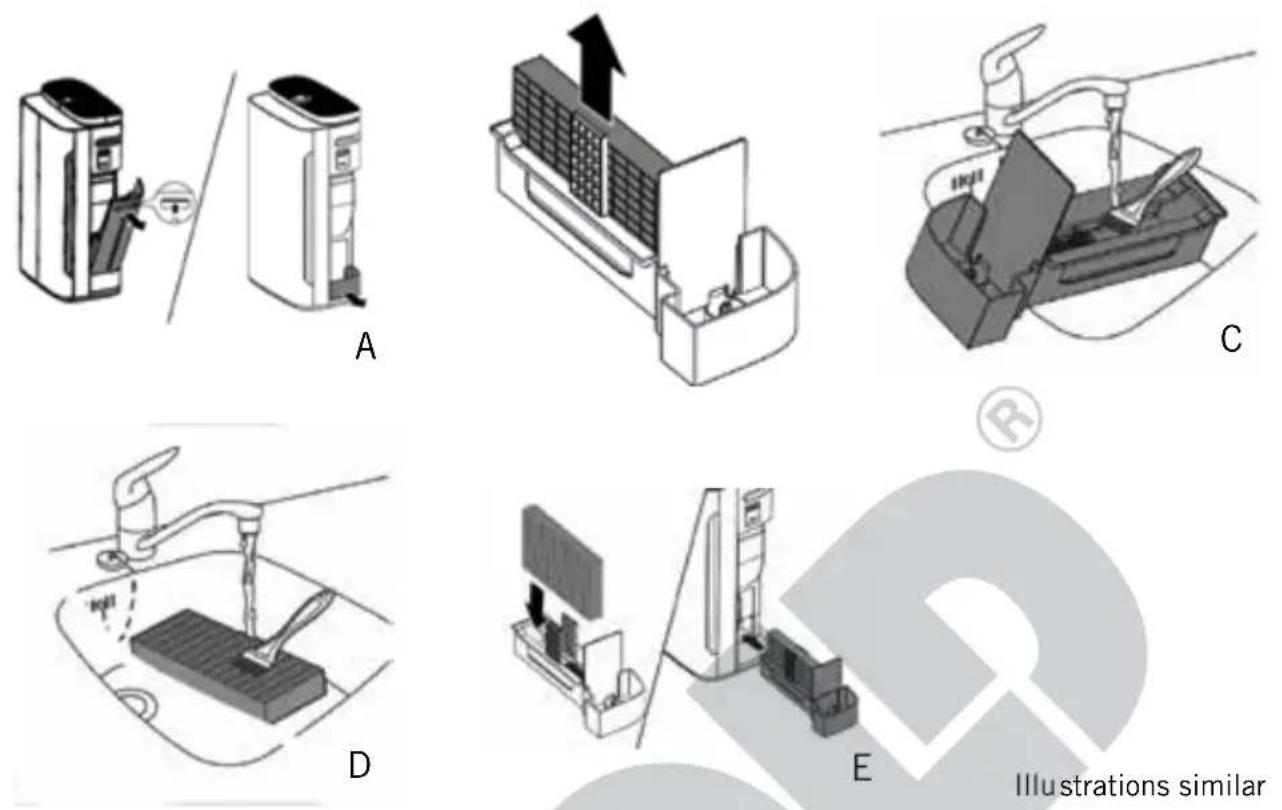
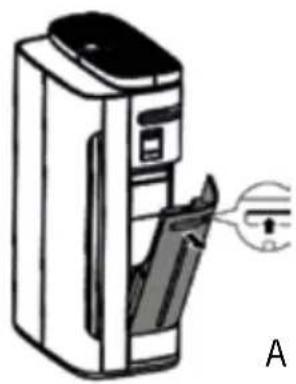
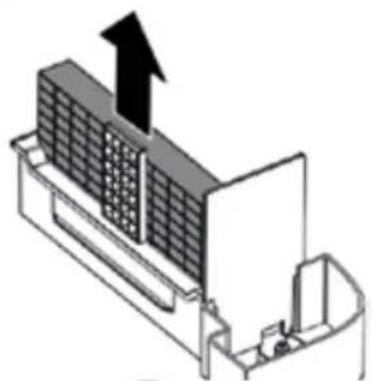
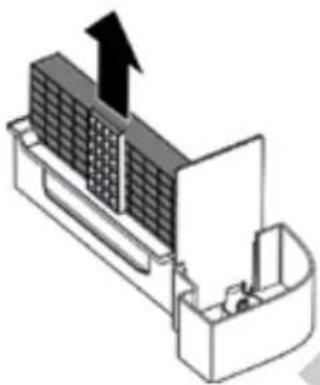
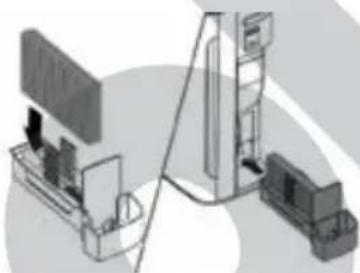
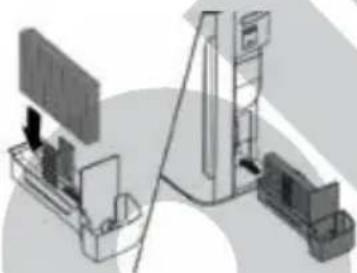
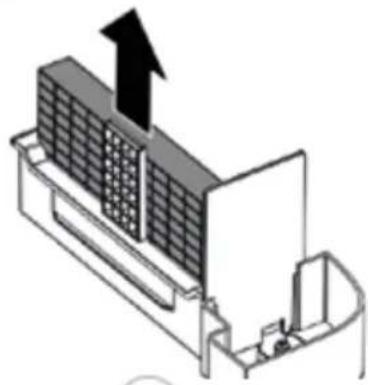
INSTALLING AND REMOVING THE FILTER
Caution: Always switch off the appliance and disconnect the power plug before changing the filters or performing other maintenance operations.
To preserve their quality, the filters have been packaged carefully. You always need to remove all packaging material before installing the filters and before you can start using the appliance. Strictly adhere to the filter order listed below as the appliance will otherwise not function properly.
Observe all personal safety measures specified in the section "Cleaning and care".
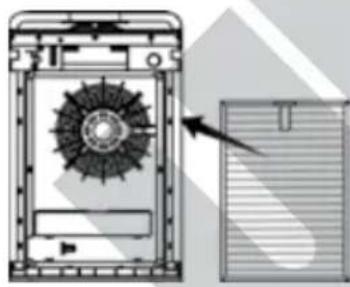
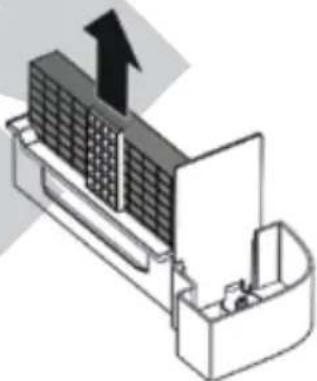
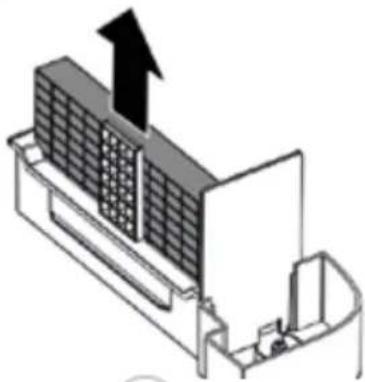
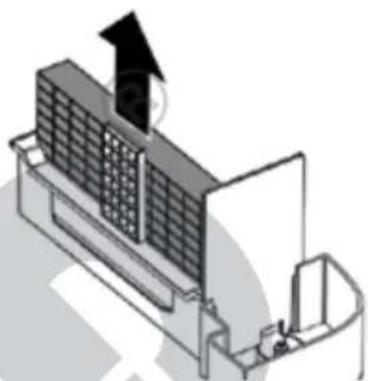
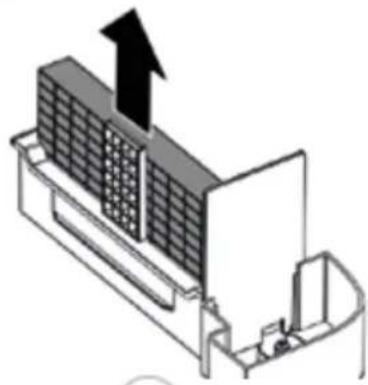
- Remove the front cover (A).
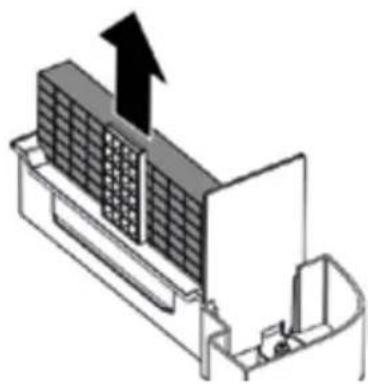
- Remove the filter holder and take out all filters seated in the holder (B).
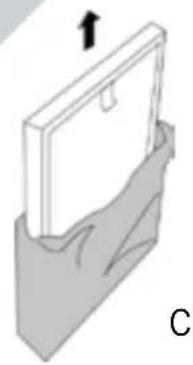
- Remove all packaging and transport safety devices from the new filters (C). Keep the packaging material away from children – choke hazard! Dispose of the packaging material according to the applicable statutory waste disposal regulations.
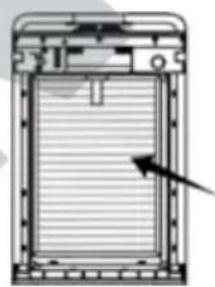
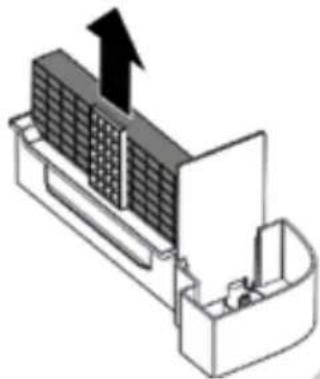
- Now, start by inserting the HEPA filter system (filter no. 1). When inserting the filter, make sure the side with the loop faces forward (i.e. outward, away from the appliance) (D).
- Next, insert the combination filter made up of carbon filter and cold catalyst filter (filter no. 2). Again, insert the filter with the side that has the loop facing forward (i.e. outward, away from the appliance) (E).
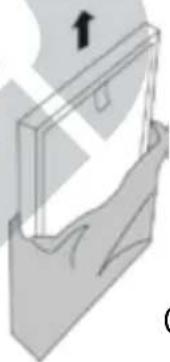
- Finish by installing the pre-filter (filter no. 3). When inserting the filter, make sure the side with the loop faces forward (i.e. outward, away from the appliance) (F).
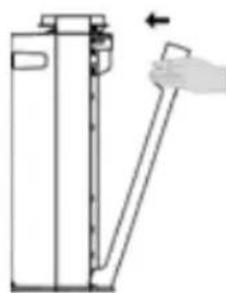
- Close the appliance again using the front cover by hooking the cover in at the bottom first and then closing it at the top until the front cover audibly locks into place (G). If the front cover is not closed properly, the appliance cannot be switched on.
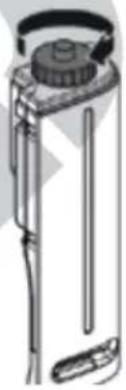
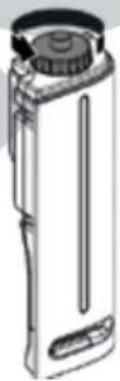
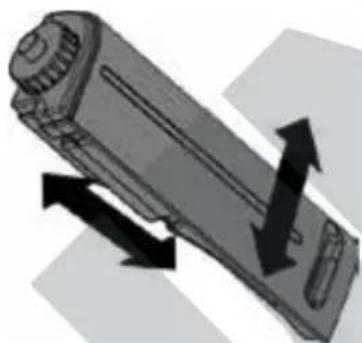
ANTI-TIP DEVICE
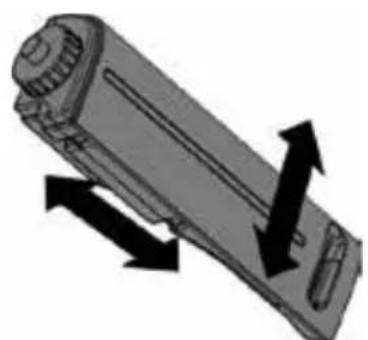
- If you shake the appliance gently, you will notice a sound coming from the inside of the appliance. That noise is caused by the mechanics of the anti-tip device and does not indicate a defect of the appliance! The anti-tip device ensures that the appliance is shut down immediately if brought into a position, e. p. by tipping, that could endanger safe operation.
REMOTE CONTROL
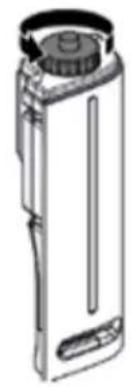
- Prior to initial use, you must pull the small plastic film out of the battery compartment.
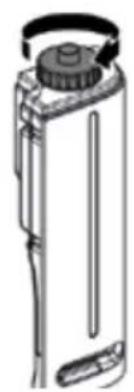
- Open the battery compartment by inserting a coin or similar into the slot and turning it in the direction marked.
- Place the battery into the designated holder. Carefully slide the battery under the spiral.
- If you wish to insert another battery, make sure to use a CR2032 coin battery.
- Close the battery compartment as described above.
- If the appliance is not used for an extended period, please remove the battery.
- When setting up the appliance with the remote control, make sure to point the remote at the air purifier while adjusting the settings. The remote control has a range of approx. 6 metres.
- The described operating principles apply equally whether the settings are defined on the control panel or using the remote control. The names of the buttons are the same in each case.
THE IDEAL LOCATION

Observe all information provided below as your appliance will otherwise not run safely.
- Never set up the appliance in a hot location or where it is exposed to direct sunlight or the air flow of air conditioners. The appliance may otherwise become damaged or display error messages.
- Never set up the appliance close to television sets or radios. The image or sound quality of these devices may otherwise be affected. Set up the appliance with a minimum distance of 1 metres from such devices. Caution: If you run the air purifier from the same power strip as TV or radio sets, you may experience noise or image distortion as well. If this happens, plug the air purifier into a different power socket.
-
The appliance will not be able to deliver its maximum filtration performance unless it is set up level on the floor as particles and pollen easily fall close to the ground.
-
Keep an adequate distance from other objects and walls. The front and the top require at least 30 ~cm of clearance to other objects, while the clearance on the rear must be 20 ~cm .
- Never place any objects on the appliance to prevent the appliance from malfunctioning.
- Never cover up any air inlets or air outlets.
- We recommend that you set up the appliance opposite a window or a door to provide for optimum air circulation.
- Make sure not to point the air flow directly at people.
OPERATION
- Follow all instructions provided in the safety regulations.
- Make sure to have chosen a safe locatio n.
- Note: Ventilate the corresponding room sufficiently before you switch on the appliance.
- Place the plug in a power socket (220–240 V\~, 50/60 Hz) and press the "Power" button.
- Select the desired mode:
"Auto" mode by pressing the "Auto" button
-
The appliance checks air quality automatically and adjusts the output of the appliance accordingly. This mode is ideal for most requirements.
-
The coloured status indicator shows the current air quality.
-
Relation between speed level, PM 2.5 level and status indicator:
| Level | PM 2.5 level | Colour Status indicator | Level | PM 2.5 level | Colour Status indicator |
| 10 | -50n | Gre(Air quality very good) | 5 121 | -140 Yellow | (Air quality poor) |
| 2 51–8 | 6 141–16 | ||||
| 3 81–1 | 100 Blue | (Air quality 5good) | 7 161 | -300 Red | (Air quality polluted) |
| 4 101 | -120 8 301– |
Manual mode
- After switching the appliance on, use the + and - buttons to select the desired speed. If desired, finish by switching on the ioniser and the UV feature. This speed is ideal for situations that require a specific type of air
purification. Keep in mind that the lower the level you select, the greater the effectiveness of the air purification will be. Select the lower level for smaller rooms and the higher level for larger rooms. We recommend that you use the appliance in auto mode as the sensor will then automatically set the ideal values.
Night mode
- Turn night mode on as needed by pressing the Night Mode button.
- Night mode can be activated in both of the modes mentioned above. When set to “Auto” mode, the appliance will switch to night mode if the environment darkens, which is controlled by the light-sensitive sensor.
Timer
- If necessary, you can also activate the timer function. Keep pressing the button until the desired operating time is displayed. After this time has elapsed, the appliance will switch off. If you wish to switch off the appliance sooner, press the “Power” button. To switch off the timer, keep pressing the “Timer” button until the display shows 12 and press this button one more time after that.
Activating the ioniser
- If needed, press this button to turn the ioniser on or off.
UV feature
- If needed, press the "Sterilize" button to turn the UV feature on or off.
Button lock
- To keep the buttons on the appliance from being pressed inadvertently, press the “Button Lock” button now if necessary. To release the lock, press and hold this button for approx. 6 seconds again. Note: Press the “Lock” button on the remote control to lock the appliance and the “Unlock” button to release the button lock. These buttons need to be pressed only briefly as there is no delay.
After use
- When it is not in use, switch off the appliance with a press of the “Power” button and disconnect the power plug.
CLEANING AND CARE

Switch off the appliance with a press of the “Power” button and disconnect the power plug. Next, wait for approx. 30 minutes before you start cleaning to allow dust etc. to settle.
Never immerse the appliance in water.
Never clean the filters by placing them in the washing machine or the dish washer!
Have the following objects ready:
■ 1 face mask, preferably an FFP2 mask.
■ Disposable gloves of appropriate size
- Cotton swabs
Paper towels
■ Soft cloth
- When replacing the filters, an appropriate number of tight-sealing garbage bags for the old filters.
■ Vacuum cleaner with, for instance, upholstery nozzle (caution: for sanitary reasons, do not use the vacuum cleaner with which you clean, for instance, your living spaces). Use a vacuum cleaner that is not used for cleaning indoor rooms.)
CLEANING INTERVALS
| What? How often? | |
| Clean the water tank daily | |
| Clean and descale the humidifierClean the humidifier holder weekly | |
| Clean the pre-filter every two weeks | |
| Change the filter | as soon as the filter change indicator lights up |
| Clean the sensor monthly | |
| Clean the exterior of the appliance as needed |
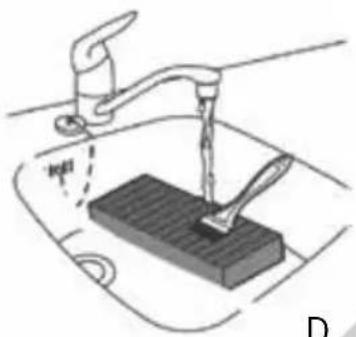
- If possible, clean the appliance in a dry and wind-protected area outside of the house. Caution: Do not clean outdoors in moist conditions or when it rains or is very windy. Choose a well-ventilated area indoors instead.
- Put on the face mask and the gloves.
- Never use scouring agents, steel wool, metal objects, hot cleaners or disinfectants.
- Wipe off the housing of the appliance thoroughly using a clean and dry cloth. For persistent stains, you can use a slightly damp cloth. Make sure no water can enter into the housing.
- To clean the filters, start by removing the filters first as described in the section "Installing the filter".
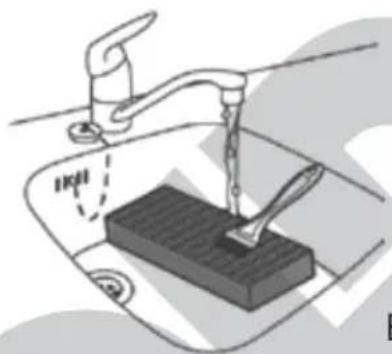
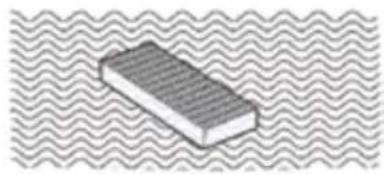
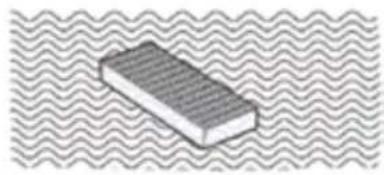
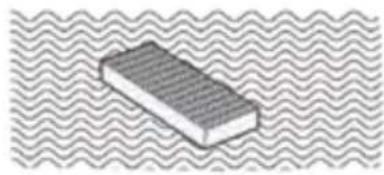
PRE-FILTER (FILTER NO. 3)
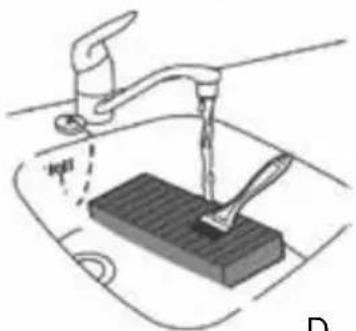
- The pre-filter must be cleaned twice every month.
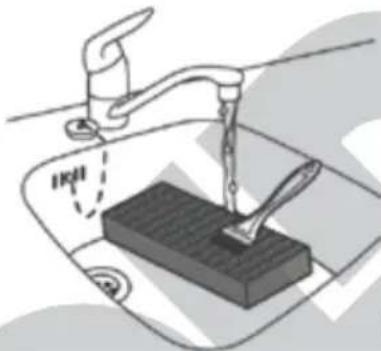
- Wash out the pre-filter in some lukewarm water and allow the filter to dry off completely. Proceed with caution as the filter is easily damaged.
- As another option, you can carefully vacuum off the pre-filter at the lowest setting using a suitable nozzle attachment (e.g. an upholstery nozzle).
CARBON FILTER AND CATALYST FILTER (F ILTER NO 2)
-
Filter no. 2 needs to be clean ed every two weeks.
-
Do not use water for cleaning, as the filter will otherwise be damaged.
-
Carefully vacuum off the filter at the lowest setting using a suitable nozzle attachment.
-
Proceed with caution as the filter is easily damaged.
-
To remove any remaining dust, particles and pollen, allow the filter to air out in a well-ventilated location. Make sure to avoid exposure to direct sunlight.
HEPA FILTER SYSTEM (FILTER NO. 1)
- Filter no. 1 needs to be cleaned every two weeks.
- Do not use water for cleaning, as the filter will otherwise be damaged.
- To remove any remaining dust, particles and pollen, allow the filter to air out in a well-ventilated location. Make sure to avoid exposure to direct sunlight. This filter must not be cleaned with water or using a vacuum cleaner!
natural_image
Cross-sectional diagram of a mechanical component with internal layered structure (no text or symbols)IONISER
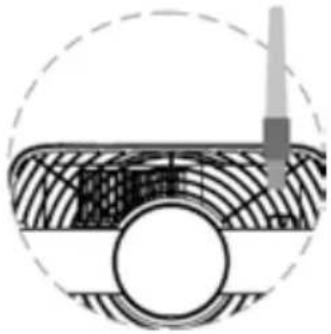
- If the air purifier makes creaking noises, the sensor of the ioniser must be cleaned. Use a brush for this purpose and carefully insert the brush above the ioniser. Gently remove the accumulated dust.
SENSOR
- The sensor is housed on the appliance side (see figure). From time to time, the dust that has settled on the sensor lens must be removed.
- Remove the cover and wipe the dust off the lens carefully.
- Make sure to keep the cotton swab from penetrating into other areas of the sensor.
- Tip: Use a torch if you are unable to see the inside of the sensor properly.
- Re-attach the cover.
text_image
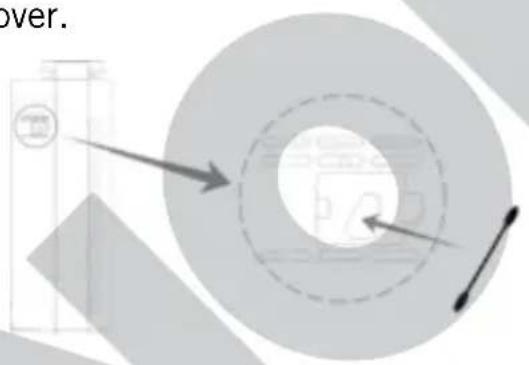
over.WATER TANK
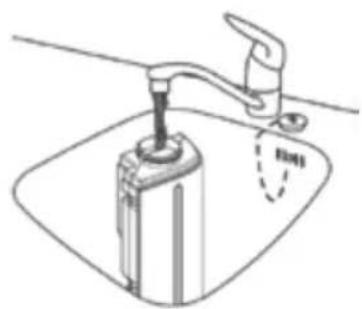
- For sanitary reasons, the water tank must be cleaned on a daily basis.
- Make sure to switch off the appliance and unplug the plug from the power socket.
- Open the lid of the water tank (A)
- Fill water into the water tank until the tank is 1/3 full (B).
- Add a mild detergent (e.g. dishwasher detergent) to the water tank.
- Close the lid of the water tank (C).
- Shake the water tank to clean the inside with the liquid, open the lid again, and pour the water out (D).
- Rinse out the water tank thoroughly several times using clear water to remove all remaining cleaning agent and reinsert the water tank into the appliance (E).
natural_image
Line drawing of a cylindrical device with lid and side ports (no text or symbols)A B C
natural_image
Line drawing of a kitchen sink with faucet and drain (no text or symbols)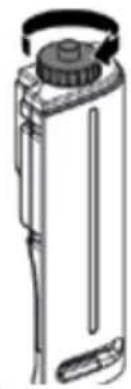
natural_image
Line drawing of a portable water dispenser with handle and spout (no text or symbols)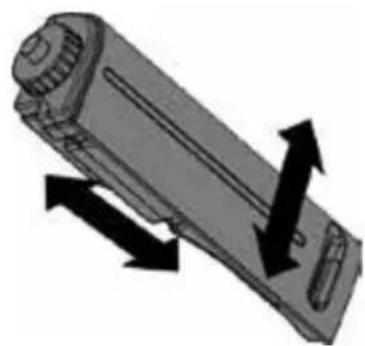
natural_image
Diagram of a mechanical component with directional arrows indicating movement or force (no text or symbols)D

natural_image
Line drawing of a cylindrical device with a lid and side panel (no text or symbols)E
Ⅲ ustrations similar
CLEANING HUMIDIFIER AND HUMIDIFIER HOLDER
- Both parts must be cleaned once a week.
- Make sure to switch off the appliance and unplug the plug from the power socket.
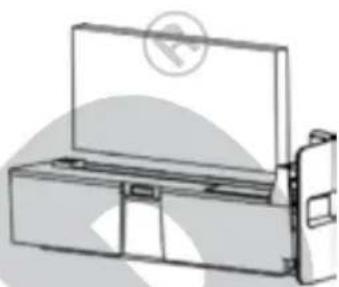
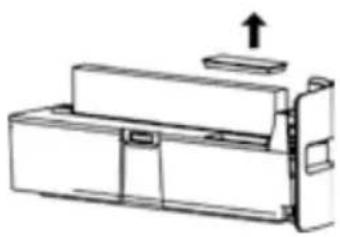
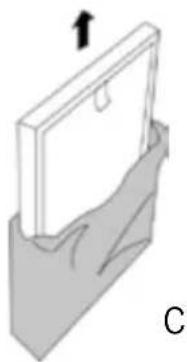
- Remove the water tank and pull out the humidifier holder (A)
- Take the humidifier out of the humidifier holder (B).
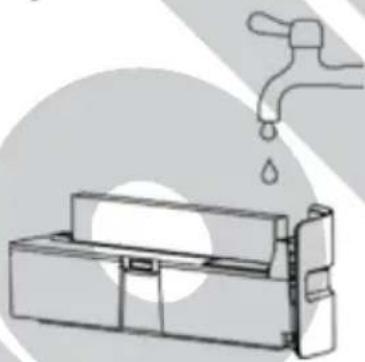
- Rinse out the holder under running water. If necessary, you can also add a small amount of detergent (C)
- R inse at the humidifier under running water (D).
- Dry the exterior of the holder.
- Allow the humidification to dry in the air before reinserting it.
- Reassemble all parts (E). Slide both parts back into the appliance.
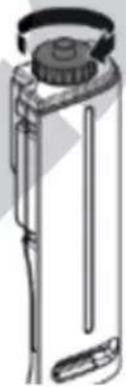
DESCALING THE HUMIDIFIER
- Lime scale left behind by the water can considerably impair operation of the humidifier by the appliance. Regular descaling is therefore of vital importance. Note: There is a small cassette with anti-limescale filter beads in the water tank, which help prevent premature limescale build-up, but they do not replace descaling.
- Make sure to switch off the appliance and unplug the plug from the power socket.
- Remove the water ank (A)
- Pu II thehumid ifier bolder out (B).
- Take the humidifierout of the humidifier holder (C).
- Prepare a descaling solution by mixing vinegar and tap water in a bowl of sufficient size. Mix 1 part of vinegar with 1 part of water.
- Place the humidifier in this bowl for one hour (D).
- Note: If white lime scale is visible on the filter, place the side showing this residue into the bowl in such a way that the side is fully covered by the descaling solution.
- Rinse out the humidifier under running water (E). Turn the filter several times while doing so.
- Allow the filter to dry in the air before reinserting it.
natural_image
Illustration of a device with a handle and cable inserted, labeled 'A' (no text or symbols on the device itself)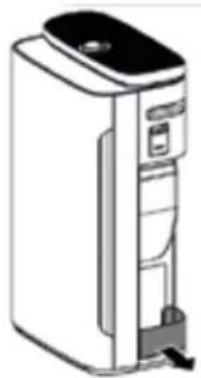
natural_image
Line drawing of a portable water dispenser device (no text or symbols)B
natural_image
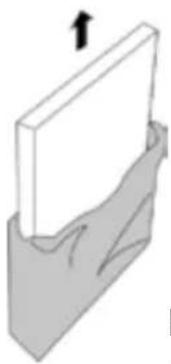
Isometric technical diagram of a mechanical assembly with a grid block and directional arrow (no text or symbols)C

natural_image
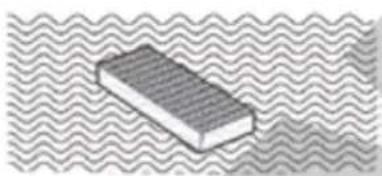
Isometric illustration of a rectangular block with a grid pattern, set against a wavy background (no text or symbols)D
natural_image
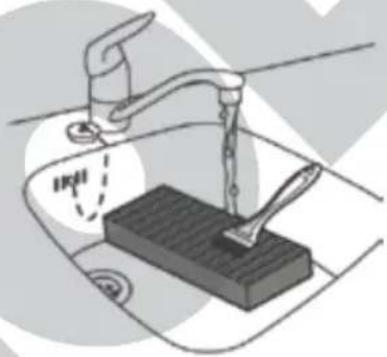
Illustration of a hand using a tool to clean or wash a rectangular object in a kitchen sink (no text or symbols)E
Illustrations similar
FINISH CLEANING
- When finished with all cleaning steps, reinstall all filters in the correct order.
- If you used a vacuum cleaner for cleaning, change the filter bag and clean the attachment you used carefully.
- Place any used filters and consumables such as mask, gloves and cotton swabs into a garbage bag and seal the bag carefully.
- Dispose of the garbage bag in accordance with the applicable statutory waste disposal regulations.
- We recommend that you put any clothes you wore during cleaning into the laundry and put on fresh clothing. You can, however, also wear a disposable coverall during cleaning.
- Wash and disinfect your hands thoroughly using an antiviral hand disinfectant.
- When it is not in use, keep the appliance in a dry and dust-free place.
- Make sure to store the appliance out of the reach of children.
- Pour the water out of the water tank if the appliance will not be used for an extended period.
TROUBLESHOOTING
| Problem Cause Remedy | ||
| The “Power” does not respond | Plug not inserted in the power socket. | Insert the plug properly |
| Front cover open Close the front cover | Front cover | |
| Appliance positioned vertically | Set up the appliance upright on a level surface | |
| Button lock | Release the button lock | |
| The status indicator is lit green, but the air is polluted or the status indicator is lit red even though the appliance is running continuously. | The appliance is set up in an unsuitable location that does not provide for good air flow. | Select a different location for the appliance |
| Sensor soiled the sensor | Clean t | |
| Creaking or hissing noises coming from the appliance | Dust on the ioniser | Clean the ioniser |
| Unpleasant odours at the air outlet | Filter clogged | Clean or change the filter |
| No improvement in air quality despite long running time | Packaging not removed from the filter. | Remove the protective films from the filter. |
| Filters inserted incorrectly | Insert the filters in the correct order | |
| F1 or F2 are indicated on the display | Technical fault in the appliance | Switch off the appliance immediately and disconnect the plug from the power socket. Contact our customer service department. |
| The appliance immediately operates in night mode | “Auto” mode active | Switch "Auto" mode off. |
GUARANTEE CONDITIONS
We grant a 24 months guarantee, and in case of commercial use a 12 months guarantee, starting from the date of purchase for any damage demonstrably due to manufacturing defects and when the appliance has been used according to its intended use. Within the warranty period we will remedy defective materials or workmanship through repair or replacement, at our option. Our warranty terms apply only to appliances sold in Germany and Austria. For other countries, please contact the responsible importer. In the event of a claim for remedy of defects, please send the appliance to our after sales service, properly packaged, together with a copy of the automatically generated sales receipt, which must show the date of purchase, and a description of the defect. You can print out a return receipt on our website www.unold.de/ruecksendung. (only for entries from Germany and Austria). The warranty does not cover damage from normal wear, improper handling and failure to comply with the maintenance and care instructions. The warranty is void if repairs or modifications are made to the appliance by third parties. Any claims of the end consumer vis-à-vis the retailer are not limited by this warranty.
WASTE DISPOSAL / ENVIRONMENTAL PROTECTION
Our appliances are produced on a high quality level for a long lifetime. Regular maintenance and expert repairs by our after-sales service can extend the useful life of the appliance. If an appliance is defective and repair is not possible we ask you to follow the following instructions for disposal. Do not dispose this appliance together with your standard household waste. Please bring this product to an approved collection point for recycling of electric and electronic products. By separate collection and disposal of waste products you help to protect natural resources and ensure, that the product is disposed in an adequate way to protect health and environment.
Dispose of all consumables and personal protective equipment such as masks, gloves, etc. immediately in accordance with applicable local regulations. Never leave them out in the open to prevent any personal danger.
Dispose of empty batteries as required by the Waste Electrical and Electronic Equipment Directive 2202/96/EC – WEEE. Contact your responsible disposal company for information regarding proper disposal.
The instruction booklet is also available for download: www.unold.de
NOTICE D'UTILISATION MODÈLE 87510
AVANT-PROPOS
natural_image
Diagram of a hand holding a tool next to a device, with no visible text or symbols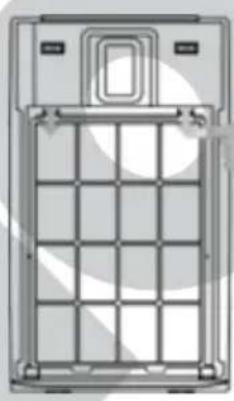
natural_image
Front view of a rectangular electronic device with grid and mounting brackets (no visible text or symbols)B
natural_image
Diagram of a mechanical component with an upward arrow and labeled section C (no text or symbols on the diagram itself)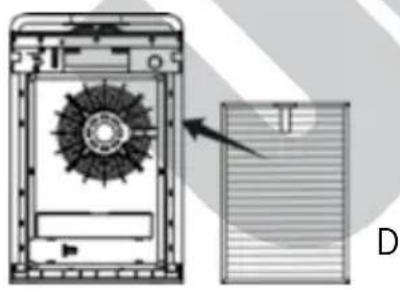
natural_image
Diagram of a device with a circular component and a rectangular panel, showing internal structure and an arrow indicating direction (no text or symbols)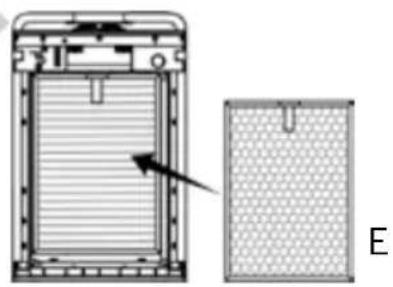
natural_image
Diagram of a device with a mesh panel and an arrow pointing to a component, labeled 'E' (no text or symbols on the diagram itself)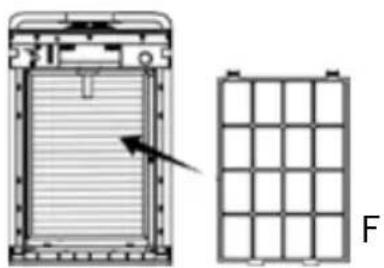
natural_image
Technical diagram showing a device with internal structure and a grid panel, no text or symbols present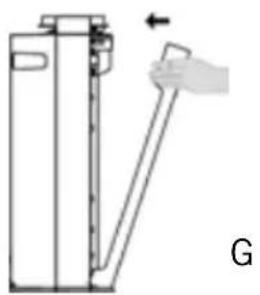
natural_image
Simple line drawing of a vertical container with an arrow indicating force or movement, labeled 'G' at bottom (no text or symbols on diagram)PROTECTION ANTI-BASCULEMENT
natural_image
Cross-sectional diagram of a mechanical component with internal layered structure (no text or symbols)Ionisateur
natural_image
Pure technical diagram showing a cylindrical component with an arrow pointing to a dashed circular component, no text or symbols present.RÉSERVOIR À EAU
natural_image
Line drawing of a cylindrical electronic device with lid and ventilation slots (no text or symbols)A
natural_image
Line drawing of a faucet with a valve and handle, no text or symbols presentB
natural_image
Line drawing of a laboratory flask with a cap and side arm (no text or symbols)C
natural_image
Diagram of a mechanical component with directional arrows indicating movement or force (no text or symbols)D
natural_image
Line drawing of a cylindrical device with lid and side ports (no text or symbols)E
Illustrations similaires
NETTOYAGE DE L'HUMIDIFICATEUR ET DE SON SUPPORT
natural_image
Diagram showing two views of a device with a handle and a circular symbol, no text or labels present.A
natural_image
3D diagram of a mechanical component with an upward arrow indicating motion or force (no text or symbols)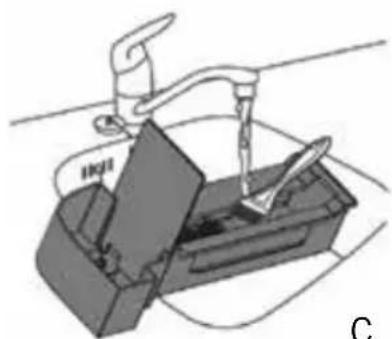
natural_image
Diagram of a hand using a tool to lift a component into a container (no text or symbols visible)C

natural_image
Diagram of a hand using a tool to clean or wash a rectangular object in a sink (no text or symbols present)D
natural_image
Diagram showing two connected devices with a monitor and tower, no text or symbols presentE
Illustrations similaires
DÉTARTRAGE DE L'HUMIDIFICATEUR
CONDITIONS DE GARANTIE
Knop AAN/UIT (On/off)

natural_image
Line drawing of a mechanical device with an arrow pointing to a component (no text or symbols)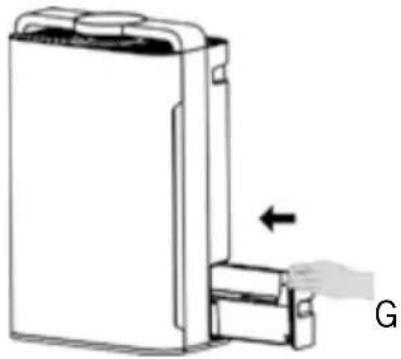
natural_image
Diagram of a device with a left-hand rule and labeled component G (no text or symbols on the device itself)FILTER MONTEREN EN DEMONTEREN

HEPA-FILTERSYSTEEM (FILTER NR. 1)
natural_image
Cross-sectional diagram of a mechanical component with internal layered structure (no text or symbols)IONISATOR
natural_image
Line drawing of a laboratory flask with a lid and side ports (no text or symbols)A C
natural_image
Diagram of a hand holding a water dispenser with a handle, showing mechanical components and a dashed line indicating motion (no text or symbols)B
natural_image
Technical line drawing of a mechanical device with no visible text or symbols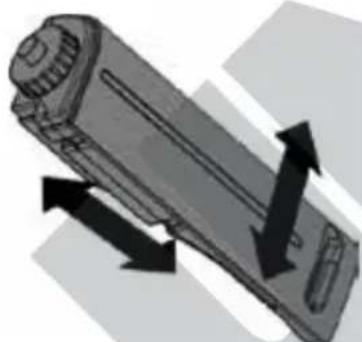
natural_image
Illustration of a mechanical component with directional arrows indicating movement (no text or symbols)DE
natural_image
Line drawing of a thermosorbent device with lid and side panel (no text or symbols)natural_image
Diagram showing two devices with a close-up of their internal components, no text or symbols present.A
natural_image
Diagram of a mechanical component with a grid structure and an upward arrow, no visible text or symbols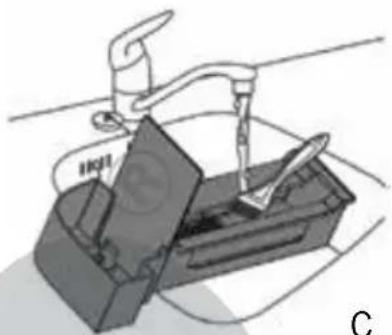
natural_image
Mechanical diagram of a kitchen sink with faucet and base (no text or symbols)C
natural_image
Diagram of a hand using a tool to press or install a rectangular object on a surface, with no visible text or symbols.D
natural_image
Isometric illustration of a room with furniture and equipment, no visible text or symbolsE
natural_image
Line drawing of a device with a handle and cable inserted, labeled 'A' (no text or symbols on the device itself)
natural_image
Line drawing of a white industrial water heater with control panel and side arm (no text or symbols)B
natural_image
3D technical diagram of a mechanical assembly with an upward arrow indicating motion (no text or symbols present)C
natural_image
Illustration of a rectangular block with horizontal grooves, set against a wavy background (no text or symbols)D
natural_image
Illustration of a hand washing a tooth in a sink with a faucet (no text or symbols)Tasto ACCESO/SPENTO (On/off)

natural_image
Diagram of a hand holding a tool next to a vertical panel, with an arrow indicating direction (no text or symbols present)
natural_image
Front view of a rectangular electronic device with grid and mounting brackets (no visible text or symbols)B
natural_image
Diagram of a mechanical component with an upward arrow and label C (no text or symbols on the diagram itself)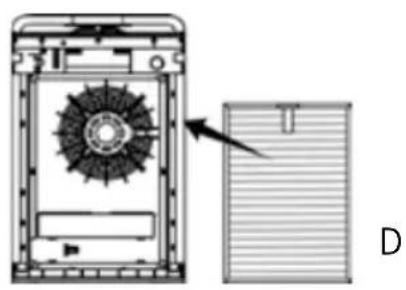
natural_image
Diagram of a device with a circular fan and rectangular panel, showing internal components and an arrow pointing to a section (no text or symbols present)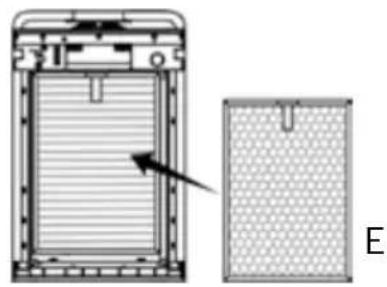
natural_image
Diagram of a device with a mesh panel and an arrow pointing to a component, labeled 'E' (no text or symbols on the diagram itself)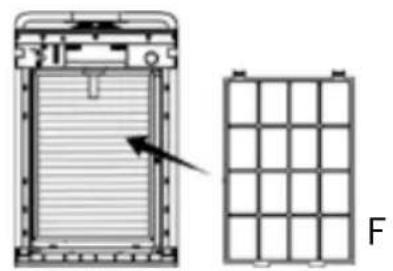
natural_image
Technical diagram showing a device with a grid layout and an arrow pointing to it, labeled 'F' (no text or symbols on the diagram itself)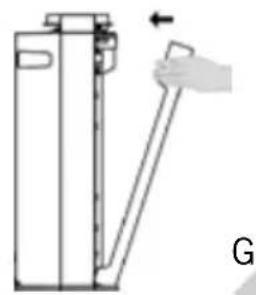
natural_image
Simple line drawing of a vertical container with an arrow indicating direction (no text or symbols)natural_image
Cross-sectional diagram of a mechanical component with internal layered structure (no text or symbols)text_image
Diagram showing a device with a circular component and a magnified view of a device with internal components, possibly indicating a physical or engineering concept.SERBATOIO DELL'ACQUA
natural_image
Line drawing of a cylindrical device with lid and side ports (no text or symbols)A C
natural_image
Diagram of a faucet with a valve and handle, showing fluid flow direction (no text or symbols)B
natural_image
Technical line drawing of a mechanical device with no visible text or symbols
natural_image
Diagram of a mechanical component with directional arrows indicating motion or force (no text or symbols)DE
natural_image
Line drawing of a cylindrical device with lid and side ports (no text or symbols)natural_image
Diagram showing two devices with a device inserted into the first and second views, connected by a cable (no text or symbols present)A
natural_image
3D diagram of a mechanical component with an upward arrow indicating motion or force (no text or symbols)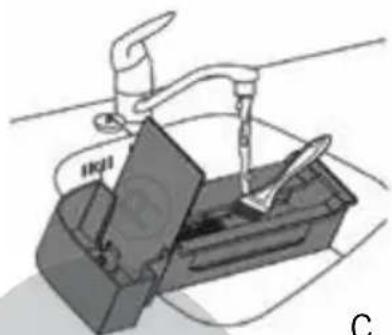
natural_image
Diagram of a kitchen sink with faucet and tool (no text or labels)C
natural_image
Illustration of a hand using a tool to clean or wash a rectangular object in a sink (no text or symbols)D
natural_image
Isometric illustration of a room with furniture and equipment (no text or symbols visible)E
natural_image
Illustration of a device with a handle and a circular button, labeled 'A' (no text or symbols on the device itself)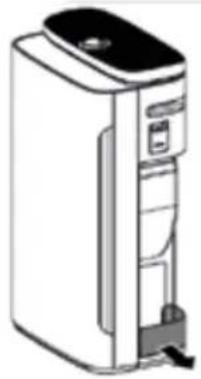
natural_image
Line drawing of a white industrial water heater with control panel and side arm (no text or symbols)B
natural_image
Isometric technical diagram of a device with a grid and directional arrow (no text or symbols)C
natural_image
Isometric illustration of a rectangular block with horizontal grooves, set against a wavy background (no text or symbols)D

natural_image
Illustration of a hand washing a tooth in a sink with a faucet (no text or symbols)E
Tecla CON/DES (On/off)

natural_image
Line drawing of a mechanical device with a hand holding a lever, showing a right-hand rule (no text or symbols)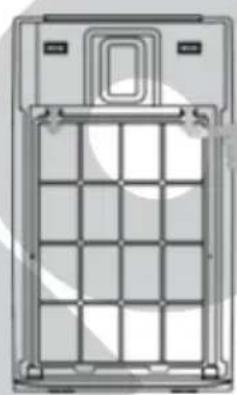
natural_image
Front view of a modular device with grid layout and control panel (no visible text or symbols)B
natural_image
Diagram of a mechanical component with an upward arrow and labeled section C (no text or symbols on the diagram itself)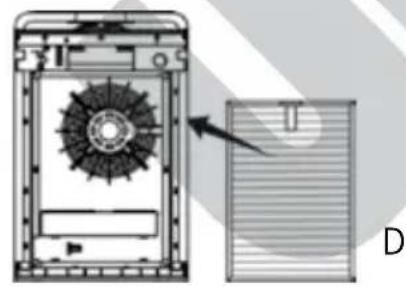
natural_image
Diagram of a device with a circular component and a magnified inset showing internal structure (no text or symbols)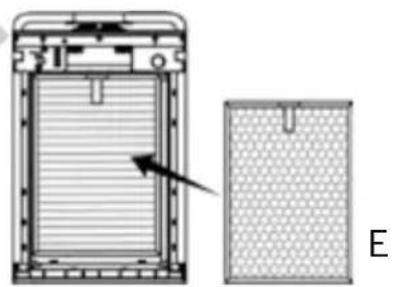
natural_image
Diagram of a device with a meshed panel and an arrow pointing to a component, labeled 'E' (no text or symbols on the diagram itself)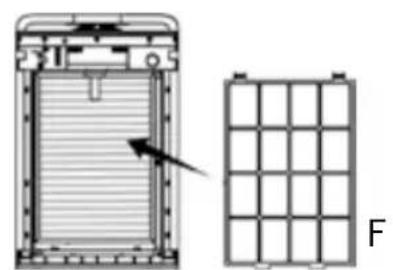
natural_image
Diagram showing a device with a grid layout and an arrow pointing to a component, labeled 'F' (no text or symbols on the diagram itself)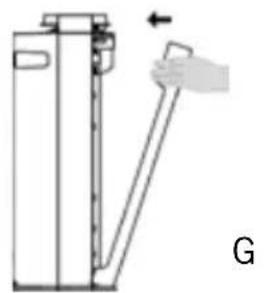
natural_image
Diagram of a hand holding a cylindrical object with an arrow indicating direction (no text or symbols)natural_image
Cross-sectional diagram of a mechanical component with internal layered structure (no text or symbols)IONIZADOR
text_image
Diagram showing a device with a circular component and a magnified view of a device with internal components, including a pointer and scale bar.DEPÓSITO DE AGUA
natural_image
Line drawing of a laboratory flask with a lid and side ports (no text or symbols)A
natural_image
Line drawing of a kitchen sink with faucet and drain (no text or symbols)B
natural_image
Line drawing of a laboratory flask with a lid and side ports (no text or symbols)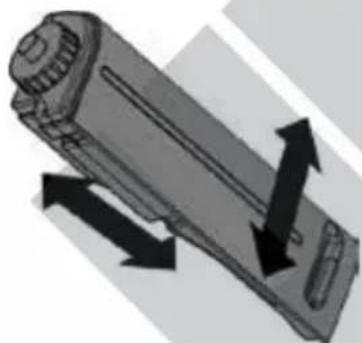
natural_image
Illustration of a mechanical component with bidirectional arrows indicating motion (no text or symbols)D
natural_image
Line drawing of a cylindrical device with lid and side ports (no text or symbols)E
natural_image
Diagram of a device with a handle and cable inserted, labeled A (no text or symbols on the device itself)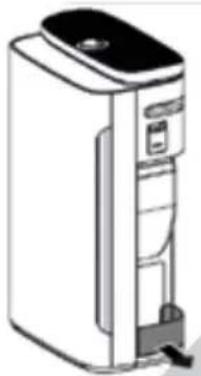
natural_image
Illustration of a portable electronic device with a lid and ventilation slots (no text or symbols)B
natural_image
Isometric technical diagram of a mechanical assembly with no visible text or symbolsC
natural_image
Illustration of a rectangular object with horizontal grooves, set against a wavy background (no text or symbols)D
natural_image
Illustration of a kitchen sink with a faucet and a toothbrush, showing no text or symbolsPrzycisk WŁ/WYŁ (On/Off)
natural_image
Diagram of a hand holding a tool next to a vertical structure, with an arrow indicating direction (no text or symbols present)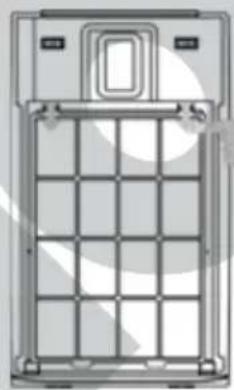
natural_image
Front view of a rectangular electronic device with grid and mounting brackets (no visible text or symbols)B
natural_image
Diagram of a mechanical component with an upward arrow and labeled point C (no text or symbols on the object itself)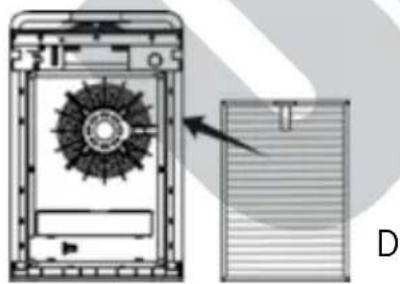
natural_image
Technical diagram of a mechanical device with a circular component and a side-view inset showing internal structure (no text or symbols)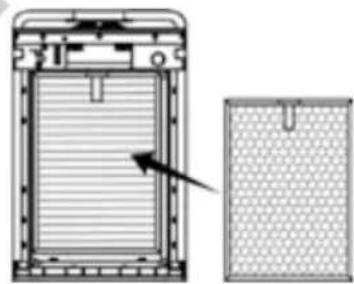
natural_image
Technical diagram of a device with a mesh pattern and an arrow pointing to a component (no text or symbols present)E

natural_image
Technical diagram showing a device with a grid layout and an arrow pointing to it (no text or symbols present)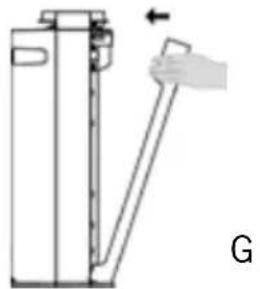
natural_image
Diagram of a vertical device with a hand holding a cylindrical component, labeled 'G' (no text or symbols on the diagram itself)FILTR WSTĘPNY (FILTR NR 3)
natural_image
Cross-sectional diagram of a mechanical component with concentric rings and a central shaft (no text or labels)JONIZATOR
text_image
Diagram showing a device with a circular component and a magnified view of a grid layout, possibly illustrating a technical or engineering concept.ZBIORNIK NA WODE
natural_image
Line drawing of a laboratory flask with a cap and side ports (no text or symbols)A
natural_image
Illustration of a hand using a faucet to lift a water bottle (no text or symbols)B
natural_image
Technical line drawing of a mechanical device with no visible text or symbolsC
natural_image
Mechanical component with directional arrows indicating motion or force (no text or symbols)DE
natural_image
Line drawing of a portable electronic device with lid and ventilation slots (no text or symbols)Ilustracje podobne
CZYSZCZENIE NAWILŻACZA I MOCOWANIA NAWILŻACZA
natural_image
Line drawing of a device with a handle and circular button, labeled 'A' (no text or symbols on the device itself)
natural_image
Line drawing of a white industrial water heater with control panel and side arm (no text or symbols)B
natural_image
Isometric technical diagram of a device with a grid and directional arrow (no text or symbols)C
natural_image
Isometric view of a rectangular block with horizontal grooves, set against a wavy background (no text or symbols)D

natural_image
Illustration of a hand washing a tooth in a sink with a faucet (no text or symbols)E
Ilustracje podobne