K1 - Stroller Osann - Free user manual and instructions
Find the device manual for free K1 Osann in PDF.


User questions about K1 Osann
0 question about this device. Answer the ones you know or ask your own.
Ask a new question about this device
Download the instructions for your Stroller in PDF format for free! Find your manual K1 - Osann and take your electronic device back in hand. On this page are published all the documents necessary for the use of your device. K1 by Osann.
USER MANUAL K1 Osann
natural_image
Line drawing of a baby stroller with wheels and seat, no text or symbols presentBedienungsanleitung
Instruction Manual
text_image
A B C D E H J I G F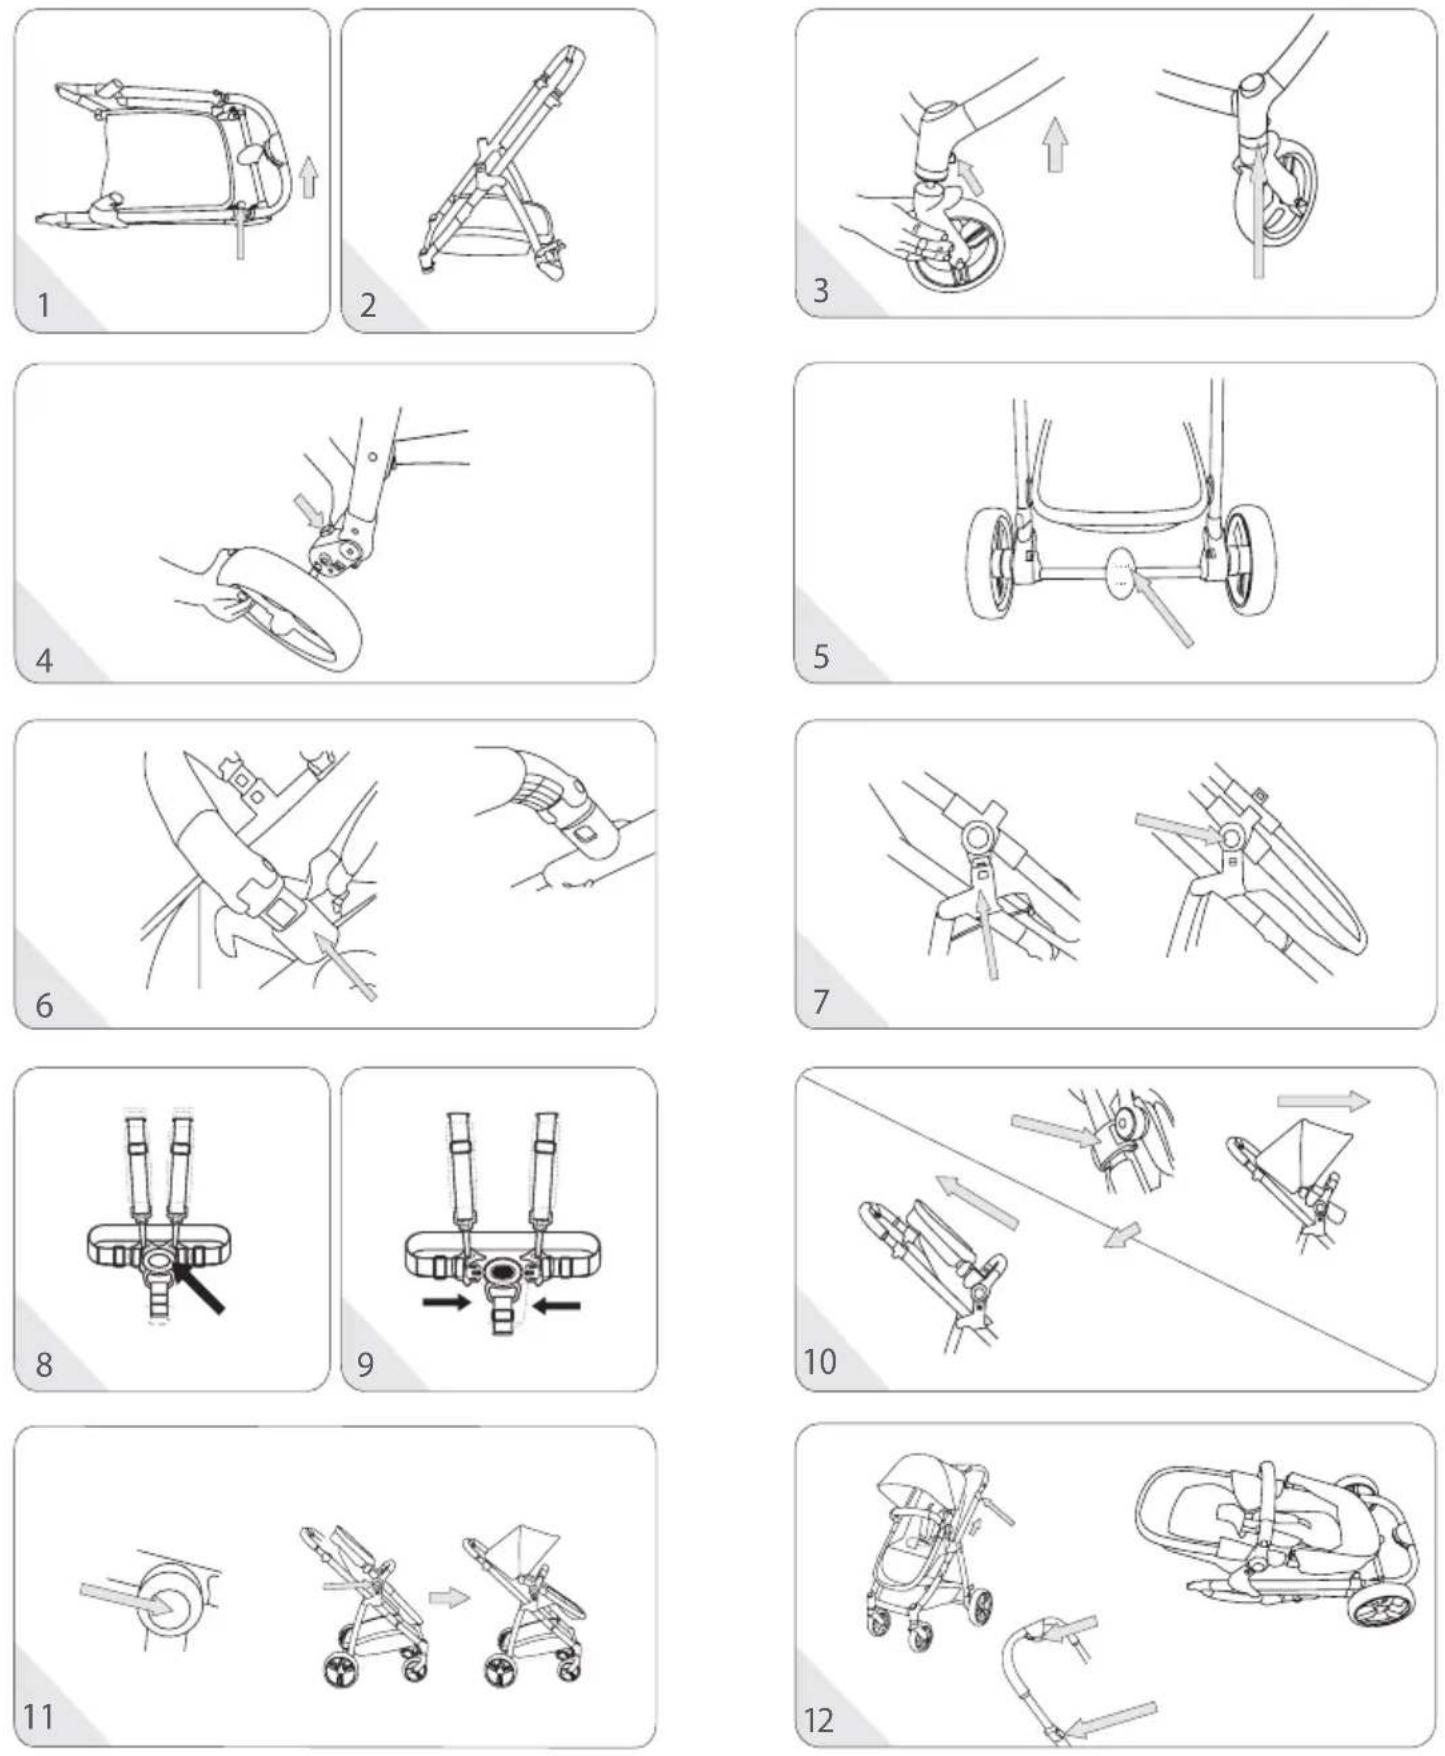
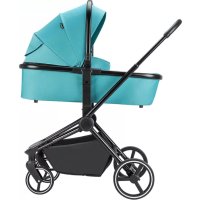
Babywanne / Carrycot / Couffin / Moisés / Culla Portatile / Bassinet
text_image
A B C D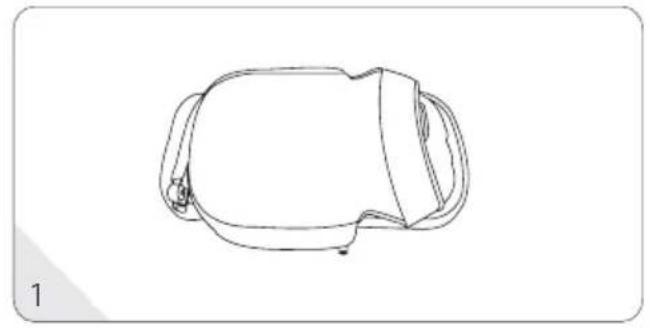
natural_image
Line drawing of a car's front view showing the rear side and side panels (no text or symbols)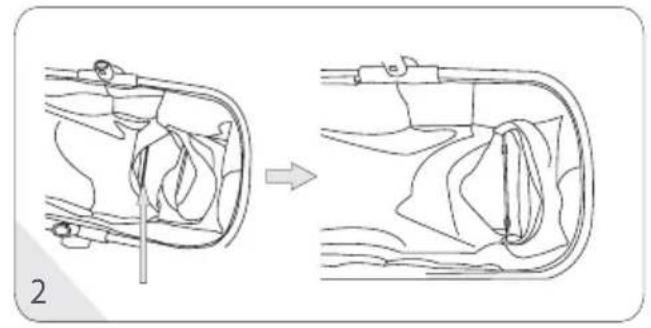
natural_image
Diagram showing a mechanical assembly before and after transformation, with no visible text or symbols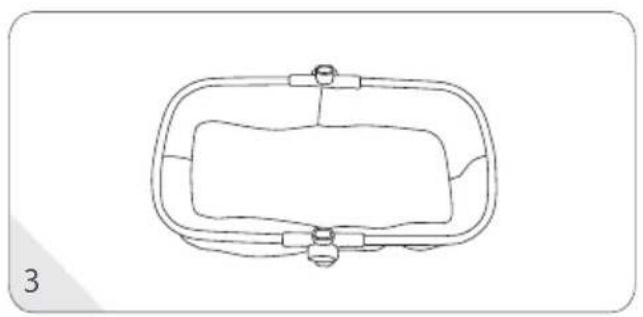
natural_image
Simple line drawing of a rectangular frame with internal components and connectors (no text or symbols)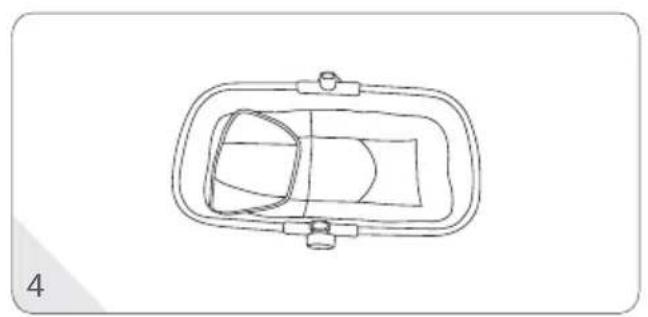
natural_image
Top-down line drawing of a car inside a rectangular frame (no text or symbols)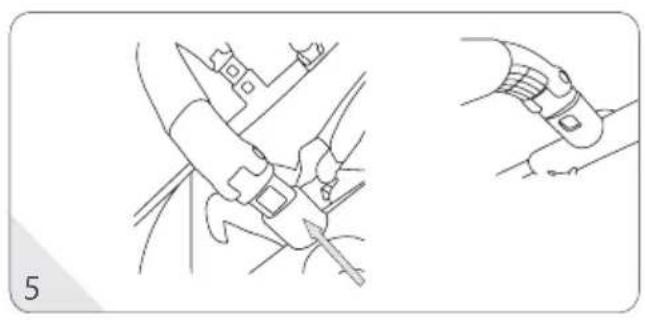
natural_image
Line drawings of two hand tools: a knife and a tool, both holding pins (no text or symbols present)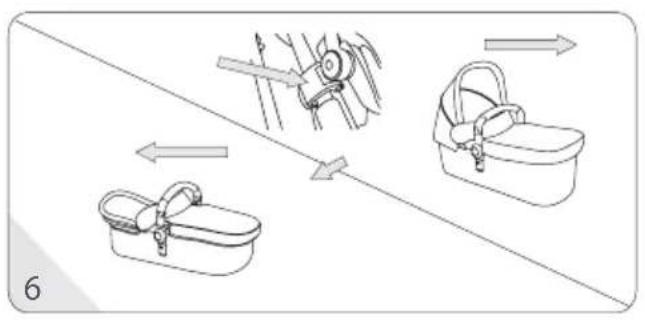
natural_image
Diagram showing two handbags with directional arrows indicating movement or force (no text or symbols)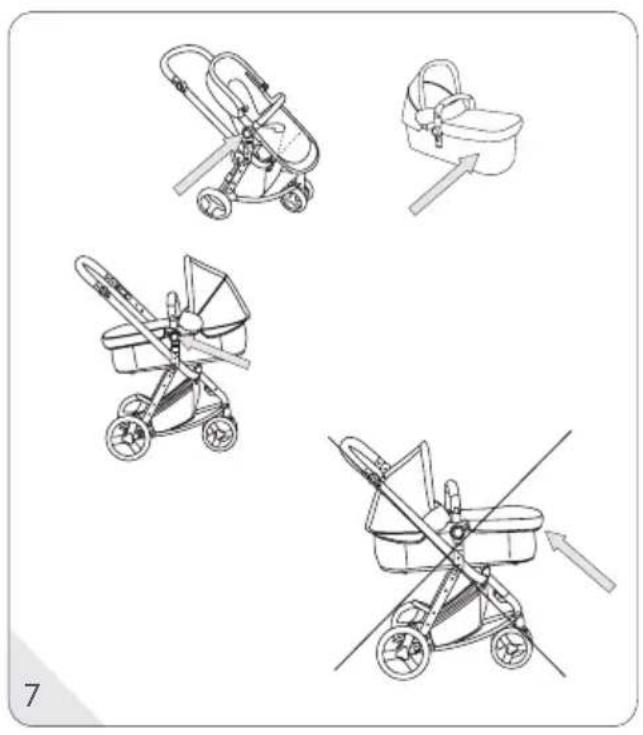
natural_image
Illustration of four different strollers with different body designs and directional arrows, no text or symbols present.Thank you very much for choosing our K1 pushchair. If you need help with this product, please contact our customer service.
WARNINGS
- WARNING Always use the crotch strap in combination with the waist strap. We recommend that you also use the shoulder strap.
- WARNING Before use, make sure that all locking parts are locked.
- WARNING Do not let your child play with this product.
- WARNING Before use, make sure that the prams and seat supports are properly locked.
- The product must be assembled by an adult.
- Only use the stroller for children under 15 kg. Otherwise the pram may be damaged. (Please note the individual maximum weights for pushchair attachment and baby carrier).
- Never place more than 4.5kg in the storage basket so that the pram does not become unstable.
- Never leave your child unattended. Always keep your child in sight.
- Use the stroller with only one child. Never place bags, shopping bags, packages or accessories on the handle or the hood.
• Overloading, incorrect folding or the use of parts from other manufacturers may impair or damage the safety of the stroller. Read the instruction manual carefully.
- Never use it with accessories from other manufacturers.
- Read all instructions in this manual before using this product. Keep this manual for future reference. Failure to follow these warnings and instructions could result in serious injury or death.
- The safety belts and the restraint system must be used correctly.
• Always use the seat belts to prevent serious injury from falling or sliding out.
• Make sure that your child does not come into contact with parts that move when you adjust the pram.
- The child can slide into the openings of the legs and strangle himself if the belt system is not used.
- Do not use stairs or escalators with the pram.
- Keep away from hot objects, liquids and electronic devices.
- Do not allow your child to climb on the pram or sit head forward in it.
- Do not park the pram on roads, slopes or dangerous areas.
- Make sure that all mechanical parts are locked before using the stroller.
- To avoid strangulation, DO NOT place any objects with a band around your child's neck. Remove the straps from these objects or fix them in place in some other way.
- Do NOT place anything on the handle so that the stroller does not tip over.
• DO NOT lift the pram while your child is sitting in it.
- DO NOT use the storage basket as a storage space for your child.
- Do not allow your child to climb on the pram or it may tip over. Always lift your child into or out of the pram.
• Always fold the stroller carefully up or down so that nothing can be trapped.
- Make sure that the stroller is fully folded or unfolded before letting your child near you.
- For the safety of your child, check that all parts are assembled and fixed before using the stroller.
- Keep your child away from the hood so it doesn't get caught in it.
• Always activate the brakes when you park the stroller.
- Do not use the stroller if it is damaged.
- The pram may only be used at walking speed. This product must not be used for jogging.
- To avoid suffocation, remove plastic bags and packaging materials before using this product. Plastic bags and packaging materials should be kept away from babies and children.
• This product is not suitable for jogging or skating.
- The sports stroller attachment / buggy attachment is suitable for children from 6 months up to a maximum body weight of 15 kg.
- Use the parking brake when inserting or removing the child.
- The baby carrier is only suitable for children who cannot sit independently, turn and/or support themselves with their hands and knees. Maximum weight of the child: 9 kg.
- The baby carrier is NOT suitable for longer sleep.
- Use only the mattress supplied with the baby carrier; DO NOT add another mattress.
- For car seats in combination with a substructure, this means of transport is not a substitute for a cot. If your child is tired, you should place him or her in a suitable pram, cot or baby bed.
- Please make sure that the child's head in the baby carrier is never lower than the child's body.
- Before carrying or lifting, please make sure that the handle is in the correct position for use.
- Do not let other children play unattended near the baby carrier.
- Handles and underside should be checked regularly for damage and signs of wear.
CARE INFORMATION
- The cleaning and maintenance of the stroller is a task that may only be performed by adults.
- The cover is not removable. Clean the fabric parts with a damp sponge and a neutral cleaner. Please observe the instructions on the care label.
- Only clean the pram frame with commercially available soap and warm water. Do not bleach or treat with cleaning agents.
- Check your stroller occasionally for loose screws, worn parts, worn materials or torn seams. Replace or repair the parts if necessary.
- Excessive exposure to sunlight or heat may cause parts to fade or deform.
- If the stroller has become wet, open the hood and allow it to dry completely before stowing it away.
- For squeaking wheels, apply a light oil (e.g. silicone spray, anti-rust oil or sewing machine oil). It is important that the oil gets into the axle and the wheel connection.
- If you take your stroller for a walk on the beach, you must clean it completely to remove sand and salt from the mechanics and wheel connections.
MAINTENANCE
Regularly check the condition of the product for possible damage. In case of damage, do not use and keep out of the reach of children.
If you have any problems, please contact Osann Customer Service at +49(0)7731/970077.
BUGGY
A: Canopy
B: Frontbar
C: Five point harness system
D: Basket
E: Front wheel
F: Rear wheel
G: Folding locker
H: Function button
I: Folding mechanism
J: Handle bar
1.-2. Open:
Unhook the folding locker, uplift the handle bar until the tube click into position.
3. Attaching the front wheels:
Insert the front wheel sets into the housing until it clicks into the knuckle and make sure the wheel attached well; rotate the locher clockwise to make the wheel to straight, on the counterclockwise rotaion to make the wheel swivel.
4. Attaching the rear wheels:
Put the wheel set into the housing as shown, and make sure they are clicked into position and attached well.
5. Adjust rear wheel brakes:
Step on the rear part of the brake to stop, to release brake, step on the front part.
6. Install the bumper bar:
Click the front bar into the plastic housing and make sure it is fixed into position.
7. Install and move the seatunit:
Place the seat unit on to the mounting points on the both side, push down until the button located in the holes of the seat mountings, press the button on the both side to move the seat out.
8. Harness Release:
Press down the button on the buckle, pull it to open.
9. Harness fastening:
Insert the two latches into the buckle on both sides until they click for locking. Sliding adjusters are fitted and should be carefully adjusted on each side so the harness fits your child comfortably.
10. Canopy installation and use:
Canopy installation: Buckle up the canopy to the upper seat frame.
Canopy using: Pull forward the canopy to stretch the canopy, and back to fold.
11. Adjust the seat and backrest position:
Press the button to adjust the seat unit within 4-position; Notice: make sure the seat unit lock in place.
12. Folding:
Adjust front wheel to swivel, then press the 2nd locker, and pull the folding system on the both side, downward the stroller into lock it.
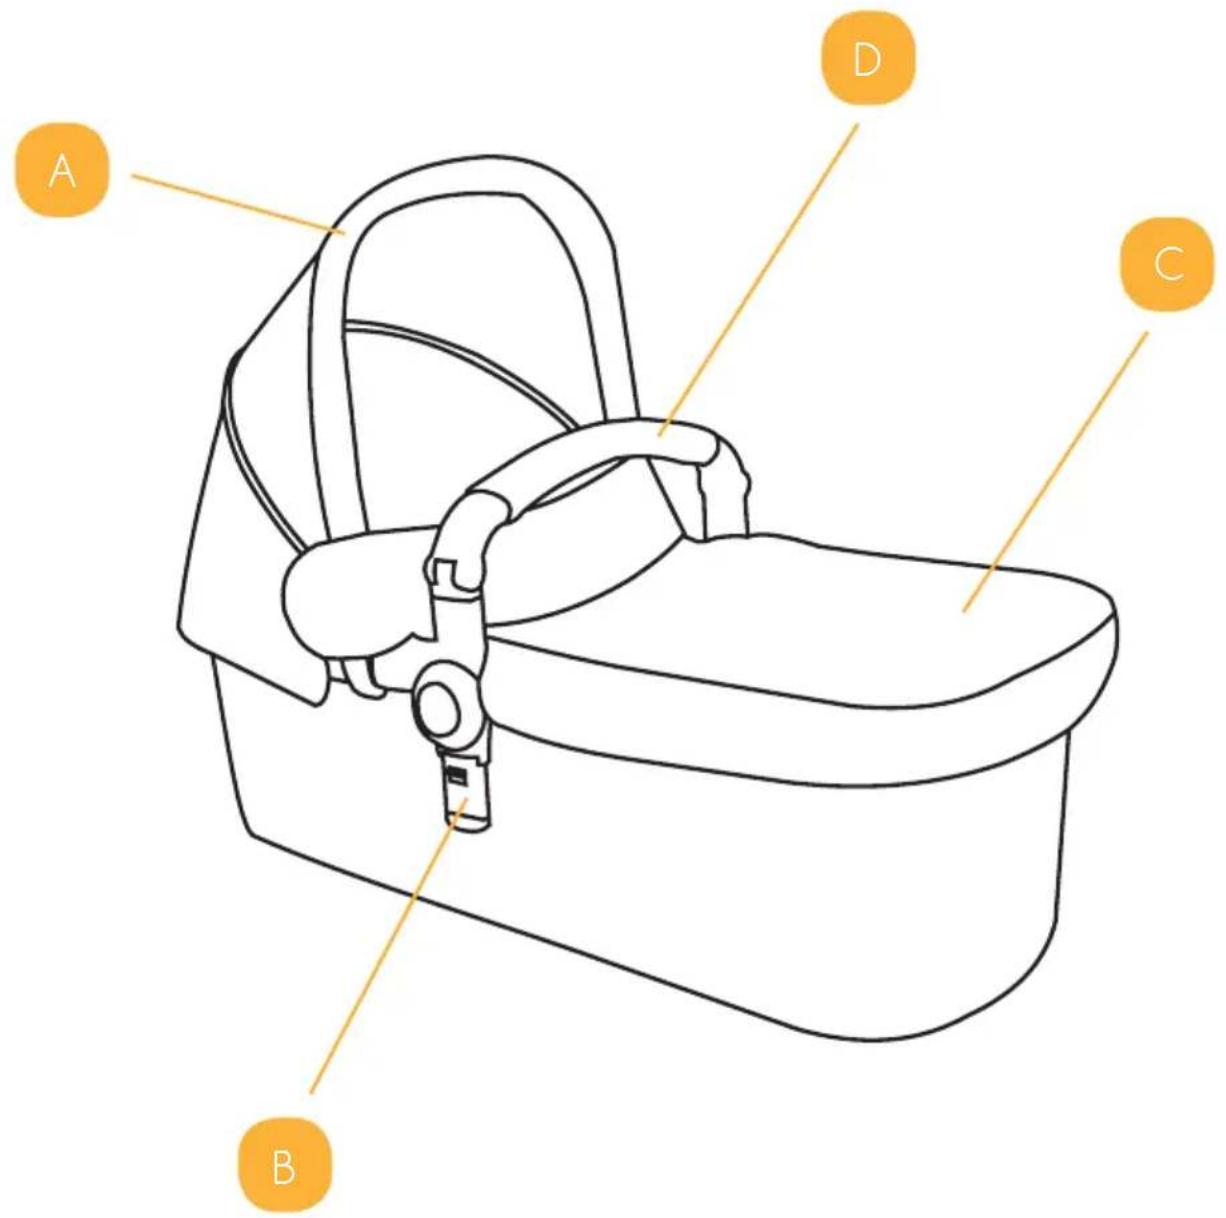
CARRYCOT
A: Canopy
B: Socket Join
C: Boot Cover
D: Armrest
1. Open:
Take out the bassinet as photo showed.
2.-3. Attaching the iron lining:
Click the iron lining into the support plastic, check and ensure that the iron lining and the support plastic closed in the right position.
4. Attaching the sleeping pads:
Put the sleeping pads into the bassinet.
5. Front armrest installation:
Put the armrest into the both side of the frame plastic housing, ensure the armrest fixed in the right position.
6. Canopy installation and use:
Canopy installation: Buckle up the canopy buckle to the upper seat frame.
Canopy using: Pull forward the canopy to stretch the canopy, and back to fold.
7. Installation carrycot:
Press the bottoms on the seat unit to move the seat out, then locate the carrycot on to the chassis as shown.
Warning: Make sure to locate the carrycot on the right way.
A: Kap
B: Insteekverbinding
C: Armleuning
D: Wiegafdekking