10666 - Coffee machine KORONA - Free user manual and instructions
Find the device manual for free 10666 KORONA in PDF.
| Product type | Drip coffee maker |
| Brand | Korona |
| Model | 10666 |
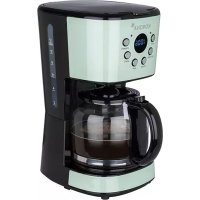
| Design | Vintage |
| Color | Not specified (likely silver/black) |
| Dimensions (approx.) | 30 cm (L) x 20 cm (W) x 35 cm (H) |
| Weight (approx.) | 2.5 kg |
| Power supply | 220-240 V ~ 50-60 Hz |
| Power | 900 W |
| Protection class | I |
| Water tank capacity | 12 cups (max approx. 1.5 L) |
| Coffee type | Ground coffee (medium to fine) |
| Included filter | Permanent filter (washable) + compatible with 1x4 paper filters |
| Functions | Delay programming (up to 24h), strength selection (normal/strong), auto shut-off after 40 min, keep warm |
| Display | LED screen with clock |
| Carafe | Glass with lid, graduations |
| Heating plate | Yes, automatic keep warm |
| Anti-drip function | Yes (stops dripping if carafe removed) |
| Safety | Auto shut-off, hot surface (caution), do not immerse |
| Care and cleaning | Removable parts washable in warm water, regular descaling required |
| Warranty | 2 years (material and manufacturing defects) |
| Customer service | Email: service@korona-electric.de, Tel: +49 2933 90284-80 |
Frequently Asked Questions - 10666 KORONA
User questions about 10666 KORONA
0 question about this device. Answer the ones you know or ask your own.
Ask a new question about this device
Download the instructions for your Coffee machine in PDF format for free! Find your manual 10666 - KORONA and take your electronic device back in hand. On this page are published all the documents necessary for the use of your device. 10666 by KORONA.
USER MANUAL 10666 KORONA
natural_image
KORONA coffee maker with digital display and glass pitcher (no visible text or symbols on device body)KORONA electric GmbH, Sundern/Germany
www.korona-electric.de
Bedienungsanleitung
Before use, please read these instructions carefully and keep them in a safe place for future reference. When passing on the appliance to a third party, make sure to include these instructions for use.
Intended Use
This appliance is only intended for making coffee. Never attempt to heat any other liquids in it. This appliance is only intended for private household use!
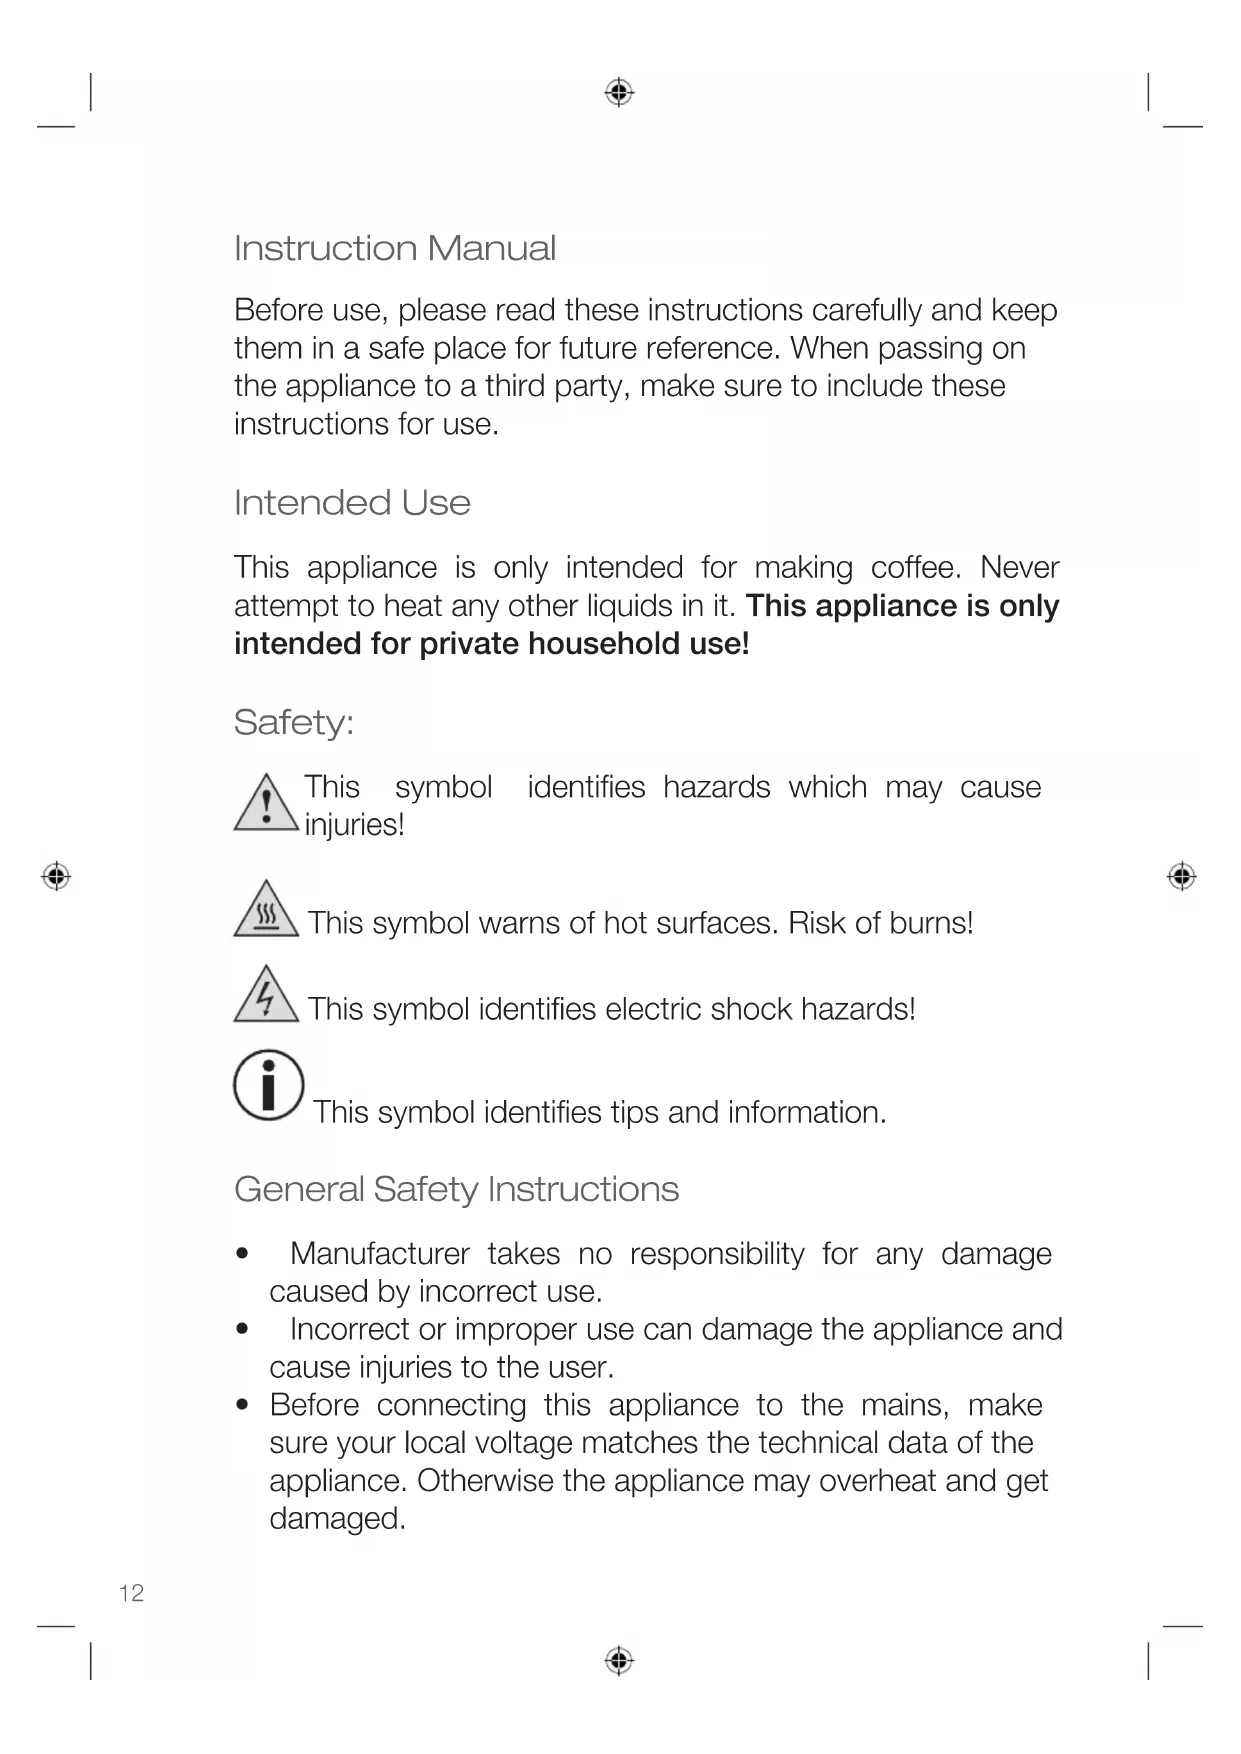
Safety:

This symbol identifies hazards which may cause injuries!

This symbol warns of hot surfaces. Risk of burns!

This symbol identifies electric shock hazards!

This symbol identifies tips and information.
General Safety Instructions
- Manufacturer takes no responsibility for any damage caused by incorrect use.
- Incorrect or improper use can damage the appliance and cause injuries to the user.
- Before connecting this appliance to the mains, make sure your local voltage matches the technical data of the appliance. Otherwise the appliance may overheat and get damaged.
Caution! Danger of electric shock!
- Never put the appliance, cord or plug into water or any other liquid.
- Do not use the appliance near a sink or wash basin.
- Do not use the appliance with wet hands.
- Do not use the appliance outdoors.
An electric appliance is not a toy!
- Never leave the appliance unattended during use.
- This appliance can be used by children aged from 8 years and above and persons with reduced physical, sensory or mental capabilities or lack of experience and knowledge if they have been given supervision or instruction concerning the use of the appliance in a safe way and understand the hazards involved. Children shall not play with the appliance. Cleaning and user maintenance shall not be made by children unless they are older than 8 and supervised.
- Keep the appliance and its cord out of reach of children less than 8 years.
- Always unplug your appliance when it is not in use, and before cleaning.
- Always pull the plug – not the cord.
- Keep the appliance and the cord well away from any hot surfaces to avoid any damage to the appliance.
- Make sure the cord may not inadvertently be pulled or cause anyone to trip when in use.
- Do not allow the cord to hang over sharp edges.
- Do not bend the cord or wind it round the appliance.
Do not use the appliance,
- if the cord is damaged.
- in case of malfunction.
- if the appliance was dropped or is damaged otherwise. Have it checked and, if necessary, repaired by a qualified person/Customer Service. Never attempt to make any modifications to or repair the appliance yourself.
- Only use accessories evaluated for use with this appliance.
- Never attempt to drive any objects into the appliance.
- Never attempt to open the housing yourself!
- The appliance is not intended to be operated by means of an external timer or separate remote-control system.
Special Safety Instructions
Warning! To avoid the possibility of injury/damage to the appliance, electric shock and risk of burns.
- Your coffee maker is only intended for making coffee.
- Place the appliance on an even and heat-resistant surface.
- Attention: The temperature of accessible surfaces may be high during operation. Therefore, do not touch the appliance during and/or immediately after operation. Only use the handle. Danger of serious burns!
- Never open the filter cover or the filter holder respectively during operation, hot steam evaporates. Danger of serious burns!
- Never operate the appliance without water.
- Never exceed the Max. filling level to avoid any boiling water from spilling. Danger of serious burns!
- Do not leave the empty glass jug on the hotplate.
- Do not use the carafe if it shows any damages.
- Do not move the appliance during operation.
- Do not place the appliance near any inflammable objects.
- Always unplug the appliance after use and let it completely cool down before cleaning.
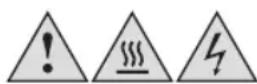
Product Description
text_image
KORONA 100%- Appliance lid
- Water outlet
- Removable filter holder + permanent filter
- Control panel with LED display
- Water tank with water level indicator
- Carafe
- Hot plate
- Power cord and plug
- Cable compartment
- Measuring spoon
Control Panel
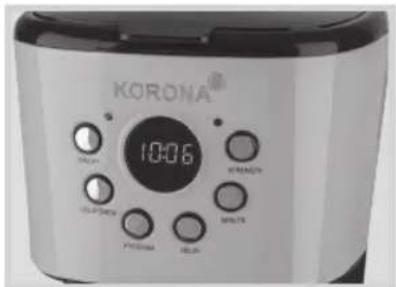
text_image
KORONA® 10:06 STRAWBING MULS FULLER FULLER FULLERBEFORE FIRST USE
- Remove all packaging material and check whether the appliance is incomplete.
• Fully unwind the power cord (8).
• Clean the detachable parts as described under Cleaning and Care. - Place the appliance on an even and heat resistant surface and connect it to a properly installed wall socket.

Note: As soon as the appliance is plugged in for the first time, the LED display shows "12:00" (flashing).
- Press the HOUR and MINUTE button to set the actual time.
- Once the actual time is set it will appear on the LED display
- Before making your first coffee, rinse the unit by filling the water tank (5) up to the Max. and operate it 2-3 times without coffee. After that your coffee maker is ready for operation.

Attention: After each rinse cycle, the appliance has to be switched off for approx. 5 minutes, in cool down.

Warning: Plastic bags are a danger to toddlers and babies, therefore keep them away to avoid
suffocation.
OPERATION
The appliance allows you to brew coffee according to your taste and strength as well as to plan ahead when you wish to enjoy it!
Brewing Coffee

Never open the appliance lid (1) during operation – hot water could evaporate – Danger of serious
burns!
Using a Paper Filter
- Place the appliance on an even and heat resistant surface and connect it to a properly installed wall socket.
- Open the appliance lid (1) and fill the water tank (5) with cold, fresh tap water. Use the carafe (6) to do so. The markings on the carafe (6) indicate the desired number of cups. Do not exceed the Max. filling level (12 cups)
- Insert a standard paper filter 1 × 4 into the removable filter holder (3). Make sure to fold the edges of the paper filter and push it slightly down.

Note: When using a paper filter remove the permanent filter from the filter holder before inserting filter.
- For each cup of coffee, use one leveled measuring spoon of grounded coffee (medium to fine). For stronger or milder coffee, adjust the amount of coffee!

Press the STRENGHT button on the control panel if you wish to enjoy stronger coffee! The respective indicator light lights up.
- Close the appliance lid (1)
- Place the carafe (6) with its lid on into the appliance.
- Press the ON/OFF button on the control panel to switch on the appliance. The respective indicator light lights up, "12:00" appears on the LED display and the appliance start operation.
The brewing process can be interrupted at any time by pressing the ON/FF button on the control panel. Once the unit is switched on again the appliance will continue with the brewing process.

Note: During the brewing process, the buttons PROGRAM, DELAY BREW, HOUR and MINUTE
are deactivated.
If you wish to have a cup of coffee before the brewing cycle is completed, remove the carafe (6) from the appliance. Due to the automatic drip stop, dripping will automatically cease. Put the carafe (6) back within 30 seconds, dripping process will automatically resume.
- After the brewing cycle is completed (no more water is dripping through the filter), the carafe (6) can be removed. When serving coffee do not remove the lid in order to preserve the proper serving temperature
- As long as the appliance is switched on, you can keep the coffee hot, by returning the carafe (6) to the hotplate (7) after serving. The hotplate (7) will automatically cycle on and off to maintain the ideal serving temperature as long as the coffee maker is switched on.

Attention: The appliance will automatically shut-off within 40 minutes and the indicator light will go OFF as well. Once the appliance has automatically shut-off, the keeping warm function is also deactivated.
- To switch off the appliance before the automatic shut-off, press the ON/OFF button on the control panel

If you wish to prepare more than one pot of coffee, the appliance has to be switched off for approx. 5 minutes, in order to cool down.
Using the permanent filter
When using the permanent filter, do not insert a paper filter!
Instead of inserting a paper filter into the filter holder (3) you can insert the permanent filter (3) into the filter holder. Add your grounded coffee and follow above mentioned steps.

Only use medium to fine grounded coffee, as otherwise the pores of the Permanent Filter could get blocked.
After use, remove the grounded coffee and clean the permanent filter (3) as described under Cleaning and Care.
Always disconnect the appliance from the mains if you are not using it!
Setting the clock
- Connect the power cord to the mains.
- 12:00 appears on the LED display.
- To set the current time, repeatedly press the MINUTE button on the control panel to set the minutes and the HOUR button on the control panel to set the hour.
Attention: If you want to use the DELAY BREW (timer) function you need to set the clock to the current time beforehand.
Delay Brewing (Timer)
Allows you to pre-set the time when you would like the coffee maker to automatically brew your coffee, up to 24 hours in advance.
- Make sure that the clock is set to the current time.
- Prepare the coffee machine as described under Brewing Coffee but, don't start the brewing process, yet.
- Press the PROGRAM button on the control panel, the ON/OFF indicator light lights up in green and flashes.
- Press the HOUR and MINUTE button on the control panel repeatedly to set the brewing time of the coffee.
- Press the PROGRAM button on the control panel to confirm the pre-set time.
- Press the DELAY BREW button on the control panel to confirm. The ON/OFF indicator light lights up in solid green, and after a few seconds, the current time appears in the display.
- Once the brewing cycle starts at the pre-set time, the ON/OFF indicator light lights up in red.
Press the DELAY BREW button on the control panel to cancel the function.
CLEANING AND CARE
Before cleaning, always switch off the appliance and disconnect it from the mains. Let it
completely cool down.
Never immerse the appliance in water. Danger! Electric Shock!
Clean the body of the appliance with a moistened soft cloth.
Do not use any aggressive cleaning agents and/or other hard objects to clean the appliance.
All detachable parts can be cleaned in warm water using some dishwashing detergent. Rinse them afterwards and dry them thoroughly.
DESCALING
Depending on the water quality and usage, calcification can occur. Therefore, to keep your coffee maker operating efficiently, you should descale it on a regular basis.
Never use any sharp, pointed or metal objects to remove limescale built up in the appliance.
To remove limescale, use a common gentle descaler, which is suitable for your appliance. Follow the manufacturer's instructions.
After descaling, always rinse your appliance as described under Before First Use.
Note: Descaler mixtures should not be poured down enamel coated sinks.
STORAGE
Keep the appliance away from children and store it in a clean and dry place.
Disposal Instructions
Waste electrical devices marked with this sign must not be disposed of with your household waste, but are to be collected separately. Therefore, please return this device at the end of its life cycle to special collection points for disposal or your local dealer.
Your Retro Coffee Maker 10665 / 10666 is packed in a retail box. Such boxes are recyclable they are reusable or recyclable.
TECHNICAL DATA
Voltage: 220 - 240 V \~ 50 - 60 Hz
Power: 900 W
Protection class: I
Technical data subject to change!
CE
Guarantee:
This product is guaranteed against defects in materials and workmanship for a period of 2 years.
This guarantee is not valid:
- if the appliance has not been used in accordance to the instructions
• for damages due to wear and tear (batteries, etc.)
• for damages known by customer at time of purchase
• for damages caused by owner
This guarantee does not affect your statutory right, nor any legal right you may have as a customer under applicable national legislation governing the purchase of goods.
In order to assert his/her right in a guarantee case during the guaranteed period, the customer must provide evidence of the date of purchase (receipt).
The guarantee is to be asserted against
KORONA electric GmbH, Sundern/Germany.
Telephone Hotline: +49 2933 90284-80
Mail: service@korona-electric.de
web: www.korona-electric.de
within 2 years after the date of purchase. In case of guarantee the customer is given the right to get the appliance repaired at our own or at an authorized shop. Further rights (due to guarantee case) are not given to the customer.
Handleiding
natural_image
Abstract geometric shape with curved and angular gray segments, no text or symbols presentRef: 10665_10666/2020.12