PCKM 1151 - Food Processor PROFICOOK - Free user manual and instructions
Find the device manual for free PCKM 1151 PROFICOOK in PDF.
| Brand | ProfiCook |
| Model | PCKM 1151 |
| Product type | Food processor with kneading function and meat grinder |
| Power supply | 220 - 240 V~, 50 - 60 Hz |
| Power | 1300 W |
| Net weight (appliance with bowl and kneading tool) | Approx. 6.2 kg |
| Control | Speed selector knob (positions P, 1-6, OFF) |
| Pulse function | Yes, position P |
| Automatic stop | After 10 minutes of continuous operation |
| Overheat protection | Yes, electronic speed regulation |
| Safety switch | Prevents operation if the swivel arm is not in locked low position |
| Bowl capacity | Up to 3.5 kg for light doughs, 2.5 kg for heavy doughs |
| Included accessories | Mixing bowl, whisk, dough hook, pastry hook, meat grinder with tray, pusher, spiral, blade, 3 discs (fine, medium, coarse), sausage attachment, kibbeh attachment, cookie attachment, cookie nozzle, splash guard |
| Bowl material | Stainless steel (presumably) |
| Cleaning | Wipe the housing with a damp cloth; accessories can be washed in soapy water, not dishwasher safe |
| Intended use | Household only |
| Protection class | I |
Frequently Asked Questions - PCKM 1151 PROFICOOK
User questions about PCKM 1151 PROFICOOK
0 question about this device. Answer the ones you know or ask your own.
Ask a new question about this device
Download the instructions for your Food Processor in PDF format for free! Find your manual PCKM 1151 - PROFICOOK and take your electronic device back in hand. On this page are published all the documents necessary for the use of your device. PCKM 1151 by PROFICOOK.
USER MANUAL PCKM 1151 PROFICOOK
WAARSCHUWING: Verwondingsgevaar!
WAARSCHUWING: Verwondingsgevaar!
WAARSCHUWING: Verwondingsgevaar!
WAARSCHUWING: Verwondingsgevaar!
3. Attacchi accessory:
Thank you for choosing our product. We hope you will enjoy using the appliance.
Symbols in this Instruction Manual
Important safety information is explicitly marked. Please follow these instructions exactly in order to avoid injuries and damages to the appliance:

WARNING:
Warns against health hazards and indicates possible risks of injury.

CAUTION:
Indicates possible damage to the appliance or to other objects.

NOTE: Highlights tips and information for you.
Contents
Overview of the Components. 3
General Notes 46
Special Safety Instructions for This Appliance. 46
Intended Use 47
Unpacking the Appliance 48
Overview of the Components/ Scope of Delivery. 48
Electrical Connection 48
Functionality of the Appliance 48
Protective Features 48
Turning the Appliance On 48
Turning the Appliance Off. 48
The Kneading Machine 48
Installation and Operation of the Kneading Machine ....48
Table of Dough and Tools 49
Interruption of Operation 49
Completion of Operation and Removal of the Bowl.....49
Recipes 49
MeatGrinder 50
Application Notes for the Meat Grinderr 50
Preparation. 50
Assembling the Mincer (See Fig. A) 51
Assembling the Sausage Attachment (See Fig. B) 51
Assembling the Attachment for
Oriental Dough Pouches (See Fig. C) 51
Assembling the Cookie Maker (See Fig. D) 51
Attach Preassembled Worm Housing. 51
Operation of the Meat Grinderr 51
Complete Operation. 51
Cleaning 51
Motor Housing. 52
Accessories of the Kneading Machine and the Meat Grinder 52
Storage 52
Troubleshooting 52
Technical Data. 52
Disposal 53
Meaning of the Symbol "Dustbin" 53
General Notes
Before operating this appliance, read the operating instructions carefully, and keep them on file, including the warranty receipt and, if possible, the box with the internal packing. If you pass the appliance on to a third party, please pass on the manual.
- Use the appliance privately and only for its intended purpose. This appliance is not intended for commercial use.
- Do not use the appliance outdoors. Keep it away from heat, direct sunlight, moisture (never dip it into any liquid), and sharp edges. Do not use the appliance with wet hands. Unplug the appliance if it is exposed to moisture or liquid.
- The appliance and the power cord must be regularly inspected for signs of damage. If damage is detected, the appliance may no longer be used.
- Use only original accessories.
- In the interest of child safety, do not leave any packaging components (plastic bags, cardboard, polystyrene, etc.) lying around.

WARNING:
Do not let little children play with foil. Danger of suffocation!
Special Safety Instructions for This Appliance

WARNING: Risk of injury!
- Prior to replacing accessories or attachments that are moved during operation, the appliance must be turned off and unplugged.
- Do not touch any moving parts.

WARNING: Risk of injury!
- The blade of the meat grinder is sharp!
- Before switching on the appliance, make sure that the accessory attachment is mounted correctly and firmly seated.
- Always disconnect the appliance from the supply if it is left unattended and before assembling, disassembling or cleaning.
- This appliance shall not be used by children.
- Keep the appliance and its cord out of the reach of children.
Children shall not play with the appliance. - Appliances can be operated by persons with reduced physical, sensory, or mental capabilities or lack of experience and / or knowledge if they have been given supervision or instruction concerning the use of the appliance in a safe way and understood the hazards involved.
- Do not repair the appliance by yourself. Always contact an authorized technician. If the supply cord is damaged, it must be replaced by the manufacturer, its service agent or similarly qualified persons in order to avoid a hazard.

CAUTION:
Do not immerse the appliance into water for cleaning. Please follow the instructions as stipulated in the chapter "Cleaning".
- Do not manipulate any safety switches.
- Use this appliance only for the processing of food.
- The abuse for any other purposes may result in injury.
Intended Use
This appliance serves as
- kneading / mixing appliance for making dough, creams, cream, whipped egg whites;
- meat grinder for crushing of food. You can form a paste or dough with different attachments.
It is intended for the use in private households and similar applications.
It is only to be used as instructed in this user manual. The appliance is not intended for commercial use.
Use the appliance as either a kneading / mixing appliance or meat grinder. Never use multiple functions simultaneously.
Any other use is considered improper and may result in material damage or even personal injury.
The manufacturer is not liable for damages caused by improper use.
Unpacking the Appliance
- Remove the appliance from the package.
- Remove all packaging material such as films, filler, cable holders and cardboard.
- Check the delivery contents for completeness.
- Should the package contents be incomplete or damages be found, do not take the appliance into operation. Take it immediately back to the dealer.
NOTE:
Dust or production residues can be located on the appliance. We recommend to clean the appliance as described under "Cleaning".
Overview of the Components / Scope of Delivery
Page 3

1 Cover for meat grinder engine
2 Release button for meat grinder attachment
3 Swivel arm
4 Knob (P CEF
5 Power indicator light
6 Release button for lowering / raising the arm
7 Motor housing
8 Mixing bowl
9 Splash guard
10 Meat grinder with filling tray and danner
11 Whisk
12 Stirring hook
13 Dough hook
Page 4: Assembly of the Meat Grinding
14 Pusher (with storage compartment for the accessories)
15 Filler tray
16 Worm housing filler neck
17 Spiral
18 Knife
193 sieves (fine, medium, coarse)
20 Locking ring
21 Dough divider
22 Sausage attachment
23 2-part attachment "Kebbe"
24 Biscuits attachment
25 Biscuits cutter form
Electrical Connection
Check whether the power supply that you want to use coincides with that of the appliance. The information can be found on the nameplate.
Functionality of the Appliance
Protective Features
- The appliance is equipped with a circuit breaker. The appliance can only be operated if the following is observed: - the swivel arm is locked in place in the lowest position.
- The electronic speed regulation prohibits a motor drive overload automatically. The revolutions per minute are automatically regulated in the case of an overload.
Turning the Appliance On
- After you have connected the appliance to the power supply, and if the circuit breaker on the swivelling arm is closed, the power indicator light will light up.
- Turn the rotary knob clockwise to select the desired speed level. The appliance starts to operate. If you do not turn off the appliance, it will turn itself off automatically after an operation time of 10 minutes. Afterwards set the knob into OFF position.
- Pulse operation: Turn the knob counter-clockwise to the P position. Hold the knob in this position only for a short time.
Turning the Appliance Off
- Set the knob into OFF position to turn the appliance off.
- Disconnect the mains plug from the socket.
The Kneading Machine
Installation and Operation of the Kneading Machine
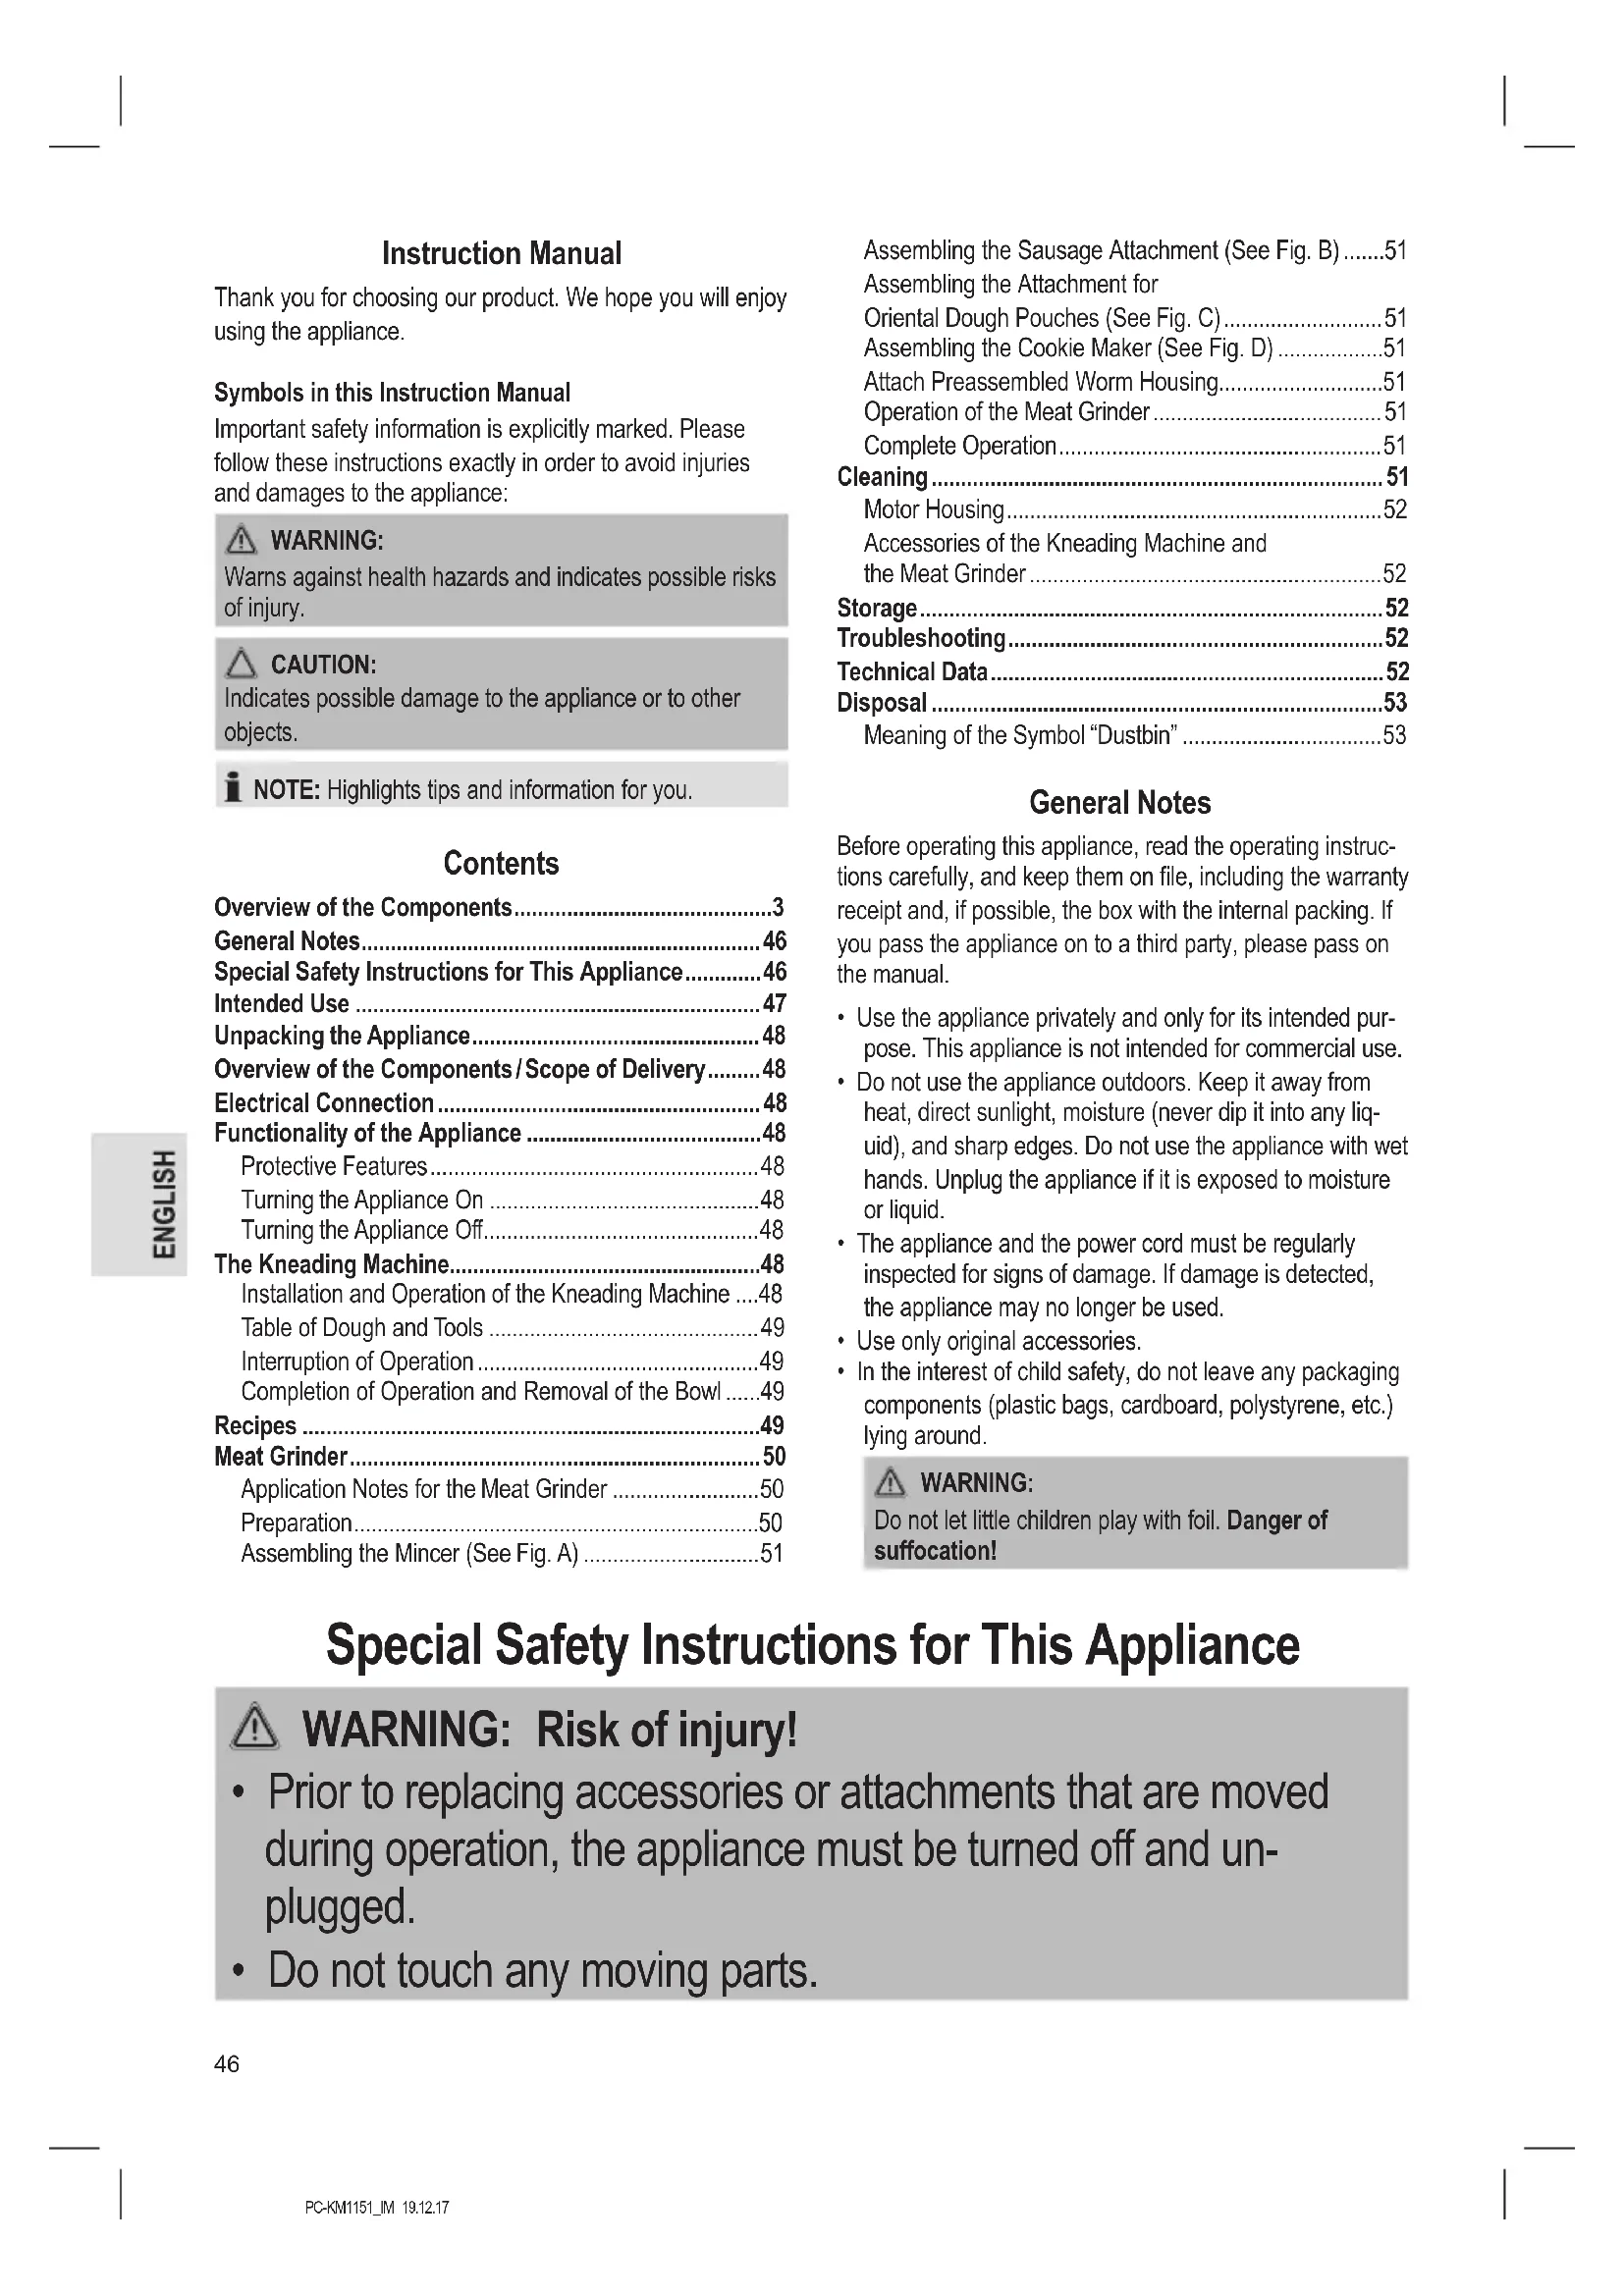
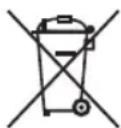
If you have used the meat grinder previously, cover the drive shaft of the spiral housing with the cover.
- Open the swivel arm: Push the swivelling arm downward. Press the release button (6). Move the arm by hand to the highest position.
- If you need the splash guard, attach it now to the swivel arm from below. Hold the splash guard (9) in such a way that the fill opening is positioned in front of you. The symbol and the marker on the swivelling arm must be aligned with one another. Turn the splash guard towards to lock it.
3. Attaching accessories:
On the top end of the accessories, there is a recess for the drive shaft and the splint. Slide the accessory over the drive shaft. Push down and at the same time turn the accessory
anticlockwise in order for the splint of the drive shaft to lock into the accessory.
- Mixing bowl: Place the mixing bowl into its holder. Turn the bowl towards to its limit.
- Fill your ingredients into the mixing bowl.
NOTE: If you knead heavy doughs, do not put all the ingredients at once into the mixing bowl. Start the kneading with flour, sugar and eggs. Add fluids slowly during the kneading.
Table of Dough and Tools
| Doughs Tool Levels Quantity | Max. Operating Time | |||
| Heavy doughs (e.g. bread or short pastry) | Dough hook | 1-2 | max. 2.5kg | 3-4 minutes |
| Moderate doughs (e.g. cake mix) Stirring hook 3-4 | min. 0.5kg max. 3.5kg | 2-4 minutes | ||
| Light doughs (e.g. waffle or crêpe batter, pudding) | Whisk | 4-5 | min. 500 ml max. 3.5 litre | 2-4 minutes |
| Cream | Whisk | 6 | min. 200 ml max. 1 litre | 2.5-5.5 minutes |
| Beaten egg whites | Whisk | 6 | 2-10 egg white | 3-5 minutes |
NOTE:
Short-term operation: Operate the appliance with heavy doughs no longer than 5 minutes, and allow the appliance to cool down for 10 minutes.
Interruption of Operation

WARNING: Risk of injury!
- Set the knob in the OFF position.
- Disconnect the power plug if you want to change the tool.
- Wait for the standstill of the tool!
If you use the release button during operation (6) to pivot up the arm, a safety switch will shut off the motor. This safety switch also prevents the appliance from being turned on after you have lowered the arm again. To get the appliance working again, set the knob first in the OFF position. Then select the desired speed setting.
Completion of Operation and Removal of the Bowl
- Set the knob in the OFF position. Disconnect the power plug.
- Push the swivelling arm downward. Press the release button (6), the arm raises.
- Remove the tool.
- Turn the mixing bowl briefly anticlockwise to remove it.
- The finished dough can be removed from the mixing bowl with the help of a dough scraper.
- Clean the parts used as described under "Cleaning".
Recipes
Cake Mix (Basic Recipe)
Level 3-4
Ingredients:
250 g soft butter or margarine, 250 g sugar, 1 pack. Vanilla sugar or 1 sachet lemon flavour, a pinch of salt, 4 eggs, 500 g flour, 1 sachet baking soda, about 16 milk.
Preparation:
Add wheat flour with the remaining ingredients into the mixing bowl, stir with the stirring hook for 30 seconds at level 3, then 3 minutes at level 4. Apply a thin layer of grease to the baking tin or line it with baking paper, pour in the batter and bake it. Before removing the pastry from the oven, perform a readiness test: pierce with a pointed wooden stick in the centre of the pastry. If no dough sticks to it, the cake is done. Overthrow the cake on a wire rack and let it cool.
Conventional Oven:
Loading height: 2
Heating: electric oven top and bottom heat 175-200°C, gas oven: level 2-3
Baking time: 50-60 minutes
This recipe can be modified depending on your taste, e. g. with 100 g raisins, nuts, or grated chocolate. There are no limits to your imagination.
Flaxseed Bread Rolls
Level 1-3
Ingredients:
500 - 550 g wheat flour, 50 g flaxseed, 3% of water, 1 cube of yeast (40 g), 100 g low-fat cheese (well drained), 1 teaspoon salt.
To glaze: 2 tablespoons water
Preparation:
Soak flaxseed in 18 ℃ lukewarm water. Fill the remaining lukewarm water ( 14 ) into the mixing bowl, crumble the yeast into it, add curd and mix well with the dough hook at level 1. The yeast should be completely dissolved. Add the flour with the soaked flaxseeds and salt to the mixing bowl. Knead at level 1, then switch to level 3 and knead for another 3 - 5 minutes. Cover the dough, and let it rise in a warm place for 45 - 60 minutes. Knead the dough once again, remove it from the bowl and shape it into 16 rolls. Line a baking sheet with wet baking paper. Position the rolls on the sheet, let them rise for 15 minutes, sprinkle them with lukewarm water and bake them.
Conventional Oven:
Loading height: 2
Heating: electric oven: top and bottom heat 200 - 220 °C (5 minutes preheating), gas oven: level 2 - 3
Baking time: 30-40 minutes
Chocolate Mousse Level 4-5
Ingredients:
200 ml whipping cream, 150 g semisweet chocolate couverture, 3 eggs, 50 - 60 g sugar, a pinch of salt, 1 sachet vanilla sugar, 1 tablespoon cognac or rum, chocolate leaves.
Preparation:
Whip the cream in the mixing bowl with a whisk to stiff peaks, remove it from the bowl and store it in a cool place. Melt the chocolate couverture according to package instructions, or in the microwave at 600W for 3 minutes. In the meantime, beat eggs, sugar, vanilla sugar, cognac or rum and salt in the mixing bowl with the whisk at level 4 until it is foamy. Add the melted chocolate couverture and stir it well at level 4 - 5. Set aside some of the whipped cream for garnishing. Add the remaining cream on the creamy mass and stir briefly by selecting the pulse function. Garnish with chocolate cream garnish and serve well chilled.
MeatGrinder
Application Notes for the Meat Grinding

WARNING:
The blade of the meat grinder (18) is sharp!
Handle the knife of the meat grinder with the necessary care during assembly and cleaning. There is a risk of injury!
- Do not mince any hard objects, such as bones or shells.
- Cut the meat into 2.5cm pieces. Ensure that there are no bones or tendons in the meat.
-
To shred the meat coarsely, use the disc with the largest holes.
-
In a second step, select the disc with the finer or centre holes. Depending on how finely you want to shred the meat.
- Before you start, lightly coat the sieves with vegetable fat.
- If you mince meat, place a container under the outlet.
- With the help of the "Kebbe" attachment (23) tubes of meat or dough can be formed.
Making Sausage
- You can use both natural and synthetic casings.
- If you have opted for a natural casing, soak this casing some time in water before using it.
- Tie a knot at one end of the casing.
- Slide the casing over the sausage attachment.
- Feed the sausage meat through the sausage attachment and fill the sausage casing.
- Make sure that the sausage meat is "loosely" stuffed into the casing as the sausage expands in volume during cooking or frying and may cause the casing to burst open.
- When the first sausage reaches the desired length, squeeze the sausage at the end of the sausage attachment together with your fingers.
- Turn the sausage once or twice around its own axis.
- Until you have established some exercise routine, you can turn off the appliance after each sausage length.
Shaping Biscuits
- Prepare a surface on which you can lay the cookies afterwards.
- With the cookie cutter form (25) you can create different cookie shapes.
- After having mounted the spiral housing with the cookie attachment (24) onto the appliance, slide the cookie cutter form into the cookie attachment.
- Select the desired cookie form.
- Hold the dough strand in your hand at the opening and cut off the desired length.
Preparation
Please refer to our overviews on page 3 and 4.
- Assemble the bowl without tools.
- The access to the worm housing is protected by a cover (1) on the appliance. To remove the cover, push it upwards gently and then lift it off.
- Set the worm, sprocket first, into the horizontal section of the worm housing.
Assembly of the accessories is described by the following sections. Prepare the mincer according to your requirements.
Assembling the Mincer (See Fig. A)

NOTE:
Depending on how fine you want to mince, select a finer or a courser mincing plate.
- Lightly coat the mincing plate beforehand with vegetable oil.
Proceed as described under "Preparation".
- Set the knife (18) onto the shaft of the worm with the sharp side facing outwards.
- Select a mincing plate (19). Use the recesses to do so. More details can be found under "Attach Preassembled Worm Housing".
Assembling the Sausage Attachment (See Fig. B)
Proceed as described under "Preparation".
- First, set the dough divider (21) onto the shaft of the worm. Use the recesses to do so.
- Set the sausage attachment (22) onto the dough divider. Use the recesses to do so.
More details can be found under "Attach Preassembled Worm Housing".
Assembling the Attachment for Oriental Dough Pouches (See Fig. C)

NOTE:
Use the attachment for oriental dough pouches to form pouches from meat or dough paste.
Proceed as described under "Preparation".
- Place the 2 part attachment for oriental dough pouches (23) onto the shaft of the worm. Use the recesses to do so.
- More details can be found under "Attach Preassembled Worm Housing".
Assembling the Cookie Maker (See Fig. D)
Proceed as described under "Preparation".
- First place the dough divider (21) onto the shaft of the worm. Use the recesses to do so.
- Place the cookie maker (24) onto the dough divider. Use the recesses to do so.
More details can be found under "Attach Preassembled Worm Housing".
Attach Preassembled Worm Housing
- Screw the locking ring (20) clockwise onto the spiral housing.
- Attach the pre-assembled worm housing to the appliance. Place the spiral housing in the two o'clock setting into the spiral drive. Turn the spiral housing counter-clockwise up to the stop. The release button (2) unlatches.
- Position the filler tray (15) so that the bed of the tray lies above the arm (3).
Operation of the Meat Grinding

WARNING: Risk of injury!
-
Once you turn on the appliance, the drive shaft of the kneading machine starts rotating. Do not reach into the rotating drive shaft during operation!
Always mount the bowl for your safety.
Always use the supplied pusher. Never put fingers or tools into the filler neck! -
Put the pieces of meat (meat paste / sausage mass or dough) on the filling tray and into the filler neck.
- Plug the power cord into a properly installed earthed socket.
- You can select a speed from level 4 to 6.
- Stuff, if necessary, the meat respectively the dough with the stuffer (14).

NOTE:
Short-term operation: Operate the appliance with the meat grinder no longer than 10 minutes and allow the appliance to cool down for 10 minutes.
Complete Operation
- Set the knob in the OFF position.
- Disconnect the power plug.
- Disassemble all parts of the meat grinder.
- Clean the parts used as described under "Cleaning".
- Cover the uptake for the spiral housing with the cover (1).
Cleaning

WARNING:
- Always disconnect the power plug before cleaning.

WARNING:
- Never immerse the appliance in water for cleaning. It could cause an electric shock or fire.
- The blade of the meat grinder is sharp! There is a risk of injury! Proceed carefully when disassembling, cleaning and assembling the individual parts.

CAUTION:
- Do not use wire brushes or other abrasive objects.
- Do not use any sharp or abrasive cleaning agents.
Motor Housing
For cleaning of the housing, only use a damp cloth and mild detergents.
Accessories of the Kneading Machine and the Meat Grinding

CAUTION:
The components are not suitable for cleaning in the dishwasher. Under the influence of heat and strong detergents, they could deform or discolour.
- Components that have come into contact with food, can be cleaned in soapy water.
- Allow the parts to dry thoroughly before assembling the appliance again.
Storage
- Clean the appliance as described. Let the accessories dry completely.
We recommend that you keep the appliance in the original packaging, if you do not want to use it for a longer period.
Always store the appliance out of reach of children in a well ventilated, dry place.
Troubleshooting
| Problem Possible cause Solution | ||
| The appliance is not working. | The appliance has no power supply. | Check the outlet with a different appliance. |
| Your appliance is equipped with safety switches. They prevent accidental starting of the motor. | - Check the proper position of the swivelling arm (3). - Set the knob in the OFF position. Then select the desired speed setting. | |
| The overheating protection has been activated. The motor is too hot. | Let the appliance cool down for at least 15 minutes before switching it on again. | |
| The appliance is defect. | Consult our service department or an expert. | |
Technical Data
Model: PC-KM 1151
Power supply: 220 - 240 V~, 50 - 60 Hz
Power consumption: 1300 W
Protection class:
Net weight (basic appliance with mixing bowl and kneading tool): approx. 6.2 kg
The right to make technical and design modifications in the course of continuous product development remains reserved.
This appliance has been tested according to all relevant current CE guidelines, such as electromagnetic compatibility and low voltage directives, and has been constructed in accordance with the latest safety regulations.
Disposal
Meaning of the Symbol "Dustbin"
Protect our environment; electrical appliances do not belong in household waste.
Use the collection points for the disposal of electrical equipment and submit your electrical and electronic equipment to these points that you will no longer use.
You help reduce the potential impact of incorrect disposal on the environment and human health.
You contribute to recycling, and other forms of recycling of electrical and electronic equipment.
Information concerning the disposal of appliances can be obtained from your local or municipal authorities.
Instrukcja obslugi
CTC Clatronic Sp. z o.o
Ul. Brzeska 1
45-960 Opole
Usuwanie
CpeIcTbTa 3aunTbI .74
BknnoeHne np6opa. 74
BbIKIIOUeHne npIbopa. 74
Tectomeeunka 74
UctahOBka n3KcNpyataaTna Tectomeaankn 74
Ta6nua TINOB TECTa INCnOJIb3yEmbIX HacaOK ....74
IpepbBaHne pa6oTb c yCTPOiCTBOM. 75
3aBepenHe paobTbC ycTpOcTBOM
I CHRTHe Yaun DnA CMeuBAHNA 75
Peuentbl 75
Mycopy6ka. 76
3aMeuHnI IO NcNoJIb3OBAHnIO Mrcopy6Kn 76
PnoIroTobka 76
C60pKa Mrcopy6kn (cm. pnc. A) 76
C6opka hacadknIy kon6aock (cm. pnc. B). 76
C6opka hacadkn dIg Kneok (cm. pnc. C) 77
C6opka hacaikn IJIpeHb8 (cm.pnc.D).77
YctaHObKa cObaHHoro Koxyxa
YeBraHn nepea.. 77
Pa6ota c mrcopy6koi 77
3aBepseHne pa6oTbI. 77
OuicTka. 77
Kopnyc Dbratela 77
PnHaJnxKHOCTeTcOMeaJIKN Mscopy6kn.78
Xpanenie 78
PeueHne npo6Jem 78
Texnueckne daHbIe 78
OshaHΦopMaζη
Ipepa60ToC yctpOcTBOM BnMaTeNbHO IpOHTte pyKOBOCTBO IO 3KcIIpyatauIN, COxpaHnte erO BMecTe C rapaHTNHBIM TaHOHOM N, eCIN BO3MOXHO, C yNAKOBKOJ.
Pnpeaue yctpoiCTBa DpymIM Nuaam, PnpioKe Hemy pykoBODCTBO NO 3KcNlyaTaun.
- IcnoJb3yIte yCTpoIcTBo 6epeXHO n ToJIbKO nIa CEneBOrO Ha3HaueHnIy. YCTpoIcTBO He npeHa3HaueHo dIaKOMMepUeCKoRIO IcNOJb3OBAHnIy.
He nCnoJIb3yIte yCTpoIcTBO BHe IomeIeHnA.
3auiuaiTe erO OT Bo3eJcTBn Tenn, npMOro conHeuHoro CBeta, BnaXHoCTn (3aIpeuaeTcN porpykaTbB XnKocTb) N OCTpbIX ppeMetOB. He noIb3yIteCb yCTpoiCTBOM, ecIn y Bac BnAxxHbIe pyKn. EcIn yCTpoiCTBO NOBeprIOcb BO3eJcTBNIO XnKocTn, OTKIOUHTe erO OT CETn.
- UcTpoICTBO u shHyp nITaHnI cNe dyET peryIpaHIO npoBepaTb Ha hAnuHne IOBpeKdEHH. Pnp o6HapUkeHHIOBpeKdEHH, 3anpeuaetcB DaJIbHeHJEM NcIOnb3O-BaTb yCTpoICTBO.
-Повьупесь толбко opиннаньнIMnpинадпхноCTЯМ.
B cIeJx oecneueHna 63onacnoctn He octabnIte BOKpy ynaKOBouHbI MaTePnAJIbI (PiactNKOBble NaKeTbI, KapToH, nONCTnPoI N T.I.) ecN B NOMeEHe IMeHOT DOCTyn DeTn.

IPEDYIPPEXDEHNE:
He no3B0JnTe DeTm mPapb c non3tneHOBOI nEko. Onacnoctb ydyuenia!
CneuNbIe yka3aHnNo 6e3oNaChOCTn IJy 3TOrO yCTpoiCTBa
I P E D U N P E X K D E H N E: O n a c h o c t b n o j u y e h n a T p a B m b i!
- Пераць ameHOB BCNOMORATEBHBIX BpaUOUXCBA BpEma pa60tBI npncnocobleni n HacaDOK Heo6XoIMBO BbIKIQUaTb yCTPOIcTBO IN BbldeprnBaTb shHyp n3 p03eTKN.
3aPpeaaetc npKacatbca K IIObIM BpaauoumcyaCTaM. - Hox Mscopy6kn OueHb ocTpbI!
- Перед Включеним устpoиства убадитесь, чTO ппнадлж-HOCTN И насану установленьИ правильно И закpenленьИ.
Bcerda otknjuayte yctpoicTBO n3 cetn, KOrda C HIM HNKTO He pa6otaet, a TaKke nepeid hauanom pa36opKn, c6opKn uYnCTKn.
-ДетямЗапецаetсЯпьзOBaTbСяданнblIM yctpoIcTBOM.
XpaHnTe yCTpOiCTBO n ero shHyp B MeCTax, HeIOCTyINhBIX dIpy dete.
-Дети He Должны Играьс устpoиCTBOM. - YCTPOICTBO MOKET ICSIOJIb3OBaTbcra JIOIDbMI C NOHIXeHHbIMNΦIN3UeCKIMN, CEHCOPHBIMN IJN YMCTBEHHbIMN CNOCO6HOCTaMI NJI C HeIOCTaTKOM ONbITa N/IIIN 3HaHNI, B CJIyuae ecNI OHN HAXOJATcRA IOI PrNCMOTpOM IJN IPOJIN IHCTpyKTaXB OTHOJEHN 6e3OAnCHOI IOIIOJIb3OBaHnY UCTPOICTBa N IOHNMAIOT CBIAHHbIE C HNM ONaCHOCTN.
He nbitaTeCb camocToaTeIbHO OTPeMOHTnPOBaTb yCTpOcTBO. O6raTeJIbHO CBJNTecb C aBTOP3OBaHHbIM MaCTepOM. Pnp IOBpeXdHm CTeBOrO shHpa, BO n36exKaHne ONaCHOCTn IopaxeHn 3JeKtpnueckm Tokom, shHyp cIeDyET 3aMeHtB y N3ROTOBtEJI, cepBnCHOro pPeDCTaBtEJI nn Dpynx KbAIN-ΦnucropOBaHHbIX nIu.

BHUMAHNE:
3a npeuaetcnaorpykaTb yctpoiCTBO B BODy dIra OunCTKn. Ipocm BaC co6HpaTaB IHCTpyKcN, npNBedeHHbIe B pa3dJe «OuInCTKa».
He MaHnPyIpyTe BbIKJIouaTeJMaM6JOKnpoBKn.
- Данhoe устюгов Рпебначесу Толбко Дд Кригоровни
B36eIte CnBbK B aWe DnTcMeuBaHnC nOMoCbBOBeHnKa Do MaKcMmaJIbHorO yPoBnR, BblneTe IN N3 qaWn
ДЯ CMEUBAHIN NOCTaBBTe B INPOXHaDHOE MecTO. PacnabBe TOKOJADHyI rna3ypb pykoBODCTByrcb HNCTpyKUnei,JIb60 NOMEcTIne ee Ha 3 MNHyTbI B MKNpoBOJHOyIO neuHa MOUHOCTn 600 BT. Ioka rna3ypb 6ydet PnABITBCsR, B36eHTe B aWSe DnA CMEUBAHIN C NOMOuBo BEHUNKa Rua, caxap, BaHINbHbI caxap, KOhJaIK UIN pOM n COJB HA CKOpocTn 4 Do O6pa3OBAHIN neHbI. Do6aBbTe pacnabNeHHyI rna3ypb N TuaTeNbHO nepMeuAte Ha ckopocTn 4-5.OCTaBBTe HEMHOrO B36NTbIX CINBOK DnY kpaehn. OctabuineCnVBKn Do6aBbTe K nepemeuBaEMoM MaCCe N CMEaJIte BCE B IMTyJbCHOM pexHIME. YkpcBaTe WOKOJAdHbI KpeM B36NTbIMn CInBKMAM. PoDABaHTe K CTONY OxNaXKeHHbIM.
Mycopy6ka
3aemaynno nncnoB3oBaHnIO mrcopy6kn
I PDEyIPEJKEHNE:
Hoxmncopy6kn(18)ouehb octpbl!
BoBpemc6opknnOChTmMrcopy6KnOpaaaiTecb
C HOKOM C BHIMAHNEcTBIO. ONaCHOCTb noLyueHnra TpaMbbl!
HnKoIa He npOnyckaIteYepe3 Mscopy6ky TBepdbIe npedMeTbI, TaKHe KaK KcOtN INN cKOpny.
HapeKbTe Mco KybKaMn npImepHo no 2,5 cm. Y6eI-TEcb, yTO B MRC EOTCYTCTBYOT KOCTN CYXOXNJINJ.
-ДгpyбоурбкmaMcnoJb3yIteDnCKCamaBIMN 60JIbшIMNOTBepCTHAMN.
Ha BTOPOM 3TANE BBIBEPNTE DUNCK C MeHbIMM OTBepCTNAM NIN C OTBepCTNAM B CEHTpe. B 3aBNCIMOCTNOT TORO, KAK MEJKO BBI XOTITE HApy6ntb MRCO.
-Перед НаимО СлгКа СмжБе стчыТьЕ НадкINODCONHeHbIM MacIOM.
- Пи порусякани мяca черз мясCopy6ky, поставты кakую-linб EMKOCtB NOД BBIXODHbIM pactpy6om мясCopy6kn.
C nOMObHnacAnKn IaI Ke66e (23) MoKHOΦopMoBaTb Tpy6oKn N3 Mca Nn Tecta.
U3zomoeHue kon6acok
Bb mokeTe nCnOJIb3ObaTb HATypaJIbHyIO nn NCKycCTBeHHyIO 06JOnky.
- PnI nCIOJIb3OBAHm HAtypaJIbHOJ o6oIoUKN, 3AMOHTe ee B BoDE nepeD hauaIOM pa6oTbI.
3aBxKte y3eHa KOHcE 06oJouKn.
- Hadehe Te obolouky Ha haca kny dny konibacok.
3aonHnTe oboOky fapwem yepe3 cooTBeTcByIO- yuHaCaNky.
- Y6eIITcB, yTO fapw 3aONJIHReT o6oJouKy He nIOtHO, NocKoJIbky npn pnproTOBnEHN KOn6acOK OH yBeINHTcR B O6beme mOKeT pa3OpBaTb O6oJouKy.
- Ecnn nepBaKoIbacaDocTnIa Tpe6yEmoN dInHbl, coXMMTe ee naIbCuMaHa KOHcE HacdKn.
3akpynte kol6acky Bokpyr CboeN OCN NIN Dbap3a.
- POKa BbI He noJyHnI ONpeJeHHbI HABbIK npiroTOBHeHnI, Bbl MOKeTe BbIKIOuAtb yCTpOcTBO nocKeKaxdOro HAnONHeHnI KOJIbAcOK Tpe6yEmOI dINHbI.
ΦopMOBa nHeHbA
- PódrtoBbTe NOBepxHocTb, Ha KOTopyo 6yndeTe BbIKnAdbBaTb NeeHbe.
C NOMOuBHO HacaDN paa3pe3aHnnepeHb (25) BblMOXeTe roTOBHT neHbe paHOB fOpMbI. - Посné установки насанд пиротовсян лесень (24) на Корпсшега, на Двиньтей на лесни разразаши лесень.
- BbIbepnteKeJaaemyoΦopMy neeHbЯ.
-ПодерхиBaHTe 3aROTOBkyИЗ TeCTa Ha BbIXOde pyKoI n Hape3aHTe NeeHbe HyKHOДПИнbl.
IpoROTOBka
Cm. o6uIy uHcOpMaUIO Ha cTpaHnCe 3 n4.
- C6epeTe yauDnI CMeunBaHnI 6e3 Hacadok
2.ДocTyK KOKxHy YeRbYHNo NpepaHn 3aKpbIT KpbIiKoI (1)ycTpoNCTBa.To6bl CHrTb KpbIiKy,OCToPOXHOpeBnHbTe ee BBepx n 3aTEM NOHMNTe. - Chauana yctahOBnTe YepBryHyu nepeaHy u 3Be3-DoOyKy B ropn3oHTaIbHyU cekuHIO Koxyxa YepBraHOn NepeaHy.
C6opka akceccyapOB onncaHa B NOcneDyUOuX CekxJX. IIOrTOBbTe MRCopy6ky B COOTBETCTBn CO CBOIMN HxkdaMn.
C6opka mrcopy6kn (cm.pnc.A)
I PIMMEUHNA:
B 3aBnCmOCTN OT TORO, KAK MEJIKO DOJXHa Hape3aTb MRCOPY6ka, BbIbepNTe MeHbUyIO JIN BoJIbUyO peWetky MRCOPY6kn.
Clerka cmaxbTe nokpbTne peWetKm MRCopy6Kn NOcONHeHbIM MacnOM.
BbINOHNHe WARM, ONICAHHbE BpaaJeIe IIOgROtOBKa).
- HacaIte HoK (18) Ha BaI ueBraHoi nepeJaH, octpoi CTopoHOH HApKy.
- YctaHOBtpepeWeyMRCopy6Kn (19).TTo6bI cDenatb 3TO,NCIOJIb3yIte yrrny6NeHnA.
Bolee noipobHyu HΦopMauno MoKHO HaTn B pa3deJe
Onachocthb nonyuene TpaMbbl
- PnB KJIIOHEn HN yCTPOINCTBa BAN DBNrAteTn TcTeOMeaJIK NauHaeT Bpaatbsc. He npKacaiTeCb K BpaaIooemyc npNBOHDomy Bany BO Bpem pa60tbl!
-Дя obecneueHЯ 6e3oNaChocTи BcERda yCTaHaBnBaIte Yauy DnA CMEuINBaHn.
Bcerda noIb3yItecb ToKaTeIeM n3 KOMnKeT aNoCTabKn. Hn B Koem npotaiknBaIte npOdykTbIB roPNOHy naIbCuAm!
PpHaJnEJXHOCT TeCTOMEaIK N Mscopy6Kn

BHIMAHNE:
PnHaJNeXHocTn HeIb3aMbITb B NocydomooeHoi MaunHe. POn DeNCTBnEM BbICOKO TeMnepaTypbI INn CnIbHOeCTByUOxN XnCTAUX CpeDCTB OHN MOrTy DeOpMnPoBaTbCnIN ObecuBetNTbcR.
- Yactn yctpoCTBa, cOpnkacabIuece C nIuIeBbIMn npOdyKTAMN, MOXHO OUnIaTb B MblbHOI BOJe.
JaTe npHaIeXHOCCTM NOJIHOCTbIO BbICOXHyTb NpeD TEM, KAK co6upaTb yCTpoiCTBO.
XpaHeHne
OuHCTHTe yCTPOIcTBBO CootBcTCTBm C HCTpyKlmaM. TaTe npHaJnEeXHOCTaM NOJIHOCTbIO BbICOXHyTb.
- EcIN Bbl XOTNTe PNOPTNB CPOK Cnyk6bI yCTpoNCTBa, peKOMEHdyETcXpaHnTbeeroBOpuHaJIbHOyNAKOBe.
Bcerda xpaHnTe yctpoCTBO B HeIOCTynHom IaI dTei, XopoIo npoBeTpnaeMOM n CyXOM MeTe.
PeueHne npo6Jem
aai aaoaog aoiao aiaduo


olalb1g ojall yts cos. jlbll allk j 2000
- g
.
j
Lolc
-1
.
10 100
[ \Leftrightarrow \frac{1 + u}{x} > \frac{\ln x}{x + u}]
| الله叨 | الله叨 | الله叨 |
| الله叨 بعسَبُمِه الحَلْدِه مَنَهُ وَهُ وَهُ وَهُ وَهُ وَهُ وَهُ وَهُ وَهُ وَهُ وَهُ وَهُ وَهُ وَهُ وَهُ وَهُ وَهُ وَهُ وَهُ وَهُ وَهُ وَهُ وَهُ وَهُ وَهُ وَهُ和其他 | الله叨 بعسَبُمِه الحَلْدِه مَنَهُ وَهُ وَهُ和其他 | الله叨 bعسَبُمِه الحَلْdِه مَ�َرْدِه和其他 |
| (3) بعسَبُمِه和其他 | (4) بعسَبُمِه和其他 | (5) bengbargh bengbargh bengbargh bengbargh bengbargh bengbargh bengbargh bengbargh bengbargh bengbargh bengbargh bengbargh bengbargh bengbargh bengbargh bengbargh bengbargh bengbargh bengbargh bengbargh bengbarg |
| (5) bengbargh bengbargh bengbargh bengbargh bengbargh bengbargh bengbargh bengbargh bengbargh bengbargh bengbargh bengbargh bengbargh bengbargh bengbargh bengbargh bengbargh bengbargh bengbargh | (6) bengbargh bengbargh bengbargh bengbargh bengbargh bengbargh bengbargh bengbargh bengbargh bengbargh bengbargh bengbargh bengbargh bengbargh bengbargh bengbargh bengbargh bengbargh bengbargh bengb | (7) bengbargh bengbargh bengbargh bengbargh bengbargh bengbargh bengb |
| (8) bengbargh bengbargh bengbargh bengbargh bengbargh bengb | (9) bengbargh bengbargh bengb | (10) bengbargh bengbargh bengb |
aJU
PC-KM 1151
j60-50.52 j 240-220
1300
I.
yj0s6,2. (jaoa bai aie gao yol jaj) 3al jgj
i 1
aalglg jia aalal CCEe lla jgao
doXwI gJgDg dAaig jaii aai biaag

.(14) gall 1s1 p1n1u w uall gall qally jj11.12


jw3y jai aoi jao piau wiy jayll jayi y: 0a o
10 10 10
JouSJJou

1
aalwla
paaldojoeoljgaooLs
"abii" pws 3 pioo goa loa oouabi jglal oji abi .4
(1) 即为 y = g( x) = a
"154511111111111111
gao lallgjaglgljgljwglg 18)Sswll4
- g( x) = ( 1 + ax) - ( 1 - ax) - 2ax .
wglb wll cua yj" pdd jdoaalil jdo jdo g gell clg
1
(BJai) jilu ly aolal aolul 0y
"1sll" 1gic ggl ggl glg
pall 1gagal gagll gagll (21) gagll (sga Cg) .4
.
aayaaal yaaal yaaal (22)laal aal al aal 5
U
glll gll lssy s" gdd jdo laaill jdo jdo geall cls
1
(CJb) 2a100000000000000000000000000000

gall gall Lsall aal alal all
"11111111111111111111
yol 100gge (23) jjajal g aai jaoa Jaoa .4
aai pall ciaagll paai
gilllll 1sogilllll Lds gdo Ildgillall aed
gucu 1
alwJ 1gjll jglqll jklk jckj j
qla
BAC = 13
.03
aLIO 150
gllab1 cloSII gaii jji
gjgl jglg lgl gla glaal gla aasll gbl gS
1
A3iiaai 1
jg9,0g2.5s. 500.1u 4.1u
8/1
S OBC = S COD + S_ BOC
a 1000000000000000000000000000000000000000000000000000000000000000000000000000
L
- 一 一 一 一 一 一 一 一 一 一 一 一 一 一 一 一 一 二 二 二 二 二 二 二 二 二 二 二 二 二 二 二 二 二
C200-175 aadaggl dalld jalll d: yjy
3-2 a:jjj
60-50:
j0 p100 pluusdu. Jtll uau yle cagis aagol oii jz j
aUdSgdu dUu 10g 10g 45ySgall g,1uRb
3-1 ggjJg j
:
00001 8/3 j50 550-500
100.(1>40)
oloo 2.
| x - 1| = | x + 3| = | x - 4|
(14/1)aall 100 aaiyaiyaiyaiyaiyaiyaiyaiyaiyaiyaiyaiyaiyaiyaiyaiyaiyaiyaiyaiyaiyaiyaiyaiyaiyaiyaiyaiyaiyaiyaiyaiyaiyaiyaiyaiyaiyaiyaiyaiyaiyaiyaiyaiyaiyaiyaiyaiyaiyaiyai
3Jd aRn 1 d aRn 1 J aRn J aRn J aRn J aRn J aRn J aRn J aRn J aRn J aRn J aRn J aRn J aRn J aRn J aRn J aRn J aRn J aRn J aRn J aRn J aRn J aRn J aRn J aRn J aRn J aRn J aRr J aRn J aRn J aRn J aRn J aRn J aRn J aRn J aRn J aRn J aRn J aRn J aRn J aRn J aRn J aRn J aRn J aRn J aRn J aRn J aRn J aRn J aRn J aRn J aRn J aR n J aRn J aRn J aRn J aRn J aRn J aRn J aRn J aRn J aRn J aRn J aRn J aRn J aRn J aRn J aRn J aRn J aRn J aRn J aRn J aRn J aRn J aRn J aRn J aRn J aR.
jolal g o jll jolal jolal g jolal a a jolal 16
julal 100g jull 111111111111111111111111111
J
2:JuaaUcUeLai
C220-200a1gagglal 4yj:jjll
3-2deJusyjIeJI(jIa56u
40-30:
5-4gjwbl
4y5g5gawgog
BAC = 1
60-50,3.2j 150glo 200
4ySg jg jgl g 0s S aed. Suu
| x,y| = 1
e gllglljy p a cclw q aaa o plall lalllc g 2gSall
joojj 1
jaoaai 1slo Juaagg sji
Cg 13 g jg jg d g a a b c d e f g h i j k l m n o p q r s t
.1u
(6) jj j j j j j j j j j j j j j j j j j j j j j j j j j j j j j j j j j j j j
(9)aallbge 3ySjpo jlll gai
jglgljg jglgljg jglgljg jglgljg
aolj 1
15 3
100000000000000000000
gag g yjil 5y jy
Jd 1
olal alalw jolal s
y
000000000000000000000000000000000000000000
在 Rt ABD 中:
. b( 1 + u) 1 + ·s + 1 + u = 1 + u
:abdo
3 10g3g3g3gbl5g2y,clalall aay jaoj
ailll allo 3blal aai ll s
jglzjj
-
aBlll aagc
glbb1 as snll s
15 1525 a 153
OFF gai jie jiaai uuiuui 10 a6
Pgsslll aLwBjra ool jssaalb jaaal bllu
.3jzg 3jzg jygl 1jzg jzgl jzgl
0.01 = 0.01 × 100%
aelllll 0eolw wse aod gdoj lal jae balei ago yg iy
1y
1ayloy1 jbs: yjdo
OFF 200015 de jai bui
aaiab1 bla6b1 aioi d aoyyby j4jpluowly ao
.
J 1
4
"ddjjll" Jd ddoob1 cdoaolg 11 1 1
.
·s · pel 即
.
aaiy jiaoyjiaoy jiaiy jiaoy aayaa jiaoy jiaoy
aJgJgLa nge gdo gau Jauo aJy
logalglgailldgalljoll
Ug2b1
- 84
84
83
83
83
82 34
82
82
82
82
82
82 - 以 3t( t为直不等式)
- 82
81
jlll l 10000000000000000000000000000
!4y1y1j:
.45joo 1j
·s + 10 + 10 + 10 + 10 + 10 + 10 + 10 + 10 + 10 + 10 + 10 + 10 + 10 + 10 + 10 + 10 + 10 + 10 + 10 + 10 + 10( 1 - x)
.0
g1.45.5a2g
AD = BD = 25
.
.

GARANTIEKARTE
warranty card · garantiekaart · carte de garantie · scheda di garanzia · tarjeta de garantia · cartao de garantia · garantikort · karta gwarancyjna · zaručni list · karta jamstva · carte de garantie · Γαραιυούνηλ καρτα · zaručný list · garancijski list · garanciajegy · rapaṭιŋΗΜΦΟμγλρ · ΓαραιΤΗΝΤΑΝΟ
jiao
PC-KM 1151
24 Monate Garantie gemäß Garantiererklarung - 24 months warranty according to warranty declaration - 24 maanden garantie volgens garantieverklaring - 24 mois de garantie selon la déclaration de garantie - 24 mesi de garanzia seconde la dichiarazione di garanzia - 24 meses de garantia de acuero con la déclaracion de garantia - 24 manedes garantiet hienholdtigarantibeteingensle-24 misiesc gwarancjna podastowedowadczcnia gwarancjnego-zaruka 24 meseicu podle prohlasei o zaruce - 24 meseecno jamstvo u skladu s jarnstvenom deklaracionj-24 luni garantie conform declaratie de garantie- 24 meeca rapanu a cbotetcbrn c rapaunonhata deknapaun - 24 meacna zaruka podla vhylasenia o zaruke - 24-mesecnagarcjna, skladno z garancjsko izjavo - 24 honap garacia a garanciafeletetelekben leirtak szerint - rapaHTI Ha 24 Mcaqii BIDNOIBHO npo rapaHTIO - rapaHTN 24 mecaa cornaco saBNEHBM rapaHTNHIM ppaRbAM -
Kaufdatum, Handlsterpmel. Unterschied - date of purchase, dealer stamp, signature - aankoepodiumat, dealsterpmel, handlfeckung - date d'achat, tampon du concessionaire, signature - date di acquisto, limbo del rivendatore, firma - fecha de compra, seilo del distribuidor, firma - data de compra, carimbo di distribuidor, assinatuna - kiposato, forhandsterpmel, signatur - data zakupu, pieczed sporadawy, podisp - datum zakuspeni, nadklo pejeodje, podisp - datum kupovine, big trovica, podisp - data ochilichne, stampla furnizorului, semnatura - Data na knokyika, T\v\v\n\n
PROFI COOK
www.proficook-germany.de