WIZ400 - Steam cleaner H.KOENIG - Free user manual and instructions
Find the device manual for free WIZ400 H.KOENIG in PDF.

| Type de produit | Window steam cleaner |
| Marque | H.Koenig |
| Modèle | WIZ400 |
| Usage | Household |
| Alimentation | Grounded wall outlet (220-240 V ~50/60 Hz) |
| Capacité du réservoir | 320 ml (max), recommended filling 250 ml |
| Temps de chauffe | Approximately 20 to 30 seconds |
| Température de vapeur | Up to 135°C |
| Fonctions principales | Disinfection and sterilization, window cleaning, BBQ/grill cleaning |
| Accessoires fournis | Measuring cup, brush, steam nozzle, large squeegee, small squeegee |
| Sécurité | Automatic shut-off when tank is empty, high-sensitivity thermostat, double cable insulation, grounded plug |
| Entretien | Empty the tank after use, clean the exterior with a dry cloth |
| Réparabilité | Power cord replaceable by an authorized after-sales service |
| Informations générales | Do not immerse the appliance, household use only, keep out of reach of children |
Frequently Asked Questions - WIZ400 H.KOENIG
User questions about WIZ400 H.KOENIG
0 question about this device. Answer the ones you know or ask your own.
Ask a new question about this device
Download the instructions for your Steam cleaner in PDF format for free! Find your manual WIZ400 - H.KOENIG and take your electronic device back in hand. On this page are published all the documents necessary for the use of your device. WIZ400 by H.KOENIG.
USER MANUAL WIZ400 H.KOENIG
natural_image
Yellow and black electric shaver with handle and control buttons (no visible text or symbols)WIZ400
Product Characteristics
■ Technically leading
With exclusive patented technology, high-temperature and high pressure steam is used for clearing away the dirt and stains all kinds of glass, such as window, mirror and etc. The machine also can be used for killing bacteria on surfaces, and removing dusts and bacteria, and it is an environment-friendly and sanitary product. Automatic control of heating, able to generate steam continuously and continuous cleaning is easy.
With pure high-pressure water steam used, no chemical agents are added, completely environment-friendly.
■ Higher Safety
Designed to prevent heating empty boiler. After the water in the boiler tank is heated and evaporated completely, the machine will automatically disconnect the power supply and thus prevent empty heating.
With high-sensitivity thermostat, 135^ C high-temperature steam is available, ensuring disinfection and sterilization.
Supplied with 3-pin power plug with earthing wire, so that the tank and heating disc can be grounded, in order to ensure safety in operation.
Extended power cord with double insulation, can effectively insulate the cable from water and dust, and ensure safety.
■ Energy-saving
With design of transparent ABS water tank, and pump the water to heating board, to produce steam, high heating efficiency and energy-saving.
■Easy to use
Switch on power supply, and the machine immediately starts heating process. When it heats to 30 seconds, press the steam button, and steam will be sprayed out slowly. So the machine is easy to operate.
With complete cleaning accessories supplied, the machine can be assembled and disassembled easily. It can be used to cleaning all kind of flat surface.
CAUTION
-
This device is not intended for use by persons with reduced capacity on the physical, mental or sensory or lack of experience and knowledge (including children), unless he has them was asked to monitor or if they have had instructions on the use of the appliance by a person responsible for their safety. Children should be supervised to ensure they do not play with the device.
-
If the power cord is damaged, it must be replaced with an after-sales service to avoid any danger.
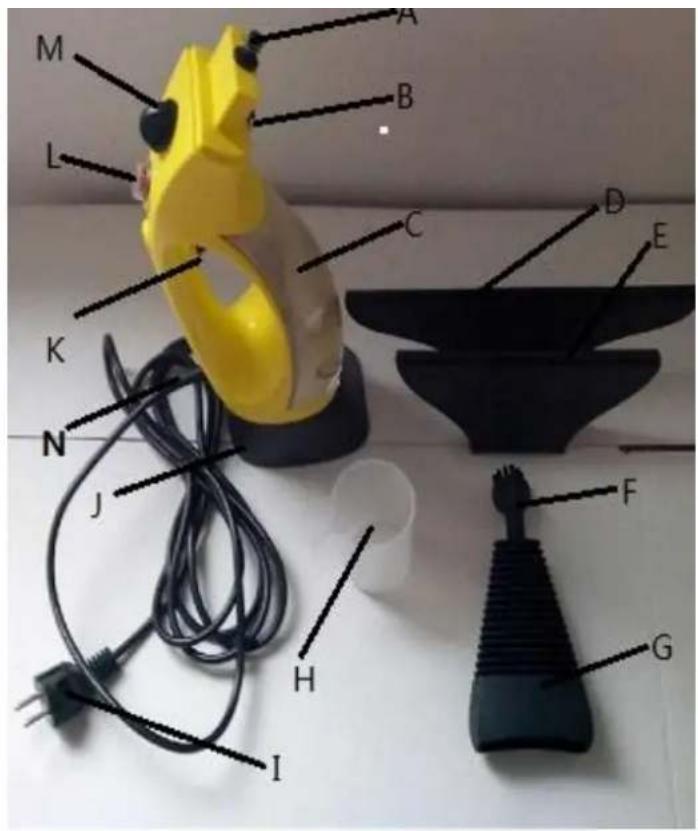
Description of Structuring Parts
A. Steam outlet
B. Access fixing buckle
C. Ultrasonic water tank
D. Big glass nozzle
E. Small glass nozzle
F. Steam brush
G. Straight nozzle
H. Measuring cup
I. Power cord
J. housing decoration cover
K. Steam button
L. Power button
M. Water injection hole
N. Cable bushing
Safety Precautions:

Children should be supervised to ensure that they do not play with the
appliance.

This icon represents "Prohibition".

This icon represents "Warning"
- Do not allow children to use this machine independently or little children to be too near to this machine when no adults attend to them.
The appliance is not intended for use by person (including children) with reduced physical, sensory or mental capabilities, or lack of experience and knowledge, unless they have been given supervision or instruction concerning use of the appliance by a person responsible for their safety.

- To prevent electrical shock, do not immerse power cord or power plug in water or

other liquids.
- The power cord and power plug should be in good condition and must not be damaged. Damaged or defective power cord and power plug must not be used

and should be repaired at appointed service center.
4. This product is for only use in households and must not be used for industrial applications.  |
5. Do not turn on power supply until the tank is full of water.  |
6. Used power supply should comply with the product requirements of the manufacturer.  |
7. During operation, the tank mouth must be plugged hermetically and safety cap should be tightened in position.  |
8. A socket with special earthing wire must be used.  |
Preparations Before Use
Unpack the product
◆ Open the packing box
◆ Read the User Manual carefully and keep it in good condition
◆ Check the accessories and documents supplied with the machine
Accessories supplied with the machine
| Name | Measuring cup | Steam brush | Straight nozzle | Big glass nozzle | Small glass nozzle |
| Q'ty | 1 | 1 | 1 | 1 | 1 |
Functions
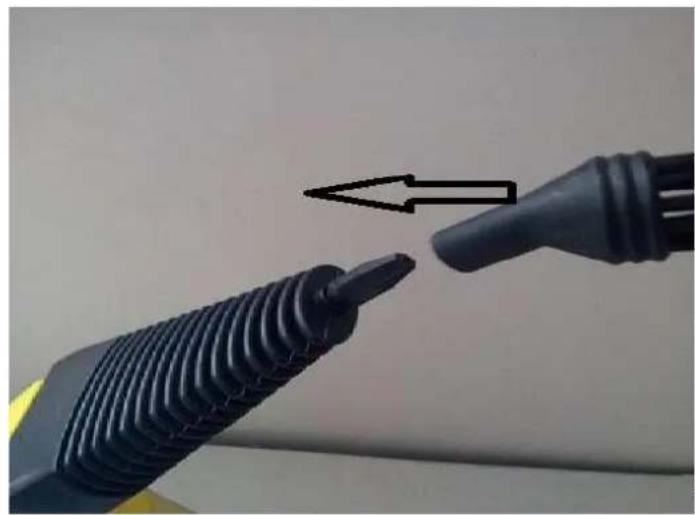
■ Disinfection and sterilization
Install the straight spray nozzle on the steam outlet, and aim the spray nozzle at the position that needs disinfection, until the click sound. Press down the steam button. High-temperature steam can kill bacteria. See pic.1.
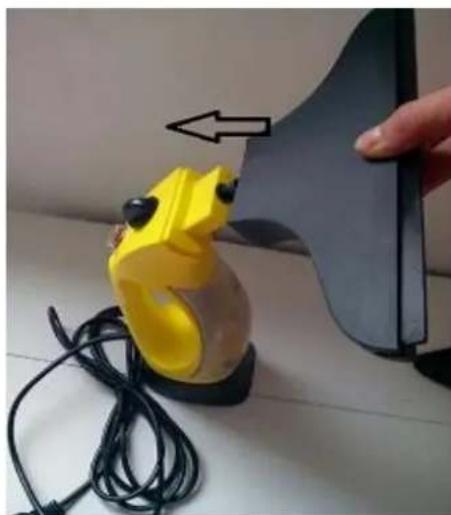
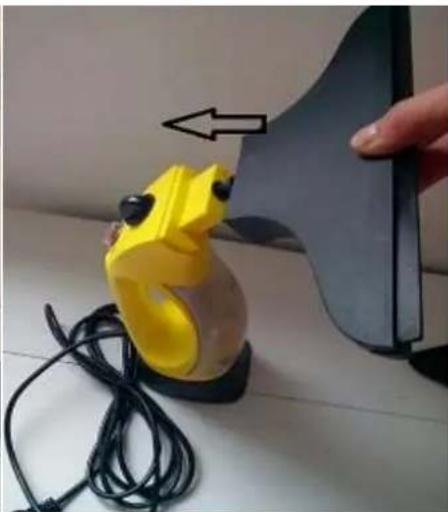
- Cleaning the glass
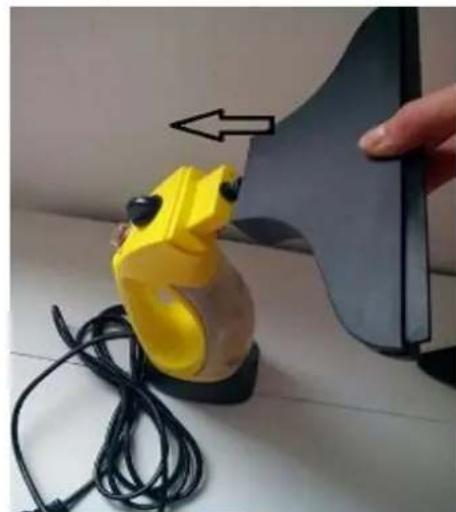
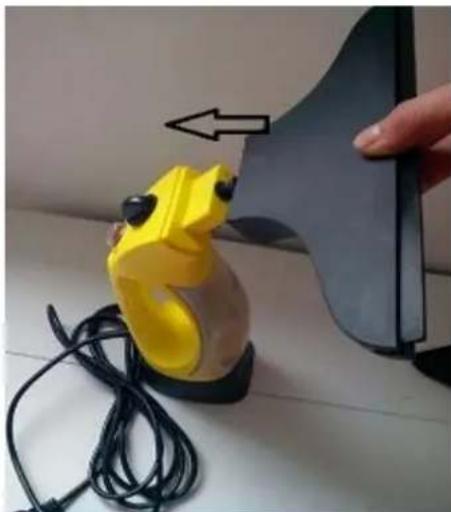
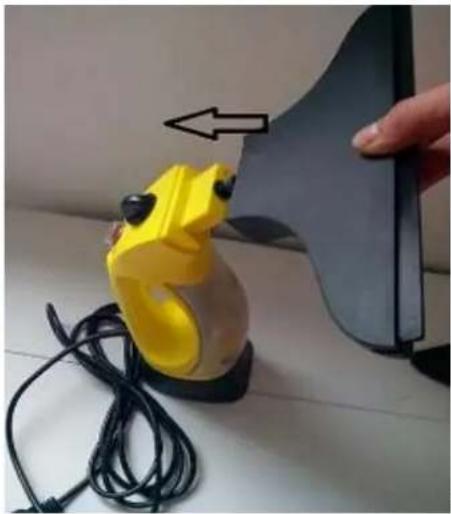
Install the big/small glass nozzle to the steam outlet, and aim at right position, press down and until sound click. Aim the nozzle at the glass, and press down the steam button and move it from top to bottom. Then stains and dist can be removed from the glass. See Pic.2.
■Cleaning the BBQ
Add the steam brush to the straight nozzle, and put on the steam outlet. Press down the steam button, can be used for the BBQ. See pic.3.
natural_image
Hand using a black 3D tool to cut a yellow rubber pad component with wires nearby (no text or symbols visible)Pic.1

natural_image
Yellow robotic device with black cable and head-mounted sensor, being handled by a hand holding a black plastic sheet (no text or symbols visible)Pic.2
natural_image
Close-up of two black plastic electrical probes with a double-headed arrow pointing to one (no text or symbols visible)Pic.3
Operating Instructions
Operation Procedures
-
Unpack the product, check the accessories and documents supplied with the product and make sure that the product and accessories are not damaged.
-
Before use, please read the User Manual carefully. The window cleaner is only for use in households.
-
First, place the window cleaner on a level platform.
-
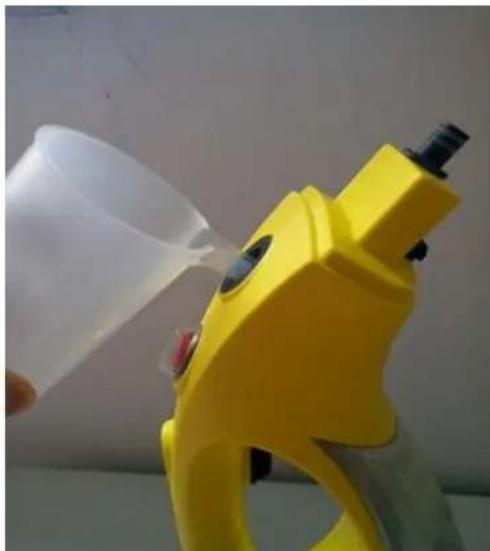
Open the water injection hole cover anticlockwise, take 250ml clean water with measuring cup, and add the water into the tank. (Max. capacity of the tank is 320ml. Do not overfill the tank and some space must be left in the tank). Insert the hole cover at right place, and clockwise until stop. Pic. 1.
-
Check the power supply and socket, and confirm they comply with the requirements given in the User Manual. Then turn on the on/off power supply, Pic.2.
-
About 20 seconds after power supply is turned on, steam is ready. At this time lightly press the steam button and check whether steam is sprayed out of the nozzle. (Do not aim the spray nozzle at other persons or objects). Pic. 2.
-
If there is steam sprayed out, please install suitable accessories according to your needs after you release the button.
-
Press down the steam button again in order to carry out the operations required by you.
natural_image
Yellow spray gun with plastic spray bottle, no visible text or symbolsPic. 1
Pic. 2
Installation of Accessories
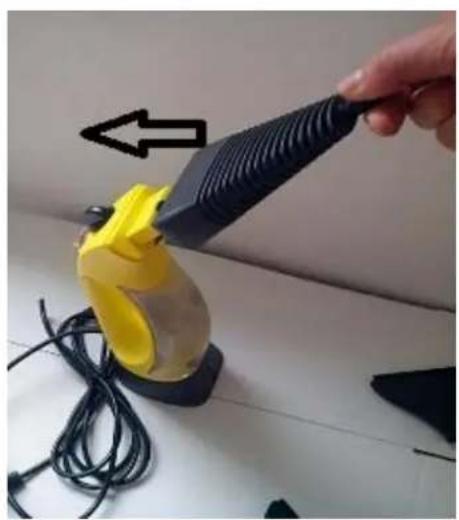
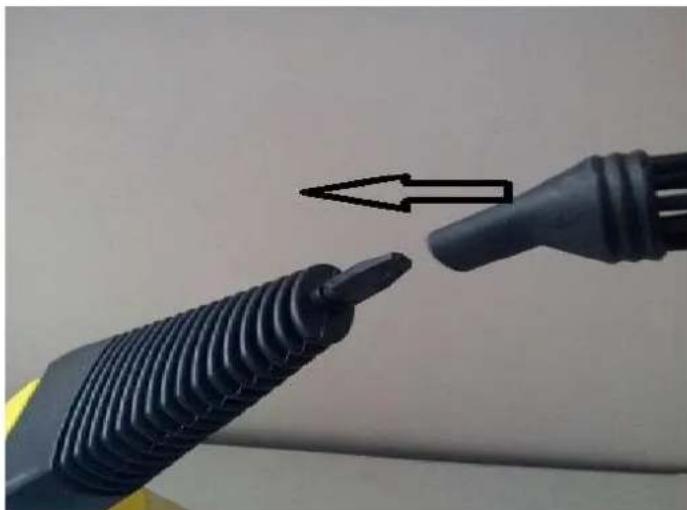
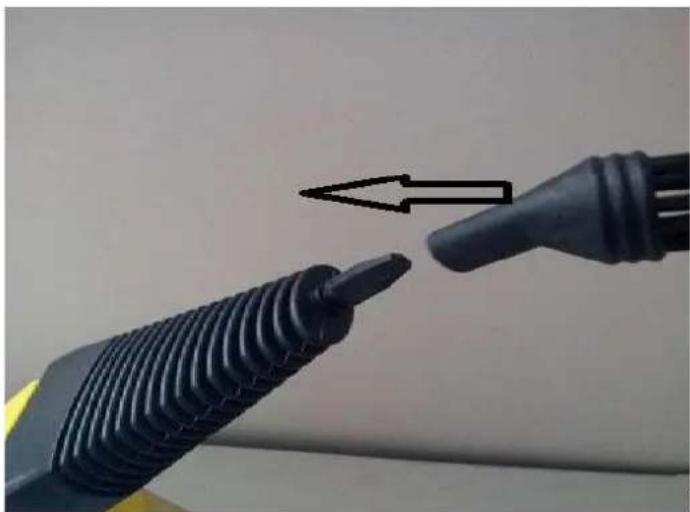
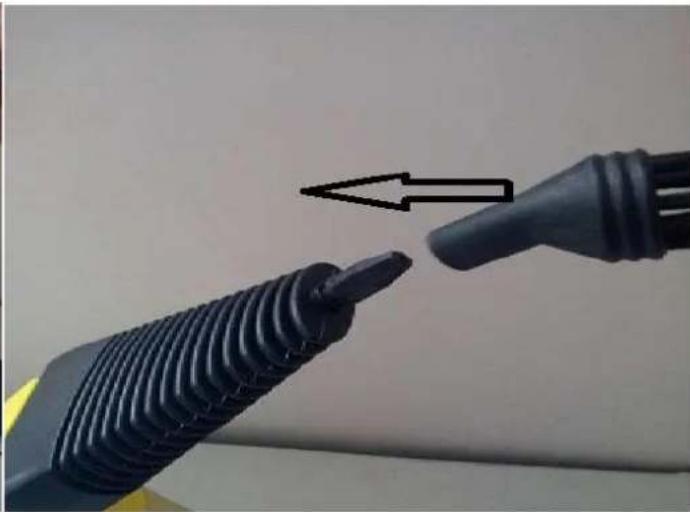
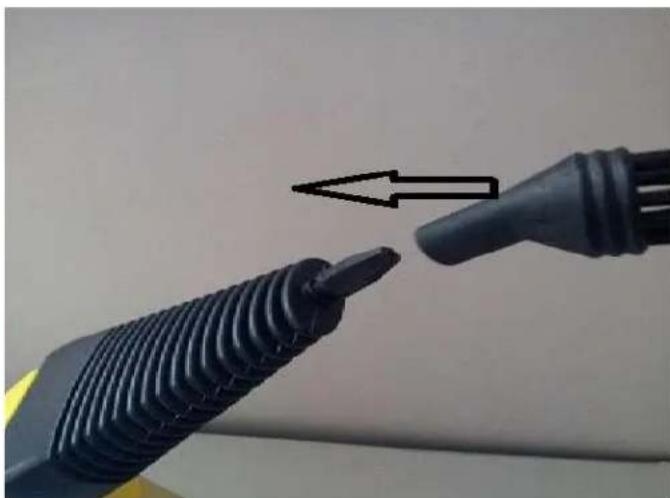
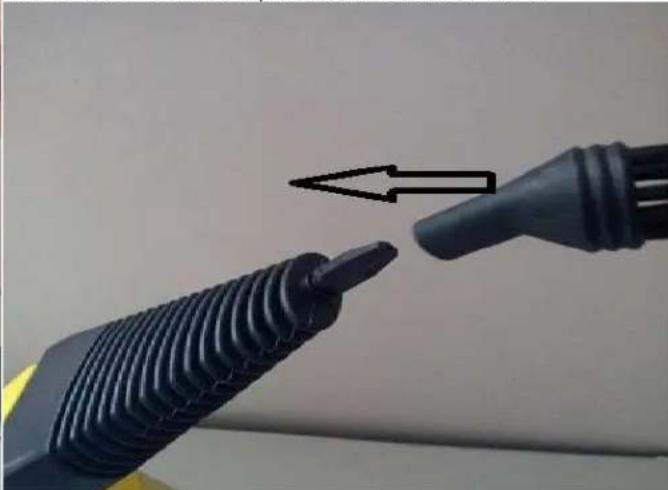
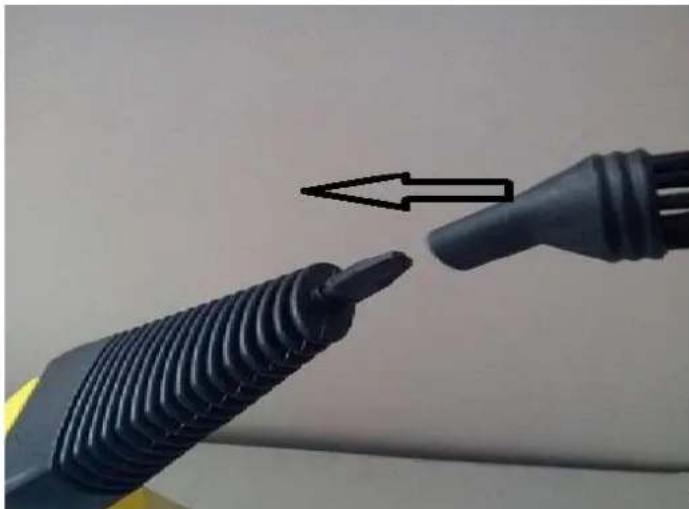
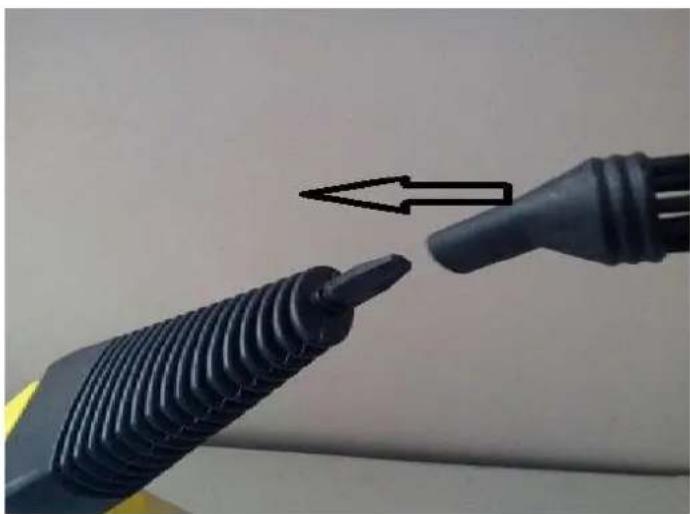
- Install the straight steam nozzle
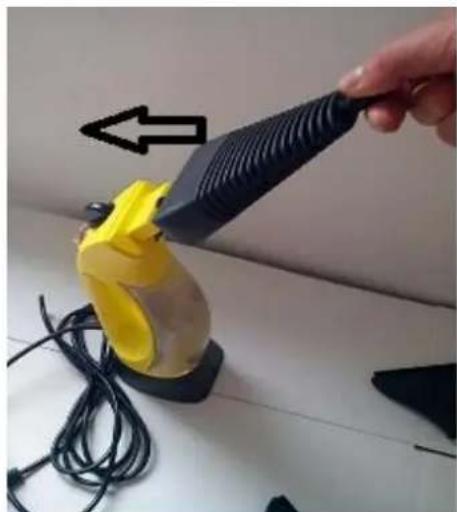
Hold the pipe section of the straight steam nozzle in your hand, make sure the line with hole at bottom, and click it into the steam outlet. If need to use the steam brush, put the steam brush to the straight nozzle.
See the pic. 3 and Pic.4.
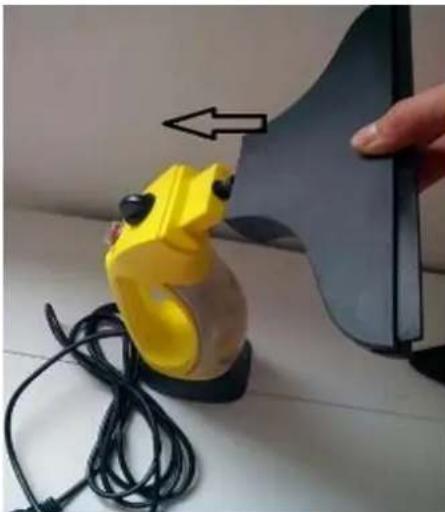
- Install the big/small glass nozzle to the steam outlet. See the pic. 5.
natural_image
Hand using a 3D-printed tool to lift a yellow rubber duck toy, with black cables and a white object nearby (no text or symbols visible)Pic.3
natural_image
Close-up of two black plastic test probes with a double-headed arrow pointing to one (no text or symbols visible)Pic.4
natural_image
Hand holding a yellow 3D-printed object next to a black plastic sheet, with wires and a hand pointing at it (no text or symbols visible)Pic.5
Refill water during operation
- No need to plug out when adding the water.
- Turn the water injection hole cover anticlockwise.
- Use the measuring cup to refill a suitable quantity of cold or hot water into the tank.
- Re-install the water injection hole cover clockwise.
After the machine is used
-
After the cleaning machine is used, unplug the power cord and disconnect the power supply.
-
Turn the water injection hole cover anticlockwise, and turn it down.
-
Empty the residual water in the tank and clean the external surface with a piece of dry cloth.
-
At last, re-install the water injection hole cover on the machine body and tighten it in position.
ENVIRONMENT
CAUTION :
Do not dispose of this product as it has with other household products. There is a separation of this waste product into communities, you will need to inform your local authorities about the places where you can return this product. In fact, electrical and electronic products contain hazardous substances that have harmful effects on the environment or human health and should be recycled. The symbol here indicates that electrical and electronic equipment should be chosen carefully, a wheeled waste container is marked with a cross.
Manufactured and imported : Adeva SAS 8 rue Marc Seguin 77290 Mitry-Mory FRANCE
www.hkoenig.com - contact@hkoenig.com - Tel 01 64 67 00 01
FRANÇAIS
natural_image
Hand using a black spray gun to clean a yellow spray bottle with black cables nearby (no text or symbols visible)Image.1
natural_image
Yellow robotic device with black connectors next to a black plastic sheet, being handled by a hand (no text or symbols visible)Image.2
natural_image
Close-up of two black electrical probes with a coiled cable, one pointing at a wire (no text or symbols visible)Image.3
natural_image
Yellow spray gun with plastic spray bottle, no visible text or symbolsImage. 1
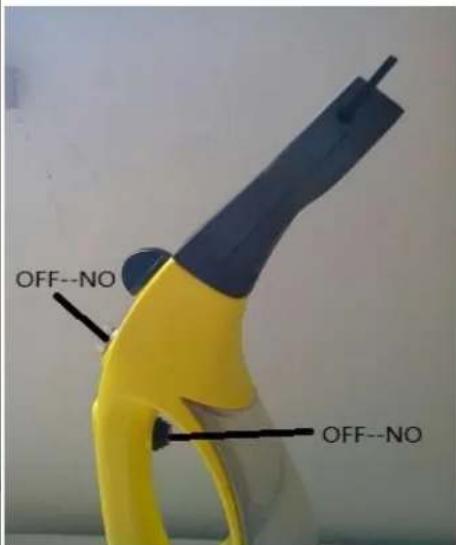
Image. 2
Installation des Accessoires
natural_image
Hand using a black 3D-printed tool to lift a yellow rubber duck toy, with wires and an arrow indicating direction (no text or symbols on the object itself)Image.3
natural_image
Close-up of two black plastic electrical connectors with a pointing arrow indicating direction (no text or symbols visible)Image.4

natural_image
Hand holding a yellow cartoon frog-shaped device next to a black cable and a blue screen, with an arrow pointing to the device (no text or symbols visible)Image.5
natural_image
Hand using a black-handled tool to lift a yellow rubber or rubber device with wires, no visible text or symbols.Bild 1

natural_image
Yellow toy car with black cable being placed next to a black plastic panel, no visible text or symbolsBild 2
natural_image
Close-up of a black threaded connector with an arrow pointing to it, no visible text or symbolsBild 3
Inbetriebnahme
Vorgehensweise
natural_image
Yellow spray gun with plastic spraying water, no visible text or symbolsBild 1
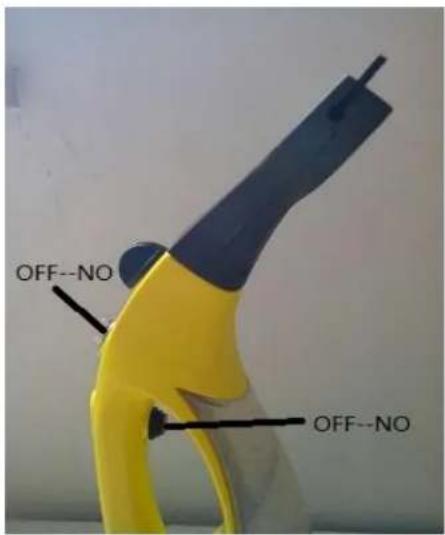
Bild 2
natural_image
Hand using a black 3D brush to apply material to a yellow cartoon character on a white surface, with wires and a wall-mounted device nearby (no text or symbols visible)Bild 3
natural_image
Close-up of two black plastic electrical probes with a directional arrow pointing to one (no text or symbols visible)Bild 4

natural_image
Hand holding a yellow plastic object next to a black cable and a flat panel, with an arrow pointing to the component (no text or symbols visible)Bild 5
natural_image
Hand using a 3D printer to clean yellow spray bottle, with cable and wire nearby (no text or symbols visible)Afb.1

natural_image
Yellow robotic dog-shaped object with black eyes being placed next to a black plastic sheet, with a hand adjusting the object (no text or symbols visible)Afb.2
natural_image
Close-up of a black threaded connector with an arrow pointing to it, no text or symbols visibleAfb.3
Gebruiksaanwijzing
Gebruiksprocedure
natural_image
Yellow spray gun with plastic spray bottle being poured into it (no text or symbols visible)Afb. 1

Afb. 2
natural_image
Hand using a black-handled tool to lift a yellow rubber or rubber device with coiled wires (no text or symbols visible)Afb.3

natural_image
Close-up of two black plastic test probes with a directional arrow indicating motion (no text or symbols)Afb.4
natural_image
Hand holding a yellow 3D-printed object next to a black cable and a blue panel, with an arrow pointing to the top section (no text or symbols visible)Afb.5
natural_image
Hand using a 3D-printed tool to lift a yellow rubber hose, with wires and a black base nearby (no text or symbols visible)Fig.1
natural_image
Yellow sculptural object resembling a frog next to a black cable and a blue screen, being held by a hand (no text or symbols visible)Fig.2

natural_image
Close-up of two black plastic electrical connectors with a directional arrow indicating movement (no text or symbols)Fig.3
natural_image
Yellow spray gun with plastic cup pouring liquid, no visible text or symbolsFig. 1
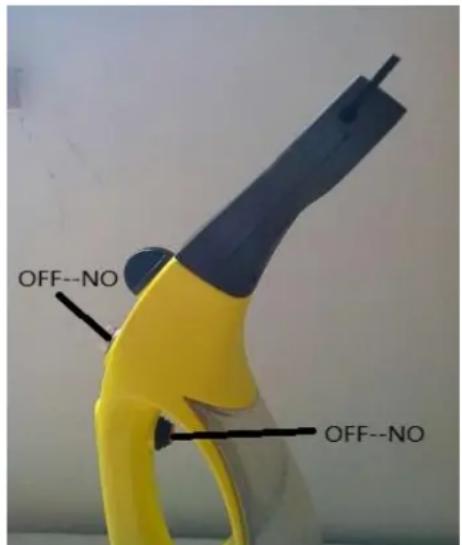
Fig. 2
natural_image
Hand using a 3D-printed spray gun to clean yellow rubber product, with black cables and a white base (no text or symbols visible)Fig.3

natural_image
Close-up of two black plastic electrical connectors with a directional arrow indicating movement (no text or symbols)Fig.4

natural_image
Yellow robotic device with black cable and a hand holding a blue rectangular object, no visible text or symbolsFig.5
natural_image
Hand using a black 3D brush to apply a yellow spray bottle onto a white surface, with wires and a directional arrow (no text or symbols visible)Fig.1
natural_image
Yellow frog-shaped object with black eyes connected to a black cable, next to a hand holding a blue card (no text or symbols visible)Fig.2

natural_image
Close-up of two black plastic connectors with threaded leads, one pointing at a tip and the other with an arrow indicating direction (no text or symbols)Fig.3
natural_image
Yellow spray gun with plastic spray bottle being poured into it (no text or symbols visible)Fig. 1

Fig. 2
natural_image
Hand using a black-handled tool to lift a yellow rubber or rubber device with coiled wires (no text or symbols visible)Fig.3
natural_image
Close-up of two black plastic test probes with a directional arrow indicating motion (no text or symbols)Fig.4
natural_image
Yellow plastic object with black connectors next to a black plastic clip, being adjusted by a hand (no text or symbols visible)Fig.5