
STM20 - Steam cleaner H.KOENIG - Free user manual and instructions
Find the device manual for free STM20 H.KOENIG in PDF.
| Product Type | Steam Cleaner |
| Brand | H.Koenig |
| Model | STM20 |
| Power Supply | 220-240 V, 50-60 Hz |
| Power | 1500 W |
| Water Tank Capacity | 330 ml |
| Number of Temperature Levels | 2 (Low T°1, High T°2) |
| Steam Function | Yes, with steam button |
| Soleplate Type | Heated soleplate for vertical ironing |
| Included Accessories | Base, brush, water tank |
| Base Attachment | On table, on wall, or hanging on a rod |
| Automatic Shut-off | No (standby after 5 minutes of inactivity) |
| Power Cord | With cord winder |
| Weight (approx.) | 1.5 kg |
| Dimensions (approx.) | 30 x 20 x 25 cm |
| Maintenance | Clean soleplate with damp cloth; empty tank after use |
| Water Usage | Distilled water only, no additives |
| Safety | Do not immerse, do not direct steam at people/animals, keep out of reach of children |
| Warranty | Standard manufacturer (parts not included) |
| Repairability | H.Koenig technical center |
Frequently Asked Questions - STM20 H.KOENIG
User questions about STM20 H.KOENIG
0 question about this device. Answer the ones you know or ask your own.
Ask a new question about this device
Download the instructions for your Steam cleaner in PDF format for free! Find your manual STM20 - H.KOENIG and take your electronic device back in hand. On this page are published all the documents necessary for the use of your device. STM20 by H.KOENIG.
USER MANUAL STM20 H.KOENIG
natural_image
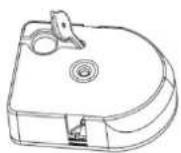
White and gold-colored steam iron machine with a golden handle and silver base (no visible text or symbols)STM20
Défroisseur 2 en 1
Hand steamer 2 in 1
ENGLISH
IMPORTANT SAFETY INSTRUCTIONS
When using your Portable Steam Iron, basic safety precautions should always be followed. Including the following:
READ ALL INSTRUCTIONS BEFORE USING
- Use iron only for its intended use.
- To protect against a risk of electric shock, do not immerse the iron in water or other liquids.
- The iron should always be turned to “Off” before plugging or unplugging from outlet. Never yank cord to disconnect from outlet; instead, grasp plug and pull to disconnect.
- Do not allow cord to touch hot surfaces. Let iron cool completely before putting away. When storing, the wires must be looped and inserted into the base of iron.
- Always disconnect iron from electrical outlet when filling with water or emptying and when not in use.
- Do not operate iron with a damaged cord or if the iron has been dropped or damaged. To avoid the risk of electric shock, do not disassemble the iron take it to a qualified serviceman for examination and repair. Incorrect reassembly can cause a risk of electric shock when the iron is used.
- Close supervision is necessary for any appliance being used by or near children. Do not leave iron unattended while connected or on an ironing board.
- Burns can occur from touching hot metal parts, hot water, or steam.
Special Instructions
- To avoid a circuit overload, do not operate another high wattage appliance on the same circuit.
- If an extension cord is absolutely necessary, a 10 ampere cord should be used. Cords rated for less amperage may overheat. Care should be taken to arrange the cord so that it cannot be pulled or tripped over.
- Save these instructions & keep it for future use
- Do not let children or untrained persons use the appliance without supervision.
- Never immerse the iron, cable or plug in any liquid. If you need to arrange cleaning, please follow our cleaning instructions on those operating instructions.
- Do not leave the hot iron touching fabrics or very inflammable surfaces.
- Do not leave the appliance unnecessarily plugged in. Disconnect the plug from the mains when the appliance is not being used.
- Never touch the appliance with wet or damp hands.
- Do not leave the appliance exposed to the weather (rain, sun, etc.).
- Do not fill the reservoir with water before removing the plug from the socket.
- Do not leave the iron without supervision when it is connected to the power supply.
- Before using the appliance, please remove all packing materials.
- After unpacking the appliance, check that it is undamaged and no parts are missing.
- All contents of the package, such as plastic bags, Styrofoam, tape.... Etc, should be kept out of reach of children, as it could be dangerous and cause suffocation.
- Only use accessories recommended by our company
and those provided with the appliance, otherwise they could constitute a danger to the user and risk to damage the appliance.
-
Before using the appliance, check that the supply voltage details marked on the appliance agree with those of the electricity supply. The rating label is placed on the appliance. If you have any doubts, please ask our customer services center for help.
-
Distilled water must be injected into the water tank before using this product. During use, please pay attention to the change of water volume, and add distilled water into the water tank on time. Except of the distilled water, do not add other liquid to the water tank.
-
This product is not a toy. It is not allowed to iron directly on people, animals or cloth worn on the body. Otherwise it will be burnt.
-
When the product is working, please take care.
-
This product is not intended for use on burning objects, as it may cause fire or burns
-
Parts are not included in the warranty. If you need to be replaced, must be purchased with my company. Parts are not necessarily available, it may take some time to replace.
-
This product is for home use only, not for any commercial purposes.
-
If the products need to be repaired, client must clean the product and kill all the insects before sent to our repair center, otherwise our company will charge extra cost for cleaning and pest control.
-
When used for the first time, there may be a slight odor or white smoke. As long as the product is placed in a ventilated place, the odor and white smoke will quickly dissipate.
-
Connect the appliance only to an alternating current of the voltage specified on the rating plate and only to an earthed socket. To avoid a circuit overload, do not operate another high wattage appliance in the same circuit.
- Never use the iron facing towards people because the steam can cause burns.
- Never twist the supply hose during use.
- The steam must not be aimed directly at electrical equipment, mains cables or parts containing electrical components (for example inside ovens, fridges, switches and lights, microwave ovens, screens).
- This appliance may be used by children of at least 8 years of age, as long as they are supervised and have been given instructions about using the appliance safely and are fully aware of the dangers involved.
- Cleaning and maintenance should not be carried out by children unless they are at least 8 years of age and are supervised by an adult.
- Keep the appliance and its power cord out of reach of children under 8 years of age.
- When using electrical equipment, safety precautions must always be taken to prevent the risk of fire, electric shock and/or injury in the event of misuse.
- Make sure that the voltage rating on the type plate corresponds to your main voltage of your installation. If this is not the case, contact the dealer and do not connect the unit
- Never leave the unit unattended while in operation.
- The device must not be used if it has been dropped, it obvious signs of damage are visible or if it has leaks;
- This device is not intended for use by persons with reduced capacity on the physical, mental or sensory or lack of experience and knowledge (including children),
unless he has them was asked to monitor or if they have had instructions on the use of the appliance by a person responsible for their safety. Children should be supervised to ensure they do not play with the device.
-
The device is not intended to be operated by external timer means or a remote control system
-
Do not operate the appliance with a damaged cord or if the appliance has been dropped or damaged. To avoid a hazard such as the risk of electric shock, do not disassemble the appliance, it must be taken to a qualified serviceman or manufacturer or its service agent for examination and repair. Incorrect re-assembly can cause a risk of electric shock when the iron is used.
PLEASE NOTE!
Do not use chemical additive, scented substances or decalcifiers. Failure to comply with the above mentioned regulations leads to loss of guarantee.
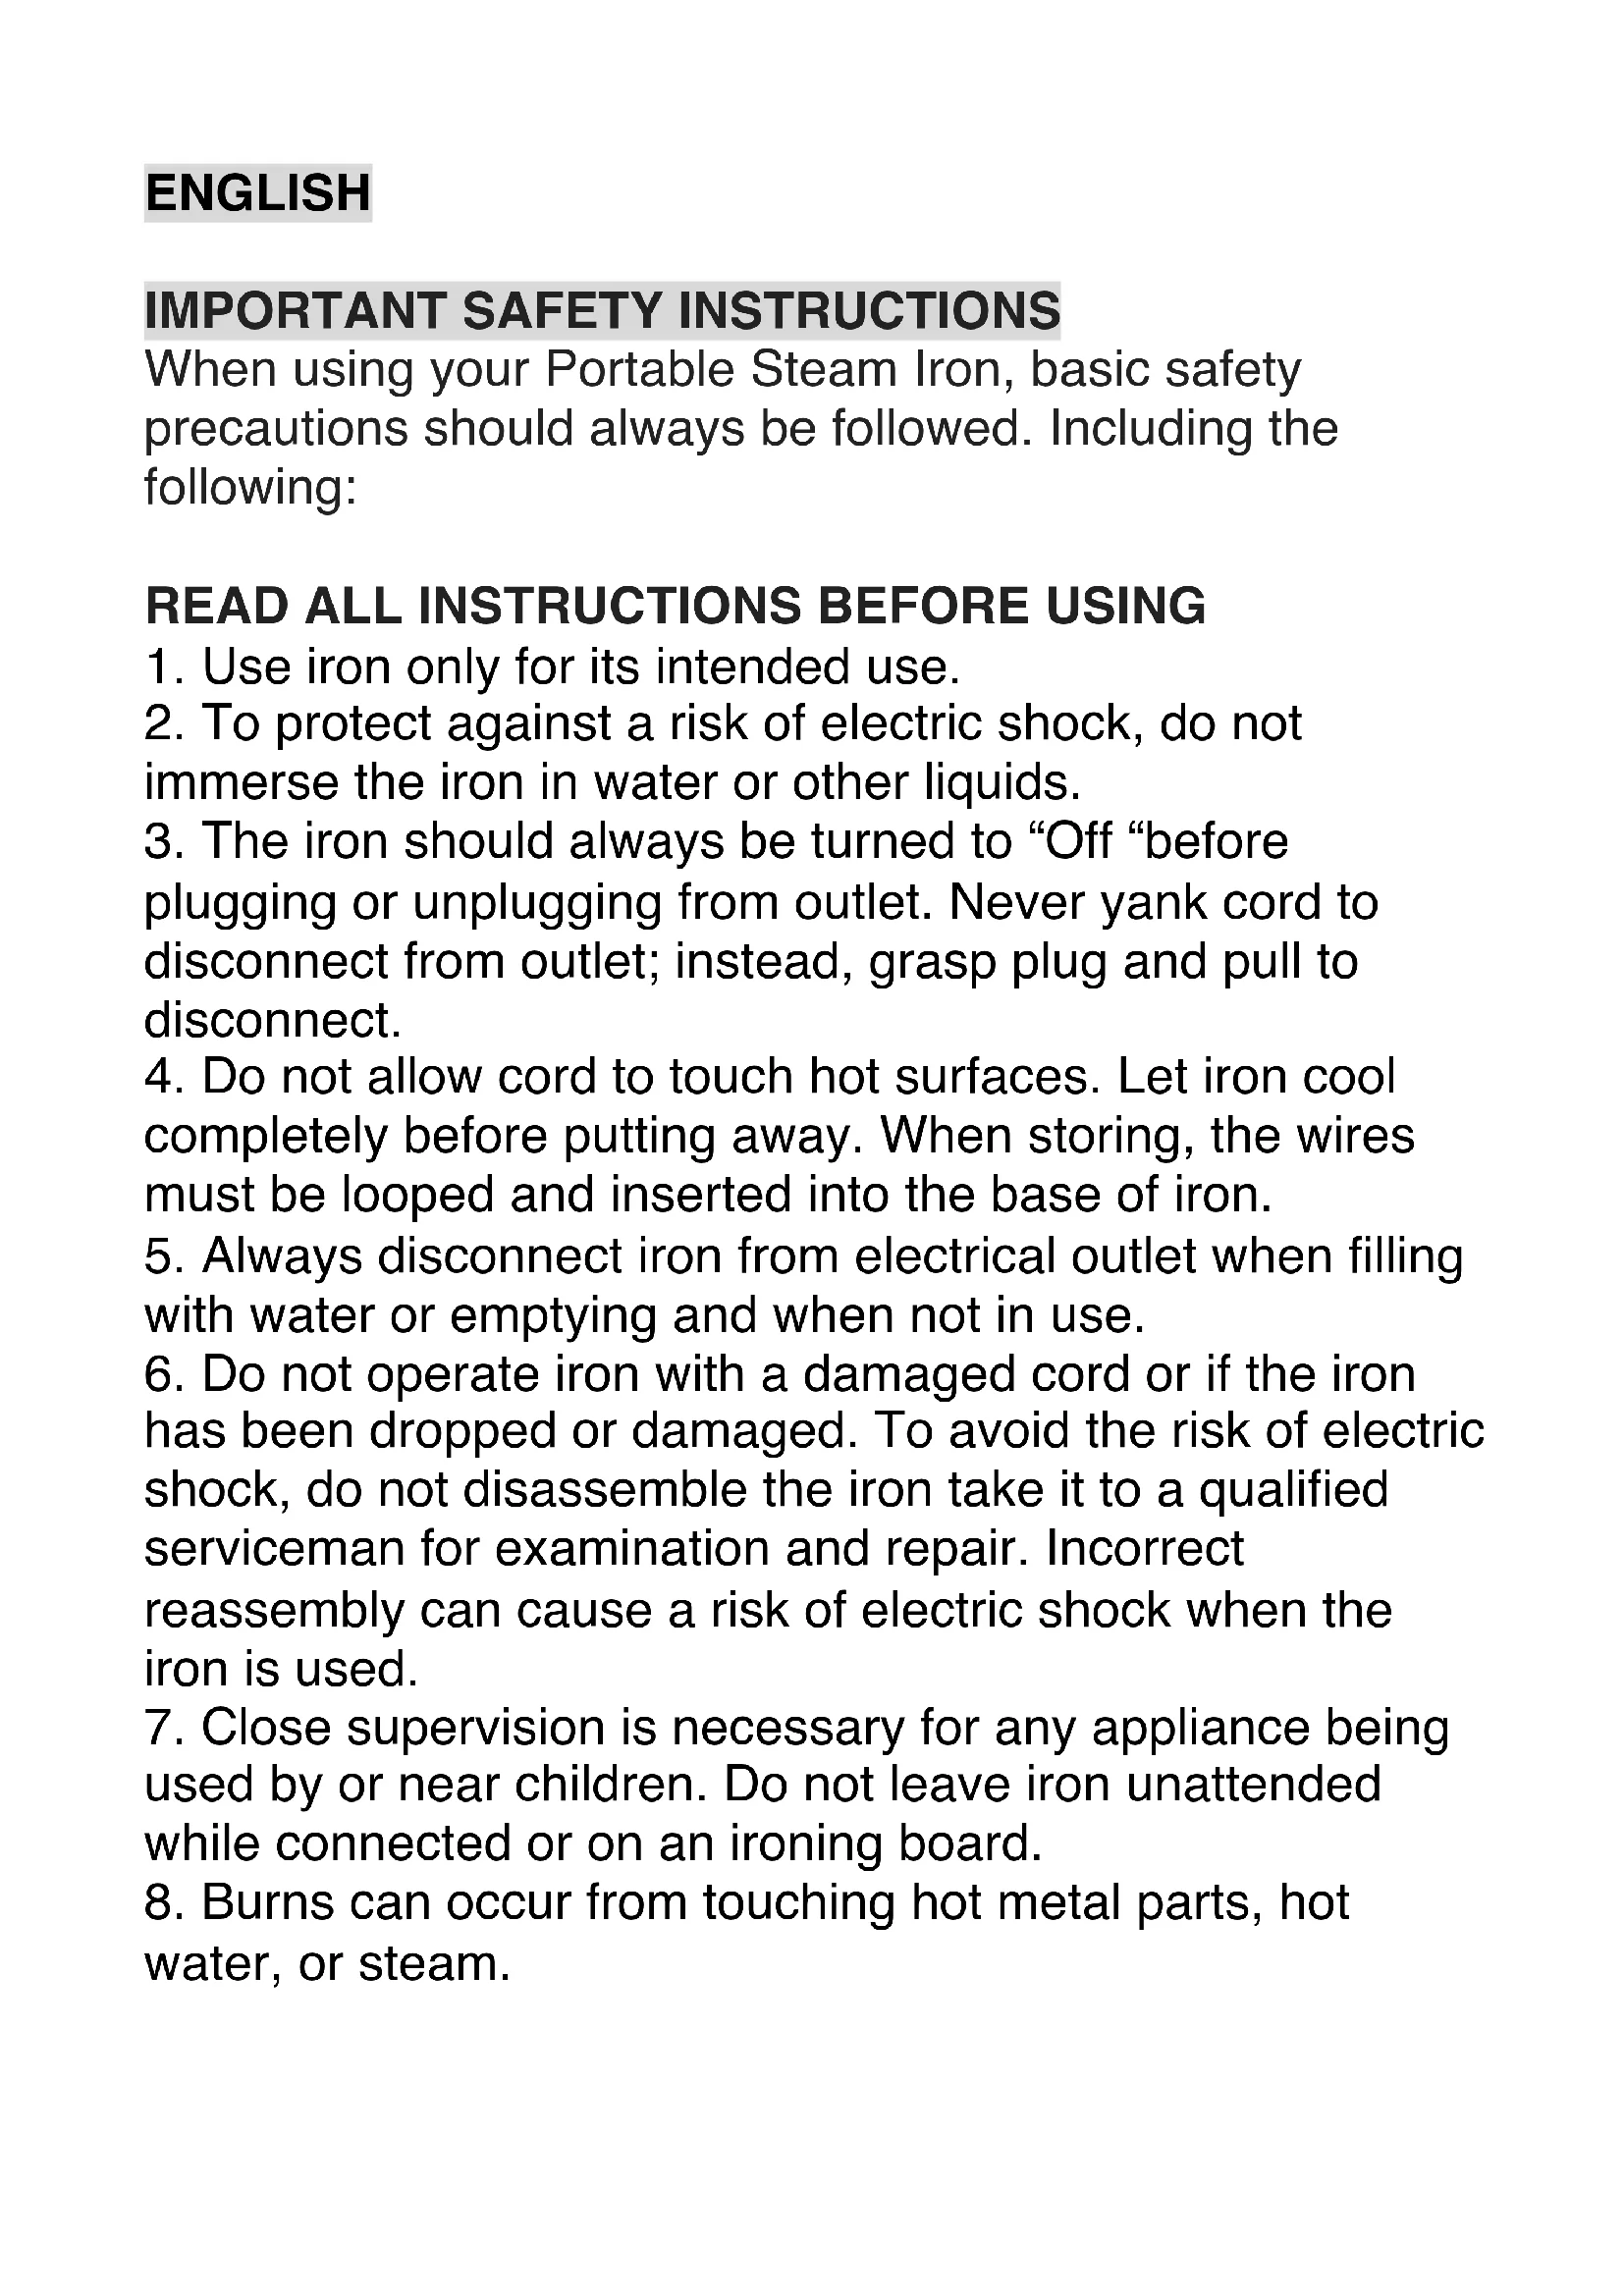
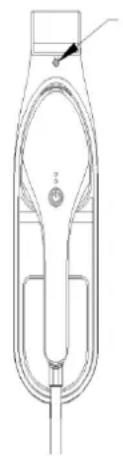
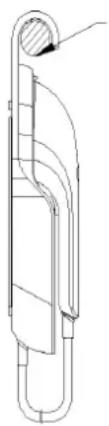
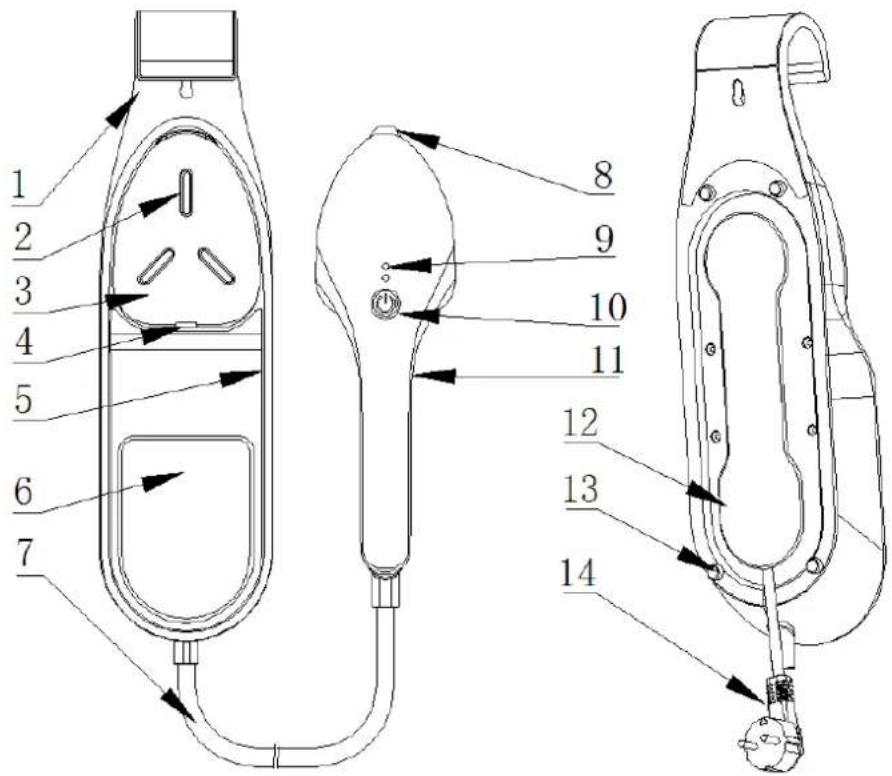
DESCRIPTION OF DEVICE

natural_image
Line drawing of a circular mechanical component with evenly spaced teeth and a central hole (no text or symbols)
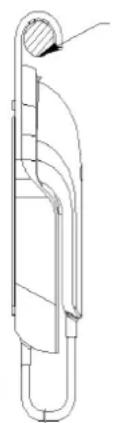
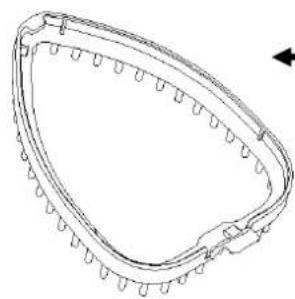
Brush
Note: This brush is equipped with some models, which are subject to the actual product.
| List of main parts (Sheet 1) | ||
| No. | Name | Main function |
| 1 | Base | For storage of water tank and the appliance suspension |
| 2 | Insulation pad | Used to separate the iron and the base, for insulation |
| 3 | Iron pad | Used for holding the iron. |
| 4 | Lock | Used to lock the Iron in the pad |
| 5 | Decoration Ring | For decoration and protection |
| 6 | Water tank | For injection the distilled water. |
| 7 | Tube | Electrify and transfer distilled water from the water tank to the iron. |
| 8 | Soleplate | For ironing |
| 9 | Indicator light | Show different level of temperature. 1 level & 2 level |
| 10 | On/Off | Power switch on and off |
| 11 | Steam | Pressing the steam when ironing |
| 12 | Winding frame | Storage the power cord |
| 13 | Base pad | Conveniently placed on the platform |
| 14 | Power cord | Used for electrify |
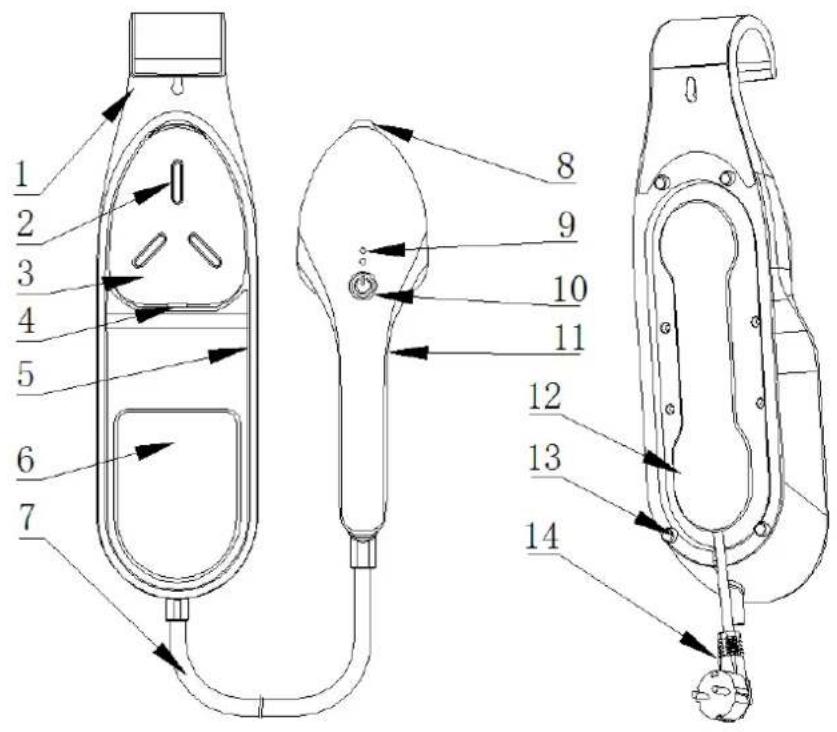
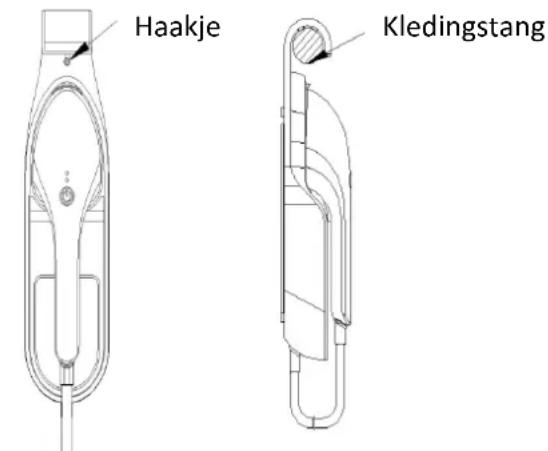
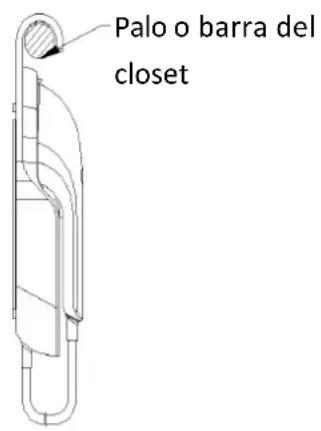
INSTALLATION BEFORE USE
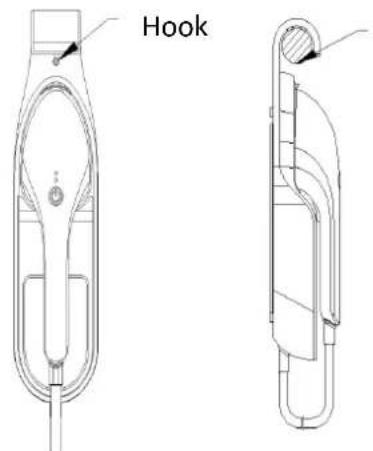
1 Place the base horizontally on the table (see figure 1), the base also can be fixed to the wall with screw or directly hang on the clothes rod (see figure 2).
natural_image
Line drawing of a handheld device with a handle and control knob (no text or symbols)Figure 1 Figure 2
Clothes rod
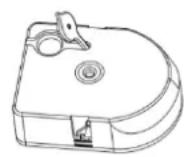
2 Pick up the iron, press the middle of the water tank, the water tank will pop up automatically. Pull out the seal on the back of water tank and inject distilled water until it full, then assemble the water tank seal (Figure 3) and install the water tank into the base (see figure 4)
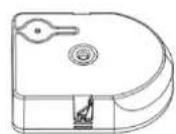
Figure 3

Figure 4

natural_image
Simple line drawing of a mechanical component with a black arrow pointing to it (no text or symbols)Tips:
a) When the base must hang on the wall, please be sure to fix it with the screws (screw & related material, please buy it from the market), so as not to fall off and damage the product.
b) When the Iron is stored in the base, it must be securely to prevent falling & damaging.
1 Pace the iron into the base: The protruding part in the front of iron must be inserted into the base slot. Then vertically press the handle of the iron, press the iron into the base. So the iron is completely fastened by the base and will not fall off automatically (see figure 5)
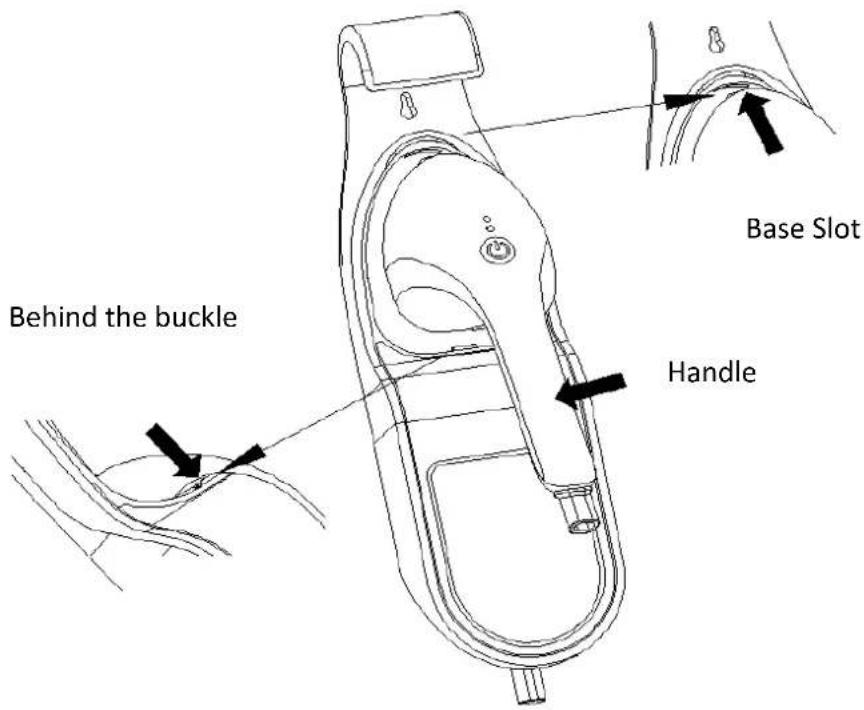
Figure 5
Brush installation and removal method
1 Insert the brush into the iron in the direction indicated, and gently press the bottom button of the brush until you hear a "click" (see figure 6).
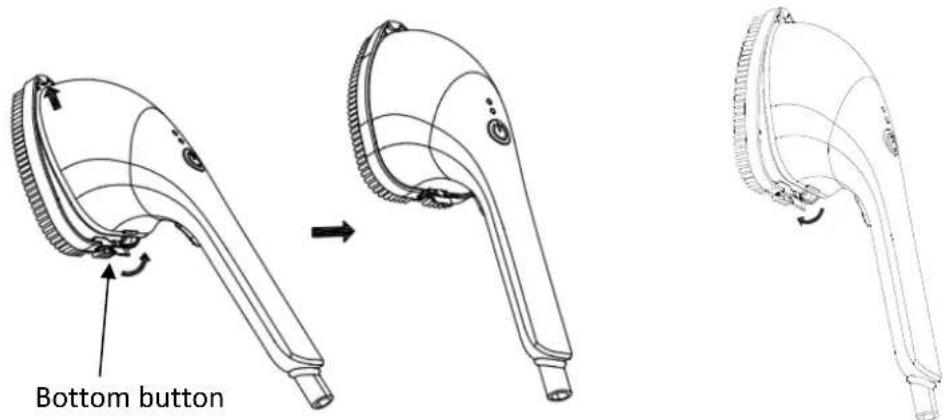
Figure 6 Figure 7
2 Hold the iron, press the button at the bottom of the brush and remove it (see figure 7)
Tips
1 Before installing the accessories, please make sure the power is disconnected and the plug must be removed from the socket. If you have used this product before, please install it after cooling to avoid burns.
2 Before using the accessories, please check & make sure in good condition.
INSTRUCTION FOR USE
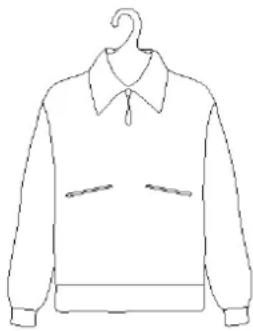
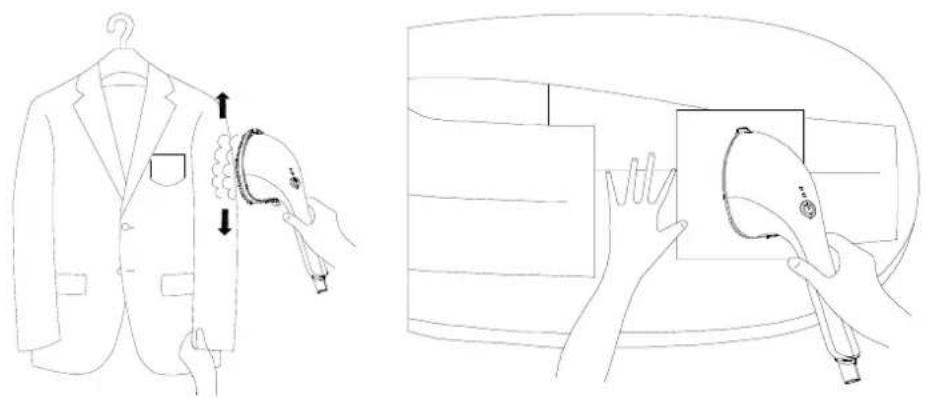
1 Choose the method you need (Place the base horizontally on the table, fixed to the wall with screw or directly hang on the clothes rod)
2 Hang up or place the clothes to be ironed.
natural_image
Line drawing of a long-sleeve jacket with collar and pocket pockets, mounted on a hook (no text or symbols)3 Pick up the iron, press the middle of the water tank, the water tank will pop up automatically. Pull out the seal on the back of water tank and inject distilled water until it full, then assemble the water tank seal (Figure 3) and install the water tank into the base (see figure 4)
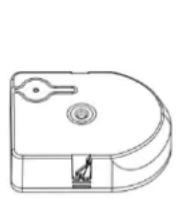
Figure 3
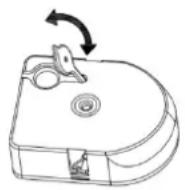
Figure 4

natural_image
Line drawing of a mechanical component with an arrow pointing to a section (no text or symbols)Tips: Water tank should not be filled with hot water, fragrance, vinegar, starch, discaling agents. Ironing additives or other chemicals substance.
4 Plug the plug into a grounded socket, press ☺ bright red light, at the same time the appliance emits a long "D" sound, the appliance does not heat.
5 Tap the iron button once to enter the 1 ^st level, the indicator light is blue. At the same time the appliance emits a “D” sound. If the temperature does not reach the set value, the 1 ^st level indicator light flashes. When the heating reaches the set temperature, the 1 ^st level indicator light stays blue and steady (will not flash), you can start using.
6 Tap the iron button again to enter the 2 ^nd level, the indicator light is blue. At the same time the appliance emits a “D” sound. If the temperature does not reach the set value, the 2 ^nd level indicator light flashes. When the heating reaches the set temperature, the 2 ^nd level indicator light stays blue and steady (will not flash), you can start using.
7 After that, tap the iron once more, the power will be turn off. The button indicator light up (red light), and the "D" sound will make a long beep, and the appliance will not heat up.

Start ironing
1 Hang the clothes on the clothes rod or place the base horizontally on the table.
2 Hold the iron handle and keep the steam vertical. Avoid the steam iron approaching any people or animals.
3 Put the stem iron close to the clothes, then roll up and down the clothes or left and right to iron.
4 For the iron that does not need to be operated, be sure to switch off the power and unplug the power cord. Put the iron back on the base and fasten it.
natural_image
Line drawings showing a suit jacket being held by a hand holding a small object, and a close-up of hands holding a small object (no text or symbols present)Choose steam
Press the steam button to produce the steam, it can penetrates the fabric and smoothes the most difficult creases.
After pressing on/off button, press the 1 ^st or 2 ^nd level again, and wait 1 ^st or 2 ^nd level indicator light no longer flash. After pressing the steam button, you will hear the water tank rolling sound. After a few seconds, the steam will be ejected. Stop pressing the steam button, the stem will go out. When the first is pressed, please wait a few seconds before pressing again.
Note: Level 1 is less steam, Level 2 is more steam.
PREPARATIONS
Soft the laundry to be ironed according to the international symbols on the garment label, or if this is missing, according to the type of fabric.
| Garment label | Fabric Type | Thermostat Regulation |
 | synthetic | 1^st level low temperature |
 | silk - wool | 1^st level low temperature |
 | Cotton - linen | 2^nd level high temperature |
 | Fabric not to be ironed | |
Start ironing the garments requiring a low temperature.
This reduces the waiting times (the iron takes less time to heat up than to cool down) and eliminates the risk of scorching the fabric.
GENERAL INSTRUCTIONS
When using the iron for the first time, you may notice a slight emission of smoke and hear some sounds made by the expanding plastics. This is quite normal and it stops after a short time. We also recommend passing the iron over an ordinary cloth before using it for the first time.
Start ironing the garments requiring a low temperature.
This appliance cannot be automatically turned off. After use it, you must press the switch to turn off and unplug the power cord.
The appliance will automatically enter the standby mode after 5 minutes of non-use. Please pay attention.
CLEANING
Please note: before cleaning the iron in any way, make sure that the appliance plug is not connected to the socket.
Any deposits, starch residue or size left on the plate can be removed using a damp cloth or an unabrasive liquid detergent.
Avoid scratching the plate with steel wool or metallic objects. The plastic parts can be cleaned with a damp cloth then wiped over with a dry cloth.
HOW TO PUT IT AWAY
Unplug the iron from outlet.
- Press the middle of the water tank, the water tank will pop up automatically. Pull out the seal on the back of water tank, turn the water tank upside down and shake gently to empty the water tank.
- Let the iron cool down completely. Put the iron into the base.
- Wind the wires into the winding frame.
- Collect or put the appliance back in the color box.
ADVICE FOR GOOD IRONING
1) We recommend using the lowest temperatures with fabrics that have unusual finishes (sequins, embroidery, flush, etc.).
2) If the fabric is mixed (e.g. 40% cotton 60% synthetics), set the thermostat to the temperature of the fibre requiring the 1^st lower temperature.
3) If you do not know what kind of knitted fabric, please pass the clothes in the clothes marked with a small cloth or clothes to test the hidden angle to determine the appropriate temperature. From the low temperature began to gradually increase until the desired temperature.
4) Never iron areas with traces of perspiration or other marks: the heat of the plate fixes the stains on the fabric, making them irremovable.
5) To avoid marking silk, woolen or synthetic garments shiny, iron them inside out.
6) To avoid marking velvet garments shiny, iron in one direction (following the fibre) and do not press down on the iron.
7) The heavier the washing machine is loaded, the more garments come out creased. This also happens when the spin drying revolutions are very high.
8) Many fabrics are easier to iron if they are not completely dry.
TECHNICAL SPECIFICATION
| Model# | Voltage | Frequency | Power | Water tank capacity |
| STM20 | 220-240V | 50-60Hz | 1500W | 330ML |
SMALL HOME APPLIANCES WARRANTY TERMS & CONDITIONS
MAIN PLAN LIMITED (hereinafter called "the Company") offers one year warranty service to the product (commencing from the date of purchase invoice by the authorized dealers). Services beyond the said warranty period will be charged according to the quotation from our Service Department.
- Customer should follow the operating instruction in operating the product. The Company shall not be liable for any direct or indirect loss or damage to any person of property, howsoever caused arising from improper use, or any stoppage, breakdown or failure of the product.
- The warranty service will not be offered if the model, serial number of the product or the invoice of the authorized dealers has been altered or effaced.
- This warranty does not cover any damage or loss caused by man-made, misuse, neglect, unauthorized repair / modification or use of the product for any purpose other than the original designed.
- This warranty service does not include any surface, cabinet, consumptive parts and accessories.
- Customer should be responsible to carry the product to our Service Department for rendering of service and collect back the product at the same location after repaired. Any defective part which has been replaced should become the property of the Company.
- All articles left unclaimed by the customer within 30 days after notification will be disposed of at our own discretion and the Company shall not be liable or responsible to the customer for such articles or for any loss or damage whatsoever in such event.
- All terms stated are subject to change without notice. In case of dispute, the Company reserves the right for final judgment and decision.
TROUBLE SHOOTING
| Fault situation | Reason | Solution |
| Appliance cannot work after turn on | 1 No power plug is plugged in2 Home Circuit or fuse in the socket are fault3 The appliance circuit is fault | 1 Please plug the plug again.2 Please repair your electricity system or socket.3 Please contact our repair center for maintenance. |
| The appliance work normally but no steam | 1 Water has no water or too less water.2 Silicone tube twists and turns3 Heating element damaged4 Indicator normal but no steam5 Pump does not work6 Pump is working | 1 Please add distilled water into the water tank2 Please contact our repair center for maintenance3 Please contact our repair center for maintenance4 Please contact our repair center for maintenance5 Please contact our repair center for maintenance6 Please re-assembling the pump again. |
| Iron head with water | 1 Just use the first have those problem, then no more effluent in the next time2 Water us very serious, and it keeps leaking | 1 It's normal, please comfort to use it.2 Please contact our repair center for maintenance |
| Leaking water | Water tank is connected to the appliance to connect the water. | Please re-assembling the water tank |
| Scale & white fine in the bottom of the iron head | Fine impurity and chemicals in the water are deposited on the surface of the heating body. | Clean with a damp cloth |
| Watermark appears on clothes when ironing | When the clothes are ironed for period of time, the watermark appears on the clothes, which is due to condensation of steam on the ironing board | Do not use steam, then dry the water & dry it. If the bottom of the ironing board is wet, dry it with a dry cloth. |
ENVIRONMENT
CAUTION:
Do not dispose of this product as it has with other household products. There is a separation of this waste product into communities, you will need to inform your local authorities about the places where you can return this product. In fact, electrical and electronic products contain hazardous substances that have harmful effects on the environment or human health and should be recycled. The symbol here indicates that electrical and electronic equipment should be chosen carefully, a wheeled waste container is marked with a cross.
Adeva SAS / H.Koenig Europe - 8 rue Marc Seguin - 77290 Mitry Mory - France www.hkoenig.com - sav@hkoenig.com - contact@hkoenig.com - Tél: +33 1 64 67 00 05
FRANÇAIS
natural_image
Line drawing of a circular mechanical component with evenly spaced teeth and a central hole (no text or symbols)
Brosse
natural_image
Line drawing of a mechanical device with no visible text or symbolsFigure 1
Figure 2
Crochet
natural_image
Technical line drawing of a mechanical component with no visible text or symbolsTringle
natural_image
Technical line drawing of a mechanical component with no visible text or symbolsnatural_image
Line drawing of a toilet with a black arrow pointing to the lid area (no text or symbols)Conseils :
natural_image
Line drawing of a handheld device with a curved handle and arrow indicating rotation (no text or symbols)Figure 7
natural_image
Line drawing of a long-sleeve jacket with collar and pocket pockets, shown in simple line art style (no text or symbols)natural_image
Line drawing of a suit jacket with a hand holding a cap, showing size measurement (no text or symbols)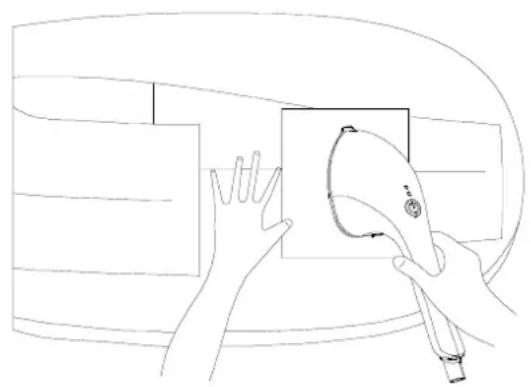
natural_image
Line drawing of a person using a tool to clean or wash a surface, no text or symbols presentnatural_image
Line drawing of a mechanical component with multiple teeth and a central body (no text or symbols)
Bürste
natural_image
Line drawing of a handheld device with handle and control knob (no text or symbols)Abbildung 1
Haken

natural_image
Technical line drawing of a mechanical component with no visible text or symbolsAbbildung 2
Garderobenstange
natural_image
Technical line drawing of a mechanical component with no visible text or symbolsnatural_image
Line drawing of a toilet with a black arrow pointing to the lid (no text or symbols)Hinweise:
natural_image
Line drawing of a long-sleeve jacket with collar and front pocket (no text or symbols)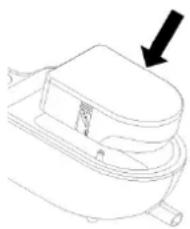
natural_image
Line drawing of a mechanical device with a black arrow pointing to a component (no text or symbols)natural_image
Line drawing of a suit jacket with a hand holding a hard hat, showing size measurement (no text or symbols)
natural_image
Line drawing of hands holding a small object near a curved surface, no text or symbols presentBESCHRIJVING VAN HET APPARAAT
natural_image
Simple line drawing of a circular mechanical component with evenly spaced teeth and a central hole (no text or symbols)Borstel
natural_image
Line drawing of a mechanical device with no visible text or symbolsFiguur 1
Figuur 2
natural_image
Line drawing of a mechanical component with an arrow pointing to a detail (no text or symbols)Tips:
natural_image
Line drawing of a mechanical device with curved arrows indicating motion or rotation (no text or symbols)Figuur 7
natural_image
Line drawing of a long-sleeve jacket with collar and pocket pockets, shown in simple line art style (no text or symbols)natural_image
Line drawing of a toilet with a black arrow pointing to the lid area (no text or symbols)natural_image
Line drawing of a suit jacket with a hand holding a cap, showing part of the jacket and handle (no text or symbols)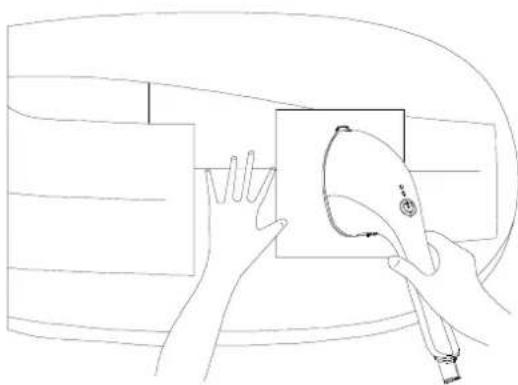
natural_image
Line drawing of a person holding a small object near a rectangular frame, with no visible text or symbolsStoomkeuze
Opmerking: Level 1 is minder stoom, level 2 is meer stoom.
VOORBEREIDINGEN
natural_image
Simple line drawing of a mechanical component with no text or symbolsCepillo
natural_image
Line drawing of a mechanical device with a handle and central shaft (no text or symbols)Figura 1
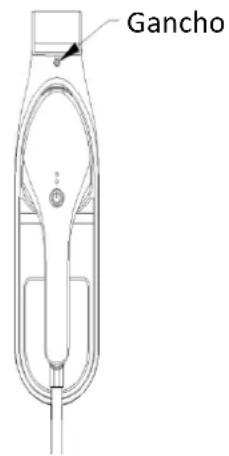
Figura 2
natural_image
Three-step diagram showing a device with a handle, a switch, and a base plate (no text or symbols)Figura 3
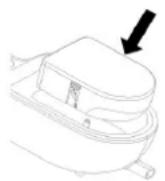
Figura 4
Recomendaciones:
natural_image
Line drawing of a curved mechanical component with no visible text or symbolsFigura 7
natural_image
Line drawing of a long-sleeve jacket with collar and pocket pockets, mounted on a hook (no text or symbols)natural_image
Three-step diagram showing a device with a switch and lock, connected to a base plate (no text or symbols)Figura 3
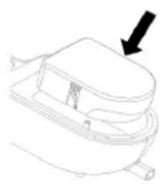
Figura 4
PLANCHADO CON VAPOR
natural_image
Line drawing of a mechanical device with no visible text or symbolsFigura 1
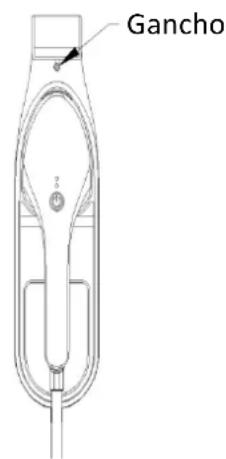
Figura 2

natural_image
Three-step diagram showing a device with a handle, a switch, and a base panel (no text or symbols)Figura 3
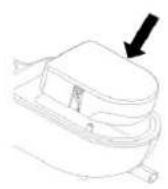
Figura 4
Recomendaciones:
natural_image
Line drawing of a mechanical device with curved and straight ends, no text or symbols presentFigura 7
natural_image
Line drawing of a long-sleeve jacket with collar and pocket pockets, shown in simple line art style (no text or symbols)natural_image
Three-step diagram showing a device with a lock and valve, connected by an arrow indicating rotation (no text or symbols)Figura 3
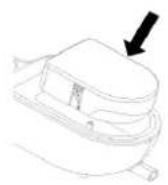
Figura 4
natural_image
Line drawing showing a suit jacket being held by a hand holding a magnifying glass, and a close-up of hands holding a magnifying glass (no text or symbols present)PLANCHADO CON VAPOR


- STM20
- ENGLISH
- IMPORTANT SAFETY INSTRUCTIONS
- READ ALL INSTRUCTIONS BEFORE USING
- Special Instructions
- PLEASE NOTE!
- DESCRIPTION OF DEVICE
- INSTALLATION BEFORE USE
- Tips:
- Tips
- INSTRUCTION FOR USE
- Start ironing
- Choose steam
- PREPARATIONS
- GENERAL INSTRUCTIONS
- CLEANING
- HOW TO PUT IT AWAY
- Unplug the iron from outlet.
- ADVICE FOR GOOD IRONING
- TECHNICAL SPECIFICATION
- SMALL HOME APPLIANCES WARRANTY TERMS & CONDITIONS
- ENVIRONMENT
- CAUTION:
- FRANÇAIS
- Conseils :
- Hinweise:
- BESCHRIJVING VAN HET APPARAAT
- Stoomkeuze
- VOORBEREIDINGEN
- Cepillo
- Recomendaciones:
- PLANCHADO CON VAPOR
Brand : H.KOENIG
Model : STM20
Category : Steam cleaner