Drop 47.3005.01 - Weather Station TFA - Free user manual and instructions
Find the device manual for free Drop 47.3005.01 TFA in PDF.
User questions about Drop 47.3005.01 TFA
0 question about this device. Answer the ones you know or ask your own.
Ask a new question about this device
Download the instructions for your Weather Station in PDF format for free! Find your manual Drop 47.3005.01 - TFA and take your electronic device back in hand. On this page are published all the documents necessary for the use of your device. Drop 47.3005.01 by TFA.
USER MANUAL Drop 47.3005.01 TFA
Thank you for choosing this instrument from TFA.
1. Before you use this product
- Please make sure you read the instruction manual carefully.
- Following and respecting the instructions in your manual will prevent damage to your instru- ment and loss of your statutory rights arising from defects due to incorrect use.
- We shall not be liable for any damage occurring as a result of non following of these instruc- tions. Likewise, we take no responsibility for any incorrect readings or for any consequences resulting from them.
- Please take particular note of the safety advice!
- Please keep this instruction manual safe for future reference.
2. Delivery contents
- Wireless rain gauge (base station)
3. Range of application and all the benefits of your new instrument
- Wireless transmission of rainfall data (433 MHz), range up to 100 m (open field)
- Indication of the current rainfall amount, of the last hour, the last 24 hours, 7 days, month, year as well as the total amount of rainfall
- Monthly rainfall history of the last 12 months
- Rainfall alert (24 hours)
- Ideal for gardening and agricultural purposes and for all those who want to learn more about nature
- This product is exclusively intended for the range of application described above. It should only be used as described within these instructions.
- Unauthorized repairs, alterations or changes to the product are prohibited. Caution! Risk of injury:
- Keep these devices and the batteries out of reach of children.
- Batteries contain harmful acids and may be hazardous if swallowed. If a battery is swallowed, this can lead to serious internal burns and death within two hours. If you suspect a battery could have been swallowed or otherwise caught in the body, seek medical help immediately.
- Low batteries should be changed as soon as possible to prevent damage caused by leaking. Never use a combination of old and new batteries together, nor batteries of different types. Wear chemical-resistant protective gloves and safety glasses when handling leaking batteries. Important information on product safety!
- Do not expose the device to extreme temperatures, vibrations or shocks.
- Protect the base station from moisture.
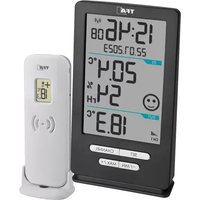
5.1 Base station (Receiver)
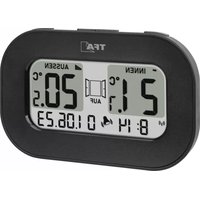
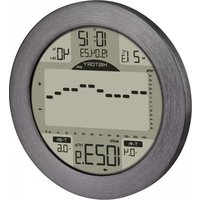
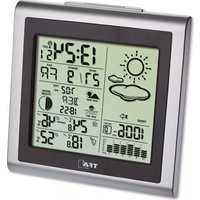
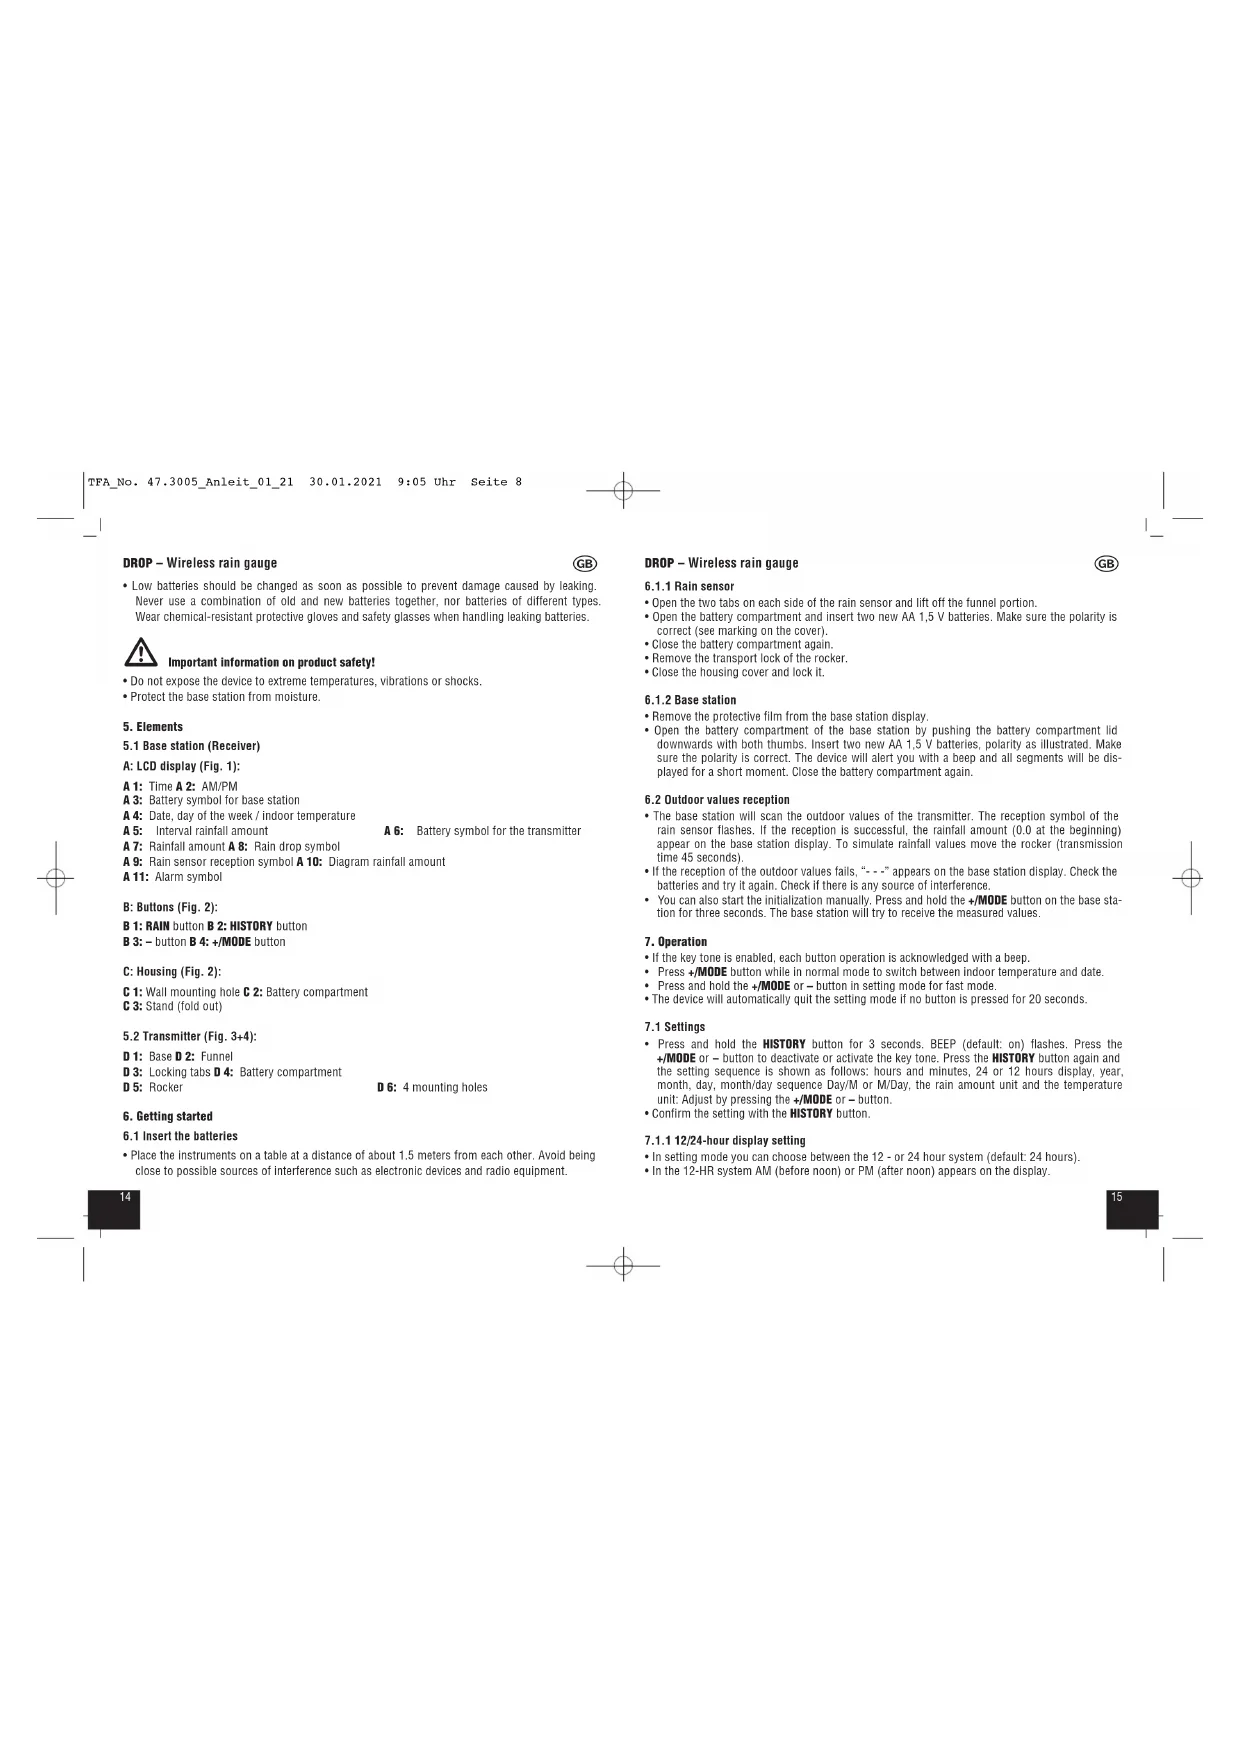
A: LCD display (Fig. 1): A 1: Time A 2: AM/PM A 3: Battery symbol for base station A 4: Date, day of the week / indoor temperature A 5: Interval rainfall amount A 6: Battery symbol for the transmitter A 7: Rainfall amount A 8: Rain drop symbol A 9: Rain sensor reception symbol A 10: Diagram rainfall amount A 11: Alarm symbol B: Buttons (Fig. 2): B 1: RAIN button B 2: HISTORY button B 3: – button B 4: +/MODE button C: Housing (Fig. 2): C 1: Wall mounting hole C 2: Battery compartment C 3: Stand (fold out)
5.2 Transmitter (Fig. 3+4):
D 1: Base D 2: Funnel D 3: Locking tabs D 4: Battery compartment D 5: Rocker D 6: 4 mounting holes
- Place the instruments on a table at a distance of about 1.5 meters from each other. Avoid being close to possible sources of interference such as electronic devices and radio equipment. DROP – Wireless rain gauge
- Open the two tabs on each side of the rain sensor and lift off the funnel portion.
- Open the battery compartment and insert two new AA 1,5 V batteries. Make sure the polarity is correct (see marking on the cover).
- Close the battery compartment again.
- Remove the transport lock of the rocker.
- Close the housing cover and lock it.
- Remove the protective film from the base station display.
- Open the battery compartment of the base station by pushing the battery compartment lid downwards with both thumbs. Insert two new AA 1,5 V batteries, polarity as illustrated. Make sure the polarity is correct. The device will alert you with a beep and all segments will be dis- played for a short moment. Close the battery compartment again.
6.2 Outdoor values reception
- The base station will scan the outdoor values of the transmitter. The reception symbol of the rain sensor flashes. If the reception is successful, the rainfall amount (0.0 at the beginning) appear on the base station display. To simulate rainfall values move the rocker (transmission time 45 seconds).
- If the reception of the outdoor values fails, “- - -” appears on the base station display. Check the batteries and try it again. Check if there is any source of interference.
- You can also start the initialization manually. Press and hold the +/MODE button on the base sta- tion for three seconds. The base station will try to receive the measured values.
- If the key tone is enabled, each button operation is acknowledged with a beep.
- Press +/MODE button while in normal mode to switch between indoor temperature and date.
- Press and hold the +/MODE or – button in setting mode for fast mode.
- The device will automatically quit the setting mode if no button is pressed for 20 seconds.
- Press and hold the HISTORY button for 3 seconds. BEEP (default: on) flashes. Press the +/MODE or – button to deactivate or activate the key tone. Press the HISTORY button again and the setting sequence is shown as follows: hours and minutes, 24 or 12 hours display, year, month, day, month/day sequence Day/M or M/Day, the rain amount unit and the temperature unit: Adjust by pressing the +/MODE or – button.
- In setting mode you can choose between the 12 - or 24 hour system (default: 24 hours).
- In setting mode the two different date displays can be selected: date/month (European version) or month/date (American version) (default: Day/M).
7.1.3 Rainfall amount unit setting
- In setting mode you can choose between mm (millimeter) or in (inches) as rainfall amount unit.
7.1.4 Temperature unit setting
- In setting mode, you can change between °C (Celsius) or °F (Fahrenheit) as temperature unit.
8. Rainfall amount indication
- The rainfall amount is shown on a corresponding cylinder graph.
- When it starts to rain the rain drop symbol begins to flash.
- NOW - rainfall amount at the start of the rain. Automatic resets after 30 minutes of no rainfall. The rain drop symbol stops flashing.
- Press the RAIN button in normal mode to change the display between the rainfall amount indi- cations:
- Rainfall amount of the last hour (ONE HR)
- Rainfall amount of the last 24 hours (24HRS)
- Rainfall amount of the last 7 days (7 DAYS)
- Rainfall amount of the last month (MONTH)
- Rainfall amount of the last year (YEAR)
- Indication of TOTAL rainfall amount since setting up or the last reset.
- NOTE: Hold the – button for 3 seconds in the respective rainfall amount indication to clear the recorded readings. Every rainfall amount indication can be reset individually.
- The device will automatically quit the rainfall amount mode if no button is pressed for 20 seconds.
9. 24 hours rain alert
- Press the RAIN button in normal mode for 3 seconds to enter the rain alert mode.
- ALERT OFF (default) appears on the display.
- Press the +/MODE or – button to enter the rain alert mode (On).
- The alert value flashes and the alert symbol appears on the display. The alarm is activated.
- Press the +/MODE or – button to adjust the alert value.
- Confirm the setting with the RAIN button.
- If a selected alert limit is exceeded, an alarm sound will ring for 5 seconds at the base station. The alarm symbol flashes.
- The alarm tone will sound again for 5 seconds in every minute.
- Press any button to stop the alarm.
- The alarm symbol will continue flashing until the measured value is below the alarm limit. DROP – Wireless rain gauge
- HIST, the current month and the rain amount appear on the display.
- The instrument stores the values of 12 month. Press HISTORY button again to scroll back the rain history for the last 12 months.
- The device will automatically quit the history mode if no button is pressed for 20 seconds.
11. Positioning of base station and transmitter
- Place the rain sensor horizontally in an area where rain can fall directly into the container, ideally 60 to 90 cm above the ground on a small platform.
- The base station can be placed onto any flat surface with the foldable leg or wall mounted at a chosen location with the mounting hole, both found at the back of the unit. Make sure you avoid the vicinity of any source of interference such as computer screens, TV sets or solid metal objects.
- Once the desired location is chosen, check whether the transmission from the transmitter to the base station is possible (transmission range of up to 100m in open areas). Within solid walls, especially ones with metal parts, the transmission range can be reduced considerably.
- If necessary choose another position for the transmitter and/or base station.
- Mount the rain sensor base with 4 mounting screws.
12. Care and maintenance
- Clean the devices with a soft damp cloth. Do not use solvents or scouring agents.
- Check and clean the rain gauge periodically for optimum performance of the rainfall measure- ment. The funnel should be routinely cleaned and freed from leaves and dirt.
- Remove the batteries if you do not use the devices for a long period of time.
12.1 Battery replacement
- Change the base station batteries when the battery symbol appears on time display.
- Change the batteries of the rain sensor, when the battery symbol appears on the rain amounts display.
- Please note: When the batteries are changed, the contact between the transmitter and the base station must be restored – so always insert new batteries into both devices or start the manual search for the transmitter.
No transmitter reception ➜ No transmitter installed Display “- - -” ➜ Check the transmitter batteries (do not use rechargeable batteries!) ➜ Restart the transmitter and the base station according to the manual ➜ Start the manual search for the transmitter: Press the +/MODE button on the base station for 3 seconds. ➜ Choose another place for the transmitter and/or the base station ➜ Reduce the distance between the transmitter and the base station ➜ Check if there is any source of interference. Display HI/LO ➜ Outside measuring range Incorrect indication ➜ Change the batteries ➜ Clean the rain sensor ➜ Check whether the rain sensor housing is inserted correctly ➜ Restart the instrument according to the manual
This product has been manufactured using high-grade materials and components which can be recycled and reused. Never dispose of empty batteries and rechargeable batteries in ordinary household waste. As a consumer, you are required by law to take them to your retail store or to an appropriate collection site depending on national or local regulations in order to pro- tect the environment. The symbols for the contained heavy metals are: Cd = cadmium, Hg = mercury, Pb = lead This product is labelled in accordance with the EU Waste Electrical and Electronic Equipment Directive (WEEE). Please do not dispose of this product in ordinary household waste. As a consumer, you are required to take end-of-life devices to a designated collection point for the disposal of electrical and electronic equipment, in order to ensure environmentally- compatible disposal.
Resolution 1°C (1°F) Rainfall amount 0…9999 mm (0…393.6 inch) Resolution 0,1 mm Power consumption Batteries 2 x AA 1,5 V (not included) Use alkaline batteries Housing dimension 90 x 30 (46) x 85 mm Weight 93 g (device only) Rain sensor Transmission time 45 seconds Range max. 100 m (open field) Transmission frequency 433 MHz Maximum radio-frequency power < 10mW Power consumption Batteries 2 x AA 1,5 V (not included) Use alkaline batteries Housing dimension 182 x 121 x 133 mm Weight 215 g (device only) No part of this manual may be reproduced without written consent of TFA Dostmann. The technical data are correct at the time of going to print and may change without prior notice. The latest technical data and information about this product can be found in our homepage by simply entering the product number in the search box. EU Declaration of conformity Hereby, TFA Dostmann declares that the radio equipment type 47.3005.01 is in compliance with Directive 2014/53/EU. The full text of the EU declaration of conformity is available at the following Internet address: www.tfa-dostmann.de/service/downloads/ce www.tfa-dostmann.de E-Mail: info@tfa-dostmann.de TFA Dostmann GmbH & Co.KG, Zum Ottersberg 12, D-97877 Wertheim, Germany 01/21 TFA_No. 47.3005_Anleit_01_21 30.01.2021 9:05 Uhr Seite 102120 DROP – Pluviomètre radio-piloté