USER MANUAL Season 35.1118.01 TFA
Thank you for choosing this instrument from TEA.
Before you use this product
©
Please make sure you read the instruction manual carefully.
- The operating instructions are enclosed with the device or can be downloaded at www.the.electrungs.de.jp/
service/downloads/instruction-manuals
This product should only be
• Following and respecting the instructions in your manual will prevent damage to your instrument and loss of your statutory rights arising from defects due to incorrect use. We shall not be liable for any damage occurring as a result of non-following of these instructions.
- Please take particular note of the safety advice!
Please keep this instruction manual safe for future reference.
F
service/downloads/instruction-manuals
service/downloads/instruction-manuals
A 7: Alarmsymbole HI/LO
A B: Trendpelle
A 9: Aubentemperatur
A 10: Batteriesymbol Sender
A 22: Befesynylsyl Desulfation
A 23: Inopotranspiration
B: Tasten (Fig. 2):
R 1-SET Task
B 2: CHANNEL Taste
B 3: ALARM Taste
B 4: -MIN Taste
B 5: MAX/+ Tasto
B 6: LIGHT Sensortaste
D
Funk-Wellerslation
Wireless weather station
1. Delivery contents
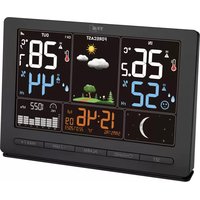
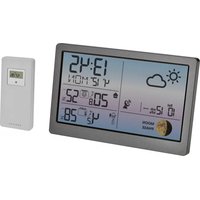
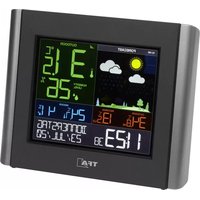
• Wireless weather station (base station)
• Thermo-hyore sensor (cal.-no. 30.3249.02)
• Power adapter
• Instruction manual
2. Range of application and all the benefits of your new instrument at a glance
• Outdoor temperature and humidity wireless (433 MHz), distance range
ur la 100 m (open field)
• Indoor temperature and humidity with comfort level
• Forecast with colourful landscape image depicting the weather
(change with the seasons).
- Relative atmospheric pressure with bar graph for the last 24 hours
• Maximum and minimum values for temperature, humidity and armo
pheric pressure with time and date of recording
• Trend indicators and alarm for temperature and humidity
• Muro phase
- Radio-controlled clock with entire date and weekday written in full let-
ters (6 languages)
• Alarm with sponge
• Manual setting action and
- Mountain setting option blue line zone correction
- Colour display with 4 brightness levels and
- Colour display will 4 brightness levels and auto-turn function (main mains connection).
(1) Wall mounting stable stand
- Wall mounting of table stands
- Optional: Expandable up to 3 temperature humidity transmitters (sold separately), also for the climate control of remote rooms, e.g. children's room, wine cellar etc.
3. For your safety
- This product is exclusively intended for the range of application described above.

- This product should only be used as described within these instructions.

Caution! Risk of electrocution!
- Plug the base station only into a mains socket installed within your country's electrical safety regulations and with a correct mains voltage (see generpale).
• The mains socket must be located near the equipment and it must be easily accessible.
- Unplung the device immediately if any fault occurs.
• The base station and the power adapter must not come into contact with water or moisture. Suitable for indoor use only.
- Do not use the device if the housing or the power adapter are damaged.
- Operate the device out of reach at persons (including children) who cannot fully appreciate the potential risks of handling electrical equipment.
• Only use the supplied new devices
- Only use the supplied power adapter.
- Do not pull the plug out of the socket by its nable.
- Be hot drain the ping out of the socket by its base.
- Route the mains cable so it does not come into contact with sharpedged or hot objects.

WARNING! Risk of Injury!
- Keep the devices and the batteries out of reach of children.
- Small parts can be swallowed by children (under three years old).
- Small parts can be swallowed by children (under three years old).
- Batteries contain harmful acids and may be hazardous if swallowed. If a battery is swallowed, this can lead to serious internal burns and death within two hours. If you suspect a battery could have been swallowed or otherwise caught in the body, seek medical help immediately.
Wireless weather station
- Batteries must not be thrown into a tire, short-circuited, taken apart or recharged. Risk of explosion!
- Low batteries should be changed as soon as possible to prevent damage caused by leaking. Make sure the potancies are correct. Never use a combination of old and new batteries together, nor batteries of different types. Remove the batteries if the device will not be used for an extended period of time. Avoid contact with skin, eyes and mucous membranes when handling leaking batteries. In case of contact, immediately rinse the affected areas with water and consult a doctor.
CAUTION
- Unauthorised repairs, alterations or changes to the devices are prohibited.
- Do not expose the devices to extreme temperatures, vibrations or shocks.
- Clean the devices with a soft damp cloth. Do not use solvents or scouring agents.
• The transmitter is splashproof, but not watertight.
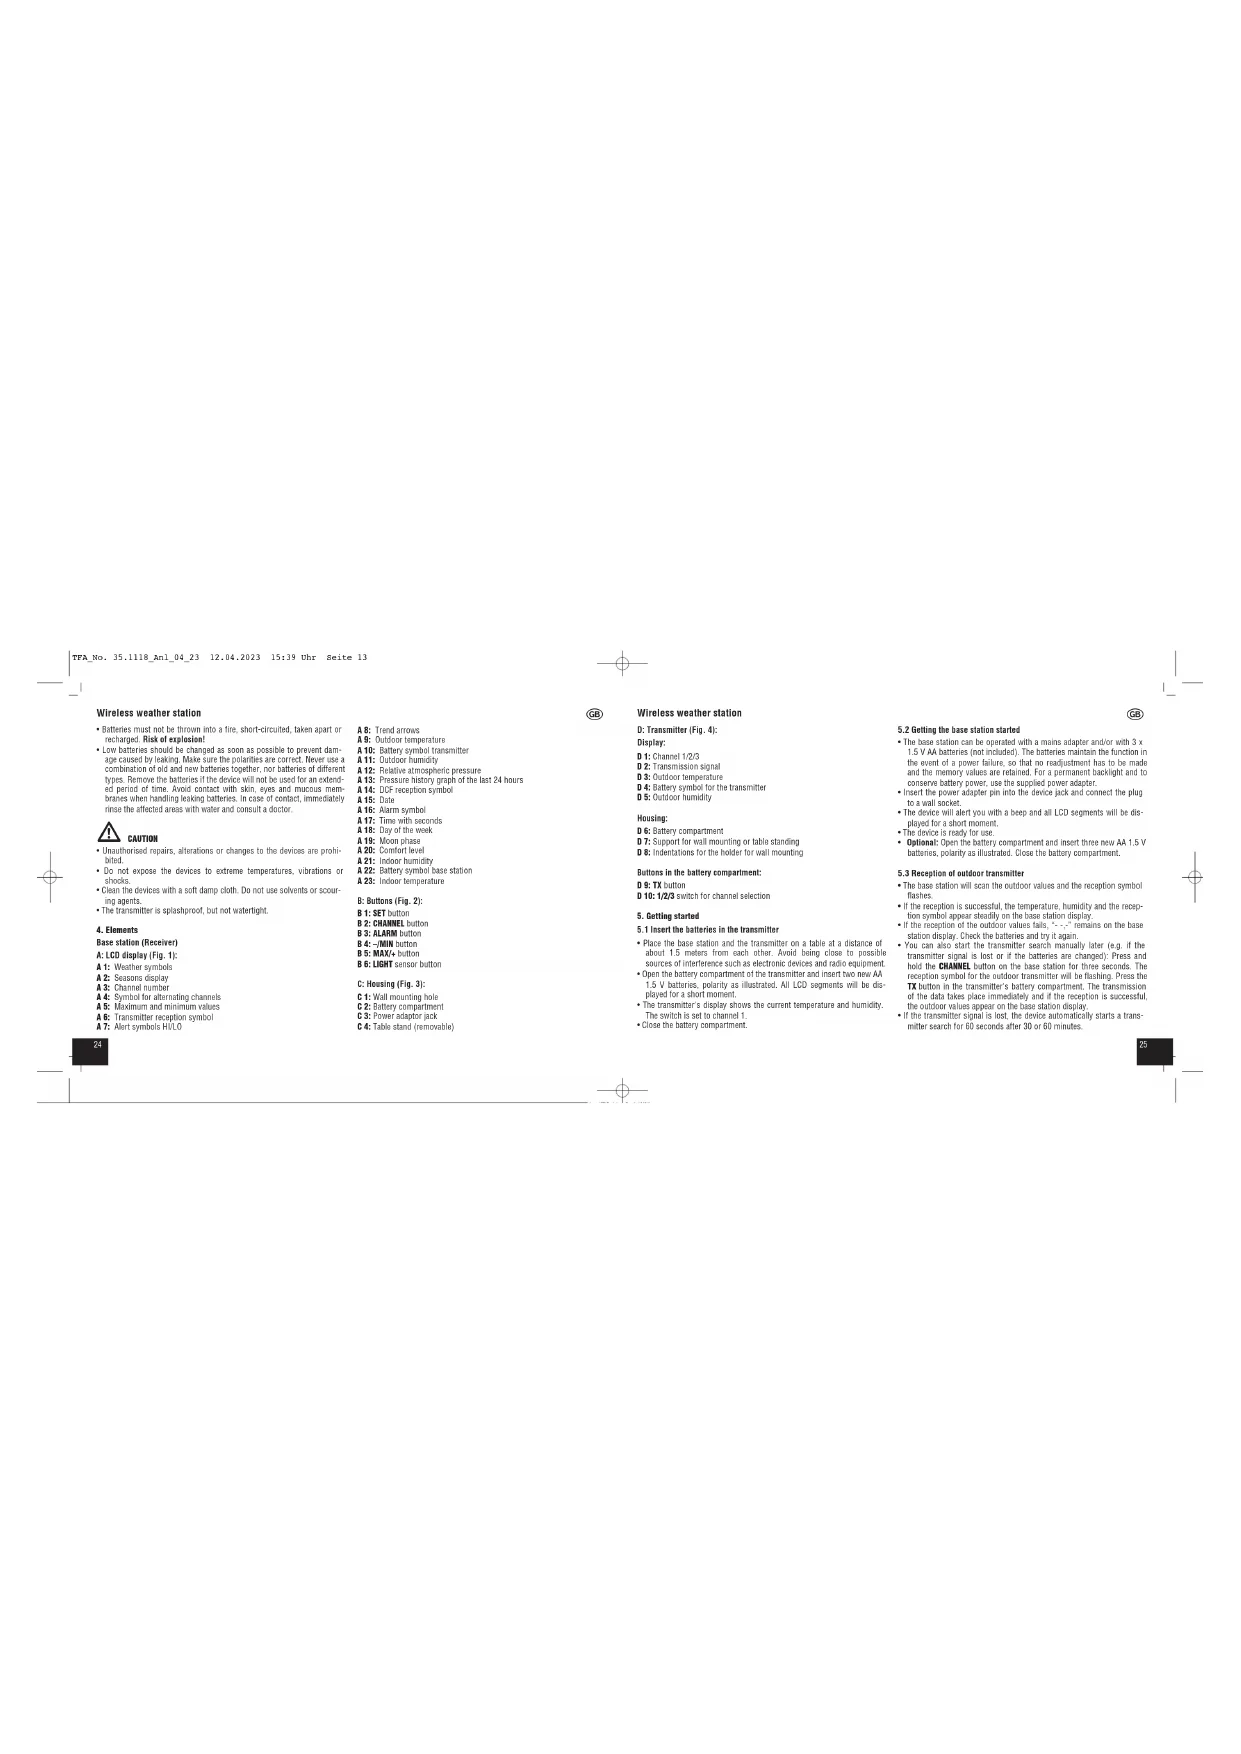
4. Elements
Base station (Receiver)
A: LCD display (Fig. 1):
A 1: Weather symbols
A 2: Seasons display
A 3: Channel number
A 4: Symbol for alternating boxes
A 5: Maximum and minimum values
A 6: Transmitter reception symbol
A7: Alert symbols Hi/LC
A8: Trend arrows
A 9: Outcoar temperature
A 10: Battery symbol transmitter
A 11: Outdoor humidity
A 12: Relative atmospheric pressure
A 13: Pressure history graph of the last 24 hours
A 14: DCF reception symbol
A 15: Date
A 16: Alarm symbol
A 17: Time with seconds A 18: Day of the week
A 16: Day of the w
A 19: Moon phase
A 20: Comfort Inv
A 20. Common level A 21. Indoor huol
A 21: Moon mily
A 22: Baten cumbal
A 22. Battery symbol Base Station
A 23: Incoor temperature
A 24: noon temperature
B: Buttons (Fig. 2):
B 1: SET button
B 2: CHANNEL butto
B 3: ALARM button
B 4: -/MIN button
B 5: MAX/+ button
B 6: LIGHT sensor button
C: Housing (Fig. 3):
C.1: Wall mounting hole
C 2: Battery compartment
C 3: Power adaptor jack
C 4: Table stand (removable)

Wireless weather station
D: Transmitter (Fig. 4)
Display:
01: Channel 1/2/3
D 2: Transmission signal
D 3: Outdoor temperature
D 4: Battery symbol for the transmitter
D 5: Outdoor humidity
Housing:
D 6: Battery compartment
7: Support for wall mounting or table standing
D 8: Indentations for the holder for wall mounting
D 9: TX button
D 10: 1/2/3 switch for channel selection
5. Getting started
5.1 Insert the batteries in the transmitter
- Place the base station and the transmitter on a table at a distance of about 1.5 meters from each other. Avoid being close to possible sources of interference such as electronic devices and radio equipment.
- Open the battery compartment of the transmitter and insert two new AA, 1.5 V batteries, polarity as illustrated. All LCD segments will be displayed for a short moment.
• The transmitter's display shows the current temperature and humidity.
The switch is set to channel 1.
- Close the battery compartment.
GB
5.2 Getting the base station started
- The base station can be operated with a mains adapter and/or with 3 x 1.5 V AA batteries (not included). The batteries maintain the function in the event of a power failure, so that no readjustment has to be made and the memory values are retained. For a permanent backlight and to conserve battery power, use the supplied power adapter.
- Insert the power adapter pin into the device jack and connect the plug to a wall socket.
• The device will alert you with a beep and all LCO segments will be declared for a short moment.
• The device is ready for use
- Optional: Open the battery compartment and insert three new AA 1.5 V batteries, polarity as illustrated. Close the battery compartment.
5.3 Reception of outdoor transmitter
- The base station will scan the outdoor values and the reception symbol flashes.
- If the reception is successful, the temperature, humidity and the reception symbol appear steadily on the base station display.
- If the reception of the outdoor values falls, “--,” remains on the base station display. Check the batteries and try it again.
- You can also start the transmitter search manually later (e.g. if the transmitter signal is lost or if the batteries are changed): Press and hold the CHANNEL button on the base station for three seconds. The reception symbol for the outdoor transmitter will be flashing. Press the TX button in the transmitter's battery compartment. The transmission of the data takes place immediately and if the reception is successful, the outdoor values appear on the base station display.
- if the transmitter signal is lost, the device automatically starts a transmitter search for 60 seconds after 30 or 60 minutes.
Wireless weather station
5.4 Reception of the DCF frequency signal
- After the reception of the outdoor values, the clock will now scan the
DCF frequency signal and the DCF symbol flashes on the display.
- When the time code is successfully received after 3-15 minutes, the radio-controlled time and the DCF symbol will be shown steadily on the display.
- The DCF reception always takes place at 1:00, 2:00 and 3:00 o'clock in the morning. If the signal is not successfully received, further attempts will be taken at 4:00 and 5:00 o'clock.
- You can also activate the DCF reception manually. Press and hold the -MIN button in normal mode for 3 seconds. The DCF reception symbol will be flashing.
- Press and hold the -IMIN button again for 3 seconds to step the reception process. The DCF reception symbol disappears.
- There are 3 different reception symbols:
flashing symbol - reception is active
solid - reception is successful
no symbol - no DGF reception
- If the clock cannot detect the DGF-signal i.e. due to interference,
• The clock will then work as a normal quartz clock (see "Manual settings").
5.5 Note on radio-controlled time
- The time is transmitted from an atomic clock near Frankfurt am Main by a DCF-77 (77.5 kHz) frequency signal with a range of about 1,500 km. Your radio-controlled clock receives the signal, converts it and always shows the exact time. The adjustment of Daylight Saving Time and Standard Time is also automatic.

- Avoid being close to possible sources of interference that may affect radio reception (see "Location and mounting").
- During night-time, the atmospheric interference is usually less severe. A single daily reception is adequate to keep the accuracy deviation under 1 second.
6. Operation
- The device will automatically quit the setting mode if no button is pressed for 20 seconds.
- Press and held the MAX/+ or -/MIN button in setting mode for last mode.
6.1 Manual settings
- Press and hold the SET button for three seconds to enter the setting mode.
• DEUTSCH (default) flashes on the display
- Press the MAX/+ or -/MIN button to set the day-of-the-week language. DEUTSCH, FRANÇAIS, ITALIANO, ESPANOL, DUTCH, ENGLISH,
- If you select English, the display will now appear in English.
- Review with the \$5T induction and go to for any viewing.
• Confirm: All the SET button and go to the next, setting
he sequence is shown as follows
- Language (default: DEUTSCH)
- Button tone ON/OFF (default: BEEP OFF)
- DL reception ON/OFF (default: DGF ON) Time range: 184.48 (ref: time: 7045.96)
- Time zone -127+12 (default: TIME ZUBE DB)
- Relative atmospheric pressure (default: PRESSURE: 1013 hPa)
- Year, month, day
Wireless weather station
6.1.1 DCF reception
- By default, the DCF reception is activated (DCF ON) and after success
ful reception of the DCF signal no manual time setting is necessary.
- In the setting mode, you can deactivate (DCF OFF) or activate again the DCF direction using the MAX/1.01.1189 button
- See the DSC time operation in decollected the clock must be manually
- Once the DOF-time reception is deactivated the clock must be manually set. No time zone will appear.
- If the DCF reception is activated, the manually set time will be overwritten by the DCF time when the signal is received successfully.
6.1.2 Time zone selling
- In the setting mode you can make the time zone correction +12/-12);
- The time zone correction is needed for countries where the DCF signal can be received but the time zone is different from the DCF time (e.g. +1=one hour plus).
6.1.3 Atmospheric pressure setting
- In the setting mode, the relative atmospheric pressure at the installation site must be entered. Ask for the current atmospheric pressure of your home area (Local weather service, Internet, optician, calibrated instruments in public buildings and airports).
7. Maximum and minimum values
- Press the -MIN button in normal mode. MIN flashes on the display.
- You can now see the lowest measuring value since the last reset with
time and date of recording.
- The sequence is shown as follows: Outdoor temperature, outdoor humidity, indoor temperature, indoor humidity, atmospheric pressure.
- Press the -/MIN button once more to go back to the current values display.

- Repeat the process by pressing the MAX/+ button to see the maximum values. MAX flashes on the display.
- Press and hold the SET button for 3 seconds while the highest or lowest values are displayed. All values will be deleted and reset to the current state.
8. Trend arrows
- The trend arrows indicate whether the values for temperature and humidity of the last 15 minutes are increasing or decreasing. If the values remain the same, there is no display.
Temperature/humidity are increasing
Temperature/humidity are steady (change < 0.5°C/2%)
Temperature/humidity are decreasing
9. Comfort level
- On the display appears a smiley to indicate the comfort level of the room climate (see Fig. 5).
10. Forecast
10.1 Atmospheric pressure
- The relative atmospheric pressure is referred to the sea level's pressure and has to be adjusted first to your local altitude (see: "Manual settings").
Wireless weather station
10.2 Developing of atmospheric pressure
- The bar graph indication of atmospheric pressure shows the last 24 hours.
- The '0' in the middle of this scale is equal to the current pressure and each charge (±2, ±4, ±6) represents how high or low in 'hPa' the past pressure was compared to the current pressure.
- If the bars go down, it means the atmospheric pressure has dropped and the weather is expected to get worse.
- If the bars are rising it means that the weather is getting better.
10.2 Weather forecast symbols
- The weather station has 6 different weather symbols: sunny, slightly cloudy, cloudy, rainy, thunderstorm, snowfall.
- A snow crystal is shown if rain is forecasted and the outdoor temperature on channel 1 is under 0°C.
- The weather forecast relates to a range of 12 to 24 hours and indicates only a general weather trend. For example, if the current weather is cloudy and the rain symbol is displayed, it does not mean the product is faulty because it is not raining. If simply means that the air pressure has dropped and the weather is expected to get worse but not necessarily rain. The accuracy is about 70 - 75% .
Note:
- Please note that the forecast symbol will become more defined in the course of operation. The forecast symbol is active right from the start, however, the reliability of the forecasts increases with the amount of data collected. To begin with, the sensor must adapt initially to the reference level at the site.
• The landscape image changes with the seasons.

11. Alarm settings
11.1 Alarm clock function
11.1.1 Alarm time setting
- Press and hold the ALARM button for three seconds to enter the alarm setting mode.
- ALARM TIME is shown in the display and the hour indicator and the alarm symbol are flashing. Press the MAX/+ or -MIN button to adjust the alarm time (hours). Confirm the setting with the ALARM button and set minutes in the same way.
- Confirm the setting with the ALARM button.
- If you do not want to set another alarm, press the SET button briefly or was 20 seconds, the device will save the setting automatically.
- If you want to set further alarms, see "Temperature and humidity alarm".
11.1.2 Activate and deactivate the alarm
- To deactivate and activate the time alarm function, press the ALARM button in normal mode. ALARM TIME is displayed. The alarm symbol and ON flash, if the alarm is activated. Press the ALARM button again, to deactivate the alarm function (OFF). Wait some seconds until the display returns to normal mode to confirm the setting.
- The alarm symbol appears on the display. When the alarm is activated, the alarm state is empty
When the alarm is saturated, the alarm starts to ring when the set alarm time is reached. The alarm symbol flashes.
- Press any outturn (except LIGHT) and the shield will stop.
- If the alarm is not stopped manually, the ascending alarm tone automatically turns off after two minutes and will be reactivated at the same set time on the following day.
• The alarm symbol remains on the display
- When the alarm rings, press the LIGHT button and the snooze function is activated.
Wireless weather station
• The alarm will be interrupted for 5 minutes. The alarm symbol flashes
- Press any button (except LIGHT) and the snoaze function will stop.
11.2 Temperature and humidity alarm
11.2.1 Set limits
- Press and hold the ALARM button for three seconds to enter the alarm setting mode.
- Set the desired alarm time (see "Alarm time selling") or press the ALARM button twice.
• LO ALERT OFF for outdoor temperature GH1 flashes.
- To activate (ON) or deactivate (OFF) the alert setting function, press the MAX/+ or -MIN button, while ON or OFF flashes.
- If you have activated the alert [CIV], wait some seconds until the alert value flashes.
- Press MAX/+ or -/MIN button to adjust the respective alarm limit.
- Confirm with the ALARM button and go to the next setting.
- If you do not want to set this alert, press the ALARM button again to move to the next alert.
• The sequence is shown as follows:
- Alarm time, hours & minutes
- Lower (LU) and upper limit (HI) outdoor temperature CRI / 40 - 50°C
- Lower (10) and upper limit (10) outdoor humidity CH
(10..99%RH)
- Lower (LO) and upper limit (HI) indoor temperature (0 ..50°C)
- Lower (LU) and upper limit (HI) indoor humidity [10...99%RH]
- Note: If you have installed more than one transmitter, press the CHANNEL button in normal mode to select the channel for which you want to make the setting.
• After all adjustments are completed, press the ALARM button to exit the alarm setting mode.

- When activated, the corresponding alert symbols appear on the display.
11.2.2 Alarm event
- In the event of an alarm, the corresponding symbol will be flashing and an alarm tone will sound for about 20 seconds.
- The alarm signal keeps on beeping every minute for three times as long as the measured value is higher/lower than the preset limit.
- Stop the alarm sound with any button.
- The alert symbol continues to flash until the measured value is within the alarm limits.
12. Dew point
- Press and hold the MAX/+ button for 3 seconds in normal mode to display the current indoor and outdoor dew point temperature.
13. Moon phase
• The actual moon phase is shown on the display (see Fig. 6).
14. Display light
- In mains operation: Press the LIGHT button to adjust the brightness in 4 levels (LVL 4-1) or to switch it off (OFF). The default setting is LVL 3.
- The last selected level will remain permanently active.
• To temporarily activate the display light in pure battery operation, press the LIGHT button. Each button press will activate the backlight for 10 seconds.
14.1 Automatic dimming mode
(during permanent backlight in mains operation)
- If the auto-dim mode is activated, the weak backlight (LVL 1) turns on automatically for the set time.
Wireless weather station
Press and hold the LIGHT button for 5 seconds.
- By default, the automatic dimming function is disabled. AUTO DIM OFF flashing on the display
- To activate the function, press the MAX/+ or -/MIN button (ON).
- Confirm with the LIGHT button.
- The start time flashes (DIM START 10:00 PM default). Press the MAX/+ or -/MIN button to set the time (full hours).
- Confirm with the LIGHT button.
- The end time flashes (DIM STOP 6.00 AM default). Press the MAX/+ or -/MIN button to set the time (full hours).
- Confirm the settings with the LIGHT button. The display returns to normal mode.
15. Location and mounting
- When placed outdoors, choose a shady and dry place for the transmitter. Direct sunlight may trigger incorrect measurement and continuous humidity damages the electronic components needlessly.
- Place the base station in any room of the house
- Avoid being close to possible sources of interference that may affect radio reception. It is recommended to keep a distance of at least 2 metres to possibly interfering sources (TV, computer, microwave, wireless phones, baby monitors) and large metal objects (e.g. refrigerator). Within solid walls, especially ones with metal parts, the transmission range can be reduced considerably. In extreme cases, please place the unit close to a window to improve reception.
- Check whether the transmission from the transmitter to the base station is possible and whether the DCF radio clock signal can be received.
- If necessary, choose another position for the outdoor transmitter and/or receiver.
- If the transmission is successful, you can place or wait mount the base station and the outdoor transmitter with the suspension device.

- To wall-mount the transmitter, screw the holder to the wall and click the outdoor transmitter into the holder.
- Do not use the base station in the vicinity of radiators, other sources of heat or in direct sunlight.
16. Battery replacement
- As soon as the battery symbol will appear on the outdoor values display of the base station or on the display of the outdoor transmitter change the batteries of the outdoor transmitter.
- Change the batteries of the base station, when the battery symbol appears on the indoor values display. The instrument also works without batteries. Than the battery symbol for the base station is permanently shown on the display.
• Please note
When the batteries are changed, the contact between the outdoor transmitter and the base station must be restored – so always restart both devices or start a manual transmitter search.
17. Additional outdoor transmitters (optional)
- When having more than one external transmitter, select a different channel for each one with the 1/2/3 switch inside the transmitter's battery compartment. Insert two new AA 1.5 V batteries, polarity as illustrated. Start the base station operation or the manual search for the outdoor transmitter.
- Choose the respective channel by pressing the CHANNEL button.
- Press and hold the CHANNEL button for three seconds. The last registered transmitter (channel) will be cancelled and the transmitter search begins.
- Press the TX button in the corresponding transmitter's battery compartment. The transmission of the outdoor data will take place immediately.
Wireless weather station
• After a successful installation close the outdoor transmitter's battery compartment carefully.
- The outdoor values and the channel number will be shown on the base station display. Press the CHANNEL button to change between the channels 1 to 3.
- After the last registered channel a circle symbol will appear. The values of the installed transmitters are displayed in sequence (10 seconds). To deactivate the function press the CHANNEL button again.
- Press the MAX/+ or -/MIN button, the maximum and minimum values for the displayed channels appear
18. Troubleshooting
Problem Solution
No indication → Control the power adapter
on the base station Battery operation:
→ Ensure the batteries' polarities are
correct
→ Change the batteries
No display on the transmitter → Ensure the bacteria' polarities are
correct
No transmitter reception → No transmitter installed
Display "---." → Check the outdoor transmitter's
for channel 1/2/3 batteries (only use batteries)
rechargeable batteries with 1.5V
→ Restart the transmitter and the base
station according to the manual
GB
→ Start the outdoor transmitter manual search
→ Choose another place for the outdoor transmitter and/or the base station
→ Reduce the distance between the outdoor transmitter and the base station
→ Check if there is any source of interference
No DCF reception
→ Activate (DCF ON) the DCF reception in setting mode
→ Press and hold the - /MIM button for 3 seconds to activate the reception manually
→ Wait for an attempt reception
during the night
→ Choose another place for your
devide
→ Set the clock manually
→ Check if there is any source of interference
→ Restart the instrument according to the manual
No permanent backlight
→ Set the brightness with the LIGHT button
→ Connect the device to the power adapter
Wireless weather station
Incorrect indication → Restart the device
Battery operation:
→ Change the batteries
If your device fails to work despite these measures, please contact the retailer where you purchased the product from for advice.
19. Waste disposal
This product and its packaging have been manufactured using high-grade materials and components which can be recycled and reused. This reduces waste and protects the environment.
Dispose of the packaging in an environmentally friendly manner using the collection systems that have been set up.

Disposal of the electrical device
Remove non-permanently installed batteries and rechargeable batteries from the device and dispose of them separately. This product is labelled in accordance with the EU Waste Electrical and Electronic Equipment Directive (WEEE).
This product must not be disposed of in ordinary household waste.
As a consumer, you are required to take end-of-life devices to a designated collection point for the disposal of electrical and electronic equipment, in order to ensure environmentally-compatible disposal. The return service is free of charge. Observe the current regulations in place!

Disposal of the batteries
Never dispose of empty batteries and rechargeable batteries with ordinary household waste.

They contain pollutants which, if improperly disposed of, can harm the environment and human health.
As a consumer, you are required by law to take them to your retail store or to an appropriate collection site depending on
national or local regulations in order to protect the environment. The return service is free of charge.
The symbols for the contained heavy metals are:
Cd=cadmium, Hg=mercury, Pb=lead.
20. Specifications
Temperature
Measuring range indoor 0 °C... +50 °C
Measuring range outdoor -40 °C... -60 °C
Resolution 0.1°C
Accuracy ±1°C (0...+50°C).
-1.5℃ [-40..0℃, +50..60℃]
Humidity 10...95% RH
Accuracy +5% RH (425°C, 30%, 80%RH
Range max. 100 m (open field)
Transmission frequency 433 MHz
Maximum
radio-frequency power < 10mW
Wireless weather station
Base station
Power consumption Power supply (included)
Input: 230-240V AC-50Hz 50mA
Output: 5.0V AC 0.15A 0.75W
Average active efficiency: ≥53.50%
No-load power consumption: +0.21 W
Dimensions 194 x 31 (47) x 133 mm
Weight 345 g (device only)
Transmitter
Power consumption 2 x AA 1.5 V batteries (not included)
We recommend Alkaline batteries
Dimensions 48 (54) x 26 (44) x 129 (135) mm
Weight 62 g (device only)

No part of this manuscript may be reproduced without written consent of TFA Costmann. The technical data are correct at the time of going to print and may change without prior notice. The latest technical data and information about this product can be found in our homeage by simply entering the product number in the search box.
Hemby, THA Destmar: contains that the radio equipment type 35.1118 is in compliance with Directive 2014b34-EJ. The full text of the EU declaration of conformity is available at the following internet address: www.tha-destmar.com/service/downloads/jce
www.fta-docimani.de
E-Mail:info@fa-cosimama.de
(1) Loschmann GmbH & Co. KG, zum Odersberg 12. 97677 Weinheim- Germany
Commercial registration number: Reg. Gericht Mannheim H74 570186
N23


K5. Temperature exchemicals
D 2: Signal de transmission
Temperature-humidite stable (variation < 0.5°C/2%)
F
Files 3 x 1.5 V AA (non incluses)
Alimentation: Pile 2 x 1.5 V AA (non incluses)
• Emittentary Joint of Interferential
- Telgore 60 to the voice
- Taxinstelling Islandaardinstelling: DEUTSCH;
- Toobstson O2-OFF (standardinstelling: PIEP OFF)
Draadloos weerstation
- DCF ontvangest DN/DFF (standardinstelling: DCF DN)
Cd-cadmium, Hg-kwlk, Pb-iod
- Technische gegevens