
DAB1000 - Radio Soundmaster - Free user manual and instructions
Find the device manual for free DAB1000 Soundmaster in PDF.
| Product type | DAB+/FM clock radio with CD player, Bluetooth, USB and NFC |
| Power supply | AC adapter 16V 2.5A (model TP40-160250E) |
| Preset stations | 30 DAB+, 20 FM |
| Audio power | 2 x 25W RMS |
| Bluetooth | Version 4.2 + EDR, range 10 meters |
| USB port | 5V 1A (charging and MP3/WMA playback) |
| Auxiliary inputs | 3.5mm auxiliary jack, digital optical input |
| CD player | CD, CD-R/RW, MP3/WMA |
| Audio functions | 5-mode equalizer (Flat, Pop, Jazz, Rock, Classic), Super bass, Loudness |
| Timers | Programmable alarm, Sleep timer (15-120 min) |
| Display | Backlit LCD, brightness adjustable to 3 levels |
| Remote control batteries | 1x CR2025 (included) |
| Safety | Class 1 laser, anti-electric shock protection, dangerous button batteries |
| Maintenance | Clean with a dry cloth, do not use abrasive detergents |
| Repairability | No user-serviceable parts, refer to qualified personnel |
Frequently Asked Questions - DAB1000 Soundmaster
User questions about DAB1000 Soundmaster
0 question about this device. Answer the ones you know or ask your own.
Ask a new question about this device
Download the instructions for your Radio in PDF format for free! Find your manual DAB1000 - Soundmaster and take your electronic device back in hand. On this page are published all the documents necessary for the use of your device. DAB1000 by Soundmaster.
USER MANUAL DAB1000 Soundmaster
natural_image
Black electronic audio workstation with CD and external control unit (no visible text or symbols)DEUTSCH
ENGLISH
FRANÇAIS
NEDERLANDS
ITALIANO
DANSK
NORSK
SVENSKA
Hersteller
natural_image
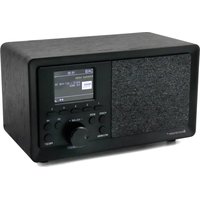
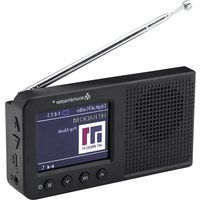
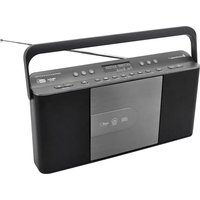
Front view of a portable electronic device with control knob and buttons (no visible text or symbols)Hauptgerät

natural_image
Line drawing of a remote control with keypad and buttons (no text or symbols)natural_image
Simple line drawing of a mechanical or electrical component with a long rod and flanged ends (no text or symbols)DAB/FM Teleskopantenne

natural_image
Simple line drawing of a connected electrical component with wires (no text or symbols)AC-Adapter

Bedienungsanleitung
BEDIENELEMENTE
FRONTANSICHT

1 Source Taste (SOURCE)
2 Standby Taste (①)
3 CD-Fach
4 Play/Pause Taste (▶▶)
Pairing Taste (▶▶)
5 Open/Close Taste (▲)
6 Stop Taste (■)
Bluetooth-Verbindung unterbrechen
Taste (■)
7 Loudness Taste (LOUDNESS)
8 USB Buchse ( )
9 NFC Sensor (N)
natural_image
Illustration of a hand holding a cylindrical object with an arrow indicating direction (no text or symbols)natural_image
Illustration showing a hand inserting a plug into a smartphone, then adding a screwdriver to the screen (no text or symbols present)Hinweis:
natural_image
Line drawing of a CD-ROM connected to an audio jack via cable (no text or symbols)Vorsicht:
DLS (Dynamic Label Segment)
Über NFC (Near Field Communication)
Copyright by Woerlein GmbH, 90556 Cadolzburg, www.soundmaster.de
Do not dispose of this product with the normal household waste at the end of its life cycle. Return it to a collection point for the recycling of electrical and electronic devices. This is indicated by the symbol on the product, user manual or packaging
The materials are reusable according to their markings. By reusing, recycling or other forms of utilization of old devices you make an important contribution to the protection of our environment.
Please contact your local authorities for details about collection points.

WARNING
Risk of electric shock Do not open!

Caution: To reduce the risk of electric shock, do not remove the cover (or back). There are no user serviceable parts inside. Refer servicing to qualified service personnel.

This symbol indicates the presence of dangerous voltage inside the enclosure, sufficient enough to cause electric shock.

This symbol indicates the presence of important operating and maintenance instructions for the device

Used batteries are hazardous waste and NOT to be disposed of with the household waste! As a consumer you are legally obligated to return all batteries for environmentally responsible recycling – no matter whether or not the batteries contain harmful substances*)
Return batteries free of charge to public collection points in your community or shops selling batteries of the respective kind.
Only return fully discharged batteries ^* ) marked Cd = cadmium, Hg = mercury, Pb = lead
- Only use mercury and cadmium-free batteries.
- Used batteries are hazardous waste and NOT to be disposed of with the household waste!!!
- Keep batteries away from children. Children might swallow batteries.
- Contact a physician immediately if a battery was swallowed.
- Check your batteries regularly to avoid battery leakage.
- Batteries shall not be exposed to excessive heat such as sunshine, fire or the like.
- CAUTION: Danger of explosion if battery is incorrectly replaced
- Replace only with the same or equivalent type

WARNING
DO NOT INGEST BATTERY, CHEMICAL BURN HAZARD
This product contains a coin/button cell battery. If the coin/button cell battery is swallowed, it can cause severe internal burns in just 2 hours and can lead to death.
Keep new and used batteries away from children. If the battery compartment does not close securely, stop using the product and keep it away from children.
If you think batteries might have been swallowed or placed inside any part of the body, seek immediate medical attention.

CAUTION - INVISIBLE LASER RADIATION WHEN OPENING THE COVER OR PRESSING THE SAFETY INTERLOCK. AVOID EXPOSURE TO THE LASER BEAM.

To prevent possible hearing damage, do not listen at high volume levels for long periods
Safety, Environmental and Setup Instructions
- Use the device in dry indoor environments only.
- Protect the device from humidity.
- This apparatus is for moderate climates areas use, not suitable for use in tropical climates countries.
- No objects filled with liquids, such as vases, shall be placed on the apparatus.
- The mains plug or an appliance coupler is used as the disconnect device, the disconnect devices shall remain readily operable.
- Connect this device to a properly installed and earthed wall outlet only. Make sure the mains voltage corresponds with the specifications on the rating plate.
- Make sure the mains cable stays dry during operation. Do not pinch or damage the mains cable in any way.
- A damaged mains cable or plug must immediately be replaced by an authorized service center.
- In case of lightning, immediately disconnect the device from the mains supply.
- Children should be supervised by parents when using the device.
- Clean the device with a dry cloth only.
- Do NOT use CLEANING AGENTS or ABRASIVE CLOTHS!
- Do not expose the device to direct sunlight or other heat sources.
• Install the device at a location with sufficient ventilation in order to prevent heat accumulation.
- Do not cover the ventilation openings!
- Install the device at a safe and vibration-free location.
- Install the device as far away as possible from computers and microwave units; otherwise radio reception may be disturbed.
- Do not open or repair the enclosure. It is not safe to do so and will void your warranty. Repairs only by authorized service/ customer center.
- No naked flame sources, such as lighted candles, should be placed on the unit.
- When you are necessary to ship the unit store it in its original package. Save the package for this purpose.
- In case of malfunction due to electrostatic discharge or fast transient (burst), remove and reconnect the power supply.
- If the unit is not using for a long period of time, disconnect it from the power supply by unplugging the power plug. This is to avoid the risk of fire.
- The device is equipped with a "Class 1 Laser". Avoid exposure to the laser beam as this could cause eye injuries.
TABLE OF CONTENTS
Pack Contents....3
Location of controls....4
Remote Control....5
Installation of Battery 6
Replace Remote Control Battery 6
Handling the Remote Control 6
Connections....7
Connect the DAB/FM Telescopic antenna....7
Connecting the Headphone 7
Connecting the AC-Adapter....7
ECO Power / Standby Features 8
Switching ON/OFF 8
Switching the system to ECO Power/Standby mode 8
Power-saving automatic standby....8
Setting the Clock....8
Automatically synchronized Clock Time 8
Setting the clock manually 8
Display the Clock....8
Volume Adjustment....8
DAB Radio 9
Store DAB+ radio stations automatically 9
Tuning to a DAB+ radio station....9
Sore DAB+ radio stations manually 9
Tuning to Preset DAB+ stations....9
DAB+ Information Display 9
FM Radio 10
Tuning a station 10
Auto Tuning 10
Manual Tuning....10
Preset Tuning (Available only after the stations are preset) 11
Program radio stations....11
Change the FM Reception Mode....11
RDS (Radio Data System) Reception.... 11
CD Mode....12
Disc Playing....12
Skip Search and play....12
Search and play....12
Programme Play (For audio CDs and MP3/WMA discs) 12
Playing the Beginning (Intro) of each Track....12
Random Play 12
To Select Album (For MP3/WMA discs) 13
Repeat Mode 13
Text Display During Playback....13
USB Mode....13
USB Playing 13
Charge your device....14
Bluetooth/NFC 14
About NFC 14
Playing from Bluetooth device 14
External Connections....15
AUX-IN 15
Digital optical device....15
Timer....15
Sleep Timer....16
Activate the Sleep Timer....16
To deactivate Sleep Timer....16
Sound Adjustment....16
Adjusting the Super Bass 16
Controlling the Loudness....16
Equalizer....16
Display Brightness 16
Factory Reset....16
Technical Specification 17
Importer....17
PACK CONTENTS
Make sure all of the following contents are included.

natural_image
Front view of a portable electronic device with control knob and buttons (no visible text or symbols)The Unit

natural_image
Line drawing of a remote control with buttons and a small circular button (no text or symbols)Remote Control (battery included)

Audio Cable

natural_image
Simple line drawing of a mechanical tool or rod with flanged ends and a threaded end (no text or symbols)DAB/FM Telescopic antenna

natural_image
Simple line drawing of a connected electrical component with wires (no text or symbols)AC Adapter

Instruction Manual
LOCATION OF CONTROLS
FRONT VIEW

1 Source Button (SOURCE)
2 Standby Button ( 🔊)
3 Disc Tray
4 Play/Pause Button (▶▶) Pairing Button (▶▶)
5 Open/Close Button (♠)
6 Stop Button (■)
Disconnect Bluetooth Connection
Button (■)
7 Loudness Button (LOUDNESS)
8 USB Jack (•)
9 NFC Area (N)
10 Remote Sensor
11 LCD Display Lens
12 Volume Control Knob (VOLUME)
13 Headphone Jack ( 🍒 )
14 Next Button (▶▶)
Long press: Search Forward Button (▶▶)
15 Previous Button (◀◀)
Long press: Search Backward
Button (◀◀)
16 Repeat Button (REPEAT)
Stereo/mono Select Button (REPEAT)
REAR VIEW

17 DC Jack
18 Optical Input Terminal
19 AUX Input Terminals
20 DAB/FM Socket
21 Bluetooth Antenna
REMOTE CONTROL

1 Standby Button ( ⏻ )
2 CD Function Button (CD)
3 Tuner Function Button (RVOAB)
4 Repeat Button (REPEAT)
Stereo/mono Select Button (REPEAT)
5 Intro Button (INTRO)
6 Loudness Button (LOUDNESS)
7 Preset Equalizer Button (P-EQ)
8 Clock Button (CLOCK)
9 Next Button / Preset Up Button (▶)
10 Long press: Search Backward Button (◀◀)
Tuning Backward Button (◀◀)
11 Previous Button ( )
Preset Down Button ( )
12 Play/Pause Button / Pairing Button (▶)
13 Album Up Button (ALB +)
14 Album Down Button (ALB -)
15 Mute Button (MUTE)
16 Number Button (0-9, 10+)
17 Open/Close Button ( ▲)
18 USB Function Button (USB)
Optical Function Button (OPT)
19 Bluetooth Function Button (✗)
AUX Function Button (AUX)
20 Random Button (RANDOM)
21 Dimmer Button (DIM)
22 Super Bass Button (S-BASS)
23 Sleep Button (SLEEP)
24 Timer Button (TIMER)
25 Information Button (INFO)
26 Long press: Search Forward Button
Tuning Forward Button
27 Stop Button (■) / SCAN Button (SCAN)
Disconnect Bluetooth Connection Button (■)
28 Volume Up Button (VOL +)
29 Volume Down Button (VOL -)
30 Program Button (PROG)
Long press: Auto Scan Button (PROG)
Memory Button (PROG)
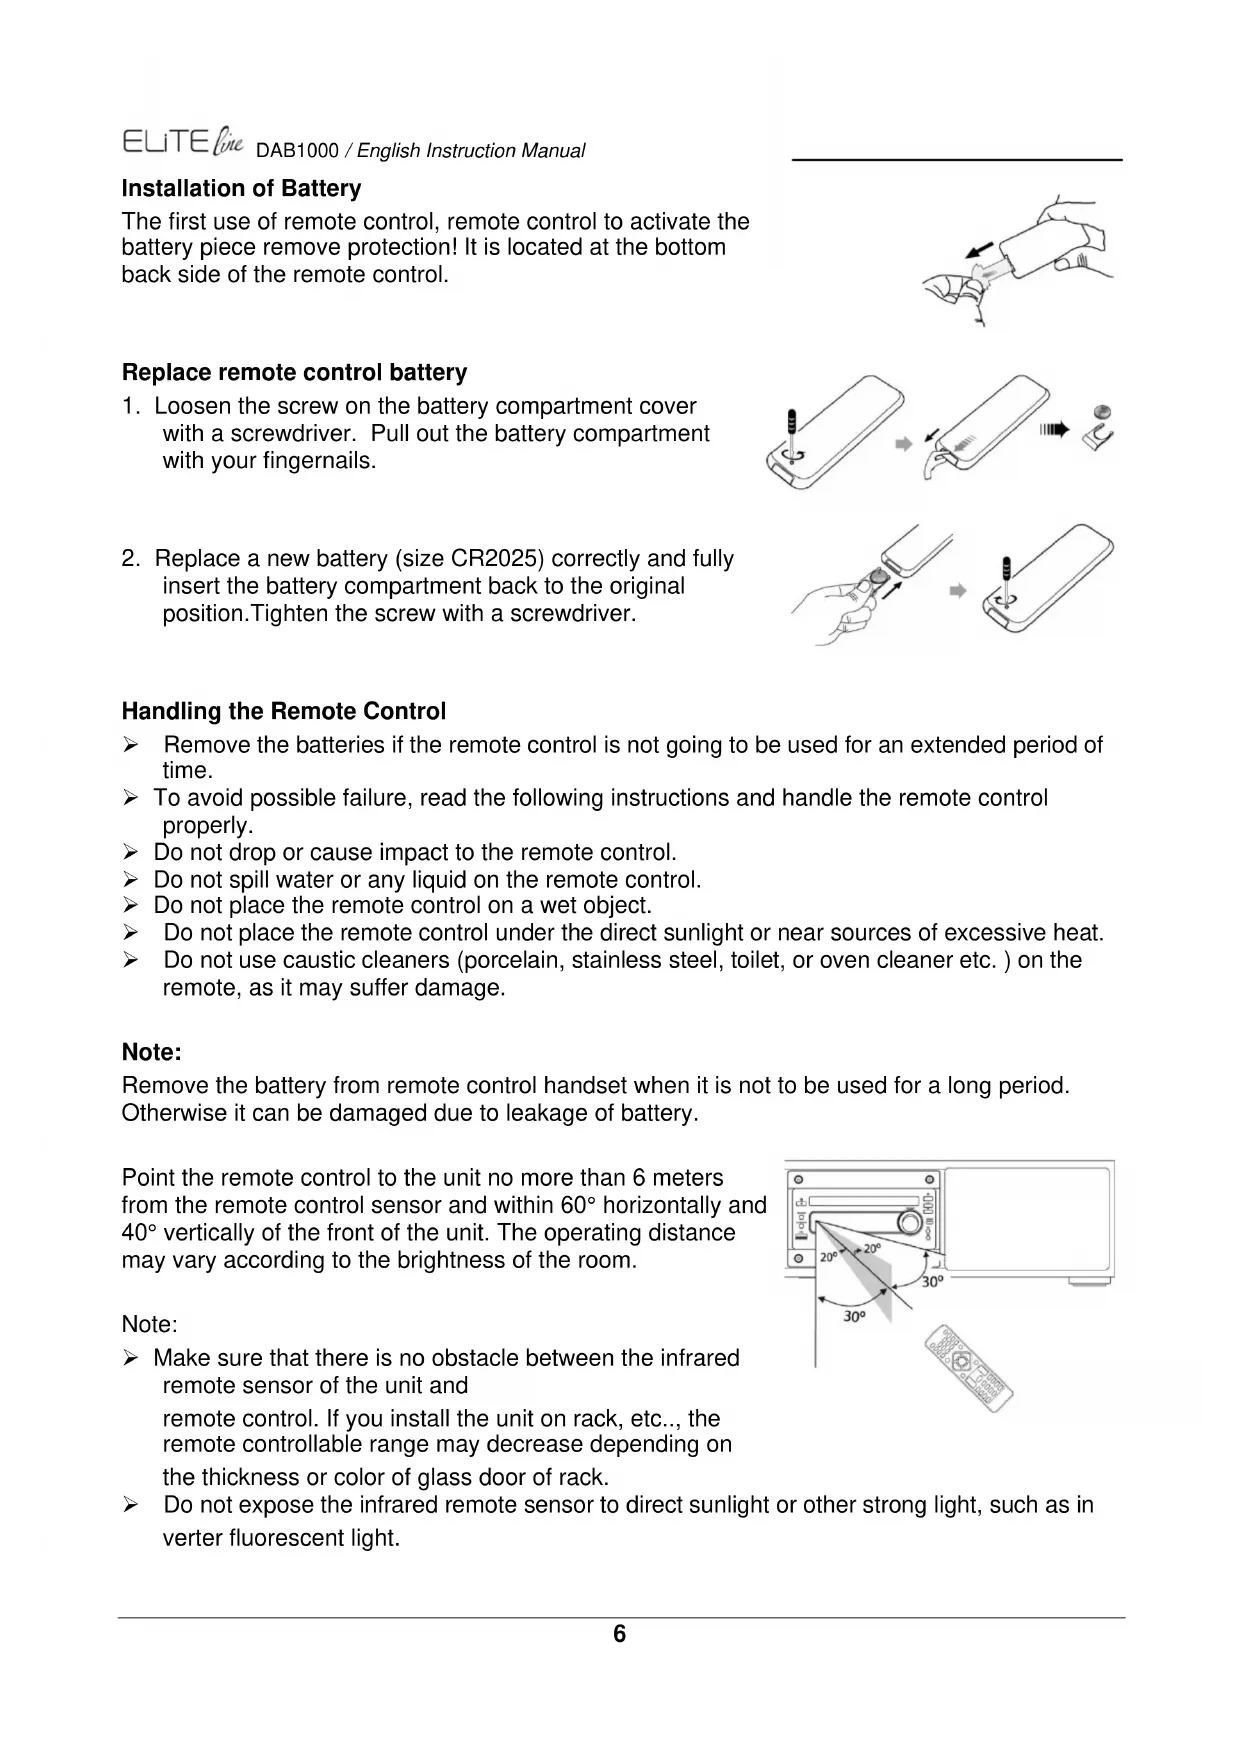
Installation of Battery
The first use of remote control, remote control to activate the battery piece remove protection! It is located at the bottom back side of the remote control.
Replace remote control battery
-
Loosen the screw on the battery compartment cover with a screwdriver. Pull out the battery compartment with your fingernails.
-
Replace a new battery (size CR2025) correctly and fully insert the battery compartment back to the original position. Tighten the screw with a screwdriver.

flowchart
graph TD
    A["Hand holding a device"] --> B["Step 1: Insert a mouse on phone"]
    B --> C["Step 2: Insert a mouse on phone"]
    C --> D["Step 3: Insert a mouse on phone"]
    D --> E["Step 4: Insert a mouse on phone"]
Handling the Remote Control
Remove the batteries if the remote control is not going to be used for an extended period of time.
To avoid possible failure, read the following instructions and handle the remote control properly.
Do not drop or cause impact to the remote control.
Do not spill water or any liquid on the remote control.
Do not place the remote control on a wet object.
Do not place the remote control under the direct sunlight or near sources of excessive heat.
Do not use caustic cleaners (porcelain, stainless steel, toilet, or oven cleaner etc.) on the remote, as it may suffer damage.
Note:
Remove the battery from remote control handset when it is not to be used for a long period. Otherwise it can be damaged due to leakage of battery.
Point the remote control to the unit no more than 6 meters from the remote control sensor and within 60^ horizontally and 40^ vertically of the front of the unit. The operating distance may vary according to the brightness of the room.

Note:
Make sure that there is no obstacle between the infrared remote sensor of the unit and remote control. If you install the unit on rack, etc., the remote controllable range may decrease depending on the thickness or color of glass door of rack.
Do not expose the infrared remote sensor to direct sunlight or other strong light, such as inverter fluorescent light.
CONNECTIONS
Caution: Make all connections before plugging the unit into the AC Power outlet.
Connect the DAB/FM Telescopic antenna
Connect the supplied DAB/FM telescopic antenna to the DAB/FM Antenna socket on the rear of the unit by turning the Antenna screw cap clockwise. Tighten the screw cap with a spanner.
Note: Do not overtighten, this could damage the Antenna.

Caution:
To avoid noise, keep the antenna away from the unit, the connecting cables and the mains cable.
Connecting the Headphone
Connect a pair of headphones to the phone jack. No sound comes out of the speakers.
Note: Be sure to turn down the volume before connecting or putting on headphones. Excessive sound pressure from earphones and headphones can cause hearing loss.

natural_image
Line drawing of a audio recording device connected to an earphone (no text or symbols present)Connecting the AC-Adapter
Insert the AC adapter's DC plug into the unit and other side into a wall outlet, and your system is at your command!

Caution:
➢ Be sure to unplug the power plug from the outlet when going out or when the unit is not in use for an extended period of time.
The mains plug is used as the disconnect device and it shall remain readily operable.
ECO POWER / STANDBY FEATURES
Switching ON / OFF
When you first connect the unit to the DC Jack, the unit will be in standby mode.
Press the ⏻ button to switch the unit on. The "HELLO" will show in the display.
➢ Press the ⏻ button to switch the unit back to standby mode. The “BYE BYE” will scroll across the display.
Switching the system to ECO Power/Standby mode
Long pressing the button for 2 seconds or more to switch to ECO Power Standby or normal standby.
▶ ECO Power standby mode
The clock will not be displayed. Red led on. Press the CLOCK button to display the clock on the LCD.
Normal standby mode
The clock display on the LCD and turn off after 90 seconds.
Power-saving automatic standby
As a power-saving feature, the unit will automatically switch to Standby mode if you do not press any buttons within 15 minutes after playback is stopped.
SETTING THE CLOCK
Automatically synchronized Clock Time
In DAB/RDS station, the unit can synchronize with time transmitted by DAB/RDS station automatically.
Setting the clock manually
Caution: You can set the clock in standby mode only.
- In standby mode, long pressing the CLOCK button on the remote control for 2 seconds or more, the LCD will display CLOCK SET and CLOCK 24 begins to blink.
- Use the ◀◀ ▶▶ buttons on the unit or ◀◀, ▶▶, ▶▶. ◀◀ buttons on the remote control to set the 12/24 hour format.
- Press the CLOCK button to store the setting, hour indicator will blink.
- Repeat above steps 2-3 to set the hour and minute.
Note:
To exit clock setting mode without storing, press the ■ button.
If no button is pressed in 90 seconds, the unit exits clock setting mode automatically.
If a power failure occurs or the unit is disconnected from the mains, the clock setting will be lost.
Display the Clock
In any source mode, the built-in clock shows the time on the LCD by press the CLOCK button.
VOLUME ADJUSTMENT
To increase or decrease the volume, rotate the VOLUME knob on the unit or press the VOL +/- buttons on the remote control.
DAB RADIO
Caution: Before listening to the radio, please check that the DAB/FM Antenna is correctly connected and adjusted for length and direction.
Store DAB+ radio stations automatically
- Repeatedly press the SOURCE button on the unit or FM/DAB button on the remote control to select DAB source. The word "DAB" will be displayed on the LCD.
- Press the ■ button on the unit or the SCAN button on the remote control to activate automatic program mode. The word "SCAN 1% (to 100%)" will be displayed on the LCD.
➢ IF NO DAB service is available, "NO DAB" will be display.
All available stations are programmed.
The system will store all detected stations at completion of the scanning, the system will turn to a station on the list.
Tuning to a DAB+ radio station
Repeatedly press the ◀◀/▶▶ buttons on the unit or ◀◀/▶▶ buttons on the remote control to change the frequency until you find the station you want.
Store DAB+ radio stations manually
You can store a maximum of 30 preset DAB radio stations.
- Tune to a radio station.
- Press the PROG button on the remote control to activate program mode.
- Repeatedly press PRESET ▶, buttons on the remote control to allocate a number to this radio station.
- Press the PROG button on the remote control again to store the station.
- Repeat above steps 1 to 4 for each station you want to store in memory with a preset number.
Manual Tuning
- Long pressing the ▶ button for 2 seconds or more to enter the manual tuning mode.
- Press the ◀◀▶▶ buttons on the remote control to select your desired DAB channels backward / forward.
- Press the ▶ button to confirm and tune to your selected channel.
Tuning to Preset DAB+ Stations
Repeatedly press PRESET buttons on the remote control until the desir preset station is displayed. The unit will tune to the selected station automatically.
DAB+ Information Display
You can view the DAB service information in the following modes. Depending on the DAB/DAB+radio station you are tuning to, some information modes may be unavailable. Repeatedly press the INFO button on the remote control to view the following information.
Station Name
When an DAB/DAB+ station is received, the name of that station will be displayed.
Ensemble Name
This displays the name of the multiplex that contains the station you are listening to. A multiplex is a collection of radio stations that are bundled and transmitted on one frequency. There are national and local multiplexes. Local ones contain stations that are specific to that area.
Note: DAB/DAB+ – unlike normal radio, groups together several radio stations and transmits them on one frequency.
Clock
This displays the current time provided automatically by the broadcaster.
Date
This displays the current date provided automatically by the broadcaster.
➢ DLS (Dynamic Label Segment)
Dynamic label segment is a scrolling message that the broadcaster may include with their transmissions. The message usually includes information, such as programme details etc.
▶ Signal Strength
This shows a number to indicate the signal strength which is between 0 and 100, for example 12, 70 or 100. The stronger the signal, the greater the number.
Programme Type
This describes the “style” or “genre” of the programme that is being broadcast.
Frequency
This shows the frequency of the current station.
Audio Bit Rate
The display will show the digital audio bit rate being received.
> Stereo/Mono
The display will show if the station being received is in mono or stereo.
FM RADIO
Caution: Before listening to the radio, please check that the DAB/FM Antenna is correctly connected and adjusted for length and direction.
Tuning a station
- Repeatedly press the SOURCE button on the unit or FWDAB button on the remote control to select tuner source. The word "TUNER" will be displayed on the LCD.
- Select a station using one of the following methods.
Auto Tuning
Long pressing the ◀◀ / ▶▶ button on the unit or the ◀◀/ ▶▶ button on the remote control for 2 seconds or more, the frequency changes down or up automatically until a station is found.
Manual Tuning
Repeatedly press the ◀◀ /▶▶ button on unit or remote control to change the frequency until you find the station you want.
Preset Tuning (Available only after the stations are preset)
Repeatedly press PRESET ▶/▲, buttons on the remote control to select the desired preset number. Its band and frequency are displayed on the LCD.
Directly press the 0-9 buttons on the remote control to input a number directly and tune to the band and frequency with this number.
Program radio stations
You can program a maximum of 20 preset radio stations (FM).
Automatically
Long pressing the PROG button on the remote control for 2 seconds or more to activate automatic program mode.
➢ [AUTO] is displayed.
All available stations are programmed.
The first programmed radio station is broadcast automatically.
Manually
- Tune to a radio station.
- Press the PROG button on the remote control to activate program mode. The preset number will blink.
- Press the 0-9 or PRESET ▶/▲, buttons on the remote control to allocate a number to this radio station.
Note: If you select more than 20, the preset number will be changed to "1" automatically. - Press the PROG button on the remote control again to store the station.
- Repeat above steps 1 to 4 for each station you want to store in memory with a preset number.
Note: If the system is unplugged or if a power failure occurs, the preset stations will not be erased.
Change the FM Reception Mode
Press the REPEAT button to select the Stereo or Mono channel to receive the best FM reception mode.
RDS (Radio Data System) Reception
Many FM stations are broadcasting added data compatible with RDS (Radio Data System). This radio set offers convenient functions using such data.
Press the INFO button repeatedly to select the information that displayed as follows.
Station Name
When an RDS station is received, the "RDS" and the name of that station will be displayed.
▶ PTY (Programme Type)
This describes the “Style” or “genre” of music that is being broadcast e.g. “Rock” or “Classical”.
Time
The broadcaster (Radio station) provides clock and date information automatically so there's no need to manually set this information.
Text
The broadcaster can include a scrolling text that displays information about the current program.
Frequency
This shows the frequency of the current station e.g. 95.30MHz.
CD MODE
Disc Playing
- Repeatedly press the SOURCE button on the unit or directly press the button on the remote control to select the disc source. The "DISC" will be displayed on the LCD.
- Press the ▲ button to open the disc door and place the disc on the disc tray (with the printed side up).
- Press the ▲ button to close the disc door, the unit will read the disc and play it automatically. Note: If in stop mode, please press the ▶ button to start playing the disc.
- Press the ▶ button to temporarily stop the playing, press the button again, it will continue to play.
- Press the ■ button once to pre-stop the disc playing. Press the button twice to stop the disc playing.
Skip Search and Play
➢ Press the ◀ button on the unit or ◀ button on the remote control once or more to skip previous one or more tracks on the disc.
➢ Press the ▶ button on the unit or ▶ button on the remote control once or more to skip next one or more tracks on the disc.
Search and Play
Long pressing the ◀◀/▶▶ buttons on the unit or ◀◀/▶▶ buttons on the remote control to search for the position that you intend to start playing.
Programme Play (For audio CDs and MP3/WMA discs)
You can programme up to 20 tracks to play in any desired order. The player must be in stop mode only with a CD inserted.
- Insert a disc and press the ■ button when it starts playing.
- Press the PROG button on the remote control, the LCD will display "001 p--01" and "PROG".
- Press the ◀◀/▶▶ buttons on the unit or 0-9, ▶/◀ buttons on the remote control to select the desired track number. The track number 8, LCD display "008 p--01".
- Press the PROG button on the remote control to confirm the track number to be stored. - The track number 8, LCD display "008 p--02".
- Repeat steps 3-4 to select and store all desired tracks.
- Press the ▶ button to start programme play.
- Press the button once to stop the programme play. Press the button twice to clear programme.
Playing the Beginning (Intro) of each Track
Press the INTRO button on the remote control to play the beginning of each track consecutively. The playing time of each track is 10 seconds, then the first track is playing automatically. When you hear the desired track, press the ▶II button.
Random Play
All tracks are played in a random sequence by pressing the RANDOM button on the remotecontrol, "SHUF" is blink on the LCD. Press this button again to return to normal play.
To Select Album (For MP3/WMA discs)
➢ Press the ALB+/- button on the remote control to select the next/previous album, and play the first track of this album.
If the playing has ended, press the ALB+/- button on the remote control to select the next/previous album.
Repeat Mode
ONE, ALB and ALL repeat play can be set by pressing the REPEAT button.
For audio CD
First press : To repeat the same track, the "TRK" and "REP" will blink. Second press : To repeat playing all tracks on a disc, the "REP ALL" will blink. Third Press : Return to the normal playback state.
For MP3/WMA Disc
First press : To repeat the same track, the "TRK" and "REP" will blink.
Second press : To repeat playing album, the "REP" and "ALB" will blink.
Third press : To repeat playing all tracks on a disc, the "REP ALL" will blink.
Fourth Press : Return to the normal playback state.
Text Display During Playback
For audio CD
Repeatedly press the INFO button on the reomote control to show the current track number and sigle elapsed time, the current track number and single remain time, the current track number and total elapsed time or the current track number and total remain time.
For MP3/WMA Disc
Press the INFO button on the remote control, ID3 information (song title and artist) will be displayed. Press this button again, album, track and playing time will be displayed.
USB MODE
USB playing
- Insert the USB device's USB plug into the socket on the unit.
Repeatedly press the SOURCE button on the unit or USB /OPT button on the remote control to select the USB source. The word "USB" will be displayed on the LCD. - In stop mode, press the ▶ button to start playing. During playing, press the ▶ button to temporarily stop the playing, press the button again, it will continue to play.
- Press the button once to pre-stop the disc playing.
- Press the ■ button twice to stop the disc playing

Note: The player support the USB music file format of MP3,WMA only.
Access a folder
During playing, press the ALB+/- buttons on the remote control to select a folder.
In stop mode, press the ALB+/- buttons on the remote control to select a folder and press the ◀◀ / ▶▶I buttons on the unit or ▶/◀buttons on the remote control to select a file, and then press the ▶II button to start play.
Charge your device
You can charge your device through the USB socket on the rear of the unit with a USB cable.
NOTE:
The maximum current for USB charging is 5V fA.
Not all devices for USB charging are guaranteed.
BLUETOOTH / NFC
About NFC
Pair your NFC(Near Field Communication)-enabled mobile device directly with this unit by just a single tap.
- Activate NFC on your mobile device.
- Tap the mobile device on the NFC area N of the unit.
- Operate your mobile device directly for playback features.
- Tap again on the NFC area of the unit to disconnect.
Note: This function only works with mobile devices that support NFC technology.
Playing from Bluetooth device
- Repeatedly press the SOURCE button on the unit or ☐/AUX button on the remote control to select the bluetooth source. The word "BT" will display on the LCD.
- Long pressing the ▶ button on the unit or PAIRING button on the remote control for 2 seconds or more to searching pairing device.
- Activate the Bluetooth function in your Bluetooth device (see the device user manual).
- Select "DAB1000" on your device for pairing. For elder devices, you need to input "0000" as pairing password.
- Start music play on your Bluetooth device, you can use this unit to control the function to your Bluetooth device.
To pause/resume play, press ▶II..
To skip to a track, press ◀◀ /▶▶ buttons on the unit or ▶/◀ buttons on the remote control.
To increase or decrease the volume, press VOL +/-
- Long pressing the ■ button for 2 seconds or more to disconnect the Bluetooth connection from your Bluetooth device and clear Bluetooth pairing history for this unit.
Note:
The operational range is approximately 10 meters.
▶ Any obstacle can reduce the operational range.
The device will also be disconnected when the device is moved beyond the operation range.
If you want to reconnect the device to the unit, place it within the operational range.
- Compatibility with all Bluetooth devices is not guaranteed.
EXTERNAL CONNECTIONS
AUX-IN
- Connect the AUX IN terminals on the rear of the unit to the line output terminals on the auxiliary equipment with an audio cable.
- Repeatedly press the SOURCE button on the unit or A/AUX button on the remote control to select AUX IN source. The word "AUX IN" will be displayed on the LCD.
- Start to play on the device (see the user manual of the external device).

flowchart
graph TD
    A["Input"] --> B["Amplifier"]
    B --> C["AUX OUTPUT"]
    C --> D["Device"]
Digital optical device
- Connect the OPTICAL (input) jack on the rear of the unit to the optical out jack on a digital recording device (such as DTS-Digital Theatre compatible, with Dolby Digital decoder) with the signal cable.

-
Repeatedly press the SOURCE button on the unit or USB /OPT button on the remote control to select OPTICAL source. The word "OPTICAL" will be displayed on the LCD.
-
Start to play on a digital device (see the user manual of the digital device).
Note: When receiving signals from televisions or other devices connected to an optical input, change the digital audio output to PCM in the setup menu of the connected device.
TIMER
Caution: Make sure that you have set the clock correctly.
- In standby mode, long pressing the TIMER button on the remote control, until [TIMER SET] scrolls on the LCD. Then the source is displayed, e.g. DISC. Note: If the clock is not set, the "SET CLOCK FIRST" will be displayed.
- Use the ◀◀ / ▶▶ on the unit or ◀◀, ▶▶, ▶▶,◀ buttons on the remote control to select a source (DISC, USB, DAB, FM).
- Press the TIMER button to store the setting, the hour indicator will blink.
- Repeat above steps 2-3 to set the hour, minute and adjust volume.
Note:
To exit clock setting mode without storing. Press the ■ button.
If no button is pressed in 90 second, the unit exits clock setting mode automatically.
If DISC/USB source is selected and the audio cannot be played, TUNER is activated automatically.
To deactivate or re-activate an alarm timer
Repeatedly press the TIMER button to activate or deactivate timer, if timer is activated, "∅" is displayed.
SLEEP TIMER
Activate the sleep timer
When the unit is turned on, repeatedly press the SLEEP button on the remote control to select a set period of time (in minutes: 120, 90, 60, 45, 30, 15), the “zz” is displayed.
To deactivate sleep timer
Repeatedly press the SLEEP button on the remote control until [SLEEP OFF] is displayed, the “ _177 ” is disappears.
SOUND ADJUSTMENT
Adjusting the Super Bass
You can reinforce the bass sound to maintain rich, full bass at low volume.
➢ Press the S-BASS button on the remote control to get the effect, the “DBB” will displayed on the LCD.
➢ Press the S-BASS button again to cancel the effect.
Controlling the Loudness
This unit has a loudness function, which can automatically increase the bass sound effect at low volume. It can also increase the bass sound effect at high volume, but it will be relatively less when it is at high volume. Press the LOUDNESS button to obtain the loudness function, the
“◀” will displayed on the LCD, press again will disappear.
Equalizer
You can adjust the sound reproduced simply by choosing from 5 preset equalizers. During play, press the P-EQ button on the remote control repeatedly to select:
FLAT → POP → JAZZ → ROCK → CLASSIC
DISPLAY BRIGHTNESS
This unit has three brightness levels for you to adjust the clock display. Press the DIM button on the remote control repeatedly to choose the desired brightness.
FACTORY RESET
Long pressing the ■ button on the unit for 3 seconds or more to display the software version of the unit, then press the ■ button again, "RESET" will shown in the display.
Note: This feature is only available for standby mode.
TECHNICAL SPECIFICATION
Power supply
: Use only the supplied power adapter
Model TP40-160250E
FIT-POWER
Power input
: 100-240V\~50/60Hz 1.5A max.
Power output
: 16V2.5A

DAB range (Band III)
: 174.928 - 239.200MHz
FM range
: 87.5 - 108MHz
Preset Stations
: 30 DAB, 20 FM
USB-Port
: 5V-1A
Bluetooth® version
: 4.2 + EDR
Bluetooth® Frequency range
: 2402 - 2480 MHz
Bluetooth® Power transmitted
: 4 dBm
NFC Frequency operation
: 13.56MHz
NFC Communication technique
: NFC passive tag
Audio power output
: 2x 25W RMS
IMPORTER
Germany Web: www.soundmaster.de
Copyright by Woerlein GmbH, 90556 Cadolzburg, www.soundmaster.de
Programmation de stations radio....11
natural_image
Front view of a device control panel with no visible text or symbols on the panel itselfAppareil

natural_image
Line drawing of a remote control with keypad and buttons (no text or symbols)natural_image
Simple line drawing of a mechanical rod or connector with two ends (no text or symbols)natural_image
Simple line drawing of a connected electrical component with wires (no text or symbols)Adaptateur CA

natural_image
Illustration of a hand holding a cylindrical object with an arrow indicating direction (no text or symbols)natural_image
Illustration showing a hand inserting a small circular component into a smartphone, then adding a screwdriver to the screen (no text or symbols present)Remarque :
natural_image
Diagram showing audio equipment connected to a computer monitor and earphones (no text or symbols present)Mise en garde :
Programmation de stations radio
Plage DAB (bande III)
: 174,928 - 239,200MHz
Plage FM
: 87,5 - 108 MHz
Technique de communication NFC
: Balise passive NFC
Email : service@soundmaster.de
Allemagne
Site web : www.soundmaster.de
LEVERINGSOMVANG....3
natural_image
Front view of a computer control panel with no visible text or symbols on the panel itselfHet hoofdapparaat

natural_image
Line drawing of a remote control with buttons and dials (no text or symbols)natural_image
Simple line drawing of a mechanical rod or connector with flanged ends (no text or symbols)Uitschuifbare DAB/FM-antenne

natural_image
Simple line drawing of a rectangular device with a coiled cable and two terminal connectors (no text or symbols)AC-adapter

Gebruiksaanwijzing
natural_image
Illustration of a hand holding a rectangular object with an arrow indicating direction (no text or symbols)natural_image
Illustration showing a hand inserting a coin into a smartphone while using a screwdriver to insert the app (no text or symbols present)Opmerking:
natural_image
Line drawing of a computer interface with an audio jack connected to a headset (no text or symbols visible)Let op:
▶ Voor MP3-/WMA-disks
Email: service@soundmaster.de
Duitsland
Website: www.soundmaster.de
natural_image
Front view of a computer monitor with control knob and buttons (no visible text or symbols)L'unità

natural_image
Line drawing of a remote control with buttons and dials (no text or symbols)natural_image
Simple line drawing of a mechanical rod or connector with flanged ends (no text or symbols)Un'antenna telescopica DAB/FM

natural_image
Simple line drawing of a connected electrical component with wires (no text or symbols)Un adattatore CA

natural_image
Illustration of a hand holding a rectangular object with an arrow indicating direction (no text or symbols)natural_image
Illustration showing a hand inserting a coin into a smartphone while being inserted into a smartphone with a screwdriver (no text or symbols present)Nota:
natural_image
Line drawing of a CD-ROM connected to an audio jack via cable, with headphones shown nearby (no text or symbols)Attenzione!
KASSENS INDHOLD....3
KNAPPER OG KONTROLLER....4
FJERNBETJENING 5
Installation of batteri....6
LYSSTYRKE I DISPLAY....17
NULSTILLING TIL FABRIKSINDSTILLINGER 17
TEKNISKE SPECIFICATIONER....17
IMPORT∅R....17
KASSENS INDHOLD
natural_image
Front view of a device control panel with no visible text or symbols on the panel itselfMusikanlæg

natural_image
Line drawing of a remote control with buttons and dials (no text or symbols)natural_image
Simple line drawing of a mechanical rod or connector with two ends (no text or symbols)DAB/FM teleskopantenne

natural_image
Simple line drawing of a connected electrical component with wires (no text or symbols)Vekselstrømsadapter

1 Knappen Standby (∅)
2 Knappen CD-funktion (CD)
3 Knappen Tunerfunktion (MAD)
4 Knappen Gentag (REPEAT)
Knappen Vælg stereo/mono (REPEAT)
5 Knappen Intro (INTRO)
6 Knappen Loudness (LOUDNESS)
7 Knappen Forvalgt equalizer (P-EQ)
8 Knappen Ur (CLOCK)
9 Knappen Næste/knappen Forvalg op (▶)
10 Langt tryk: Knappen Søg tilbage ( Knappen Tuning nedad ( )
11 Knappen Forrige ()
Knappen Forvalg ned (
12 Knappen Afspil/Pause/knappen Parring (▶)
13 Knappen Album op (ALB +)
14 Knappen Album ned (ALB -)
15 Knappen Slå lyd fra (MUTE)
16 Knappen Tal (0-9, 10+)
17 Knappen Åbn/Luk (
18 Knappen USB-funktion (USB)
Knappen Optisk funktion (OPT)
19 Knappen Bluetooth-funktion (3)
Knappen AUX-funktion (AUX)
20 Knappen Vilkårlig (RANDOM)
21 Knappen Dæmpning (DIM)
22 Knappen Superbas (S-BASS)
23 Knappen Slumring (SLEEP)
24 Knappen Tidsur (TIMER)
25 Knappen Information (INFO)
26 Langt tryk: Knappen Søg fremad
Knappen Tuning opad
27 Knappen Stop (■)/knappen S∅G (SCAN)
Knappen til Afbrydelse af
Bluetooth-forbindelse (■)
28 Knappen Lydstyrke op (VOL +)
29 Knappen Lydstyrke ned (VOL -)
30 Knappen Programmering (PROG)
Langt tryk: Knappen Automatisk søgning(PROG)
Knappen Hukommelse (PROG)
Installation of batteri
Bemærk:
natural_image
Line drawing of a computer interface with an audio jack connected to a headset (no text or symbols visible)Forsigtig:
JUSTERING AF LYDSTYRKE
Web: www.soundmaster.de
For å velge album (for MP3/WMA-disker).... 13
natural_image
Front view of a computer control panel with buttons and a dial (no text or symbols visible)Hovedenhet

natural_image
Line drawing of a remote control with buttons and dials (no text or symbols)natural_image
Simple line drawing of a mechanical rod or connector with two ends (no text or symbols)DAB/FM-teleskopantenne

natural_image
Simple line drawing of a connected electrical component with wires (no text or symbols)AC-adapter

Bruksanvisning
OVERSIKT OVER TASTENE
SETT FORFRA

1 Lydkilde-knapp (SOURCE)
2 Standby-knapp (∅)
3 CD-skuff
4 Spill av-/Pause-knapp ( )
Innstilling fremover-knapp (▶)
Paring-knapp ( )
5 Åpne/Lukke-knapp (
6 Stopp-knapp (■)
Innstilling bakover-knapp (■)
Koble fra Bluetooth-forbindelse-knapp (■)
7 Lydstyrke-knapp (LOUDNESS)
8 USB-inngang (●)
1 Standby-knapp (ψ)
2 CD-funksjon-knapp (CD
3 Innstilling-funksjon-knapp (HIVDAB)
4 Gjenta-knapp (REPEAT)
Stereo/mono-valgknapp (REPEAT)
5 Intro-knapp (INTRO)
6 Lydstyrke-knapp (LOUDNESS)
7 Forhåndsinnstilling equalizer-knapp (P-EQ)
8 Klokke-knapp (CLOCK)
9 Neste-knapp/Forhåndsinnstilling opp-knapp (▶)
10 Langt trykk: Søk bakover-knapp (✗)
Innstilling bakover-knapp (✗)
11 Forrige-knapp ( )
Forhåndsinnstilling ned-knapp ( )
12 Spill av-/Pause-knapp / Paring-knapp ( )
13 Album opp-knapp (ALB +)
14 Album ned-knapp (ALB-)
15 Dempe-knapp (MUTE)
16 Nummer-knapp (0–9, 10+)
17 Åpne/Lukke-knapp (
18 USB-funksjon-knapp (USB)
Optisk funksjon-knapp (OPT)
19 Bluetooth-funksjon-knapp ( )
AUX-funksjon-knapp (AUX)
20 Tilfeldig-knapp (RANDOM)
21 Lysdemper-knapp (DIM)
22 Super-bass-knapp (S-BASS)
23 Innsovning-knapp (SLEEP)
24 Tidtaker-knapp (TIMER)
25 Informasjon-knapp (INFO)
26 Langt trykk: Søk fremover-knapp
Innstilling fremover-knapp
27 Stopp-knapp (■)/Skanne-knapp (SCAN)
Koble fra Bluetooth-forbindelse-knapp (■)
28 Volum opp-knapp (VOL +)
29 Volum ned-knapp (VOL-)
30 Programming-knapp (PROG)
Langt trykk: Auto-skanne-knapp (PROG)
Minne-knapp (PROG)
Installere batteri
Händtering av fjernkontrollen
Merk:
natural_image
Line drawing of a computer monitor connected to an audio jack and headphones (no text or symbols present)Koble til AC-adapteren
Advarsel:
For å velge album (for MP3/WMA-disker)
Tilgang til en mappe
INNEHÅLLSFÖRTECKNING
FÖRPACKNINGENS INNEHÅLL....3
PLACERING AV KNAPPAR 4
FJÄRRKONTROLL 5
Sätta i batteriet 6
Byta ut batteriet i fjärrkontrollen 6
natural_image
Front view of a device control panel with no visible text or symbols on the panel itselfEnheten

natural_image
Line drawing of a remote control with keypad and buttons (no text or symbols)natural_image
Simple line drawing of a mechanical rod or connector with two ends (no text or symbols)natural_image
Simple line drawing of a connected electrical component with wires (no text or symbols)AC-adapter

Bruksanvisning
PLACERING AV KNAPPAR
BILD PÅ FRAMSIDA

1 Källknapp (SOURCE)
2 Standby-knapp (∅)
3 Skivfack
4 Spela/Pausa-knapp ( )
Ställ in framåt (▶)
Parkopplingsknapp ( )
Obs!
natural_image
Line drawing of a computer interface with an audio jack connected to a headset (no text or symbols visible)Ansluta AC-adaptern
Varning:
E-post: service@soundmaster.de
Germany
D 90556 Cadolzburg, Germany
Tel: +49 9103 71 67 0
Fax: +49 9103 71 67 12
E-Mail: info@soundmaster.de
Internet: www.soundmaster.de
Hereby, Wörlein GmbH declares that this device is in compliance with the essential requirements and other relevant provisions of Directive 2014/53/EU.
A copy of the declaration of conformity can be obtained from the above address.

- BEDIENELEMENTE
- FRONTANSICHT
- Hinweis:
- Vorsicht:
- Über NFC (Near Field Communication)
- WARNING
- DO NOT INGEST BATTERY, CHEMICAL BURN HAZARD
- TABLE OF CONTENTS
- PACK CONTENTS
- LOCATION OF CONTROLS
- REMOTE CONTROL
- Installation of Battery
- Replace remote control battery
- Handling the Remote Control
- Note:
- CONNECTIONS
- Connect the DAB/FM Telescopic antenna
- Caution:
- Connecting the Headphone
- Connecting the AC-Adapter
- ECO POWER / STANDBY FEATURES
- Switching ON / OFF
- Switching the system to ECO Power/Standby mode
- ▶ ECO Power standby mode
- Normal standby mode
- Power-saving automatic standby
- SETTING THE CLOCK
- Automatically synchronized Clock Time
- Setting the clock manually
- Display the Clock
- VOLUME ADJUSTMENT
- DAB RADIO
- Store DAB+ radio stations automatically
- Tuning to a DAB+ radio station
- Store DAB+ radio stations manually
- Manual Tuning
- Tuning to Preset DAB+ Stations
- DAB+ Information Display
- Station Name
- Ensemble Name
- Clock
- Date
- ➢ DLS (Dynamic Label Segment)
- ▶ Signal Strength
- Programme Type
- Frequency
- Audio Bit Rate
- > Stereo/Mono
- FM RADIO
- Tuning a station
- Auto Tuning
- Preset Tuning (Available only after the stations are preset)
- Program radio stations
- Automatically
- Manually
- Change the FM Reception Mode
- RDS (Radio Data System) Reception
- CD MODE
- Disc Playing
- Skip Search and Play
- Search and Play
- Programme Play (For audio CDs and MP3/WMA discs)
- Playing the Beginning (Intro) of each Track
- Random Play
- To Select Album (For MP3/WMA discs)
- Repeat Mode
- For audio CD
- For MP3/WMA Disc
- Text Display During Playback
- USB MODE
- USB playing
- Access a folder
- Charge your device
- BLUETOOTH / NFC
- About NFC
- Playing from Bluetooth device
- EXTERNAL CONNECTIONS
- AUX-IN
- Digital optical device
- TIMER
- To deactivate or re-activate an alarm timer
- SLEEP TIMER
- Activate the sleep timer
- To deactivate sleep timer
- SOUND ADJUSTMENT
- Adjusting the Super Bass
- Controlling the Loudness
- Equalizer
- DISPLAY BRIGHTNESS
- FACTORY RESET
- TECHNICAL SPECIFICATION
- Power supply
- IMPORTER
- Remarque :
- Mise en garde :
- Programmation de stations radio
- Opmerking:
- Let op:
- ▶ Voor MP3-/WMA-disks
- Nota:
- Attenzione!
- KASSENS INDHOLD....3
- KNAPPER OG KONTROLLER....4
- FJERNBETJENING 5
- LYSSTYRKE I DISPLAY....17
- NULSTILLING TIL FABRIKSINDSTILLINGER 17
- TEKNISKE SPECIFICATIONER....17
- IMPORT∅R....17
- KASSENS INDHOLD
- Installation of batteri
- Bemærk:
- Forsigtig:
- JUSTERING AF LYDSTYRKE
- OVERSIKT OVER TASTENE
- Installere batteri
- Händtering av fjernkontrollen
- Merk:
- Koble til AC-adapteren
- Advarsel:
- For å velge album (for MP3/WMA-disker)
- Tilgang til en mappe
- INNEHÅLLSFÖRTECKNING
- FÖRPACKNINGENS INNEHÅLL....3
- PLACERING AV KNAPPAR 4
- FJÄRRKONTROLL 5
- PLACERING AV KNAPPAR
- Obs!
- Ansluta AC-adaptern
- Varning:
Brand : Soundmaster
Model : DAB1000
Category : Radio