WS 8086 - Clock TECHNOLINE - Free user manual and instructions
Find the device manual for free WS 8086 TECHNOLINE in PDF.
| Product type | LED quartz clock |
| Brand | TECHNOLINE |
| Model | WS 8086 |
| Main power supply | AC adapter 5V-1.2A (included) |
| Backup power supply | 1 CR2032 battery (not included) |
| Display | Digital LED |
| Time format | 12H / 24H adjustable |
| PM indicator | Yes (in 12H mode) |
| Sound sensor | Yes, adjustable sensitivity (OFF, LO, HI) |
| Ambient light | Yes, white and color changing |
| Display brightness adjustment | Rotary knob |
| Ambient light brightness adjustment | Rotary knob |
| Wall mounting | Bracket included |
| Power cord length | 3 meters |
| Time memory | Yes, with backup battery |
| Cleaning | Soft cloth and soapy water |
| Use | Indoor only |
| Precautions | Do not open rear panel, avoid shocks and humidity |
| Compliance | Directive 2014/53/EU and ROHS 2011/65/EC |
| Recycling | Compliant with WEEE, do not dispose of with household waste |
Frequently Asked Questions - WS 8086 TECHNOLINE
User questions about WS 8086 TECHNOLINE
0 question about this device. Answer the ones you know or ask your own.
Ask a new question about this device
Download the instructions for your Clock in PDF format for free! Find your manual WS 8086 - TECHNOLINE and take your electronic device back in hand. On this page are published all the documents necessary for the use of your device. WS 8086 by TECHNOLINE.
USER MANUAL WS 8086 TECHNOLINE
text_image
A1 A2 PM 12:38 A3natural_image
Diagram of a mechanical or fluid system with a curved pipe and directional arrow, no text or symbols presentStandfuß
natural_image
Pure diagram of a curved pipe or duct with an arrow pointing upward, no text or symbols presentStandfuß

natural_image
Simple line drawing of a curved structure with a vertical plane and a rectangular object, resting on a hatched ground surface (no text or symbols)Instruction manual – WS8086
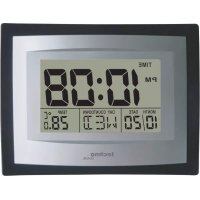
Color changing LED quartz clock
Overview
text_image
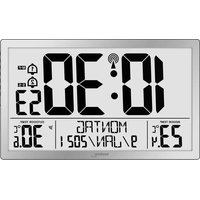
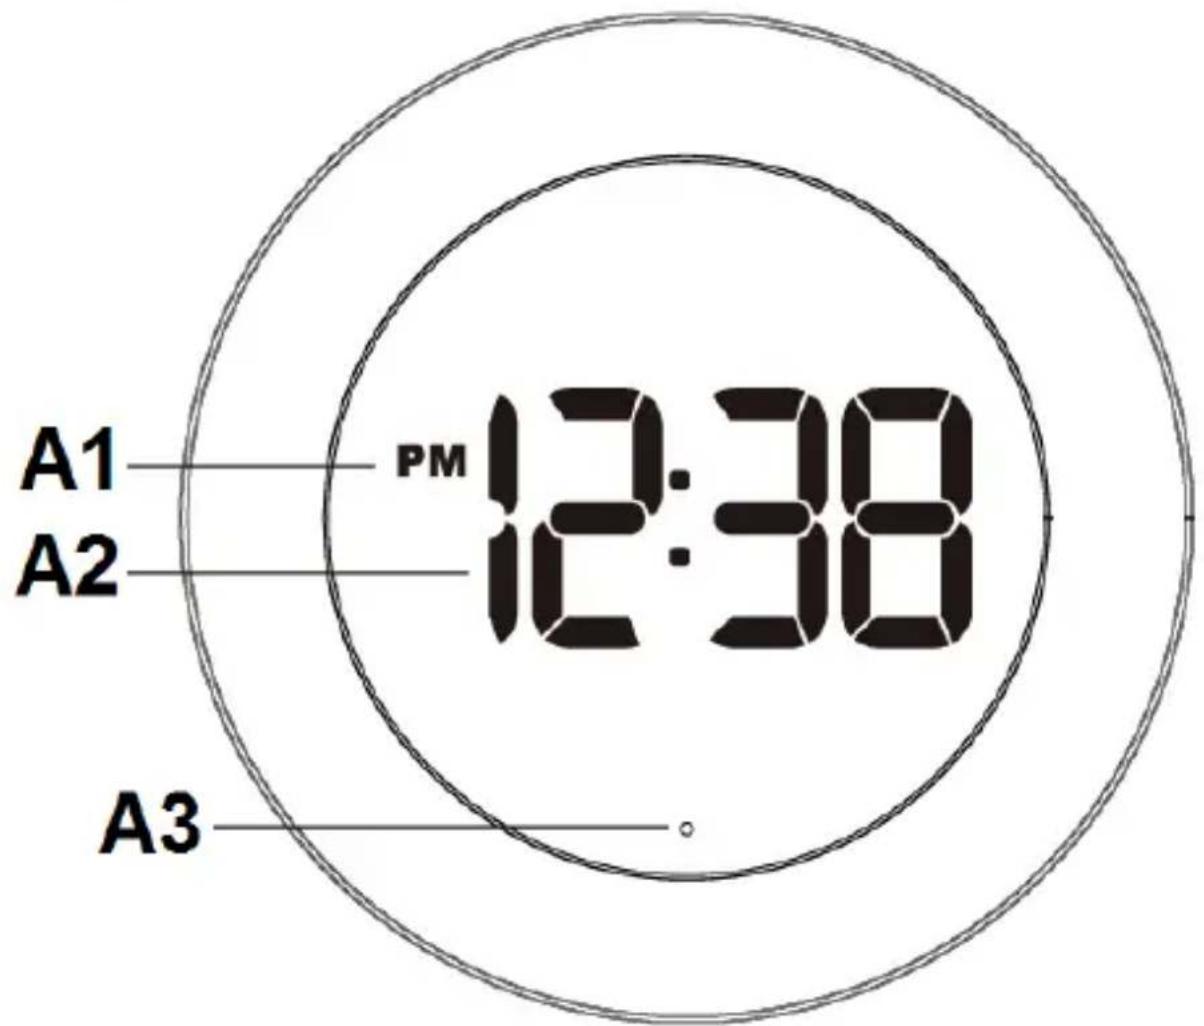
A1 A2 PM 12:38 A3A. Front view / display
A1 – PM icon A2 – Time
A3 – Sound sensor
text_image
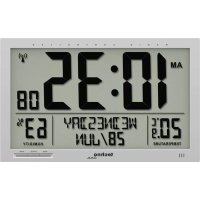
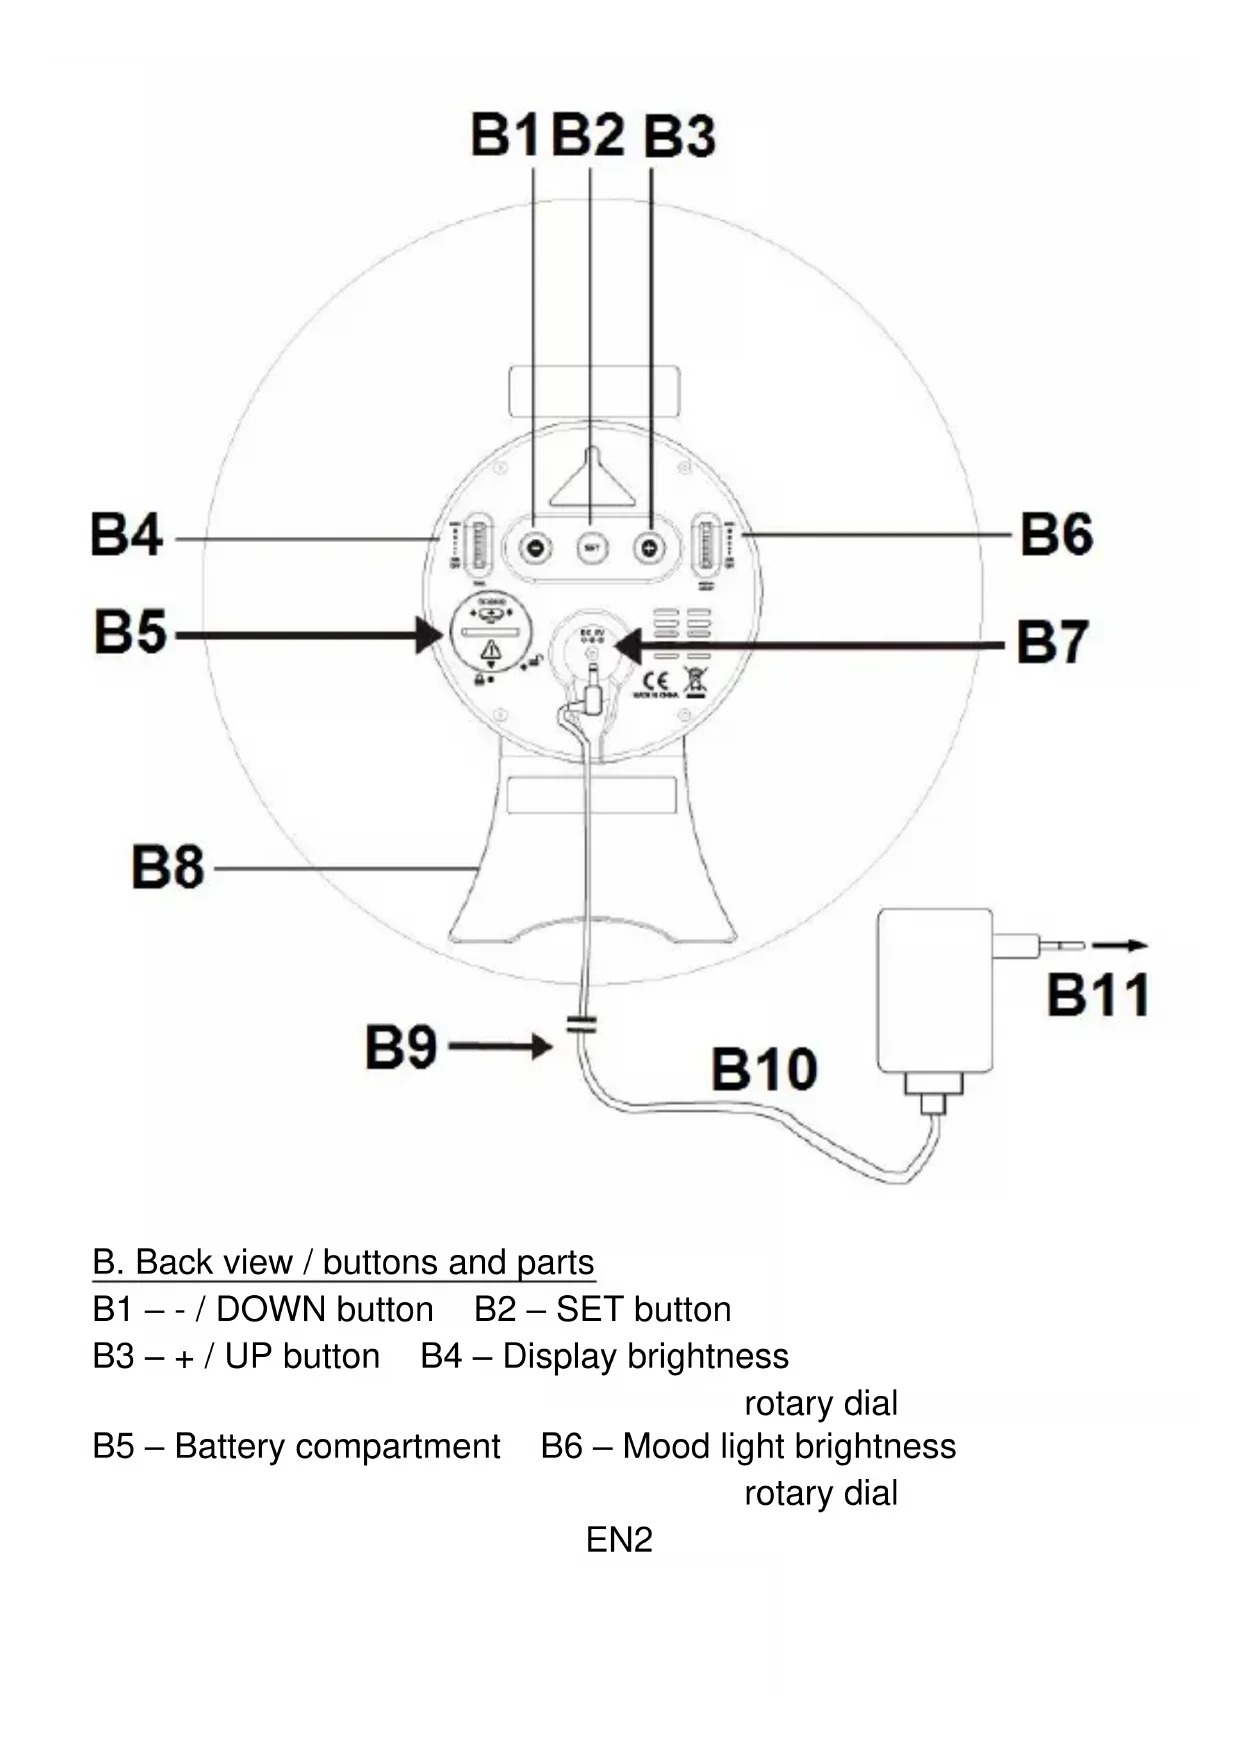
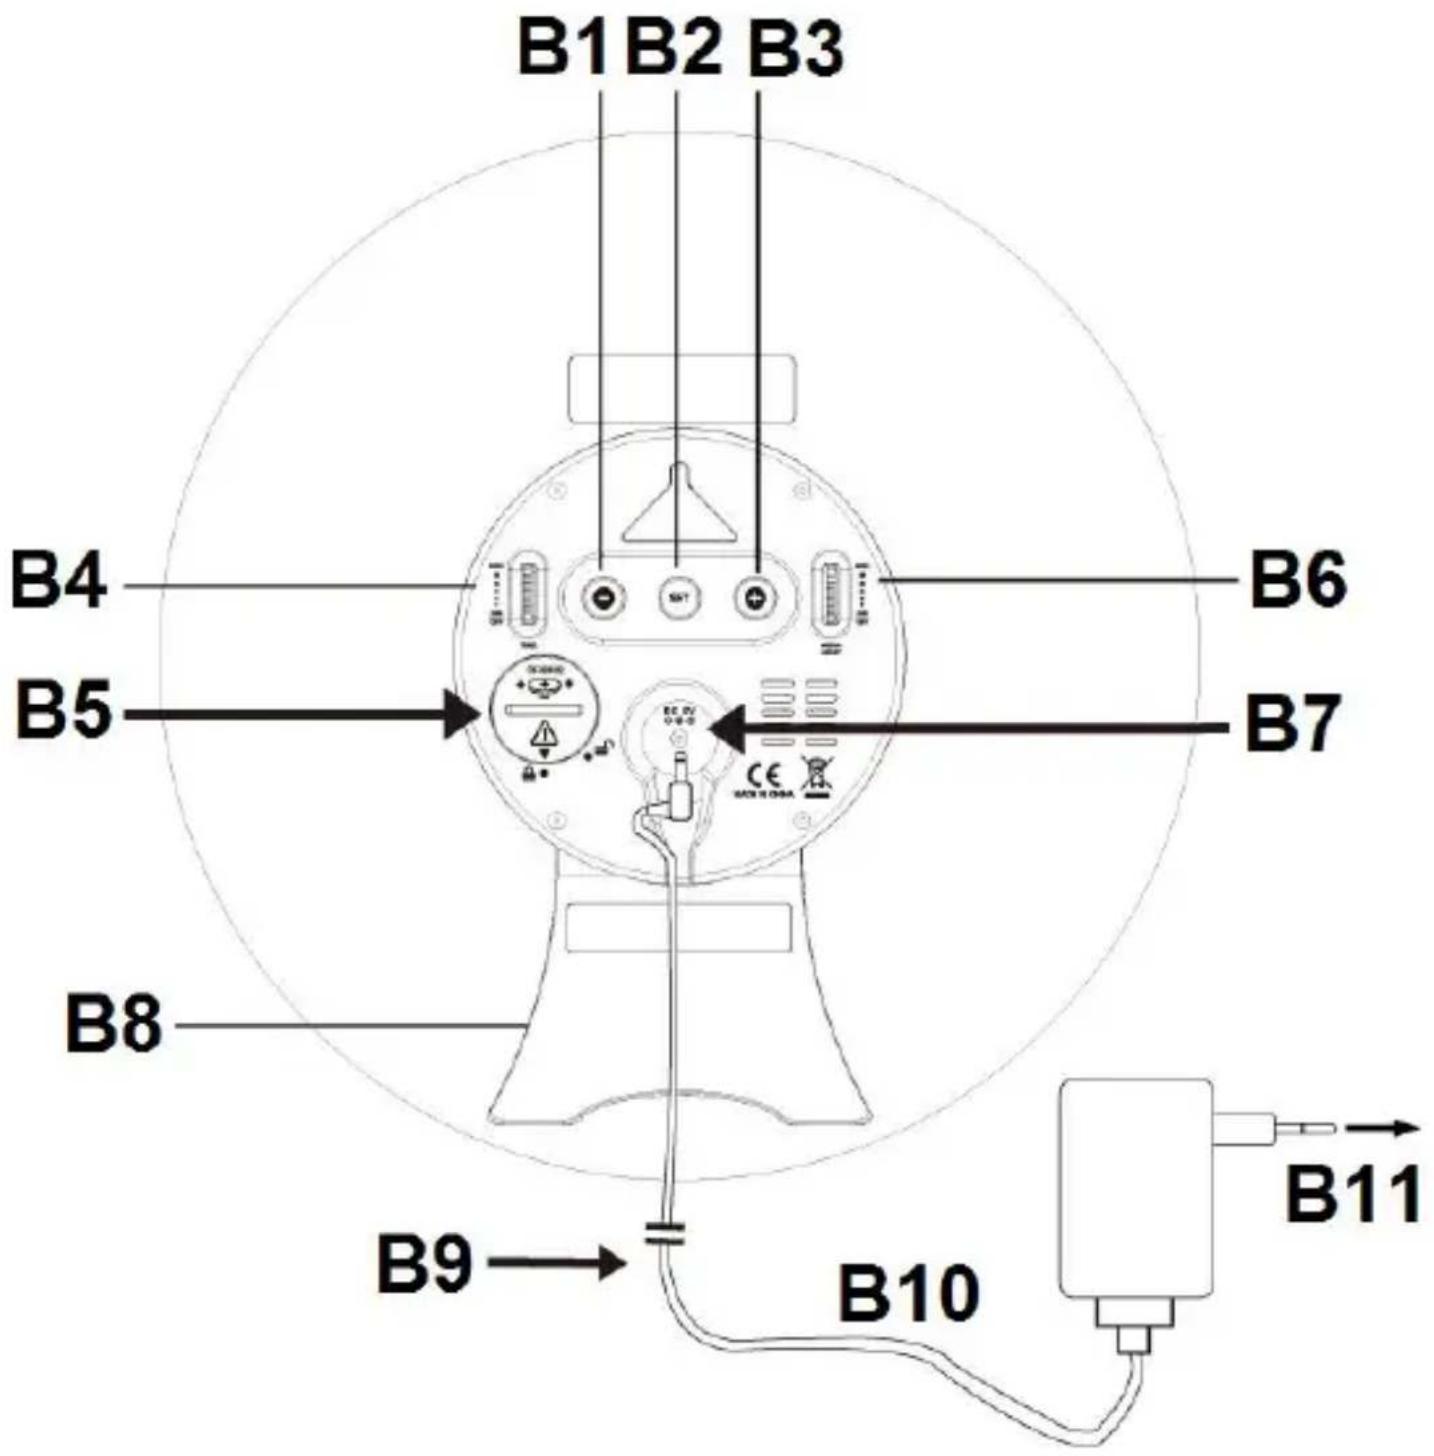
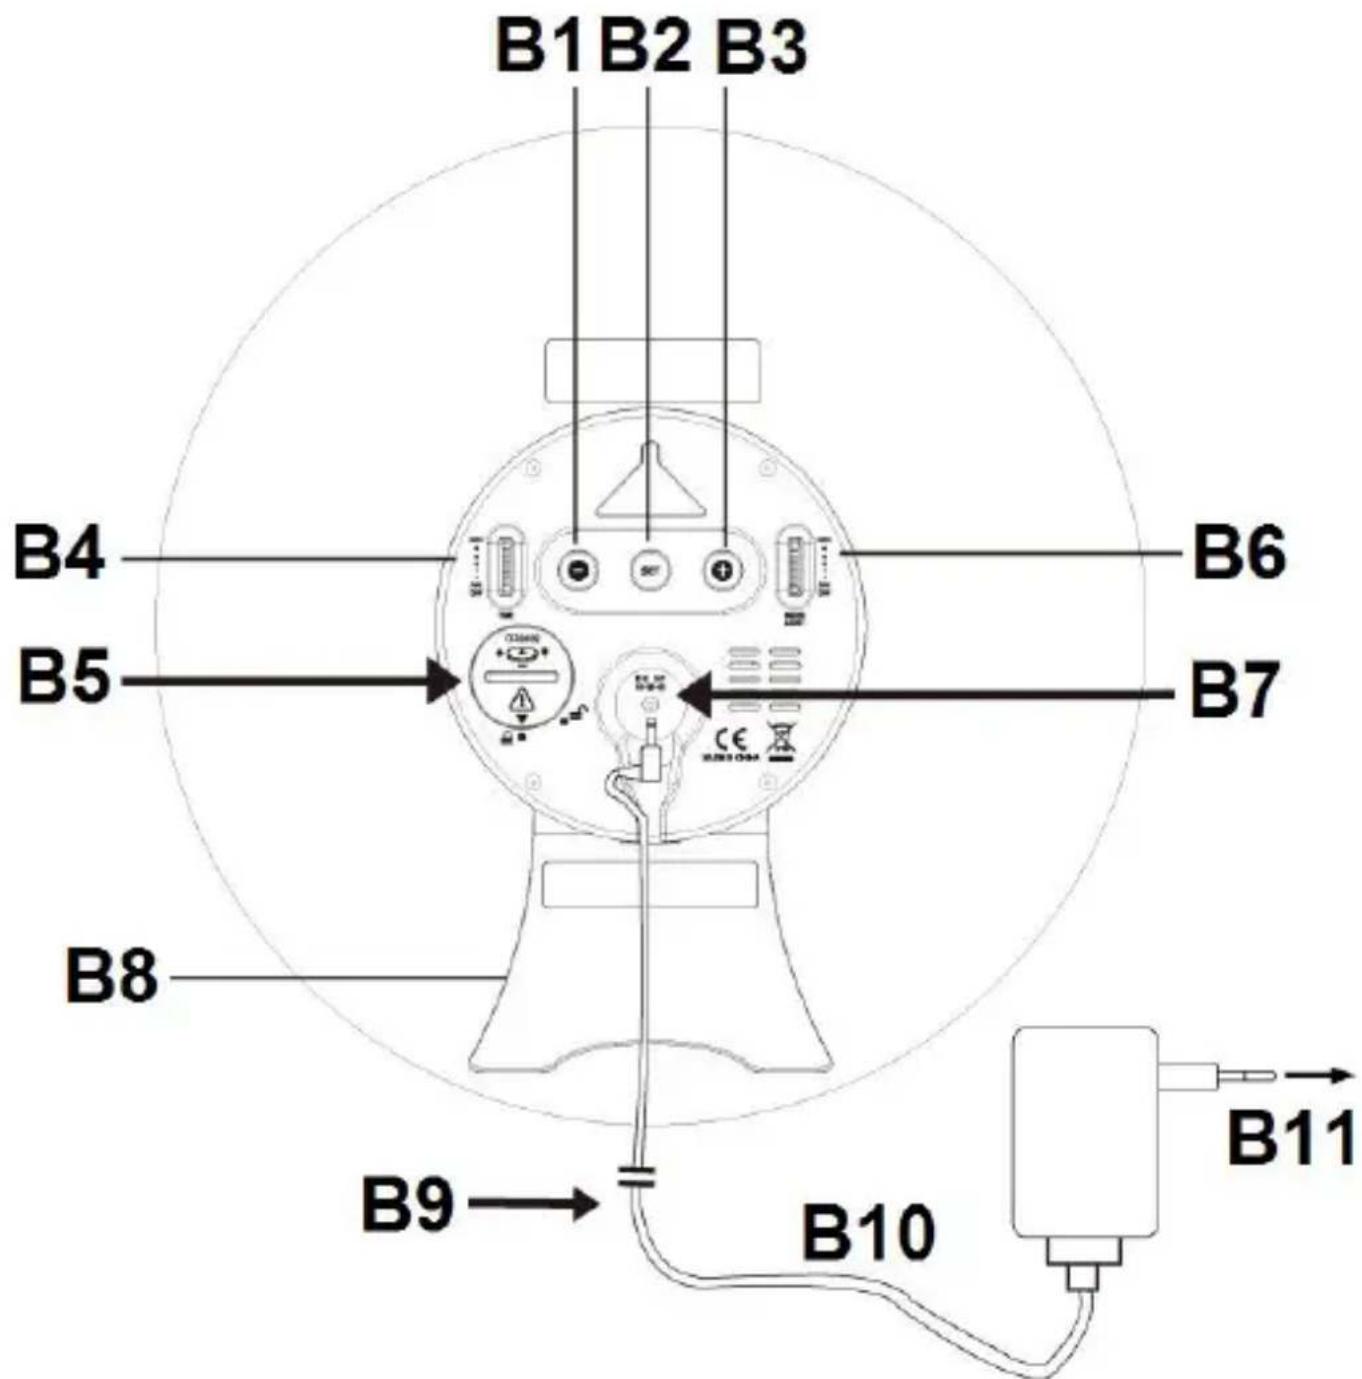
B1 B2 B3 B4 B5 B6 B7 B8 B9 B10 B11B. Back view / buttons and parts
B1 -- / DOWN button B2 - SET button
B3 - + / UP button B4 - Display brightness
rotary dial
B5 – Battery compartment B6 – Mood light brightness
rotary dial
EN2
B7 – DC power socket B8 – Stand
B9 – 3- meter white power cable B10 – AC/DC power adapter
B11 – AC power socket
To power the clock
Plug in the 5V-1.2A AC/DC adaptor HX075B-0501200-AG-001 (included) to an AC wall outlet and then the DC jack to the DC power socket on the back of your clock.
To install back-up batteries
Your clock requires 1 x CR2032 battery (not included) to provide backup power to it in the event of a temporary power interruption.
- Place your clock face down on a flat and soft surface.
- Use a coin to turn the battery cover anti-clockwise at the back of your unit.
- Insert one new lithium cell “CR2032” battery into the battery compartment by observing the “+” polarity facing upward.
- Replace the battery cover and turn clockwise to lock it.
If AC power is interrupted and backup batteries are being used, the time and all settings of your unit will be kept. The mood light does not function and the time display does not light up.
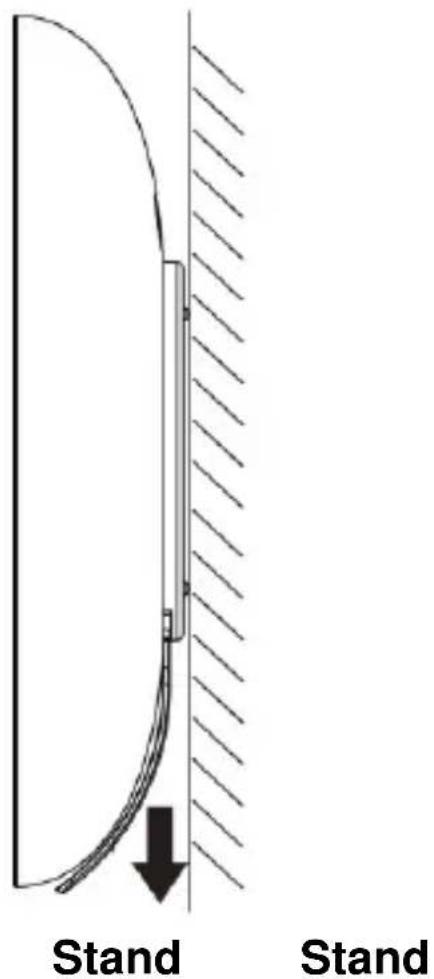
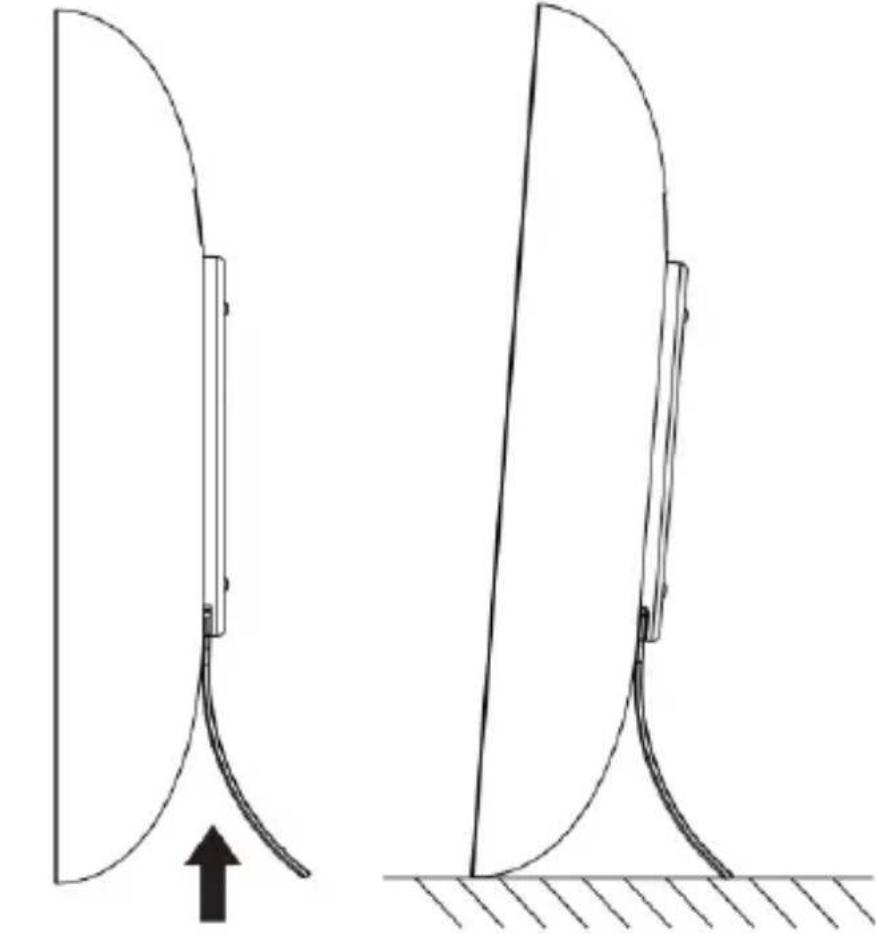
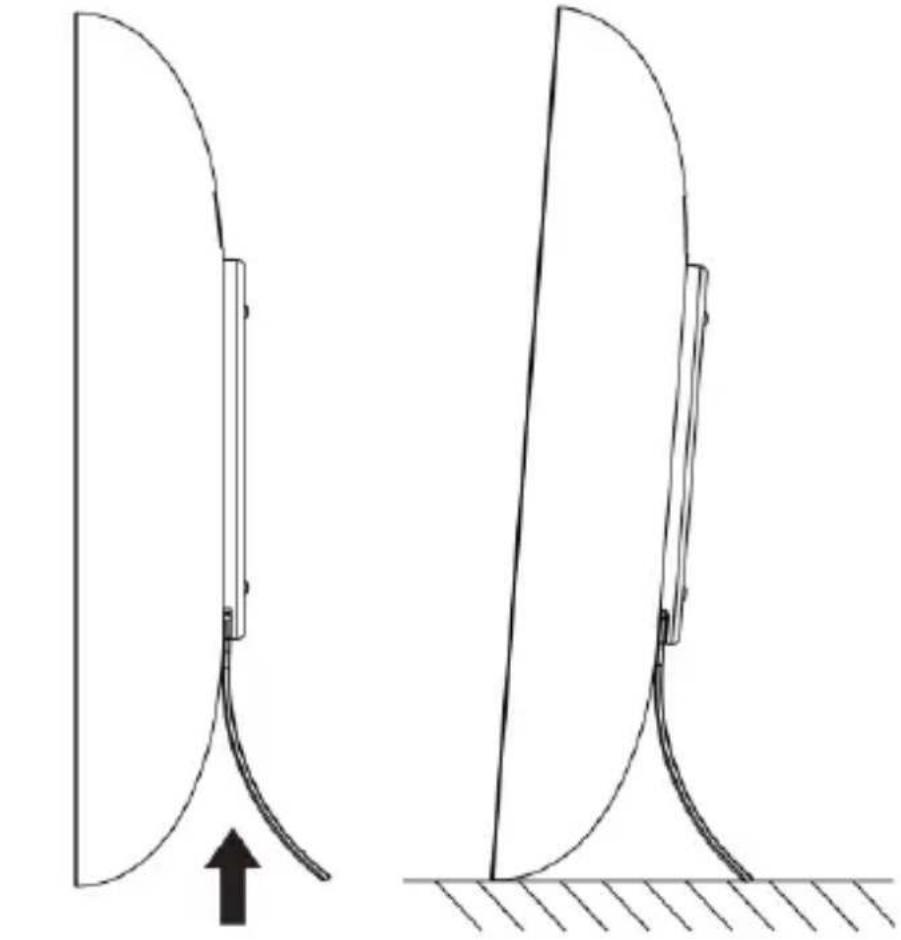
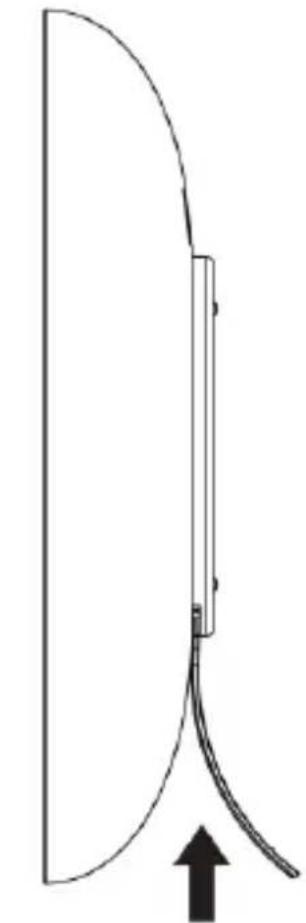
Wall mounting
text_image
Stand StandTable standing
natural_image
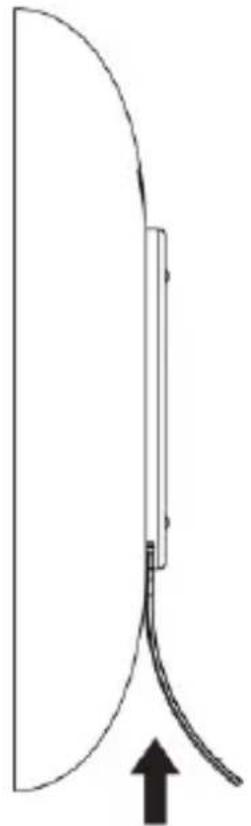
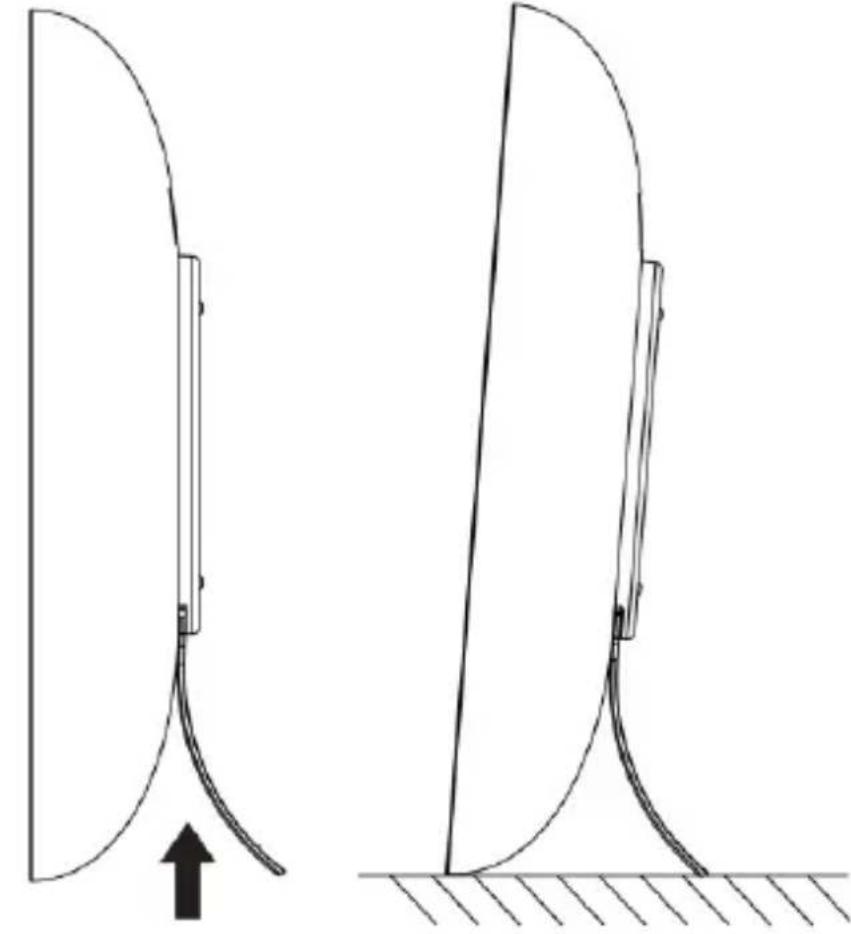
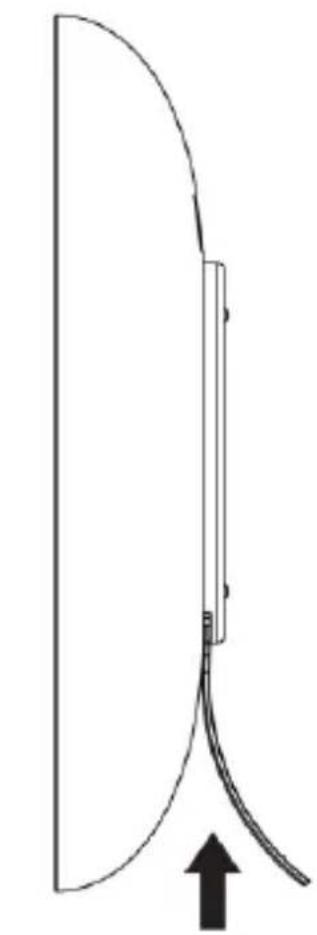
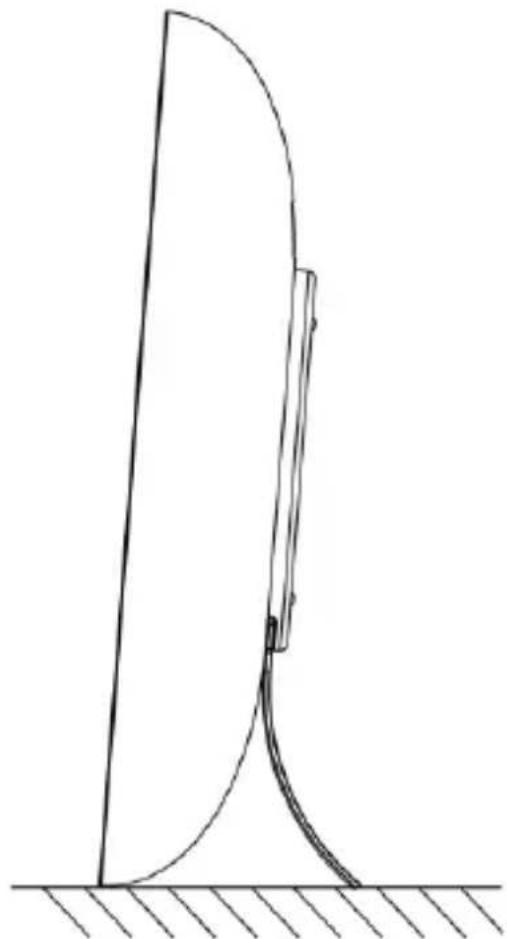
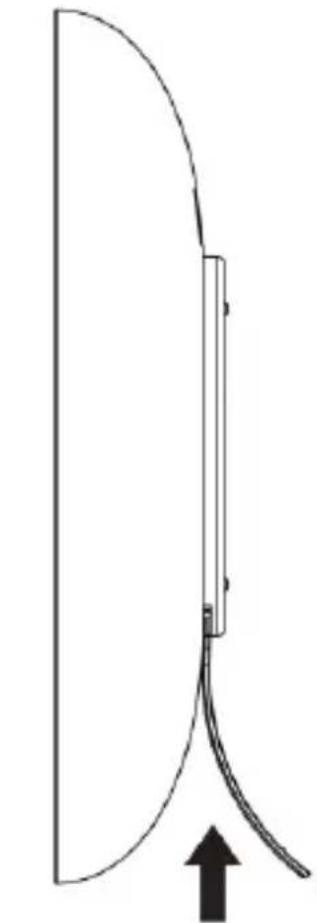
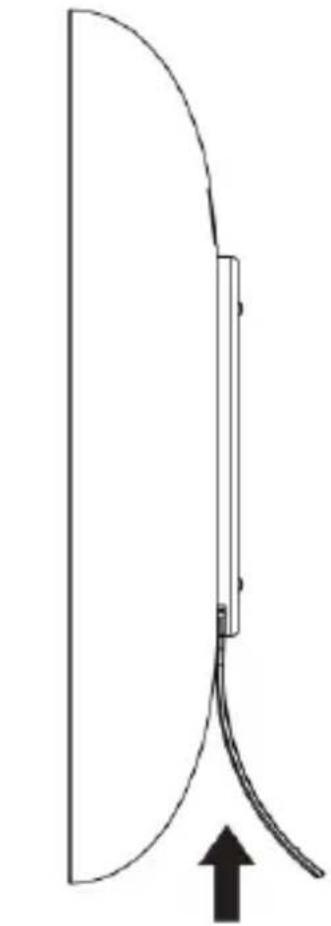
Diagram showing two mechanical or structural configurations with an upward arrow, no text or symbols present.Slide down the stand and flip it into the desired direction. Insert it back into the opening on the lower part of the clock until you hear a click sound. The stand is now safely secured.
Setting time and sound sensor sensitivity (default time is at 0:00)
- Press the SET button and the hour digit “0” flashes. Press + or - to set the hours. PM indicator will be on to indicate afternoon time. There is no AM indicator.
-
Press the SET button and the minute digits "00" flash. Press + or - to set the minutes. Press and hold + or - will accelerate setting at high speed.
-
Press the SET button and the time digits change to "24Hr" and flash. Press + or - to select "24Hr" or "12Hr" time format. When 12Hr time format is selected," PM" LED appears.
- Press the SET button and "LO" flashes, press + or - to select "OFF", "HI" or "LO" sensitivity of the sound sensor.
- Press the SET button to confirm and exit setting. The set time is displayed.
Note:
- Press and hold + or - will accelerate the setting process.
- The clock exits the set mode when no key is pressed for 10 seconds.
Using white light / mood light
At normal time display, face the clock up front at a distance of 1 meter. Clap your hands once to turn on the white mood light. Clap again to turn on the color changing mood light. Clap once again to stop the mood light at a particular color. Clap again to turn off the mood light.
Off -> white light -> mood light (changing color) -> mood light (fixed color) -> off
Selecting the “HI” sensitivity of the sound sensor in point 4 above will increase the distance to 2.5 to 3 meters but the clock will becomes very sensitive to sound and changes its color more frequently.
To adjust the brightness of the display and white / mood light
Rotate the TIME brightness dial at the back side of the clock to set display brightness.
Rotate the MOOD LIGHT brightness dial at the back side of the clock to set mood light brightness.
Turn the selected dial upward for higher brightness or downward for lower brightness.
Trouble shooting
If your clock displays irrelevant time or does not function properly, which maybe caused by electro-static discharge or other interference. Unplug the DC jack at the back of the unit, open the battery cover and take out the batteries. Then re-plug the DC jack and reinstall batteries by observing the correct +/- polarity. Your unit will be reset to default settings and you need to set it again.
Hereby, Technotrade declares that this product WS 8086 is in compliance with the essential requirements and other relevant provisions of Directive 2014/53/EU and ROHS 2011/65/EC. The original EU declaration of conformity may be found at: www.technoline.de/doc/4029665080864
Specifications
Default settings:-
Time 0:00, 24HR format
Sound sensor sensitivity LO
Care of the product
- Place your unit on a stable surface, away from sources of direct sunlight or excessive heat or moisture.
- Protect your furniture when placing your units on a natural wood and lacquered finish by using a cloth or protective material between it and the furniture.
- Clean your unit with a soft cloth moistened only with mild soap and water. Stronger agents such as Benzine, thinner or similar materials can damage the surface of the unit. Make sure the unit is unplugged before cleaning.
- Do not mix old and new batteries. Do not mix alkaline, standard (carbon-zinc), or rechargeable (nickel-cadmium) batteries.
- If the unit is not to be used for a prolonged period, such as a month or longer, remove the batteries to prevent possible
corrosion. Should the battery compartment become corroded or dirty, clean the compartment thoroughly and replace the batteries.
-
Do not open the inner back case or tamper with any components of this clock.
-
Do not plug in any other AC/AC or AC/DC adaptor with incorrect specifications or voltage.
Precautions
- This main unit is intended to be used only indoors.
- Do not subject the unit to excessive force or shock.
- Do not expose the unit to extreme temperatures, direct sunlight, dust or humidity.
- Do not immerse in water.
- Avoid contact with any corrosive materials.
- Do not dispose this unit in a fire as it may explode.
- Do not open the inner back case or tamper with any components of this unit.
Batteries safety warnings
- Use only alkaline batteries, not rechargeable batteries.
• Install batteries correctly by matching the polarities (+/-).
• Always replace a complete set of batteries. - Never mix used and new batteries.
- Remove exhausted batteries immediately.
- Remove batteries when not in use.
- Do not recharge and do not dispose of batteries in fire as the batteries may explode.
- Ensure batteries are stored away from metal objects as contact may cause a short circuit.
- Avoid exposing batteries to extreme temperature or humidity or EN7
direct sunlight.
- Keep all batteries out of reach from children. They are a choking hazard.
Use the product only for its intended purpose!
Consideration of duty according to the battery law

Old batteries do not belong to domestic waste because they could cause damages of health and environment. You can return used batteries free of charge to your dealer and
collection points. As end-user you are committed by law to bring back needed batteries to distributors and other collecting points!
Consideration of duty according to the law of electrical devices
This symbol means that you must dispose of electrical devices separated from the General household waste when it reaches the end of its useful life. Take your unit to your local waste collection point or recycling centre. This applies to all
countries of the European Union, and to other European countries with a separate waste collection system.
text_image
A1 PM A2 12:38 A3natural_image
Diagram of a curved pipe or duct with a downward arrow indicating direction, against a hatched wall background (no text or symbols)Support
Support pour table
natural_image
Pure diagram of a curved structure with an arrow pointing upward, no text or symbols presentSupport
natural_image
Simple line drawing of a curved structure with a vertical plane and a rectangular object, resting on a hatched ground surface (no text or symbols)natural_image
Symbolic icon of a person walking with arrows, enclosed in a circle (no text or symbols)text_image
A1 PM A2 12:38 A3A. Vista delantera / pantalla
A1 - Icono PM
natural_image
Pure technical diagram showing a curved pipe or channel with a downward arrow, no text or symbols presentSoporte
Soporte de mesa
natural_image
Pure diagram of a curved structure with an arrow pointing upward, no text or symbols presentSoporte

natural_image
Simple line drawing of a curved structure with a vertical plane and a rectangular object, resting on a hatched ground surface (no text or symbols)text_image
A1 A2 PM 12:38 A3natural_image
Pure diagram of a curved pipe or channel with a downward arrow, no text or symbols presentSteun
Tafelsteun
natural_image
Pure diagram of a curved structure with an arrow pointing upward, no text or symbols presentSteun

natural_image
Simple line drawing of a curved structure with a vertical plane and a rectangular object, resting on a hatched ground surface (no text or symbols)text_image
A1 A2 PM 12:38 A3A. Vista frontale/display
A1 - Icona PM
A3 – Sensore audio
A2 – Orario
text_image
B1 B2 B3 B4 B5 B6 B7 B8 B9 B10 B11B. Vista posteriore/pulsanti e parti
B1 – Pulsante -/DOWN
B3 – Pulsante +/UP
B5 – Vano batteria
natural_image
Pure diagram of a curved pipe or duct with a downward arrow, no text or symbols presentSupporto
Supporto da tavolo
natural_image
Diagram showing two mechanical or structural configurations with curved surfaces and a central component, no text or symbols present.Supporto
text_image
A1 A2 PM 12:38 A3natural_image
Pure mechanical diagram showing a curved pipe or rod inserted into a vertical wall, with a downward arrow indicating force direction (no text or symbols)Stojan
Postavení na stůl
natural_image
Diagram showing two mechanical or structural configurations with an upward arrow, no text or symbols present.Stojan
text_image
A1 PM A2 12:38 A3natural_image
Pure technical diagram showing a curved pipe or tube inserted into a vertical wall, with a downward arrow indicating direction (no text or symbols)Podstawka
Ustawianie na stole
natural_image
Pure diagram of a curved structure with an arrow pointing upward, no text or symbols presentPodstawka