USER MANUAL WS 6767 TECHNOLINE
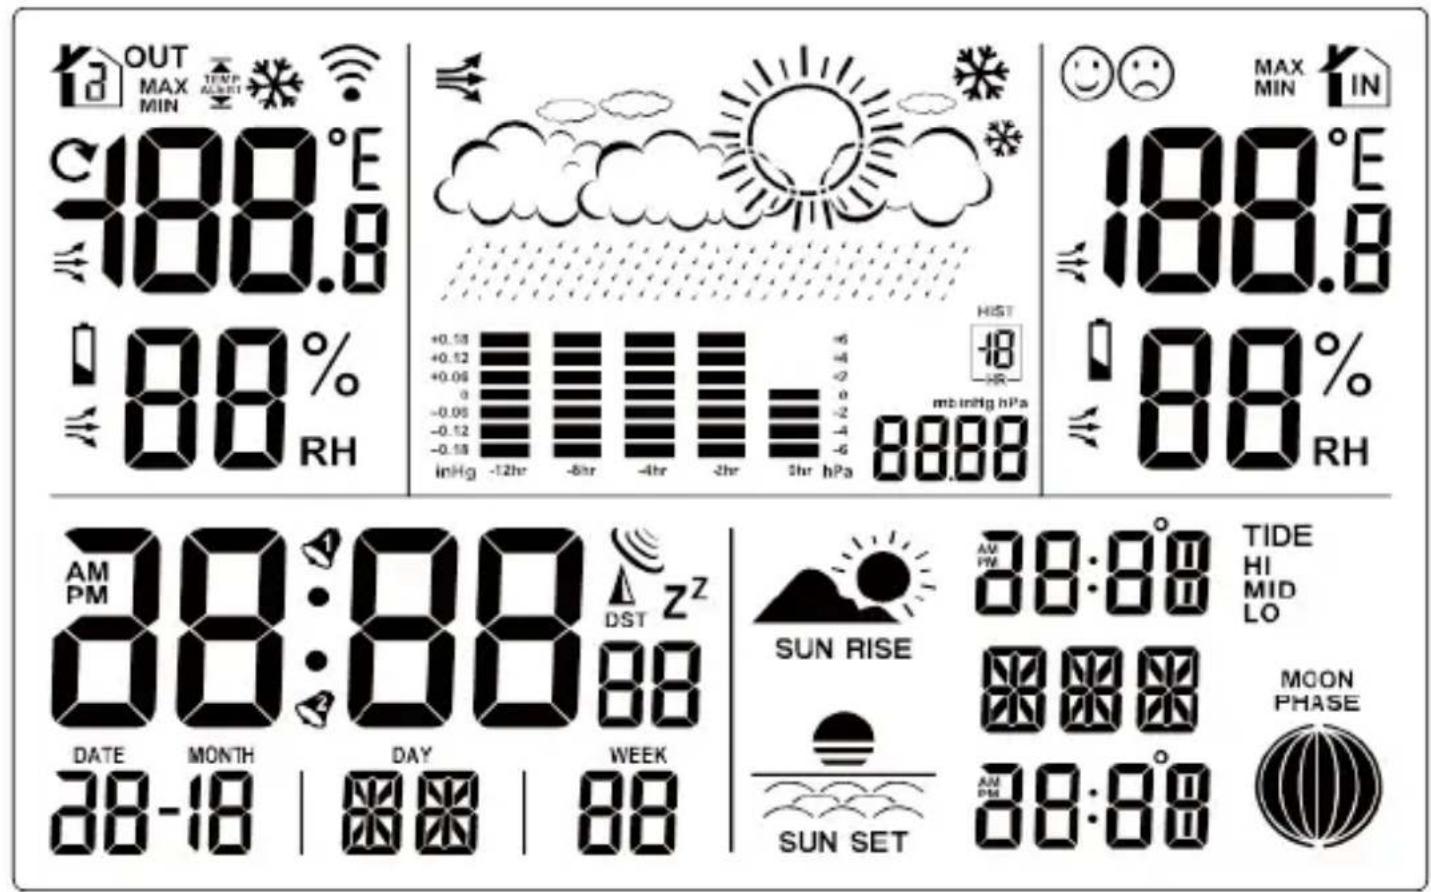
text_image
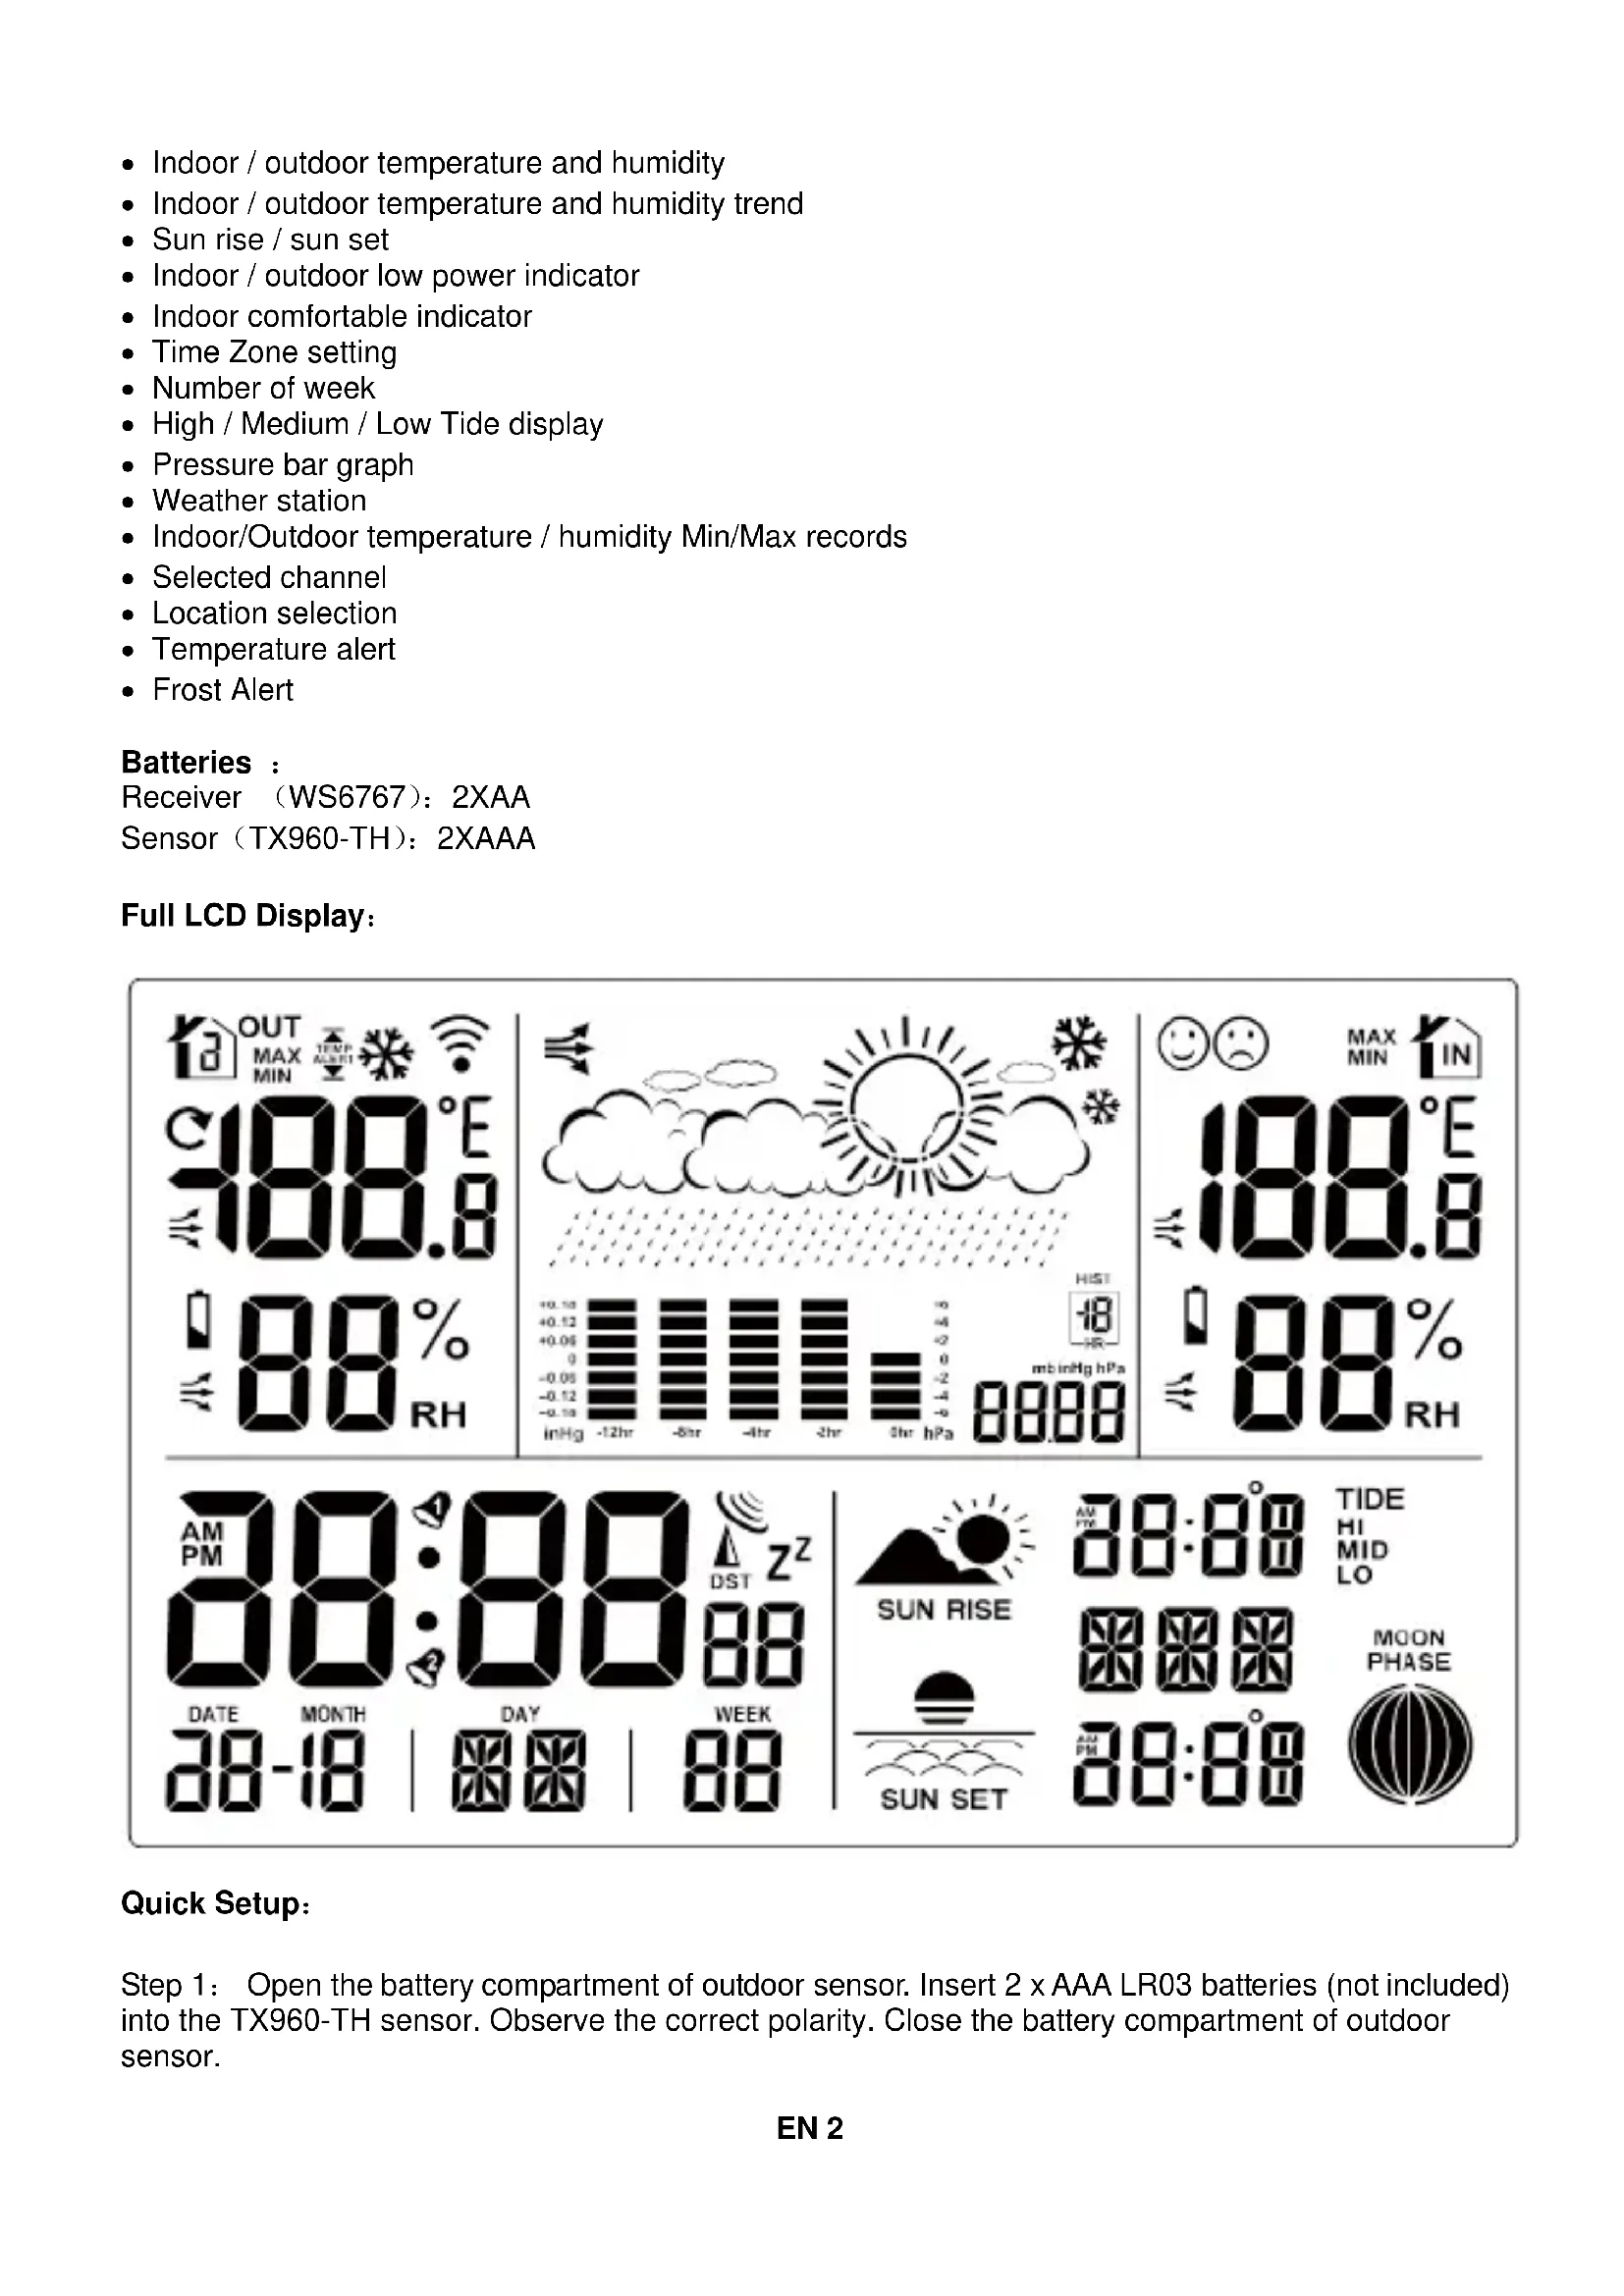
OUT
MAX
MIN
TEMP
ALBERT
C100.8°E
100.8
88%
RH
+0.18
+0.12
+0.06
0
-0.06
-0.12
-0.18
inHg -1.2hr -8hr -4hr -3hr
-6
-4
-2
0
-2
-4
-6
5hr hPa
88.88
MAX
MIN
IN
100.8°E
100.8
88%
RH
AM
PM
38:88
DST
zZ
88
DATE MONTH DAY WEEK
38-18 | 88 | 88
SUN RISE
AM
PM
38:88
TIDE
HI
MID
LO
MOON
PHASE
SUN SET
AM
PM
38:88
Schnellstart:
text_image
AM
PM
8:00 AM
8:00 AM
text_image
AM
PM
0:00:00:00
82
text_image
AM
PM
8:00-02:00
Last
Hinweise:
text_image
Neumond
Vollmond
Batterieendanzeige:
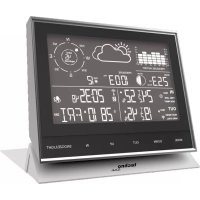
1 – Outdoor channel icon
3 – Sensor reception icon
5 – Weather forecast symbol
7- Air pressure display
9 – Outdoor temperature
11 – Outdoor humidity
13 - Time
15 – Alarm icon
17- Calendar week
19 – Moon phase
21 – Indoor temperature
23 – Indoor humidity
25 - Tide icon
2 – Temperature alert icon
4 – Weather tendency icon
6 – Air pressure history bar diagram
8 - Feel-good-indicator
10 – Outdoor temperature trend
12 – Outdoor humidity trend
14 – Date and month
16 - Weekday
18 – Sunrise and sunset display
20 – Indoor temperature trend
22 - Low battery indicator
24 – Indoor humidity trend
26 - Set location display
Features:
• Calendar (Date/Month/Year)
- DCF Radio controlled time (with DST)
• 24HR/12HR selection
• Five languages (GE,EN,IT,FR,SP)
• Alarm and snooze function
- Weekdays
- ^ C / ^ selectable
- Moon phase
- Indoor / outdoor temperature and humidity
- Indoor / outdoor temperature and humidity trend
- Sun rise / sun set
- Indoor / outdoor low power indicator
- Indoor comfortable indicator
- Time Zone setting
• Number of week
• High / Medium / Low Tide display
- Pressure bar graph
- Weather station
- Indoor/Outdoor temperature / humidity Min/Max records
- Selected channel
- Location selection
- Temperature alert
- Frost Alert
Batteries :
Receiver (WS6767): 2XAA
Sensor (TX960-TH): 2XAAA
Full LCD Display:

text_image
OUT
MAX
MIN
TEMP
ALUST
C108.8°E
108.8
88%
RH
+0.14
+0.12
+0.06
0
-0.05
-0.12
-0.14
inHg -12hr -8hr -4hr -2hr 3hr hPa 8888
HIST
-18
mb inHg hPa
18°E
188.8
88%
RH
AM
PM
30:00
DST
Zz
88
DATE MONTH DAY WEEK
38-18 | 88 | 88
SUN RISE
AM
PM
38:00
TIDE
HI
MID
LO
MOON
PHASE
SUN SET
AM
PM
38:00
Quick Setup:
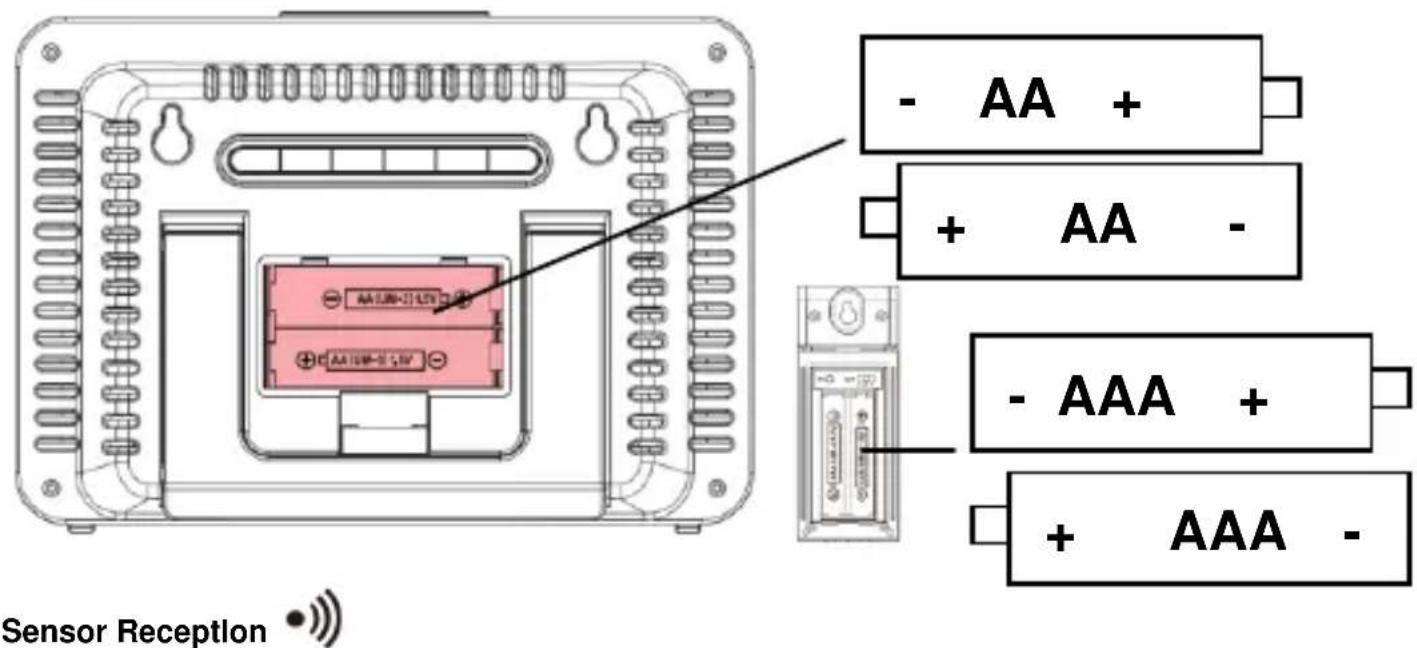
Step 1: Open the battery compartment of outdoor sensor. Insert 2 x AAA LR03 batteries (not included) into the TX960-TH sensor. Observe the correct polarity. Close the battery compartment of outdoor sensor.
Step 2: Open the battery compartment of weather station. Insert 2 x AAA LR06 batteries (not included) into the weather station. Observe the correct polarity. The red LED will flash during transmission. Close the battery compartment of weather station.
Restart: If there is no outdoor temperature and humidity data after 3 minutes, remove the batteries from station and out sensor for 15 minutes then return to step 1 above.
Power On:
- Display full segment for 3 seconds.
- The weather station starts searching wireless sensor via 433MHZ.
- If outdoor temperature is not displayed after 3 minutes, hold the "CH" button on the main until to search for outdoor sensor. Then press "TX" button on the sensor to send signal. If it still does not receive the outdoor temperature, remove the batteries from transmitter and go back to step 1 of the set up.
text_image
Sensor Reception
AA LUN-12 LTV
AA LUN-12 LTV
AA LUN-12 LTV
- AA +
+ AA -
- AAA +
+ AAA -
- Press and hold the "CH" button for 3 seconds to search for the sensor.
• The strength signal icon will flash util the sensor signal is received for 3 minutes if no available.
RF signal icon:


Adding additional sensors:
- Make sure channel 2 or 3 is displayed on the weather station. Press the "CH" button to change channels on the weather station.
- Make sure the channel selector switch the sensor 2 or 3 position.
- Once the channel numbers on the weather station and sensor are the same. Proceed by opening the battery cover at the back of your wireless sensor and insert 2XAAA new alkaline batteries to the battery compartment. Replace the battery cover.
- Press and hold the "CH" button for 3 seconds and your weather station will receive the data signal from the outdoor transmitter in a few seconds.
- Place your outdoor transmitters in a dry and shaded area once the weather station receives the data of this sensor.
Note:
If the weather station is used with 2 or 3 transmitters, press "CH" button shortly to display channel 1/2/3 or cyclic display. In cyclic display, the channel will be changed every 5 seconds.
Deleting Sensors / clearing channels:
Press and hold the "CH" button for 3 seconds to clear the current channel to register.
MODE HISTORY + - CITY CH SNOOZE

The DCF reception icon with full signal strength will appear on screen if the reception of atomic time is successful.
- In normal display mode, press the "+" and "-" button at the same time to start the DCF searching.
- The tower icon will stay solid when the station has received the DCF signal.
- No tower icon displayed. The station was unable to receive a signal at this time.
- Resposition the station for better signal reception and wait an overnight automatically receive hours: daily 1:00,2:00,3:00,4:00,5:00.DCF automatically receive,at any time once receive 3,4,5:00 no longer receive the same day.
- Only if unit receives summer time, it will display the "DST" icon.
- If there is no signal or too much interference the receiver will only be on for 2 minutes.
- If the signal is good it may catch a signal in about 2-3 minutes.
- If the signal is weak it will try to catch a signal for up to 10 minutes.
- In the normal display, hold the "+" and "-" button at the same time or hold the "CH" button to stop the DCF searching.
Settings:
- Press and hold the button "MODE" for 3 seconds to enter the setting mode
- 24HR will flash, press “+” or “-” to select the 24HR/12HR format.press “MODE” button to confirm and continue.
- °C will flash, press “+” or ” – “ to select the °C/°F format, press “MODE” button to confirm and continue.
- HPA will flash, press “+” or ” –“ to select the HPA/ InHg format, press “MODE” button to confirm and continue.
- 00 will flash, press "+" or "-" to select the time zone press "MODE" button to confirm and continue. For example, use 00 for Germany and -01 for UK.
- 0 will flash, press "+" or "-" to select the hour press "MODE" button to confirm and continue.
- 00 will flash, press "+" or "-" - " to select the minutes, press "MODE" button to confirm and continue.
- Year will flash, press "+" or "-" – " to select the year, press "MODE" button to confirm and continue.
- Month will flash, press “+” or ” – “ to select the month, press “MODE” button to confirm and continue.
- Date will flash, press “+” or ” – “ to select the date, press “MODE” button to confirm and continue.
- Language will flash, press “+” or ”-“ to select the language, press “MODE” button to confirm and continue.
| GERMAN | ENGLISH | ITALIAN | FRENCH | SPANISH |
| WEEK | GE | EN | IT | FR | SP |
| MON | MO | MO | LU | LU | LU |
| TUE | DI | TU | MA | MA | MA |
| WED | MI | WE | ME | ME | MI |
| THU | DO | TH | GI | JE | JU |
| FRI | FR | FR | VE | VE | VI |
| SAT | SA | SA | SA | SA | SA |
| SUN | SO | SU | DO | DI | DO |
Note:
- If no buttons are pressed in 20 seconds, setting mode will time out and return to normal display mode.
• +/- buttons press once to adjust by 1 unit, hold for fast scroll adjustment.
- Tide / monphase / sunrise / sunset will change with the year / month / date.
- Moon phase, Tide, week will change with the date/month/year.
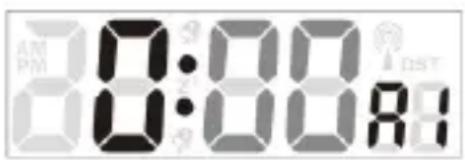
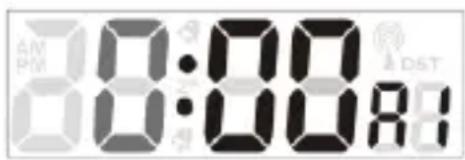
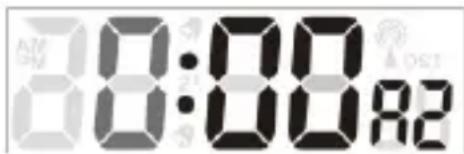
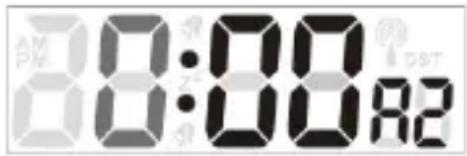
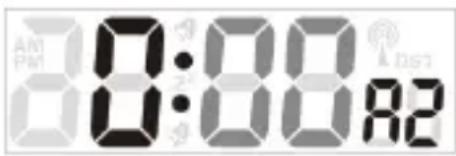
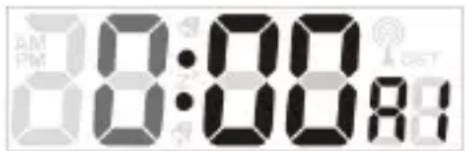
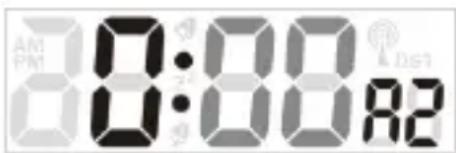
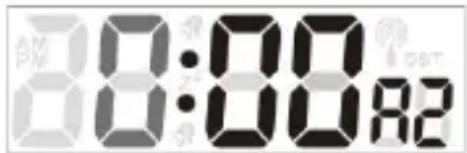
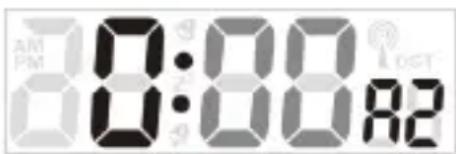
Activating Alarm and deactivating the alarm
- In normal display press the "MODE" button once, alarm 1 will show on the LCD.
- Press "+" button to active / deactivate the alarm1.When active the alarm icon will be displayed.
- In normal display press the "MODE" button twice, alarm 2 will show on the LCD.
- Press "+" button to active / deactivate the alarm 2. When active, the alarm icon will be displayed.
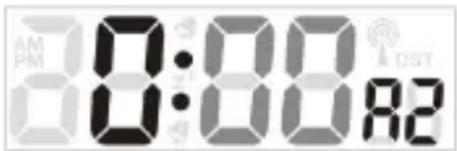
Alarm setting :
- In the alarm mode hold the "MODE" button for 3 seconds to enter the alarm setting mode.
- 0 will flash, press "+" or "-" button to select the alarm hour, press "MODE" button to confirm and continue.
- 00 will flash, press "+" or "-" button to select the alarm hour, press "MODE" button to confirm and return to the normal display mode.
text_image
0:00
AM
PM
0:00
8:00
GST
text_image
AM
PM
08:00:00
08:00:00
AST

text_image
08:00:00
08:00:00
DST
text_image
08:00:08:02
Note:
- If no buttons are pressed in 20 seconds, setting mode will time out and return to nominal display mode.
• +/- buttons press once to adjust by 1 unit, hold for fast scroll adjustment.
Snooze Function:
- When alarm sounds, press "SNOOZE" button to trigger snooze for 5 minutes. The alarm
icon and snooze icon will flashes when the snooze is active.
- When in snooze mode, press any button except “SNOOZE” to exit the snooze mode.Snooze icon will disappeared.
- When alarm 1 and alarm 2 is the same time, default alarm is alarm 2.
Selecting the location:
- Press the “CITY” button the location (BER) will flash.
- Press “ + “ or “ – “ button to select the location. And the lontitude and latitude will be changed with the city.
- Press the "CITY" button to confirm and return to the normal mode. If the abbreviation for your location does not appear in the display, you may enter a user-defined location (see "Selecting the location manually").
Selecting the location manually:
- In normal display, hold the "CITY" button for 3 seconds and press "+" or "-" button to select the beginning letters of your location.
- Press "CITY" button to confirm and then set the 2nd and 3rd letter as the first step.
- GMT will show, time zone will flash, press “+” or “-” button to set the difference from your time zone to GMT. Press Press “CITY” button to confirm.
- longitude will flash press “+” or “-” button to set the longitude of your location. Press Press “CITY” button to confirm.
- Latitude will flash press “+” or “-” button to set the latitude of your location. Press Press “CITY” button to confirm and turn back to normal display.
Note:
- If no buttons are pressed in 20 seconds, settings will auto saved
• +/- buttons press once to adjust by 1 unit, hold for fast scroll adjustment.
-
Tide / monphase / sunrise / sunset will change with the location.
-
Moon phase, Tide, week will change with the location.
- Once you set the location, it will indicate the local sun rise and sun set time.
•
City list:
| Germany | (DE) | Zagreb | ZAG |
| Berlin | BER | Czech | (CZ) |
| Bremen | BRE | Brno | BRN |
| Köln | KOE | Prague | PRG |
| Dortmund | DOR | Denmark | (DK) |
| Dresden | DRE | Aalborg | ALB |
| Düsseldorf | DUS | Copenhagen | KOB |
| Erfurt | ERF | Odense | ODE |
| Frankfurt | FRA | Finland | (FI) |
| Freiburg | FRE | Helsinki | HEL |
| Hamburg | HAM | France | (FR) |
| Hannover | HAN | Ajaccio | AJA |
| Hof | HOF | Biarritz | BIA |
| Kaiserslautern | KAI | Bordeaux | BOR |
| Kassel | KAS | Brest | BRE |
| Kiel | KIE | Cherbourg-Octeville | CHE |
| Leipzig | LEI | Clermont-Ferrand | CMF |
| Magdeburg | MAG | Dijon | DIJ |
| München | MUN | Lille | LIL |
| Nürnberg | NUR | Lyon | LYO |
| Osnabrück | OSN | Marseille | MRS |
| Passau | PAS | Metz | MET |
| Regensburg | REG | Nantes | NAN |
| Rostock | ROS | Nice | NIC |
| Saarbrücken | SAA | Orleans | ORL |
| Stuttgart | STU | Paris | PAR |
| Ulm | ULM | Perpignan | PER |
| Würzburg | WUR | Rouen | ROU |
| Australia | (AU) | Strasbourg | STR |
| Canberra | CBR | Toulouse | TOU |
| Melbourne | MEL | Greece | (GR) |
| Sydney | SYD | Athens | AHN |
| Austria | (AT) | Hungary | (HU) |
| Bregenz | BRE | Budapest | BUD |
| Graz | GRZ | Ireland | (IE) |
| Innsbruck | INN | Dublin | DUB |
| Linz | LNZ | Italy | (IT) |
| Salzburg | SLZ | Ancona | ANC |
| Vienna | WIE | Bari | BAR |
| Villach | VIL | Bolzano | BOZ |
| Wels | WEL | Cagliari | CAG |
| Belgium | (BE) | Florence | FIR |
| Antwerp | ANT | Foggia | FOG |
| Bruges | BRG | Genoa | GEN |
| Brussels | BRU | Lecce | LEC |
| Libramont | LIB | Messina | MES |
| Liege | LIE | Milan | MIL |
| Bosnia &Herzegovina | (BA) | Naples | NAP |
| Sarajevo | SAR | Palermo | PAL |
| Croatia | (HR) | Parma | PAR |
| Split | SPL | Perugia | PER |
| Rome | ROM | La Coruña | LCO |
| San Remo | SRE | Las Palmas | LPA |
| Triest | TRI | Leon | LEO |
| Turin | TOR | Madrid | MAD |
| Venice | VEN | Malaga | MAL |
| Verona | VER | Palma de Mallorca | PAL |
| Liechtenstein | (LI) | Salamanca | SAL |
| Vaduz | VDZ | Sevilla | SEV |
| Luxemburg | (LU) | Valencia | VAL |
| Luxembourg | LUX | Zaragoza | ZAR |
| Monaco | (MC) | Sweden | (SE) |
| Monte Carlo | MCM | Gothenburg | GOT |
| Netherlands | (NL) | Karlstad | KAR |
| Amsterdam | AMS | Stockholm | STO |
| Arnhem | ARN | Switzerland | (CH) |
| Eindhoven | EIN | Basel | BAS |
| Groningen | GRO | Berne | BRN |
| Rotterdam | ROT | Chur | CHU |
| The Hague | DHA | Geneva | GEN |
| New Zealand | (NZ) | Lucerne | LUC |
| Wellington | WLG | Lugano | LUG |
| Norway | (NO) | Sion | SIO |
| Bergen | BGN | St. Gallen | SGL |
| Lillehammer | LIL | Zurich | ZUR |
| Oslo | OSL | United Kingdom | (GB) |
| Poland | (PL) | Aberdeen | ABD |
| Cracow | KRA | Belfast | BEL |
| Gdansk | GDA | Birmingham | BIR |
| Poznan | POZ | Cardiff | CAR |
| Warsaw | WAR | Glasgow | GLW |
| Portugal | (PT) | London | LON |
| Faro | FAR | Manchester | MAN |
| Lisbon | LIS | Newcastle upon Tyne | NEC |
| Porto | POR | Plymouth | PLY |
| Russian Federation | (RU) | United States | (US) |
| St. Petersburg | PET | Los Angeles | LAX |
| Serbia | (RS) | New York | NYC |
| Belgrade | BEO | Washington | WAS |
| Slovakia | (SK) | Lithuania | (LT) |
| Bratislava | BRV | Vilnius | VNO |
| Kosice | KOS | Bulgaria | ( BG ) |
| Slovenia | (SI) | Sofia | SOF |
| Ljubliana | LUB | Romania | ( RO ) |
| Spain | (ES) | Bucharest | BUH |
| Alicante | ALI | Cyprus | (CY) |
| Andorra | AND | Nicosia | NIC |
| Badajoz | BAD | Northen Ireland | (NI) |
| Barcelona | BAR | Belfast | BFS |
| Bilbao | BIL | | |
| Cordoba | COR | | |
| Eivissa Ibiza | IBZ | | |
Indoor comfort indicator:
When indoor temperature is in the range of 20^ C -28°C (68°F -82.4°F), humidity in the range 40%\~

70%. LCD will show a happy face:.
When indoor temperature is out of the range of 20^ C -28°C (68°F -82.4°F), humidity out of the range
40%\~70%. LCD will show a sad face:

Temperature and frost alerts:
- In the normal mode, press "−" button once to activate the outdoor temperature alert, press twice to activate the frost alert (-1.0°C—+2.9°C), press third time to activate the temperature alert and frost alert at the same time, press fourth to turn off the alert.
- In normal mode hold the" –" button for 3 seconds. The maximum temperature (+70°C) will flash. Press "+" or "-" button to set the values. Press the "MODE" button to confirm.
-
The minimum temperature(-50°C) will flash. Press "+" or "-" button to set the values. Press the "MODE" button to confirm.
-
When setting the temperature values, press "CH" to switch the temperature alert value for each channel.
Note:
• If no buttons are pressed in 20 seconds, settings will be auto saved.
• +/- buttons press once to adjust by 1 unit, hold for fast scroll adjustment.
Min/Max recordings:
- In normal mode, press " +" button once to view the MAX value of indoor / outdoor temperature and humidity, press twice to view the MIN value of indoor / outdoor temperature and humidity, press third time to view the current value of indoor / outdoor temperature and humidity.
- In normal mode, hold the "+" button for 3 seconds to reset the MIN/MAX value manually.
Temperature and Humidity Trend Indicators:
The temperature (1°C / 2°F) trend indicators update with every change of temperature.
• Temperature or humidity has risen in the past 1 hours.
• Temperature or humidity has not changed in the past 1 hours.
• Temperature or humidity has fallen in the past 1 hours.
Forecast Icons:
- The weather station offers these 5 forecast icons based on barometric pressure.
- The rain+snow icon will only appear if the outdoor temperature is below 0^ C ( 32^ F) and the forecast would be rainy or stormy.

Sunny

Party Sunny

Cloudy

Rain
Forecast Tendency Indicators
Rising pressure; Weather is expected to improve
Not Changed pressure; will keep steady weather pattern
Falling Pressure; Weather is expected to worsen


Barometric Pressure History Graph:
- The bar graph shows in hPa, the recorded air pressure over the past 12-hours.
- The horizontal axis shows the hours at increments of -12 hours, -8 hours, -4 hours, -2 hours and 0 hours (current).
- The "0h" on the horizontal axis indicates the current hour, thus the current air pressure also.
-
Each bar on the bar graph represents a value of 2 hPa.
-
At every full hour the current air pressure is used as a basis for the display of a new graph bar.
-
Air pressure trends can be determined by simply glancing at the bar graph.
a. If the bars are rising (higher on the right than the left) then the air pressure has a rising trend, and the weather should improve.
b. If the bars are dropping (lower on the right than the left) then the air pressure has a falling trend, and the weather should worsen.
-
The bar chart will constantly scroll to avoid burnout of the LCD.
-
Press "HISTORY" button to view the pressure records.
Tide indicator;

flowchart
graph LR
    A["Tide Lo"] --> B["Low Tide"]
    C["Tide Mid"] --> D["Medium water level"]
    E["Tide Hi"] --> F["High Tide"]
Moon phase:
The weather station has a display which automatically displays the current lunar phase from 1 of 12 icons:
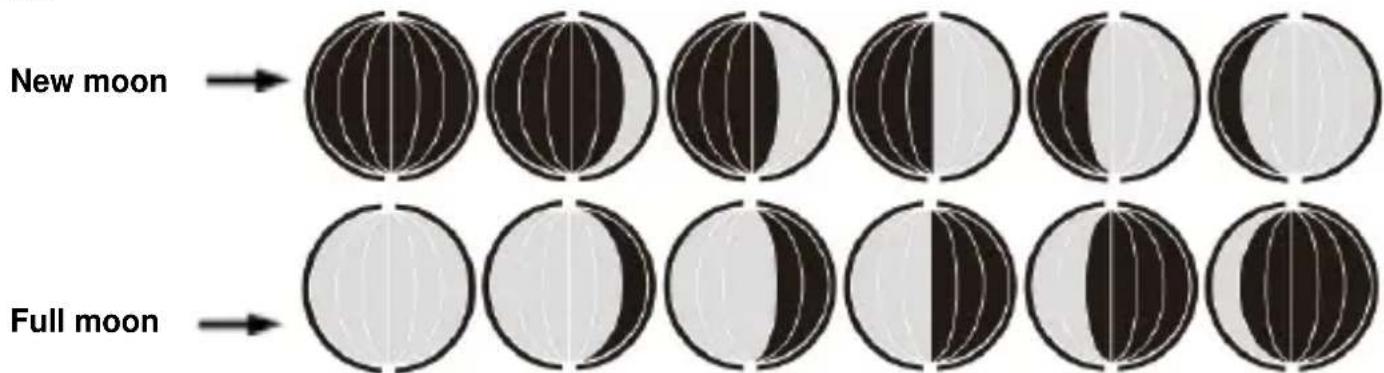
text_image
New moon
Full moon
Low battery indicator:
The weather station displays the low battery condition symbol when the batteries of the weather station or the outdoor sensor need to be exchanged.
- Battery icon by indoor humidity - change batteries in thestation.
- Battery icon by outdoor humidity - change batteries in the sensor.
Specifications:
Indoor temperature:
- Operating temperature range = 0°C to 50°C (32°F to 122°F)
- Accuracy ± 1 degrees Celsius 0°C to 50°C (32°F to 122°F)
• Resolution = 0.1 degree Celsius
- When above 50^ (122°F), the LCD will display HH.H°C /°F
- When below 0^ (32°F) the LCD will display LL.L°C /°F
Indoor Humidity:
- Operating humidity range =20% RH to 95%RH
• Accuracy +/- 5% RH
• Resolution = 1 % RH
Outdoor temperature:
- Operating temperature range = -50°C to 70°C (-58°F to 158°F)
- Accuracy ± 1 degrees Celsius from 0°C to 50°C (32°F to 122°F)
- Accuracy ±1.5 degrees Celsius -40°C to 0°C (-40°F to 32°F) and 50°C to 60°C (122°F to 140°F)
• Resolution = 0.1 degree Celsius
- When above 70°C (158°F), the LCD will display HH.H°C /°F
- When below-50°C (-58°F), the LCD will display LL.L°C /°F
Outdoor Humidity:
- Operating humidity range =20% RH to95%
• Accuracy +/- 5% RH
• Resolution = 1 % RH
Default Setting:
- Time:00:00
• 24HR
• Calendar 01/01/2019
- Temperature: °C
- Weather Forecast Icons: partly sunny
- Pressure unit: HPA
• German week display
Environmental reception effects
The station obtains the accurate time with wireless technology. Same as all wireless devices, the reception is maybe affected by the following circumstances:
- long transmitting distance
• nearby mountains and valleys
- near freeway, railway, airports, high voltage cable etc.
- near construction site
- among tall buildings
• inside concrete buildings
• inside moving vehicles
• near electrical appliances (computers, TV's, etc) and metallic structures
Place the station at a location with optimal signal, i.e. close to a window and away from metal surfaces or electrical appliances.
Precautions
• This main unit is intended to be used only indoors, the outdoor sensor is to be used outdoors.
- Do not subject the unit to excessive force or shock.
- Do not expose the unit to extreme temperatures, direct sunlight, dust or humidity.
- Do not immerse in water.
- Avoid contact with any corrosive materials.
- Do not dispose this unit in a fire as it may explode.
- Do not open the inner back case or tamper with any components of this unit.
Batteries safety warnings
- Use only alkaline batteries, not rechargeable batteries.
• Install batteries correctly by matching the polarities (+/-).
• Always replace a complete set of batteries.
- Never mix used and new batteries.
- Remove exhausted batteries immediately.
- Remove batteries when not in use.
- Do not recharge and do not dispose of batteries in fire as the batteries may explode.
- Ensure batteries are stored away from metal objects as contact may cause a short circuit.
- Avoid exposing batteries to extreme temperature or humidity or direct sunlight.
- Keep all batteries out of reach from children. They are a choking hazard.
Use the product only for its intended purpose!
Consideration of duty according to the battery law

Old batteries do not belong to domestic waste because they could cause damages of health and environment. You can return used batteries free of charge to your dealer and collection points. As end-user you are committed by law to bring back needed batteries
to distributors and other collecting points!
Consideration of duty according to the law of electrical devices

This symbol means that you must dispose of electrical devices separated from the General household waste when it reaches the end of its useful life. Take your unit to your local waste collection point or recycling centre. This applies to all countries of the
European Union, and to other European countries with a separate waste collection system.
text_image
1
2
3
4
5
6
7
8
9
OUT
24.3°C
-51%
RH
22:52.47
DATE MONTH DAY WEEK SUN RISE 8:21 TIDE HI
1-1101 01 BER 6:01 SEON PHASE
SUN SET 16:01
techno
natural_image
Three black dots with sound waves, no text or symbols present
Ajout de capteurs:
text_image
AM
8:00 AM
8:00 AM
k_dst

text_image
AM
PM
8:00 AM
8:00 AM
8:2
Remarque :
text_image
1
2
3
4
5
6
7
8
9
OUT
24.3°C
-24.3
5.1%
RH
25.8°C
-25.8
0
36%
RH
10:07
22:52.47
DATE MONTH DAY WEEK SUN RISE 8:21 TIDE HI
1-11 DI 01 BER SMOON PHASE
SUN SET 16:01
techno
Sensor (TX960-TH): 2 X AAA
Pantalla LCD completa:
text_image
OUT
MAX
MIN
TEMP
ALYST
C188.0°E
188.8
88%
RH
+0.58
+0.12
+0.06
0
-0.05
-0.12
-0.18
inHg -12hr -8hr -4hr -2hr 3hr hPa
HIST
-18
mb inHg hPa
88.88
180.8°E
180.8°E
88%
RH
AM
PM
38:00
DST
Zz
88
DATE MONTH DAY WEEK
38-18 | 88 | 88
SUN RISE
AM
PM
38:00
TIDE
HI
MID
LO
MOON
PHASE
SUN SET
AM
PM
38:00
Instalación rápida:
text_image
Recepción del sensor
AA 10M-21.5V
AA 10M-21.5V
AA 10M-21.5V
AA 10M-21.5V
AA 10M-21.5V
AA 10M-21.5V
AA 10M-21.5V
AA 10M-21.5V
AA 10M-21.5V
AA 30M-21.5V
AA 30M-21.5V
AA 30M-21.5V
AA 30M-21.5V
AA 30M-21.5V
AA 30M-21.5V
AA 30M-21.5V
AA 30M-21.5V
AA 30M-31.5V
AA 30M-31.5V
AA 30M-31.5V
AA 30M-31.5V
AA 30M-31.5V
AA 30M-31.5V
AA 30M-31.5V
AA 30M-31.5V
AA 30M-31.5W
AA 30M-31.5W
AA 30M-31.5W
AA 30M-31.5W
AA 30M-31.5W
AA 30M-31.5W
AA 30M-31.5W
AA 30M-31.5W
AA 30M-31.5W
AA 40M-21.5V
AA 40M-21.5V
AA 40M-21.5V
AA 40M-21.5V
AA 40M-21.5V
AA 40M-21.5V
AA 40M-21.5V
AA 40M-21.5V
AA 40M-21.5V
AA 60M-21.5V
AA 60M-21.5V
AA 60M-21.5V
AA 60M-21.5V
AA 60M-21.5V
AA 60M-21.5V
AA 60M-21.5V
AA 60M-21.5V
AA 60M-31.5V
AA 60M-31.5V
AA 60M-31.5V
AA 60M-31.5V
AA 60M-31.5V
AA 60M-31.5V
AA 60M-31.5V
AA 60M-31.5V
AA 60M-31.5W
text_image
AM
PM
8:00:00:00
8:00:00:00
A D S1
text_image
8:00:00 A2
Nota:
text_image
Luna Ilena
text_image
1
2
3
4
5
6
7
8
9
OUT
24.3
51%
RH
22:52
DATE MONTH DAY WEEK SUN RISE 8:21 BER 16:01 TIDE HI SOON PHASE
SUN SET
Sensor (TX960-TH): 2 X AAA
text_image
AM
PM
8:00 AM
text_image
AM
PM
8:00-82
A DS3
text_image
AM
PM
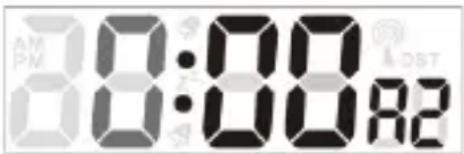
8:00A2
Opmerking:
text_image
1
2
3
4
5
6
7
8
9
OUT
24.3
51%
RH
22:52
DATE MONTH DAY WEEK SUN RISE 8:21 BER 16:01 TIDE HI SOON PHASE
SUN SET
Sensore (TX960-TH): 2 X AAA
Display LCD intero:

text_image
OUT
MAX
MIN
TEMP
ALYST
C188.0°E
188.8
88%
RH
+0.58
+0.12
+0.06
0
-0.05
-0.12
-0.18
inHg -12hr -8hr -4hr -2hr 3hr hPa
HIST
-18
mb inHg hPa
88.88
180.8°E
180.8°E
88%
RH
AM
PM
38:00
DST
Zz
88
DATE MONTH DAY WEEK
38-18 | 88 | 88
SUN RISE
AM
PM
38:00
TIDE
HI
MID
LO
MOON
PHASE
SUN SET
AM
PM
38:00
text_image
AM
PM
8:00:00'00'
8:00:00'01'
8:00:01'01'
text_image
AM
PM
8:00 AM
8:00 AM
text_image
0:00
82
text_image
AN
PM
8:00
82
Nota:
natural_image
Grid of twelve identical black-and-white circular diagrams arranged in two rows, each with vertical lines dividing the circle into three equal halves (no text or symbols)
Luna piena

text_image
1
2
3
4
5
6
7
8
9
OUT
24.3
51%
RH
22:52
DATE MONTH DAY WEEK SUN RISE 8:21 BER 16:01 TIDE HI SOON PHASE
SUN SET
text_image
AM
PM
8:00
8:00
8:00
text_image
AM
PM
08:08 AM
text_image
AM
PM
8:00-8:30
8:00-8:30
text_image
80:00 82
Poznámka:
text_image
AM
PM
8:00 AM
8:00 AM
text_image
AM
PM
0:00:00:00
0:00:00:00
82
text_image
AM
PM
8:00 AM
R2
Uwaga:
natural_image
Simple line drawing of a sun above clouds (no text or symbols)
Przejaśnienia

Zachmurzenie

Deszcz