
MXPI2633FLEX - Cooker Mx Onda - Free user manual and instructions
Find the device manual for free MXPI2633FLEX Mx Onda in PDF.
| Product Type | Built-in Induction Hob |
| Brand | Mx Onda |
| Model | MXPI2633FLEX |
| Dimensions (W x D x H) | 590 x 520 x 55 mm |
| Recess Dimensions (W x D) | 560 x 490 mm |
| Net Weight | 10 kg |
| Power Supply | 220-240 V ~ 50/60 Hz |
| Maximum Total Power | 7200 W |
| Number of Cooking Zones | 4 zones + 1 flexible zone |
| Zone 1 (front right) | Diameter 90-180 mm, 1500 W (Turbo 2000 W) |
| Zone 2 (rear right) | Diameter 80-160 mm, 1300 W (Turbo 1600 W) |
| Zone 3 (front left) | Diameter 80-160 mm, 1300 W (Turbo 1600 W) |
| Zone 4 (rear left) | Diameter 80-180 mm, 1500 W (Turbo 2000 W) |
| Flexible zone (left side) | Surface 180 x 395 mm, 2600 W (Turbo 3000 W) |
| Control Type | Touch |
| Power Levels | 9 |
| Special Functions | Flex Mode, Turbo, Timer (99 min), Child Lock, Automatic Safety Shut-off, Pan Detection, Residual Heat Indicator |
| Cooking Surface | High-strength Glass Ceramic |
| Maintenance and Cleaning | Clean with a damp cloth and special induction cleaner; do not use abrasive products |
| Safety | Panel lock, automatic shut-off, unsuitable pan detection, overheating protection |
| Repairability and Spare Parts | Contact an authorized MX Onda technical service; do not attempt repair yourself |
| General Information | Compliant with EMC and Low Voltage directives; household use only |
Frequently Asked Questions - MXPI2633FLEX Mx Onda
User questions about MXPI2633FLEX Mx Onda
0 question about this device. Answer the ones you know or ask your own.
Ask a new question about this device
Download the instructions for your Cooker in PDF format for free! Find your manual MXPI2633FLEX - Mx Onda and take your electronic device back in hand. On this page are published all the documents necessary for the use of your device. MXPI2633FLEX by Mx Onda.
USER MANUAL MXPI2633FLEX Mx Onda
MODELE: MX-PI2633FLEX
CE
AVANT D'UTILISER CE MANUEL DE LIRE ATTENTIVEMENT
ATTENTION
- Attention aux surfaces chaudes!
SOLUTIONE DI PROBLEMI
USER AND INSTALLATION MANUAL
Mx Onda
INDUCTION HOB TO BUILD WITH FOUR COOKING ZONES AND FLEXIBLE ZONE
MODEL: MX-PI2633FLEX
C E
BEFORE USE, READ THIS MANUAL CAREFULLY
ATTENTION!
THIS DEVICE WORKS WITH A VOLTAGE OF 230 V, TO PREVENT A POSSIBLE ELECTRICAL SHOCK DO NOT TRY TO OPEN IT. This team has no part that can be repaired by yourself, in case of a malfunction not handle, contact an authorized service MX ONDA.
Having exhausted the life of this electrical product, do not throw household waste. Place it in a clean container suitable point in your town, for recycling.

This product complies with European RoHS Directive (2011/65 / EU) on the restriction of use of certain hazardous substances in electrical and electronic equipment.

Cuple con
RoHSV
INTRODUCTION
Congratulations on your purchase of the built-in induction hob with four cooking zones and MX ONDA flexible zone, model MX-PI2633FLEX.
We recommend that you spend some time reading this Installation and User Manual to fully understand how to install it correctly and how to use it. For installation, read the installation section. Read all safety instructions carefully before use and save this user and installation manual for future reference. Among others, it incorporates the following features:
High resistance ceramic glass.
Maximum power: 7200 W
- Operation in independent mode with 4 cooking zones or FLEX mode that combines the two left cooking zones to obtain a large cooking surface:
- Independent mode operation:
- Zone 1 (upper right): from 90 to 180mm cooking diameter, power 1500 W (2000 W turbo mode)
- Zone 2 (lower right): 80 to 160mm cooking diameter, power 1300 W (1600 W turbo mode)
- Zone 3 (upper left): 80 to 160mm cooking diameter, power 1300 W (1600 W turbo mode)
- Zone 4 (lower left): 80 to 180mm cooking diameter, power 1500 W (2000 W turbo mode)
Operation in FLEX mode:
- Left zone: 180 × 395 ~mm of cooking surface, power 2600 W (3000 turbo mode)
- Touch-type electronic controls with 9 power levels
- Timer up to 99 minutes
- Detection of small to unsuitable vessels for induction
Automatic safety shutdown
Child lock - Indication of residual heat
BEFORE CONNECTING THE APPLIANCE
Your security is important for us. Please read this information before using the induction hob.
Installation (Electric Shock Hazard)
- Disconnect the appliance from the mains before carrying out any work or maintenance on it.
- Connection to a good ground wiring system is essential and mandatory.
- Modifications to the home wiring system should only be made by a qualified electrician.
- Failure to follow this advice can result in electric shock or death.
Important safety instructions
- Read these instructions carefully before installing or using this appliance.
- No product or combustible product should be placed in this appliance at any time.
- Make this information available to the person responsible for installing the device, as it could reduce your installation costs.
- To avoid risks, this appliance must be installed in accordance with these installation instructions.
- This appliance must be connected to a circuit incorporating an isolation switch that provides complete disconnection from the power source.
- Failure to properly install the device could invalidate warranty or liability claims.
Use and maintenance
- Do not cook on a broken or cracked hob. If the surface of the cooking surface breaks or cracks, disconnect the hob from the mains (automatic) outlet and contact a qualified technician.
- Failure to follow this advice can result in electric shock or death.
- Turn off the hob and wait until it is completely cool before cleaning, for maintenance you must disconnect the hob from the electrical network.
Health hazard
- This device complies with electrical and electromagnetic safety standards.
- However, people with pacemakers or other electrical implants (such as insulin pumps) should consult their physician or the implant manufacturer before using this device to ensure that their implants are not affected by the electromagnetic field.
- Failure to follow this advice can result in death or significant damage to your health.
Hot surface hazard
- During use, accessible parts of this appliance will become hot enough to cause burns.
- Do not allow your body, clothing, or anything other than the proper cookware to come into contact with the induction glass until the surface is cool.
- Metal objects such as knives, forks, spoons and lids should not be placed on the surface of the worktop as they can become hot.
- Failure to follow this advice can cause burns and scalds
- The handles of the saucepan may be hot to the touch. Make sure the pot handles do not stick out from other cooking zones that are on. Keep the handles out of the reach of children.
- Keep children away.
Cut hazard
- The sharp blade of a glass plate scraper is exposed when the safety cover is retracted. Use with great care and always store safely and out of the reach of children.
- Failure to take the necessary precautions can cause cuts.
IMPORTANT SAFETY INSTRUCTIONS
- Never leave the appliance unattended when in use. When oil overheats it can cause smoke and spills that can ignite.
- Never use your appliance as a work or storage surface.
- Never leave objects or utensils on the appliance.
- Do not place or leave magnetizable objects (eg credit cards, memory cards) or electronic devices (eg computers, MP3 players) near the device, as they may be affected by its electromagnetic field.
- Never use your appliance to heat or heat the room.
- After use, always turn off the cooking zones and the hob as described in this manual (ie using the touch controls). Do not rely on the non-induction cookware detection feature to turn off the cooking zones when you remove the pans.
- Do not allow children to play with the appliance or sit, stand or climb on the hob.
- Do not place toys or products that attract the attention of children on the hob, children could climb on the hob and could seriously injure themselves.
- Do not leave children alone or unattended in the area where the appliance is used.
- Children or people with a disability who limit their ability to use the appliance must have a responsible and competent person to instruct them on its use. The instructor must be convinced that they can use the device without danger to themselves or to their surroundings.
- Do not use a steam cleaner to clean the hob.
- Do not place or drop heavy objects on the hob.
-
Do not lean on the plate.
-
Do not repair or replace any part of the appliance unless specifically recommended in the manual. All other services must be performed by a qualified technician.
- Do not use pots, pans or saucepans with ragged edges or drag them across the surface of the induction glass as this may scratch the glass.
- Do not use scourers or other abrasive cleaners to clean the surface of the hob, as they can scratch the induction glass.
- If the power cord is damaged, it must be replaced by the manufacturer or qualified personnel to avoid a hazard.
- This appliance is designed for household, non-professional use only. MX ONDA will not accept any responsibility and the guarantee will not be valid in case of improper use or non-compliance with the instructions.
WARNING: The appliance and its accessible parts get hot during use. - Care must be taken to avoid touching the cooking zones.
- Children under the age of 8 should be kept away unless continuously supervised.
- Children must not play with the appliance. Cleaning and user maintenance should not be performed by children without supervision.
- This device can be used by children from 8 years of age and by people with reduced physical, sensory or mental capacities or lack of experience and knowledge, if they have been given supervision or instructions on using the device safely and they understand the dangers involved
- WARNING: Unattended cooking on a greasy or oily plate can be dangerous and cause a fire.
- NEVER try to put out a fire with water, turn off the appliance! and then cover the flame for example with a lid or a fire blanket.
- WARNING: Fire Hazard - Do not place or store products on cooking surfaces.
-
A steam cleaner should not be used.
-
WARNING: If the surface is cracked, turn off the appliance to avoid the possibility of electric shock and do not touch it to avoid cutting the ceramic glass.
- The appliance is not designed to be operated by means of an external timer or a separate remote control system.
- CAUTION: The cooking process must be supervised. The short-term cooking process must be continuously monitored.
- WARNING: To prevent the plate from moving, the safety anchors must be installed. See installation instructions.
- WARNING: Use only kitchen protectors designed by the cooking appliance manufacturer or indicated by the appliance manufacturer in the appropriate instructions for use or kitchen protectors incorporated into the appliance. The use of unsuitable protectors can cause accidents.
- This appliance incorporates a ground connection for functional purposes only.
- Remove any protective film that may be on the induction hob.
THE INDUCTION COOKER
Advantages of induction cooking
Induction cooking is a radical change in the traditional way of cooking food, the heat is generated directly in the container, thus eliminating the loss of heat between the different elements (container, glass ceramic plates, etc.) the advantages are as follows:
- Reduced cooking time: the pan heats up faster.
- Energy saving: by reducing the time to cook and / or fry. When the pan is removed from the cooking zone, it automatically stops supplying heat.
- Simpler cleaning; Since the surface is not so hot, food that spills does not burn as quickly.
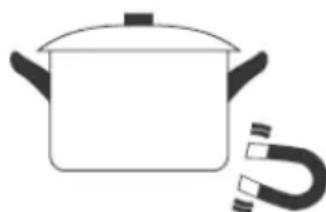
Cookware suitable for induction
Ferromagnetic vessels
The suitable containers for induction cooking are those that are made of ferromagnetic material. They can be made of enameled steel, cast iron or special stainless steel induction dishes.
To find out if a container is suitable for induction cooking, check that they are attracted by a magnet.
Special containers
There are other types of containers whose base is not entirely ferromagnetic. Before using them, check the diameter of the base and that these pans are detected by the induction hob.
Cookware not suitable for induction
Never use containers made of normal stainless steel, glass, clay, copper, or aluminum.
Container base features
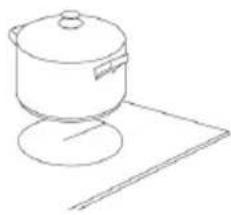
Pay special attention to the shape of the base, as it must be completely flat. Do not use containers with ragged edges or a curved bottom.
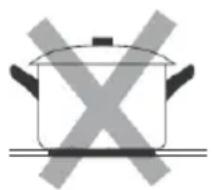
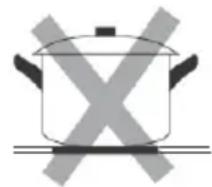
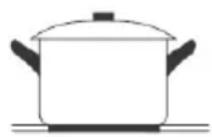
Make sure the base of the pan is smooth, lies flat against the glass, and is the same size as the cooking zone. Use containers whose diameter is as large as the graphic for the selected zone. When using a canister, slightly more energy will be used at its maximum efficiency. If you use a smaller pot, the efficiency may be lower than expected. Always center the pan on the cooking zone. The base of a container can influence the distribution of heat and therefore the cooking result. Choosing a container with a higher quality base (for example, a sandwich type) will save us cooking time and energy.
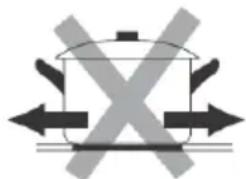
Protect the glass surface
Always lift the cookware off the induction hob, do not slide it, as this could scratch the glass.
Containers empty or with a very thin base
Never place an empty container on the hob and turn it on, as this can cause the container to overheat (due to excess heat) and damage the ceramic glass or the hob itself. If the base of the container is very thin, it can also become overheated, refrain from using this type of container.
Container detection
The hob has a minimum detection limit of the cooking zone that varies for each cooking zone. For this reason, you should refrain from using containers whose base is less than the specified diameter.
If you turn on the hob without any cookware, with a cookware with a lower base than specified or with a cooktop not suitable for induction, the cooktop will not work, the display will show “ ≥ ≤ ”.
Container dimensions
The cooking zones have a minimum and maximum operating diameter, and are automatically adapted to the diameter of the pan. However, the bottom of the pan must have a minimum diameter according to the corresponding cooking zone. To get the best efficiency from your induction hob, place the base of the pan in the center of the cooking zone.
Cooking diameter of the upper right zone: 90 180~mm
Cooking diameter of the lower right zone: 80 160~mm
Cooking diameter of the upper left zone: 80 160 ~mm
Baking diameter of the lower left zone: 80 180 ~mm
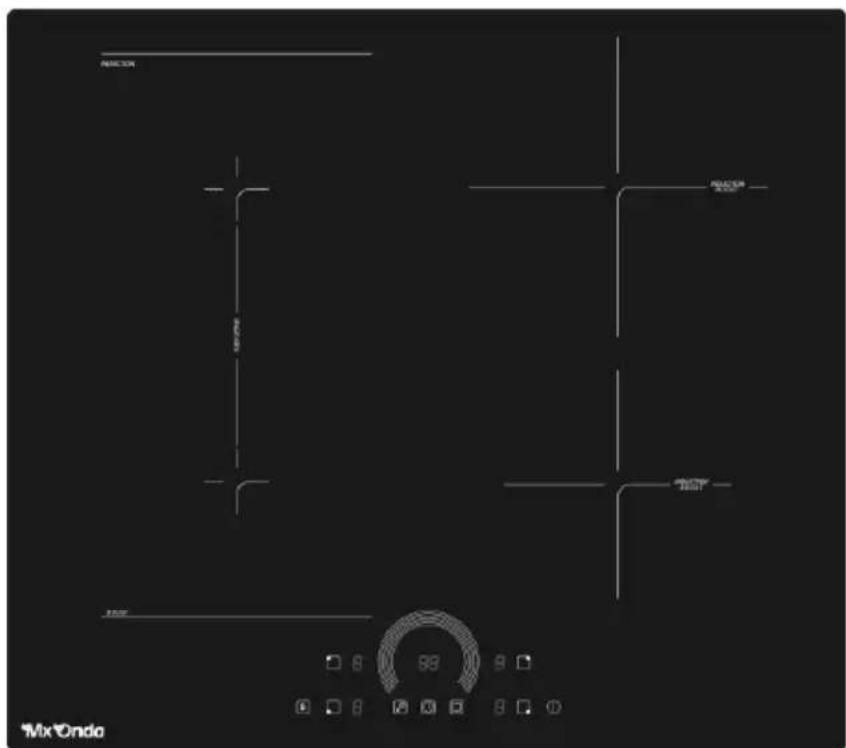
CONTROLS AND ELEMENTS
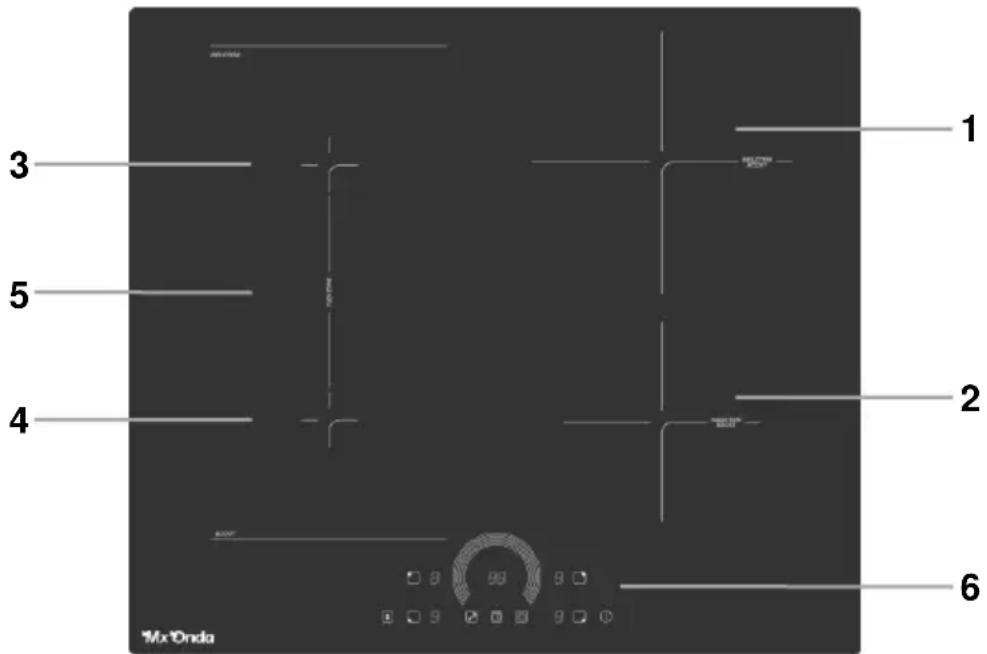
- Upper right cooking zone: Cooking diameter: 90 180 mm Power: 1500W (2000W turbo mode)
- Lower right cooking zone: Cooking diameter: 80 160 mm Power: 1300W (1600W turbo mode)
- Top left cooking zone: Cooking diameter: 80 160 ~mm Power: 1300W (1600W Turbo mode)
- Lower left cooking zone: Cooking diameter: 80 180 mm Power: 1500W (2000W turbo mode)
- Flexible cooking zone: Maximum cooking surface: 180 × 395 mm Power: 2600W (3000W turbo mode)
- Control Panel
CONTROL PANEL
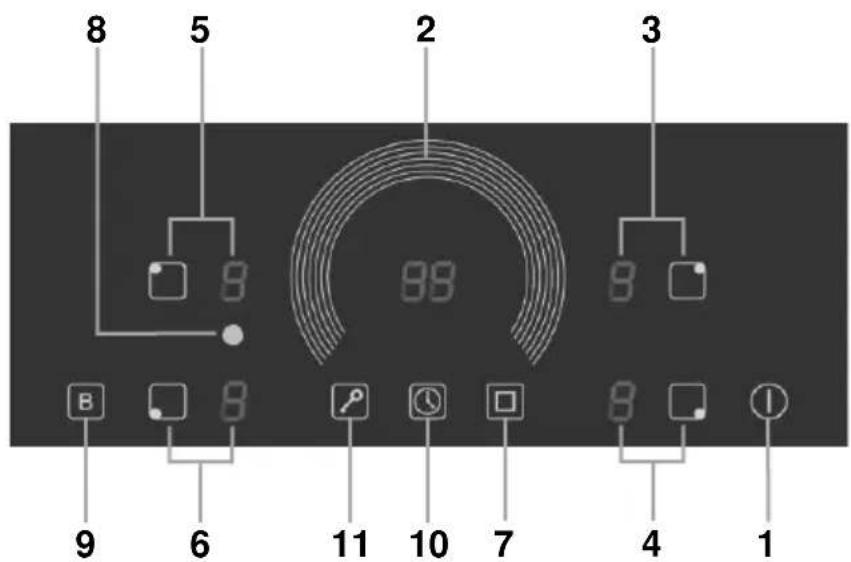
- Power ON and OFF
- Power level selector
- Upper right cooking zone (selector and power indicator)
- Lower right cooking zone (selector and power indicator)
- Upper left cooking zone (selector and power indicator)
- Lower left cooking zone (selector and power indicator)
- Flexible cooking zone on and off
- Flexible cooking zone indicator on
- Turbo function
- Timer
- Control panel lock
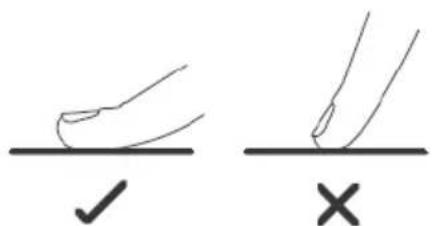
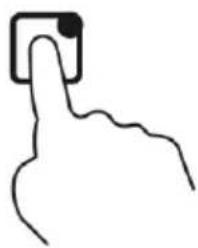
- The controls are responsive to touch, so no pressure is required.
- Use the entire part of the fingertip, not the tip.
- You will hear a beep each time a touch is detected.
- Make sure the controls are always clean, dry and that there are no objects (for example, a utensil or cloth) covering them. Even a thin layer of water can make the controls difficult to operate.
USING THE INDUCTION COOKER
To start cooking
-
Touch the Power on / off button 1 (①). When the hob is turned on, an acoustic warning will sound and the displays will show the indication "--", warning that the hob is on and in the standby or standby state.
-
If after 30 seconds you do not switch on a cooking zone, the induction hob will automatically switch off.
-
Place a suitable container for the chosen cooking zone.
-
Make sure the bottom of the pan and the surface of the cooking zone are clean and dry.
-
Touch the selection button 3 (□), 4 (□), 5 (□) or 6 (□) corresponding to the chosen cooking zone, the power indicator of the chosen cooking zone will show the default power level “0” flashing.
-
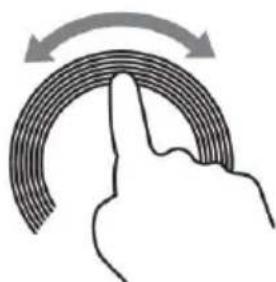
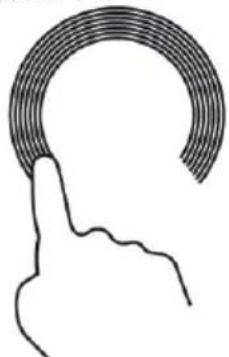
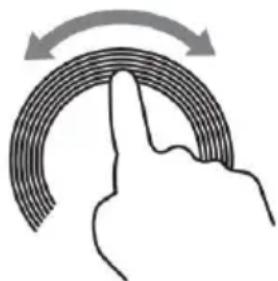
Touch the semicircle of the power level 2 selector with your fingertip and make a circular motion to the right or left to increase or decrease the power respectively. The power level indicator for the selected cooking zone will show the selected power (1, 2, 3, etc.).

-
The power level of a cooking zone can be varied at any time during cooking. To do this, select the desired cooking zone using the selection buttons 3 (□), 4 (□), 5 (□) or 6 (□) and when the power level indicator starts to flash, adjust the power using the power level selector 2.
-
To switch off a cooking zone, select the desired cooking zone (see the previous section) and when the power level indicator of the chosen cooking zone starts to flash, touch and hold your finger for 3 seconds on the lower left on the power level selector 2 until the power indicator shows " - ".
If the display flashes the indication
This means that...
- You have not placed a pan on the correct cooking zone or,
- that the cookware you are using is not suitable for induction cooking or,
- that the pan has a too small base or is not centered correctly on the cooking zone.
Therefore...
- Heating is not carried out unless there is a suitable container in the cooking zone.
- The screen will turn off automatically after 1 minute if a suitable container is not placed on it.
When you have finished cooking
- Choose the cooking zone you want to turn off using the selection buttons 3 (□), 4 (□), 5 (□) or 6 (□) and when the power level indicator starts to flash, turn off the cooking zone as described in point 6 of the previous section).
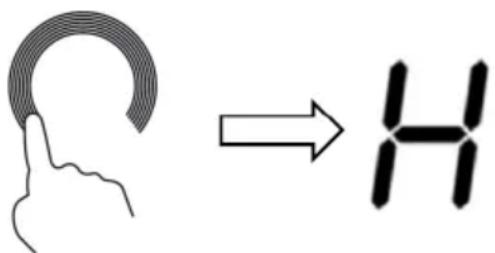
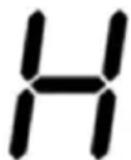
- If the power indicator of a cooking zone shows " H ", it means that the corresponding cooking zone is very hot.
- To turn off the induction hob, touch the Power on / off button 1 (①).

- Beware of hot surfaces!
The " H " symbol indicates which cooking zone is hot to the touch. It will disappear when the surface has cooled to a safe temperature. It can also be used as an energy saving function if you want to heat more pans, use the cooking zone that is still hot
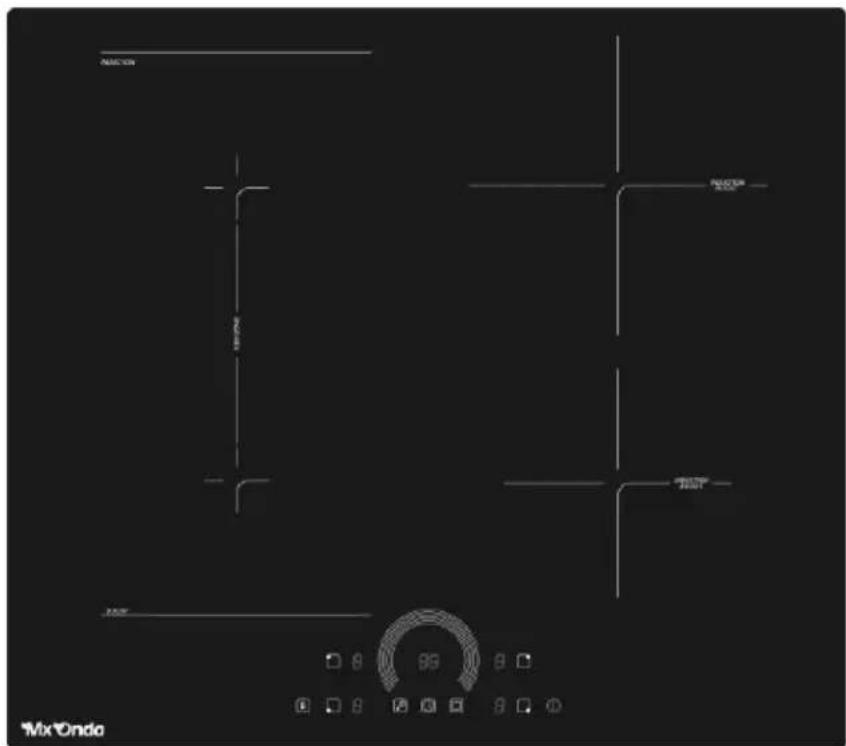
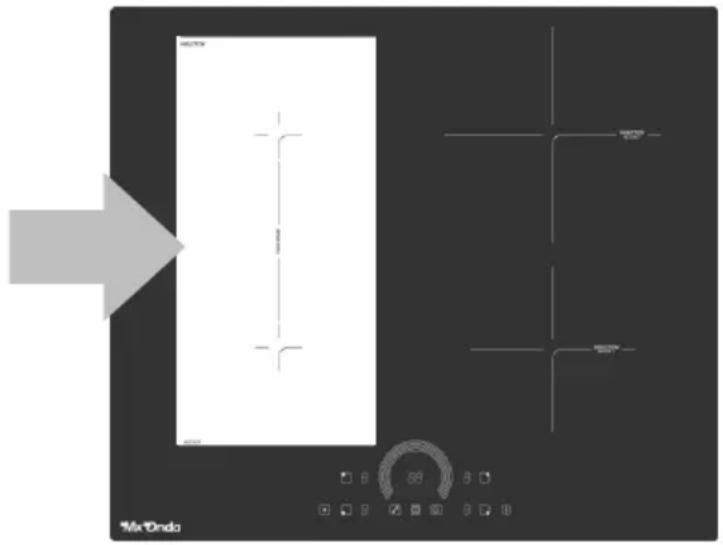
FLEXIBLE COOKING AREA
The flexible cooking zone is located on the left side of the induction hob and is delimited by two horizontal lines, the pan must not exceed the rectangle formed by both horizontal lines and their corresponding vertical lines (not drawn), white area in the drawing.
Flexible cooking area
- Turn on the hob, touch the Power on / off button 1 (①) and place a suitable pan on the flexible cooking zone.
- Touch one of the selection buttons 5 (□) or 6 (□) and the corresponding power indicator will show the default power level “0” flashing.
- Touch the flexible cooking zone on / off button 7 ( ☐ ), the indicator 8 will light up and the power level indicators of the upper and lower left cooking
zone will show the default power level " 5 " blinking.
- Touch the semicircle of the power level 2 selector with your fingertip and make a circular motion to the right or left to increase or decrease the power respectively. The power level indicators for the upper and lower left cooking zones will show the selected power (1, 2, 3, etc.).
-
The power level of the flexible cooking zone can be varied at any time during cooking. To do this, touch one of the selection buttons 5 (□) or 6 (□) and when the power level indicators start to flash, adjust the power using the power level selector 2.
-
To turn off the flexible cooking zone, touch one of the selection buttons 5 (□) or 6 (□) and when the power level indicators start to flash, touch and hold your finger for 3 seconds on the bottom left of the power level selector 2 until the power indicators show “-”.

TURBO FUNCTION
The Turbo function is used to temporarily increase the power of the chosen cooking zone, and thus to be able to obtain a more powerful and faster cooking in a short period of time. We recommend that you use the Turbo function with caution and only temporarily as excess power can burn or overheat food.
Using the Turbo function
- To activate the Turbo mode in a cooking zone, touch the selection button 3 (□), 4 (□), 5 (□) or 6 (□) corresponding to the desired cooking zone, the power indicator of the selected cooking zone will show the selected power level flashing.
- Then touch the Turbo function button 9 (B) and the power indicator will show the indication “b” which is the Turbo (Boost) mode.
- To cancel the Turbo function, using the selection buttons 3 (□), 4 (□), 5 (□) or 6 (□) choose the cooking zone that has this function activated, when the indication “b” is flashing, touch the function button Turbo 9 (B) and the power indicator will show the level selected before activating the Turbo function.
Note: The Turbo function increases the power considerably, so we recommend that you use it with caution as cooking times can vary and excess temperature can burn the food.
CONTROL PANEL LOCK
You can lock the control panel to prevent unintentional use (for example, children accidentally turning on the cooking zones).
When the control panel is locked, all the buttons are locked except the Power on / off button 1 (①) only to turn off the hob and the control panel lock / unlock button 11 (图).
To lock the control panel
Touch the control panel lock button 11 ( ) and the timer indicator will show the indication “L0”.
To unlock the control panel
- Touch and hold your finger on the Lock Button 11 (☑), until the indication "L0" disappears from the screen.
- Now the control panel is unlocked and the board can be used.

When the induction hob control panel is in lock mode, all buttons are disabled except the Power on / off button 1. You can always turn off the induction hob using the Power on / off button 1 in case of emergency, then you need to unlock the control panel.
TIMER
The timer deactivates the selected cooking zone and warns by "Beeps" after the previously set time has elapsed. The timer can be set up to a maximum time of 99 minutes.
Using the timer (The cooking zone must be operating)
-
Touch the selection button 3 (□), 4 (□), 5 (□) or 6 (□) corresponding to the selected cooking zone, the power indicator of the selected cooking zone will show the power level flashing.
-
Touch the timer button 10 ( 📁), the display will show the factory default switch-off time “ 30 ” and the digit “ 3 ” corresponding to the tens of minutes flashing.
-
Set the tens of minutes for automatic shutdown using the power level selector. Touch the selection circle for power level 2 with your fingertip and make a circular motion to the right or left to increase or decrease the tens of minutes respectively.
-
After setting the tens of minutes, allow 3 seconds to elapse without touching any button and the digit corresponding to the units of the minutes will begin to flash.
-
Set the minute units for automatic shut-off using the power level dial. Touch the power level 2 selection circle with your fingertip and make a circular motion to the right or left to increase or decrease the minutes.
-
Once the time for automatic shutdown is set, allow 2 seconds to elapse without touching any button, a confirmation "Beep" will sound and the countdown to automatic shutdown will start. The power indicator of the timed zone will appear with a flashing dot to indicate that it is timed.
-
To cancel the timer touch the selection button 3 (□), 4 (□), 5 (□) or 6 (□) corresponding to the timed cooking zone you want to cancel, when the power indicator of the cooking zone is flashing touch the timer button 10 (□).

The cooking zone that is not set with the timer will continue to operate if it is turned on previously.
Notes:
- If you want to use the timer only as a reminder and not to deactivate a cooking zone, skip step 1 (selecting a cooking zone) and the timer will only warn by "Beeps" after the selected time has elapsed.
- If you want to change the time for automatic power off after setting the timer, you must start from step 1.
- All cooking zones can be timed, to do this follow the steps indicated above for each cooking zone.
- The timer can only be activated, modified or deactivated when the cooking zone is selected, that is, when the power level indicator digit is flashing.
OVERHEATING PROTECTION
Inside the induction hob, a temperature sensor is located, which is constantly monitoring the operating temperature, when it is excessive and the built-in fans are not capable of reducing the temperature, the hob will stop working automatically.
AUTOMATIC SAFETY SHUTDOWN
It is a protection system that incorporates the induction hob, which turns off automatically if you forget to turn it off.
The automatic shutdown time varies depending on the selected power, see the following table:
| Power level | 1 | 2 | 3 | 4 | 5 | 6 - 9 |
| Auto power off time (hours) | 6 | 6 | 5 | 5 | 4 | 1,5 |

People with a pacemaker should consult their physician before using this unit.
CLEANING THE INDUCTION HOB
| Dirt type | How to clean | Important |
| Daily soiling on the glass surface (fingerprints, marks, food stains or unsweetened spills) | 1. Disconnect the power from the board using the switch or differential enabled for this. 2. Use an induction hob cleaner while the surface is warm (but not hot)! 3. Rinse and dry the plate with a clean cloth or paper towel. 4. Reconnect the board to power | ·When turning off the power to the hob, there will be no indication of a hot surface, but the cooking zone still be hot! ·Use special scouring pads for induction hobs. Do not use harsh, corrosive or abrasive cleaners that can damage the plate. Always read the label to see if your cleanser or scourer is suitable. Never leave residue on the surface, the glass can stain. |
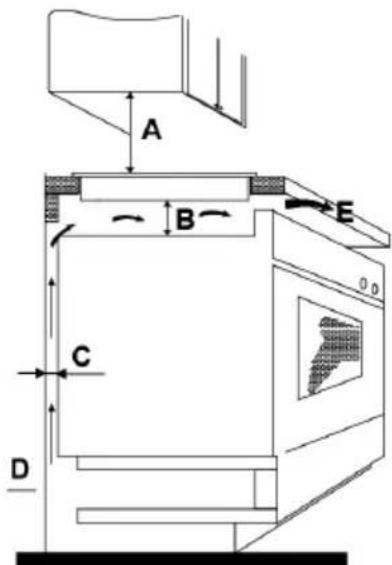
| Spills from sugary foods | Remove them immediately using a scraper suitable for induction hobs, but be careful with hot surfaces in the cooking zone: 1. Disconnect the power from the board using the switch or differential enabled for this. 2. Hold the scraper at a 30° angle and scrape dirt to a cool area of the plate. 3. Wipe up dirt or spills with a kitchen towel or paper towel. | Remove stains from melting and sugary foods or spills as soon as possible. If allowed to cool on the glass, it can be difficult to clean or even permanently damage the surface of the hob. Cut Hazard - When the safety cover is retracted, the blade on a scraper becomes sharp. Use it with great care and always store safely and out of the reach of children. |
| Dirt and spill stains on the control panel | 1. Disconnect the power from the board using the switch or differential enabled for this. 2. Clean the control panel area with a clean, damp sponge or cloth. 3. Completely dry the control panel area 4. Reconnect the board to power. | Liquid spillage in the area of the control panel may cause the induction hob to malfunction, the touch buttons may not work properly. Be sure to thoroughly clean and dry the control panel area before reconnecting the board to power. |
PROBLEM SOLVING
| Problem | Possible causes | What to do? |
| The induction hob does not turn on | No mains power | Make sure that the induction hob is connected to the mains socket and that the switch or circuit breaker is in the on position. Check if you have light in the rest of your house. If you have checked everything and the problem persists, call a technician. |
| Touch buttons do not work | The control panel is locked | Unlock the control panel, see the corresponding section. |
| Touch buttons are not working properly | There may be a small film of water or liquid on the buttons or you may be using the tip of your finger when touching the buttons. | Make sure the control panel area is clean and dry. Use the pad of your finger when touching the controls. |
| The surface of the plate is scratched | Cookware can have edges or edges that will deteriorate the hob. The utensils or cleaning products used are not suitable. | Use cookware with a flat, smooth bottom. See the section "The induction cooker" and the section cleaning the induction hob. |
| Some containers make noises or clicks | Some containers have a sandwich base | This is normal and is due to the type of base of the container, this is normal and does not indicate an anomaly or failure. |
| The hob produces a humming noise when used at a high power level. | This is caused by induction cooking technology. | This is normal, the noise should be reduced or disappear completely when the power is decreased. |
| Fans noise coming from the induction hob. | The fans that cools the induction hob has turned on. Prevent the hob from overheating, the fans can continue to work after turning off the induction hob. | This is normal and is not a malfunction. Do not turn off the power to the induction hob while the fan is running. |
| The containers do not heat up and the display shows u | The cookware is not suitable for induction, the base of the cooker is too small or it is not centered on the cooking zone. | Use cookware suitable for induction, with a base large enough to be detected and center it in the cooking zone |
ERROR MESSAGES
If an abnormality arises, the induction hob will enter the protection state automatically and display the corresponding error codes:
| Message | Description | Solution |
| E1/E2 | Protection against under voltage (<85 V) or over voltage (>285 V) | If the voltage at the mains outlet is lower or higher than specified, consult a qualified electrician. |
| E3 | Induction coil temperature sensor fault. | Contact the closest MX ONDA Official Technical Service. |
| E4 | IGBT temperature sensor failure | Contact the closest MX ONDA Official Technical Service. |
| E5 | High temperature (>280 °C) of the induction coil temperature sensor. | Turn off the induction hob and wait for it to cool down. |
| E6 | High temperature at IGBT sensor | Check that the ventilation is correct and the fans are not obstructed. |
| ER | Internal fault of the control circuits. | Contact the closest MX ONDA Official Technical Service. |
| EE | There is excess liquid on the buttons on the control panel | Clean and dry the control panel |
INSTALLATION
Drill a hole in the worktop based on the following suggestions:
- It must leave at least a minimum of 5cm around the hole, free of obstacles (furniture, appliances, etc.).
- The thickness of the worktop is at least 30~mm .
- Choose the material of the worktop that is heat resistant to avoid deformation caused by heat radiation from the induction hob.
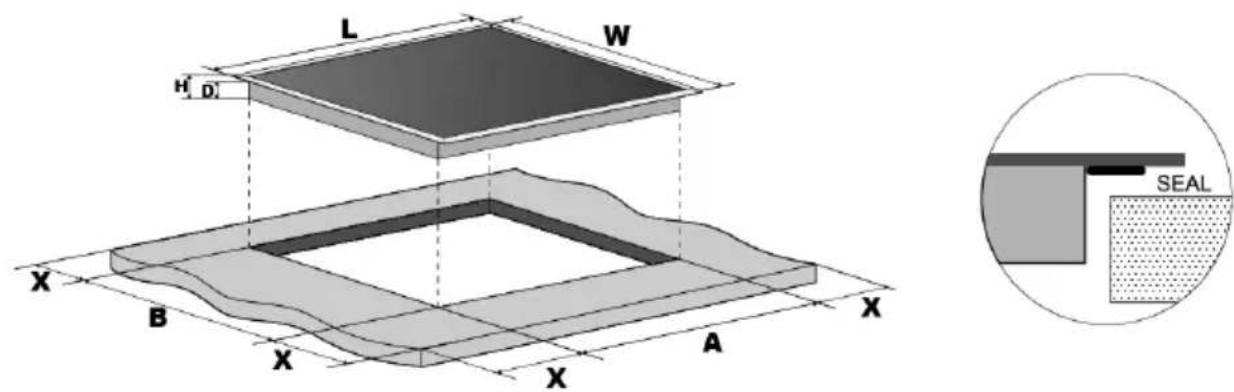
| L(mm) | W(mm) | H(mm) | D(mm) | A(mm) | B(mm) | X(mm) |
| 590 | 520 | 55 | 51 | 560 | 490 | 50 min. |
Under all circumstances, make sure that the induction hob is well ventilated and that the air inlet and outlet are not blocked.
Make sure the induction hob is in good working order. As shown below
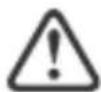
Note: The safety distance between the induction hob and the cabinet or extractor hood above the induction hob must be at least 760~mm .
| A(mm) | B(mm) | C(mm) | D | E |
| 760 | 50 mm | 20 mm | Air inlet | Air outlet 10 mm |
Before installing the induction hob, make sure that
- The countertop surface is smooth and level, and no structural elements interfere with space requirements
- The hob is made of a heat-resistant material.
- If the induction hob is installed above an oven, that the oven has a built-in cooling fan.
- The facility will comply with all authorization requirements and applicable standards and regulations.
- The electrical installation complies with local safety rules and regulations and incorporates a suitable isolation switch or circuit breaker that provides a total disconnection from the electrical network.
- The isolating switch or circuit breaker must be adequate and provide a 3mm air gap contact separation on all poles (or on all active [phase] conductors if local wiring rules allow for this variation of requirements)
- The isolating switch or circuit breaker is easily accessible to the user.
- Consult with a licensed electrician or local authorities regarding installation and statutes, if in doubt about installation.
- se easy-to-clean, heat-resistant finishes (such as ceramic tile) for the wall surfaces surrounding the countertop.
At the end of the installation of the induction hob, make sure that ...
- The power cord is not accessible through drawer or drawer doors.
- There is adequate flow of fresh air from the outside of the cabinet to the base of the counter.
- If the induction hob is installed over a drawer or closet space, a thermal protection barrier is installed under the base of the hob.
- The isolating switch or circuit breaker is easily accessible by the user.
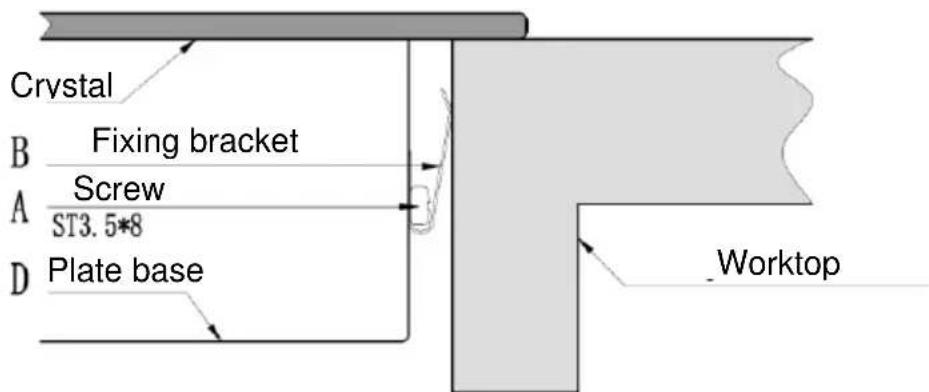
Before attaching the fixing brackets.
The unit must be placed on a stable and smooth surface (use the packaging). Do not apply force to controls that protrude from the plate.
Attaching the fixing brackets
To fix the induction hob on the hob, you must first place the fixing brackets, use the supplied screws (do not use other screws as they could damage the inside of the induction hob).
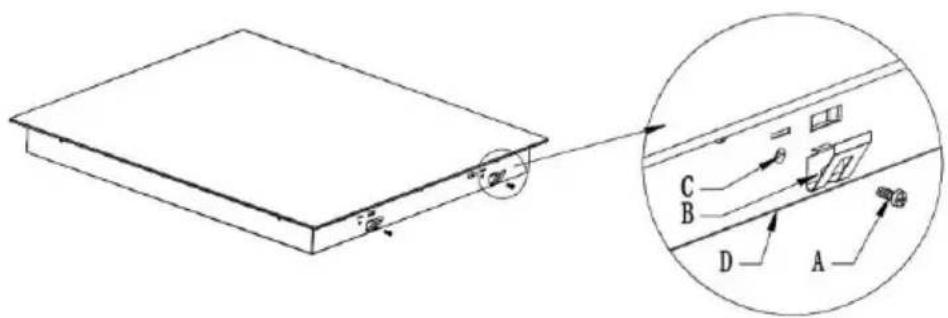
| A | B | C | D |
| Screw | Support | Screw hole | Base |
Precautions
- The induction hob must be installed by licensed electricians or qualified technicians. Please never do the operation on your own.
- The induction hob cannot be installed directly over a dishwasher, refrigerator, freezer, washing machine or dryer, as moisture can damage the electronic components of the induction hob.
- The induction hob will be installed so that better heat radiation can be guaranteed to improve its reliability.
- The wall and the induced heating zone on the table top must withstand the heat.
- To avoid any damage, the hob must be heat resistant.
CONNECTION OF THE INDUCTION HOB TO THE ELECTRICITY SOCKET.

The induction hob must be installed by a licensed electrician or suitably qualified technician.
Before connecting the induction hob to the mains, check that:
- The electrical installation where the induction hob is to be connected must be suitable for the power consumed by the induction hob.
-
The voltage must correspond to the nominal value specified in the characteristics described in this manual.
-
The section of the power cables must withstand the current specified on the nameplate.
To connect the induction hob to the mains socket, you must not use adapters, reducers or branches, as these devices can become hot and cause a fire. The power cable of the induction hob must not touch any part or area where it acquires high temperatures and must be positioned so that the temperature will not exceed 75^ at any point. Check with a licensed and qualified electrician for proper electrical installation. Any modification to the electrical installation must only be carried out by licensed electrician.
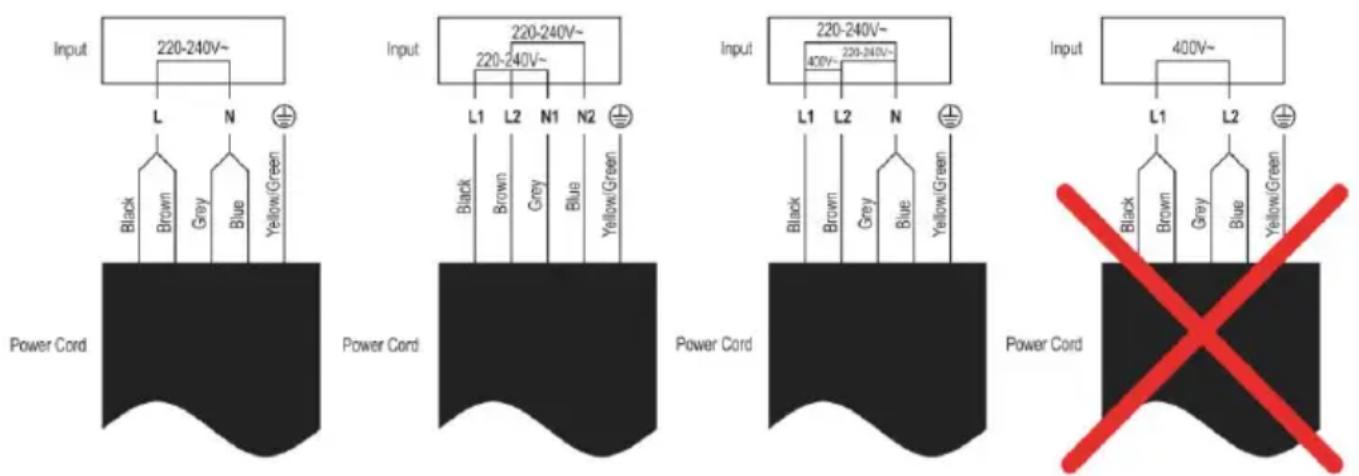
The electrical connection of the induction hob must be carried out in accordance with current regulations and protected by a single-pole magnetothermic or automatic switch. The connection is shown below:
- If the cable is damaged, to be substituted or replaced, the operation must be carried out by an Official Mx Onda Technical Service.
- If the induction hob is connected directly to the mains, a single-pole switch must be installed with a minimum opening of 3mm between the contacts.
- The authorized installer must ensure that the correct electrical connection has been made and that it complies with safety regulations.
- The cable must not be bent or compressed.
- The cable should be checked regularly and replaced only by authorized technicians.
- The yellow / green wire of the power cord must be connected to the earth of the mains socket.
- The manufacturer is not responsible for any accident resulting from the use of an appliance that is not grounded or from faulty grounding continuity.
- If the device has an electrical outlet, it must be installed so that the electrical outlet is accessible.
TECHNICAL SPECIFICATIONS
Supply voltage 220 - 240V 50 / 60Hz
Maximum consumption 7200 W
Cooking surface High resistance ceramic glass
Zone 1 (upper right) Maximum power 1500W (2000W turbo mode)
Cooking diameter 90 180~mm
Zone 2 (lower right) Maximum power 1300 W (1600 W turbo mode)
Cooking diameter 80 160~mm
Zone 3 (upper left) Maximum power 1300 W (1600 W turbo mode)
Cooking diameter 80 160 ~mm
Zone 4 (lower left) Maximum power 1500W (2000W turbo mode)
Cooking diameter 80 180~mm
FLEX mode Maximum power 2600 W (3000 turbo mode)
Cooking surface 180 x 395 mm
Controls Touch type
Power levels 9 levels
Timer Up to 99 minutes
Dimensions 590 × 520 × 58 mm (l, w, h)
Recessed hole dimensions 560× 490mm (l, w)
Weight 10 Kg
Specifications subject to change without notice.
This product complies with the European Directives 2014/30/EC (EMC - Electromagnetic Compatibility) and the 2014/35/EC (LVD - Low Voltage Directive) relative to Low Tension Security.
"MX, MX ONDA" and its logos are trademarks of MX ONDA, S.A.
Telephone of information and Technical Service: +34 902 551 501
MX ONDA, S. A.
C/Matabueyes,7 Nave 1A 19171
Cabanillas del Campo (Guadalajara SPAIN)

Manual de instrucciones Instruction manual
- ATTENTION
- USER AND INSTALLATION MANUAL
- Mx Onda
- INDUCTION HOB TO BUILD WITH FOUR COOKING ZONES AND FLEXIBLE ZONE
- ATTENTION!
- INTRODUCTION
- BEFORE CONNECTING THE APPLIANCE
- Installation (Electric Shock Hazard)
- Important safety instructions
- Use and maintenance
- Health hazard
- Hot surface hazard
- Cut hazard
- THE INDUCTION COOKER
- Advantages of induction cooking
- Cookware suitable for induction
- Special containers
- Cookware not suitable for induction
- Container base features
- Protect the glass surface
- Containers empty or with a very thin base
- Container detection
- Container dimensions
- CONTROLS AND ELEMENTS
- CONTROL PANEL
- USING THE INDUCTION COOKER
- To start cooking
- If the display flashes the indication
- When you have finished cooking
- FLEXIBLE COOKING AREA
- TURBO FUNCTION
- Using the Turbo function
- CONTROL PANEL LOCK
- To lock the control panel
- To unlock the control panel
- TIMER
- Using the timer (The cooking zone must be operating)
- Notes:
- OVERHEATING PROTECTION
- AUTOMATIC SAFETY SHUTDOWN
- PROBLEM SOLVING
- ERROR MESSAGES
- INSTALLATION
- Before installing the induction hob, make sure that
- At the end of the installation of the induction hob, make sure that ...
- Before attaching the fixing brackets.
- Attaching the fixing brackets
- Precautions
- CONNECTION OF THE INDUCTION HOB TO THE ELECTRICITY SOCKET.
- TECHNICAL SPECIFICATIONS
Brand : Mx Onda
Model : MXPI2633FLEX
Category : Cooker