
M318800 - Scale ADE - Free user manual and instructions
Find the device manual for free M318800 ADE in PDF.
| Product type | Classic beam medical scale with stadiometer |
| Brand | ADE |
| Model | M318800 |
| Maximum capacity | 200 kg |
| Weighing graduation | 100 g |
| Stadiometer measuring range | 600 to 2100 mm |
| Stadiometer graduation | 1 mm |
| Platform dimensions | 375 x 275 mm |
| Overall dimensions | 272 x 1467 x 530 mm |
| Total weight | Approximately 18 kg |
| Power supply | None (mechanical scale) |
| Main functions | Weighing with sliding counterweights, height measurement with cursor |
| Tare adjustment | Adjustment screw under the column |
| Assembly | Adjustable feet, column, beam, stadiometer, castors |
| Cleaning | Damp cloth, mild detergents, no corrosive products |
| Safety | Use on flat, firm surface, do not immerse in water |
| Warranty | 2 years, spare parts excluded |
| Compliance | CE |
| Manufacturer | ADE Germany GmbH, Hamburg, Germany |
| Package contents | Column, base, stadiometer, castors, adjustable feet, screws, key, manual |
Frequently Asked Questions - M318800 ADE
User questions about M318800 ADE
0 question about this device. Answer the ones you know or ask your own.
Ask a new question about this device
Download the instructions for your Scale in PDF format for free! Find your manual M318800 - ADE and take your electronic device back in hand. On this page are published all the documents necessary for the use of your device. M318800 by ADE.
USER MANUAL M318800 ADE
Classic beam scale with height rod
General 11
Assembling 12
Correct weighing and measuring 16
Cleaning and maintenance 17
Technical Data. 18
CE-conformity 18

This symbol means: "Consult operating instructions". To achieve accurate results, read the instructions for use carefully before use and follow all instructions provided therein. Keep the instructions for use for future reference.
Your ADE Classic Physician Beam Scale with height rod is a precision instrument and must be treated accordingly. Therefore, kindly read and follow the operating manual in all respects.
Check carton contents:
- Column with head part
- Base/platform
- Height rod
- Pair of wheels (incl. 2 cross-slotted crews)
- Levelling feet 4 pieces
- Mounting material: (6 x cross-slotted screw, 2 x hexagonal screw, 1 wrench)
- Operating manual
Safety
- Handle your scale with care - it is a precision instrument.
- Use the scale on a firm and level surface
- Operate the unit only within the permissible ambient conditions.
- Do not operate the unit in hazardous or unstable environments.
- Clean with a dry cloth, do not use harsh cleaning agents.
- Do not immerse the appliance in water or other liquids.
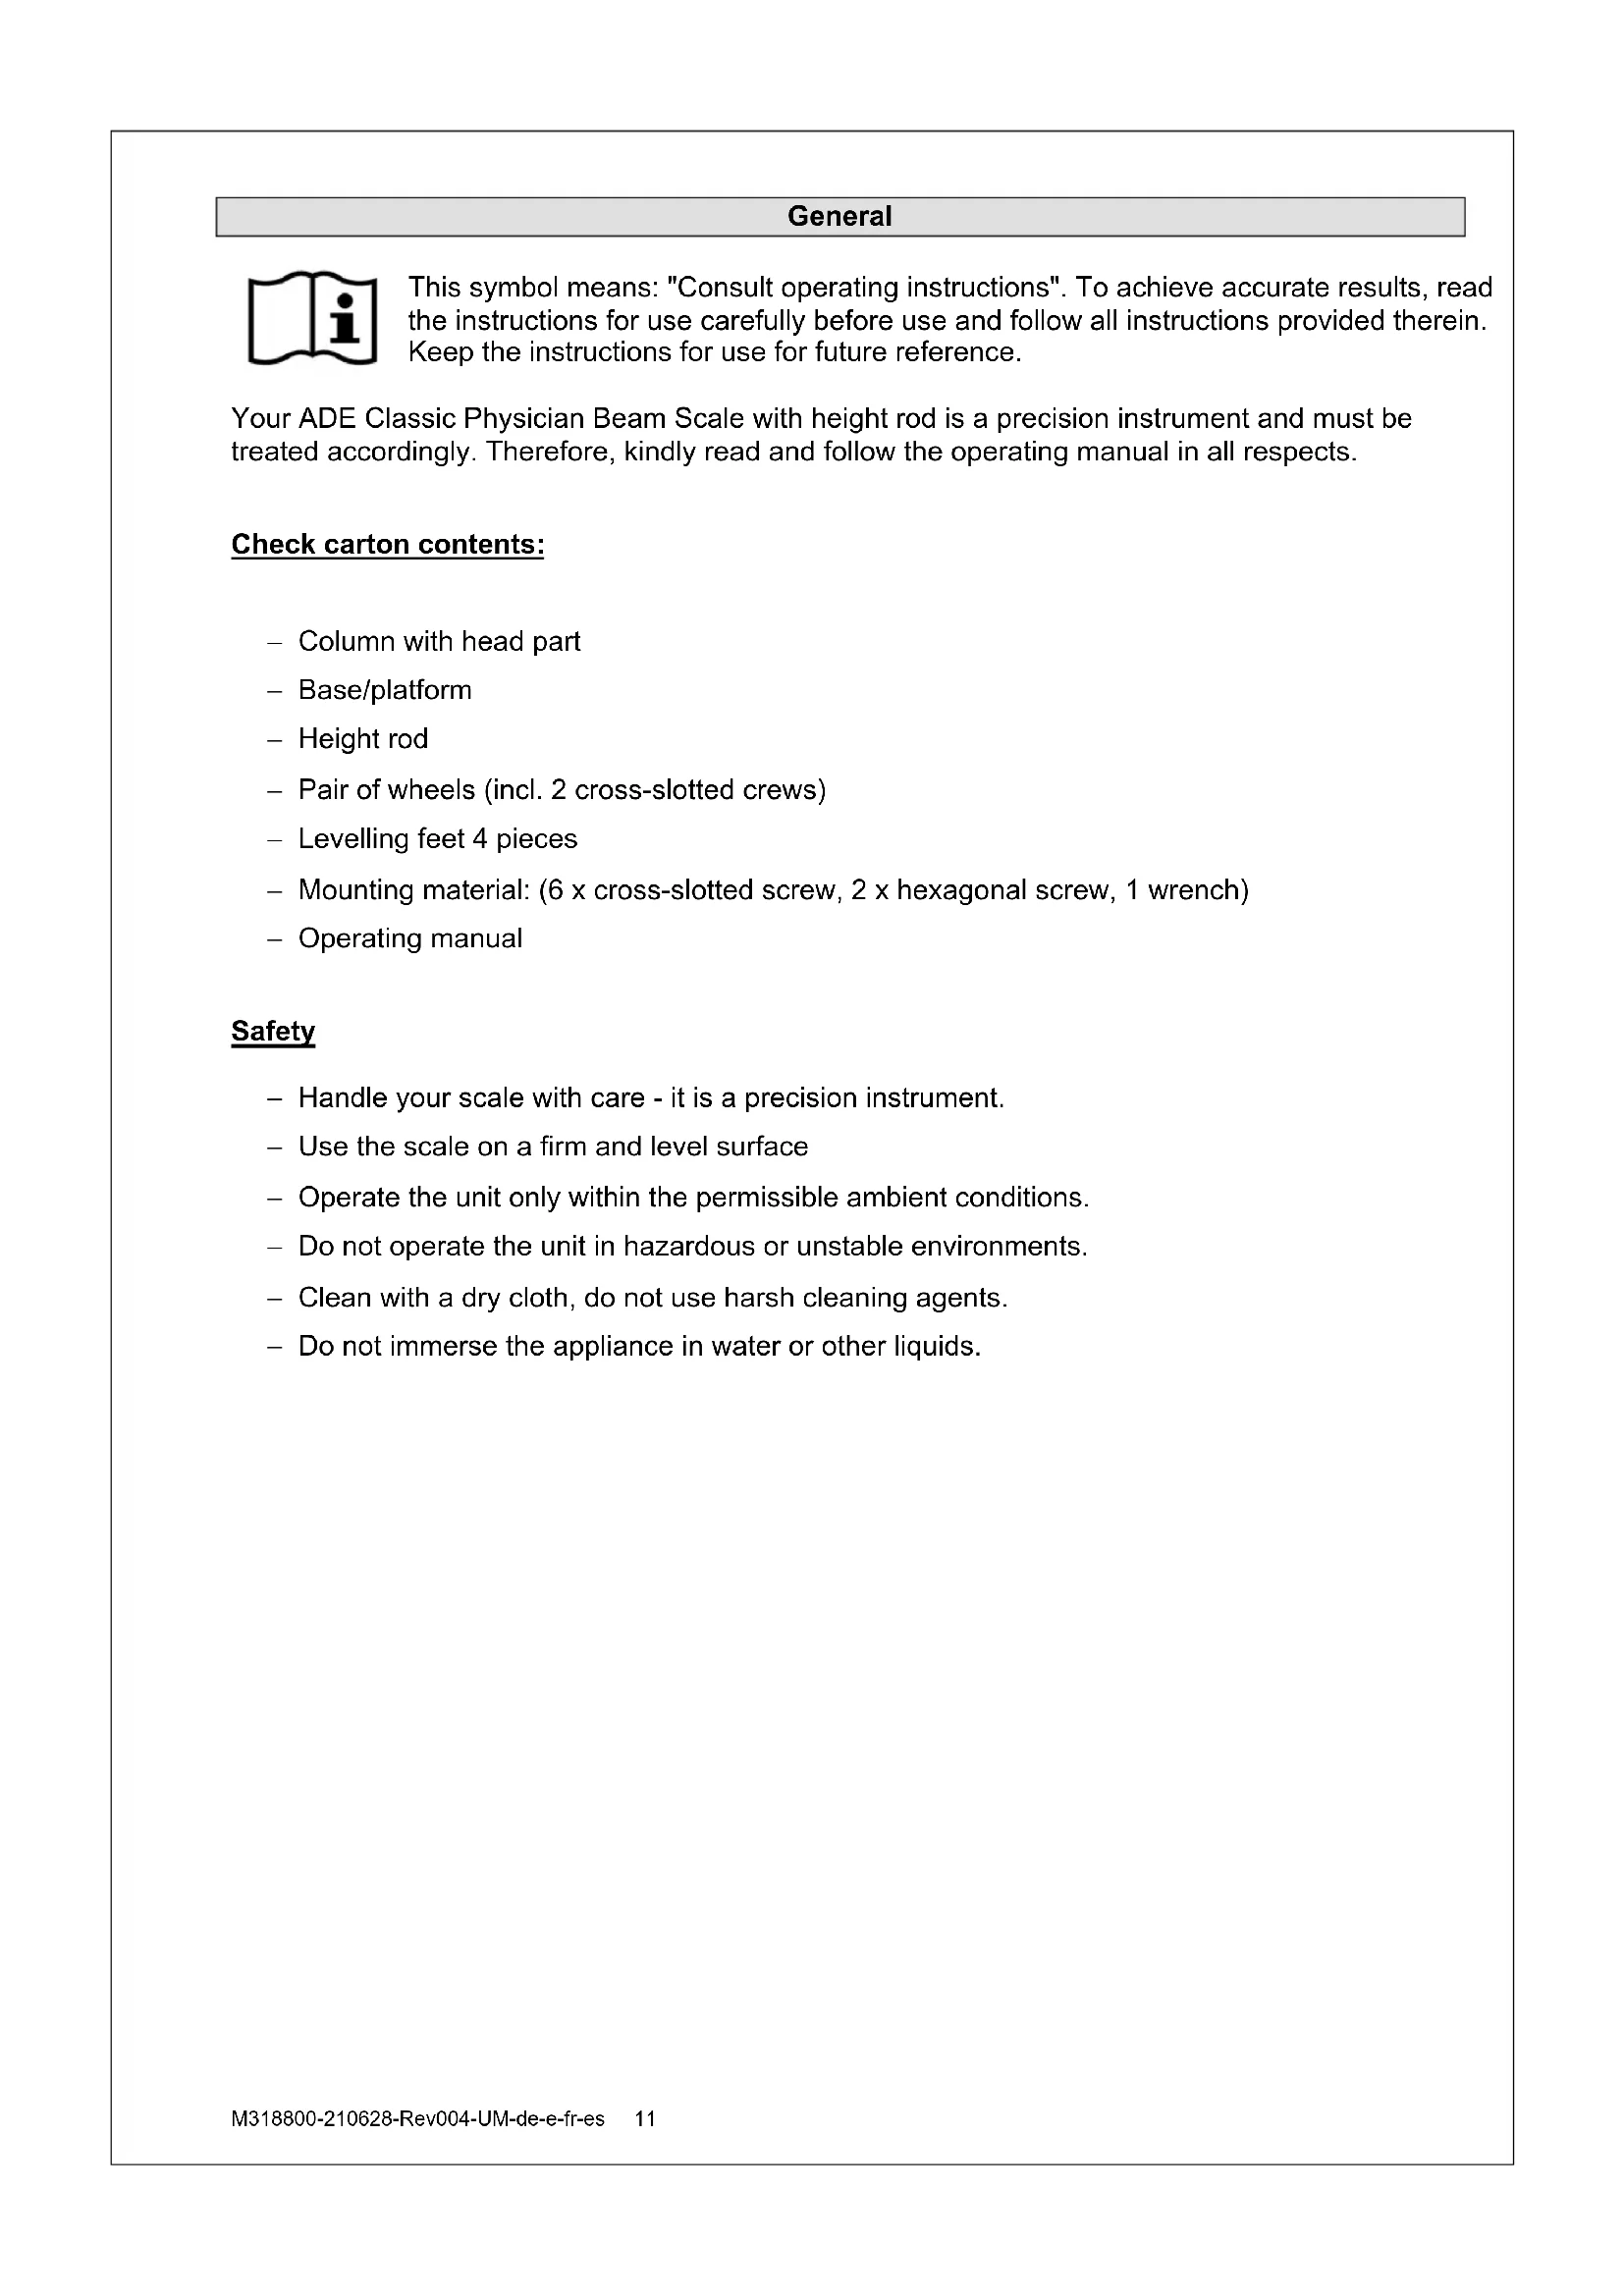
Assembling
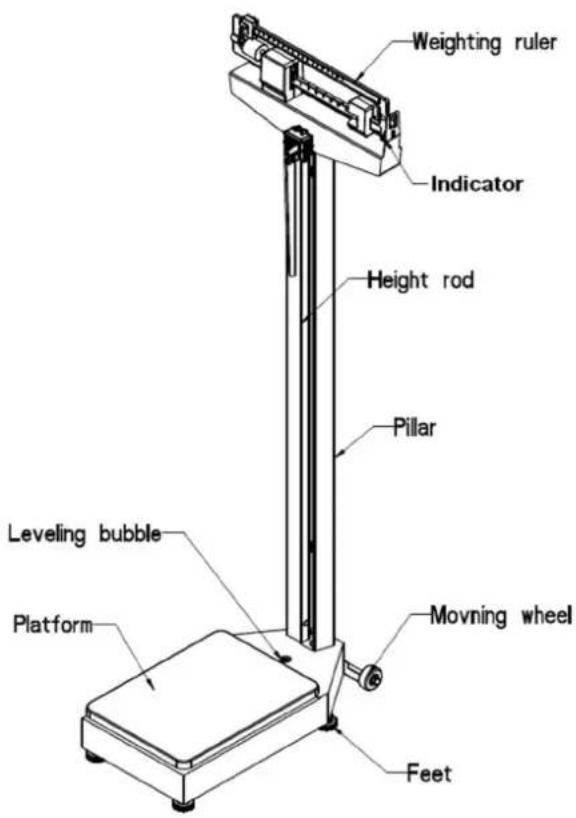
Fig.1-ADE M318800
The assembling of the scale is easily done as all parts and components are pre-assembled during manufacturing:
Fixing of levelling feet
The levelling feet are to be screwed into the holes underneath the weighing platform.
Assembling of the pillar
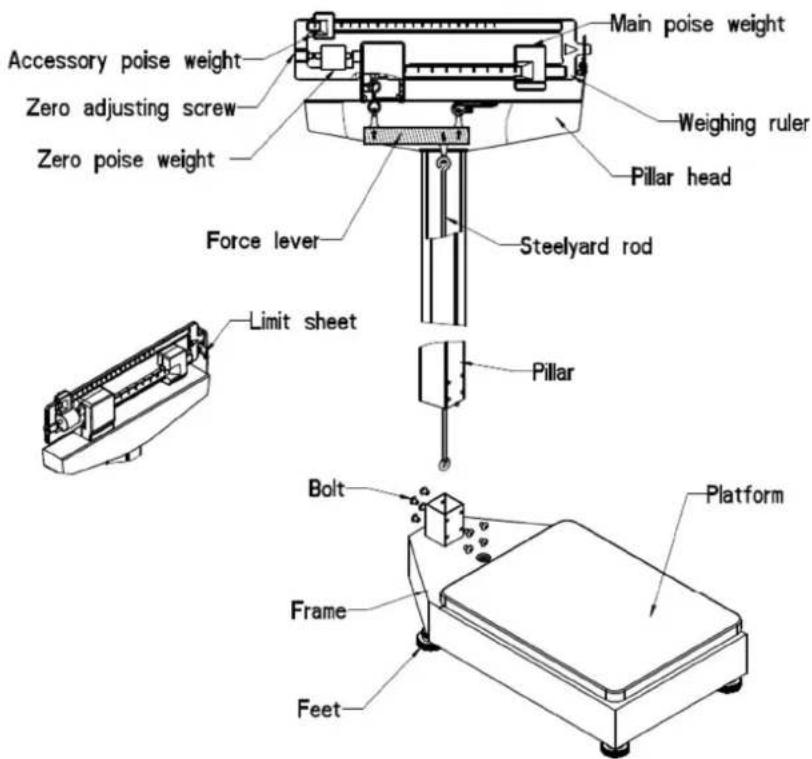
Fig. 3 - Pillar assembling
- Insert the pillar upright into the bracket
- Use the screws and washers to fix the pillar in a vertical position
Connection of the steelyard rod to the long lever
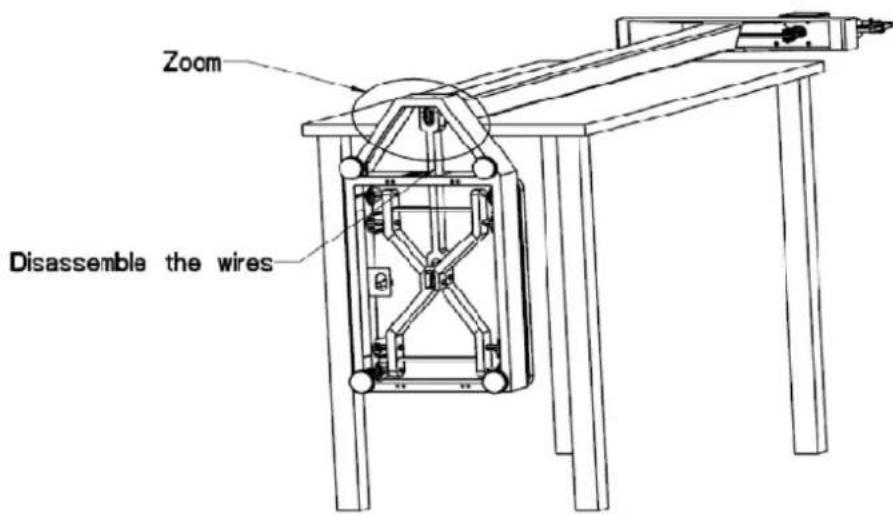
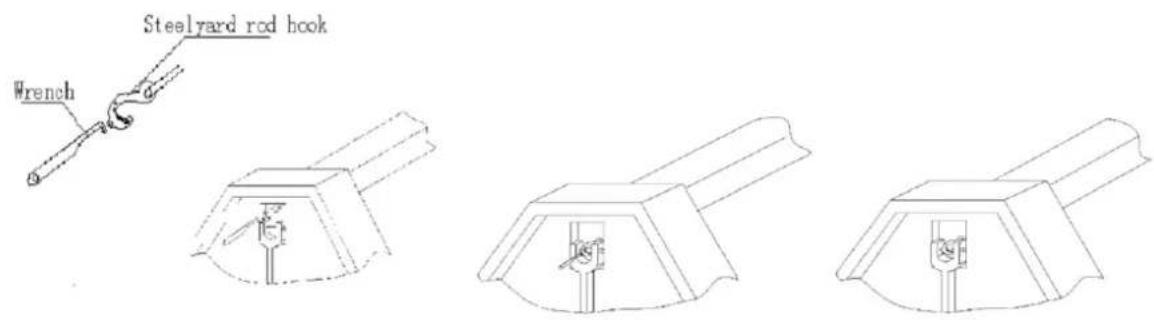
Fig. 4 - Connection of the steelyard
Fig.4-1 Fig.4-2 Fig.4-3
- Place the pillar on a table (Fig. 4).
- Disassemble the transport wires of the levers.
- Insert the wrench to the small hole in front of the steelyard rod and pull the steelyard rod hock out.
- Push the long lever up and hook the bearing of the steelyard rod over the pivot of the long lever (Fig. 4-2).
- Take the wrench off (Fig. 4-3).
- Place the scale gently on the ground.

The connecting rod must move freely.
Height rod Installation
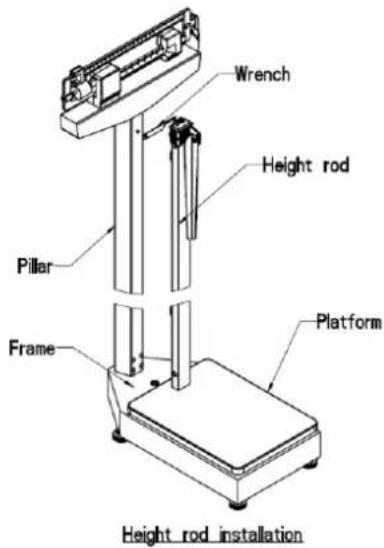
Fig 5
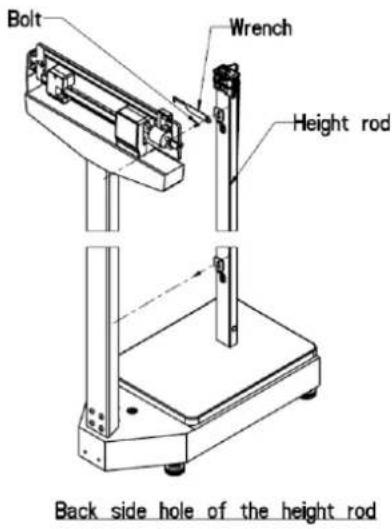
Fig 5-1
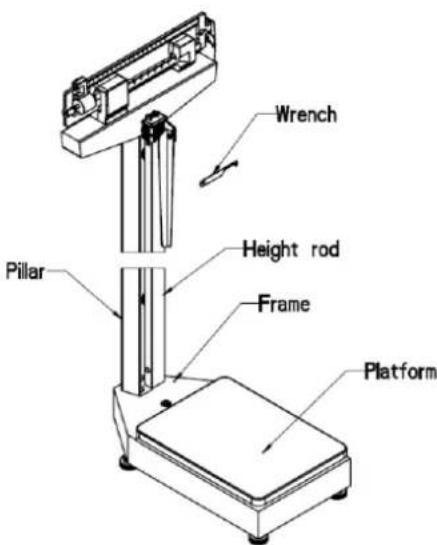
Fig 5-2
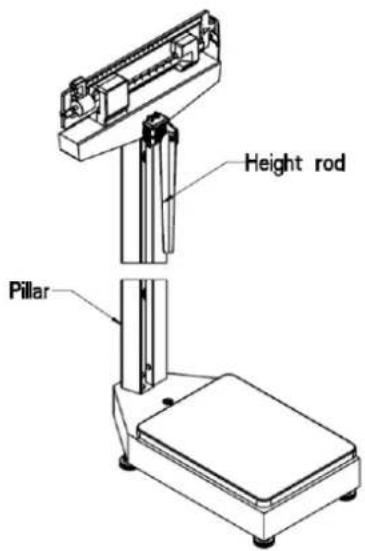
Fig 5-3
- Place the height measure with the holes at the back side onto the bolts at the front side of the pillar, adjust the height rod downwards to the right position (Fig. 5-1).
- Use the wrench to tighten the two hex-head screws. Do not over tighten the screws (Fig. 5-2).
- Take the wrench away after tightening of the screws (Fig. 5-3).
Installation of castors - moving wheels
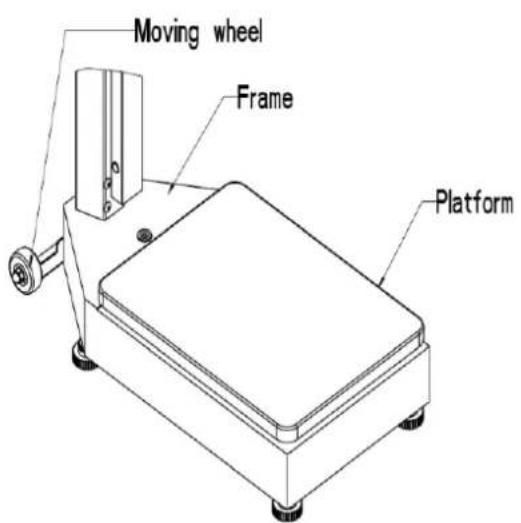
Fig 6-1
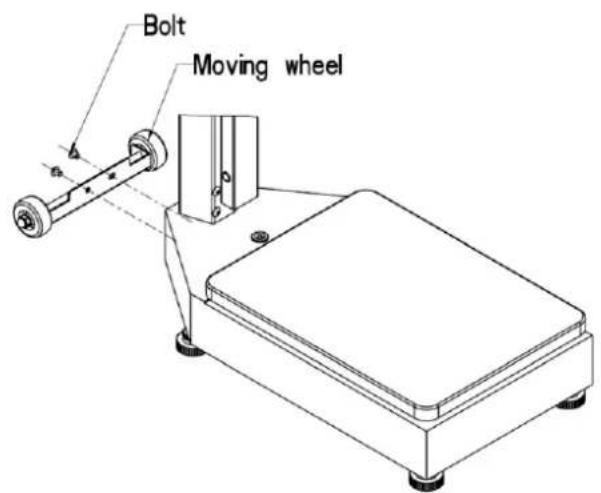
Moving wheel installation
Fig 6
- Place the wheel-set with the two holes towards the frame (platform) of the scale. The holes must be in an upside position.
- Use the screws and washers to fix the wheel-set to the frame (platform) and adjust the wheel-set at a level position, then tighten the screws.
- When moving the scale first tilt the scale on the wheels and make sure, that the platform is well off the ground.
Correct weighing and measuring
Zero adjustment:
Before the first use of the scale, please adjust the zero point carefully to insure correct weighing results.
- First step on and off the scale for several times to make sure that all parts come back into the right position after transport.
- For zero setting keep the platform empty.
- Set both sliding weights on the beam (head part) into zero position.
- The beam has to move freely equilibrating very close to level.
- Turn the zero adjustment screw (Fig. 3) slowly to the right respectively to the left to bring the beam into the exact level position.
- The scale is now ready to be used.

A periodically zero setting according to the previous instructions should be done. This applies especially if the scale is used in a different place and on a different surface.
Weighing
- Step on the scale.
- Slide the larger counterweight to the estimated weight.
- Now use the small sliding weight to reach the correct result.
- Wait until the beam comes close to a standstill in even position.
- Even if the head is still moving you can read the correct result + - 100g
- Total weight is the addition of both results (smaller and larger counterweight).
Length Measuring
- Place measuring tongue into a horizontal position and pull the height rod up.
- Place the person on the scale and place the measuring tongue on top of the head.
- For the person shorter than 114.7cm push the red button on top of the measure and lower the measuring tongue until it reaches the person's head.
- The reading is done either at the red line or between the two white triangles.
- If the measure is not in use, place the measuring tongue in a vertical position and push the height measure down.
Cleaning and maintenance
Cleaning
For cleaning just use a damp cloth or common disinfection fluids. Do not use any aggressive cleaning fluids.
Warranty - Liability
ADE will repair or replace this product within a period of 2 year from date of delivery applying to defects occurred due to poor material or workmanship (presentation of invoice is necessary). All moveable parts – batteries, cables, mains units, rechargeable batteries etc. – are excluded. Warranty does not include natural wear, damages caused by incorrect or negligent handling, overuse or unsuitable or improper storage. The cost of transport will be borne by the customer should the equipment be located anywhere other than the customer's premises. In the event of transport damage, claims under warranty can be accepted subject to using the complete original packaging and the equipment secured the way it was packed and secured originally. All the packaging should therefore be retained.
Any warranty claim will be rejected if the equipment is opened by persons not authorized expressly by ADE to do so.
Customers abroad are kindly requested to contact their local dealer for any warranty claim, customer service and spare parts.
Technical Data
M318800
Max. Capacity: 200kg
Graduation: 100g100g / 4oz
- Platform size: 375 × 275 mm
Dimensions: 272× 1467× 530mm
M318800-02
200 kg / 440 lb
Height rod:
- Measuring range: 600 - 2100 mm
Graduation: 1 mm
Total Weight: approx. 18 kg
CE-conformity
C
Declaration of conformity by the manufacturer
These scales have been manufactured in accordance with the harmonised European standards. They conform to the regulations of the EC-directives listed below:
Machinery Directive 2006/42/EC
in the valid version.
This declaration loses its validity if modifications are made to the scale without our approval.
Hamburg, May 2021
ADE Germany GmbH
Fabricant: ADE Germany GmbH