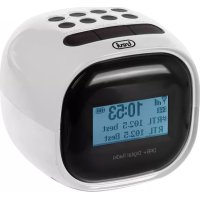
RC 85D8 DAB - Alarm clock radio Trevi - Free user manual and instructions
Find the device manual for free RC 85D8 DAB Trevi in PDF.
User questions about RC 85D8 DAB Trevi
0 question about this device. Answer the ones you know or ask your own.
Ask a new question about this device
Download the instructions for your Alarm clock radio in PDF format for free! Find your manual RC 85D8 DAB - Trevi and take your electronic device back in hand. On this page are published all the documents necessary for the use of your device. RC 85D8 DAB by Trevi.
USER MANUAL RC 85D8 DAB Trevi
Donotuse power supply with a voltage higher than 5V_r caused damage to the player.
- Listen at high volume for long periods of time, may damage your hearing.
- Avoid using it in the following cases:
- Near strong heat sources, such as central heating plants or stoves.
- In very humid places such as bathrooms, swimming pools, etc...
- In very dusty places.
- In places subject to strong vibrations.
- Position the appliance in such a way that there is always enough room for free air circulation (at least 5cm).
- Do not block the air inlets.
- If any liquid enters the appliance, unplug it immediately from the socket and take it to the nearest TREVI authorised service centre.
- Before switching on the appliance, always check that the power cable and the connection cable are properly installed.
- No naked flame sources, such as lighted candles, should be placed on this.
- The apparatus shall not be exposed to dripping or splashing water and no object filled with water, such as vases, should be placed on the unit.
- Keep this manual for future reference.
Care and maintenance
For cleaning it is recommended to use a soft, slightly damp cloth. Avoid solvents or abrasive substances.
Important
The construction of this device guarantees long flawless operation. However, if come some problem, you should consult your nearest authorized service center.
TREVI pursues a policy of continuous research and development. Therefore, the products may show different characteristics from those described.
To avoid possible hearing damage, limit the listening time at hight volumes
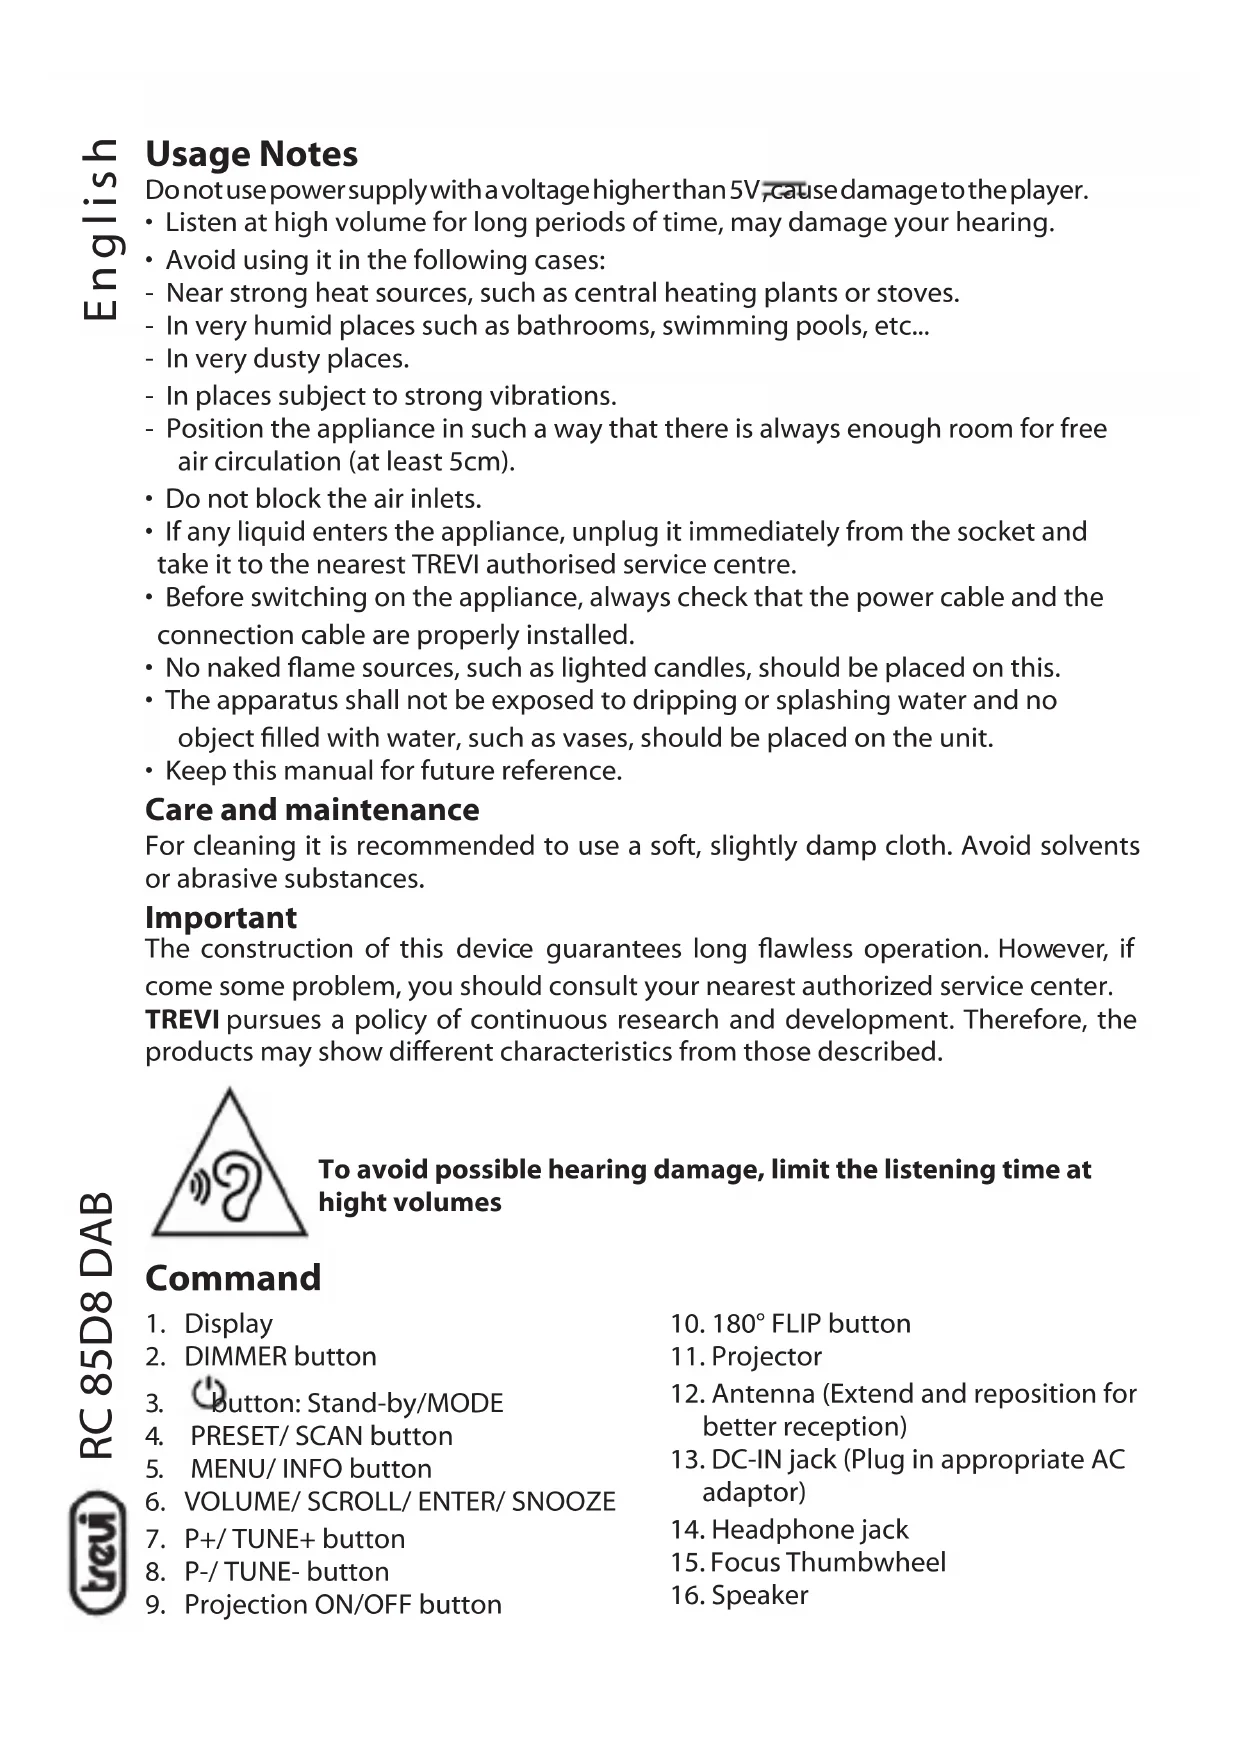
Command
- Display
-
DIMMER button
-
button: Stand-by/MODE
- PRESET/SCAN button
- MENU/ INFO button
- VOLUME/ SCROLL/ ENTER/ SNOOZE
- P+/TUNE+ button
- P-/TUNE- button
-
Projection ON/OFF button
-
180^ FLIP button
- Projector
- Antenna (Extend and reposition for better reception)
- DC-IN jack (Plug in appropriate AC adaptor)
- Headphone jack
- Focus Thumbwheel
- Speaker
Installation
Insert the plug of the supplied power adapter into the power supply socket (13) and connect the power supply to a 110 - 230V 50 / 60Hz power socket.
OPERATION
Power On/ Standby:
- Press Stand-by/ MODE (3) button to switch On the unit;
- Press and hold for 2 seconds (1) Stand-by/ MODE (3) button to put the unit in Stand-by mode (the display shows time and date).
Volume adjustment
Turn the knob VOLUME/SCROLL/ENTER/SNOOZE (6) to increase or decrease the volume.
Time Setting
The time will be set automatically by turning on the device in DAB mode, if you want to set it manually:
- Press Stand-by/ MODE (3) button to switch on the appliance;
- Hold down the MENU/ INFO button (5) for 2 seconds;
- Turn the VOLUME/ SCROLL knob (6) and select "System"; press the VOLUME/ SCROLL knob (6) to select it;
- Turn the VOLUME/ SCROLL knob (6) and select "Time"; press the VOLUME/ SCROLL knob (6) to select it;
- Turn the VOLUME/ SCROLL knob (6) and select "Set Time/Date"; press the VOLUME/SCROLL knob (6) to select it;
- Turn the VOLUME/ SCROLL knob (6) to adjust the hour and press the VOLUME/ SCROLL knob (6) to confirm it and go to setting the minutes;
- Also adjust the date using the VOLUME/ SCROLL knob (6).
Setting Alarm
To set alarm 1 or 2, follow the next steps:
- In clock mode (Stand-by), press and hold for 2 seconds MENU/ INFO button (5); select "System" and press the VOLUME/ SCROLL knob (6) to confirm;
- Turn the VOLUME/ SCROLL knob (6) and select the "Alarm" item, press it to select it;
- Turn the VOLUME/ SCROLL knob (6) and select "Alarm 1" or "Alarm 2", press it to confirm;
- urn the VOLUME/ SCROLL knob (6) to adjust the hour and press it to confirm it and move on to the minute setting;
-
Turn the VOLUME/ SCROLL knob (6) to adjust the duration and press to confirm;
-
Turn the VOLUME/ SCROLL knob (6) to select the ringtone type (FM, DAB or BUZZER) and press it to confirm it;
- Turn the VOLUME/ SCROLL knob (6) to select the frequency (once, daily, weekly, weekend only) and press it to confirm;
- Turn the VOLUME/ SCROLL knob (6) to adjust the start date and press to confirm it;
- Turn the VOLUME/ SCROLL knob (6) to adjust the volume and press it to confirm;
- Rotate the VOLUME/ SCROLL knob (6) to activate or deactivate the alarm and press it to confirm.
Once the alarm is activated, the bell symbol will appear on the display with the number 1 for the first alarm and number 2 for the second alarm.
Turn off the alarm
To stop the alarm completely (ringtone or radio) press Stand-by/MODE (3) button. To temporarily stop the alarm sound, press the VOLUME/ SCROLL knob (6); the interruption lasts 9 minutes, after which the alarm goes back on.
DAB/DAB+ Radio
Automatic Storage
- Adjust the antenna extension and the angle to get the best reception;
- Press and hold the PRESET/ SCAN button (4) for a few seconds to start the automatic scan of the DAB stations. During the scan, the display will show the progress bar and the number of stored stations;
- Hold down the P+/ TUNE+ key (7) or the P-/ TUNE- key (8) for a few seconds, turn the VOLUME/ SCROLL knob (6) to select the desired station; press the VOLUME/ SCROLL knob (6) to confirm and start listening to the station.
Note:
- It may be necessary to wait a few seconds for the unit to tune to the new channel.
- In DAB mode the date and time of the device are synchronized with those of the station being listened to.
Manual Scan
- Hold down the MENU/ INFO button (5) for 2 seconds;
- Turn the VOLUME/ SCROLL knob (6) and select the "Manual Tune" item, press the VOLUME/ SCROLL knob (6) to select it;
- Turn the VOLUME/ SCROLL knob (6) to select the desired channe (5A-13F), press the VOLUME/ SCROLL knob (6) to select it.
Note: Up to 30 stations can be stored. A stored frequency can be erased from the memory by storing another frequency in its place.
DAB/DAB+ information
In DAB function press the MENU/ INFO button (5) repeatedly to change the information displayed:
Top line:
Station channel and frequency for the current station will be shown on the top line.
Bottom line:
a. Scrolling text broadcast by most DAB stations
b. DAB ensemble
c. Type of content being broadcast. E.g. Sport, Pop music.
d. DAB Station name
e. DAB frequency
f. Signal error
g. 80kbps/DAB
Note: not all DAB stations provide information that can be viewed by the device.
DAB/DAB+ Menu
- In DAB mode, hold down the MENU/ INFO button (5) for a few seconds;
- Turn the VOLUME/ SCROLL knob (6) to select the desired item from: Full Scan, Manual tune, DRC, Prune, TA, System;
- Press the VOLUME/ SCROLL knob (6) to select the desired item and enter its settings.
A) Full Scan - Automatically scan DAB+ stations
B) Preset Recall - select a radio station from those stored.
C) Preset Store - allows you to store a station.
D) Manual Tune - manual tune
E) DRC - off, low, high
F) Prune - yes, no
G) TA - On, Off.
H) System -
- Sleep - off, 15, 30, 45, 60, 90 (minutes)
-
Alarm - To set Alarm 1 and Alarm 2.
-
Time:
-
Set Time/Date
-
Auto update - Automatic update of date and time from source or Off. It is advisable to keep it set to "Update from DAB" to avoid continuous time shifts.
- Set 12/24 hour - Set AM/PM or 24 hour.
-
Set date format - DD MM YYYY, MM DD YYYY
-
Language - English, Deutsch, Italiano, Franks, Netherlands, Espanol, Dansk.
-
factory reset - No or Yes
- SW version
FM Radio
- Extend the antenna and reposition for better reception;
- Press Stand-by/ MODE (3) button to turn On the unit;
- Press Repeatedly Stand-by/ MODE button (3) and select FM mode.
Automatic storage:
- Press and hold for 3 seconds PRESET/ SCAN (4) button to start scanning and automatic storage of the stations;
- At the end of the scan, use the P + / TUNE + (7) and P - / TUNE - (8) keys to select a memorized radio station.
Note: The automatic scan sensitivity is adjustable by Menu.
Manual search and storage:
- Press and hold the P+/ TUNE+ (7) or P-/ TUNE- (8) key for a few seconds to tune in to the next or previous radio station;
-
To store a radio station:
-
Move to the frequency to be stored and press the PRESET/ SCAN button (4);
- Turn the VOLUME/ SCROLL knob (6) to select the number where to store the station;
- Press the VOLUME/ SCROLL knob (6) to confirm.
FM broadcast information
Press MENU/ INFO (5) button to view:
Top line:
Station name, reception type.
Bottom line:
a. Information (provided by the radio station).
b. information relating to the type of program broadcast.
c. Frequency.
d. Stereo/mono.
e. Time.
f. Date.
FMMenu
- In FM mode, hold down the MENU/ INFO key (5) for a few seconds;
- Turn the VOLUME/ SCROLL knob (6) to select the desired item from: Preset Recall, Preset Store, Scan Setting, Audio setting, System;
- Press the VOLUME/ SCROLL knob (6) to select the desired item and enter its settings.
A) Scan setting
- All Stations
- Strong Stations
B) Audio setting
- Stereo Allowed
- Forced Mono
C) System
- Sleep - Choose between OFF, 15, 30, 45, 60, 90 minutes
- Alarm - To set Alarm 1 and Alarm 2.
3.Time:
- Set Time/date
- Auto update - Automatic update of date and time from source or Off. It is advisable to keep it set to "Update from DAB" to avoid continuous time shifts.
- Set 12/24 hour - Set AM/PM or 24 hour.
-
Set date format - DD MM YYYY, MM DD YYYY
-
Language - English, Deutsch, Italiano, Franks, Netherlands, Espanol, Dansk.
-
Factory reset - No or Yes
- SW version
Projection
Power ON/OFF and adjustment
- Press the Projection ON/OFF button (9) to switch on the projection;
- Press the 180^ FLIP button (10) to rotate the projection 180^ if necessary;
- Scroll Focus Thumbwheel (15) for setting the best projection clock image;
- Press the Projection ON/OFF button (9) to switch off the projection.
Dimmer
Press the DIMMER button (2) several times to change the display light.
TECHNICAL FEATURES
Power: .5V 1000mA
Power Audio: 1W
FM band reception: 87.5 - 108 MHz
DAB/DAB+ band reception: 174.928 - 239.200 MHz
Dimensions: 150x80x80mm
Weight: 332 gr.

Precautions for correct disposal of the product.
The symbol shown on the equipment indicates that waste must be disposed of in "separate collection" and so the product must not be disposed of together with urban waste. The user must take the product to special "separate waste collection centres" provided by local government, or deliver it to the retailer against the purchase of a new product.
Separate collection of waste and subsequent treatment, recycling and disposal operations promotes the production of equipment with recycled materials and limits negative effects on the environment and on health caused by improper handling of waste. Illegal disposal of the product leads to the enforcement of administrative penalties.
Notes d'emploi
- All Stations
- Strong Stations
B) Audio setting
- Stereo Allowed
- Forced Mono
C) System
Alimentation: .5V=1000mA
Puissance audio: 1W
Dimensions: 150x80x80mm
Poids: 332 gr.

- All Stations
- Strong Stations
B) Audio setting
- Stereo Allowed
- Forced Mono
C) System
- All Stations
- Strong Stations
B) Audio setting
- Stereo Allowed
- Forced Mono
C) System
SIMPLIFIED EU DECLARATION OF CONFORMITY
Hereby TREVI Spa declares that equipment type RC 85D8 DAB is in compliance with directive 2014/53/EU. The full text of the EU declaration of conformity is available at the following internet address: https://www.trevi.it/dms/zidi/TREVI/DOCRC85D8DAB.pdf

EN If you will not find your language on the instruction manual, please go on our website www.trevi.it to find it