HG02725 - Air mattress Meradiso - Free user manual and instructions
Find the device manual for free HG02725 Meradiso in PDF.
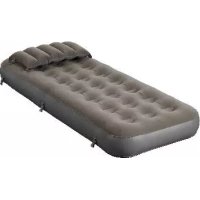
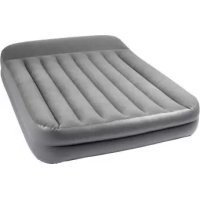
| Product Type | 2-person inflatable mattress (2 beds stackable or side by side) |
| Brand | Meradiso |
| Model | HG02725 |
| Dimensions (per bed) | Approx. 195 × 81 × 25 cm (L × W × H) |
| Pillow dimensions | Approx. 62 × 12 × 34 cm (L × H × D) |
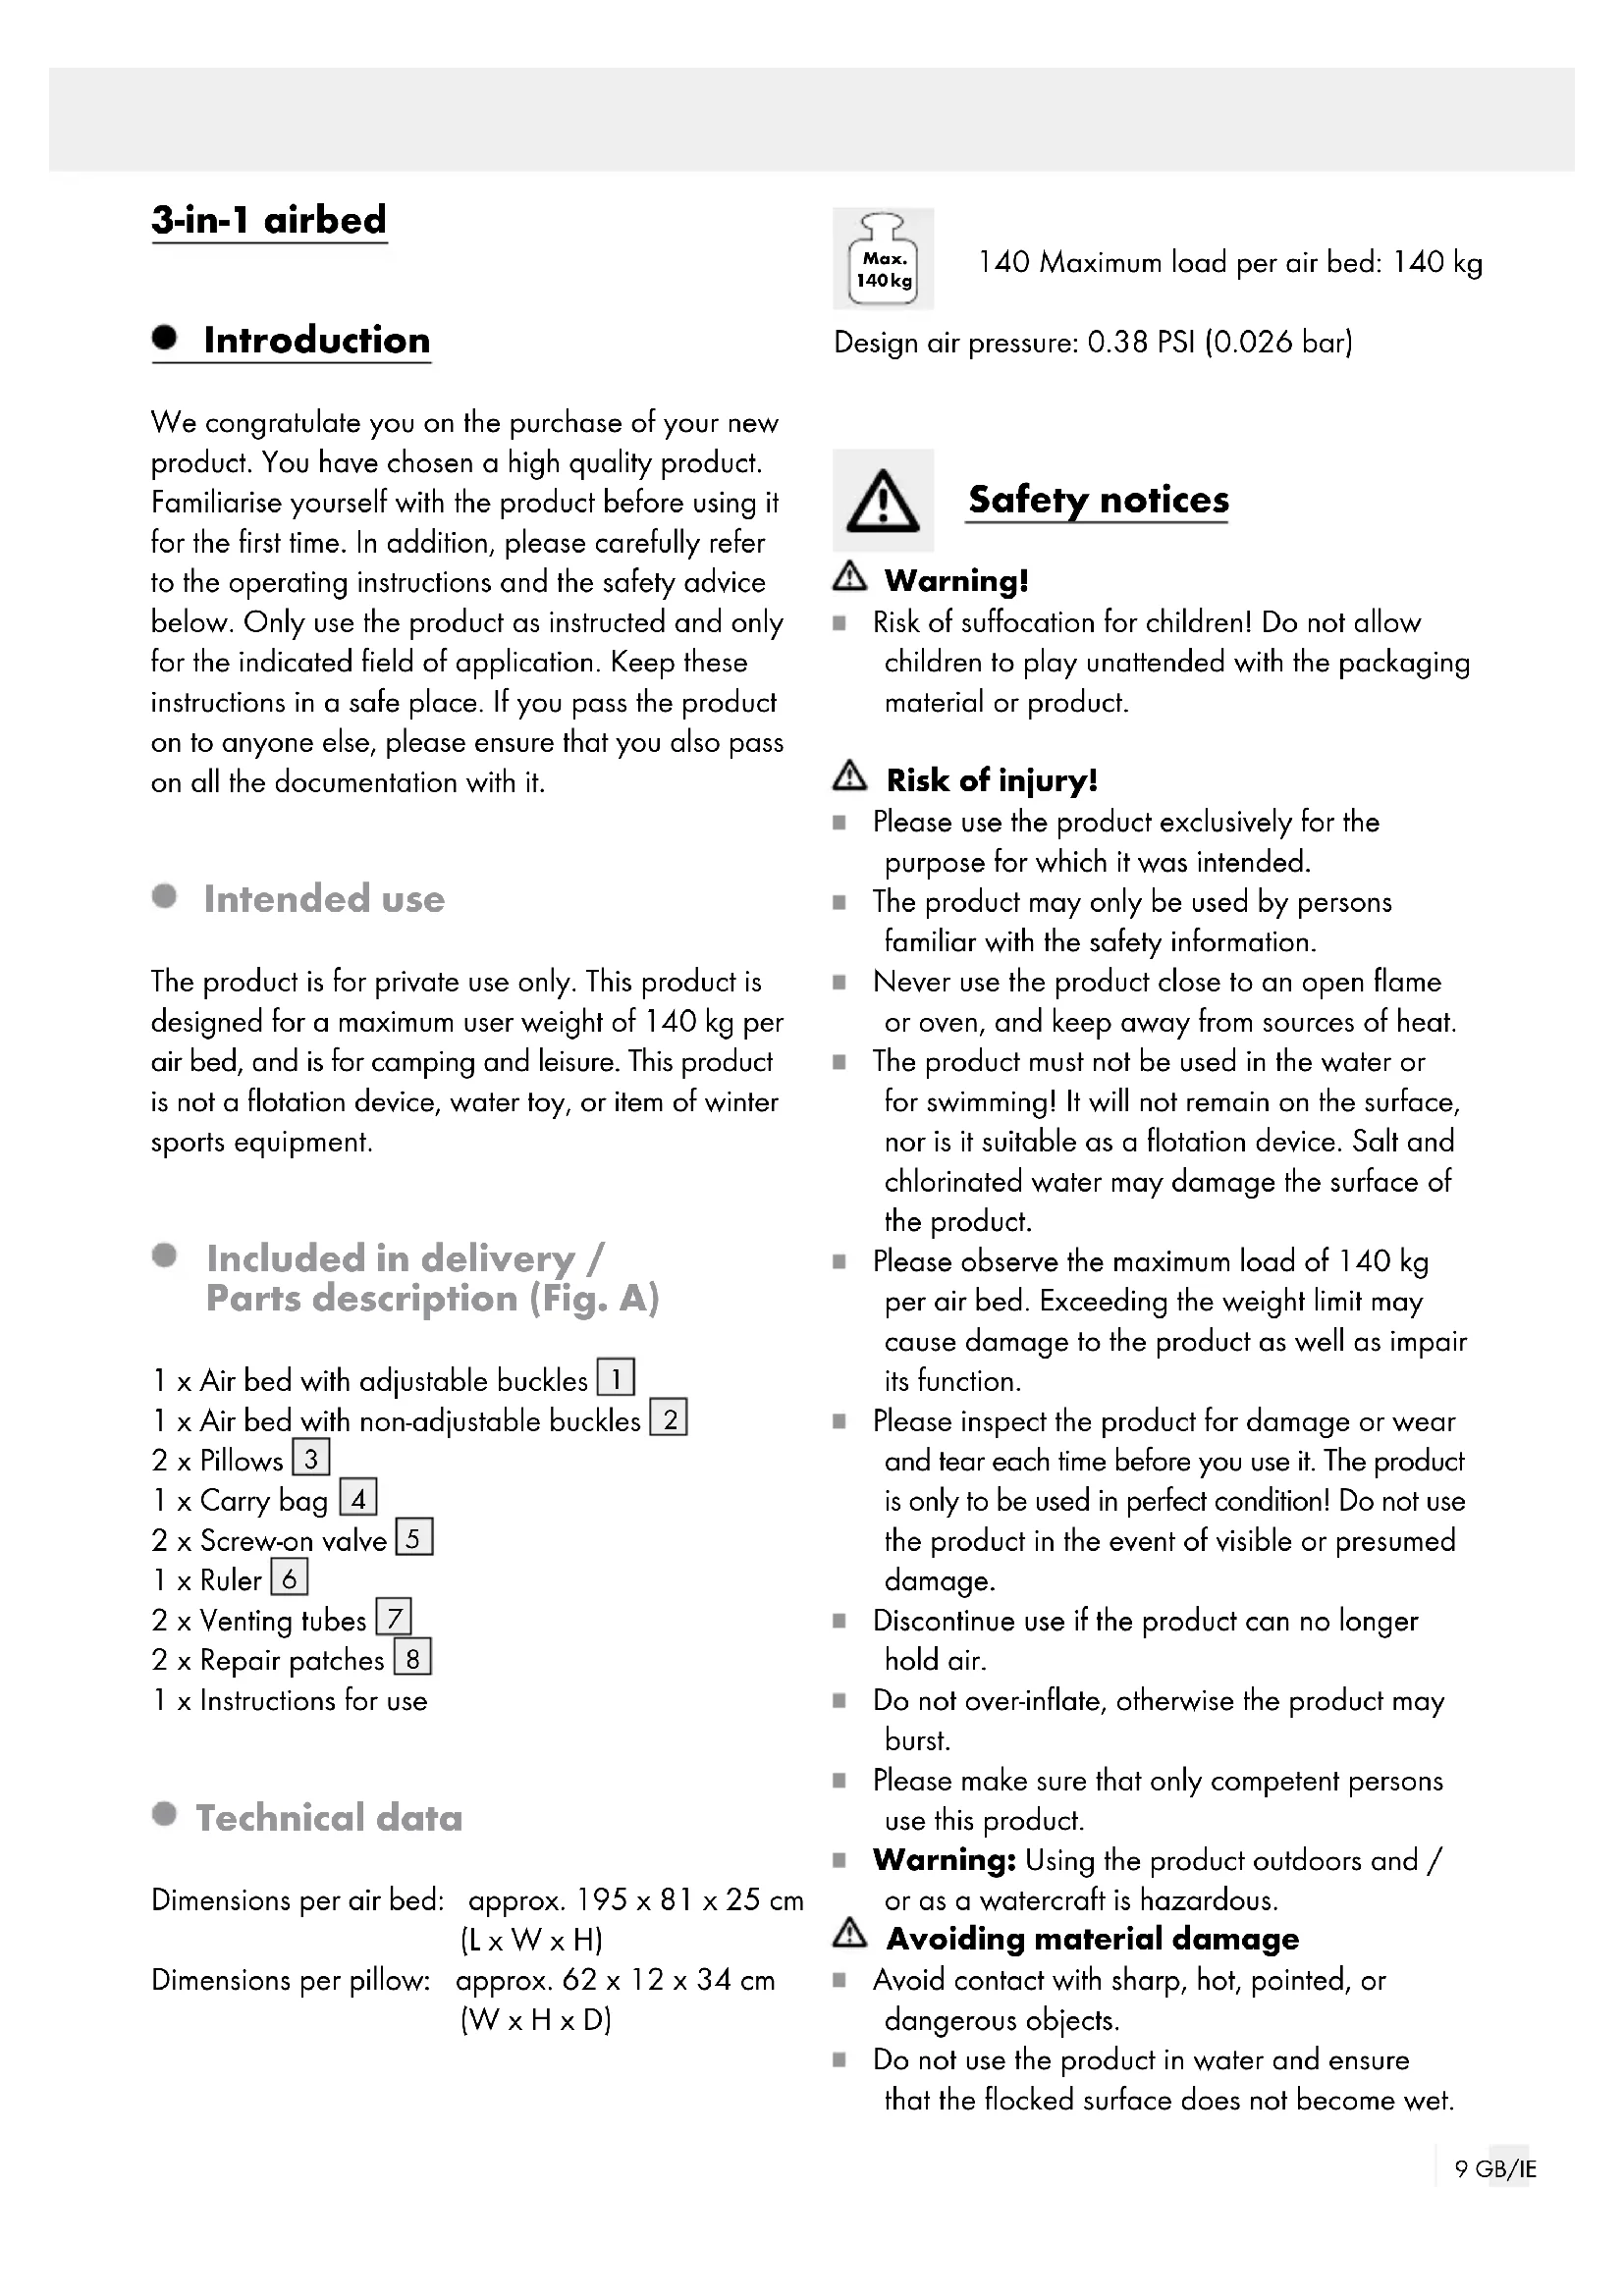
| Maximum load (per bed) | 140 kg |
| Rated pressure | 0.38 PSI (0.026 bar) |
| Main material | Flocked PVC (soft surface) |
| Delivery contents | 2 inflatable beds, 2 pillows, 2 screw valves, 2 ventilation tubes, 2 repair patches, 1 carry bag, 1 control gauge, instructions |
| Inflation | Foot or hand pump (conical adapter Ø 17.5 mm for bed, Ø 8.5 mm for pillow) |
| Usage | Indoor, camping, leisure (not for water, nor as flotation aid) |
| Operating temperature | Between 15 °C and 40 °C |
| Care | Clean with water or soapy water, no machine, no aggressive products |
| Storage | Clean and dry, valve closed, rolled up dry |
| Repair | Provided patches for small leaks (wait 24 h before reinflating) |
| Safety | Risk of suffocation (children), do not use near flames, respect max load 140 kg |
| Warranty | 3 years (spare parts available during warranty period) |
| Customer service France | Tel.: 0800904879, Email: owim@lidl.fr |
| Customer service Belgium/Luxembourg | Tel.: 080071011, Email: owim@lidl.be |
Frequently Asked Questions - HG02725 Meradiso
User questions about HG02725 Meradiso
0 question about this device. Answer the ones you know or ask your own.
Ask a new question about this device
Download the instructions for your Air mattress in PDF format for free! Find your manual HG02725 - Meradiso and take your electronic device back in hand. On this page are published all the documents necessary for the use of your device. HG02725 by Meradiso.
USER MANUAL HG02725 Meradiso
KOMFORT-3-IN-1-LUFTBETT/3-IN-1 AIRBED/LIT GONFLABLE CONFORT 3 EN 1
DE AT CH
KOMFORT-3-IN-1-LUFTBETT
Operation and safety notes
NL BE
COMFORT 3-IN-1 LUCHTED
GB/IEOperation and safety notesPage 9
We congratulate you on the purchase of your new product. You have chosen a high quality product. Familiarise yourself with the product before using it for the first time. In addition, please carefully refer to the operating instructions and the safety advice below. Only use the product as instructed and only for the indicated field of application. Keep these instructions in a safe place. If you pass the product on to anyone else, please ensure that you also pass on all the documentation with it.
- Intended use
The product is for private use only. This product is designed for a maximum user weight of 140kg per air bed, and is for camping and leisure. This product is not a flotation device, water toy, or item of winter sports equipment.
- Included in delivery / Parts description (Fig. A)
1 x Air bed with adjustable buckles 1
1 x Air bed with non-adjustable buckles 2
2 x Pillows 3
1 x Carry bag 4
2 x Screw-on valve 5
1 x Ruler 6
2 x Venting tubes 7
2 x Repair patches 8
1 x Instructions for use
- Technical data
Dimensions per air bed: approx. 195 × 81 × 25 cm (L x W x H)
Dimensions per pillow: approx. 62 × 12 × 34 cm (W x H x D)
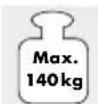
140 Maximum load per air bed: 140 kg
Design air pressure: 0.38 PSI (0.026 bar)

Safety notices
Warning!
Risk of suffocation for children! Do not allow children to play unattended with the packaging material or product.
Risk of injury!
Please use the product exclusively for the purpose for which it was intended.
The product may only be used by persons familiar with the safety information.
Never use the product close to an open flame or oven, and keep away from sources of heat.
The product must not be used in the water or for swimming! It will not remain on the surface, nor is it suitable as a flotation device. Salt and chlorinated water may damage the surface of the product.
Please observe the maximum load of 140kg per air bed. Exceeding the weight limit may cause damage to the product as well as impair its function.
Please inspect the product for damage or wear and tear each time before you use it. The product is only to be used in perfect condition! Do not use the product in the event of visible or presumed damage.
Discontinue use if the product can no longer hold air.
Do not over-inflate, otherwise the product may burst.
Please make sure that only competent persons use this product.
Warning: Using the product outdoors and / or as a watercraft is hazardous.
Avoiding material damage
Avoid contact with sharp, hot, pointed, or dangerous objects.
Do not use the product in water and ensure that the flocked surface does not become wet.
Only use the valves with suitable pump adapters, otherwise there may be damage to the valves.
This product reacts strongly to cold and heat. Do not use the product if the surrounding temperature drops below 15^ or rises above 40^ . Otherwise this may lead to damage.
Make sure the valves are closed tightly after inflating.
-Assemblingthe screw-on valves (Fig. B)
Each air bed 1 2 is equipped with a threaded hole for the valves 5.
- Pull the ring of the valve over the threaded holes so that it fits firmly in the groove.
- Turn the valve firmly into the threaded hole in a clockwise direction.
Inflating the product
The product should be inflated by an adult.
CAUTION!
To inflate the product, please use a commercially available foot pump or double stroke piston pump with corresponding pump adapter.
- Do not use compressors or compressed air bottles to inflate the product. Doing so may lead to damage.
- Stop pumping when resistance increases and the seams become stretched. Otherwise the material may rip.
Note: We recommend leaving the inflated product to air for a few days before using for the first time. Remove the product from its carry bag 4 and unfold.
Note: For the valve on the pillow, you will need a pump with a nozzle adapter (Ø approx. 8.5 mm) (Fig. F).
For the air bed valve 12, you will need a pump with a nozzle adapter, with a diameter of approx. 17.5mm (Fig.C).
Inflating the air bed
- Turn the screw cap of the valve 5a in an anticlockwise direction (Fig. C).
- Inflate the air bed with the appropriate pump (Fig.C).
- Hold the ruler 6 next to the measuring mark. You will have reached nominal pressure when the length of the ruler matches the length of the measuring mark (Fig. D).
- After reaching the nominal pressure, screw the valve 5 in a clockwise direction (Fig. E).
Inflating the pillow and attaching it to the air bed
- Open the valve 3b (Fig. G).
- Inflate the pillow [Fig. F].
- Close the valve (Fig. G) and sink the valve, applying light pressure (Fig. H).
- To attach the pillow to the air bed, pull the fastening holes 3a of the pillow over the fastening straps 1b of the air bed (Fig. K).
Note: Only attach the pillow to an inflated air bed.
- Attaching the air beds
The two air beds can be fastened together either next to one another or on top of one another (Fig. K) (Fig. L). There are buckles on each side of the air bed [1a], which are then attached to the buckles [2a] of the other air bed.
Attaching side by side (Fig. K)
- Place the air beds next to one another so that the pillows are placed beside one another and facing the same direction.
- Fasten the buckles, as shown in the diagram.
Attaching one on top of the other (Fig. L)
- Remove the pillow from one of the air beds.
- Place the air bed with the pillow onto the air bed without a pillow, and buckle the two air beds together as shown in the diagram.
-Deflating
Pillow
- Pull out the valve (Fig. H).
- Open the valve 3b and gently press the valve stem 3c together so that the air can escape (Fig. G). Alternatively, push the venting tube 7 into the valve stem 3c in order to let the air escape quickly (Fig. J).
Air bed
Turn the valve 5 out of the threaded hole of the air bed 1 2 in an anti-clockwise direction (Fig.1).
Repair
Small leaks or holes can be repaired with the repair patches supplied.
Important! After repairing the product, do not inflate for approximately 24 hours! Do not use the patches on the seams.
Deflate the product fully.
Clean the area around the leak thoroughly. The area must be dry and free of grease.
Cut out a piece of the repair material large enough that its edges extend approximately 1.3 cm over the damaged area.
Round off the corners of the patch.
Remove the patch from its paper, place it on the damaged area, and press down firmly.
- Maintenance and storage

clevercare.info
The product is not suitable for cleaning in the washing machine.
Do not expose the product to extreme weather conditions such as extreme temperatures, wind, and rain.
Clean only using water or soapy water; never with harsh detergents.
Always store the product clean and dry.
The product should only be rolled up in dry condition, and the valve should remain closed during storage.
Disposal
The packaging is made entirely of recyclable materials, which you may dispose of at local recycling facilities.
Contact your local refuse disposal authority for more details of how to dispose of your worn-out product.
Warranty
The product has been manufactured to strict quality guidelines and meticulously examined before delivery. In the event of product defects you have legal rights against the retailer of this product. Your legal rights are not limited in any way by our warranty detailed below.
The warranty for this product is 3 years from the date of purchase. The warranty period begins on the date of purchase. Please keep the original sales receipt in a safe location. This document is required as your proof of purchase.
Should this product show any fault in materials or manufacture within 3 years from the date of purchase, we will repair or replace it - at our choice - free of charge to you. This warranty becomes void if the product has been damaged, or used or maintained improperly.
The warranty applies to defects in material or manufacture. This warranty does not cover product parts subject to normal wear, thus possibly considered consumables (e.g. batteries) or for damage to fragile parts, e.g. switches, rechargeable batteries or glass parts.
Warranty claim procedure
To ensure quick processing of your case, please observe the following instructions:
Please have the till receipt and the item number (e.g. IAN 123456_7890) available as proof of purchase.
You will find the item number on the rating plate, an engraving on the front page of the instructions for use (bottom left), or as a sticker on the rear or bottom of the product.
If functional or other defects occur, please contact the service department listed either by telephone or by e-mail.
You can return a defective product to us free of charge to the service address that will be provided to you. Ensure that you enclose the proof of purchase (till receipt) and information about what the defect is and when it occurred.
Service
GB Service Great Britain
Tel.: 08000569216
E-Mail: owim@lidl.co.uk
IE Service Ireland
Tel:1800200736
E-Mail: owim@lidl.ie
Lit gonflable comport 3 en 1
Introduction
$$ (b \times h \times d) $$

- 0
- 0
- 0
- 0
- 0
- 0
- 0
- 0
- 0
- 0
- 0
- 0
- 0
- 0
- 0
- 0
- 0
- 0
- 0
- 0
- 0
- 0
- 0
- 0
- 0
- 0