USER MANUAL NA543 PHILIPS
Important safety instruction 3
Danger 3
Warning 4
Caution 5
Electromagnetic fields (EMF) 6
Automatic shut-off 6
Recycling 7
Warranty and support 7
Introduction 7
General description 8
Product overview 8
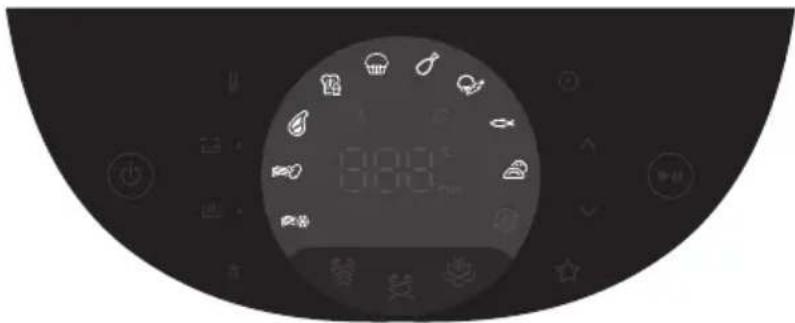
Control panel overview 9
Before first use 13
Preparations before use 13
Using the appliance 13
Airfry mode 14
Steamfry mode 16
Steam mode 19
Cooking with preset programs 22
Cleaning 25
Routine cleaning 25
Steam cleaning 26
29
Storage 33
Troubleshooting 33
Important safety instructions
Read this important information carefully before you use the appliance and save it for future reference.
Danger
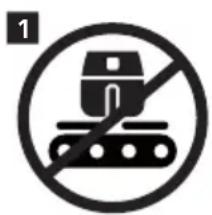
- Do not place the appliance on or near a hot gas stove or all kinds of electric stove and electric cooking plates, or in a heated oven (fig. 1).
- Never immerse the appliance in water nor rinse it under the tap.
- Do not let any water or other liquid enter the appliance to prevent electric shock.
- Always put the ingredients to be fried in the basket, to prevent them from coming into contact with the heating elements.
- Do not cover the air inlet and the air outlet openings while the appliance is operating.
Warning
- Do not fill the pan with oil as this may cause a fire hazard.
- Do not use the appliance, if the plug, the mains cord or the appliance itself is damaged.
- Never touch the inside of the appliance while it is operating.
- Never put any amount of food that exceeds the maximum level indicated in the basket. Always make sure heater is clean and no food is stuck in heater.
- Be careful when cleaning the upper area of the cooking chamber: Hot heating element, edge of metal parts.
- If the supply cord is damaged, it must be replaced by Philips, its service agent or similarly qualified persons in order to avoid a hazard.
- Only connect the appliance to an earthed wall socket, protected by an earth leakage circuit breaker.
- Always make sure that the plug is inserted into the wall socket properly.
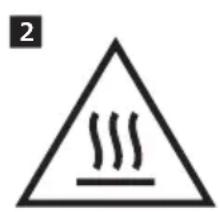
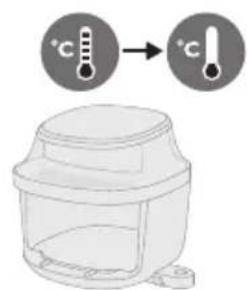
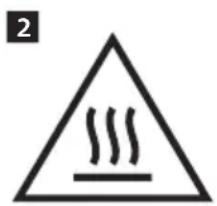
- This appliance is not intended to be operated by means of an external timer or a separate remote control system. The accessible surfaces may become hot during use (fig. 2).
- This appliance can be used by children aged from 8 years and above and persons with reduced physical, sensory or mental capabilities or lack of experience and knowledge if they have been given supervision or instruction concerning use of the appliance in a safe way and understand the hazards involved.
- Children shall not play with the appliance.
- Cleaning and user maintenance shall not be made by children unless they are older than 8 years and supervised.
- Do not place the appliance against a wall or against other appliances. Leave at least 15 cm free space at the back, on both sides and above the appliance. Do not place anything on top of the appliance.
- During hot air frying, hot steam is released through the air outlet openings. Keep your hands and face at a safe distance from the steam and from the air outlet openings. Also, be careful of hot steam and air when you remove the pan from the appliance.
- Never use light ingredients or baking paper in the appliance.
- Storage of potatoes: The temperature shall be appropriate to the potato variety stored and it shall be above 6°C to minimize the risk of acrylamide exposure in the prepared foodstuff.
- Since this Air fryer has a big chamber, its electric power is large. Do not operate other powerful appliances on the same circuit at the same time (e.g., kettles, electric grills, and the like). Else, it can happen that the circuit breaker in your house installation responds and the power at this socket fails.
- When using the Air fryer, be careful when opening, closing, or shaking the large, heavy drawer. Always handle it securely to prevent it from slipping or falling, which could cause injury.
- This appliance is designed to be used at ambient temperatures between 5°C and 40°C.
- Check if the voltage indicated on the appliance corresponds to the local mains voltage before you connect the appliance.
- Keep the mains cord away from hot surfaces.
- Do not use the appliance for any purpose other than described in this manual to avoid potential injury, and use only original Philips accessories.
- Do not let the appliance operate unattended.
- The pan, basket, and accessories placed inside the cooking chamber become hot during and after use of the appliance. Always handle them carefully.
- Thoroughly clean the parts that come into contact with food before using the appliance for the first time. Refer to the instructions in the manual.
- Do not place the pan and basket on the UI panel, as they may fall and cause injury.
- When steaming food, be careful when pulling out the pan to prevent burns from the escaping steam.
- Do not position the appliance's steam outlet towards the socket.
Caution
- This appliance is intended for normal household use only. It is not intended for use in environments such as staff kitchens of shops, offices, farms, or other work environments. Nor is it intended to be used by clients in hotels, motels, bed and breakfasts, and other residential environments.
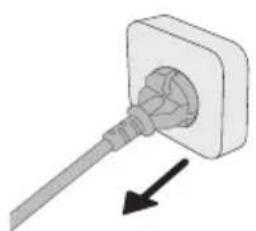
- Always disconnect the appliance from the supply if it is left unattended and before you assemble, disassemble, store, or clean it.
- Place the appliance on a horizontal, even, and stable surface.
- If the appliance is used improperly or for professional or semi-professional purposes, or if it is not used according to the instructions in the user manual, the guarantee becomes invalid and Philips refuses any liability for damage caused. Always return the appliance to a service center authorized by Philips for examination or repair. Do not attempt to repair the appliance yourself, otherwise the guarantee becomes invalid. Always unplug the appliance after use.
- Let the appliance cool down for approximately 30 minutes before you handle or clean it.
- Make sure the ingredients prepared in this appliance come out golden yellow instead of dark or brown.
- Remove burnt remnants. Do not fry fresh potatoes at a temperature above 180°C (to minimize the production of acrylamide). Always make sure that the food is fully cooked in the Airfryer. Always make sure that you have control over your Airfryer.
- When cooking fatty food, the Air fryer could emit smoke.
- Do not press the basket release button during shaking and moving the pan.
- When the descending icon lights up, please proceed with the descending process.
- Be careful when pouring out the cooked food and be careful not to let the accessories fall out.
- Make sure the device is positioned with its back at least 15 cm away from the wall and its front 2 cm from the countertop edge. Also, make sure the air outlet is not facing any power socket.
- Do not place the Air fryer next to another cooking appliance, close to the kitchen wall, or beneath a kitchen cupboard, as hot steam may condense and run down the surfaces.
- In normal use, good ventilation must be ensured around the product.
- If steam accumulates inside or around the surface of the steam outlet, wipe with a soft dry cloth.
- If there is condensation water on the socket, it is recommended to adjust the position of the appliance or use a socket dust cover to avoid condensation accumulating in sockets.
- This appliance is provided with a short power supply cord to reduce the risk of entanglement or tripping which can occur with a longer power-supply cord.
- Extension cords may be used if care is exercised in the use. If an extension cord is used:
- The marked electrical rating of the cord must be as great as the rating of the appliance.
- The cord should be arranged so that it will not drape over the edge of the counter or table top where it could be pulled by children or tripped over unintentionally.
- The extension cord should be a grounded type 3-wire cord.
- This appliance has a polarized plug (one blade is wider than the other). To reduce the risk of electric shock, this plug is intended to fit into a polarized outlet only one way. If the plug does not fit fully in the outlet, reverse the plug. If it still does not fit, contact a qualified electrician. Do not attempt to modify the plug in any way.
- To avoid damaging the appliance, do not use alkaline cleaning agents. Instead, clean with a soft cloth and a mild detergent.
- To avoid damaging the appliance, do not use hard water. Instead, use purified water for steam, steamfry, and descaling.
- Do not direct the cold air from fans or air conditioners towards the air outlet of the Airfryer.
- Please use Philips descaler only. Under no circumstances should you use a descaler based on sulfuric acid, hydrochloric acid, sulfamic or acetic acid (vinegar) as this may damage the water circuit in your machine and not dissolve the limescale properly. Not using the Philips descaler will void your warranty. Failure to descale the appliance will also void your warranty. Heating element surface is subject to residual heat after use.
Electromagnetic fields (EMF)
This appliance complies with the applicable standards and regulations regarding exposure to electromagnetic fields.
Automatic shut-off
- This appliance is equipped with an automatic shut-off function. If you do not press a button within 20 minutes, the appliance switches off automatically. To switch off the appliance manually, press the power On/off button.
Recycling
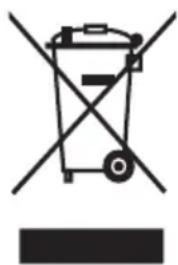
- This symbol means that electrical products shall not be disposed of with normal household waste.
- Follow your country's rules for the separate collection of electrical products.
Warranty and support
Versuni offers a two-year warranty after purchase on this product. This warranty is not valid if a defect is due to incorrect use or poor maintenance. Our warranty does not affect your rights under law as a consumer. For more information or for invoking the warranty, please visit our website www.home.id/warranty.
EcoDesign information for Model identifier(s): NA540, NA541, NA543, NA547
| Description Symbol Value Unit | |
| Off-mode power consumption P | off | 0.3 W | |
| Standby mode power consumption P | sb | / | W |
| Period before automatic switches into standby mode T | sb | 20 Min | |
| Measurement standard for service value EN 50564:2011 | |
| Contact details for obtaining more information DAP B.V.
Tussendiepen 4a,9206AD Drachten, The Netherlands | |
| The appliance complies with the ecodesign requirements of COMMISSION REGULATION (EU) 2023/826. | |
Introduction
Congratulations on your purchase and welcome to Philips!
To fully benefit from the support that we offer, register your product at
www.home.id.
General description
Product overview
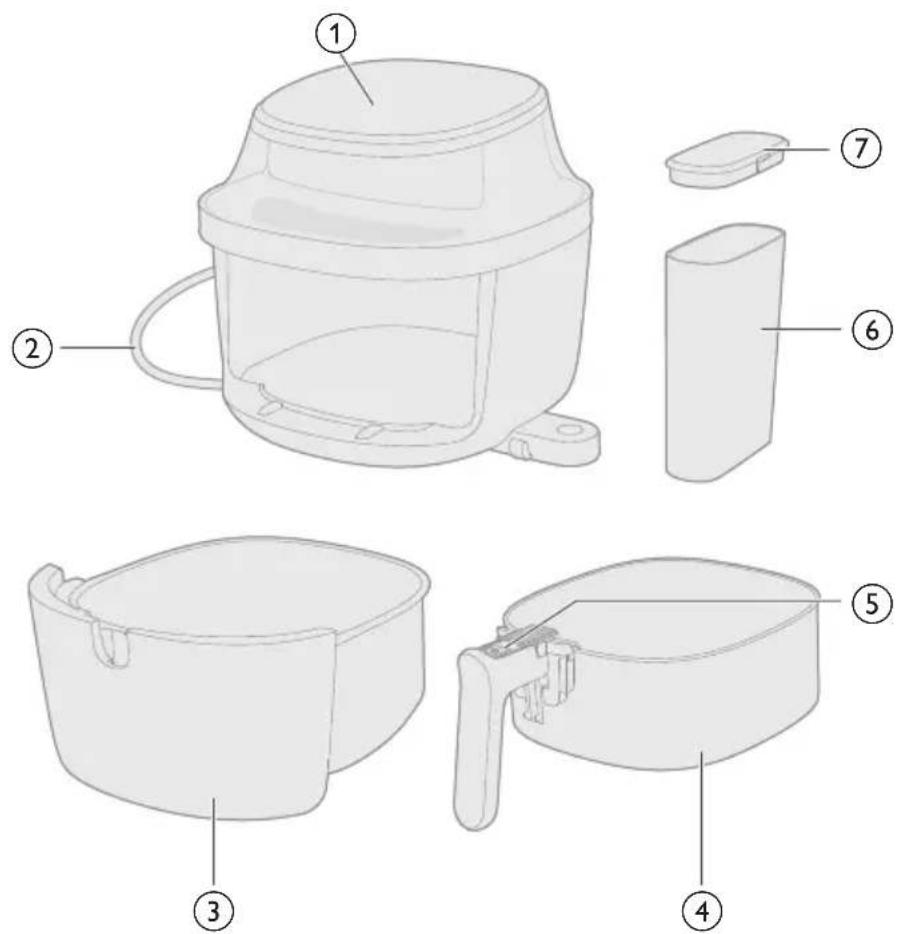
1 Control panel 2 Power cord 3 Pan 4 Basket 5 Basket release button 6 Water tank 7 Water tank lid
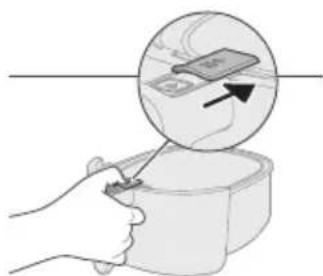
Slide the cap to access the basket release button.
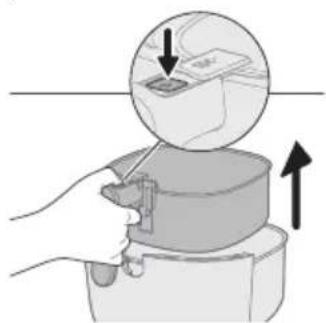
Press the basket release button and lift the basket to remove it from the pan.
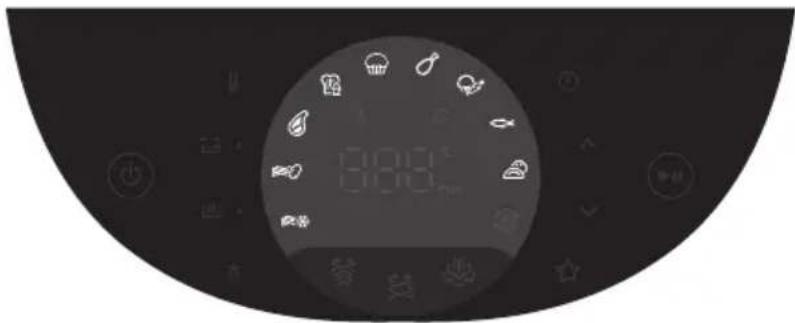
Control panel overview
Power and basic operations
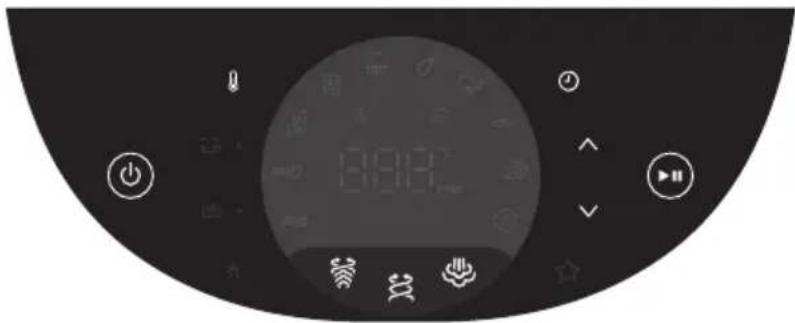

Tap to power the Airfryer on or off.

Tap to begin or pause the cooking process.
Tap to start airfrying with hot air circulation for crispy results.

Tap to start steam and airfrying for moist interiors and crispy exteriors.

Tap to cook food using steam for gentle and even heating.

Tap to increase or decrease the cooking temperature and time.

Tap to enter temperature adjusting mode.

Tap to enter time adjusting mode.
Preset programs
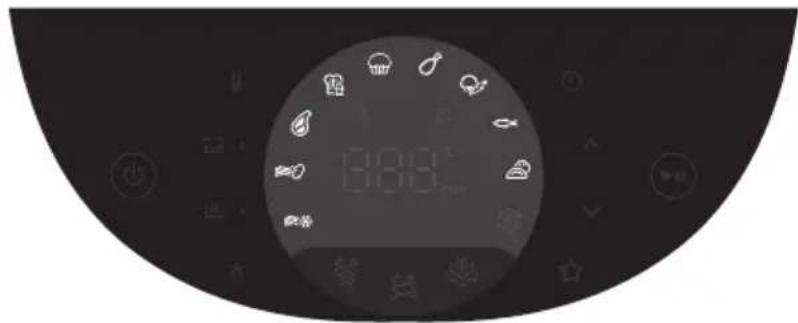
Frozen fries

Use this preset to cook frozen fries, wedges, or hash browns to a crispy golden finish.

Fresh potatoes
Use this preset for crispy fries or wedges made from fresh-cut potatoes.

Meat chops
Use this preset to grill steak to your preferred doneness with a seared exterior.

Breakfast
Use this preset for a quick, balanced breakfast with golden toast and soft-cooked eggs.

Muffin
Use this preset to bake fluffy, evenly cooked muffins.

Chicken drumsticks
Use this preset to cook chicken drumsticks thoroughly with a crispy skin.

Mixed vegetables
Use this preset to roast or crisp vegetables evenly with minimal oil.

Fish
Use this preset to gently cook fish fillets or seafood while keeping them moist and flaky.

Dumplings
Use this preset to cook dumplings evenly with a crisp exterior and tender filling.
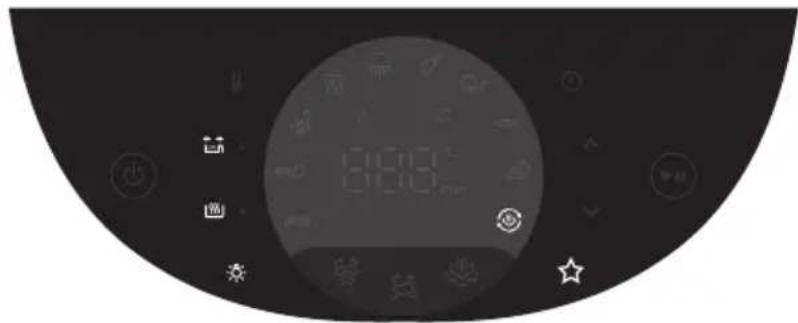
Additional functions
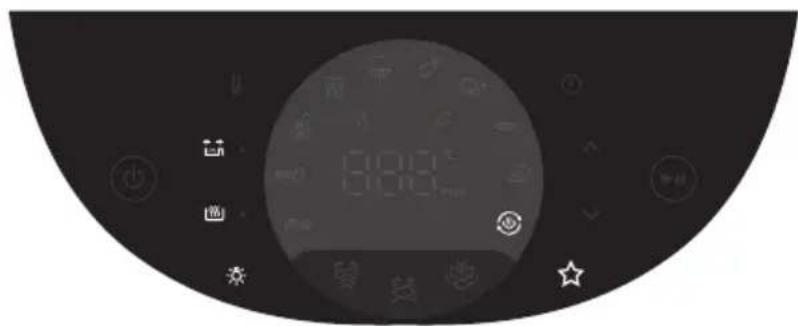

Keep warm
You can activate Keep-warm mode at any time—before or during cooking—by tapping the Keep warm button. When the Keep warm function is activated, the appliance will automatically switch to keep-warm mode once cooking is complete.

Shake reminder
This model features a shake reminder. For optimal results, shake or turn the food promptly when the reminder alarm sounds.
Press the Shake Reminder button to turn alerts on or off. When enabled, you'll hear a beep and see the button flash—reminding you to shake or turn your food during cooking for more even results.

Light
Turn the light in the cooking chamber on or off.

Steam cleaning
Effectively dissolves greasy residue and provides a deep clean for both the basket and pan.

Favorite
Your Air fryer includes a save favorite feature for quick access to your preferred settings.
- Set your desired cooking temperature and time.
- Press and hold the Favorite button until you hear a beep—this confirms the setting is saved.
- To update your favorite, simply repeat the steps above with the new settings.
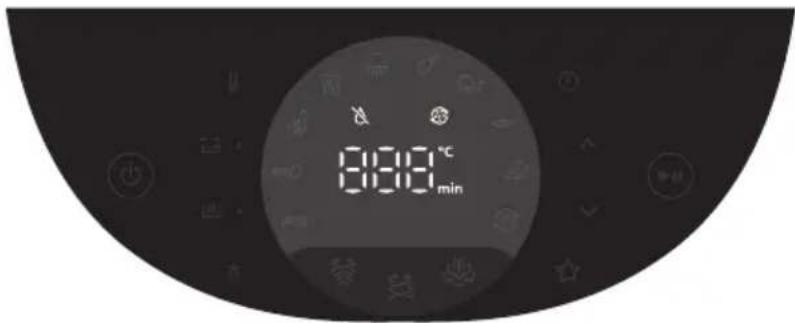
Display
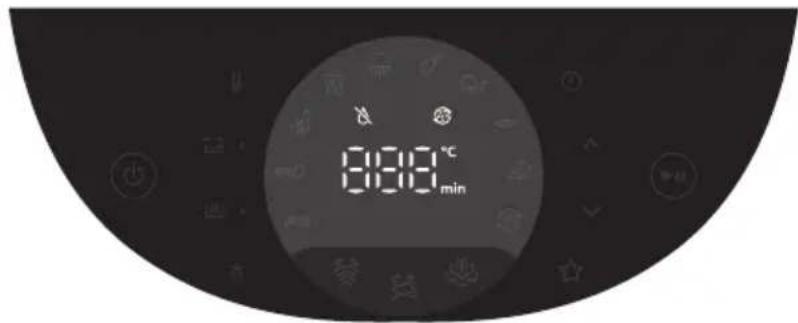
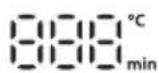
Time/temperature display
The screen cycles between displaying the cooking time and temperature.

No water indication
Lights up when there is not enough water in the water tank.

Descaling indication
Lights up when the steam enabled functions have been used for 20 hours.
Before first use
Important: During the first time use, the air fryer may produce some smoke and odor. This is normal and should dissipate in a few minutes.
Caution: This is an Air fryer that works on hot air. Do not fill the pan with oil, frying fat, or any other liquid.
Caution: Do not touch hot surfaces. Handle the hot pan with oven-safe gloves.
Caution: This appliance is for household use only.
Note: Preheating of the appliance is not necessary.
1 Remove all packing material. 2 Remove any stickers or labels (if applicable) from the appliance. 3 Thoroughly clean the appliance before first use.
Preparations before use
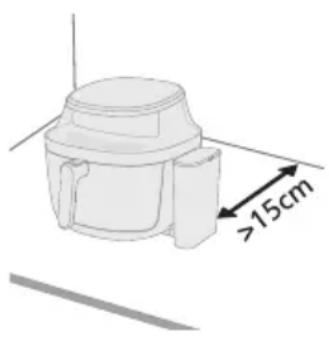
1 Place the appliance on a stable, level and heat-resistant surface. Make sure there is enough space on the table for the extended rail after the pan is pulled out. 2 Leave at least 15 cm free space at the back of the appliance.
Note: During use, hot steam is released through the air outlets. Keep your hands and face safely away from the steam and outlets. Place the appliance at least 15 cm away from the wall, and do not position the air outlets directly in front of the socket.
Note: Do not put anything on top or on the sides of the appliance. This could disrupt the airflow and affect the frying result.
Note: Do not place the Air fryer next to another cooking appliance, close to the kitchen wall, or beneath a kitchen cupboard, as hot steam may condense and run down the surfaces.
Using the appliance
This appliance with steam function offers three versatile cooking modes designed to suit a wide range of cooking needs.
- Airfry Mode delivers crispy results with minimal oil, perfect for snacks and fried favorites.
- Steamfry Mode combines hot air and steam to lock in moisture while achieving a golden finish—ideal for delicate foods like homemade bread and fish.
- Steam Mode uses pure steam to gently cook ingredients, preserving nutrients and texture, making it perfect for vegetables and seafood.
Airfry mode
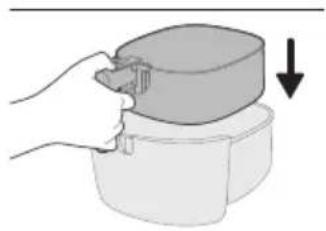
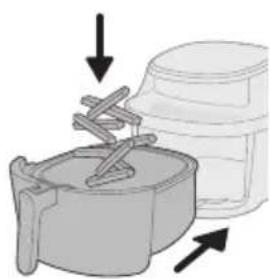
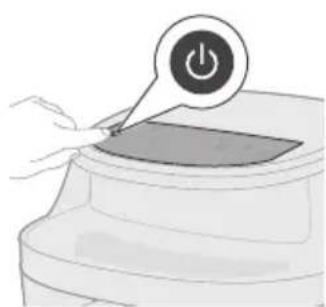
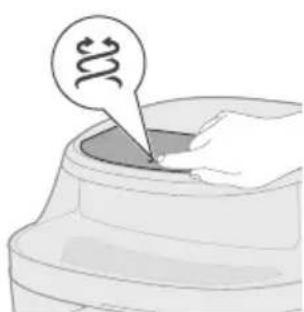
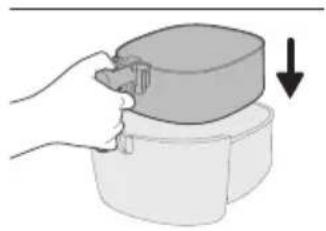
1 Place the basket in the pan.
2 Add ingredients to the basket and place the pan back into the appliance.
Note: The Airfryer is suitable for preparing a wide variety of ingredients. For best results, refer to the "Food table" for recommended quantities and cooking times.
Note: Avoid exceeding the suggested amounts or filling the basket beyond the "MAX" line, as this may impact cooking performance.
3 Tap the On/off button to switch on the appliance.
4 Tap the Airfry button to enter Airfry mode.
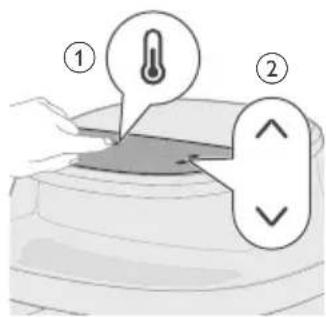
5 Tap the Temperature button and then use the Increase or Decrease button to select the desired cooking temperature.
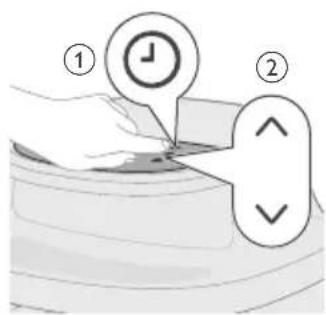
6 Tap the Time button and then use the Increase or Decrease button to select the desired cooking time.
Note: In addition to manually selecting the cooking temperature and time, you can also choose from a variety of preset programs designed for convenience and optimal results.
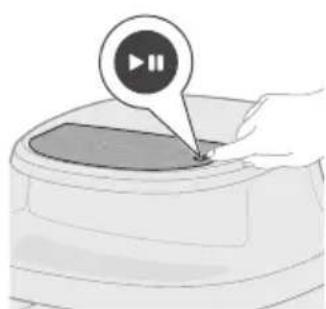
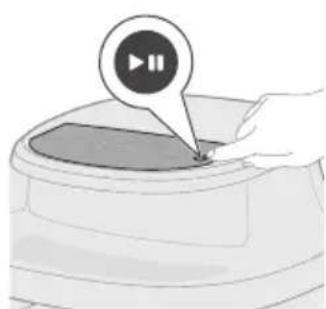
7 Tap the Start/pause button to start cooking.
Note: Some ingredients require shaking or turning halfway through the cooking time (see "Food table"). To do this:
Gently pull out the pan. - Shake or turn the ingredients over a heat-resistant surface. - Place the pan back to continue cooking.
Note: To pause the cooking process, press the Start/pause button. Press the same button again to resume.
Note: The appliance will automatically pause when the pan is removed. Cooking will automatically resume once the pan is placed back into the appliance.
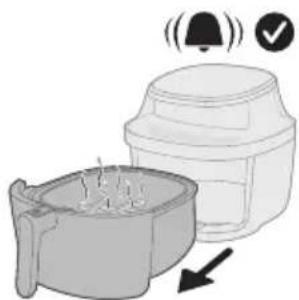
8 Once cooking is complete, a timer bell will sound. Carefully pull out the pan.
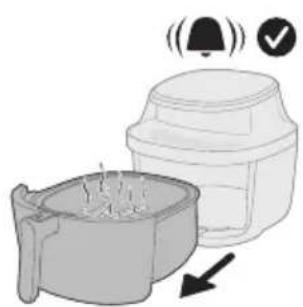
Caution: After the cooking process, the basket, pan, the interior housing and the ingredients will be hot. Always place the basket and pan on a heat resistant surface (e.g. trivet or silicone mat) when you remove them from the appliance. Depending on the type of food, hot steam may escape from the pan.
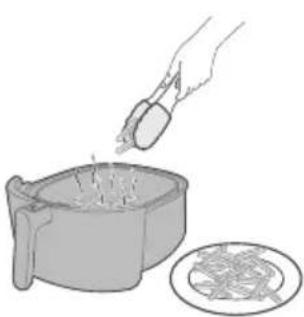
9 Remove the cooked food from the basket.
Note: Excess oil or rendered fat from the ingredients will collect at the bottom of the pan.
Note: Depending on the type of food being cooked, you may wish to pour off the excess oil or fat between batches or before shaking the contents. To do this safely, place the pan on a heat-resistant surface and wear oven-safe gloves. Carefully pour out the oil or fat.
Food table for Airfry mode
The table below provides recommended base settings for preparing various food types.
Note
- The settings listed are intended as guidelines. Due to variations in ingredient origin, size, shape, and brand, optimal results cannot be guaranteed for all ingredients.
- When cooking larger quantities (e.g., fries, prawns, drumsticks, frozen snacks), shake, turn, or stir the ingredients 2-3 times during the cooking process to ensure consistent texture and doneness.
Food items Food amount Temperature Time Note
| Frozen spring rolls 800 g 200 °C 15 min Shake, turn, or stir 1-2 times in |
| | | between |
| Hamburger (around 150 g/5 oz) | 6 patties 200 °C 16-25 | min | Shake, turn, or stir 1-2 times in between |
| Meat loaf 1400 g 150 °C 65-70 | | min | |
| Meat chops without bone (around 190 g/7 oz) | 4 chops 200 °C 16-25 | min | Shake, turn, or stir 1-2 times in between |
| Chicken breast (around 160 g/6 oz) | 5 pieces 180 °C 20-28 | min | Shake, turn, or stir 1-2 times in between |
| Whole chicken (1200 g/42 oz) | 1 piece 180 °C 50-60 | min | Shake, turn, or stir 1 time in between |
Steamfry mode
1 Place the basket in the pan.
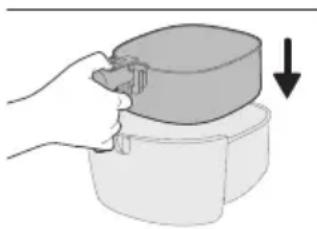
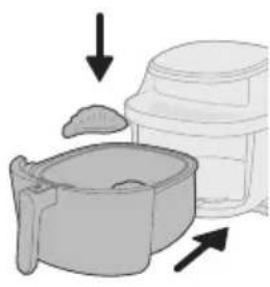
2 Add ingredients to the basket and place the pan back into the appliance.
Note: The Airfryer is suitable for preparing a wide variety of ingredients. For best results, refer to the 'Food Table' for recommended quantities and cooking times.
Note: Avoid exceeding the suggested amounts or filling the basket beyond the "MAX" line, as this may impact cooking performance.
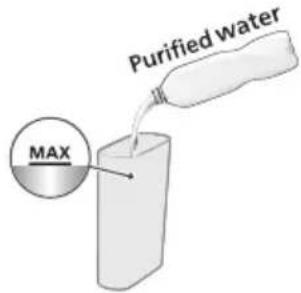
3 Fill the water tank with purified water up to the MAX water level.
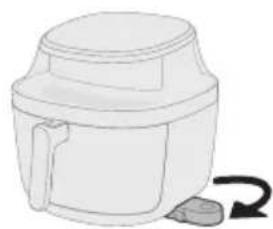
4 Pull out the water tank base from the bottom side of the appliance.
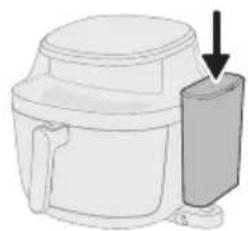
5 Secure the lid on the water tank and place the water tank onto the base.
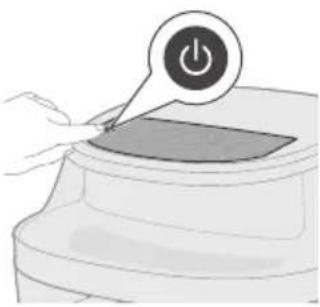
6 Tap the On/off button to switch on the appliance.
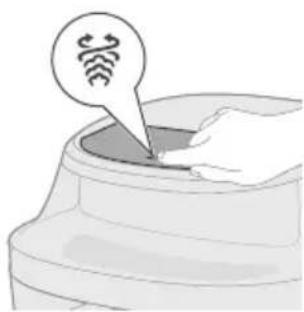
7 Tap the Steamfry button to enter Steamfry mode.
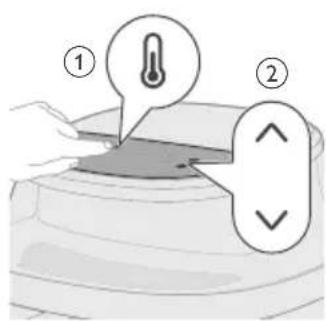
8 Tap the Temperature button and then use the Increase or Decrease button to select the desired cooking temperature.
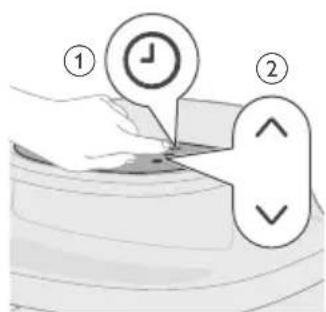
9 Tap the Time button and then use the Increase or Decrease button to select the desired cooking time.
Note: In addition to manually selecting the cooking temperature and time, you can also choose from a variety of preset programs designed for convenience and optimal results.
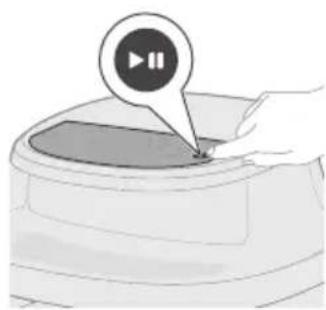
10 Tap the Start/pause button to start cooking.
Note: Some ingredients require shaking or turning halfway through the cooking time (see "Food table"). To do this:
Gently pull out the pan. - Shake or turn the contents over a heat-resistant surface. - Place the pan back to continue cooking.
Note: To pause the cooking process, press the Start/pause button. Press the same button again to resume.
Note: The appliance will automatically pause when the basket is removed. Cooking will automatically resume once the basket is placed back into the appliance.
11 Once cooking is complete, a timer bell will sound. Carefully pull out the pan.
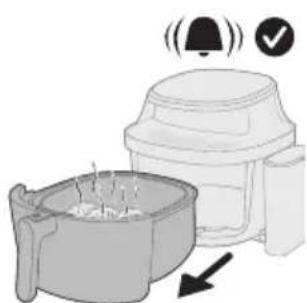
Caution: After the cooking process, the basket, pan, the interior housing and the ingredients will be hot. Always place the basket on a heat resistant surface (e.g. trivet or silicone mat) when you remove the basket. Depending on the type of food, hot steam may escape from the basket.
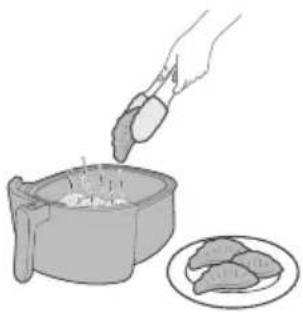
12 Remove the cooked food from the basket.
Note: Excess oil or rendered fat from the ingredients will collect at the bottom of the pan.
Note: Depending on the type of food being cooked, you may wish to pour off the excess oil or fat between batches or before shaking the contents. To do this safely, place the pan on a heat-resistant surface and wear oven-safe gloves. Carefully pour out the oil or fat.
Food table for Steamfry mode
The table below provides recommended base settings for preparing various food types.
Note
- The settings listed are intended as guidelines. Due to variations in ingredient origin, size, shape, and brand, optimal results cannot be guaranteed for all ingredients.
- When cooking larger quantities (e.g., fries, prawns, drumsticks, frozen snacks), shake, turn, or stir the ingredients 2-3 times during the cooking process to ensure consistent texture and doneness.
Food items Food amount Tempera
Time Note
ture
| Fresh potato cubes 1200 g/42 oz 180 °C 35 min Shake, turn, or stir 1-2 times in between |
| Chicken breast (around 160 g/6 oz) | 5 pieces 160 °C 29 min Shake, turn, or stir 1-2 times in between |
| Fish fillet (around 125 g/4 oz) | 6 pieces 160 °C 22 min Shake, turn, or stir 1-2 times in between |
| Homemade bread 500 g 180 °C 30 min Spread the dough into an even, flat layer to prevent it from rising and touching the heating element during cooking, which could burn the bread. |
| Whole chicken 1200 g/42 oz 180 °C 50 min Shake, turn, or stir once in between |
Steam mode
1 Place the basket in the pan.
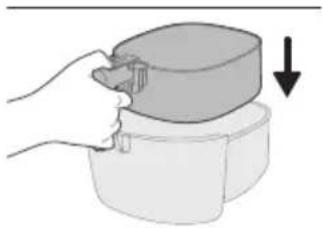
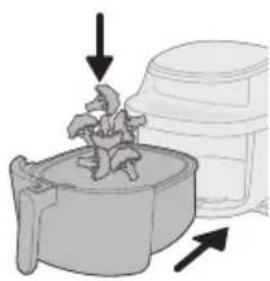
2 Add ingredients to the basket and place the pan back into the appliance.
Note: The Airfryer is suitable for preparing a wide variety of ingredients. For best results, refer to the "Food Table" for recommended quantities and cooking times.
Note: Avoid exceeding the suggested amounts or filling the basket beyond the 'MAX' line, as this may impact cooking performance.
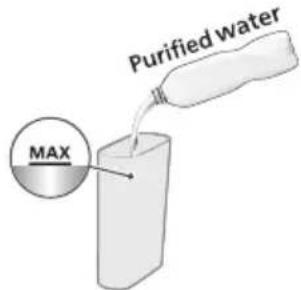
3 Fill the water tank with purified water up to the MAX water level.
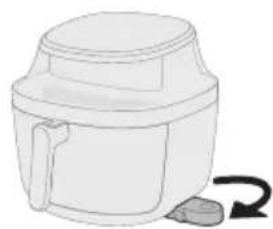
4 Pull out the water tank base from the bottom side of the appliance.
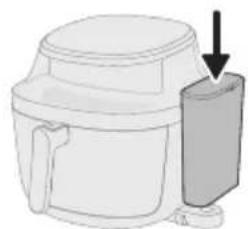
5 Secure the lid on the water tank and place the water tank onto the base.
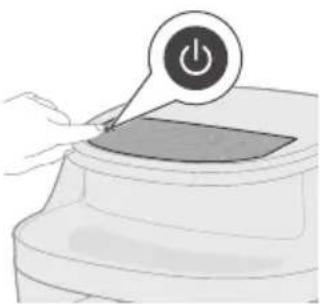
6 Tap the On/off button to switch on the appliance.
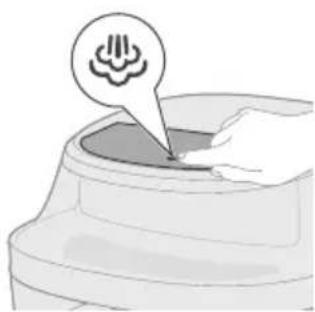
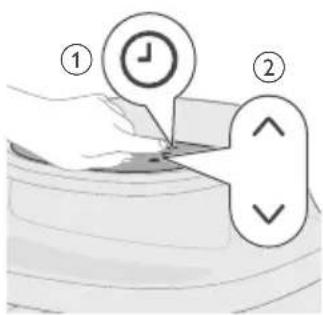
7 Tap the Steam button to enter Steam mode.
8 Tap the Time button and then use the Increase or Decrease button to select the desired cooking time.
Note: Temperature adjustment is disabled for Steaming.
Note: In addition to manually selecting the cooking temperature and time, you can also choose from a variety of preset programs designed for convenience and optimal results.
9 Tap the Start/pause button to start cooking.
Note: Some ingredients require shaking or turning halfway through the cooking time (see "Food table"). To do this:
Gently pull out the pan. - Shake or turn the ingredients over a heat-resistant surface. - Place the pan back to continue cooking.
Note: To pause the cooking process, press the Start/pause button. Press the same button again to resume.
Note: The appliance will automatically pause when the basket is removed. Cooking will automatically resume once the basket is placed back into the appliance.
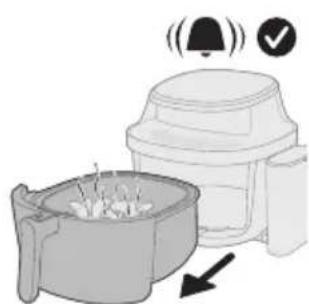
10 Once cooking is complete, a timer bell will sound. Carefully pull out the pan.
Caution: After the cooking process, the basket, pan, the interior housing and the ingredients will be hot. Always place the basket and pan on a heat resistant surface (e.g. trivet or silicone mat) when you remove them from the appliance. Depending on the type of food, hot steam may escape from the basket.
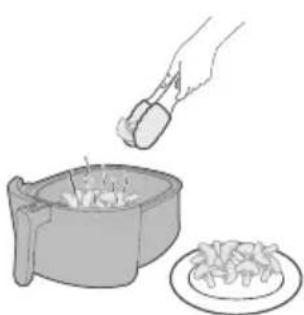
11 Remove the cooked food from the basket.
Note: Excess oil or rendered fat from the ingredients will collect at the bottom of the pan.
Note: Depending on the type of food being cooked, you may wish to pour off the excess oil or fat between batches or before shaking the contents. To do this safely, place the pan on a heat-resistant surface and wear oven-safe gloves. Carefully pour out the oil or fat.
Food table for Steam mode
The table below provides recommended base settings for preparing various food types.
Note
- The settings listed are intended as guidelines. Due to variations in ingredient origin, size, shape, and brand, optimal results cannot be guaranteed for all ingredients.
- When cooking larger quantities (e.g., fries, prawns, drumsticks, frozen snacks), shake, turn, or stir the ingredients 2-3 times during the cooking process to ensure consistent texture and doneness.
| Food items Food amount Tempera-ture | Time Note | |
| Fresh potato cubes 800 g / 28 oz 100 °C 28-35 | | |
| | min | |
| Whole potato (around 250-300 g/9-11 oz) | 4 pieces 100 °C 50-60 | min | |
| Pork ribs 300 g/11 oz 100 °C 25-35 | | |
| | min | |
| Rice 320 g/11 oz 100 °C 35-40 | min | Using cooking pot, like baking pot, silicon tray etc. Add 320 ml of water to the pot, maintaining a rice-water ratio of 1:1.2. |
| Yam/Sweet Potato (around 100 g/3.5 oz) | 8 pieces 100 °C 50-75 | min | |
Cooking with preset programs
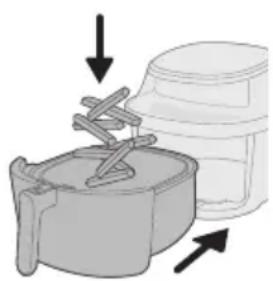
This appliance comes with a variety of preset cooking programs designed to simplify meal preparation. Each preset is optimized for a specific type of food, automatically setting the ideal temperature and cooking time to deliver delicious results with minimal effort.
1 Add ingredients to the basket and place the pan back into the appliance.
Note: Avoid exceeding the suggested amounts or filling the basket beyond the "MAX" line, as this may impact cooking performance.
2 Tap the On/off button to switch on the appliance.
3 Tap the Airfry, Steam, or Steamfry button to enter one of the cooking modes.
Note: Make sure to have the filled water tank in place when you are using the Steam or Steam fry cooking modes.
4 Choose one of the preset programs according to the food you are cooking.
5 Tap the Start/pause button to start cooking.
Note: Some ingredients require shaking or turning halfway through the cooking time (see 'Food table'). To do this:
Gently pull out the basket. - Shake or turn the contents over a heat-resistant surface. - Reinsert the basket to continue cooking.
Note: To pause the cooking process, press the Start/pause button. Press the same button again to resume.
Note: The appliance will automatically pause when the basket is removed. Cooking will automatically resume once the basket is placed back into the appliance.
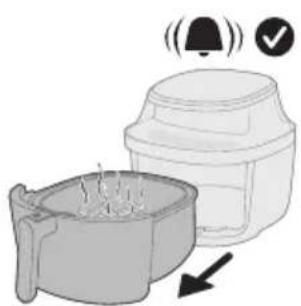
6 Once cooking is complete, a timer bell will sound. Carefully pull out the pan.
Caution: After the cooking process, the basket, pan, the interior housing and the ingredients will be hot. Always place the basket and pan on a heat resistant surface (e.g. trivet or silicone mat) when you remove them from the appliance. Depending on the type of food, hot steam may escape from the pan.
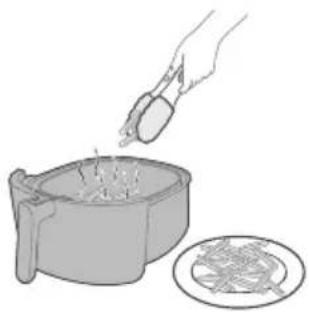
7 Remove the cooked food from the basket.
Note: Excess oil or rendered fat from the ingredients will collect at the bottom of the pan.
Note: Depending on the type of food being cooked, you may wish to pour off the excess oil or fat between batches or before shaking the contents. To do this safely, place the pan on a heat-resistant surface and wear oven-safe gloves. Carefully pour out the oil or fat.
Preset table for Airfry
Preset | Recommended amount | Time | Temperature | Shake
Reminder
| Frozen fries 1000 g 27 min 180 °C 2 times |
| Homemade fries | 1000 g 29 min 180 °C 2 times | |
| Meat chop 4 pieces (190g/piece) 17 min 200 °C 1 time |
| Egg and breakfast | 3 toasts, 4 eggs 12 min | 160 °C / Add toast 6 min into cooking |
| Muffin 9 cups (around 30g per cup) 16 min 160 °C / |
| Chicken drumsticks | 10 pieces (125g/piece) 28 min 180 °C 2 times |
| Mixed vegetables | 1000 g (Air fry mode) 12 min 180 °C 2 times 600 g (Steam fry and Steam modes) |
| Whole fish 2 fish (300-400g per fish) 13 min 200 °C 1 time |
| Preset Weight | Preset table for Steam fry
Time Temperature Shake | Reminder |
| Chicken
drumsticks | 10 pieces (125 g/piece) 35 min 180 °C 2 times | |
| Cauliflower 600 g | 19 min 160 °C 2 times | |
| Whole fish 2 fish (300-400 g per fish) 18 min 200 °C 1 time |
| Dumplings 370 g 16 min 160 °C / |
| Preset table for Steam
Preset Weight Time Temperature |
| Chicken | 10 pieces (125 g/piece) 33 min 100 °C |
| drumsticks | |
| Broccoli 600 g 13 min 100 °C |
| Whole fish 2 fish (300-400 g per fish) 19 min 100 °C |
| Dumplings 370 g 13 min 100 °C |
Cleaning
Routine cleaning
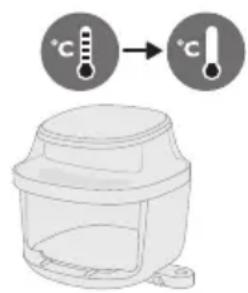
Warning: Let the pan, basket, and inside of the appliance cool down completely before you start cleaning.
Warning: The basket has a non-stick coating. Do not use metal kitchen utensils or abrasive cleaning materials as this may damage the non-stick coating.
Clean the appliance after every use. Remove oil and fat from the bottom of the pan after every use.
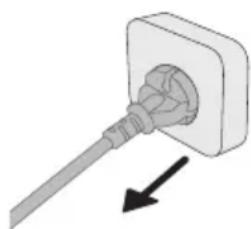
1. Press the power On/Off button to switch off the appliance, remove the plug from the wall outlet, and let the appliance cool down. 2. Dispose of rendered fat or oil from the bottom of the pan.
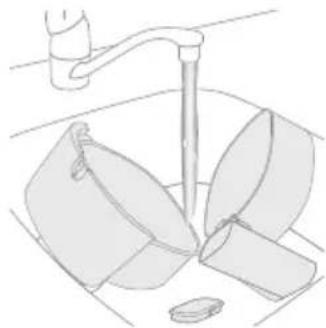
3. Clean the basket, pan, and water tank under the tap, if necessary with warm water, dishwashing liquid, and a non-abrasive sponge (see "cleaning table").
Tip: If food residues are stuck to the basket or pan, you can soak them in hot water and dishwashing liquid for 10-15 minutes. Soaking loosens the food residues and makes them easier to remove. Make sure you use a dishwashing liquid that can dissolve oil and grease. If there are grease stains on the basket or pan and you have not been able to remove them with hot water and dishwashing liquid, use a liquid degreaser.
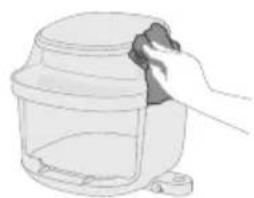
Tip: If necessary, food residues stuck to the heating element can be removed with a soft to medium bristle brush. Do not use a steel wire brush or a hard bristle brush, as this might damage the coating on the heating element.
4. To prevent scratches, gently wipe the outside and inside of the appliance with an unwrinkled, clean, and soft cloth. Begin with a slightly moistened cloth and follow up with a dry one, if necessary.
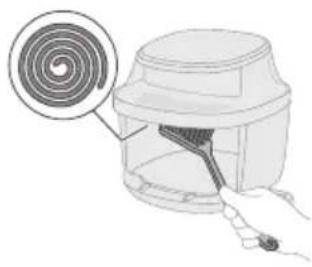
5 Clean the heating element with a cleaning brush to remove any food residues.
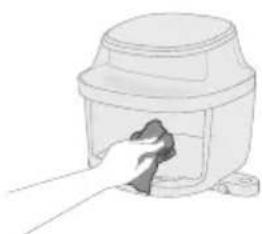
6 Clean the inside of the appliance with a slightly moistened soft cloth and follow up with a dry one, if necessary.
Steam cleaning
The steam cleaning function effectively dissolves greasy residue and provides a deep clean for both the basket and pan.
The program runs for 20 minutes, consisting of:
- 15 minutes of steam cleaning to dissolve buildup.
- 5 minutes of drying to ensure the pan is ready for use.
Note: When starting the steam cleaning program, the appliance may release more vapor from the back than during regular steam mode. This is normal and may result in increased condensation on nearby walls.
Before starting, please ensure the following:
Air outlet is not directly facing any power socket. - Do not place other kitchen appliances next to the appliance. - Keep at least 15 cm of space between the appliance and the wall to minimize condensation buildup.
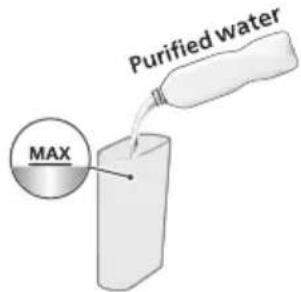
1 Fill the water tank with purified water up to the MAX water level.
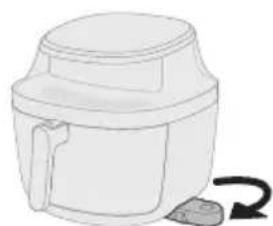
2 Pull out the water tank base from the bottom side of the appliance.
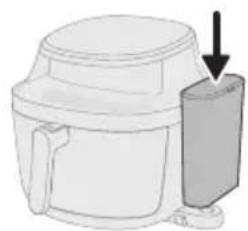
3 Secure the lid on the water tank and place the water tank onto the base.
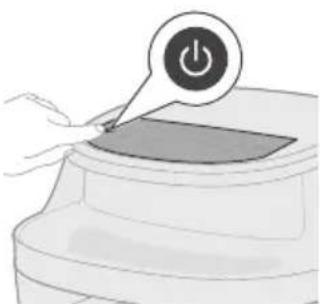
4 Tap the On/off button to switch on the appliance.
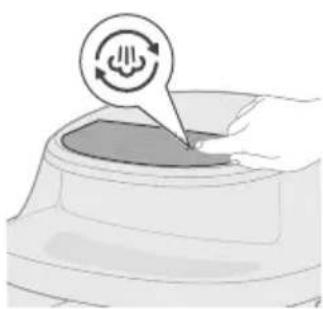
5 Tap the Steam Clean button.
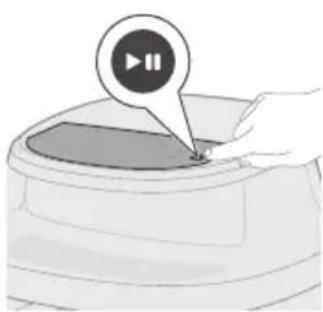
6 Press the Start/pause button to start the steam cleaning process.
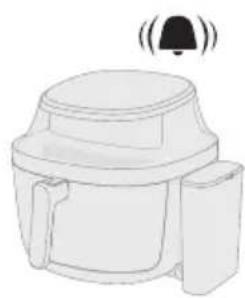
7 After 15 minutes, the appliance will beep continuously and the steam clean icon will start flashing.
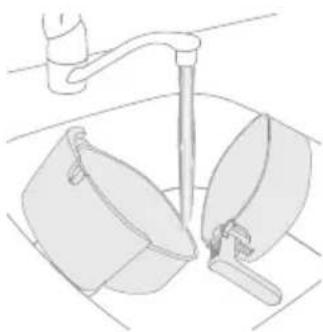
8 Pull out and clean the pan and basket.
Caution: Always wear heat-resistant gloves to handle the hot pan.
Note: If grease remains in the pan and basket, clean them with soapy water or detergent using a sponge, then rinse again.
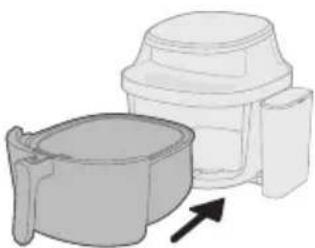
9 Place the basket and pan back into the appliance.
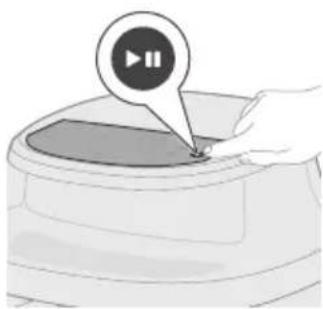
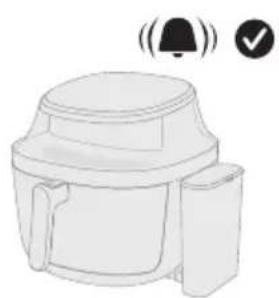
10 Tap the Start/pause button to start the drying process.
11 After 5 minutes, a beep sound indicates that drying is complete.
Tip: Before first use or if not used for a long time, we suggest using the "Steam cleaning" function to thoroughly clean the water circle and cooking chamber.
Descaling
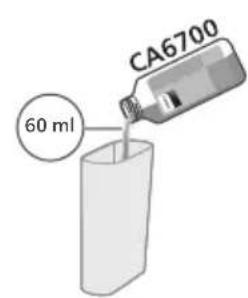
Every 20 hours of using steam mode, a descending reminder will automatically appear and blink on the display—this means it is time to run the descending program. The descending program cleans limescale buildup from the air fryer's water system, helping to extend its lifespan.
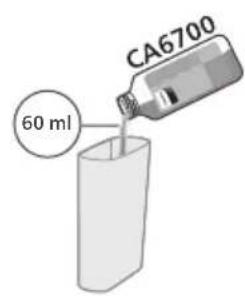
1 Pour 60 ml of Philips Descaler CA6700 (sold separately) into the water tank.
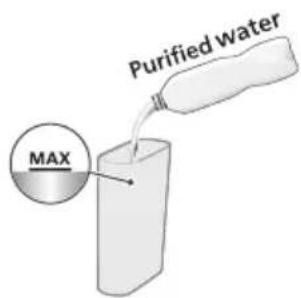
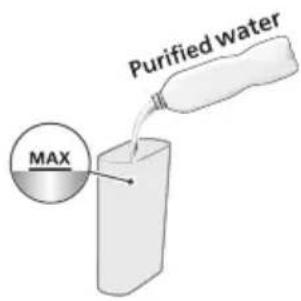
2 Fill the water tank with purified water up to the MAX level.
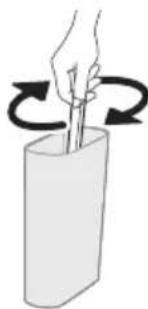
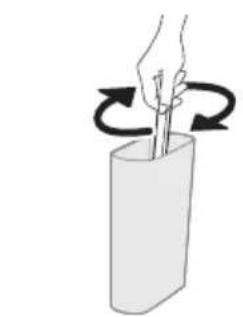
3 Mix the water and descaler evenly in the water tank.
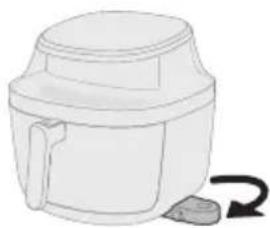
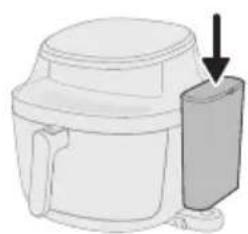
4 Pull out the water tank base from the bottom side of the appliance.
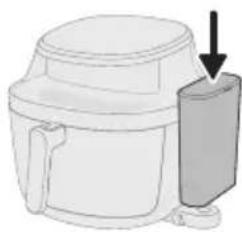
5 Secure the lid on the water tank and place the water tank onto the base.
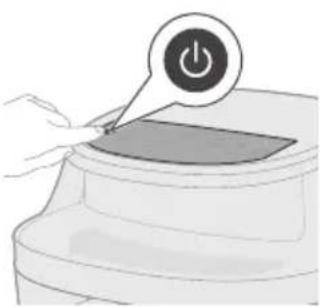
6 Tap the On/off button to switch on the appliance.
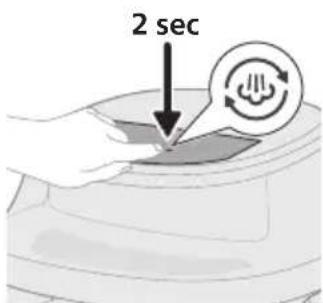
7 Tap and hold the Steam clean button for 2 seconds.
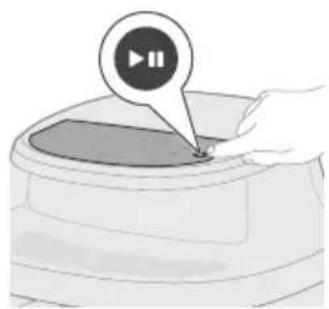
8 Tap the Start/pause button to start descending.
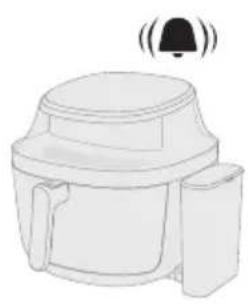
9 After 25 minutes of descending, the appliance will beep and remind you to pull out the pan.
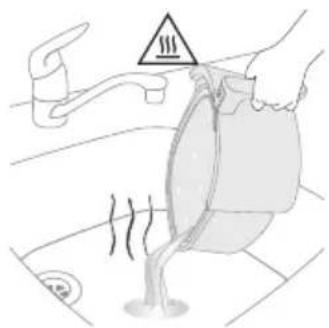
10 Pull out the pan and pour off any remaining water in the pan.
Caution: Always wear heat-resistant gloves to handle the hot pan.
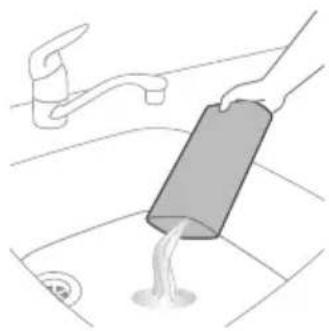
11 Pour off any remaining water in the water tank.
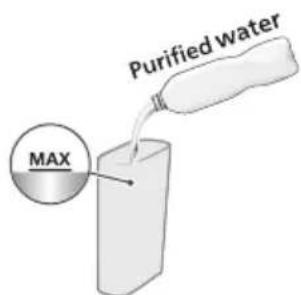
12 Refill the water tank with purified water.
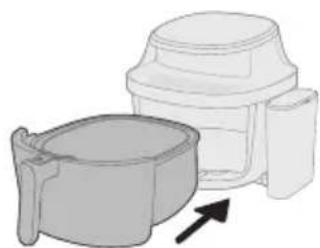
13 Place the basket and pan back to the appliance.
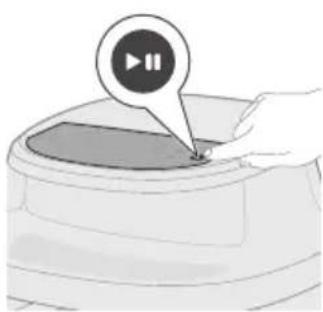
14 Press the Start/pause button to continue descending.
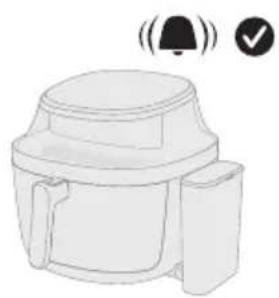
15 The descending process ends when you hear the appliance beep again.
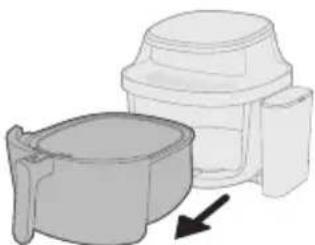
16 Pull out the basket and pan.
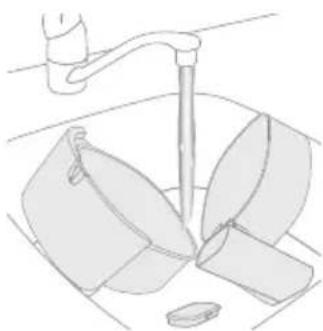
17 Rinse the basket, pan, and water tank under the tap.
Important: Under no circumstances should you use a descaling liquid based on sulfuric acid, hydrochloric acid, sulfamic or acetic acid (vinegar) as this may damage the water system in your appliance and not dissolve the limescale properly.
Note: If you often use hard water in your area, you may need to descale the device more frequently.
Storage
1. Unplug the appliance and let it cool down. 2. Make sure all parts are clean and dry before storing.
Note
- When carrying the Airfryer, hold it horizontally and support the pan at the front to prevent any accidental tilting and potential damage to the parts.
- Always make sure that the removable parts of the Airfryer are fixed before you carry and/or store it.
Troubleshooting
This chapter summarizes the most common problems you could encounter with the appliance. If you are unable to solve the problem with the information below, visit www.home.id/support for a list of frequently asked questions or contact the Consumer Care Center in your country.
Problem Possible cause Solution
| The outside of the appliance becomes hot during use. | The heat inside radiates to the outside walls. | This is normal. All areas that you need to touch during use stay cool enough to touch. |
| | The pan, the basket, and the inside of the appliance always become hot when the appliance is switched on to ensure the food is properly cooked. These parts are always too hot to touch. |
| | If you leave the appliance switched on for a longer time, some areas get too hot to touch. These areas are marked on the appliance with the following icon: |
| | As long as you are aware of the hot areas and avoid touching them, the appliance is safe to use. |
| My home-made fries do not turn out as I expected. | You did not use the right potato type. | To get the best results, use fresh floury potatoes. If you need to store the potatoes, do not store them in a cold environment like in a fridge. Choose potatoes whose package states that they are suitable for frying. |
Problem Possible cause Solution
| The amount of ingredients in the basket is too big. | Follow the instructions in this user manual to prepare home-made fries. |
| Certain types of ingredients need to be shaken halfway through the cooking time. | Follow the instructions in this user manual to prepare home-made fries. |
| The Air fryer does not switch on. The appliance is not plugged in. Check if the plug is inserted in the wall outlet properly. |
| Several appliances are connected to one outlet. | The Air fryer has a high wattage. Try a different outlet and check the fuses. |
| You did not tap the On/off button. | Tap the On/off button to switch on the appliance. |
| I see some peeling off spots inside my Air fryer. | Some small spots can appear inside the pan of the Air fryer due to the incidental touching or scratching of the coating (e.g. during cleaning with harsh cleaning tools and/or while inserting the basket). | You can prevent damage by lowering the basket into the pan properly. If you insert the basket at an angle, its side may knock against the wall of the pan, causing small pieces of coating to chip off. If this occurs, please be informed that this is not harmful as all materials used are food-safe. |
| White smoke comes out of the appliance. | You are cooking fatty ingredients. Carefully pour off any excess oil or fat from the pan and then continue cooking. |
| The pan still contains greasy residues from previous use. | White smoke is caused by greasy residues heating up in the pan. Always clean the pan and the basket thoroughly after every use. |
| Breading or coating did not adhere properly to the food. | Tiny pieces of airborne bread ing can cause white smoke. Firmly press bread ing or coating to food to ensure it sticks. |
| Marinade, liquid or meat juices are splattering in the rendered fat or grease. | Pat food dry before placing it in the basket. |
| The screen on the Air fryer shows "E1". | Your Air fryer might be stored in a place where it is too cold. | If your device was stored at a low ambient temperature, let it warm up to room temperature for at least 15 minutes before you plug it in again.
If your display still shows "E1", call the service hot line or contact the Consumer Care Center in your country. |
Problem Possible cause Solution
| The screen on the Air fryer shows "E4-E12". | The device might have a malfunction. | Try to unplug and plug in the device again.
If this does not help please call the service hot line or contact the Consumer Care Center in your country. |
| The screen on the Air fryer shows "E15". | The internal water tube is blocked. | Perform the descaling process.
If this does not help please call the service hot line or contact the Consumer Care Center in your country. |
| I hear some strange noise coming from the inside of the appliance. | This appliance is equipped with a fan to circulate heat and a water pump to enable the steaming function.
During operation, you may hear sounds from these components. | This is normal and expected.
If the noise becomes noticeably louder or changes in character, please contact the Consumer Care Center for further assistance. |
| There is water in the cooking chamber after use. | After cooking, you may notice water remaining in the cooking chamber.
This is due to the steam generated during operation, which condenses on the food and the inner walls of the chamber. | A small amount of condensation is normal.
Simply wipe it away using a soft, damp, non-abrasive cloth. |
| is flashing. No water in water tank. Add purified water to the water tank. |
| Water tank is not placed properly. Press the water tank to secure it in place. |
| The internal water tube is blocked. Perform the descaling process.
If this does not help please call the service hot line or contact the Consumer Care Center in your country. |
| is flashing. This is the descaling reminder. Perform the descaling process. See chapter "Descaling". |
Problem Possible cause Solution
| There is condensation on the wall during steaming, steam cleaning, or descending. | It is normal. The appliance may release increased vapor from the air outlet. This vapor can be pushed toward nearby surfaces by the internal fan, leading to visible condensation on walls. | To ensure safe and optimal use: - Place the appliance at least 15 cm away from the wall to reduce condensation buildup. - Ensure the air outlet is not directly facing any power socket to avoid electrical hazards. - Do not place other kitchen appliances close to the unit during operation. - Use a mop or soft cloth to dry any condensation that forms on surrounding surfaces. |
| There is water leakage from the Air fryer. | Internal Leakage (e.g., water tube or internal components). | Contact the Consumer Care Center in your country for further assistance. |
| Cracks or Damage from External Force. If the appliance has been dropped or deformed, it may cause structural damage leading to leaks. | |
| The water tank may not be properly installed or could be damaged. | Remove the water tank and reinstall it securely. Check for any visible cracks or damage. If damage is found, contact the Consumer Care Center for further assistance. |
| The Air fryer is not producing enough steam. | Insufficient water in the water tank. | Check the water tank to ensure there is enough water. |
| The water tank is not properly inserted. | Press the water tank to secure it in place. |
| The water inlet is dirty or clogged. | Clean and rinse thoroughly to remove any blockages. |
| There is steam generator clogging or pipeline leakage. | If the appliance has been used for an extended period, the steam generator may require maintenance. Run the descaling program to clean the steam system. If the issue persists after descaling, please contact the Consumer Care Center in your country for further assistance. |
Warning 38
Note 39
Electromagnetic fields (EMF) 40
Automatic shut-off 40
Recycling 41
Warranty and support 41
Introduction 41
General description 42
Product overview 42
Øg / reducer-knapper
Press to increase or decrease cooking temperature and time.

Temperature button
Press to change temperature.

Time button
Press to change the time.
Preset programs
Frozen french fries

Use this preset to cook golden frozen french fries, potato wedges, or hash browns.

Fresh potatoes
Ecodesign information 149
Descaling 208
Storage 211
Troubleshooting 212
Important
Food table for Airfry mode
Table for Airfry presets
| Forhåndsinnstilling | AnbefaltAPEngde Tid Temperatur Pâminnelseom risting |
| Frosnepommes frites | 1000 g 27 min 180 °C 2 ganger |
| Hjemmelagetpommes frites | 1000 g 29 min 180 °C 2 ganger |
| Koteletter 4 stykker (190 g per stykke) 17 min 200 °C 1 gang |
| Egg og frokost 3 skiver ristet brød, 4 egg 12 min | 160 °C /Legg tilbrødskiveneNR det hargatt 6 min |
| Muffins 9 kopper (rundt 30 g per kopp) 16 min 160 °C / |
| Kyllingklubber 10 stykker (125 g per stykke) 28 min 180 °C 2 ganger |
| Blandede grønnsaker | 1000 g (Airfry-modus)12 min 180 °C 2 ganger |
| 600 g (Steam fry- ogdampmodus) |
| Hel fisk 2 fisk (300-400 g per fisk) | 13 min 200 °C 1 gang |
| Tabell for forhåndsinnstillinger for Steam fryForhåndsinnstilling | Tid Temperatur Pâminnelseom risting |
| Kyllingklubber 10 stykker (125 g per stykke) 35 min 180 °C 2 ganger |
| Blomkål | 600 g19 min 160 °C 2 ganger |
| Hel fisk 2 fisk (300-400 g per fisk) 18 min 200 °C 1 gang |
| Dumplings 370 g 16 min 160 °C / |
| Tabell for forhåndsinnstillinger for damp
Forhåndsinnsti- Vekt Tid Temperatur
Iling |
| Kyllingklubber 10 stykker (125 g per stykke) 33 min 100 °C |
| Brokkoli 600 g 13 min 100 °C |
| Hel fisk 2 fisk (300-400 g per fisk) 19 min 100 °C |
| Dumplings 370 g 13 min 100 °C |
Cleaning
Routine cleaning
www.home.id/warranty.
Automatic switch-off
This appliance is equipped with an automatic switch-off function. If you do not press a button within 20 minutes, the appliance will switch off automatically. To switch the appliance on again, press the on/off button.
Recycling
This symbol indicates that electrical products should not be disposed of with regular household waste. Follow your local regulations regarding separate collection of electrical products.
Warranty and support
Versuni provides a two-year warranty for this product from the date of purchase. The warranty is not valid if defects are caused by incorrect use or lack of maintenance. This warranty does not affect your legal rights as a consumer. For more information or to invoke the warranty, visit our website at www.home.id/warranty.
Eco-design information
Eco-design information for model identifier(s): NA540, NA541, NA543, NA547
Description Symbol Value Unit
Steam button
Press to start steam generation with the iron held upright for vertical steaming or for creases in hanging clothes.

Steam button
Press to prepare the food for even heating.

Increase/Decrease buttons
Place the food in the basket, set the temperature and time on the display.

Temperature button
Air frying mode
1. Put the ingredients in the basket.
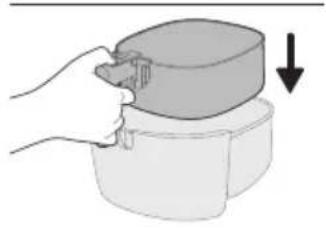
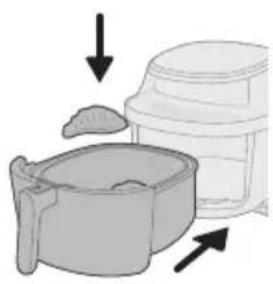
2. Add the ingredients to the basket and place the basket back into the appliance.
Note: The Airfryer is suitable for cooking a wide variety of products. For best results, see the "Food Table" for recommended quantities and cooking times.
Note: Avoid exceeding the recommended quantities when filling the basket up to the "MAX" line, as this may affect the cooking results.
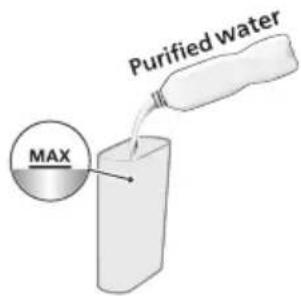
3. Fill the water reservoir with water up to the MAX level.
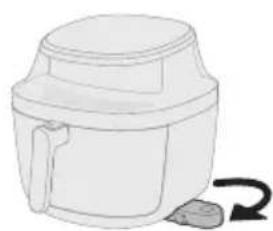
4. Remove the base of the water reservoir from the bottom of the appliance.
8. Remove and clean the basket and the basket handle.
Caution: Be careful of the hot steam and the hot basket when working with the hot basket.
Note: If there is residue left in the basket and the basket handle, clean them with soapy water and a sponge, then rinse them off.
9. Place the basket and the basket handle back into the appliance.
10. Press the start/pause button to begin the cooking process.
11. After 5 minutes, a sound signal indicates that the drying is complete.
If the appliance will not be used for a long time, we recommend that you use the "Descaling" function to clean the water circulation system and the heating chamber thoroughly.
Descaling
After every 20 hours of operation in normal mode, the appliance automatically displays a reminder for descaling - this means it is time to start the descaling program. The descaling program removes limescale from the water system of the Airfryer, which helps to extend its operational life.
1 Pour 60 ml of Philips CA6700 descaling agent (sold separately) into the water reservoir.
2 Fill the water reservoir with fresh water up to the MAX level.
3 Mix the water and descaling agent evenly in the water reservoir.
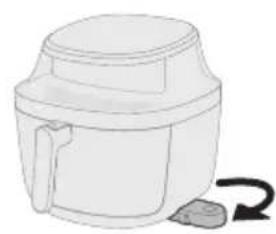
4 Remove the base of the water reservoir from the bottom side of the appliance.
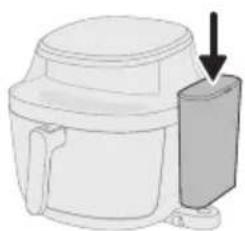
Preparation before use 956
Using the appliance 956
Air frying mode 957 Frying with steam mode 960 Frying mode 963 Cooking with pre-set programs 966
Cleaning 969
Routine cleaning 969 Cleaning with steam 971 Removing odors 973
Storage 977
Troubleshooting 977
Important
Please read the important information before using the appliance and keep it for future reference.
Danger
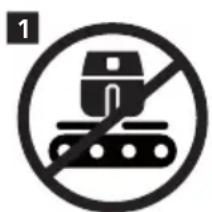
- Do not place the appliance near open flames, such as electric or gas burners, or in a heated oven (Fig. 1).
- Never immerse the appliance in water or rinse it under running water. To prevent electric shock, make sure that water or other liquids do not enter the appliance.
- Always store the appliance in a dry place to prevent the heating elements from coming into contact with moisture.
- Do not cover the air inlet and outlet openings of the appliance.
- Do not fill the appliance with oil, as this may cause a fire.
- Do not use the appliance if the plug, power cord, or the appliance itself is damaged.
- Never touch the interior of the appliance while it is operating.
- Never fill the food basket beyond the maximum level indicated in the pan.
- Always check that the heating element is clean and that there is no food residue on it.
- Be careful when removing the hot pan from the appliance: the heating element and metal parts are hot.
Preheating
For proper use, the power cord must be replaced by Philips, its service center, or another qualified person to avoid danger. Connect the appliance only to a grounded wall outlet, protected by a ground fault circuit interrupter. - Always make sure the plug is correctly inserted into the socket. - This appliance is not intended for use with an external timer or a separate remote control system. - Ensure that nothing is covering the appliance while it is in operation (see fig. 2). - This appliance can be used by children aged 8 years and above and by persons with reduced physical, sensory, or mental capabilities or lack of experience and knowledge, provided they have been given supervision or instruction concerning safe use of the appliance and understand the hazards involved. - Children must not play with the appliance. - Cleaning and user maintenance shall not be performed by children unless they are older than 8 years and supervised. - Do not place the appliance on a wall or on another appliance. Leave at least 15 cm of free space on the back, both sides, and above the appliance. Do not place anything on top of the appliance. During use, hot steam is released from the air outlet. Keep your hands and face at a safe distance from the steam and the air outlet. Also, be careful of the hot steam and air when removing the jug from the appliance. - Never use chemical additives or paper towels in the appliance. - Compressor disposal: The temperature must be appropriate for the type of compressor, and it must be at least 6°C to minimize the risk of exposure to acrylamide in cooked food.
Do not use the Airfryer appliance for purposes other than those described in this manual. Do not use other electrical appliances on the same electrical circuit at the same time (e.g., water boilers, electric skillets, and irons). If the circuit is overloaded, the fuse in the household electrical installation may blow and the appliance may be activated. To avoid this, do not use other appliances on the same circuit. - When using the Airfryer appliance, be careful when opening, closing, or touching the large and small parts. Always handle them carefully to prevent burns or injuries that could be caused by hot steam. - The appliance is intended for use at ambient temperatures between 5°C and 40°C. - Before plugging in the appliance, check that the voltage indicated on the appliance matches the voltage of the local electrical network. Keep the power cord away from hot surfaces. - Use the appliance only for its intended purpose as described in this manual to avoid potential damage. Use only original Philips accessories. Do not leave the appliance running unattended. - The pans, baskets, and accessories become hot during and after use of the appliance. Always handle them with care. - Before first use of the appliance, thoroughly clean the parts that come into contact with food. Follow the instructions in the manual. Do not place the pans and baskets on a table with a flammable surface, as they may cause damage. When cooking food with oil, be careful when removing the pan to prevent burns from the hot oil. - Do not block the steam outlet on the appliance.
Attention
- This appliance is intended for standard household use only. It is not intended for use in environments such as staff kitchens in shops, offices, farms, or other work environments. It is also not intended for use by guests in hotels, motels, bed and breakfasts, or other types of accommodation.
- Always unplug the appliance from the power supply if you leave it unattended, and also before assembly, disassembly, storage, or cleaning.
- Place the appliance on a horizontal, flat, and stable surface. If the appliance is used incorrectly, for professional or semi-professional purposes, or not in accordance with the instructions in the user manual, the warranty will be void and Philips will not accept any liability for damage. If the appliance needs to be checked or repaired, always contact the Philips service center in your area. Do not attempt to repair the appliance yourself, as this will void the warranty.
- Always unplug the appliance from the outlet after use.
- Let the appliance cool down completely for 30 minutes before handling or cleaning it. Be careful that the contents of this appliance are hot, not cold or lukewarm.
- Remove the fried leftovers. Do not use fresh potatoes with a temperature above 180°C (to reduce the formation of acrylamide to a minimum).
- Always check that the food is fully cooked in the Airfryer appliance.
- Always make sure you have control over your Airfryer. When cooking fatty food, the Airfryer may emit smoke.
- Do not touch the hot surfaces of the appliance while it is operating or while you are moving or placing the food.
- When the indicator light for removing the basket turns on, continue with the removal of the basket. Be careful when removing the cooked food and be careful not to spill it.
- Place the appliance so that the rear side is at least 15 cm away from the wall, and the front side is 2 cm away from the work surface. Also, make sure the air outlet is not blocked by the plug. Do not place the Airfryer near other heating appliances, kettles, or irons, as the hot air may damage them and cause them to melt on the surfaces.
- During use, the appliance must have good ventilation around it.
- If food accumulates around the air outlet, remove it with a soft, dry cloth.
- If there is condensed water on the plug, we recommend adjusting the position of the appliance or using the cord winder to avoid accumulation of condensation on the plug.
- This appliance is equipped with a short power cord to reduce the risk of tripping or tangling that may occur with a longer cord.
- An extension cord may be used if you are careful during use. When using an extension cord:
- The marked electrical rating of the extension cord must be at least as great as the electrical rating of the appliance.
- The cable must be positioned so that it cannot be pulled out of the appliance or stepped on.
- The cable must be plugged into a grounded outlet.
- This appliance has a polarized plug (one contact is wider than the other). To reduce the risk of electric shock, this plug is intended to fit into a polarized outlet only one way. If the plug does not fit fully into the outlet, reverse the plug. If it still does not fit, contact a qualified electrician. Do not attempt to modify the plug in any way.
To avoid damage to the appliance, do not use abrasive cleaning agents. Instead, clean with a soft cloth and mild detergent. - To avoid damage to the appliance, do not use hard water. Instead, use distilled water for steaming, ironing, and stain removal. - Do not direct the steam outlet of the Airfryer at the ventilation openings or air conditioners. - Use only Philips stain remover. Never use stain removers based on sulfuric acid, hydrochloric acid, sulfuric acid, or oxalic acid (Oet) as they may damage the water system of the machine and may not remove stains properly. If you do not use the Philips stain remover, your warranty will be void. If you do not remove stains from the appliance, your warranty will be void. - The surface of the heating element is hot after use.
Electromagnetic fields (EMF)
This appliance complies with the relevant standards and regulations regarding exposure to electromagnetic fields.
Automatic shut-off
This appliance has an automatic shut-off function. If you do not press any buttons within 20 minutes, the appliance will automatically turn off. To turn off the appliance manually, press the on/off button.
Recycling
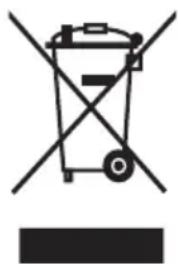
- This symbol indicates that electrical products should not be disposed of with normal household waste.
- Please follow the regulations in your country for the separate collection of electrical products.
Warranty and support
You get a two-year warranty after purchasing this product. This warranty is not valid if the defect is caused by incorrect use or poor maintenance. This warranty does not limit your legal rights as a consumer. For more information or
For the warranty, please visit our website at www.home.id/warranty.
Indicator light for no water
Lights up when there is not enough water in the reservoir.

Defrosting indicator
Lights up when the defrosting functions are used for 20 hours.
Using the appliance
This appliance has a frying function with three cooking modes, designed for a wide range of cooking needs.
The air frying mode allows for crispy results with minimal oil, perfect for snacks and healthy meals. - The grilling mode combines hot air and grilling to retain moisture while achieving a nice appearance - ideal for delicate foods like poultry and fish. The grilling mode uses the same heat for even cooking, preserving nutrients and texture, making it perfect for vegetables and seafood.
Air frying mode
1 Place the basket in the pan.
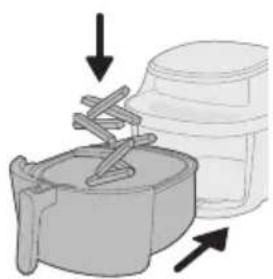
2 Put the ingredients in the basket and slide the pan into the appliance.
Note: The Airfryer can cook a large number of ingredients. For best results, refer to the "Food Table" for recommended quantities and cooking times.
Note: Do not overfill the basket beyond the "MAX" line, as this may affect the cooking performance.
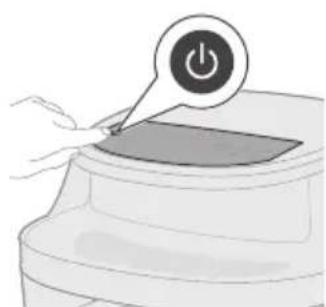
Press the on/off button to turn on the appliance.
4 Press the air frying button to enter the air frying mode.
5 Turn the temperature knob, then use the knob to select the desired cooking temperature.
6 Turn the time knob, then use the knob to select the desired cooking time.
Note: Before selecting the temperature and time for cooking, you can also select from the preset programs for practicality and optimal results.
7 Press the start/pause button to start the cooking process.
Note: Some foods need to be turned or flipped halfway through the cooking time (see, food table). To do this:
Carefully remove the pan. - Turn the food over with a heat-resistant spatula. Put the pan back into the appliance to continue cooking.
Note: To pause the cooking process, press the start/pause button. To continue cooking, press it again.
Note: The appliance will automatically pause when the pan is removed. Cooking will automatically continue when you put the pan back into the appliance.
8 When the cooking is finished, the timer will sound. Carefully remove the pan.
Caution: During the cooking process, the housing, pan, interior, and food become hot. Always place the pan and the housing on a heat-resistant surface (e.g., a trivet or heat-resistant mat) when removing them from the appliance. Depending on the type of food, steam may escape from the pan.
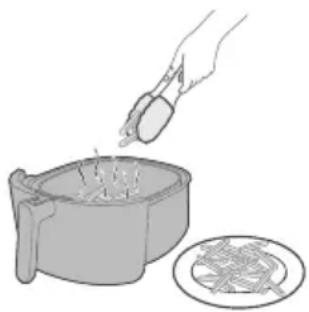
9 Remove the cooked food from the pan.
Note: Excess oil or fat from the food will collect at the bottom of the pan.
Note: Based on the type of food being cooked, you may want to add some oil or fat between different batches or before cooking the contents. To do this safely, place the pan on a heat-resistant surface and wear protective gloves. Carefully add the oil or fat.
Food table for air frying with time and temperature
The following table provides basic settings for cooking different types of food.
- The supply voltage must not change to avoid damage. Due to differences in the voltage, size, shape, and brand of the food, optimal results cannot be guaranteed for all foods. When cooking larger quantities of food (e.g., meat, cakes, casseroles, frozen snacks), stir them, turn them over, and process them 2-3 times during cooking to achieve the desired texture and degree of doneness.
Steam cooking
| Замрзати п的对象ы
pondички | 800 g 200 °C 15 min.iprotraceTe,празвтeteunni
измeesajte 1-2 ratni pri
rotbeheTo |
| Хамбуpresр
(приблжно 150 g/5 oz) | 6 пескавицn 200 °C 16-25
MHN. Празвтeteunni
измeesajte 1-2 ratni pri
rotbeheTo |
| Ралат od meco 1400 g 150 °C 65-70 |
| MHN. |
| Месни котлети бez
КOSTа
(приблжно 190 g/7 oz) | 4 котлети 200 °C 16-25
MHN. Празвтeteunni
измeesajte 1-2 ratni pri
rotbeheTo |
| Пиileшkin гади
(приблжно 160 g/6 oz) | 5 парочьa 180 °C 20-28
MHN. Празвтeteunni
измeesajte 1-2 ratni pri
rotbeheTo |
| ЦILA кокошka
(1200 g/42 oz) | 1 паре 180 °C 50-60
MHN. Празвтeteunni
измeesajte 1 ratni pri rotbeheTo |
Steam cooking mode
1. Place the food in the basket.
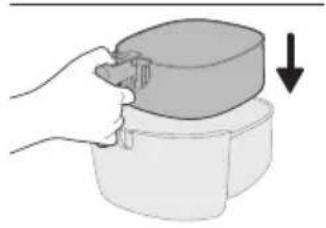
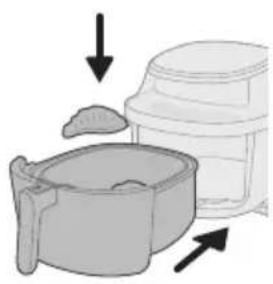
2. Add the ingredients to the basket and put the basket back into the appliance.
Note: The Airfryer appliance can cook a large number of ingredients. For best results, refer to the "Food Table" for recommended quantities and cooking times.
Note: Do not overfill the basket or fill it above the "MAX" line, as this may affect the cooking performance.
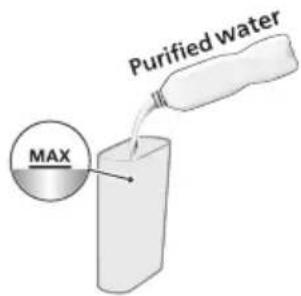
3. Fill the water reservoir with water up to the MAX mark for the water level.
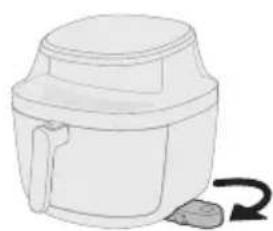
4. Pull out the base of the water reservoir from the side of the appliance.
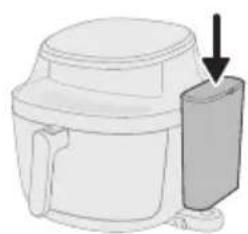
5. Attach the cap to the water reservoir and place the water reservoir onto the base.
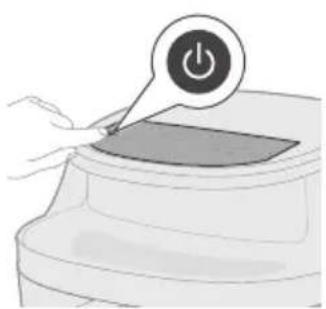
6. Press the on/off button to turn on the appliance.
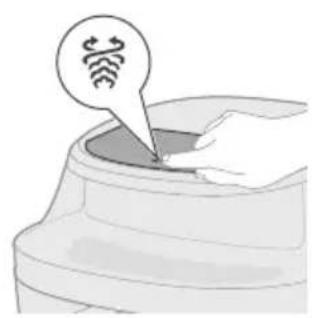
7. Press the steam cooking button to enter steam cooking mode.
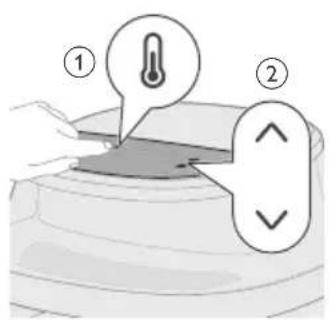
8. Press the temperature button, then use the increase/decrease buttons to select the desired cooking temperature.
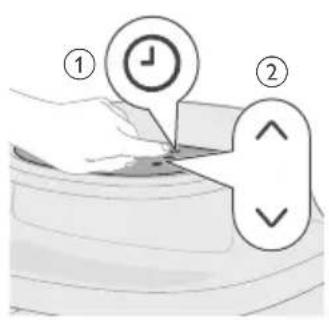
9. Press the time button, then use the increase/decrease buttons to select the desired cooking time.
Depending on the room temperature and the drying time, you can select a preset program for practical and optimal results.
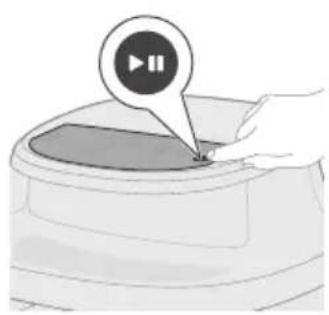
Place the food in the basket and the basket in the appliance.
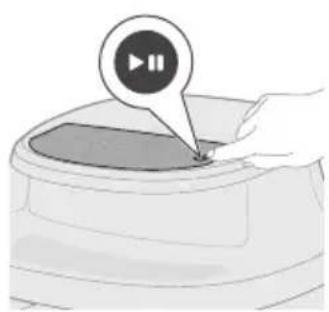
Press the start/pause button to start the drying process.
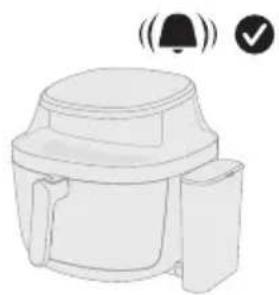
After 5 minutes, a sound signal will indicate that the drying is complete.
Tip: If the appliance has not been used for a long time, we recommend using the "Clean with steam" function to thoroughly clean the water circuit and the cooking chamber.
Descaling
After every 20 hours of use of the steam function, the appliance will automatically remind you to descale. This means it is time to run the descaling program. The descaling program removes limescale from the water system of the Airfryer, allowing it to continue working efficiently.
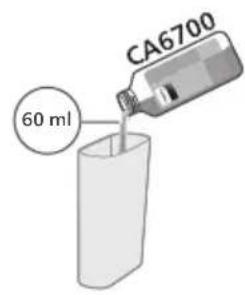
Pour about 60 ml of Philips descaling solution CA6700 (sold separately) into the water reservoir.
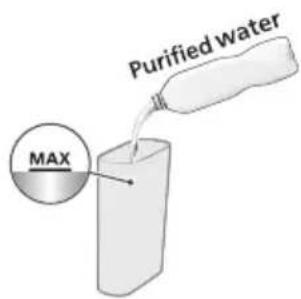
Fill the water reservoir with fresh water up to the MAX mark.
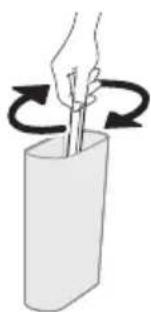
Swirl the water and descaling solution evenly in the water reservoir.
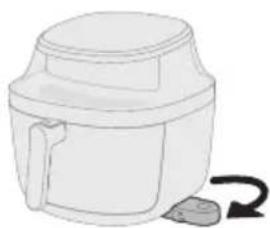
Remove the base of the water reservoir from the back of the appliance.
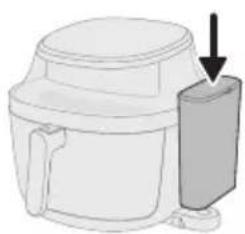
Attach the lid to the water reservoir and place the water reservoir back onto the base.
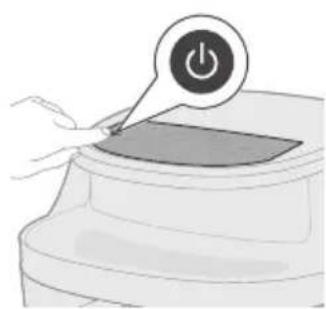
Press the on/off button to turn on the appliance.
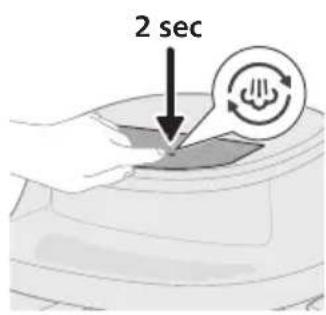
Press and hold the "Clean with steam" button for 2 seconds.
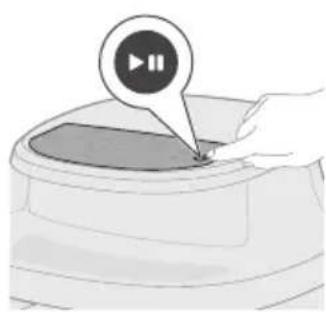
Press the start/pause button to start the descaling process.
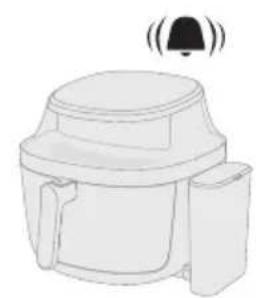
9 Press the button to start the descaling cycle. The appliance will emit sounds to indicate that the tank is being emptied.
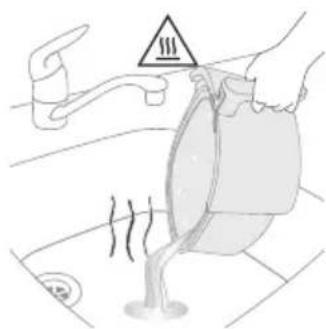
10 Empty the tank and rinse it with clean water.
Warning: Always wear protective gloves when handling the hot tank.
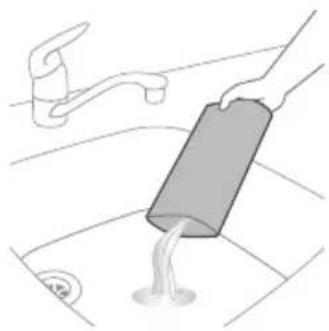
11 Empty the remaining water from the water tank.
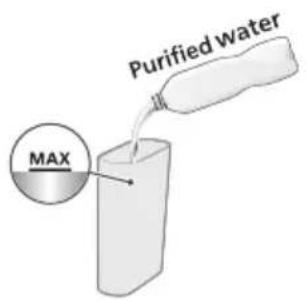
12 Fill the tank with fresh water.
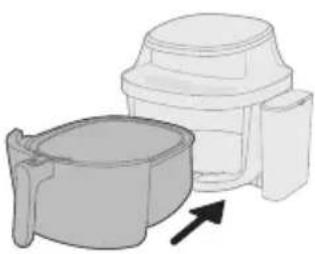
13 Put the lid and the tank back into the appliance.
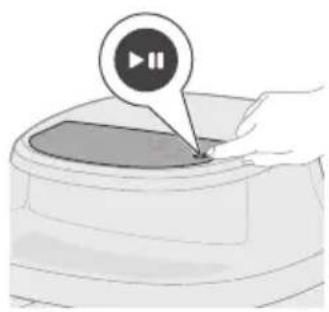
14 Press the start/stop button to begin the descaling process.
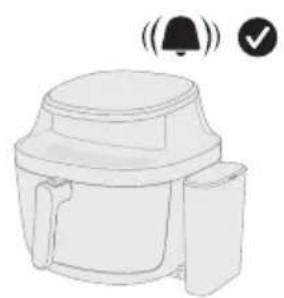
15 The descaling process ends when the sounds are heard again from the appliance.
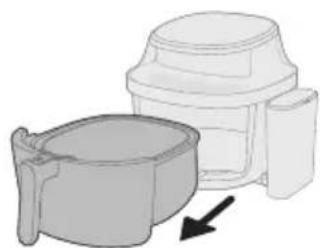
16 Remove the lid and the tank.
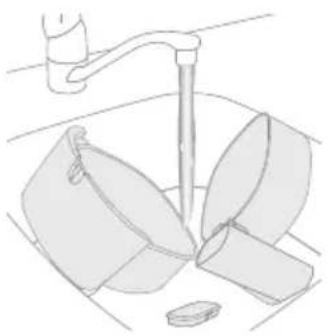
17 Rinse the lid, the tank, and the water tank under running water.
Important: Never use descaling agents based on sulfuric acid, hydrochloric acid, sulfamic acid, or acetic acid (vinegar) as they may damage the water system of the appliance and may not remove the limescale completely.
Note: If you use hard water, you may need to descale more frequently.
Storage
1 Unplug the appliance and let it cool down. 2 Check that all parts are clean and dry before storing them. Note
Always hold the Airfryer horizontally and support it from the bottom side to prevent accidental tipping and potential burns. - Always check that the parts of the Airfryer are properly attached before carrying or storing it.
Possible problems
In this chapter, common problems that can be solved by the user are described. If you cannot solve the problem with the information given below, visit the website www.home.id/support to find a list of common questions or contact the customer support center in your country.
Preparation for use 994
Using the device 995
Air fryer mode 995 "Air fryer + steam" mode 998 "Steam oven" mode 1001 Preparing with accessories 1004
Cleaning 1008
Cleaning procedure 1008 Cleaning the steam generator 1009 Descaling 1012
Storage 1015
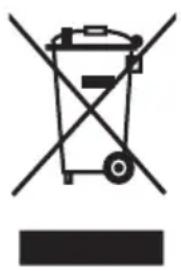
- This symbol indicates that electrical products must not be disposed of with household waste.
- Dispose of electrical and electronic products separately, in accordance with the regulations in your country.
Warranty and support
Versuni offers a two-year warranty on this product after purchase. The warranty is not valid if the defect arises from incorrect use or improper care. This warranty does not affect your consumer rights under applicable law. To obtain additional information or make a warranty claim, visit our website www.home.id/warranty.
Regulatory information
Environmental information for the following models: NA540, NA541, NA543, NA547
On/Off button
Cooking programs button
Press to select cooking programs for even and gentle cooking.

Increase/decrease buttons
Press to change temperature and cooking time.

Temperature selection button
Press to open temperature setting mode.

Khonka HactpoynBpeMeHH
HaKmTe, Yo6bl OTkpblbpeXIM HacTpoKn BpeMeHn.
PpeyctaHOBLeHHbI npoRpaMMbl
3amopoxeHHbI KapToΦeJIb ΦpI

IcnoJb3yIte 3Ty npedyctaHOBky IJn npuROTOBJeHn 3amopoxeHHoro KapToΦeJI φ pu, KapToΦeJI aJdxO nJn xa6payHa Do 30JOTnCToKOpouKn.

CbeKn KapToeJIb
IcnoJb3yIte 3Ty npeducTaHOBky IpynprTOBHeHnKapToΦeJI φpni nn aui daxo n3 cbexero KapToΦeJI.

OT6nBhIe
Use this preset to prepare a glass of the selected roast with a crispy crust.

Breakfast
Use this preset for quick preparation of a balanced breakfast with toast and jam.

Muffins
Use this preset for perfect baking of flour muffins.

Chicken legs
Use this preset for preparing chicken legs with a crispy crust.

Vegetables
Use this preset for even roasting of vegetables with a minimum of oil.

Fish
Use this preset for gentle preparation of fish fillet while preserving moisture and delicate texture.

Dumplings
Use this preset for even cooking of dumplings with a perfect texture of the filling.
Additional functions

Temperature maintenance
You can turn off the temperature hold mode at any time — before and during cooking — by pressing the temperature hold button.
When the temperature hold function is active, the appliance will automatically switch to keep warm mode once cooking is complete.

Reminder to stir
This model has a stir reminder. For optimal results, stir or flip the ingredients immediately after the alert sounds.
Press the stir reminder button to enable or disable the alert. If enabled, you will hear an audible signal, and the button will flash, reminding you to stir or flip the food during cooking for a more even result.

Light
Turning the light in the cooking chamber on or off.

Steam cleaning

Favorite
Your appliance has a function to save favorites for quick access to key settings.
- Set the cooking time and temperature.
- Press and hold the Favorite button until you hear an audible signal - this means the setting has been saved. To change the favorite parameters, repeat the above actions, setting new settings.
Dispel.
Water level indicator
It ignites when the water level is insufficient.

Cleaning indicator
It ignites when the frying function has been used for a total of 20 hours.
8 After cooking is complete, a timer signal will sound. Carefully remove the baking tray.
Warning! After cooking, the basket, baking tray, internal components of the housing, and ingredients will be hot. Always place the basket and baking tray on a heat-resistant surface (e.g., a stand or a silicone mat) after removing them from the appliance. Depending on the loaded ingredients, hot steam may be emitted from the baking tray.
9 Remove the cooked food from the basket.