DNHC4500 - Controller Denon DJ - Free user manual and instructions
Find the device manual for free DNHC4500 Denon DJ in PDF.
| Product Type | DJ Controller |
| Brand | Denon DJ |
| Model | DN-HC4500 |
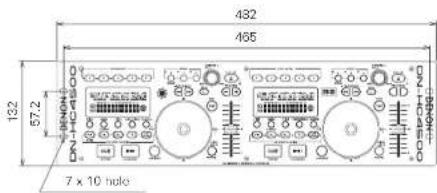
| Dimensions (W × H × D) | 482 × 132 × 88 mm (max 106 mm depth) |
| Weight | 3.7 kg |
| Power Supply | AC 100-235 V, 50/60 Hz, consumption 12 W (US/Europe models), 10 W (Japan) |
| Operating Temperature | 0 °C to 40 °C |
| Analog Audio Output | 2 × RCA unbalanced, 2 Vrms (0 dBFS) |
| Digital-to-Analog Converter | 24-bit, oversampling, supports 44.1/48/96 kHz |
| Frequency Response | 20 Hz – 22 kHz, ±0.5 dB |
| Harmonic Distortion | Less than 0.05% |
| USB Interface | USB 2.0 High Speed |
| Jog Wheel | 71 mm, touch-sensitive, resolution 1480/740/555/370 pulses/cycle |
| Display | VFD 40 × 100 mm, 2 lines × 12 characters + scratch marker |
| Loop Functions | Seamless Loop, Hot Start, Stutter |
| Pitch Control | 60 mm slider, adjustable ranges (Pitch Bend, Key Adjust) |
| Fader Start | Yes, compatible with Denon mixers (3.5 mm jack) |
| X-Control | Yes, with DN-X500/DN-X900 mixers (3.5 mm mini-jack cable) |
| Firmware Update | Via USB using dedicated software (PC/Mac) |
| Included Accessories | RCA audio cable, USB cable, user manual, CD-ROM (ASIO drivers/update software) |
| Maintenance and Cleaning | Unplug the device, clean with a dry cloth. Do not use solvents or abrasive products. |
| Safety | Isolated internal power supply, surge protection. Do not expose to water or moisture. |
| Spare Parts and Repairability | Contact Denon DJ after-sales service. Do not disassemble the device yourself. |
Frequently Asked Questions - DNHC4500 Denon DJ
User questions about DNHC4500 Denon DJ
0 question about this device. Answer the ones you know or ask your own.
Ask a new question about this device
Download the instructions for your Controller in PDF format for free! Find your manual DNHC4500 - Denon DJ and take your electronic device back in hand. On this page are published all the documents necessary for the use of your device. DNHC4500 by Denon DJ.
USER MANUAL DNHC4500 Denon DJ
The lightning flash with arrowhead symbol, within an equilateral triangle, is intended to alert the user to the presence of uninsulated "dangerous voltage" within the product's enclosure that may be of sufficient magnitude to constitute a risk of electric shock to persons.

The exclamation point within an equilateral triangle is intended to alert the user to the presence of important operating and maintenance (servicing) instructions in the literature accompanying the appliance.
IMPORTANT TO SAFETY
WARNING:
To reduce the risk of fire and electric shock, this apparatus should not be exposed to rain or moisture and objects filled with liquids, such as vases, should not be placed on this apparatus.
CAUTION:
- Handle the power supply cord carefully
Do not damage or deform the power supply cord. If it is damaged or deformed, it may cause electric shock or malfunction when used. When removing from wall outlet, be sure to remove by holding the plug attachment and not by pulling the cord.
- Do not open the rear cover
In order to prevent electric shock, do not open the top cover. If problems occur, contact your DENON DEALER.
- Do not place anything inside
Do not place metal objects or spill liquid inside the system. Electric shock or malfunction may result.
Please, record and retain the Model name and serial number of your set shown on the rating label.
Model No. DN-HC4500 Serial No.
CAUTION:
USE OF CONTROLS OR ADJUSTMENTS OR PERFORMANCE OF PROCEDURES OTHER THAN THOSE SPECIFIED HEREIN MAY RESULT IN HAZARDOUS RADIATION EXPOSURE. THIS PRODUCT SHOULD NOT BE ADJUSTED OR REPAIRED BY ANYONE EXCEPT PROPERLY QUALIFIED SERVICE PERSONNEL.
This device consists with Part 15 of the FCC Rules. Operation is subject to the following two conditions: (1) This device may not cause harmful interference, and (2) this device must accept any interference received, including interference that may cause undesired operation.
This Class B digital apparatus meets all requirements of the Canadian Interference-Causing Equipment Regulations.
IMPORTANT SAFETY INSTRUCTIONS
READ BEFORE OPERATING EQUIPMENT
This product was designed and manufactured to meet strict quality and safety standards. There are, however, some installation and operation precautions which you should be particularly aware of.
-
Read these instructions.
-
Keep these instructions.
-
Head all warnings.
-
Follow all instructions.
-
Do not use this apparatus near water.
-
Clean only with dry cloth.
-
Do not block any ventilation openings. Install in accordance with the manufacture's instructions.
-
Do not install near any heat sources such as radiators, heat registers, stoves, or other apparatus (including amplifiers) that produce heat.
-
Do not defeat the safety purpose of the polarized or grounding-type plug. A polarized plug has two blades with one wider than the other. A grounding type plug has two blades and a third grounding prong. The wide blade or the third prong are provided for your safety. If the provided plug does not fit into your outlet, consult an electrician for replacement of the obsolete outlet.
-
Protect the power cord from being walked on or pinched particularly at plugs, convenience receptacles, and the point where they exit from the apparatus.
-
Only use attachments/accessories specified by the manufacturer
-
Use only with the cart, stand, tripod, bracket, or table specified by the manufacturer, or sold with the apparatus. When a cart is used, use caution when moving the cart/apperatus combination to avoid injury from tip over.

-
Unplug this apparatus during lightning storms or when unused for long periods of time.
-
Refer all servicing to qualified service personnel. Servicing is required when the apparatus has been damaged in any way, such as power-supply cord or plug is damaged, liquid has been spilled or objects have fallen into the apparatus, the apparatus has been exposed to rain or moisture, does not operate normally, or has been dropped.
Additional Safety Information!
- Marked terminals are HAZARDOUS LIVE and that the external wiring connected to those terminal requires installation by an instructed person or the use of ready-made leads or cords.
NOTE ON USE / HINWEISE ZUM GEBRAUCH / OBSERVATIONS RELATIVES A L'UTILISATION / NOTE SULL'USO / NOTAS SOBRE EL USO / ALVORENS TE GEBRUIKEN / OBSERVERA

- Avoid high temperatures.
Allow for sufficient heat dispersion when installed in a rack.
• Handle the power cord carefully.
Hold the plug when unplugging the cord.
- Keep the apparatus free from moisture, water, and dust.
• Do not let foreign objects in the set.
- Do not let insecticides, benzene, and thimer come in contact with the sat.
- Never disassemble or modify the apparatus in any way.
- The ventilation should not be impeded by covering the ventilation openings with items, such as newspapers, tablecloths, curtains, etc.
- No naked flame sources, such as lighted candles, should be placed on the apparatus.
- Attention should be drawn to the environmental aspects of battery disposal.
- Do not expose the set to dripping or splashing fluids.
- No objects filled with liquids, such as vases, shall be placed on the apparatus.
ACHTUNG:
• DECLARATION OF CONFORMITY
We declare under our sole responsibility that this product, to which this declaration relates, is in conformity with the following standards:
EN60065, EN55013, EN55020, EN61000-3-2 and EN61000-3-3. Following the provisions of 73/23/EEC, 2004/108/EC and 93/68/EEC Directive.
A NOTE ABOUT RECYCLING:
This product's packaging materials are recyclable and can be reused. Please dispose of any materials in accordance with the local recycling regulations.
When discarding the unit, comply with local rules or regulations.
Batteries should never be thrown away or incinerated but disposed of in accordance with the local regulations concerning chemical waste.
This product and the accessories packed together constitute the applicable product according to the WEEE directive except betenes.
HINWEIS ZUM RECYCLING:
To completely disconnect this product from the mains, disconnect the plug from the wall socket outlet.
The mains plug is used to completely interrupt the power supply to the unit and must be within easy access by the user.
VORSICHT:
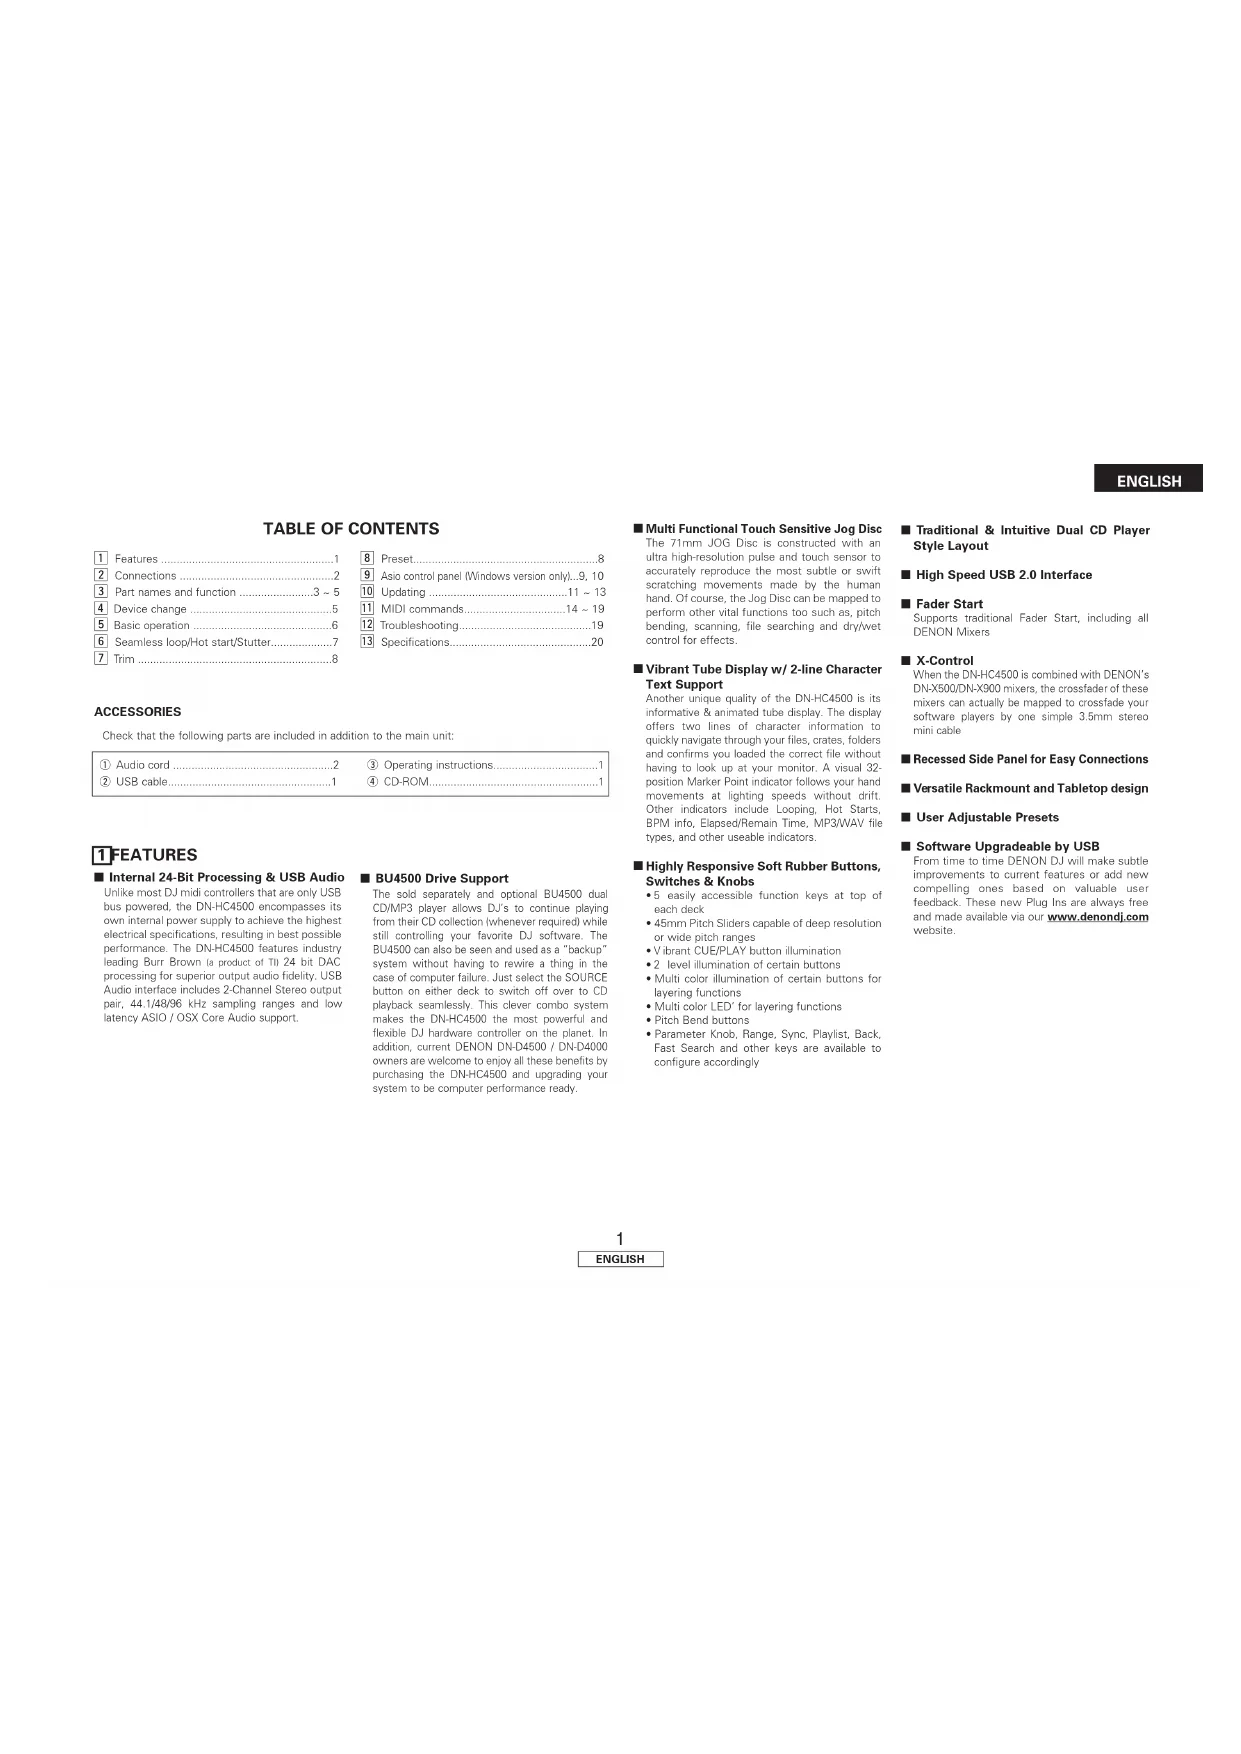
| 1 | Features......1 |
| 2 | Connections......2 |
| 3 | Part names and function......3 ~ 5 |
| 4 | Device change......5 |
| 5 | Basic operation......6 |
| 6 | Seamless loop/Hot start/Stutter......7 |
| 7 | Trim......8 |
| 8 | Preset......8 |
| 9 | Asio control panel (Windows version only)......9, 10 |
| 10 | Updating......11 ~ 13 |
| 11 | MIDI commands......14 ~ 19 |
| 12 | Troubleshooting......19 |
| 13 | Specifications......20 |
ACCESSORIES
Check that the following parts are included in addition to the main unit:
| 1 | Audio cord | 2 |
| 2 | USB cable | 1 |
| 3 Operating instructions....1 |
| 4 CD-ROM....1 |
1 FEATURES
■ Internal 24-Bit Processing & USB Audio Unlike most DJ midi controllers that are only USB bus powered, the DN-HC4500 encompasses its own internal power supply to achieve the highest electrical specifications, resulting in best possible performance. The DN-HC4500 features industry leading Burr Brown (a product of TI) 24 bit DAC processing for superior output audio fidelity. USB Audio interface includes 2 Channel Stereo output pair, 44.1/48/96 kHz sampling ranges and low latency ASIO / OSX Core Audio support.
■ BU4500 Drive Support
The sold separately and optional BU4500 dual CD/MP3 player allows DJ's to continue playing from their CD collection (whenever required) while still controlling your favorite DJ software. The BU4500 can also be seen and used as a "backup" system without having to rewire a thing in the case of computer failure. Just select the SOURCE button on other deck to switch off over to CD playback seamlessly. This clever combo system makes the DN-HC4500 the most powerful and flexible DJ hardware controller on the planet. In addition, current DENON DN-D4500 / DN-D4000 owners are welcome to enjoy all these benefits by purchasing the DN-HC4500 and upgrading your system to be computer performance ready.
■ Multi Functional Touch Sensitive Jog Disc The 71mm JOG Disc is constructed with an ultra high-resolution pulse and touch sensor to accurately reproduce the most subtle or swift scratching movements made by the human hand. Of course, the Jog Disc can be mapped to perform other vital functions too such as, pitch bending, scanning, file searching and dry/wet control for effects.
■ Vibrant Tube Display w/ 2-line Character Text Support
Another unique quality of the DN-HC4500 is its informative & animated tube display. The display offers two lines of character information to quickly navigate through your files, crates, folders and confirms you loaded the correct file without having to look up at your monitor. A visual 32-position Marker Point Indicator follows your hand movements at lighting speeds without drift. Other indicators include Looping, Hot Starts, BPM info, Elapsed/Remain Time, MP3/WAV file types, and other useable indicators.
■ Highly Responsive Soft Rubber Buttons, Switches & Knobs
- 5 easily accessible function keys at top of each deck
- 45mm Pitch Sliders capable of deep resolution or wide pitch ranges
- Vibrant CUE/PLAY button illumination
- 2 level illumination of certain buttons
- Multi color illumination of certain buttons for layering functions
- Multi color LED' for layering functions
- Pitch Bend buttons
- Parameter Knob, Range, Sync, Playlist, Back, Fast Search and other keys are available to configure accordingly
■ Traditional & Intuitive Dual CD Player Style Layout
■ High Speed USB 2.0 Interface
Fader Start
Supports traditional Fader Start, including all DENON Mixers
X-Control
When the DN-HC4500 is combined with DENON's DN-X500/DN-X900 mixers, the crossfader of these mixers can actually be mapped to crossfade your software players by one simple 3.5mm stereo mini cable
■ Recessed Side Panel for Easy Connections
■ Versatile Rackmount and Tabletop design
■ User Adjustable Presets
■ Software Upgradeable by USB
From time to time DENON DJ will make subtle improvements to current features or add new compelling ones based on valuable user feedback. These new Plug Ins are always free and made available via our www.denondj.com website.
ENGLISH
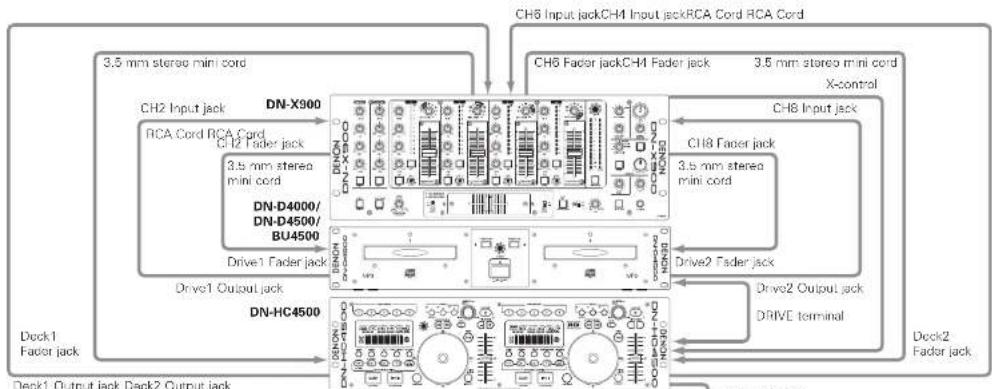
2 CONNECTIONS
CONNECTIONS
- Turn off the POWER switch.
- Connect the RCA pin cords to the inputs on your mixer.
COUTION:
- Be sure to use the supplied control cord. Using another type of cable may result in damage.
- Be sure the power is off when connecting the control cord. Otherwise the units may not work properly.
flowchart
graph TD
    A["CH6 Input jack"] --> B["CH6 Fader jack"]
    B --> C["CH8 Input jack"]
    C --> D["Ch8 Fader jack"]
    D --> E["Drive2 Output jack"]
    E --> F["Drive2 Fader jack"]
    F --> G["Drive1 Output jack"]
    G --> H["DC1 Fader jack"]
    H --> I["DC2 Fader jack"]
    I --> J["DC3 Fader jack"]
    J --> K["DC4 Fader jack"]
    K --> L["DC5 Fader jack"]
    L --> M["DC6 Fader jack"]
    M --> N["DC7 Fader jack"]
    N --> O["DC8 Fader jack"]
    O --> P["DC9 Fader jack"]
    P --> Q["DC10 Fader jack"]
    Q --> R["DC11 Fader jack"]
    R --> S["DC12 Fader jack"]
    S --> T["DC13 Fader jack"]
    T --> U["DC14 Fader jack"]
    U --> V["DC15 Fader jack"]
    V --> W["DC16 Fader jack"]
    W --> X["DC17 Fader jack"]
    X --> Y["DC18 Fader jack"]
    Y --> Z["DC19 Fader jack"]
    Z --> AA["DC20 Fader jack"]
Deck1 Output jack Deck2 Output jack
DENON PC/MAC Upgrade Application and ASIO Driver Application included.

Computer OS versions that can be connected to the DN-HC4500: Windows XP SP2 Mac OSX 10.4 or later
Computers with other operating systems are not compatible with USB MIDI, so the computer may operate erratically after connected to the DN-1C4500 by USB.
Connection to a PC
- The DN-HC4500 is a plug-and-play device. This means that when the DN-HC4500 is first connected to your computer, the driver is installed automatically.
• To connect the DN-HC4500 and a PC via a usable USB port, use the included USB cable. - When connected, the display below appears at the bottom right of the PC's screen.

Found New Hardware
USB audio device

Once installation is completed, the message "Your new hardware is installed and ready to use." is displayed, as shown below.

Found New Hardware
Your new hardware is installed and ready to use.

Installation is now complete. The DN-HC4500 is now usable.
Connection to a Macintosh computer
- The DN-HC4500 is plug-and-play device based on the Macintosh OS, and is immediately ready for use when connected.
• To connect the DN-HC4500 and Macintosh computer via a usable USB port, use the included USB cable.
Some features will not work for DN-D4000.
3PART NAMES AND FUNCTION
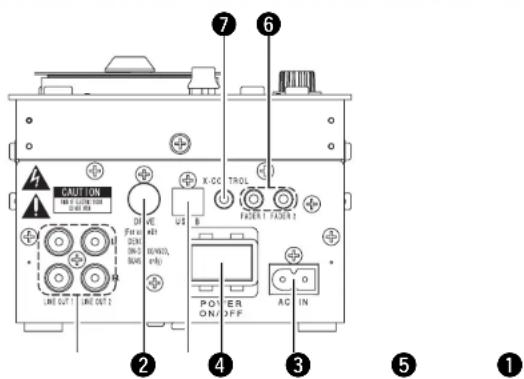
(1) Side Panel
text_image
CAUTION FOR IN ON/OFF LINE OUT 1 LINE OUT 2 K-CC TROL FOR IN ON/OFF LINE OUT 3 POWER AC IN AC IN ① ② ③ ④ ⑥ ⑦① Analog out put terminal (LINE OUT)
- This is unbalanced RCA output terminals. - Audio signals outputs.
② DRIVE terminal
- Connect the DN-D4000/D4500/BU4500 drive unit. For instructions on operating the DN-D4000/D4500/BU4500, refer to the respective model's operating instructions.
③ USB B terminal
- Connect to a computer. - Sends the USB MIDI and HID commands from the DN-HC4500. - Sends the USB audio signals from a PC.
4 POWER button
- Push this button to turn power on and off.
⑤ AC Inlet terminal
- Inlet the power cord's plug into DN-HC4500's AC inlet terminal.
⑥ Fader start terminals
- Use this when your mixer has the Fader Start function.
⑦ X-CONROL output terminal
- Use this when connected to a DENON DN-X900 or DN-X500 mixer that offers X-Control. - With the DN-HC4500 it is possible to convert the input fader position into a MIDI signal and send it from the USB terminal.
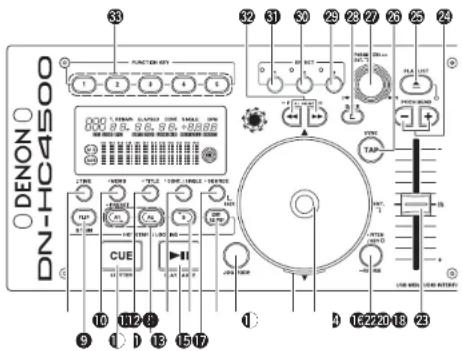
(2) Front panel
text_image
000-1000 DENON FUNCTION KEY 1 2 3 4 5 6 7 8 9 10 11 12 13 14 15 16 17 18 19 20 21 22 23 CUE TAP TAP TAP TAP TAP TAP TAP TAP TAP TAP TAP TAP TAP TAP TAP TAP TAP TAP TAP TAP TAP TAP TAP TAP TAP TAP TAP TAP TAP TAP TAP TAP TAP TAPCAUTION:
Note that there are many buttons working two different function selected by short time pushing or long pushing (1second or more). The “● mark indicates short time push function and ” — mark indicates long time push function.
8 • TIME, -Total
[When PCDJ connected]
Refer to the PCDJ's manual.
[When DN-D4500 connected]
• TIME
When this button is pressed, the time indicator switches between "ELAPSED" (elapsed time), "REMAIN" (remaining time).
• Total:
When this button is pushed for more 1 second, you can display the total time.
⑨ FLIP/B TRIM
[When PCDJ connected]
Refer to the PCDJ's manual.
[When DN-D4500 connected]
- Push this button to switch between the loop mode/not start mode and stutter mode.
- After setting the B point, the B TRIM MODE can be selected.
⑩ • MEMO, - PRESET
[When PCDJ connected]
Refer to the PCDJ's manual.
[When DN-D4500 connected]
• MEMO:
The MEMO mode starts when this button is pushed once in the Cue/Pause mode.
- PRESET:
When this button is pushed for more than 1 sec, the PRESET mode menu is displayed.
⑪ CUE/STUTTER
[When PCDJ connected],
[When DN-D4500 connected]
- Pushing this button in play mode will force the file back to the position which playback started.
- In Cue mode, by pushing the CUE button makes a Stutter sound from the Cue point. This is called Stutter play. (Stutter)
ENGLISH
ENGLISH
⑫ TITLE
[When PCDJ connected]
Refer to the PCDJ's manual.
[When DN-D4500 connected]
- CD TEXT:
CD text is displayed.
• MP3:
The ID3 tag information switches each time the button is pressed.
⑬ A1, A2
[When PCDJ connected],
[When DN-D4500 connected]
- Using this button you can create starting point for Hot Start, Seamless Loop and Stutter.
14 CONT./SINGLE, RELAY
[When PCDJ connected]
Refer to the PCDJ's manual.
[When DN-D4500 connected]
• CONT./SINGLE:
A short tap of this button will toggle between 3 possible END modes for playback CONT. (continue: plays all files) SINGLE (stops playing and ReCUE's back to your original set point), PLAYLOCK.
• RELAY:
When this button is pushed for more than 1 sec, you can turn on and off RELAY PLAY mode.
15 PLAY/PAUSE
[When PCDJ connected],
[When DN-D4500 connected]
• This button will start or pause playback.
16 B
[When PCDJ connected],
[When DN-D4500 connected]
- Use this to set the B point for to create a Seamless Loop after the A point has been set.
⑰ SOURCE
[When PCDJ connected]
Refer to the PCDJ's manual.
(When DN-D4500 connected)
- Press this button to select the source, PC or CD.
18 EXIT/RELOOP
[When PCDJ connected],
[When DN-D4500 connected]
- Use this to exit or return back again to Seamless loop playback. You can add variety to looping with this function.
⑲ JOG MODE
[When PCDJ connected]
Refer to the PCDJ's manual.
[When DN-D4500 connected]
Select from Bend mode or Manual Frame Search mode.
20 JOG indicator
[When PCDJ connected]
Refer to the PCDJ's manual.
[When DN-D4500 connected]
- This vibrant blue bar provides JOG modes at a glance such as, Pitch Bend and Frame Search.
②1 JOG disc
[When PCDJ connected]
Refer to the PCDJ's manual.
[When DN-D4500 connected]
- Use this vinyl JOG for manual search, Pitch Bend operations.
22 RITCH/KEY, RANGE
[When PCDJ connected]
Refer to the PCDJ's manual.
[When DN-D4500 connected]
- PITCH/KEY:
The display toggles as follows each time the key is pressed: Pitch on → Key Adjust → both off
• RANGE
Push this button for more than 1 sec to select the pitch range.
23 Pitch Slider
[When PCDJ connected],
[When DN-D4500 connected]
- Use this slider to adjust playing speed
- The playing speed decreases when sliding upwards and increases downwards.
24 PITCH BEND±
[When PCDJ connected],
[When DN-D4500 connected]
- While pushing these buttons will change main playing speed temporarily.
- When release button, playing speed returns to the previous speed.
25 PLAY LIST
[When PCDJ connected]
Refer to the PCDJ's manual.
[When DN-D4500 connected]
- Push this butoon to open and close the disc holder.
- The disc holder will not open during playback. Stop playback before pushing this button.
26 TAP
[When PCDJ connected]
Refer to the PCDJ's manual.
[When DN-D4500 connected]
- Does not function.
27 PARAMETERS Knob
[When PCDJ connected],
[When DN-D4500 connected]
- Turn:
Select the Track/File or preset parameters.
- Press:
Set the selected parameters.
28 BACK
[When PCDJ connected]
Refer to the PCDJ's manual.
[When DN-D4500 connected]
- Does not function.
29 EFFECT3
[When PCDJ connected]
Refer to the PCDJ's manual.
[When DN-D4500 connected]
- Does not function.
30 EFFECT2
[When PCDJ connected]
Refer to the PCDJ's manual.
[When DN-D4500 connected]
- Does not function.
31 EFFECT1
[When PCDJ connected]
Refer to the PCDJ's manual.
[When DN-D4500 connected]
- Turns the Brake mode ON or OFF.
32 FAST SEARCH (◄◄/►►) QUICK JUMP
[When PCDJ connected].
[When DN-D4500 connected]
- QUICK JUMP:
When one of these buttons is tapped shortly, the playback position jumps in the reverse (◀◀) or forward (▶▶) direction.
- FAST SEARCH:
When one of these buttons is pressed and held in, the disc is fast-searched in the reverse (◀◀) or forward (▶▶) direction.
33 FUNCTION
[When PCDJ connected]
Refer to the PCDJ's manual.
[When DN-D4500 connected]
- Does not function.
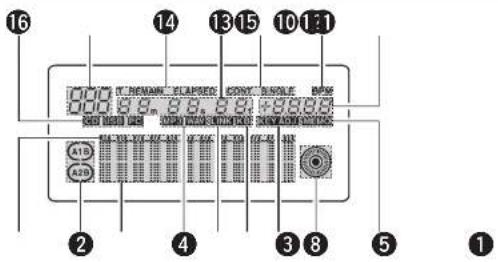
(3) Display
text_image
16 14 13 15 10 1:1 000.89, 8.8, 8.8, +8888 A1B A2B 2 4 3 8 5 1① Play Position indicators
- The white position indicator lights during normal playback, and the position in the track is indicated by the elapsed time.
- If the time to the end of the track is shorter than the specified time, the playback position indicator flashes according to the track's remaining time (EOM) to indicate the end of the track.
② Loop mode indicators
- The DN-HC4500 has two loop mode indicators, A and B.
The A and B indicators light when A and B are set.
③ Character display
- This block displays various operational information, text message, etc.
4 File data indicators
• These indicate the type of file being played.
⑤ External device connection confirmation indicator
- This lights when MIDI signals have been sent or received between the DN-HC4500 and an external device.
⑥ Keyboard indicator
- This lights when the light command is received from a computer.
⑦ KEY ADJ. indicator
- "KEY ADJ." lights when in the key adjust mode.
⑧ Visual Marker
- The playback position is indicated according to the playback status of the different decks.
9 MEMO Indicator
- The "MEMO" indicator lights when there is memo data stored for the track that is currently playing or set to standby.
⑩ Pitch indicator
• This indicates the playing speed (pitch).
⑪ BPM indicator
- This lights when the BPM is displayed in the pitch display section.
⑫ Play mode indicators
• These indicate the play mode.
CONT.:
Once playback of a track finishes, the next track is played.
SINGLE:
Playback stops once the end of that track is reached.
⑬ Minute, second and frame displays
- This indicates the position currently playing or at which the standby mode is set.
⑭ Time mode indicators
- The display switches as follows when the Time button is pressed:
ELAPSED:
The elapsed playing time from the beginning of the track is displayed.
REMAIN:
The track's remaining time is displayed.
T.ELAPSED:
The playing time from the first track on the disc is displayed.
T.REMAIN:
The remaining time of all the tracks on the disc is displayed.
7
⑮ Track indicator
- This indicates the number of the currently playing track.
16 Connection indicators
• These indicate the connected devices controlled by the DN-HC4500.
PC:
The DN-HC4500 is controlling the DJ software on a PC/MAC.
CD:
The DN-HC4500 is controlling a DN-D4000/D4500/BU4500.
*Playback of the USB audio signals from a P6 continues while in the CD mode.
0
9
4 DEVICE CHANGE
Press the SOURCE button
to display the "SOURCE"
selection screen
• SOURCE
©
[Non-Text]
-
Note:
1 • When the BACK button is pressed, source switching is completed and the mode returns to the normal model.

text_image
Turn the PARAMETERS knob to select the device. Press the knob again to enter. "OK to CHANGE" is displayed. Note: • The mode switches to "NO" when the PARAMETERS knob is turned while "OK to CHANGE?" is displayed. • When in the "NO" mode, press the PARAMETERS knob or BACK button to return to step 1.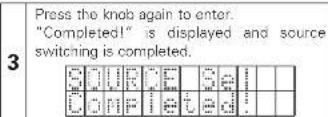
text_image
Press the knob again to enter. "Completed" is displayed and source switching is completed.ENGLISH
5 BASIC OPERATION
This section describes the basic operations when connected to a DN-D4000/D4500/BU4500.
PLAY and PAUSE
• Each push of the PLAY/PAUSE button switches between playback and pause. PLAY/PAUSE button illuminates solid green during playback and flashes in pause
- When the PLAY/PAUSE button is pushed during play, the DN-D4500 pauses playback at that point. Push PLAY/PAUSE button once again and playback resumes.
PLAY and Cue
- When the CUE button is pushed during playback, the track/file stops and returns to the original position of which playback started from, the (Cue point). This function is also called Back-Cue. With the Back-Cue function, you can start from exactly same position. The CUE button illuminates solid red when DN-D4000/D4500/BU4500 is ready to start playback.
- You can set and change Cue point as follows.
- When you started playback.
- File select finished.
- Manual search.


Adjusting the pitch
With Pitch slider you can adjust the playback speed (Pitch).
| 1 | Push the PITCH button to light the PITCH LED.  |
| 2 | |
| 3 | The DN-D4000/D4500/BU4500 has several pitch ranges.When the RANGE button is pushed for more than 1 sec, the pitch range can be selected with the PARAMETERS knob.When the PARAMETERS knob is pushed the pitch range is entered and the pitch range selection mode is cancelled.  |
Pitch Bend
With PITCH BEND function you can change pitch temporary. DN-D4000/D4500/BU4500 has two ways for this function PITCH BEND buttons and JOG disc.
| 1 | [PITCH BEND +/- buttons]Push the PITCH BENDbutton for momentarychange of pitch.While holding thesebuttons down, the pitchcontinues to change up to the limitation.After releasing the PITCH BEND buttons,playback pitch returns to slider setting. |
| 2 | [JOG disc]The playback speed canbe changed by turningJOG disc duringplayback. |
Power on play
When the DN-D4000/D4500/BU4500's "Power On Play" presetting is set to "ON", playback starts from the beginning of the disc when the power is turned on.
Relay playback
For instructions on relay playback, refer to the manual of the DN-D4000/D4500/BU4500.
Select the File
• Turn the PARAMETERS knob.

6SEAMLESS LOOP/HOT START/STUTTER
Seamless Loop/Hot Start/Stutter (A1,A2 buttons)
Operation display (refer to the section describing the display)

| 1 | Setting the A point(loading the Hot Start data)1 Push the A1 or A2button to set the Apoint and Hot Start dateloading starts.A1 and A2 buttons can be usedseparately for each Hot Start.When an A point is set, the correspondingA button and "Cdisplay light and thatbutton is set to the Hot Start mode. |  |
| 2 | Starts Hot Start2 When A1 or A2 buttonis pushed, Hot Start playback starts fromthe corresponding Apoint. |  |
Setting the B point for Seamless Loop
③ When the B button is pushed after setting
the A point or after
starting Hot start
playback, the B point is
set and Seamless Loop playback starts from the A point.
- The B button works with respect to the A point operated before the B button was pushed.
- If the B button is pushed during Seamless Loop playback or after EXIT playback, the B point moves to the point at which the button was pushed.
- When the B point is set, the B and "→" displays light.

| 4 | Playing Seamless LoopsWhen the B point for A1 is detected after playback started from A1 point, playback returns to A1 point with seamless. While A1 to B looping, B point for A2 ignored.When the B point for A2 is detected after playback started from A2 point, playback returns to A2 point with seamless. While A2 to B looping, B point for A1 ignored. |
| 5 | Exit/ReloopIn Seamless Loop playback, you can force exit from or return to  EXIT:While the Seamless Loop playback, push the EXIT/RELOOP button to exit from loop. DN-D4000/D4500/BU4500 continues playback after the B point.RELOOP:When the EXIT/RELOOP button is pushed after exit the loop, Seamless Loop playback resumes from the A point. EXIT:While the Seamless Loop playback, push the EXIT/RELOOP button to exit from loop. DN-D4000/D4500/BU4500 continues playback after the B point.RELOOP:When the EXIT/RELOOP button is pushed after exit the loop, Seamless Loop playback resumes from the A point. |
Playing Seamless Loops
Exit/Reloop
EXIT:
RELOOP:
| 6 | StutterA1 and A2 points can be also used for Stutter playback.Toenable stutter playback, push FLIP button for A1/A2 buttons, then "C" display turns off.Press the FLIP button to switch between the Hot Start/Seamless Loop and Stutter modes. |
| 7 | Clear the A1/A2 pointWhile pressing the FLIP button, push the A1 or A2 button to clear the corresponding A and B points.Or push the FLIP button for more than 1 sec to clear both A1 and A2 points at once. Quickly pressing the "FLIP" button first and then A1, A2 or B buttons will clear these points individually. |
ENGLISH
7TRIM
For instructions on the trim function, refer to the manual of the DN-D4000/D4500/BU4500.
NOTE:
If the setting made at the "CD Mode Sel" presetting does not correspond to what is actually connected, the unit may not operate properly.
8PRESET
- This function is only valid when the "PC" source is selected.
(When the DN-D4000/D4500/BU4500 is connected, the corresponding preset operation is performed.)
- The DN-HC4500 is equipped with a preset function allowing users to store and recall the devices' operation modes. The function includes the items and values described below.
1. Preset mode
① Press and hold in the PRESET button for at least 1 second to enter the preset mode.
② Use the PARAMETERS knob to select the preset item.
③ Select the item and press the PARAMETERS knob to set the preset item to be changed
④ Next, turn the PARAMETERS knob. The preset data is selected
⑤ Select the data and press the PARAMETERS knob to set the preset data to be changed.
⑥ To make multiple presettings, repeat steps ② - ⑤
⑦ The preset mode is turned off when the PRESET button is pressed.
2. Preset items and data
The “*” mark next to the data indicates the default value.
(1) USB Mode Sel: HC4500 MIDI*
Selects the USB communications mode.
The DN-HC4500 uses unique MIDI specifications.
(2) CD Model Sel: DN-D4500* / DN-D4000
Select the name of the model to be connected to the DRIVE terminal and controlled.
The BU4500 is the same as the DN-D4500's drive, so the PRESET setting is "DN-D4500".
(3) Audio Fs Sel: 44.1k* / 48k / 96k / Auto
44.1 kHz: The sampling frequency (Fs) is fixed at 44.1 kHz, regardless of the data sent from the PC.
48 kHz: The sampling frequency (Fs) is fixed at 48 kHz, regardless of the data sent from the PC.
96 kHz: The sampling frequency (Fs) is fixed at 96 kHz, regardless of the data sent from the PC.
AUTO: The sampling frequency (Fs) switches automatically according to the data sent from the
PC.
① Toset "Fs", press PARAMETERS
"OK to CHANGE?↓" is displayed on the character display.
② Push the PARAMETERS knob again
③ After the sampling frequency is changed, "Audio Fs Sel" is displayed.
(4) Unit No. Set: 1 to 15 / ALL*
Sets the device's unit number.
For example, when two devices are connected to a PC, set one device to "No. 2" or the like.
(5) MIDI CH Set: 1&2* / 3&4 / 5&6
Sets the MIDI channel.
(6) JOG Pulse Sel: 1480* / 740 / 555 / 370 count/cycle
Selects the number of pulses output per one revolution of the jog wheel.
(7) FaderIn Mode: 1-PLAY/CUE / 2-PLAY / CUE
(8) X-CONT XFD: OFF / ON*
Sets whether to enable or disable X-control input signal cross fader input.
(9) Preset Init.: Set all the preset data back to the factory defaults.
① To clear the PRESET data, push the PARAMETERS knob.
"Preset Init" flashes on the character display.
② Push the PARAMETERS knob again.
"Push to Exe↓" is displayed on the character display.
③ Push the PARAMETERS knob again.
"OK to CHANGE?↓" is displayed on the character display.
④ Once clearing is completed, "Completed!" is displayed.
9ASIO CONTROL PANEL (Windows version only)
Installing the ASIO driver
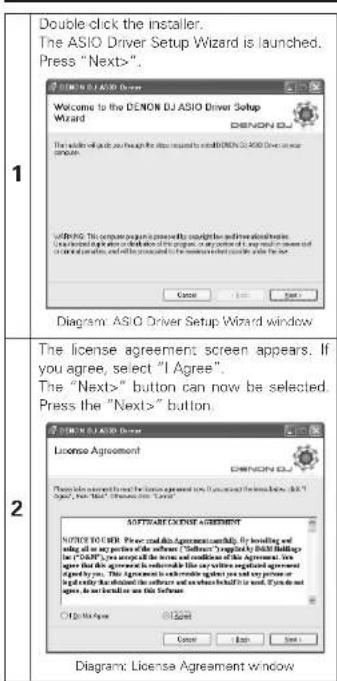
text_image
Double-click the installer. The ASIO Driver Setup Wizard is launched. Press "Nextlö". 1 Welcome to the DENON DJ ASIO Driver Setup Wizard DENON DJ The driver will call you through the driver request to install DENON DJ ASIO Driver Setup Wizard. Writing: This computer program is presented by copyright and otherwise announced. I can be installed in order to think about the drivers, or any portion of it may result in a version of the driver's software, or will be processed by the software which could be used in the user. Cancel Next Next 2 The license agreement screen appears. If you agree, select "I Agree". The "Nextlö" button can now be selected. Press the "Nextlö" button. 1 DENON DJ ASIO Driver License Agreement DENON DJ Please note that this agreement will be issued to the license agreement with the license above. See "I Agree" (see "Nextlö" in this document) in Table 1. SOFTWARE LICENSE AGREEMENT NOTICE ORDER: Please click this Agreement normally. By issuing and selling all or any portions of the software ("Software"). Complicate BYDIN Buildings for "DINION". You accept the license and conditions of the Agreement, then agree that this agreement is not suitable for any written signature agreement designed by you. This Agreement is not intended to use any person or if you really choose the following software and use when behind it or not. If you are agree, we can be found here this Software. Other than agree Cancel Next Next Diagram: License Agreement window3
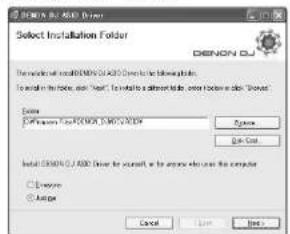
A screen for verifying the folder in which the ASIO driver is to be installed appears. Press the "Next>" button.
text_image
ENOCY DU Select Installation Folder ENOCY DU File path: C:\Program Files\ENOCY DU\ENOCY Name: ENOCY DU File Path: C:\Program Files\ENOCY DU\ENOCY Name: ENOCY DU File Path: C:\Program Files\ENOCY DU\ENOCY Name: ENOCY DU File Path: C:\Program Files\ENOCY DU\ENOCY Name: ENOCY DU File Path: C:\Program Files\ENOCY DU\ENOCY Name: ENOCY DU File Path: C:\Report Files\ENOCY DU\ENOCY Name: ENOCY DU File Path: C:\Report Files\ENOCY DU\ENOCY Name: ENOCY DU File Path: C:\Report Files\ENOCY DU\ENOCY Name: ENOCY DU File Path: C:\Report Files\ENOCY DU\ENOCY Name: ENOCY DU File Path: C:\Report Files\ENOUCU\ENOCY Name: ENOCY DU File Path: C:\Report Files\ENOCY DU\ENOCY Name: ENOCY DU File Path: C:\Report Files\ENOCY DU\ENOCY Name: ENOCY DU File Path: C:\Report Files\ENOCY DU\ENOCY Name: ENOCY DU File Path: C:\Report Files\ENOCY DU\ENOC Y Name: ENOCY DU File Path: C:\Report Files\ENOCY DU\ENOCY Name: ENOCY DU File Path: C:\Report Files\ENOCY DU\ENOCY Name: ENOCY DU File Path: C:\Report Files\ENOCY DU\ENOCY Name: ENOCY DU File Path: C:\Report Files\ENOCY DU\ENOCY Name: EPCN File Path: C:\Report Files\ENOCY DU\ENOCY Name: ENOCY DU File Path: C:\Report Files\ENOCY DU\ENOCY Name: ENOCY DU File Path: C:\Report Files\ENOCY DU\ENOCY Name: ENOCY DU File Path: C:\Report Files\ENOCY DU\ENOCY Name: ENOCY DU File Path: C:\Report Files\ENOCY DU\ENOCY Name: ENOCY DU File Path: C:\Report Files\ENOCY DU\ENOCY Name: ENOCY DU File Path: C:\Report Files\ENOCY DU\ENOCY Name: ENOCY DU File Path: C:\Report Files\ENOCY DU\ENOCY Name: ENOCY DU File Path: C:\Report Files\nENOCY DU\nENOCY DU\nENOCY DU\nENOCY DU\nENOCY DU\nENOCY DU\nENOCY DU\nENOCY DU\nENOCY DU\nENOCY DU\nENOCY DU\nENOCY DU\nENOCY DU\nENOCY DU\nENOCY DU\nENOCY DU\nENOCY DU\nENOCY DU\nENOCY DU\nENOCY DU\nENOCY CU\nENOCY CU\nENOCY CU\nENOCY CU\nENOCY CU\nENOCY CU\nENOCY CU\nENOCY CU\nENOCY CU\nENOCY CU\nENOCY CU\nENOCY CU\nENOCY CU\nENOCY CU\nENOCY CU\nENOCY CU\nENOCY CU\nENOCY CU\nENOCY CU\nENOCY CU\nENOCY UU\nENOCY UU\nENOCY UU\nENOCY UU\nENOCY UU\nENOCY UU\nENOCY UU\nENOCY UU\nENOCY UU\nENOCY UU\nENOCY UU\nENOCY UU\nENOCY UU\nENOCY UU\nENOCY UU\nENOCY UU\nENOCY UU\nENOC Y UU\nEnocy UU\nEnocy UU\nEnocy UU\nEnocy UU\nEnocy UU\nEnocy UU\nEnocy UU\nEnocy UU\nEnocy UU\nEnocy UU\nEnocy UU\nEnocy UU\nEnocy UU\nEnocy UU\nEnocy UU\nEnocy UU\nEnocy UU\nEPCNDiagram: Select Installation Folder window
By default, the ASIO driver is installed in "C\Program Files\DENON_DJ\DDJASIO". To change this, select "Browse", then choose the desired folder.
Choose "Everyone" if "everyone" uses the computer on which the update program is to be installed, "Just me" if you are the only user.
4
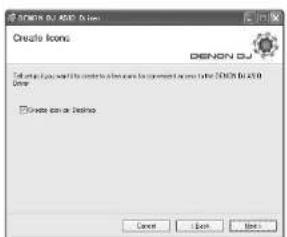
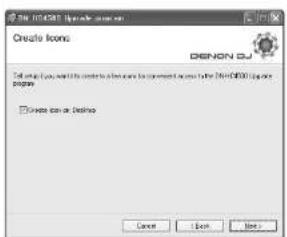
A window for verifying whether or not to create icons on the desktop appears. If you want to create the icons on the desktop, check the checkbox, then press the "Next>" button.
text_image
CREATE ICONS DENON DJ □ Create an icon or device Cancel OK Next HelpDiagram Create Icons window
5
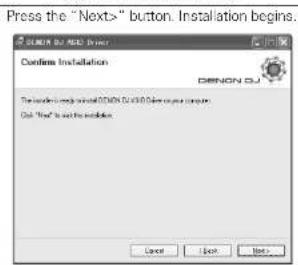
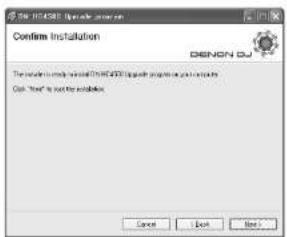
text_image
Press the "Next>" button. Installation begins. Confirm Installation DENON DJ The installation will install DENON DJ/30.00 Deven on your computer. One "Next" is set up the installation.Diagram: Confirm Installation window
ENGLISH
6
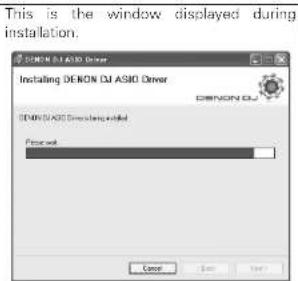
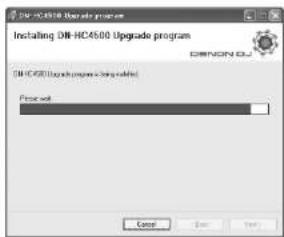
text_image
This is the window displayed during installation. DENON DJ ASIO Driver Installing DENON DJ ASIO Driver DENON DJ ASIO Driver installed Progress OK Cancel HelpDiagram: Installing window
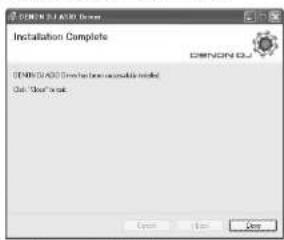
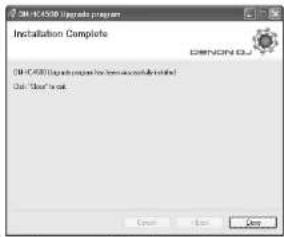
This window is displayed when installation is finished. Press the "Close" button.
7
text_image
ENONOL 6.0 Installation Complete ENONOL 6.0 OK CancelDiagram: Installation Complete window
Uninstalling
Uninstall at the "Add or Remove Programs" control panel.
ENGLISH
Starting Up
When the DENON DJ ASIO driver's "ASIO Control Panel" is called out from the host application, the DENON DJ ASIO driver displays the ASIO control panel.
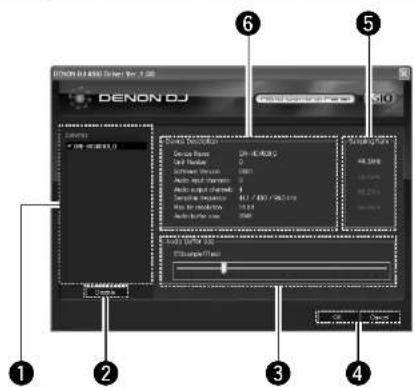
About the control panel screen
text_image
DENON DJ 1.0000000000000000000000000000000000000000000000000000000000000000000000000000000000000000000000000 1 2 3 4 5 6 7 8 9 10 11 12 13 14 15 16 17 18 19 20 21 22 23 24 25 26 27 28 29 30 31 32 33 34 35 36 37 38 39 40 41 42 43 44 45 46 47 48 49 50 51 52 53 54 55 56 57 58 59 60 61 62 63 64 65 66 67 68 69 70 71 72 73 74 75 76 77 78 79 80 81 82 83 84 85 86 87 88 89 90 91 92 93 94 95 96 97 98 99 1001 Device
This is the area in which the list of compatible DENON DJ devices is displayed automatically. (Example: DN-HC4500-1)
- Select the device to be set from the list to display the selected device's current settings on the right.
- If the device is double-clicked, the status of the ASIO device specifications device switches between enabled and disabled.
NOTE:
- Only one device can be selected.
- The device currently being used as the ASIO device is displayed in bold characters. (Multiple devices can be enabled simultaneously.)
② Enable/Disable
This button is for activating the device selected in the device display list as the ASIO device.
③ Audio Buffer Size
Use this slider to adjust the buffer size.
NOTE:
- The range of values is 88 to 2048 (sample units), in steps of 1 ms.
- When multiple devices are activated, the settings of all the active devices are shared.
④ OK/Cancel
OK:
Use this button to close the ASIO control panel, reflecting the changes to the settings.
Cancel:
Use this button to close the ASIO control panel without reflecting the changes to the settings.
⑤ Sampling Rate
The sampling rate selection is displayed here. The frequencies with which the DENON DJ ASIO driver is compatible are as follows: • 44.1kHz/48kHz/96kHz
6 Device Description
This is the area in which information for the device selected in the device information list is displayed.
The following are displayed:
- Device name
- Unit number
- Software version
• Audio input channels
• Audio output channels - Sampling frequency
- Max bit resolution
- Audio buffer size
NOTE:
If the device's information cannot be acquired, "-" (hyphens) are displayed for all items.

UPDATING
Product are updated using the product version update software via our "www.denondj.com" website. Check www.denondj.com for latest updates.
Installing the update program (Windows version)
text_image
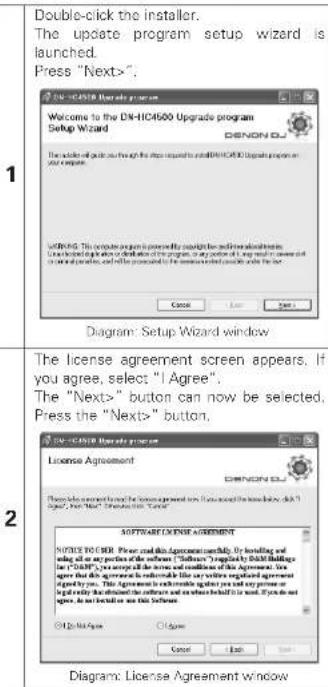
Double-click the installer. The update program setup wizard is launched. Press "Nextlö". Welcome to the DN-HC4500 Upgrade program Setup Wizard DENONO JO The installed software through the system returned to the DN-HC4500 Upgrade program on your computer. WARNING: This version is designed to ensure that the installation and installation will be used in the device or data of the program, so any portion of it may result in a new design or on its application, and will be provided to the software which provides the next. Create Save Edit Diagram: Setup Wizard window The license agreement screen appears. If you agree, select "I Agree". The "Nextlö" button can now be selected. Press the "Nextlö" button, License Agreement DENONO JO Please note that this agreement should be found in the name below click "Agree", then "Nextlö". Please note this "Nextlö" SOFTWARE LICENSE AGREEMENT NOTICE TO BEER. Power and this Agreement is normally, for handling and sale all an any portion of the software ("Software") regularly by BATT Buildings for ("BATT"), you accept all the terms and conditions of the Agreement. We agree that this agreement is normally called by your own registration agreement agree by you. The Agreement is normally against you and you present or legal entity that is distributed by the software and are when itself is in use. If you do not agree, do not be listed or see this Software. © 2016 Copyright © Agree Cancel Back Diagram: License Agreement window3
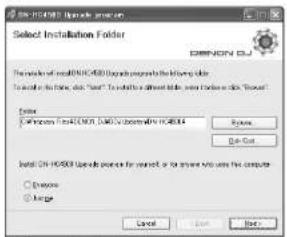
A screen for verifying the folder in which the update program is to be installed appears. Press the "Next>" button.
text_image
Select Installation Folder EMRONCY GU File Path: install HTML/4000 files to prepare the folder title. To install this folder, add "C:\Users\"). To install a different folder, save or restore it. "Browse" Options: Windows Not Install HTML/4000 to install HTML/4000 Browse Edit Out Install HTML/4000 type code format for insert, or if any text is used to compute Browse Merge Cancel Finish NextDiagram: Select Installation Folder window
By default, the update program is installed in "C\Program Files\DENON_DJ\DDJ\Updater\DN-HC4500".
To change this, select "Browse", then choose the desired folder.
Choose "Everyone" if "everyone" uses the computer on which the update program is to be installed, "Just me" if you are the only user.
4
A window for verifying whether or not to create icons on the desktop appears. If you want to create the icons on the desktop, check the checkbox, then press the "Next>" button.
text_image
File 10.04501 (File name: www.dsn.com) Create icons DENON BJ To start you want to create a new file in the following steps: □ Create can or terminate Cancel Next NextDiagram Create Icons window
5
Press the "Next>" button. Installation begins.
text_image
Confirm Installation DENON BJ The software will install DENON BJ package to install a new file. OK "Yes" to install a solution.Diagram: Confirm Installation window
ENGLISH
6
This is the window displayed during installation.
text_image
DR-HC4500 Upgrade program Installing DR-HC4500 Upgrade program OK Cancel OK DR-HC4500 Upgrade program is required to Prior work CancelDiagram: Installing window
This window is displayed when installation is finished. Press the "Close" button.
7
text_image
ON-ICAS08 Upgrade program Installation Complete OK OK OKDiagram: Installation Complete window
■ Uninstalling (Windows version only)
Uninstall at the "Add or Remove Programs" control panel.
Installing the update program (Macintosh version)
With installation of the Macintosh version of the update program, the program itself is copied onto the computer.
ENGLISH
Updating procedure
1
Connect the computer by USB cable.
Turn on the device's power in the update mode. Turning on the power in the update mode: Press the BACK and SOURCE buttons simultaneously on Deck1 or Deck2.
The following appears on the device's panel display:
an Deck1
The version information is displayed.
2
an Deck2
If the device is not yet connected, the following appears on the device's panel display:
an Deck2
Launch the DN-HC4500 update program. The screen shown below appears on the computer.
3 -1
text_image
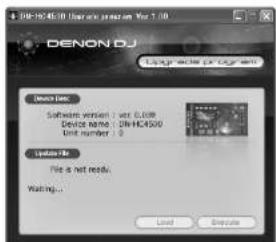
DENON DJ Upgrade program Device type: Software version 1: new 0.000 Device name: CNHCA400 Unit number: 3 Status file: File a net ready. Waiting... Load ExecuteCurrent version information The identified device name is displayed.
3 -2
If the device is not connected or not in the update mode at this time, the screen shown below is displayed.
If the update file has not been loaded, "File is not ready." is displayed.
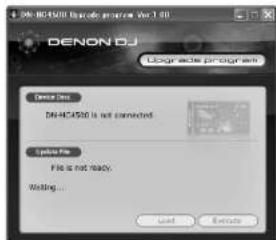
text_image
DENON DJ Upgrade program DN-4C4500 is not connected. Update File File is not ready. Waiting... Load NextUpdate file not loaded

text_image
DENON DJ Upgrade program Design Dev. DN-DE200 is not ready for version up. Download File File is not ready Waiting... Load Cancel4
Drag and drop the update file to the "DENON DJ Upgrade program" screen. The Load button can now be selected.

text_image
DENON DJ Upgrade program Design Test Software version: var 0.005 Device name: DW-RC4502 Unit number: 0 Upgrade file Adapter version: var 0.015 Load ExecuteThe Load button can be selected
Press the Load button to transfer the update file.
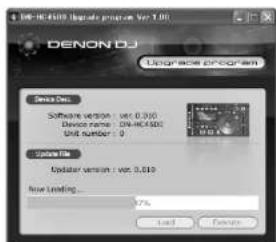
text_image
DENON DJ Upgrade program Design Data Software version: var 0.300 Device name: DENOC-650C Unit number: 0 Update File Updater version: var 0.310 Now Loading... 7% Load Device5-1

text_image
DENON DJ Upgrade program Design Dev Software of Windows 9.0.0 (Windows 9.0) Device Unit 4 Interface Local max configured Imported Imported Update New Loading... 100% Load Delete5 -2
The following is displayed on the device's panel: During file transfer:
on Deck1
Once file transfer is finished;
(Left side: Old version; Right side: New version) Once file transfer is finished, press the OK button. The Execute button is now enabled (can be pressed).
Press the Execute button to begin updating the version.
Once version updating is completed, "Version up was completed." is displayed.

text_image
DENON DJ Upgrade program Yes 1.0 Upgrade program Design Data: Software version: 1.00.010 Device name: DENOC4500 Unit number: 1.0 Update file Update version: 1.00.010 Executing... 8% Load Execute
text_image
DENON DJ Upgrade program Device Data Software Design Unit Installation Update No Description Version up was completed. OK Microsoft Teams Version up was completed. Load NextThe following is displayed on the device's panel during version updating:
On Deck1:
Once version updating is completed
If version updating has failed, "Version up was not completed." is displayed and the screen returns to as it was before the Execute button was pressed. Press the Execute button again.
Press the OK button to finish.
The following is displayed on the device's panel:
On Deck2:
7
| 10 | 10 | 10 | 10 | 10 | 10 | 10 | 10 | 10 | 10 |
| 10 | 10 | 10 | 10 | 10 | 10 | 10 | 10 | 10 | 10 |
| 10 | 10 | 10 | 10 | 10 | 10 | 10 | 10 | 10 | 10 |
Quit the updating program and turn off the DN-HC4500's power.
NOTE:
- Do not turn off the set's power or disconnect the cable connecting it to the computer during loading or version updating. Also, do not press any buttons on the set or any keys on the computer's keyboard.
- If an error message appears during loading or version updating, repeat from step 1.
Other error messages are as follows:
"File is invalid"
When the loaded update file was invalid.
"Load failed. Check the connection, and retry"
When a transfer error has occurred during transfer of the update file to the device.
"Loaded data is invalid. Check the file."
When a SUM check error has occurred after transfer of the update file to the device.
"Version up was not completed."
When version updating was not completed normally.
ENGLISH
11 MIDI COMMANDS
Data transmission
The panel operation data is transmitted by MIDI command, as per the table below.
■ Send command to PC
| items | MIDI command | Message type | |||
| Command | Number Value | ||||
| 1 | Playlist | SW ON : 0x9nSW OFF : 0x8n | 0x02 | SW ON : 0x40SW OFF : 0x00 | Note ON/OFF |
| 2 | JOG mode | ↑ | 0x04 | ↑ | ↑ |
| 3 | Pitch/KEY | ↑ | 0x05 | ↑ | ↑ |
| 4 | TAP | ↑ | 0x07 | ↑ | ↑ |
| 5 | Pitch Bend+ | ↑ | 0x08 | ↑ | ↑ |
| 6 | Pitch Bend- | ↑ | 0x09 | ↑ | ↑ |
| 7 | Fast search- | ↑ | 0x10 | ↑ | ↑ |
| 8 | Fast search- | ↑ | 0x11 | ↑ | ↑ |
| 9 | EFX1/ECHO/LOOP | ↑ | 0x12 | ↑ | ↑ |
| 10 | EFX2/LANCER | ↑ | 0x13 | ↑ | ↑ |
| 11 | EFX3/FILTER | ↑ | 0x14 | ↑ | ↑ |
| 12 | HOT1 | ↑ | 0x17 | ↑ | ↑ |
| 13 | HOT2 | ↑ | 0x18 | ↑ | ↑ |
| 14 | HOT3 | ↑ | 0x19 | ↑ | ↑ |
| 15 | IOT4 | ↑ | 0x20 | ↑ | ↑ |
| 16 | HOT5 | ↑ | 0x21 | ↑ | ↑ |
| 17 | TIME/TOTAL | ↑ | 0x23 | ↑ | ↑ |
| 18 | MEMO/PRESET | ↑ | 0x24 | ↑ | ↑ |
| 19 | TITLE | ↑ | 0x25 | ↑ | ↑ |
| 20 | CONT/SINGLE | ↑ | 0x26 | ↑ | ↑ |
| 21 | Parameters KNOB SW | ↑ | 0x28 | ↑ | ↑ |
| 22 | BACK | ↑ | 0x30 | ↑ | ↑ |
| 23 | SOURCE mode | ↑ | 0x31 | ↑ | ↑ |
| 24 | FLIP | ↑ | 0x36 | ↑ | ↑ |
| 25 | A1 | ↑ | 0x37 | ↑ | ↑ |
| 26 | A2 | ↑ | 0x38 | ↑ | ↑ |
| 27 | B | ↑ | 0x39 | ↑ | ↑ |
| 28 | EXIT/Reloop | ↑ | 0x40 | ↑ | ↑ |
| 29 | Cue | ↑ | 0x42 | ↑ | ↑ |
| 30 | Play | ↑ | 0x43 | ↑ | ↑ |
| 31 | JOG LIP | ↑ | 0x47 | ↑ | ↑ |
| 32 | JOG DOWN | ↑ | 0x48 | ↑ | ↑ |
| 33 | JOG LEFT | ↑ | 0x49 | ↑ | ↑ |
| 34 | JOG R/CUT | ↑ | 0x50 | ↑ | ↑ |
| 35 | Jogwheel touch | ↑ | 0x51 | ↑ | ↑ |
| items | MIDI command | Message type | |||
| Command | Number Value | ||||
| 36 | Preset Mode | SW ON : 0x9nSW OFF : 0x8n | 0x52 | SW ON : 0x40SW OFF : 0x00 | Note ON/OFF |
| 37 | D4500 Cont. mode | ↑ | 0x53 | ↑ | ↑ |
| 38 | Jogewheel (Ivudrev 0x8n 0x5) | Reverse 0x3F → 0x00Forward 0x41 ~ 0x7Tslow → fast* relative data | Control change | ||
| 39 | X-Control Iader | ↑ | 0x53 | 0x32 (min) → 0x7F (inad) | ↑ |
| 40 | Parameters KNOBIncrement/Decrement | ↑ | 0x54 | Increment : 0x00Decrement : 0x7F | ↑ |
| 41 | Pitch Slider 0xEn 0xlin (LSB) | 0xmmh (MSB) Pitch bond change | |||
| -100% : 0x7F7F (MSB/LSB)0% : 0x4000 (MSR/LSB)+100% : 0x0000 (MSB/LSE) | |||||
n = MIDI CH
ENGLISH
Data reception
LED data reception
The panel's LEDs can be set to on, off or blinking by MIDI command, as per the table below.
■ Receive command for LED
| items | MIDI command | Message type | Notes | |||
| Command | Number | Value | ||||
| LED | 0xBn | ON TRG : 0x4A OFF TRG : 0x4B Blink ON TRG : 0xC | ↓↓ | Control Change | ||
| 1 | Playlist | 0x02 | ||||
| 2 | Pitch match LED | 0x04 | ||||
| 3 | JOG mode Green | 0x05 | ||||
| 4 | JOG mode Orange | 0x06 | ||||
| 5 | Pitch/KEY Green | 0x07 | ||||
| 6 | Pitch/KEY Orange | 0x08 | ||||
| 7 | TAP Green | 0x09 | ||||
| 8 | TAP Orange | 0x0A | ||||
| 9 | EFX1/ECH/Q/LOOP RED | 0x0B | ||||
| 10 | EFX1 Green | 0x0C | ||||
| 11 | EFX2/FLANGER RED | 0x0D | ||||
| 12 | EFX2 Groon | 0x0E | ||||
| 13 | EFX3/FILTER RED | 0x0F | ||||
| 14 | EFX3 Groon | 0x10 | ||||
| 15 | HOT1 | 0x11 | ||||
| 16 | HOT1 Dimmer | 0x12 | ||||
| 17 | HOT2 | 0x13 | ||||
| 18 | HOT2 Dimmer | 0x14 | ||||
| 19 | HOT3 | 0x15 | ||||
| 20 | HOT3 Dimmer | 0x16 | ||||
| 21 | HOT4 | 0x17 | ||||
| 22 | HOT4 Dimmer | 0x18 | ||||
| 23 | HOT5 | 0x19 | ||||
| 24 | HOT5 Dimmer | 0x1A | ||||
| 25 | Parameter KNOB | 0x1E | ||||
| 26 | A1 | 0x24 | ||||
| 27 | A1 Dimmer | 0x3C | ||||
| 28 | A2 | 0x25 | ||||
| 29 | A2 Dimmer | 0x3D | ||||
| 30 | Cue | 0x26 | ||||
| 31 | Play | 0x27 | ||||
| 32 | Jogwheel | 0x3B | ||||
| 33 | Pitch slider request | only Use 0x4A (request TRG) | 0x3C | DNHC4x3D return pitch slider position | ||
| 34 | X-Control fader request | only Use 0x4A (request TRG) | 0x3D | DNHC4x3D return X-Control fader position | ||
n = M|D|CH
VFD symbol data reception
The various VFD symbols can be set to on, off or blinking, as per the table below.
■ Receive command for VFD Symbol
| items | MIDI command | Message type | |||
| Command | Number | Value | |||
| VFD Symbol 0xBn | ON TRG : 0x4DOFF TRG : 0x4EBlink ON TRG : 0x4F | ↓↓ | Control Change | ||
| 1 | T . 0 x 0 1 | ||||
| 2 | REMAIN 0x02 | ||||
| 3 | ELAPSED 0x03 | ||||
| 4 | CONT. 0x04 | ||||
| 5 | SINGLE 0x05 | ||||
| 6 | BPM 0x06 | ||||
| 7 | m 0 x 0 7 | ||||
| 8 | s 0 x 0 8 | ||||
| 9 | f 0 x 0 9 | ||||
| 10 | Pitch dot right | 0x0A | |||
| 11 | Pitch dot center | 0x0B | |||
| 12 | Pitch dot left | 0x0C | |||
| 13 | MP3 | 0x10 | |||
| 14 | WAV | 0x11 | |||
| 15 | KB | 0x13 | |||
| 16 | KEY ADJ. | 0x14 | |||
| 17 | MEMO | 0x15 | |||
| 18 | : A1 side | 0x16 | |||
| 19 | : A2 side | 0x17 | |||
| 20 | : A1 side | 0x18 | |||
| 21 | : A2 side | 0x19 | |||
| 22 | A1 | 0x1A | |||
| 23 | A2 | 0x1B | |||
| 24 | B : A1 side | 0x1C | |||
| 25 | B : A2 side | 0x1D | |||
| 26 | Scratch Ring out side | 0x1E | |||
| 27 | Scratch Ring in side | 0x1F | |||
| 28 | Touch dot 0x20 | ||||
| 29 | Track Position Blink | only Use 0x4F/0x4F | 0x21 | ||
| 30 | Scratch Position 1 (Tcp right) | only Use 0x4D/0x4E | 0x22 | ||
| 31 | Scratch Position 2 | only Use 0x4D/0x4E | 0x23 | ||
| 32 | Scratch Position 3 | only Use 0x4D/0x4E | 0x24 | ||
| 33 | Scratch Position 4 | only Use 0x4D/0x4E | 0x25 | ||
| 34 | Scratch Position 5 | only Use 0x4D/0x4E | 0x26 | ||
| 35 | Scratch Position 6 | only Use 0x4D/0x4E | 0x27 | ||
| 36 | Scratch Position 7 | only Use 0x4D/0x4E | 0x28 | ||
ENGLISH
| items | MIDI command | Message type | |||
| Command | Number Value | ||||
| VFD Symbol 0xBn | ON TRG : 0x4D OFF TRG : 0x4E Blink ON TRG : 0x4F | ↓↓ | Control Change | ||
| 37 | Scratch Position 8 | only Use 0x4D/0x4E | 0x29 | ||
| 38 | Scratch Position 9 | only Use 0x4D/0x4E | 0x2A | ||
| 39 | Scratch Position 10 | only Use 0x4D/0x4E | 0x2B | ||
| 40 | Scratch Position 11 | only Use 0x4D/0x4E | 0x2C | ||
| 41 | Scratch Position 12 | only Use 0x4D/0x4E | 0x2D | ||
| 42 | Scratch Position 13 | only Use 0x4D/0x4E | 0x2E | ||
| 43 | Scratch Position 14 | only Use 0x4D/0x4E | 0x2F | ||
| 44 | Scratch Position 15 | only Use 0x4D/0x4E | 0x30 | ||
| 45 | Scratch Position 16 (Bottom) | only Use 0x4D/0x4E | 0x31 | ||
| 46 | Scratch Position 17 | only Use 0x4D/0x4E | 0x32 | ||
| 47 | Scratch Position 18 | only Use 0x4D/0x4E | 0x33 | ||
| 48 | Scratch Position 19 | only Use 0x4D/0x4E | 0x34 | ||
| 49 | Scratch Position 20 | only Use 0x4D/0x4E | 0x35 | ||
| 50 | Scratch Position 21 | only Use 0x4D/0x4E | 0x36 | ||
| 51 | Scratch Position 22 | only Use 0x4D/0x4E | 0x37 | ||
| 52 | Scratch Position 23 | only Use 0x4D/0x4E | 0x38 | ||
| 53 | Scratch Position 24 | only Use 0x4D/0x4E | 0x39 | ||
| 54 | Scratch Position 25 | only Use 0x4D/0x4E | 0x3A | ||
| 55 | Scratch Position 26 | only Use 0x4D/0x4E | 0x3B | ||
| 56 | Scratch Position 27 | only Use 0x4D/0x4E | 0x3C | ||
| 57 | Scratch Position 28 | only Use 0x4D/0x4E | 0x3D | ||
| 58 | Scratch Position 29 | only Use 0x4D/0x4E | 0x3E | ||
| 59 | Scratch Position 30 | only Use 0x4D/0x4E | 0x3F | ||
| 60 | Scratch Position 31 | only Use 0x4D/0x4E | 0x40 | ||
| 61 | Scratch Position 32 (Top) | only Use 0x4D/0x4E | 0x41 | ||
n = MIDI CH
* "Track Position Blink" sets blinking of the entire track position display segment on or off.
VFD parameter data reception
The time-related display and segment display can be set by MIDI command, as per the table below.
n = M|D|CH
■ Receive command for VFD Parameter
| Items | MIDI command | Message Type | |||
| Command | Number Value | ||||
| VFD Parameter | |||||
| 1 | T r number MSB 0xBn 0x20 | 0-99100-108: "0" to "9"110: "--", 111: " " | Control Change | ||
| 2 | T r number LSB | ↑ | 0x41 | ↑ | ↑ |
| 3 | T ime mini | ↑ | 0x42 | ↑ | ↑ |
| 4 | T ime sec | ↑ | 0x43 | ↑ | ↑ |
| 5 | T ime frame | ↑ | 0x44 | ↑ | ↑ |
| 6 | Pitch POL | ↑ | 0x45 | " " 0x00"* " 0x01"-" 0x02 | ↑ |
| 7 | Pitch MSB | ↑ | 0x46 | ↑ | ↑ |
| 8 | P rch LSB | ↑ | 0x47 | ↑ | ↑ |
| 9 | T rack Position | ↑ | 0x48 normal0x49 reverse | 0-100% | ↑ |
| 10 | Segment 1-1 MSB | ↑ | 0x01 0x00 - 0x0F | ↑ | |
| 11 | Segment 1-2 MSB | ↑ | 0x02 | ↑ | ↑ |
| 12 | Segment 1-3 MSB | ↑ | 0x03 | ↑ | ↑ |
| 13 | Segment 1-4 MSB | ↑ | 0x04 | ↑ | ↑ |
| 14 | Segment 1-5 MSB | ↑ | 0x05 | ↑ | ↑ |
| 15 | Segment 1-6 MSB | ↑ | 0x07 | ↑ | ↑ |
| 16 | Segment 1-7 MSB | ↑ | 0x08 | ↑ | ↑ |
| 17 | Segment 1-8 MSB | ↑ | 0x09 | ↑ | ↑ |
| 18 | Segment 1-9 MSB | ↑ | 0x0A | ↑ | ↑ |
| 19 | Segment 1-10 MSB | ↑ | 0x0B | ↑ | ↑ |
| 20 | Segment 1-11 MSB | ↑ | 0x0C | ↑ | ↑ |
| 21 | Segment 1-12 MSB | ↑ | 0x0D | ↑ | ↑ |
| 22 | Segment 1-1 LSB | ↑ | 0x21 | ↑ | ↑ |
| 23 | Segment 1-2 LSB | ↑ | 0x22 | ↑ | ↑ |
| 24 | Segment 1-3 LSB | ↑ | 0x23 | ↑ | ↑ |
| 25 | Segment 1-4 LSB | ↑ | 0x24 | ↑ | ↑ |
| 26 | Segment 1-5 LSB | ↑ | 0x25 | ↑ | ↑ |
| 27 | Segment 1-6 LSB | ↑ | 0x27 | ↑ | ↑ |
| 28 | Segment 1-7 LSB | ↑ | 0x28 | ↑ | ↑ |
| 29 | Segment 1-8 LSB | ↑ | 0x29 | ↑ | ↑ |
| 30 | Segment 1-9 LSB | ↑ | 0x2A | ↑ | ↑ |
| 31 | Segment 1-10 LSB | ↑ | 0x2B | ↑ | ↑ |
| 32 | Segment 1-11 LSB | ↑ | 0x2C | ↑ | ↑ |
| 33 | Segment 1-12 LSB 0xEn 0x2 | D 0x00 -- 0x0F Control Charge | |||
| 34 | Segment 2-1 MSB | ↑ | 0x0C | ↑ | ↑ |
| 35 | Segment 2-2 MSB | ↑ | 0x0F | ↑ | ↑ |
| 36 | Segment 2-3 MSB | ↑ | 0x10 | ↑ | ↑ |
| 37 | Segment 2-4 MSB | ↑ | 0x11 | ↑ | ↑ |
| 38 | Segment 2-5 MSB | ↑ | 0x12 | ↑ | ↑ |
| 39 | Segment 2-6 MSB | ↑ | 0x13 | ↑ | ↑ |
| 40 | Segment 2-7 MSB | ↑ | 0x14 | ↑ | ↑ |
| 41 | Segment 2-8 MSB | ↑ | 0x15 | ↑ | ↑ |
| 42 | Segment 2-9 MSB | ↑ | 0x16 | ↑ | ↑ |
| 43 | Segment 2-10 MSB | ↑ | 0x17 | ↑ | ↑ |
| 44 | Segment 2-11 MSB | ↑ | 0x18 | ↑ | ↑ |
| 45 | Segment 2-12 MSB | ↑ | 0x19 | ↑ | ↑ |
| 46 | Segment 2-1 LSB | ↑ | 0x2C | ↑ | ↑ |
| 47 | Segment 2-2 LSB | ↑ | 0x2F | ↑ | ↑ |
| 48 | Segment 2-3 LSB | ↑ | 0x30 | ↑ | ↑ |
| 49 | Segment 2-4 LSB | ↑ | 0x31 | ↑ | ↑ |
| 50 | Segment 2-5 LSB | ↑ | 0x32 | ↑ | ↑ |
| 51 | Segment 2-6 LSB | ↑ | 0x33 | ↑ | ↑ |
| 52 | Segment 2-7 LSB | ↑ | 0x34 | ↑ | ↑ |
| 53 | Segment 2-8 LSB | ↑ | 0x35 | ↑ | ↑ |
| 54 | Segment 2-9 LSB | ↑ | 0x36 | ↑ | ↑ |
| 55 | Segment 2-10 LSB | ↑ | 0x37 | ↑ | ↑ |
| 56 | Segment 2-11 LSB | ↑ | 0x38 | ↑ | ↑ |
| 57 | Segment 2-12 LSB | ↑ | 0x39 | ↑ | ↑ |
VFD segment data reception
The various segments are set by 2-byte data, as per the following font code (0x00/0x00 to 0x00/0x07 cannot be used.)
■ Font codes for segments

text_image
0009 0010 0011 0012 0013 0014 0015 0016 0017 0018 0019 0020 0021 0022 0023 0024 0025 0026 0027 0028 0029 0030 0031 0032 0033 0034 0035 0036 0037 0038 0039 0040 0041 0042 0043 0044 0045 0046 0047 0048 0049 0050 0051 0052 0053 0054 0055 0056 0057 0058 0059 0060 0061 0062 0063 0064 0065 0066 0067 0068 0069 0070 0071 0072 0073 0074 0075 0076 0077 0078 0079 0080 0081 0082 0083 0084 0085 0086 0087 0088 0089 0090 0091 0092 0093 0094 0095 0096 0097 0098 0199ENGLISH
ENGLISH
Preset data
The DN-HC4500's presettings can be loaded and some items can be set from an external device using the DENON DJ's MIDI system exclusive format.
(1) Configuration command format
The basic configuration supported by the DN-HC4500 is as follows:
| CMD Item Data Length | |||
| SOX | Start of System Exclusive | 0xF0 | 1Byte |
| IDC | ID code → DENON DJ ID | 0x004003 | 3Byte |
| PMT | Communication format | 0x12: one way | 1Byte |
| MDN | Model number | 0x41 [DN-HC4500] | 1Byte |
| UN | Unit number | depends on preset mode (0x00 to 0x0F) | 1Byte |
| MCH | MIDI channel | depends on preset mode (0x00 to 0x0S) | 1Byte |
| MST | Message Type | 0x53: Selecting, 0x50: Polling, | 1Byte |
| CMD | Command | 0x20: Preset set/ 0x21: Preset request | 1Byte |
| DL | Data Length | 0x** number of the data Byte refer the preset data table | 1Byte |
| Data | Preset data | **** | |
| BCC | Block check character | 0x** EVEN parity of the Data block | 1Byte |
| EOX | End of System Exclusive | 0xF7 | 1Byte |
(2) Loading preset data from an external device
PC DN-HC4500
[DRM] [DSM]
Issue the commands shown below from the PC to the DN-HC4500. [DRM]
| CMD Item Data Length | |||
| SOX | Start of System Exclusive | 0xF0 | 1Byte |
| IDC | ID code → DENON DJ ID | 0x004003 | 3Byte |
| FMT | Communication format | 0x12: one way | 1Byte |
| MDN | Model number | 0x41 (DN-HC4500) or 6x7F IALL model | 1Byte |
| UN | Unit number | depends on preset mode (0x00 to 0x0F) | 1Byte |
| MCH | MIDI channel | depends on preset mode (0x00 to 0x05I) | 1Byte |
| MST | Message Type | 0x50: Polling | 1Byte |
| CMD | Command | 0x21: Preset request | 1Byte |
| EOX End of System Exclusive 0xF7 1Byte | |||
The text shown below is returned from the DN-HC4500. [DSM]
| CMD Item Data Length | |||
| SOX | Start of System Exclusive | 0xF0 | 1Byte |
| IDC | ID code → DENON DJ ID | 0x004003 | 3Byte |
| FMT | Communication format | 0x12: one way | 1Byte |
| MDN | Model number | 0x41 (DN-HC4500) | 1Byte |
| UN | Unit number | depends on preset mode (0x00 to 0x0F) | 1Byte |
| MCH | MIDI channel | depends on preset mode (0x00 to 0x06) | 1Byte |
| MST | Message Type | 0x63: Selecting | 1Byte |
| CMD | Command | 0x21: Preset request (Return) | 1Byte |
| DL | Data Length | 0x** number of the data Byte | 1Byte |
| Data | Preset data | refer the preset data table | **** |
| BCC | Block check character | 0x** EVEN parity of the Data block | 1Byte |
| EOX | End of System Exclusive | 0xF7 | 1Byte |
The structure of the reply data to the preset request command is as shown below.
■ Return data table for Preset request command
| Preset name Item Data Length | |||
| USB mode SelCD Model SelAudio Fs Sel | USB Control mode selectDrive control model selectAudio sampling frequency select | 0x00: HC4500 MIDI, 0x02 to 0x0F: Reserve0x00: DN-D4500, 0x01: DN-D40000x01: 44.1kHz, 0x02: 48kHz, 0x08:96kHz, 0x04: AUTOAUTO: Automatically follow Fs by USB data | 1Byte1Byte1Byte |
| Unit number SetMIDI CH SatJOG Pulse SelFader In ModeXcont XTDAudio bufferModel code | Unit numberMIDI CHJOG count number per cycleFader In mode selectX-control mode selectAudio buffer sizeModel number | 0x00 to 0x0F0x00: CH1&Z, 0x01: CH3&M, 0x02: CH5&60x00: 1480, 0x01: 740, 0x02: 555, 0x03: 3/00x00: 2wire PlayCus, 0x01: 1wire PlayCus0x00: OFF, 0x01: CN0x0040 to 0x0810 (2Bytes)0x41 | 1Byte1Byte1Byte1Byte1Byte1Byte1Byte1Byte2Byte1Byte |
(3) Setting the preset data from an external device.
PC DN-HG4500
[DSM] Reception message execution
Issue the selecting message shown below from the PC to the DN-HC4500. [DSM]
| CMD Item Data Length | |||
| SOX | Start of System Exclusive | 0xF0 | 1Byte |
| IDC | ID codo → DENON DJ ID | 0x004003 | 3Byte |
| FMT | Communication format | 0x12: one way | 1Byte |
| MDN | Model number | 0x41 (DIN-HC4500) | 1Byte |
| UN | Unit number | depends on preset mode (0x00 to 0x0F) | 1Byte |
| MCH | MIDI channel | depends on preset mode (0x00 to 0x0S) | 1Byte |
| MST | Message Type | 0x53: Selecting, | 1Byte |
| CMD | Command | 0x20: Preset set | 1Byte |
| DL | Data Length | 0x** number of the data Byte | 1Byte |
| Data | Preset data | refer the preset data table | **** |
| BCC | Block check character | 0x** EVEN parity of the Data block | 1Byte |
| EOX | End of System Exclusive | 0xF7 | 1Byte |
When the DN-HC4500 identifies that the model number and unit number match, the preset data for the items settable from an external device are updated according to the received message's data table.
The structure of the preset set command's data is as shown below.
■ Preset set data table
| Preset name Item Data Length | |||
| USB mode SelCD Model SolAudio Fs Sel | USB Control mode selectDrive control model selectAudio sampling frequency select | 0x00: HC4500 MIDI, 0x02 to 0x0F: Reserve0x00: DN D4500, 0x01: DN D40000x01: 44.1kHz, 0x02: 48kHz, 0x08:96kHz, 0x04: AUTO(A)JC: Automatically follow Fs by USB datal | 1Byte1Byte1Byte |
| JOG Pulse SolFeder In ModeXcont XFD | JOG count number per cycleFeder In mode selectX control mode select | 0x00: 1480, 0x01: 740, 0x02: 555, 0x03: 3700x00: 2wire PlayCue, 0x01: 1wire PlayCue0x00: OFF, 0x01: ON | 1Byte1Byte1Byte |
12 TROUBLESHOOTING
■ DN-HC4500 does not operate normally or no sound is produced
- Are the USB cable, audio cables, etc., properly connected?
- Is the volume setting for the source, audio device, application, OS, etc., properly raised?
- Is the appropriate device selected on your audio application?
• Is the sampling frequency setting appropriate?
Either make the same settings in the DN-HC4500's preset mode and on the application or set the DN-HC4500's preset mode to "AUTO". - Are there WAV files with different sampling frequencies and bit rates?
→Depending on your audio application, it may not be possible to play WAV files with different sampling frequencies and bit rates simultaneously.
• Is other USB equipment in use?
→If other USB devices are connected, try connecting only DN-HC4500 to check for problems. - Is the USB connector of the connected computer compatible with USB 2.0 (Hi-Speed)?
→Use a USB 2.0-compatible cable.
■ Sound is broken or distorted
- Are other applications or device drivers operating?
→Close any unneeded applications. - Are you playing multiple WAV files?
When playing multiple WAV files simultaneously, depending on the capacity of your computer, the sound may be broken.
ENGLISH
13 SPECIFICATIONS
General
Power requirement: U.S.A, CANADA model: AC 120 V 60 Hz European model: AC 235 V 50 Hz Japan model: AC 100 V 50 Hz/60 Hz
Power consumption: U.S.A, CANADA model: 12 W European model: 12 W Japan model: 10 W
Ambient operation
temperature: 0 °C to 40 °C
Dimensions: 482 (W) x 132 (H) x 88 (max106) (D) mm rack space: EIA 3U
Weight: 3.7 kg
Finish: Front panel: Black (Painted steel) Rear & Enclosure: Black (Painted steel)
Audio
Analog output: 1, 2 RCA pin: unbalanced
2Vrms = 0dBFS
DA converter: Type 24bit 32times oversampling Fs: 44.1 kHz/48 kHz/96 kHz D-range 106 dB (TYP) S/N 106 dB (TYP) (DIN) Frequency response: 20 to 22 kHz, ±0.5 dB T.H.D: Less than 0.05 % (input = output = 2Vrms/1 KHz, RL: 10 kΩ) Residual noise: Less than -94 dBV (TYP) Crosstalk: Less than -110 dB (TYP @1 kHz)
USB I/F
USB B connector: USB2.0 (Max480 Mbps)
PC/MAC (Host) ← DN-HC4500 (Slave) application USB Audio (Speaker) PCM 16bit/24bit 44.1 kHz/48 kHz/96 kHz 4ch USB MIDI I/O IN: 1 port, OUT: 1 port USB HID I/O (General) 32Byte packet
Control I/F
Fader start: FADER 1
3.5 mm stereo mini jack (Tip/Ring:signal, Sleeve: GND), 0.5VDC FADER 2 3.5 mm stereo mini jack (Tip/Ring:signal, Sleeve: GND), 0.5VDC Input 3.5 mm stereo mini jack (Tip/Ring:signal, Sleeve: GND), 0.5VDC CD Drive control: Mini-DIN 8pin connector (DN-D4500/D4000/BU4500 Drive unit c
Others
Display:
40 mm x 100 mm VFD
Character w/12digitx2line dot matrix & Scratch marker
Jog wheel:
71 mm, touch moving detection
(Touch ON/OFF, Dir FWD/RVS, Pulse count) MIDI: Note ON/OFF 1480/740/555/370 Pulse/cycle MIDI: Control Change
Rubber SW:
Function SW
5 w/LED
for HOT start and LOAD SW and others MIDI: Note ON/OFF
Other SW
10 w/LED
for CUE/PLAY/HOT start/EFX/LOAD and others MIDI: Note ON/OFF
Other SW
14 w/o LED
for Fast search / Pitch bend and others MIDI: Note ON/OFF
Pitch Fader:
60 mm w/center tap 1024 steps
MIDI: Pitch bend
(MIDI data -100 %: 0x7F7F / ±0 %: 0x4000 / +100 %: 0x0000)
Parameter knob:
SW for Enter and others MIDI: Note ON/OFFF
FWD/RVS 24 Pulse/cycle MIDI: Control Change
■ DENON DJ ASIO Driver
Control parameter:
Buffer size
88 (Fs: 44.1 kHz/48 kHz) /188 (Fs: 96 kHz) sample to 2048 sample
Hardware buffer control
Sampling Freq.
44.1 kHz/48 kHz/96 kHz (follow DN-HC4500 setting)
* ASIO is a trademark of Steinberg Media Technologies GmbH
* MAC is a trademark of Apple Computer, Inc.
*MIDI is a trademark of AMEI
text_image
432 465 132 67.2 7 x 10 hole
Unit: mm
DEUTSCH
INHALTSVERZEICHNIS
text_image
0 0 0 0 0 0 0 0 0 0 0 0 0 0 0 0 0 0 0 0 0 0 0 0 0 0 0 0 0 0 0 0 0 0 0 0 0 0 0 0 0 0 0 0 0 0 0 0 0 0 0ACHTUNG:
(4) Unit No. Set: 1 to 15 / ALL
text_image
Doppelklicken Sie auf den Installationsassistenten. Nun wird der Setup-Assistent für den ASIO- Teiber gestartet. Klicken Sie auf "Next)". Welcome to the DENON DJ ASIO Driver Setup Wizard DENON DJ The reader will be your first step required to install DENON DJ ASIO Driver Setup as necessary. WARNING: This computer program is currently being used in the OSIO system. It is recommended that this setup is designed to be completed by the software. We will also be performed by the software which provides an offer for the use. Cancel Close Help Next! Schaubild: Setup-Assistentenster des ASIO Treibers Nun wird der Bildschirm mit der Lizenzvereinbarung angezeigt. Wahlen Sie "I Agree", wenn Sie den aufgeführten Bedingungen zustimmen. Klicken Sie anschließend auf die "Next>"- Taste. Klicken Sie auf die "Next>"-Taste. LICENSE AGREEMENT DENON DJ Please note that you can see the Agreement with all you heard the above before it's right. SOFTWARE LICENSE AGREEMENT NOTICE TO EDIT. Please check the Agreement carefully. For writing and reading all of our pieces of the software ("Software") (apply by Field Buildings the "DIN"), you accept all the words and conditions of this Agreement. This page gives that this agreement is not available for any written agreement or signed by you. This Agreement is not available together with any previous and is clearly defined by the software and otherwise should be used. If you do not agree, then cannot be sure this Software. C:\My Agree Cancel Next School Schaubild: Fenster mit der Lizenzvereinbarung3
text_image
DENON DU Create Icons DENON DU Call what you want to create or exit icons for comment in your home. DENON DU 43.0 Drive Choose or exittext_image
DENON DU Award Contains Installation DENON DU The installed installation DENON DU Award is required to complete. DIN: "OK" is not the installation. Cancel Help Next >6 Device Description
• Device name
- Unit number
- Software version
• Audio input channels
• Audio output channels
- Sampling frequency
- Max bit resolution
• Audio buffer size
HINWEIS:
text_image
Create Icons DENON DJ Call what you want to create a new file to create an icon that has been created by the D:\WIN\WIN\WIN project. Create can be done Cancel Next Nexttext_image
Denon DJ Confers Installation The version ready to install D:\MSCI\300\12\pack-in\program\all-PC\comp D:\.Tow! to test the installation.text_image
DENON DJ Upgrade pre-Program Options Software version 1: win 0.09 Device name: DMHC4300 Unit number: 5 System File File is not ready. Waiting... Load Removetext_image
DENON DJ Upgrade program DENS ON: DN-DC1500 is not connected. Update File File is not ready. Waiting... Just Generatetext_image
DENON DJ Upgrade program DENON DJ Upgrade program Design Dev. DEN HD/200 is not ready for version up. Browse File File is not ready. Waiting... Load Execute4
text_image
DENON DJ Upgrade program Upgrade program Design Data Software version: var 0.365 Device name: DHRC4500 Unit number: 0 Update file Updater version: var 5.815 Load Deletetext_image
DENON DJ Upgrade program Design Data Software to Device Unit 9 Interface Load res configured Add New Leading... 100% Add Deletetext_image
DENON DU Upgrade mode program Device Name: Software version: var 0.016 Device name: DIFEC4000 Unit number: 2 Update File Update version: var 0.016 Default... 8% Unit Cancel
text_image
DENON DJ Upgrade program Windows Des. Software Options Options to Update In Update Information Version up now completed. All Microsoft Windows Write up now completed. Load Execute"Loaded data is invalid. Check the file."
"Version up was not completed."
| Items | MIDI command | Message Type | |||
| Command | Number Value | ||||
| VFD Parameter | |||||
| 33 | Segment 1-12 LSB 0xEn 0x2 | D 0x00 -- 0x0F Control Charge | |||
| 34 | Segment 2-1 MSB | ↑ | 0x0C | ↑ | ↑ |
| 35 | Segment 2-2 MSB | ↑ | 0x0F | ↑ | ↑ |
| 36 | Segment 2-3 MSB | ↑ | 0x10 | ↑ | ↑ |
| 37 | Segment 2-4 MSB | ↑ | 0x11 | ↑ | ↑ |
| 38 | Segment 2-5 MSB | ↑ | 0x12 | ↑ | ↑ |
| 39 | Segment 2-6 MSB | ↑ | 0x13 | ↑ | ↑ |
| 40 | Segment 2-7 MSB | ↑ | 0x14 | ↑ | ↑ |
| 41 | Segment 2-8 MSB | ↑ | 0x15 | ↑ | ↑ |
| 42 | Segment 2-9 MSB | ↑ | 0x16 | ↑ | ↑ |
| 43 | Segment 2-10 MSB | ↑ | 0x17 | ↑ | ↑ |
| 44 | Segment 2-11 MSB | ↑ | 0x18 | ↑ | ↑ |
| 45 | Segment 2-12 MSB | ↑ | 0x19 | ↑ | ↑ |
| 46 | Segment 2-1 LSB | ↑ | 0x2C | ↑ | ↑ |
| 47 | Segment 2-2 LSB | ↑ | 0x2F | ↑ | ↑ |
| 48 | Segment 2-3 LSB | ↑ | 0x30 | ↑ | ↑ |
| 49 | Segment 2-4 LSB | ↑ | 0x31 | ↑ | ↑ |
| 50 | Segment 2-5 LSB | ↑ | 0x32 | ↑ | ↑ |
| 51 | Segment 2-6 LSB | ↑ | 0x33 | ↑ | ↑ |
| 52 | Segment 2-7 LSB | ↑ | 0x34 | ↑ | ↑ |
| 53 | Segment 2-8 LSB | ↑ | 0x35 | ↑ | ↑ |
| 54 | Segment 2-9 LSB | ↑ | 0x36 | ↑ | ↑ |
| 55 | Segment 2-10 LSB | ↑ | 0x37 | ↑ | ↑ |
| 56 | Segment 2-11 LSB | ↑ | 0x38 | ↑ | ↑ |
| 57 | Segment 2-12 LSB | ↑ | 0x39 | ↑ | ↑ |
n = M|D|CH
(4) Unit No. Set: 1 to 15 / ALL
text_image
DENON DJ ASIO Driver Setup Welcome to the DENON DJ ASIO Driver Setup Wizard DENON DJ The software will you have through the steps required to install DENON DJ ASIO Driver Setup Wizard. WARNING: This is completed by a successful configuration and installation process. It is not possible to continue or require further details in the design, but it is also intended to ensure that the system is designed to operate or implement a specific mode of operation.text_image
LICENSE AGREEMENT NOTICE TO OTHER. Please check this agreement temporarily, if being heard and posted on any portion of the software "Software" connected to SASH Buildings for the "CHINA" system, except that the terms and conditions of this agreement. You may have a right to view the applicable website or an application for your own. This Agreement is not otherwise given any and any person who is allowed to be allowed to receive any other information. If you do not agree, you can be required to use this permission. © Do You Agree Cancel Change Nexttext_image
ENON DJ Create Items ENON DJ Set this item and if the items are allowed to comment in order to take ENON DJ. This is done. □ Create Item or destination.text_image
SPRING BJ - A500 System Confirm Installation DENON BJ The version is installed BY DENON BJ with 500% confidence level. Out: "Not" to set the installation. Cancel Help Nexttext_image
DENON DJ / AWD Series 1.00 Denon DJ USB drive Device Power: 250 MHz Cell Number: 0 Software Power: 1000 Auto and Camera: 0 Audio output channels: 1 Signal Frequency: 47.7 MHz/160 MHz Radio frequency: 12.3 Auto Power line: 0.000 USB drive (DIN)... External Filter 1 2 3 4 5 6① Périphérique
6 Device Description
- Device name
- Unit number
- Software version
• Audio input channels
• Audio output channels - Sampling frequency
• Max bit resolution - Audio buffer size
REMARQUE:
text_image
License Agreement DENON DJ SOFTWARE LICENSE AGREEMENT NOTICE TO USE. Please note the agreement monthly. By detailing and adding all or any portions of the software ("Software") completely, that is already being done by "O&R". You accept the terms and conditions of the Agreement. We agree that this agreement is withdrawn in this way to register a specified agreement for the software. The agreement will not be against you and any prior to legal entity that is obtained from the software and so when behalf is used. If you do not agree, do not install it as this file. Figure: Fenêtre de licence d'utilisation du logiciel3
text_image
Select Installation Folder File name: installed\MSCC2010\My Documents\My Office\ To install in this folder, click "M" to install a folder named MScC2010 Name: Software: installed.MSCC2010\My Documents\My Office\ Open... Help... Install CMSCC2010 (My Documents) for your own or its anyone who has this computer Options Change Cancel Save Helptext_image
Create logo DENON DJ □ Create can or destroytext_image
Confirm Installation DENON BJ The installation will be installed in DENON BJ package to install a new file. OK / Cancel to install the installation.text_image
Cette fenêtre est affichée pendant l'installation. Involving DW-HC4500 Upgrade programs DENON DU DW-HC4500 Upgrade programs (using installed) Place next OK Cancel Finish Canceltext_image
DH-CAD038 Upgrade program Installation Complete DENON 6J DH-CAD038 Upgrade program has been completed by the user - Clean is set.text_image
DENON DJ Setup file progress with Denon D: Software version 1: set 0.029 Device name: DN-HC4360 Unit number: 3 System file File is not ready. Waiting... Load Removetext_image
DENON DJ Logade program DENS-100 DN-HC4500 is not connected. Update File File is not ready. Waiting... Last Nexttext_image
DENON DJ Upgrade program DENON DJ Upgrade program Design Box... DEN-DC500 is not ready for version up. Browse File File is not ready. Waiting... Load Execute4
text_image
DENON DJ Upgrade program Design Data: Software version: var 0.005 Device name: DENOC4502 Unit number: 0 Upgrade File Updater version: var 0.015 Load Nexttext_image
DENON DJ Upgrade program Design Dev. Software version: var 0.310 Device name: DEN-DC-5200 Unit number: 0 Update File Updater version: var 0.010 Now Loading... 7% Load Remove5-1

text_image
DENON DJ Upgrade program Design Data Software settings: User Device Unit 1 Interface Imported Load miss configured Current file Upgrade v Now Loading... 100% Load Delete| L | P | Q | R | S | T | U | V | W |
| 1 | 2 | 3 | 4 | 5 | 6 | 7 | 8 | 9 |
sur Deck1
5 -2
| L | P | Q | R | S | T | U | V |
| # | # | # | # | # | # | # | # |
text_image
DENON DJ Upgrade program Windows Des. Software Options Options Settings Settings Settings Settings Settings Settings Settings Settings Settings Settings Settings Settings Settings Settings Settings Settings Settings Settings Settings Settings Settings Settings Settings Settings Settings Settings Settings Settings Settings Settings Settings Settings Settings Settings Settings Settings Settings Settings Settings Settings Settings Settings Settings Settings Settings Settings Settings Settings Settings Settings Instructions Instructions Instructions Instructions Instructions Instructions Instructions Instructions Instructions Instructions Instructions Instructions Instructions Instructions Instructions Instructions Instructions Instructions Instructions Instructions Instructions Instructions Instructions Instructions Instructions Instructions Instructions Instructions Instructions Instructions Instructions Instructions Instructions Instructions Instructions Instructions Instructions Instructions Instructions Instructions Instructions Instructions Instructions Instructions Instructions Instructions Instructions Instructions Instructions Instructions Automatic Settings... Automatic Settings... Automatic Settings... Automatic Settings... Automatic Settings... Automatic Settings... Automatic Settings... Automatic Settings... Automatic Settings... Automatic Settings... Automatic Settings... Automatic Settings... Automatic Settings... Automatic Settings... Automatic Settings... Automatic Settings... Automatic Settings... Automatic Settings... Automatic Settings... Automatic Settings... Automatic Settings... Automatic Settings... Automatic Settings... Automatic Settings... Automatic Settings... Automatic Settings... Automatic Settings... Automatic Settings... Automatic Settings... Automatic Settings... Automatic Settings... Automatic Settings... Automatic Settings... Automatic Settings... Auto... Delete... Remove..."Load failed. Check the connection, and retry"
"Loaded data is invalid. Check the file."
"Version up was not completed."
| Items | MIDI command | Message Type | |||
| Command | Number Value | ||||
| VFD Parameter | |||||
| 33 | Segment 1-12 LSB 0xEn 0x2 | D 0x00 -- 0x0F Control Charge | |||
| 34 | Segment 2-1 MSB | ↑ | 0x0C | ↑ | ↑ |
| 35 | Segment 2-2 MSB | ↑ | 0x0F | ↑ | ↑ |
| 36 | Segment 2-3 MSB | ↑ | 0x10 | ↑ | ↑ |
| 37 | Segment 2-4 MSB | ↑ | 0x11 | ↑ | ↑ |
| 38 | Segment 2-5 MSB | ↑ | 0x12 | ↑ | ↑ |
| 39 | Segment 2-6 MSB | ↑ | 0x13 | ↑ | ↑ |
| 40 | Segment 2-7 MSB | ↑ | 0x14 | ↑ | ↑ |
| 41 | Segment 2-8 MSB | ↑ | 0x15 | ↑ | ↑ |
| 42 | Segment 2-9 MSB | ↑ | 0x16 | ↑ | ↑ |
| 43 | Segment 2-10 MSB | ↑ | 0x17 | ↑ | ↑ |
| 44 | Segment 2-11 MSB | ↑ | 0x18 | ↑ | ↑ |
| 45 | Segment 2-12 MSB | ↑ | 0x19 | ↑ | ↑ |
| 46 | Segment 2-1 LSB | ↑ | 0x2C | ↑ | ↑ |
| 47 | Segment 2-2 LSB | ↑ | 0x2F | ↑ | ↑ |
| 48 | Segment 2-3 LSB | ↑ | 0x30 | ↑ | ↑ |
| 49 | Segment 2-4 LSB | ↑ | 0x31 | ↑ | ↑ |
| 50 | Segment 2-5 LSB | ↑ | 0x32 | ↑ | ↑ |
| 51 | Segment 2-6 LSB | ↑ | 0x33 | ↑ | ↑ |
| 52 | Segment 2-7 LSB | ↑ | 0x34 | ↑ | ↑ |
| 53 | Segment 2-8 LSB | ↑ | 0x35 | ↑ | ↑ |
| 54 | Segment 2-9 LSB | ↑ | 0x36 | ↑ | ↑ |
| 55 | Segment 2-10 LSB | ↑ | 0x37 | ↑ | ↑ |
| 56 | Segment 2-11 LSB | ↑ | 0x38 | ↑ | ↑ |
| 57 | Segment 2-12 LSB | ↑ | 0x39 | ↑ | ↑ |
n = M|D|CH
Gamme D 106 dB (TYP)
S/N 106 dB (TYP) (DIN)
Diaphonie (crosstalk): Inférieure à -110 dB (TYP @1 kHz)
USB I/F
Connecteur USB B: USB2.0 (Max480 Mbps)
Application de type PC/MAC (Hôtel) DN-HC4500 (Esclave)
PCM 16bit/24bit 44.1 kHz/48 kHz/96 kHz 4ch
USB MIDI I/O
IN: 1 port, OUT: 1 port
① Cable de audio....2
② Cable USB 1
text_image
000-1000 DENON FUNCTION KEY 1 2 3 4 5 6 7 8 9 10 11 12 13 14 15 16 17 18 19 20 21 22 23 CUE TAP TAP TAP TAP TAP TAP TAP TAP TAP TAP TAP TAP TAP TAP TAP TAP TAP TAP TAP TAP TAP TAP TAP TAP TAP TAP TAP TAP TAP TAP TAP TAP TAP TAPPRECAUCIÓN:
(4) Unit No. Set: 1 to 15 / ALL
text_image
DENON DJ ASIO Driver Welcome to the DENON DJ ASIO Driver Setup Wizard DENON DJ This will be able to switch the drive setup to install DENON DJ ASIO Driver Setup computer. WINCHU: This computer program is designed to obtain a key and then install a new file. It is also designed to install a key and then install a key and then install a key and then install a key and then install a key and then install a key and then install a key and then install a key and then install a key and then install a key and then install a key and then install a key and then install a key and then install a key and then install a key and then install a key and then install a key and then install a key and then install a key and then install a key and then install a key and later Cancel Finish Next Helptext_image
LICENSE AGREEMENT SUPPORTS LICENSE AGREEMENT NOTICE TO 100%. Please note that the agreement is required to be issued and filed, all or any portion of the software. "Software" is permitted by Field Buildings ("The Build"), you accept, all the words, and conditions of this agreement. This offer that this agreement to be structured by the software is not allowed for any purpose of agreement aligned by you. This agreement is not valid for any use of any other legal entity. This agreement does not require any liability for any use of any other liability. If you do not agree, you do not treat or use any other Software. © Go to date: © Copyright Edit Send Nexttext_image
BENON DU Select Installation Folder BENON DU Trassembled install BENON DU 100% to be installed. Trassembled in this case, click "Save" To install a modified file or other folder as "Remove" Options □ Process From BENON DU 100% to BENON □ Add □ Add Out Install BENON DU 100% Drive to software as to install existing the computer ○ Remove ● Arrange Cancel Finish Nexttext_image
DENOON BJ - A$300 Common Create Income DENOON BJ Take us if you want to create a dollar or more, then make an additional 100.00 /150. Create income or revenue Cancel Help FinishDiagrama: ventana Crear iconos
5
text_image
DENN BY Award System Confirm Installation DENN BY The version of the installed DENN BY Award System on your computer OK: "Yes" is not installed.text_image
DEVON DJ ASIO Driver Installing DEVON DJ ASIO Driver DEVON DJ ASIO Driver installed Prior work OK Cancel Help FinishDiagrama: ventans Instalando
text_image
DENON 3.0.x80 System Installation Complete DENON 3.0.x80 System has been successfully installed Edit "User" is set.6 Device Description
- Device name
- Unit number
- Software version
• Audio input channels
• Audio output channels - Sampling frequency
- Max bit resolution
- Audio buffer size
NOTA:
text_image
Welcome to the DK-HC4500 Upgrade program Setup Wizard DENON 62 This will be able to use all the options required to install DK-HC4500 Upgrade program on your computer. Withing: This computer program is presented by copyright and then allowed to use. Use the following instructions for the program or its other functions, it must not be converted to any other function, but it should be provided to the software or related information under the law. Cancel Next Next1 Diagrama: ventana Asistente de configuracióntext_image
LICENSE AGREEMENT Please note agreement to the license agreement. If you would check the above below "I" you have a license agreement to be done. SOFTWARE LICENSE AGREEMENT NOTICE TO WRITE. Please visit this License Agreement. For additional and, call for any person of the software "C:\Users\My Documents\My Documents\My Documents\My Documents\My Documents\My Documents\My Documents\My Documents\My Documents\My Documents\My Documents\My Documents\My Documents\My Documents\My Documents\My Documents\My Documents\My Documents\My Documents\My Documents\My Documents\My Documents\My Documents\My Documents\My Documents\My Documents\My Documents\My Documents\My Documents\My Documents\My Documents\My Documents\My Documents\My Documents\nIf you would check the terms and conditions of the Agreement, you will use your permission to enable your rights and conditions of the Agreement. You will use your permission to enable your rights and conditions of the Agreement, you will use your permission to enable your rights and conditions of the Agreement, you will use your permission to enable your rights and conditions of the Agreement, you will use your permission to enable your rights and conditions of the Agreement, you will use your permission to enable your rights and conditions of the Agreement, you will use your permission to enable your rights and conditions of the Agreement, you will use your permission to enable your rights and conditions of the Agreement, you will use you should not use any other file or file.text_image
Select Installation Folder DRAGON DU The folder is installed in MSCI-MSI. It is designed to create a new folder. Form: C:\Program Files\MSCI-MSCI\Software\MSCI\MSI Open... Get Out... Install MSCI-MSI. It is designed to create a new folder in the anyone who uses this computer. Access Aange Cancel Save Helptext_image
Create Items DENON DJ Take any you want to create a new item for creating an app in the CASHUPPO project program. □ Create new item: Discovery Cancel Back HelpDiagrama: ventana Crear iconos
5
text_image
Confirm Installation DENON DU The following: to check the installation of D:\WINDOWS\logitech\logitech\logitech\logitech.exe Del. "the" is not the installation.text_image
DR-HC4500 Upgrade program Installing DR-HC4500 Upgrade program OK Cancel OK DR-HC4500 Upgrade programs are enabled Prior work CancelDiagrama: ventana Instalando
text_image
COM/OSO Upgrade program Installation Complete COM/OSO Upgrade will continue to install the successful installed OK "OK" is set.text_image
DENON DJ Upgrade program Upgrades program Device Des. Software version: 1 unit 0.039 Device name: DENOC4500 Unit number: 0 Update To: File is not ready. Warning... Load Deletetext_image
DENON DJ Upgrade program Design Dev. DH-DC500 is not connected. Options File File is not ready. Waiting... Load Removetext_image
DENON DJ Log-ragde prnrgyram Dennis.dsn DN HDASB is not ready for version up. Edit File File is not ready. Nothing... Load Edit4
text_image
DENON DJ Upgrade program Design Data Software version: var. 0.005 Device name: DMHC4503 Unit number: 1.0 Update file Adapter version: var. 0.015 Load Deletetext_image
DENON DJ Upgrade program Sensor Data: Software version: var. 0.000 Device name: DN-KE4502 Unit number: 10 System File Updates version: var. 0.010 New Loading... 7% Load Remove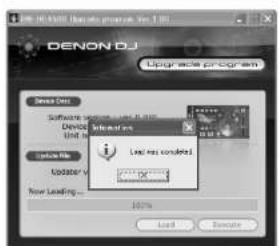
text_image
DENON DJ Upgrade program Design Data Software version 1.0.0.0.0.0.0.0.0.0.0.0.0.0.0.0.0.0.0.0.0.0.0.0.0.0.0.0.0.0.0.0.0.0.0.0.0.0.0.0.0.0.0.0.0.0.0.0.0.0.0.1 Device Unit 1 Internal unit Load less controlled Updo New Loading... 100% Load Deletetext_image
DENON DJ Upgrade program Yes 1.0 Upgrade program Design Data: Software version: 1.00.010 Device name: DENOC4500 Unit number: 1.0 Update file Update version: 1.00.010 Executing... 8% Load Execute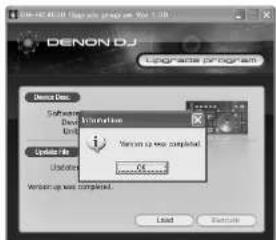
text_image
DENON DJ Upgrade program Design Des. Software Units Options No. Explanation Version up was completed. OK Cancel"Load failed. Check the connection, and retry"
"Loaded data is invalid. Check the file."
"Version up was not completed."
| Items | MIDI command | Message Type | |||
| Command | Number Value | ||||
| VFD Parameter | |||||
| 33 | Segment 1-12 LSB 0xEn 0x2 | D 0x00 -- 0x0F Control Charge | |||
| 34 | Segment 2-1 MSB | ↑ | 0x0C | ↑ | ↑ |
| 35 | Segment 2-2 MSB | ↑ | 0x0F | ↑ | ↑ |
| 36 | Segment 2-3 MSB | ↑ | 0x10 | ↑ | ↑ |
| 37 | Segment 2-4 MSB | ↑ | 0x11 | ↑ | ↑ |
| 38 | Segment 2-5 MSB | ↑ | 0x12 | ↑ | ↑ |
| 39 | Segment 2-6 MSB | ↑ | 0x13 | ↑ | ↑ |
| 40 | Segment 2-7 MSB | ↑ | 0x14 | ↑ | ↑ |
| 41 | Segment 2-8 MSB | ↑ | 0x15 | ↑ | ↑ |
| 42 | Segment 2-9 MSB | ↑ | 0x16 | ↑ | ↑ |
| 43 | Segment 2-10 MSB | ↑ | 0x17 | ↑ | ↑ |
| 44 | Segment 2-11 MSB | ↑ | 0x18 | ↑ | ↑ |
| 45 | Segment 2-12 MSB | ↑ | 0x19 | ↑ | ↑ |
| 46 | Segment 2-1 LSB | ↑ | 0x2C | ↑ | ↑ |
| 47 | Segment 2-2 LSB | ↑ | 0x2F | ↑ | ↑ |
| 48 | Segment 2-3 LSB | ↑ | 0x30 | ↑ | ↑ |
| 49 | Segment 2-4 LSB | ↑ | 0x31 | ↑ | ↑ |
| 50 | Segment 2-5 LSB | ↑ | 0x32 | ↑ | ↑ |
| 51 | Segment 2-6 LSB | ↑ | 0x33 | ↑ | ↑ |
| 52 | Segment 2-7 LSB | ↑ | 0x34 | ↑ | ↑ |
| 53 | Segment 2-8 LSB | ↑ | 0x35 | ↑ | ↑ |
| 54 | Segment 2-9 LSB | ↑ | 0x36 | ↑ | ↑ |
| 55 | Segment 2-10 LSB | ↑ | 0x37 | ↑ | ↑ |
| 56 | Segment 2-11 LSB | ↑ | 0x38 | ↑ | ↑ |
| 57 | Segment 2-12 LSB | ↑ | 0x39 | ↑ | ↑ |
n = M|D|CH
PCM 16 bits/24 bits, 44.1 kHz/48 kHz/96 kHz, 4 can.
USB MIDI I/O
natural_image
Cartoon illustration of a character with steam rising toward a smiling face, next to a surprised character (no text or symbols)■ 結露後の処置は
(3) Unit No. Set: 1 to 15 / ALL*
機番のユニット番号を設定します。
text_image
インストーラをダブルクリックします。 ASIO Driver Setupウィザードが立ち上がります。 "Next >" を押します。 Welcome to the DENON DJ ASIO Driver Setup Wizard The installation will guide you through the map required to install DENON DJ ASIO Setup on your computer. WITH DOOR, This is a software program in place by copyright law that will be implemented. It is not allowed for any other way to use this program. It is possible if it may result in a success or completion of the program, and will be provided in the case where you should write under the line. Cancel Save ① ASIOドライバセットアップウィザード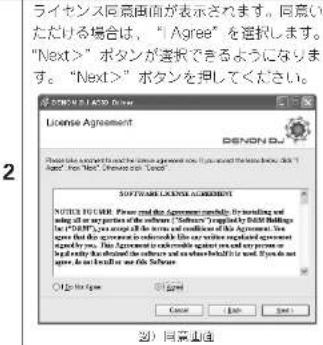
text_image
BENON DU A500 Driver Select Installation Folder The following will install BENON DU A500 Driver to the following website. To install in this folder, then "Yes". To install a different folder, then "Delete or Edit" Options. Entry: □ Microsoft PowerPoint 2019-03-01/2019 □ Help □ Stop Ctrl... Install BENON DU A500 Driver for yourself, or for anyone who uses this computer. ○ Remove ● Adder Cancel Finish Next図)インストーカ場所答認
text_image
DENON BJ Christine Drive DENON BJ Will start your user to create this drive to the name for comment access (http://DENON BJ.ADE) Drive □ Create or Use Desktop Cancel Next Next図)アイコン作成確認画面
5
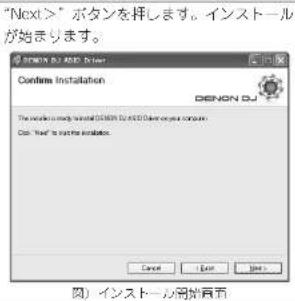
text_image
インストーラをダブルクリックします。 Upgrade programセットアップウィザード が立ち上がります。"Next >"を押します。 Welcome to the DN-HC4500 Upgrade program Setup Wizard DENON OJ The addition of your steps through the steps requested to install DN-HC4500 Upgrade program on your computer. WRIPING: This computer program is created by copyright and written permission. Use a specific tool to create a new program in any particular way, or should not be used for any other method. And will be recognized by the requirements required to use the tool. 【】アップグレードウィザード ライセンス同意画面が表示されます。同意いただける場合は," / Agree" を選択します。 "Next >" ポタンが選択できるようになります。 "Next >" ポタンを担してください。 ※ DN-HC4500 Upgrade program License Agreement DENON OJ Please note agreement that the computer program does not have been done with "Next >", then "Next >". Please note "Next >". Software is a "Custom" SOFTWARE LICENSE AGREEMENT NOTICE TO COM: Please read this agreement completely. For installing and writing all an any portion of the software ("Software") regularly filled with findings for it (DINP), you accept all the terms and conditions of this agreement. You agree that this agreement is readable like any written agreement agreed by you. This agreement is readable if you can put some key details but also read the software and when before it is wrong. If you do not agree, you can better use this software. 【】 同意画面3

text_image
DIN-100001 (Create version) Create icons DENON DJ To what you want to create a custom menu for custom options (DIN-10001) Log your progress □ Create icon on Desktop Cancel Help Next ④ メイコン作成確認頁面5
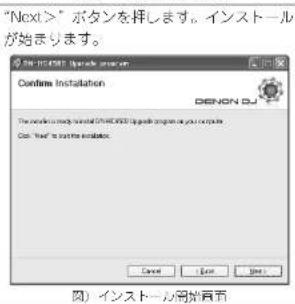
| F | C | D | E | F | G | H | I | J |
| D | D | D | E | F | G | H | I | J |
が表示されます。
text_image
DENON DJ Design file program Software version: set 0.038 Device name: DM-HE200 Unit number: 9 Update file File is not ready. Waiting... Load Removetext_image
DENON DU Design Active Program Denon Dus Dus HDC4500 is not connected. Update File File is not ready. Waiting... Used Executetext_image
DENON DJ Upgrade program Device Set: DN-DC500 is not ready for version up Update File File is not ready. Waiting... Last Create4
text_image
DENON DJ Upgrade program Design Data Software version: var 0.000 Device name: DN-014500 Unit number: 0 Update file Updater version: var 0.010 Load... RemoveLoadボタンが選択可能になる。
text_image
DENON DJ Upgrade program Design Data Software version: Unit 0.000 Device name: CN-RC4300 Unit number: 0 Update File Upgrade version: Unit 0.010 New Loading... 27% Load Activate5-1

text_image
DENON DJ Upgrade program Device Info Software Version 2000 - 10.000 Device Unit n Update File Updated Now Leading... Remove Live new console! OK Cancel Add Deletetext_image
DENON DJ Upgrade program Device Dwg. Software version: 1 var 0.016 Device name: SIM-CA4300 Unit number: 2 Update file Update version: 1 var 0.016 Encoding: 8% Load... Remove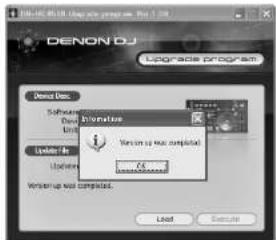
text_image
DENON DJ Upgrade program Denos Des. Software Options Unit Updated for Updated Information Version up to complete. Version up will complete. OK Cancel Load ExecuteLoaded data is invalid. Check the file.
Version up was not completed.
text_image
Scanned document with dense text and a QR code, likely a form or digital recordCMD Item Data Length
| SOX | Start of System Exclusive | 0xF0 | 1Byte |
| IDC | ID code → DENON DJ ID | 0x004003 | 3Byte |
| FMT | Communication format | 0x12 : one way | 1Byte |
| MDN | Model number | 0x41 (DN-HC4500) | 1Byte |
| LIN | Unit number | depends on preset mode (0x00 to 0x0F) | 1Byte |
| MCH | MIDI channel | depends on preset mode (0x00 to 0x05) | 1Byte |
| MST | Message Type | 0x53 : Selecting, 0x50 : Polling , | 1Byte |
| CMD | Command | 0x20 : Preset so/ 0x21 : Presc. rousest | 1Byte |
| DI | Data Length | 0x** number of the data Byte | 1Byte |
| Data | Preset data | refer the preset data table | **** |
| BCC | Block check character | 0x** EVEN parity of the Data block | 1Byte |
| EOX | End of System Exclusive | 0xF7 | 1Byte |
44.1 kHz/48 kHz/96 kHz
D-レンジ 106dB (TYP)
S/N 106dB (TYP) (DIN)
N: 1port, OUT: 1port
USB HID I/O (一般)
32Byteパケット
■ 制御インターフェース
フェダースタート:
フェダー
3.5 mmステレオミニジャック