
MXCDP2680 - Range hood Mx Onda - Free user manual and instructions
Find the device manual for free MXCDP2680 Mx Onda in PDF.
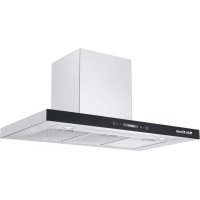
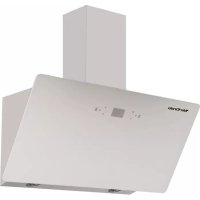
| Product type | Decorative wall-mounted extractor hood |
| Brand | Mx Onda |
| Model | MXCDP2680 |
| Dimensions (W x D x H) | 895 x 497 x 1040 mm |
| Weight | 16.95 kg |
| Power supply | 220-240 V ~ 50 Hz |
| Motor power | 190 W |
| Maximum consumption | 193 W |
| Lighting | LED 2 x 1.5 W |
| Number of speeds | 3 |
| Extraction capacity | 700 m³/h |
| Noise level | ≤ 68 dB |
| Air outlet diameter | 150 mm |
| Energy class | B (A+++ to D) |
| Fluid dynamic efficiency class | A |
| Lighting efficiency class | A |
| Grease filtration efficiency class | D |
| Material | Stainless steel |
| Filters | Aluminium, 5 levels |
| Non-return flap | Yes |
| Minimum height above cooking surface | 65 cm |
| Control type | Mechanical (push buttons) |
| Installation | Wall-mounted, external exhaust |
| Standards | CE, RoHS |
Frequently Asked Questions - MXCDP2680 Mx Onda
User questions about MXCDP2680 Mx Onda
0 question about this device. Answer the ones you know or ask your own.
Ask a new question about this device
Download the instructions for your Range hood in PDF format for free! Find your manual MXCDP2680 - Mx Onda and take your electronic device back in hand. On this page are published all the documents necessary for the use of your device. MXCDP2680 by Mx Onda.
USER MANUAL MXCDP2680 Mx Onda
natural_image
Line drawing of a kitchen range hood with ventilation slots and a chimney (no text or symbols)CE
ANTES DE SU USO LEA ATENTAMENTE ESTE MANUAL
¡ATENCIÓN!
ESTE APARATO FUNCIONA CON UNA TENSIÓN DE 230 V, PARA EVITAR UNA POSIBLE DESCARGA ELÉCTRICA NO TRATE DE
natural_image
Diagram showing a vertical arrow pointing upward and a cylindrical object with wavy texture (no text or symbols)
natural_image
Technical line drawing of a mechanical component with threaded shaft and base, labeled D (no text or symbols on the diagram itself)CARACTERÍSTICAS TÉCNICAS
natural_image
Line drawing of a kitchen air conditioner unit with ventilation grilles and a chimney (no text or symbols)CE
ANTES DE USAR, LEIA ESTE MANUAL COM ATENÇÃO
ATENÇÃO
ESTE APARELHO FUNCIONA COM UMA TENSÃO DE 230 V, PARA EVITAR CHOQUE ELÉTRICO POSSÍVEL, NÃO TENTE ABRI-LO. Este
Para trocar as lâmpadas LED:
CARACTERÍSTICAS TECNICAS
USER AND INSTALLATION MANUAL
Mx Onda
DECORATIVE WALL-MOUNTED RANGE HOOD
MODEL: MX-CDP2680

natural_image
Line drawing of a kitchen range hood with ventilation slots and a chimney (no text or symbols)CE
PLEASE READ THIS MANUAL BEFORE OPERATION
WARNING
This unit operates with a voltage of 230 V, to avoid a possible electrical shock not try to open it. This equipment does not have part some that could be repaired by your, in the event of a wrong operation not manipulate it, and attend to an Official Technical Service MX ONDA.
Waste electrical products must not be disposed of with household waste.
This equipment should be taken to your local recycling centre for safe treatment.

This product complies with European Directives RoHS (2011/65/UE), on the restriction of use of certain dangerous substances in electrical and electronic appliances.

INTRODUCTION
Congratulations on the purchase of your new MX ONDA decorative wall-mounted extractor hood, model MX-CDP2680.
We recommend that you spend some time reading this Installation and User Manual to fully understand how to properly install and operate it. Before installing the hood, consult the installation section of this manual.
Among others, it incorporates the following features:
- Mechanical type controls
• 3 extraction speeds
• LED lighting (2 x 1.5 W) - Motor power: 190 W
- Energy class: B
• Dynamic fluid efficiency class: A
• Lighting efficiency class: A - Grease filtering efficiency class: D
• Sound level: ≤ 68 dB
• Extraction capacity: 700 m³ / h
• Aluminum filters with 5 filter levels - Backflow valve
• Air outlet diameter: 150 mm
• Housing, chimney and front in stainless steel

BEFORE CONNECTING THE APPLIANCE
Your security is important for us. Please read all safety instructions carefully before using and installing the range hood and keep this user and installation manual for future reference.
- After removing the packaging, check that the appliance is not damaged. If in doubt do not install it and contact technical support staff.
- Keep packaging materials (bags, polystyrene pieces, etc.) out of the reach of children, as they are a potential source of danger.
- Check that the voltage of your electrical outlet is 220-240 V \~ 50 Hz and that it is grounded. The electrical safety of this appliance is guaranteed only if it is connected to a socket with an effective earth connection, as foreseen by the safety regulations in force.
- The manufacturer declines any responsibility for damages derived from the lack of grounding in the installation. When in doubt, consult a professional.
- This appliance must be connected to a circuit that incorporates an omnipolar isolation switch that provides a total disconnection from the electrical network.
- If the electrical connection is made with the mains plug and this is accessible after installation, it will not be necessary to install a circuit that incorporates an isolation switch.
- Before installing the extractor hood, consult the regulations and legal provisions regarding the current regulations on air and smoke evacuation in your area.
- To improve the evacuation and performance of the cooker hood, we recommend that the flexible tube be as short as possible and avoid right angles.
-
The lower part of the hood must be at a minimum height of 65 cm from the hob. If a gas hob is to be used and a greater distance is indicated in its installation instructions, this distance must be respected.
-
The hood exhaust pipe must not be connected to the smoke exhaust duct of appliances powered by gas or other fuel.
- Do not connect the exhaust pipe of the hood to the ventilation duct or hot air.
- To avoid damage to the cooker hood, use only the supplied screws.
- The manufacturer declines any responsibility for damages and injuries resulting from improper installation, incorrect or reckless use of the appliance.
IMPORTANT SAFETY INSTRUCTIONS
- Due to the suction of hot air and smoke from cooking, the hood and its accessible parts can become hot.
- This device can be used by children from 8 years and people with reduced physical, sensory or mental capacities or lack of experience and knowledge, if they have been given supervision or instructions on using the device safely and they understand the dangers involved, and provided they have the supervision of a person who is responsible for their safety.
- Children must not play with the appliance. Cleaning and maintenance must not be carried out by children.
- The kitchen must have adequate ventilation if the extractor hood is used in conjunction with gas or other fuel hobs.
- Do not leave open flames, for example a gas cooking zone without a container or flaming food when the extractor hood is operating.
- NEVER use the cooker hood without the filters or if they are excessively greasy.
- DO NOT leave pans or containers of oil unattended during use, as oil can heat up and catch fire.
-
To avoid the risk of fire and improve performance, regularly clean the filters as well as the interior of the hood, the accumulation of grease on the filters reduces the air flow.
-
During the installation, cleaning or maintenance of the extractor hood, the electricity supply must be cut off (isolation switch in the off position or the hood unplugged from the mains socket).
- To avoid injury during installation or cleaning, use extreme caution and pay attention to the sharp edges inside the cooker hood (wear gloves).
- When the extractor hood and kitchen appliances that run on gas or other fuel are running simultaneously, the negative pressure in the kitchen should not exceed 4 Pa (4 x 10⁻⁵ Bar).
- Do not repair or replace any part of the appliance unless specifically recommended in the manual. All other services must be performed by a qualified technician.
- Do not use scourers or any other abrasive cleaning product to clean the cooker hood, and do not use steam cleaners as this could damage the electrical and electronic parts.
- In case of breakdown, abnormality, if the plug, power cord or other parts show deterioration, do not plug in the appliance and do not try to repair it yourself. Contact the closest MX ONDA Official Technical Service.
- This appliance is designed for household, non-professional use only. MX ONDA will not accept any responsibility and the guarantee will not be valid in case of improper use or non-compliance with the instructions.
CONTROL PANEL

- Switching the extractor hood on and off.
Press this button to turn the cooker hood on and off. - Low speed selector.
Pressing this button will cause the range hood motor to run at low speed. - Medium speed selector.
Pressing this button will cause the range hood motor to run at medium speed. - High speed selector.
Press this button to run the range hood motor at full speed. - Turning the light on and off.
Press this button to turn the hood lighting on and off.
USE OF THE RANGE HOOD
We recommend that a few minutes before starting to cook, turn on the extractor hood in order to create a constant air flow, the air flow will prevent smoke and odors from being distributed throughout the different rooms. Press button 1 to turn on the extractor hood and using buttons 2, 3 or 4 select the desired extraction speed.
If you want to turn the cooker hood lighting on or off, repeatedly press button 5. It is advisable that when you finish cooking, leave the extractor hood running for a few minutes in order to eliminate any traces of smoke and odors that remain in the kitchen.
CLEANING AND MAINTENANCE
Before cleaning, disconnect the extractor hood from the mains, turn off the omnipolar isolation switch or unplug it from the mains socket.
Cleaning the outside and inside of the range hood
Clean the outside and inside with a damp cloth with warm water and degreasing soap, then dry them carefully.
Do not use scourers, alcohol or abrasive products and do not allow the appliance to come into contact with volatile agents such as gasoline, solvents, insecticides, etc.
Cleaning the filters
To remove the filters, press the retention tabs and gently pull the filters down.
Soak the filters in hot water with degreasing soap and let the solution work, then rinse the filters with hot water and let them dry.
If you wish, you can use specific products with high degreasing power to remove grease, in which case you should read the instructions for the degreaser product and follow the advice for use.
Do not put wet filters in the hood, make sure they are completely dry before putting them back.
Do not use abrasive or metal scourers that can scratch the surfaces, use specific products for grease.
To insert the filters into the hood, match the fixed tabs (the ones opposite the retainer) into the grooves of the cooker hood, then press the retaining tabs and snap the filter into place by releasing the retaining tabs. Make sure the filters are properly retained.
REPLACING THE LED BULBS
The hood LED bulbs must only be replaced by an Official Technical Service or by qualified personnel.
To change the LED bulbs:
- Before proceeding with the replacement of the LED bulbs, disconnect the cooker hood from the mains, turn off the omnipolar isolation switch or unplug it from the mains socket.
- Remove the filters to access the interior of the cooker hood.
- The bulbs are held by pressure plates, so by applying a slight pressure from the inside of it towards the outside the bulb will come out, then disconnect the power connector from the bulb to be able to extract it completely.
- Insert the new bulb with slight pressure on it and reconnect the power connector.
Note: Use original accessories, otherwise it could damage the cooker hood and the warranty will not be valid.
INSTALLATION
Remember... Before proceeding with the installation, the extractor hood must be disconnected from the mains, turn off the omnipolar isolation switch or unplug it from the mains socket.
The hood must be placed just below the kitchen smoke outlet hole. To obtain the best performance, the optimum height of the hood with respect to the worktop must be between 65 and 75 cm.
1. Installing the cooker hood bracket
a) With the help of a level mark the four holes B of the support D. The distance A must be the recommended height (65 to 75 cm) plus the height of the hood, that is, you must add the necessary centimeters so that when the hood is hanging from the support, it is at the recommended height (65 to 75 cm) from the worktop.
b) Drill four 10 mm ∅ holes at marks B.
c) Insert the supplied plugs C.
d) Attach the bracket D and fix it to the wall using the supplied screws E.

flowchart
graph TD
    A["Power Supply"] --> B["Motor Control"]
    B --> C["Grid Board"]
    C --> D["Component 1"]
    C --> E["Component 2"]
    C --> F["Component 3"]
    C --> G["Component 4"]
    C --> H["Component 5"]
    C --> I["Component 6"]
    C --> J["Component 7"]
    C --> K["Component 8"]
    C --> L["Component 9"]
    C --> M["Component 10"]
2. Installation of the chimney supports (first section)
The chimney of the extractor hood is made up of two pieces, which are inserted one inside the other to adapt to the height between the ceiling and the main body of the extractor hood.
a) Position the first chimney section (the one without vents) so that the screw holes are at the bottom.
b) Insert support A into the interior of the fireplace, matching the tabs on the support with the slots on the inside of the fireplace.
c) Mark the two holes B of the chimney bracket.
d) Drill two 10 mm ∅ holes at marks B.
e) Insert the supplied plugs C.
f) Attach the bracket and fix it to the wall using the supplied screws D.

3. Installation of the chimney supports (second section)
a) Place the second section of the chimney and align it with the first section of the chimney, mark its position on the wall next to the ceiling, then remove the two sections of the chimney and place bracket A.
b) Mark the two holes B of the chimney bracket.
c) Drill two 10 mm ∅ holes at marks B.
d) Insert the supplied plugs C.
e) Attach the bracket and fix it to the wall using the supplied screws D.

4. Installation of the extendable evacuation tube
The extendable evacuation tube has a diameter of 150 mm, if the smoke outlet hole has a different diameter, you will have to attach a suitable adapter to the required diameter.
a) Once the chimney supports have been installed, remove the two sections of the chimney.
b) Extend the extendable tube and lead it from the main body of the hood to the smoke outlet in the ceiling.
c) To fix the tube you can use plastic ties or metal clamps D. You can also use silicone or adhesive paste in order to fix and improve the tightness.

5. Placement of the sections that form the chimney
a) Connect or plug the cooker hood into the mains outlet and turn on the omnipolar isolation switch.
b) Check that the extractor hood works correctly.
c) Attach the first section of the chimney and fix it to the hood using the supplied screws A.
d) Insert the second section of the chimney so that it is inserted inside the first section of the chimney and is glued to the ceiling, then fix it to the support using the supplied screws B.

TECHNICAL SPECIFICATIONS
Supply voltage 220 - 240 V \~ 50 Hz
Maximum consumption 193 W
Extraction capacity 700 m³ / h
Motor power 190 W
LED lighting 2 x 1.5 W
Number of extraction 3 speeds
Energy class B (within the range A +++ to D)
Dynamic fluid efficiency class A
Lighting efficiency class A
Grease filtering efficiency class D
Sound level ≤ 68 dB
Air outlet diameter 150 mm ∅
Measures 895 x 497 x 1040 mm
Weight 16.95 Kg
Specifications subject to change without notice.
This product complies with the European Directives 2014/30/EU (EMC – Electromagnetic Compatibility) and the 2014/35/EU (LVD – Low Voltage Directive) relative to Low Tension Security.
“MX, MX ONDA” and its logos are trademarks of MX ONDA, S.A.
Telephone of information and Technical Service: +34 902 551 501
MX ONDA, S. A.
C / Matabueyes, 7 nave 1A
19171 - Cabanillas del Campo
(Guadalajara - Spain)
E-MAIL: mxsat@mxonda.es
http://www.mxonda.es
MANUEL D'UTILISATION ET D'INSTALLATION
Mx Onda
HOTTE ASPIRANTE MURALE DÉCORATIVE
MODÈLE: MX-CDP2680

natural_image
Line drawing of a kitchen air conditioner unit with ventilation grilles and a chimney (no text or symbols)CE
AVANT D'UTILISER CE MANUEL DE LIRE ATTENTIVEMENT
ATTENTION
REPLACEMENT DES AMPOULES LED
natural_image
Diagram showing a vertical arrow pointing upward and a cylindrical object with wavy internal lines (no text or symbols)
natural_image
Isometric line drawing of a vertical cylindrical object mounted on a base, with no visible text or symbols.CARACTÉRISTIQUES TECHNIQUES
Tension d'alimentation 220-240 V \~ 50 Hz
natural_image
Line drawing of a Method air conditioner with ventilation grilles and a chimney (no text or symbols on the diagram itself)C€
PRIMA DI UTILIZZARE IL MANUALE DI LEGGERE ATTENTAMENTE
ATTENZIONE
CARATTERISTICHE TECNICHE
natural_image
Line drawing of a microwave oven with ventilation grilles and a chimney (no text or symbols)CE
VOR GEBRAUCH SORGFÄLTIG LESEN SIE DIESE
ACHTUNG
natural_image
Icon of a person reading a book inside a circle (no text or symbols)E-MAIL: mxsat@mxonda.es
http://www.mxonda.es
- ¡ATENCIÓN!
- ESTE APARATO FUNCIONA CON UNA TENSIÓN DE 230 V, PARA EVITAR UNA POSIBLE DESCARGA ELÉCTRICA NO TRATE DE
- CARACTERÍSTICAS TÉCNICAS
- ATENÇÃO
- ESTE APARELHO FUNCIONA COM UMA TENSÃO DE 230 V, PARA EVITAR CHOQUE ELÉTRICO POSSÍVEL, NÃO TENTE ABRI-LO. Este
- CARACTERÍSTICAS TECNICAS
- USER AND INSTALLATION MANUAL
- Mx Onda
- DECORATIVE WALL-MOUNTED RANGE HOOD
- WARNING
- INTRODUCTION
- BEFORE CONNECTING THE APPLIANCE
- IMPORTANT SAFETY INSTRUCTIONS
- CONTROL PANEL
- USE OF THE RANGE HOOD
- CLEANING AND MAINTENANCE
- Cleaning the outside and inside of the range hood
- Cleaning the filters
- REPLACING THE LED BULBS
- INSTALLATION
- Installing the cooker hood bracket
- Installation of the chimney supports (first section)
- Installation of the chimney supports (second section)
- Installation of the extendable evacuation tube
- Placement of the sections that form the chimney
- TECHNICAL SPECIFICATIONS
- MX ONDA, S. A.
- MANUEL D'UTILISATION ET D'INSTALLATION
- HOTTE ASPIRANTE MURALE DÉCORATIVE
- ATTENTION
- REPLACEMENT DES AMPOULES LED
- CARACTÉRISTIQUES TECHNIQUES
- ATTENZIONE
- CARATTERISTICHE TECNICHE
- ACHTUNG
Brand : Mx Onda
Model : MXCDP2680
Category : Range hood