SS 210 - Saw Stayer - Free user manual and instructions
Find the device manual for free SS 210 Stayer in PDF.

| Product type | Jigsaw |
| Brand | Stayer |
| Model | SS 210 |
| Power supply | Mains 230 V / 50 Hz (110-120 V depending on country) |
| Rated power | 600 W (estimated) |
| No-load speed (strokes/min) | 500 - 3000 (variable) |
| Blade stroke | 20 mm (estimated) |
| Max blade length | 100 mm (estimated) |
| Wood cutting capacity | Up to 100 mm (estimated) |
| Metal cutting capacity | Up to 10 mm (estimated) |
| Aluminum cutting capacity | Up to 20 mm (estimated) |
| Weight | Approx. 2 kg (estimated) |
| Sound pressure level | Approx. 85 dB(A) (estimated) |
| Sound power level | Approx. 95 dB(A) (estimated) |
| Vibrations (wood) | ah = 19.5 m/s², K = 1.5 m/s² |
| Vibrations (particleboard) | ah = 18.5 m/s², K = 1.5 m/s² |
| Base plate | Adjustable and tiltable (inclination and longitudinal position) |
| Variable speed control | Integrated, adjustable by trigger pressure |
| Safety | Start lock-out device, automatic stop in case of jamming |
| Maintenance | Regular cleaning of ventilation slots and blade holder, lubrication |
| Compatible blades | Universal shank (12 mm), bimetal for flush cutting |
| Warranty | Manufacturer's warranty on manufacturing defects (according to warranty card) |
| Spare parts | Available from Stayer after-sales service (info@grupostayer.com) |
Frequently Asked Questions - SS 210 Stayer
User questions about SS 210 Stayer
0 question about this device. Answer the ones you know or ask your own.
Ask a new question about this device
Download the instructions for your Saw in PDF format for free! Find your manual SS 210 - Stayer and take your electronic device back in hand. On this page are published all the documents necessary for the use of your device. SS 210 by Stayer.
USER MANUAL SS 210 Stayer
28320 PINTO (MADRID)
Tel.: +34 902 91 86 81 / Fax: +34 91 691 91 72
CERTIFICA
Que las mecinas:
Tip: SIERRA DE SABLE
Modelo:
SS210 - SS L18
28320 PINTO (MADRID)
Tel.: +34 902 91 86 81/ Fax: +34 91 691 91 72
CERTIFICA
Che le macchine:
Tip:
SEGA UNIVERSALE
Modellos: SS210 - SS L18
This manual is consistent with the date of manufacture of your machine, you will find information on the technical data of the machine acquired manual check for updates of our machines on the website: www.grupostayer.com
The machine is intended for sawing wood, plastic, metal and building materials while resting firmly on the workpiece. It is suitable for straight and curved cuts. When using the appropriate bimetal saw blades, it is possible to cut flush to the workpiece surface.
1. Contents
page
-
Specific safety instructions 14
-
Instructions for use 14
3.1Assembly 14
3.2 Illustrated description 15
- Operating instructions 15
4.1 Placement and Testing 15
4.2 General instructions for use 15
- Maintenance and service instructions 16
5.1 Cleaning 16
5.2 Repair service 16
5.3 Warranty 16
5.4 Disposal and recycling 16
- Regulations 16
6.1 Technical Data 16
6.2 EU declaration of conformity 17
2. Specific safety instructions
- Cutting accessory contacting a "live" wire may make exposed metal parts of the power tool "live" and could give the operator an electric shock.
- Keep hands away from the sawing range. Do not reach under the workpiece. Contact with the saw blade can lead to injuries.
- Apply the machine to the workpiece only when switched on. Otherwise there is danger of kickback when the cutting tool jams in the workpiece.
- When sawing, the adjustable footplate 2 must always faces against the workpiece. The saw blade can become wedged and lead to loss of control over the machine.
- When the cut is completed, switch off the machine and then pull the saw blade out of the cut only after it has come to a standstill. In this manner you can avoid kickback and can place down the machine securely.
- Use only undamaged saw blades that are in perfect condition. Bent or dull saw blades can break, negatively influence the cut, or lead to kickback.
- Do not brake the saw blade to a stop by applying side pressure after switching off. The saw blade can be damaged, break or cause kickback.
-
Clamp material well. Do not support the workpiece with your hand or foot. Do not touch objects or the floor with the saw running. Danger of kickback.
-
Use suitable detectors to determine if utility lines are hidden in the work area or call the local utility company for assistance. Contact with electric lines can lead to fire and electric shock. Damaging a gas line can lead to explosion. Penetrating a water line causes property damage or may cause an electric shock.
- Secure the workpiece. A workpiece clamped with clamping devices or in a vice is held more secure than by hand.
- Always wait until the machine has come to a complete stop before placing it down. The tool insert can jam and lead to loss of control over the power tool.
3. Instructions for use

Read all safety warnings and all instructions. Failure to follow the warnings and instructions may result in electric shock, fire and/or serious injury.
While reading the operating instructions, unfold the graphics page for the machine and leave it open.
Placement
- When working with the machine, always hold it firmly with both hands and provide for a secure stance. The power tool is guided more secure with both hands.
- The tool is provided with a base plate 2 which should be settled permanently against the workpiece while this sawing.
3.1 Assembly

Before any work on the machine itself, pull the mains plug.

When mounting the saw blade, wear protective gloves. Danger of injury when touching the saw blade.

When changing the saw blade, take care that the saw blade holder is free of material residue, e.g. wood or metal shavings.
Selecting a Saw Blade
Use only saw blades with 12 universal shank. The saw blade should not be longer than required for the intended cut. Use a thin saw blade for narrow curve cuts.
Inserting the Saw Blade (see figure A)
- Press the unlock button on the base plate 6.
Turn in the direction of clockwise the knurled housing saw blade 3 and insert the saw blade 1 in the front, in the housing of the saw blade 3. Affirm the housing 3 this when the blade.

Check the tight seating by pulling on the saw blade. A loose saw blade can fall out and cause injury.
For certain work, the saw blade 1 can also be turned through 180^ (with the teeth pointed upwards) and re-inserted again.
Removing the Saw Blade

Before removing, allow the saw blade to cool down. Danger of injury when touching the hot saw blade.
Put forward the housing of the saw blade 3 and remove the saw blade 1. Release the lever 5.
3.2 Illustrated description
- Saw blade
- Adjustable footplate
- Saw blade holder
- Stroke rod
- Motor
- Locking baseplate
- Lock-off button for On/Off switch
- On/Off switch
- Handle
4. Operating instructions
4.1 Placement and Testing

Observe correct mains voltage! The voltage of the power source must agree with the voltage specified on the nameplate of the machine.
Switching On and Off
To start the machine, first push the lock-off button for the On/Off switch 7 and then press the On/Off switch 8 and keep it pressed.
To switch off the machine, release the On/Off switch 8.
Note: For safety reasons, the On/Off switch 8 cannot be locked; it must remain pressed during the entire operation.
When not using the power tool, switch it off in order to save energy.
Controlling the Stroke Rate
Increasing or reducing the pressure on the On/Off switch 8 enables stepless stroke-rate control of the switched-on machine.
Light pressure on the On/Off switch 8 results in a low stroke rate. Increasing the pressure also increases the stroke rate.
The required stroke rate is dependent on the material and the working conditions and can be determined by a practical trial.
Reducing the stroke rate is recommended when the saw blade engages in the material as well as when sawing plastic and aluminium.
After longer periods of work at low stroke rate, the machine can heat up considerably. Allow the machine to cool down by running it for approx. 3 minutes at maximum stroke rate.
For greater control make a mark with the cutting line on the workpiece. Do not make plunge cuts in metallic materials! When cutting metals, lubricate the blade with oil regularly.
4.2 General instructions for use

Before any work on the machine itself, pull the mains plug.

When sawing light building materials, observe the statutory provisions and the recommendations of the material suppliers.
Check wood, press boards, building materials, etc. for foreign objects such as nails, screws or similar, and always use the correct sawblade.
Switch the machine on and guide it toward the workpiece. Position the footplate 2 onto the surface of the work and saw through the material applying uniform contact pressure and feed. After completing the working procedure, switch the machine off.
If the saw blade 1 should jam, switch the machine off immediately. Widen the gap somewhat with a suitable tool and pull out the machine.
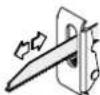
Pivoting and Retractable Footplate (see figure B-C)
Due to its movability, the adjustable footplate 2 adapts to the required angular position of the surface.
Depending on the application and the saw blade being used, the footplate 2 can be moved variably in length direction.
Plunge Cutting (see figures B-C)

The plunge cutting procedure is only suitable for treating soft materials such as wood, plaster board or similar! Do not work metal materials with the plunge cutting procedure!
Use only short saw blades for plunge cutting.
Place the machine with the edge of the footplate 2 onto the workpiece and switch on. For power tools with stroke speed control, set the maximum stroke speed. Press the power tool firmly against the workpiece and allow the saw blade 1 to slowly plunge into the workpiece.
As soon as the footplate 2 fully lays on the surface of the workpiece, continue sawing alongside the desired cutting line.
For certain work, the saw blade 1 can also be inserted turned through by 180^ and the sabre saw can be guided accordingly in a reversed manner.
Flush Cuts (see figure D)
Using elastic bimetal saw blades, items still attached to a wall (e.g. projecting building elements such as water pipes, etc.) can be sawn off flush at the wall.

Pay attention that the saw blade always extends beyond the diameter of the material being worked. There is danger of kickback.
Position the saw blade directly against the wall and apply some lateral pressure via the tool until the footplate faces against the wall. Switch the power tool on and saw through the workpiece, applying constant lateral pressure.
Coolant / Lubricant
When sawing metal, coolant/lubricant should be applied alongside cutting line because of the material heating up.
5. Maintenance and service instructions

Before any work on the machine itself, pull the mains plug.

For safe and proper working, always keep the machine and ventilation slots clean.
5.1 Cleaning
Clean the saw blade holder preferably with compressed air or a soft brush. Remove the saw blade from the power tool for this. Ensure proper operation of the saw blade holder by applying a suitable lubricant.
Heavy contamination of the machine can lead to malfunctions. Therefore, do not saw materials that produce a lot of dust from below or overhead.
5.2 Repair service
Our after-sales service responds to your questions concerning maintenance and repair of your product as well as spare parts.
Exploded views and information on spare parts can also be found under: info@grupostayer.com
Our customer consultants answer your questions concerning best buy, application and adjustment of products and accessories.
5.3 Warranty
Warranty card
Included in the documentation that accompanies this equipment, you should find the warranty card. You should fill out the card completely and return to vendor with a copy of purchasing receipt or invoice and you should receive a receipt.
Note: If you cannot find the warranty card within the documentation,you must ask for it through your supplier.
The warranty is limited only to manufacturing defects and expire if pieces have been removed or manipulated or repaired otherthan themanufacturer.
5.4 Disposal and recycling
The machine, accessories and packaging should be sorted for environmental-friendly recycling.
OnlyforEC countries:
Do not dispose of power tools into household waste!
According the European Guideline 2002/96/EC for Waste Electrical and Electronic Equipment and its implementation into national right, power tools that are no longer usable must be collected separately and disposed of in an environmentally correct manner.
Subject to change without notice.
6.Regulations
6.1 Technical Data

= Voltage

=Rated power input

= Battery power

= Load speed

= Battery charging time
= Displacement of the Sierra
= Length of the blade

= Wood cutting capacity

= Capacity Metal Cutting

= Cut Aluminum Capacity

= Weight
LwA
=Sound power level
L
=Sound pressurelevel

=Vibration
The values given are valid for nominalvoltages [U]230/240 V-50/60 Hz - 110/120 V-60Hz. For lower voltage and models for specific countries, these values can vary.Please observe the article number on the type plata of your machine.The tradenamesoftheindividualmachines may vary.
NoiseNibration Information
Measured soundvalues determined according to EN 60745. Typically the A-weighted noise levels of the product are: See technical data table (page 5).

Wear hearing protection!
Vibration total values ah (triax vector sum) and uncertainty K determined according to EN 60745:
Cutting board: a_b = 14m / s^2 K = 1.5m / s^2
Cutting wooden beam: a_1 = 19.5 m/s^2 , K = 1.5 m/s^2 .
The vibration emission level given in this information sheet has been measured in accordance with a standardised test given in EN 60745 and may be used to compare one tool with another. It may be used for a preliminary assessment of exposure.
The declared vibration emission level represents the main applications of the tool. However if the tool is used for different applications, with different accessories or poorly maintained, the vibration emission may differ. This may significantly increase the exposure level over the total working period.
An estimation of the levelof exposure to vibration should also take into account the times when the tool is switched off or when it is running but not actually doing the job. This may significantly reduce the exposure leveloverthetal working period.
Identify additional safety measures to protect the operator from the effects of vibration such as: maintain the tool and the accessories, keep the hands warm, organisation of work patterns.
6.2 EU declaration of conformity
The undersigned:
STAYER IBERICA,S.A.
With address at:
28320 PINTO (MADRID)
Tel.:+34 902 91 86 811 Fax:+34 91 691 91 72
CERTIFIES
That the machine:
Type:
RECIPROCATING SAW
Models:
SS210 - SS L18
We declare under our sole responsibility that this product is in conformity with the following standards or standardized documents: UNE EN 60335-2:-2010/A1:2013, UNE EN 60335-1:2012/A11:2014, according to EU regulations 2006/42/CE y 2014/30/EU.
January 5, 2017
Ramiro de la Fuente
Managing Director
C∈ROHS
Sousreservedemodifications.
Model: SS 210-SS L18
GENERALNY DYSTRYBUTOR NA TERENIE RP
POLNOCNA GRUPA NARZEDZIOWA SP. Z O.O.
ul Hurtowa 6
14-100 Ostróda
Tel. +48 89/6429700
Fax +48 89/6489701
e-mail. pgn@pgn.com.pl
www.www.stayer.pl
CENTRALNY SERWIS
ul. Hurtowa 6
14-100 Ostróda
Tel. +48 89/6429734
Fax +48 89/6429735