DPL 2235 WF - Digital photo frame Trevi - Free user manual and instructions
Find the device manual for free DPL 2235 WF Trevi in PDF.
| Product Type | Digital Photo Frame |
| Brand | Trevi |
| Model | DPL 2235 WF |
| Dimensions | 266 × 195 × 20 mm |
| Screen | 10.1 inches (25.65 cm) TFT LCD, resolution 1280x800 pixels (16:10) |
| Power Supply | 5V ⎓ 2A, maximum power consumption 10W |
| Processor | Rockchip RK3126 Quad-Core |
| Internal Memory | 8 GB |
| External Storage | microSD card up to 32 GB |
| Connectivity | Wi-Fi 802.11 b/g/n, micro USB port (PC transfer) |
| Operating System | Android 6.0.1 |
| Mobile App | Frameo (iOS and Android) to send photos |
| Main Functions | Slideshow, video playback, reactions, clock, weather, night mode, backup and restore |
| Care and Cleaning | Wipe with a soft dry cloth. Do not use abrasive products. |
| Safety | Do not open the device, avoid humidity and heat sources, unplug during storms |
| Spare Parts and Repairability | Contact Trevi support or an authorized center. No user-serviceable parts. |
| General Information | Weight not specified in the manual. Warranty and support via the Trevi website. |
Frequently Asked Questions - DPL 2235 WF Trevi
User questions about DPL 2235 WF Trevi
0 question about this device. Answer the ones you know or ask your own.
Ask a new question about this device
Download the instructions for your Digital photo frame in PDF format for free! Find your manual DPL 2235 WF - Trevi and take your electronic device back in hand. On this page are published all the documents necessary for the use of your device. DPL 2235 WF by Trevi.
USER MANUAL DPL 2235 WF Trevi
Before connecting, operating or adjusting this product, please read this user's manual carefully and completely.
ENGLISH
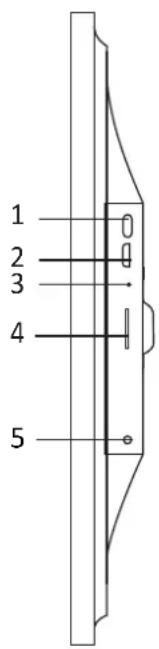
1. Turning on
Long press for 3 seconds to turn the appliance on or off. Press to turn the display on or off.
2. USB
Connect to a USB device to transfer photos. Use a micro USB cable.
3. Reset
Use a needle or paper clip to restore the drive.
4. Micro SD
Insert the external micro SD memory (up to 32GB) here to transfer photos or to backup photos.
5. DC
Insert the DC adapter plug to turn on the appliance.
Contents
Getting started 4
Frameo app 4
Video tutorials 4
Frameo quick setup 4
Updating the Frameo application 5
Start using Frameo 6
Connecting a new friend 6
Navigating your Frameo 7
Add friend 7
Settings 7
Power menu 7
React 7
Hide photo 7
Gallery 7
Fit to frame/Fill frame 7
Adjust photo 8
Interacting with videos 8
Power menu 9
React menu 9
External storage menu 9
Clock and Weather widgets 10
Weather menu 10
Settings11
My frame 11
Frame name 11
Frame location 11
Set language 11
Weather location 11
Temperature unit 11
Date 11
Time 11
Time zone 11
Set first day of week 12
Enable/Disable 24-hour format 12
Manage photos 12
Show/hide photos 12
Delete photos 12
Import photos 12
Transfer from computer 12
Export photos 13
Play from external storage 13
My Friends 13
Change options for a friend 13
Add person 13
Display 13
Brightness level 13
Sleep mode 13
Slideshow 14
Timer 14
Fill frame 14
Frame background 14
Photo display order 14
Reverse photo display order 14
Show caption 14
Show clock 14
Show weather 15
Autplay 15
Video playback 15
Auto mute 15
Video volume 15
Wi-Fi 15
Wi-Fi details 15
Reset Wi-Fi 15
Notifications 16
Show notifications 16
Notification volume 16
Storage space 16
Backup 16
Network connection 16
New photos 16
New friends 16
Software update 16
Feature news 16
Date and time 16
Backup and Restore 17
Backup frame to external storage (e.g. microSD card) 17
Automatic backup 17
Restore from backup 17
Reset frame 17
Help 17
Guide 17
Support 18
About 18
Peer ID 18
Frameo version 18
Check for update 18
Beta program 18
Third party attributions 18
Share anonymous analytics data 18
Privacy 19
Support 19
Specifications 19
Safety information 19
Disposal 20
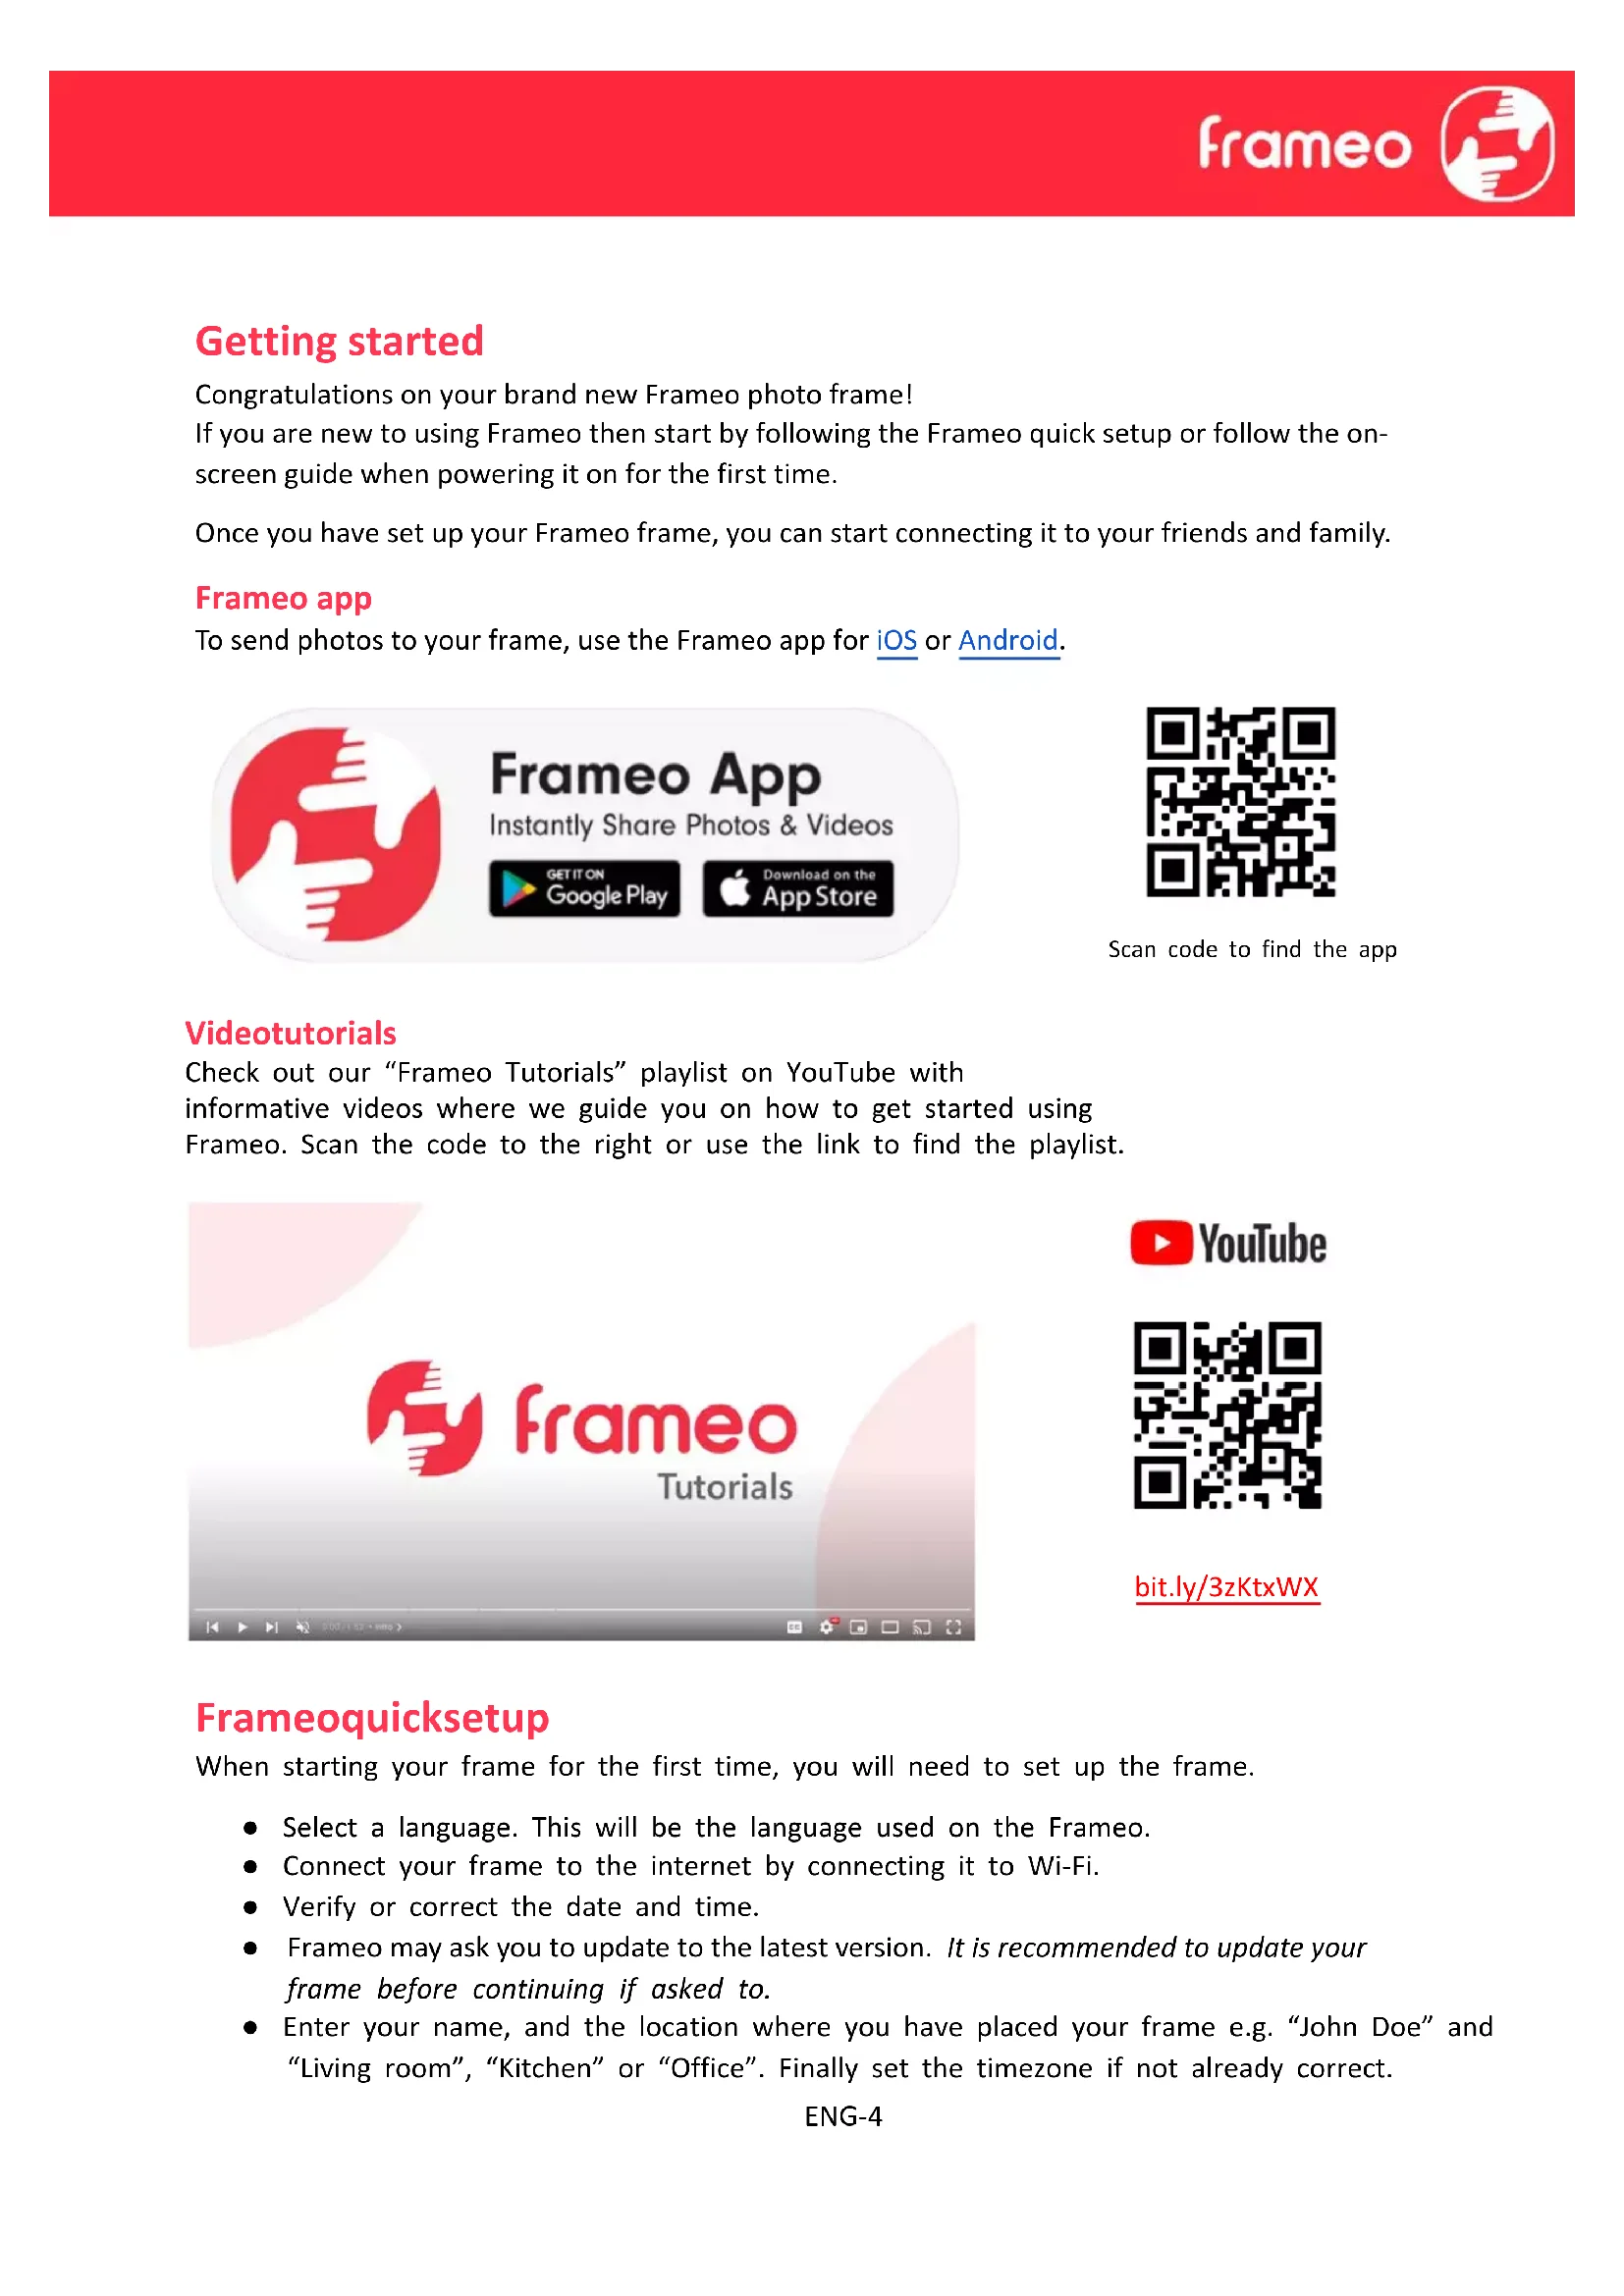
Getting started
Congratulations on your brand new Frameo photo frame!
If you are new to using Frameo then start by following the Frameo quick setup or follow the on-screen guide when powering it on for the first time.
Once you have set up your Frameo frame, you can start connecting it to your friends and family.
Frameo app
To send photos to your frame, use the Frameo app for iOS or Android.


Scan code to find the app
Videotutorials
Check out our "Frameo Tutorials" playlist on YouTube with informative videos where we guide you on how to get started using Frameo. Scan the code to the right or use the link to find the playlist.

YouTube

bit.ly/3zKtxWX
Frameoquicksetup
When starting your frame for the first time, you will need to set up the frame.
- Select a language. This will be the language used on the Frameo.
- Connect your frame to the internet by connecting it to Wi-Fi.
- Verify or correct the date and time.
- Frameo may ask you to update to the latest version. It is recommended to update your frame before continuing if asked to.
- Enter your name, and the location where you have placed your frame e.g. "John Doe" and "Living room", "Kitchen" or "Office". Finally set the timezone if not already correct.
Updating the Frameo application
At first installation, during the wizard, the system may detect an update of the Frameo application:
- At the Update available windows, press INSTALL
Important note: If you were doing the wizard, finish the required settings and then upgrade (at the Update available, press DISMISS).
Update available
Frameo Frame v1.0.6a (281) is available. Install update?
DISMISS INSTALL
- The digital frame will start updating (Loading window) by downloading the update package.
- At the end of the operation, you will see a warning window (Install blocked), press SETTINGS, and enable the UNKNOWN SOURCES, confirm with OK.
Install blocked
For security, your tablet is set to block installation of apps obtained from unknown sources.
CANCEL SETTINGS
Unknown sources
Allow installation of apps from unknown sources


- Turn off the digital frame by long press of POWER button and confirming it with the command POWER OFF.
- Turn on the digital frame by long press of POWER button.
- When the update is available again, press INSTALL and press INSTALL at the next window.
- At the App Installed confirmation window, press OPEN, the frame is now up to date and ready for use.
StartingFrameo
Next step is to connect Frameo with your friends and family by providing them with a code from your frame.
If you want to be able to send photos to the frame yourself, start by downloading the app for iOS or Android on App Store or Google Play. Then use the code to connect your frame and app as described below.
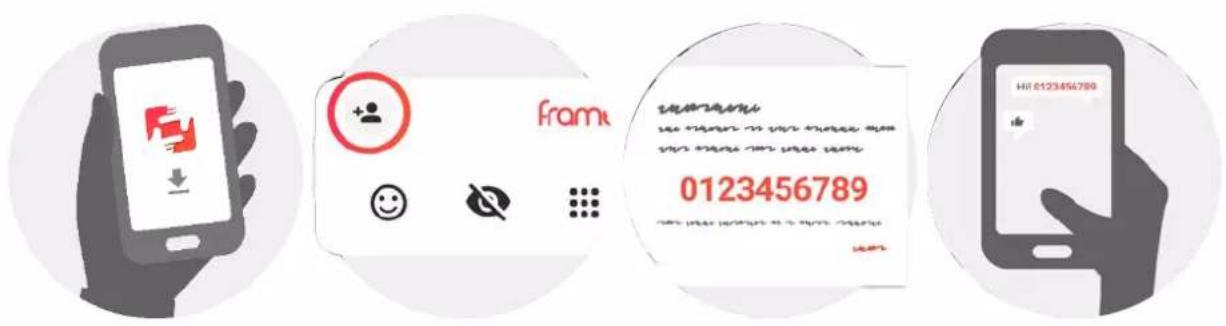
Connecting a new friend
Make sure that your friend has downloaded and installed the Frameo app.
Click the add friend icon on your frame. A dialog will appear showing a connection code, which is valid for 12 hours.
Now share this code in whatever fashion you prefer e.g. SMS, E-Mail, IM, phone call, to your friend.
Once your friends have added the code in their Frameo app, they will automatically appear on your frame and be able to send you photos.
Read chapter Change options for a friend to allow connected friends, to retrieve and share the connection code via the smartphone app.
NavigatingyourFrameo
Swipe left or right to go through your photos.
To access the menu, simply tap once on the screen.
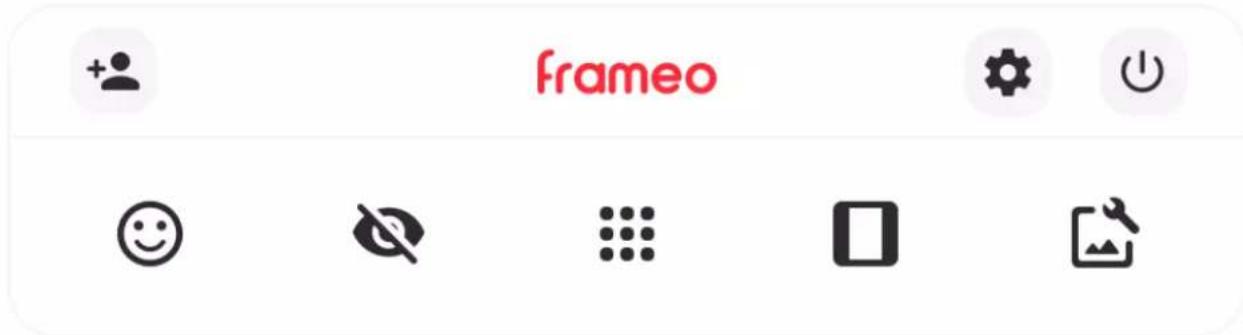
In the menu you will find the most used features.

Addfriend
This will generate a code that you can share with your friends and family so they can connect and send photos to your frame.

Settings
Opens the Settings.

Powermenu
Opens the Power menu.

React
Opens the React menu.
NB.TheReactmenucanonicalsobeaaccessedbydouble-tappingonthescreen.

Hidephoto
Hints the current photo. This means that the photo will no longer be shown in the slideshow. If needed the photo can be shown again through the settings menu.

Gallery
Opens a gallery which allows for easy and fast navigation through your photos.

Fittoframe/Fillframe
This toggles how the photo is shown.
The Fill frame option is the default. The photo is scaled so that it fills the whole screen. It will be centered around what is selected as the most important part. See the first picture below.
Fit to frame will make sure that the entire photo is shown on the screen. See the second picture below.


Adjustphoto
Allows you to adjust the position of the photo in the frame for an even better fit. Here you can also use to rotate your photo, and you can use to edit the caption on imported photos. For received photos, please ask the sender to edit the caption in the Frameo app.
Interactingwithvideos
When a video is shown two additional controls are shown. One for play/pause of the video and one to control the volume level for video sounds.


Press to start the video playback. Pressing will pause the video playback.

Press to open the volume slider. Use the slider to adjust the volume level for video sounds.
Pressing will mute the video while pressing will unmute the video.

Powermenu
Tap the power icon to access the power menu. Here you can power off using, restart your frame using or enter sleep mode using.


NB.Makesuretoalwaysusethepoweroffbuttononthedevicereinthepowermenutoturn Frameoff.NeverdisconnectpowerwhenFrameoisrunning.
Reactmenu
Tap one of the reactions to let the sender know how it made you feel.


Externalstoragemenu
When inserting an external storage (e.g. a microSD card) a menu will automatically appear with three options: Press to play photos directly from the external storage, press to import photos to the internal memory of your frame or press to make a backup of your frame.


ClockandWeatherwidgets
The current time and weather will appear in the upper-right corner of the frame when the frame has received at least one photo. Tapping either of these will open the weather menu.
Weathermenu
The weather menu contains more detailed weather forecasts and has shortcuts to weather-related settings.

Shows the weather location of your frame. Tap to access the weather location settings.
1DAY
1-day forecast which includes weather conditions for time periods of the day.
4DAY
4-day forecast. Tap to see the weather forecast for the next four days.

Displays the frame's current time. Tap to access the time settings.
Settings
Through the settings, you can personalise your frame to your needs.
My frame
Framename
Changes the name of your frame. This is also the name that connected friends and family will see in their list of connected frames in the smartphone app.
Framelocation
Changes the location of your frame. This is the location displayed on your friends' and family's list of connected frames which can help to distinguish frames from each other.
Setlanguage
Sets the language used on the frame.
Weatherlocation
Sets the location for the frame's weather feature, ensuring that your frame displays the appropriate weather forecast for you.
Temperatureunit
Toggles between the Fahrenheit and Celsius temperature scales.
Date
Sets the date used on the frame.
Time
Sets the time used on the frame.
Frameo will automatically try to set the correct date and time when connected to the internet.
Zone
Sets the time zone used on the frame.
Setfirstdayofweek
Sets which day of the week is considered the first.
Enable/Disable24-hourformat
Enables, and disables, 24-hour time format.
Manage photos
In the manage photos menu you can see how many photos are on your frame and the storage they use. You can also see the amount of storage left available on your device for storing new photos.
Show/hidephotos
Select which photos to hide by tapping them. Hidden photos will NOT be deleted from your frame and you can always select them to be shown again.
Use to hide or show all photos.
Deletephotos
Select photos that you want to permanently delete from your frame by tapping the photo. Use to select or deselect all and to permanently delete the selected photos.
Importphotos
Allows you to import photos from an external storage (e.g. microSD card).
Before you try to import photos, make sure you have an external storage (e.g. microSD card) inserted into your frame with the photos you wish to import.
Start by selecting the photos that you want to import onto your frame. Once selected tap the import button to start the import process.
Use to select or deselect all photos on the external storage (e.g. microSD card).
Use to set the sort order of photos before import and to order by ascending/descending.
Transferfromcomputer
Allows you to transfer photos from a computer using a USB cable. Enable the feature and then follow the on-screen guide for step-by-step instructions on how to transfer photos to your frame.
For more information, please visit our help center: https://frameo.net/usbfaq
Exportphotos
Allows you to export photos from the frame to external storage (e.g. microSD card).
The export function will export all photos on the frame as well as profile pictures.
Playfromexternalstorage
Enables / disables playback of photos and videos directly from an external storage (e.g. microSD card) without taking up space on the frame.
My Friends
This list contains all the connected friends that are allowed to send photos to your frame.
Changeoptionsforafriend
Click the options icon to open the friend options menu. From here you can allow / disallow if a friend may share the code to the frame. If this is enabled the friend can retrieve and share the code to the frame from his/her app.
From the options menu you can also delete a friend, by pressing the DELETE FRIEND button. This will remove the friend from the list and thereby remove their permission to send photos to the frame. You will then be asked to confirm the removal and if you would like to remove all photos previously received from this friend.
Addperson
To allow a new person to send you photos, simply tap the add friend button and share the presented code in whatever way you prefer.
Display
Brightnesslevel
Adjust the brightness level of the screen.
Sleepmode
Frameo offers a sleep mode which turns off the screen to reduce power consumption. The default setting is to turn off the screen at 23:00 and turn on the screen again at 07:00 every day. This can be altered by changing your sleep schedule(s). It is possible to have multiple schedules
active at once to e.g. have different settings for weekdays and the weekend or a separate schedule to turn off the frame while at work.
Your frame is not powered down or in standby, so you will still be able to receive photos during sleep mode.
Slideshow
Timer
Set the duration that a photo should be displayed before showing the next photo.
Fillframe
Set the default frame photo setting. Check to set default to fill which makes the photos fit the device screen according to the most important part of the photo. Uncheck to make the photo fit inside the screen of the device, adding background bars on the sides or top/bottom.
Framebackground
Choose between several different frame background options to be shown as bars if the photo does not fill the screen.
Photodisplayorder
Sets the order in which your photos are displayed on the frame.
- By date taken: Photos are shown in order of when it was taken.
- By date received: Photos are shown in order of when it was received.
- Shuffle: Photos are shuffled and shown in a random order.
Reversephotodisplayorder
Sets if photos are displayed newest to oldest or oldest to newest.
Showcaption
Set whether or not to display the captions that your friends have sent with the photo. Check to display captions. Uncheck to hide captions.
Showclock
Set whether or not to display the clock widget in the upper-right corner of the slideshow.
Showweather
Set whether or not to display the weather widget in the upper-right corner of the slideshow.
Autplay
Enables/disables autplay of videos in the slideshow. Videos can always be manually started regardless of this setting.
Videplayback
Determines how videos should be played when autplay is enabled.
- Loop videos: The video will loop until the slideshow timer is up.
- Play once: The video will play once and show its thumbnail until the timer is up.
- Play once and continue: The video will play once and continue to the next photo, or video, once it completes.
Automute
Enable to automatically mute the video volume after a short period of time of not interacting with the frame.
Videovolume
Adjust the volume level for video sounds on the frames.
Wi-Fi
Set which Wi-Fi the frame connects to. If you are connecting to a network with a captive portal Connection status will say that Wi-Fi login is required and show . Tap this to open a login screen where you can enter credentials to access the network.
Wi-Fidetails
Use to show details about the current connected Wi-Fi.
ResetWi-Fi
Use to delete all Wi-Fi information and restart your frame.
Notifications
Shownotifications
Enables/disables whether notifications are shown in the slideshow (e.g. when a new photo is received).
Notificationvolume
Adjust the volume level for notification sounds.
Storagespace
Enables/disables notifications shown when frame storage is low.
Backup
Enables/disables notifications shown if automatic backup has failed.
Networkconnection
Enables/disables notifications showing network connection status.
Newphotos
Enables/disables notifications shown when receiving new photos.
Newfriends
Enables/disables notifications shown when new friends are added.
Softwareupdate
Enables/disables notifications shown when a software update has been installed.
Featurenews
Enables/disables notifications shown when new exciting features are added.
Dateandtime
Enables/disables notifications shown if time or date is not set correctly.
Backup and Restore
Backupframetoexternalstorage(e.g.microSDcard)
Tap to make a backup of your photos, friends and settings. The time of the latest successful backup is also displayed here.
Any existing backup on the external storage will be overridden!
Automaticbackup
If checked, your frame will automatically take a backup within 30 hours of receiving new photos or making changes to your frame.
Restorefrombackup
Before you attempt to restore your frame, start by confirming that your backup is up-to-date. This is done by confirming the date under "Backup frame to external storage (e.g. microSD card)". If e.g. the last backup is too old or if no backup is made, then press the "Backup frame to external storage (e.g. microSD card)" button to make a new backup.
NB: To keep both the old and the new frame operational at the same time after restoring from backup, please make sure that both frames are updated to the latest version beforehand.
If you wish to restore a backup on a frame that has already been setup, then you must first reset the frame. This is done by pressing the "Reset frame" button. This will delete all data on the Frameo and reset the Frameo to its setup screen.
On the setup screen you can select the "Restore from backup" button which will restore your frame according to the backup.
If the "Restore from backup" button isn't visible, then confirm that the external storage (e.g. microSD card) is correctly mounted.
Resetframe
Removes all data from your frame.
This will permanently remove all your photos, friends/connections and settings.
Help
Guide
Shows the quick start guide, which was shown when you first started the frame.
Support
Find contact information for Frameo's support team, and find technical device information.
The menu features a special QR code that is there for our support staff to scan. It contains additional device details and information, enabling our support team to efficiently address your specific concerns and provide accurate assistance. Simply take a photo of the QR code and share it with our support staff.
About
PeerID
This is a unique ID for your photo frame. When contacting our support, please provide this ID with your message.
Frameversion
Shows what version of the Frameo software is currently installed on your frame.
Checkforupdate
Check if an update is available for your frame.
Betaprogram
If checked the device will join the Beta program where it will receive updates more frequently and before normal release devices.
Thirdpartyattributions
Open source libraries
Opens a list of open source libraries used in the app and their licenses
Shareanonymousanalyticsdata
Sharing anonymous analytics data helps us tremendously to improve the Frameo software. We understand if you do not wish to share this data with us. Keep it checked if you wish to help us improve Frameo. Set unchecked to deny the sharing of anonymous analytics data.
Privacy
For more information regarding privacy, please visit http://privacy.frameo.net
Support
Please visit https://support.frameo.net/hc for FAQ, support and to provide feedback.
Specifications
Power supply: 5V ---2A
Max absorption: 10W
Display: 10.1" (25,65cm) TFT LCD
Resolution: 1280x800 (16:10)
CPU: QuadCore Rockchip RK3126
Internal memory: 8GB
Operating system: Android 6.0.1
WiFi: 802.11 b/g/n
Dimensions: 266 × 195 × 20mm
Safety information
- Make sure that the appliance is not damaged, in which case contact the seller.
- Check that all accessories are present.
- Do not open the unit: inside there are no user-controlled commands or spare parts. For all operations, contact an Authorized Trevi Support Center.
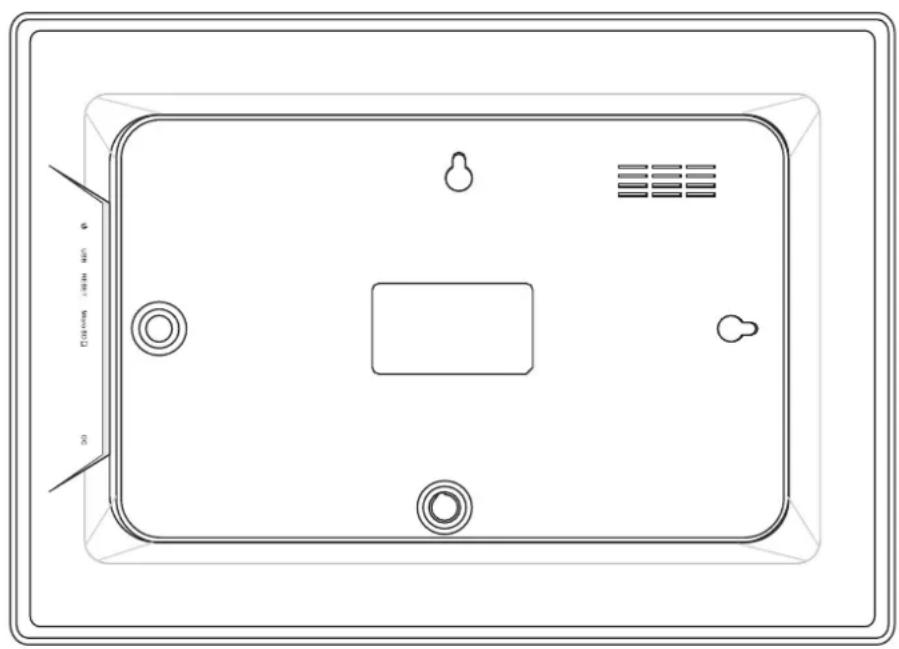
- Place the appliance on a flat surface.
- Place the appliance so that there are enough free space on its sides (at least 10cm ).
- Do not place any objects on the unit.
- Do not cover the ventilation slots on and behind the appliance.
- The appliance must not be exposed to dripping or splashing. No objects filled with liquid, such as vases, should be placed on the appliance.
- No naked flame source, such as lighted candles, must be placed on the appliance.
- The cables must be hidden and protected in order to avoid any stumbling block by someone and the resulting fall of the device.
- Keep the device away from the following locations: Close to heat sources (heaters, stoves, direct sunlight, etc ...); Near wet areas (bathrooms, swimming pools, etc ...); Dusty areas; Areas subject to strong vibrations.
- Disconnect the power cord during storms or for long periods of inoperation.
- Prevent children and people with poor knowledge of the product properly.
- Keep the following operating manual.
Disposal

Precautions for correct disposal of the product
The symbol shown on the equipment indicates that waste must be disposed of in "separate collection" and so the product must not be disposed of together with urban waste.
The user must take the product to special "separate waste collection centres" provided by local government, or deliver it to the retailer against the purchase of a new product.
Separate collection of waste and subsequent treatment, recycling and disposal operations promotes the production of equipment with recycled materials and limits negative effects on the environment and on health caused by improper handling of waste.
Illegal disposal of the product leads to the enforcement of administrative penalties.


MANUEL UTILISATEUR
DPL 2235 WF
www.trevi.it
For security, your tablet is set to block installation of apps obtained from unknown sources.
CANCEL SETTINGS
Unknown sources
Allow installation of apps from unknown sources


Librairies open source
For security, your tablet is set to block installation of apps obtained from unknown sources.
CANCEL SETTINGS
Unknown sources
Allow installation of apps from unknown sources

For security, your tablet is set to block installation of apps obtained from unknown sources.
CANCEL SETTINGS
Unknown sources
Allow installation of apps from unknown sources


Monitor: 10.1" (25,65cm) TFT LCD
SIMPLIFIED EU DECLARATION OF CONFORMITY
Hereby TREVI Spa declares that the radio equipment type DPL 2235 WF is in compliance with directive 2014 / 53 / EU.
The full text of the EU declaration of conformity is available at the following internet address https://www.trevi.it/dms/zidi/TREVI/DOCDPL2235WF.pdf


MADE IN CHINA