Bulldog 7 - Speaker MAGNAT - Free user manual and instructions
Find the device manual for free Bulldog 7 MAGNAT in PDF.

User questions about Bulldog 7 MAGNAT
0 question about this device. Answer the ones you know or ask your own.
Ask a new question about this device
Download the instructions for your Speaker in PDF format for free! Find your manual Bulldog 7 - MAGNAT and take your electronic device back in hand. On this page are published all the documents necessary for the use of your device. Bulldog 7 by MAGNAT.
USER MANUAL Bulldog 7 MAGNAT
Important notes for installation / warranty card
The Bluetooth® word mark and logos are registered trademarks owned by Bluetooth SIG, Inc. and any use of such marks by Magnat Audio-Produkte GmbH is under license. Other trademarks and trade names are those of their respective owners.

At the end of the product's useful life, please dispose of it at appropriate collection points provided in your country.
SECONDARY IN -PRIMARY OUT:
Mixer-Kanal 1 (Channel 1):
Mixer-Kanal 2 (Channel 2):
Mixer-Kanal 3 (Channel 3):
Dear MAGNAT Customer,
Congratulations on your fine new loudspeakers and thank you very much for choosing MAGNAT! You have made an excellent choice. The high-quality speakers produced by MAGNAT are renowned all over the world.
Please study the instructions and information below carefully before using your new loudspeakers.
IMPORTANT SAFETY PRECAUTIONS
- Please read through the instruction manual carefully before starting to use the device. This manual contains important information concerning operation and safety aspects. It is Imperative you observe all of the Information. Keep the manual in a safe location.
WARNING NOTICES: All of the warning symbols on the device, accessories and in the instruction manual itself must be adhered to. - EXPOSURE TO HEAT: Only operate the device and accessories in a temperature range from 10^ to 40^ . The device should not be positioned near heat sources (heaters, ovens, radiant heaters, naked flames, etc.). When setting up close to an amplifier a minimum distance of 10cm must be maintained. No naked flame sources, such as lighted candles, should be placed on the device. Pay attention to a sufficient ventilation of the device. The device may not be covered, e.g. by drapes, curtains. Maintain a distance of 20cm to walls.
- EFFECT OF MOISTURE: The device should not be exposed to dripping or splash water. Neither should it be used to support vases or other containers filled with liquid. Do not expose the device to water or high levels of humidity. There is a danger of electric shock. In the event of contact with moisture or liquids remove the mains adapter immediately.
- FOREIGN MATERIAL: Ensure that no foreign material enters through the device openings and into the interior. This could trigger short circuits and even result in electric shock and fire.
- CLEANING: Please use a soft, dry cloth with no cleaning agents, sprays or chemical solvents, as these could damage the surfaces.
- ELECTRICAL CONNECTION: Please note the voltage levels on the information signs. The mains adapter for the device should only be operated with the voltage and frequency values specified on the signs.
- LIGHTNING PROTECTION/PREVENTIVE MEASURES: If the device is not going to be used for a prolonged period (e.g. when on holiday), it should be disconnected from the mains by removing the plug. The device should also be disconnected from the mains in the event of a thunderstorm. Doing this will prevent damage caused by lightning and overvoltage.
- MAINS CABLE: The mains cable must always be suitable for operation and it should only ever be laid out in a manner that prevents it from being trodden on. It should not be pinched by objects either, as this can damage the cable. When using plugs and power strips it must be ensured that the cable is not kinked at the point where it emerges from the socket. Do not connect or remove the mains cable with damp hands.
- The mains plug is used as the disconnecting device. Disconnecting devices shall remain readily operable.
- Do not endanger the safety of plugs with reverse polarity protection or a ground connection. A plug with reverse polarity protection has 2 contacts with one wider contact. A plug with a ground connection has 2 contacts and a third contact that functions as a ground connection. The third contact is for your safety. If the supplied cable is not compatible with your socket, please ask an electrician to replace the unusable cable.
- MAINS FUSE: Only the type of fuse that is specified on the rear of the amplifier (next to the fuse holder) may be used.
OVERLOAD: Sockets, power strips and extension cables should not be overloaded. Observe the rated values on the sockets and extension cables. If an overload occurs, there is a risk of electric shock and fire. - SETTING UP: Please read the installation instructions. The device should only be positioned or mounted on a solid surface and not on moving base frames, otherwise there is a risk of injury.
Only use attachments/accessories specified by the manufacturer.
DAMAGE THAT MUST BE RECTIFIED BY A SPECIALIST:
If any of the following damage occurs, disconnect the speaker from the mains immediately and contact a specialist to conduct the repair work:
- The device should not continue to be operated if there is visible damage to the mains cable. A damaged cable should not be repaired, but must be replaced.
- Damage to the mains socket at the device.
- If moisture or water has entered the device or foreign objects have fallen into the device.
- If the device has fallen and the housing is damaged.
If the device does not work properly, even though all of the information in the instruction manual has been observed.
Only those subsequent alterations approved by the manufacturer may be conducted. Only original spare parts should be used for repair. After conducting any repairs the safety of device should be checked to ensure it is functioning correctly and safely.
Repairs must always be conducted by qualified specialists, as you might otherwise be exposed to dangerous high voltage levels or other hazards.

The triangle with a lightning symbol warns the user that high voltage is used within the device which can result in electric shock.

The triangle with an exclamation mark informs the user that important operating and maintenance instructions (repair) are contained in the accompanying instruction manual, which must be observed.

Do not open! Risk of electric shock!
CAUTION: In order to avoid electric shock do not open the speaker housing/mains adapter or remove the covers. The user is not to conduct any repairs him/herself. Repairs should only be conducted by qualified technicians! Do not use any sockets or extension cables that do not fully accommodate the plug of the device.
INSTRUCTIONS FOR DISPOSAL
In accordance with European Directive 2012/19/EU all electrical and electronic appliances must be disposed of separately via local collection points. Please observe the local regulations and do not dispose of your old appliances with normal household waste.
BATTERY DISPOSAL
Old batteries and rechargeable batteries are hazardous waste and do not belong in household waste. As such, they must be disposed of in accordance with current regulations. Please only dispose of batteries and rechargeable batteries in a discharged state!
DECLARATION OF CONFORMITY
Hereby, Magnat Audio-Produkte GmbH declares that the device Bulldog 7 is in compliance with the essential requirements and other relevant provisions of directive 2014/53/EU. The Declaration of Conformity can be found at www.magnat.de in the download area of the device.
USE AS DIRECTED
This device is designed for indoor use only.
CONTENTS
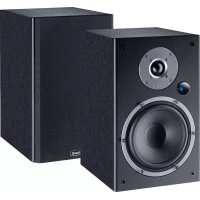
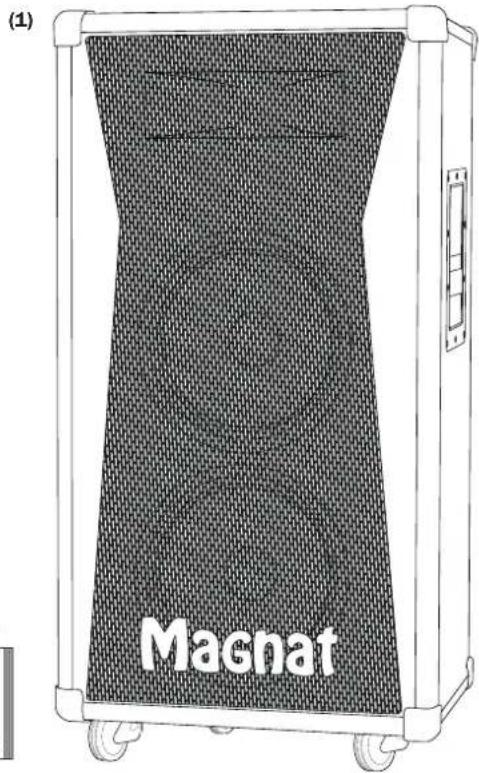
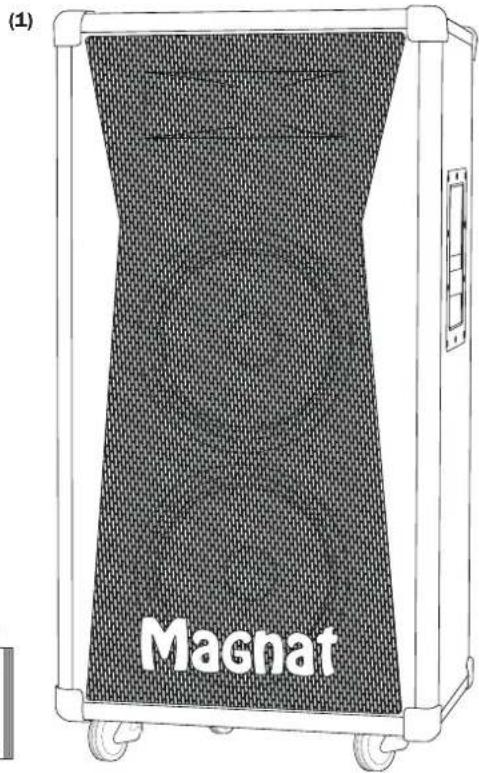
(1) Bulldog 7 (active speaker)
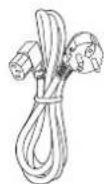
(2) Mains cable
Set of casters with mounting accessories:
(3) 2 × Casters
(4) 2 x Casters with parking brake
(5) 4 × Washers
(6) 4 × Locking washers
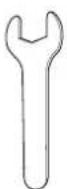
(7) 1 x Mounting wrench
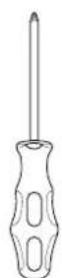
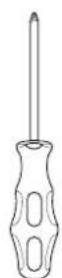
(8) 1 × Screwdriver
(9) Instruction manual (incl. warranty certificate)
(2)

(3) (4)


(5) (6)
(8)

(9)
UNPACKING THE SPEAKER
Please unpack the speaker and accessories carefully and check the contents of the box using the list above. In the event of any transport damage, please contact your supplier. Keep the packaging material safe. The original packaging will allow you to transport the speaker easily for any servicing requirements or if you wish to move it at a later date.
SETTING UP THE SPEAKER
- The speaker must be positioned on a level and stable surface.
- The surrounding environment should be dry and free of dust.
- Only use the speaker outdoors if the weather is dry.
- Make sure the connecting cables are laid safely.
- Exposure to direct sunlight or close proximity to heat sources should be avoided.
- Do not place any objects on top of the speaker, especially containers that are filled with liquid.
- The easiest way to operate the speaker is from behind the speaker itself.
- The Bulldog 7 should only be carried using the side handles.
Please note:
If the speaker is moved from a cold environment to a warm environment, condensation may form inside the device. In such a case, please do not operate the speaker for at least 2 hours.
MOUNTING THE SUPPLIED CASTERS
Four resonance-damping rubber feet are mounted on the underside of the housing. The supplied casters (3, 4) can also be mounted to make it easier to transport the speaker. Two of the casters are equipped with a parking brake (4). This brake should always be applied (lever located in the lower position) and only disengaged for transport.
- Carefully lay the Bulldog 7 (1) on its side.
- Use the screwdriver (8) to loosen the fastening screws of the four rubber feet and remove them.
Please slide a locking washer (6) onto the threaded bolt of each caster (3, 4) first, followed by a plain washer (5) and then screw the casters (3, 4) into the four screw holes. When doing this, the casters that are equipped with a parking brake (4) should be mounted at the rear. - Use the mounting wrench (7) to secure the casters (3, 4) in place via the hexagon nuts (at the upper ends of the threaded bolts).

OPERATING ELEMENTS AND CONNECTIONS ON THE REAR PANEL
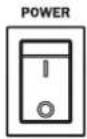
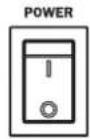
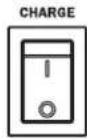
Power switch, charging switch, mains connection

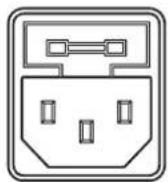
110-240V-50/60Hz FUSE:T3.15AL/250V POWER CONSUMPTION:200W
Connect the supplied mains cable to the power socket.
The operating mode is selected via the POWER and CHARGE switches.
| POWER CHARGE | Mains cable connected |
| OFF OFF - The device is switched off, the battery is not being charged | |
| ON OFF no The device is switched on, battery operation | |
| ON OFF yes The device is switched on, mains operation | |
| ON ON no The device is switched on, battery operation, the battery is not being charged | |
| ON ON yes The device is switched on, mains operation, the battery is being charged | |
| OFF ON no The device is switched off, the battery is not being charged | |
| OFF ON yes The device is switched off, the battery is being charged | |
CAUTION:
The speaker should always be operated with the battery installed and connected. If it is necessary to operate the speaker without a battery, both switches (POWER and CHARGE) must be set to "ON".
NOTE:
We recommend charging the battery on a regular basis, even when the speaker is not being used (once a month). Doing this will increase the service life of the battery. The battery is only partially charged when delivered. Please fully charge the battery before using it for the first time.
Audio connections
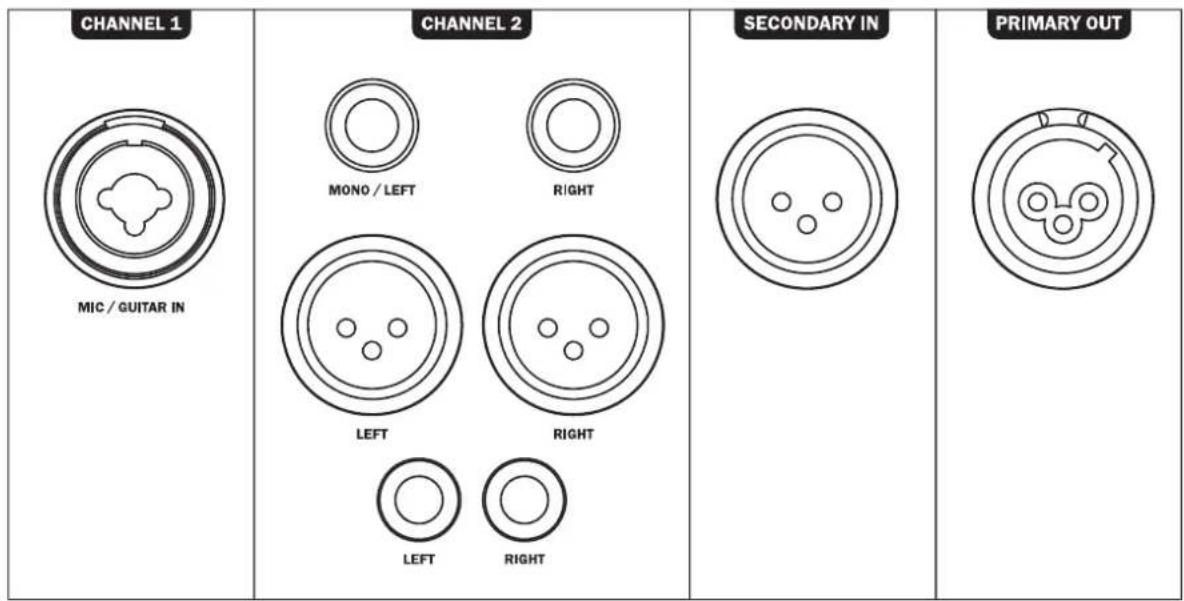
Audio input for channel 1:
A mono audio source (microphone or guitar) can be connected to channel 1.
An XLR/6.3mm combi jack is available for this purpose.
Audio input for channel 2:
A stereo audio source can be connected to channel 2.
There are two cinch (RCA) sockets, two XLR sockets and two 6.3mm jack sockets available here.
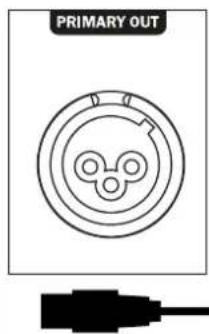
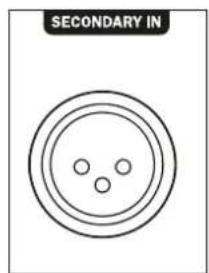
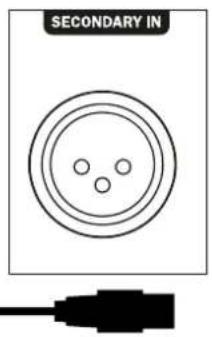
SECONDARY IN -PRIMARY OUT:
Two Bulldog 7 speakers can be connected to one another via these sockets.
For further information, please refer to chapter PRIMARY/SECONDARY Operation (page 18).
CHARGE
CHARGING

FULL


LOW

6%

100%
BATTERY LEVEL
RECHARGEABLE BATTERY INSIDE.
CHARGE THE BATTERY EVERY 30 DAYS EVEN IF NOT USED.
Battery charge Indicator
CHARGING LED:
Lights up red when the battery is being charged.
FULL LED:
Lights up green when the battery is fully charged.
BATTERY LEVEL LEDs:
These indicate the battery charge level (100%/66%/33%).
If the red LED (LOW) lights up, it means the battery is almost depleted and
the speaker will switch off soon to prevent a deep discharge of the battery.
OPERATING ELEMENTS AND CONNECTIONS ON THE REAR PANEL
The Bulldog 7 active speaker has a mixer with three input channels that can be controlled separately from one another.
CHANNEL 1


Mixer channel 1:
This channel is suitable for mono audio sources such as a microphone or guitar. An input socket is available on the rear panel for this purpose (see page 15).
CLIP LED (overload indicator):
The LED lights up red if the channel is overloaded. Reduce the volume (VOLUME) or adjust the tone control (reduce the bass and treble levels by using the BASS and/or TREBLE controls).
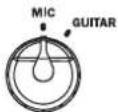
MIC/GUITAR:
This switch can be used to select the input sensitivity for a microphone or guitar.
BASS, TREBLE:
These controls can be used to adjust the bass and treble levels for channel 1 within a range of + / - 8dB
VOLUME:
This controller adjusts the volume of channel 1.
CHANNEL 2


Mixer channel 2:
This channel is suitable for stereo audio sources. Various devices including CD players, tuners and external mixing consoles, or instruments such as electric pianos and keyboards can be connected here. There are several input sockets on the rear panel for this purpose (see page 15).
CLIP LED (overload indicator):
The LED lights up red if the channel is overloaded. Reduce the volume (VOLUME) or adjust the tone control (reduce the bass and treble levels by using the BASS and/or TREBLE controls).
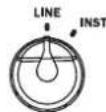
LINE/INST:
This switch can be used to select the input sensitivity for line level audio sources (e.g. CD player) or electronic instruments (e.g. keyboard).
BASS, TREBLE:
These controls can be used to adjust the bass and treble levels for channel 2 within a range of + / - 8dB
VOLUME:
This controller adjusts the volume of channel 2.
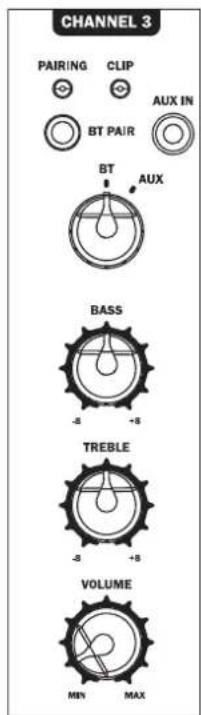
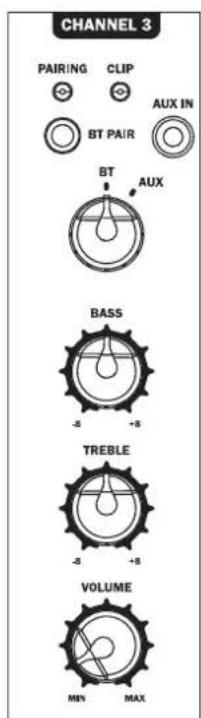
Mixer channel 3:
This channel can be connected to a Bluetooth source, or a mobile audio device can be connected via a stereo cable with a 3.5mm jack plug (AUX IN input socket).
CLIP LED (overload indicator):
The LED lights up red if the channel is overloaded. Reduce the volume (VOLUME) or adjust the tone control (reduce the bass and treble levels by using the BASS and/or TREBLE controls).
BT/AUX:
This switch selects between the Bluetooth input and the AUX input.
BASS, TREBLE:
These controls can be used to adjust the bass and treble levels for channel 3 within a range of + / - 8dB
VOLUME:
This controller adjusts the volume of channel 3.
Bluetooth pairing:
- Set the selector switch to BT.
The speaker now automatically switches to its pairing mode and the blue LED (PAIRING) flashes. If not, please press the BT PAIR button briefly
Now activate the Bluetooth mode on your source device. The speaker will appear in the list of Bluetooth devices as "Magnet Bulldog 7". If it is not displayed in the list, set your source device to search for Bluetooth devices manually and make sure that the speaker has been switched to its pairing mode. - When pairing is successful, the LED (PAIRING) will display a solid blue light.
- The Bluetooth connection can be disconnected again by pressing the BT-PAIR button.
- If you have previously connected a Bluetooth device, the speaker will automatically attempt to re-establish a connection with this device. If this is the case, you may be required to manually reconfirm the connection on the source device.
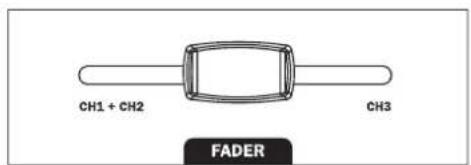
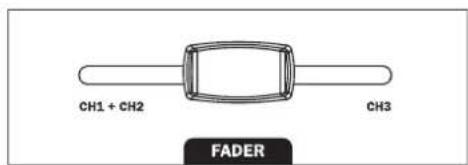
FADER (speaker balance control):
This controller can be used to fade between channel 1/2 and channel 3.
When set to the left position, only the signal from channel 1 and 2 (depending on the setting of the respective channel volume) is routed to the master channel; when set to the right position, only the signal from channel 3 is routed. When set to an area in between, the channels are continuously mixed.

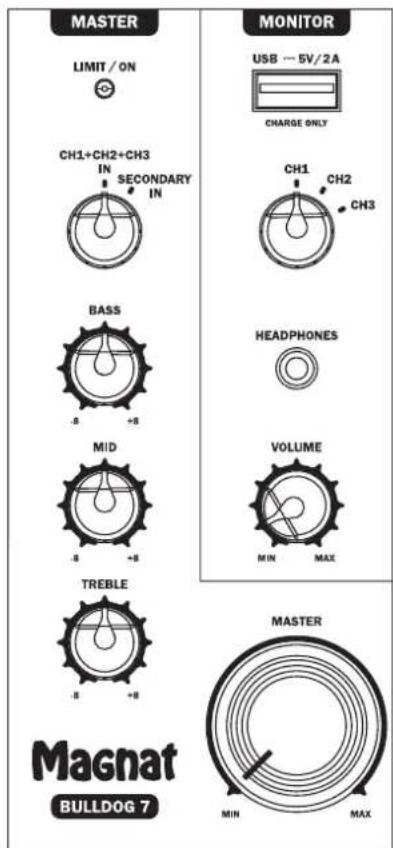
Master channel:
The audio signal from the 3-channel mixer is routed to the master channel. The following setting options and functions are available here:
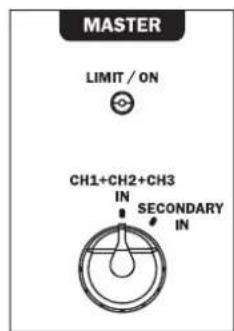
LIMIT/ON LED (overload indicator):
The LED lights up red if the power amplifiers are overloaded. Reduce the volume (MASTER) or adjust the tone control (reduce the bass, midrange and treble levels by using the BASS, MID and TREBLE controls).
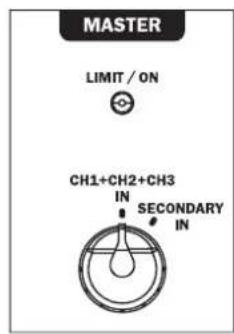
CH1+CH2+CH3 IN/SECONDARY IN:
This switch is used to select between the normal operating mode (CH1+CH2+CH3 IN) and the PRIMARY/SECONDARY mode. When operating a single Bulldog 7 speaker, this switch must be set to CH1+CH2+CH3 IN. The procedure for connecting a second Bulldog 7 speaker is described in chapter PRIMARY/SECONDARY Operation on page 18.
BASS, MID, TREBLE:
These controls can be used to adjust the bass, midrange and treble levels for the master channel within a range of +/-8dB.
MASTER:
This controller is used to adjust the overall output volume.
Monitor:
The Bulldog 7 is equipped with a monitor function. The audio signal of each individual mixer channel can be previewed individually via headphones.
USB-CHARGE: USB charging socket. External mobile devices (e.g. a smartphone or tablet) can be charged via this socket (5V/ max. 2A).
CH1/CH2/CH3: This switch selects one of the three channels to be listened to through headphones.
HEADPHONES: Headphone socket for connecting headphones.
VOLUME: This controller adjusts the volume at the headphone jack.
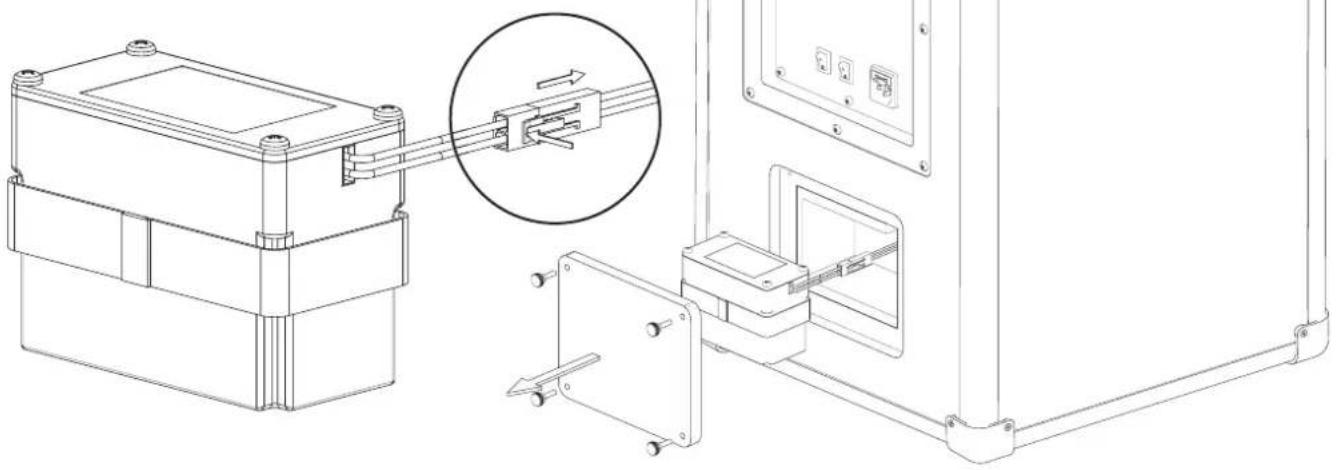
CHANGING THE BATTERY
The battery is installed in a compartment at the rear of the speaker.
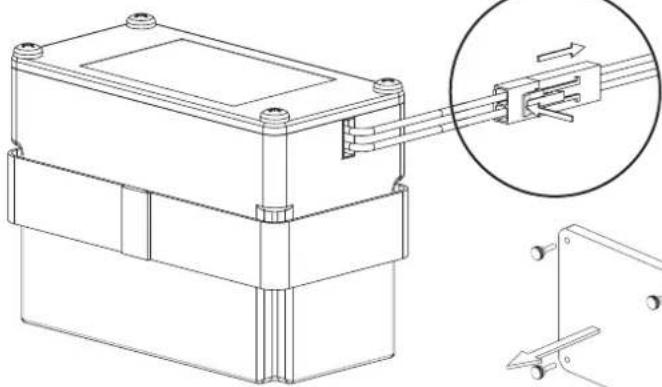
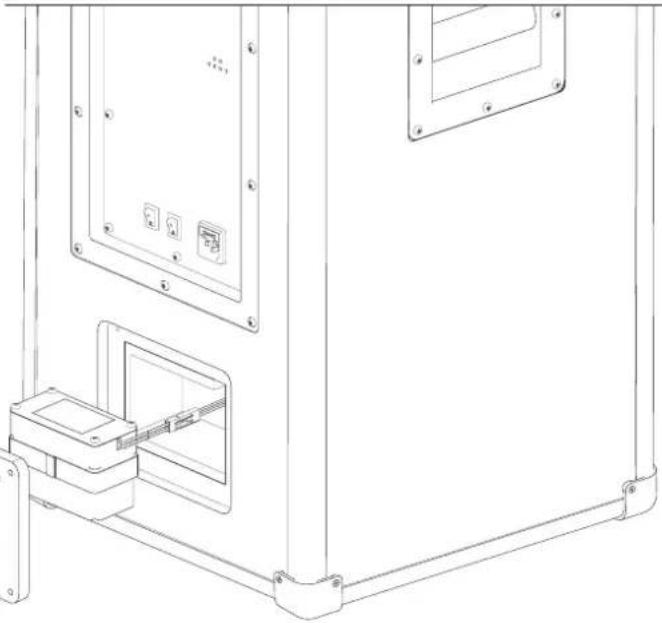
If it needs to be replaced, proceed as follows:
- Remove the battery compartment cover by loosening the four knurled screws.
- Remove the battery carefully and disconnect the cable connector by releasing the locking mechanism.
The battery is inserted in reverse order.
PRIMARY/SECONDARY OPERATION - CONNECTING A SECOND BULLDOG 7
A second Bulldog 7 can be connected to provide sound for larger rooms.
In this setup, one Bulldog 7 is configured as the main speaker (primary) and the other as a so-called secondary speaker.
All audio sources, including Bluetooth, are connected to the main speaker. All of the settings for the mixer and master channel are also only adjusted via the main speaker.
The secondary speaker is connected as follows using an XLR cable.
MAIN SPEAKER SECONDARY SPEAKER
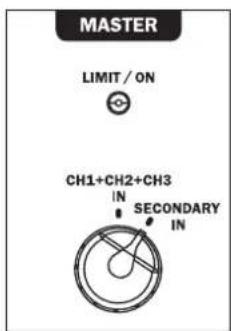
The selector switch for the master channel must be set to CH1+CH2+CH3 IN on the main speaker and to SECONDARY IN on the secondary speaker. The control panel of the secondary speaker is then deactivated and the speaker reproduces the same audio signal at the same volume as the main speaker.
NOTE: Both Bulldog 7 speakers reproduce audio in mono mode.
CAUTION: If the speaker or accessories are tampered with, this will void the operating license. The accessories supplied are to be used for operation. Additional accessories must be suitable for the intended use and be in perfect condition.
TECHNICAL DATA
BULLDOG7
Configuration: 2.5-way bass reflex, active
Speaker assembly: 2 × 250 ~mm woofer
Battery life when operated at maximum volume: 4 hours
Maximum battery life: up to 16 hours
Battery charging time: 6 hours
Sound pressure: up to 126 dB
Bluetooth Version 5.0
Operating Frequency: 2402 - 2480 MHz
Maximum emitted power
4 dBm
(EN 62479):
Mains voltage: 100 - 240 V
Dimensions (WxHxD): 460 x 875 x 380 mm
Weight 35kg
SUBJECT TO TECHNICAL CHANGE.
Très cher client.
SECONDARY IN -PRIMARY OUT:
SECONDARY IN -PRIMARY OUT:
SECONDARY IN -PRIMARY OUT:
NOBPEXDAEHNA, KOTOPbIE DOANKHBYUCTPAHRTbCnELNAHCTOM:
PnCLeAyoUxNIOBpeKdEHHX, Pn6Op HHeo6xoHMO HeMeAeHHOOTc0eAHHTb OT cTeH NtHaHry Ha npOBeHeHpeMOHTa:
- Ean Ha cetEBOM Ka6ebe 6ydt ObHApJxHeBn NobpeXDeHn, 3KnayatnpoBaT yCTpoCTBO 6oIb3n. NpOpeXeHHn Ka6eAb peMOHTPOBaTB Heh3r, erHyKHO 3aMeHHTb.
-Повржденя разьема петань на усторстve.
ECAHByTpbyyCTpOHTBa nonaBAIARNAHIOCTOPOHNEIpeAMTebl. - Eca yctpoictBO onpOKHHyocb H npH 1OM NOBpeAACK Kopnyc.
EaH yctpoiCTBO He npabnA hO FyHKUHOHNpyET, XOTa CO6IODeHbI BCE yKa3aHnR PyKOBOcTBa nO 3KcnAyaTaunn.
DonyctHMO npeaepnHHMaTb TOAe KO Te DOONAHHTeABHbIe H3MeHeHr, KOToPbIe pa3peWeHbI N3ROTOBtAEm.
ApaemOHHa Heo6xHMo HcnoA3OBaTb ToAkoOpnHaHbIe 3anaChIbe TaAH.
Pocpe moHTa Heo6xOAnMo IPOBepntb yctpoHCTBO Ha 6e30nacHOCTb, TObbl ObecneuHTb HAdExkauee HAdExkHoe FyHKUHOHPOBAHe.
PemOHthe pa60tBdoKbBcERda BbIIOAHHTBCa KBaHnHnHpOBaHHbIMn CneuaHCTAMN, TAK KAK Haue MOxET BO3HNKHyTB ONaCHOE BbOCOe HapJKeHHe HAn DpyTne BNAbI ONaCHOCTn.

3TOT CIMBOA INpeaynpexkaeI IOaB30BaTeA O TOM, YTO BHYTPN yCTPOINCTBA HcNOAB3yETCBA BICOKOE HAnpJxHHe, KOTOPOE MOKET PnIBeCTN K ONaChbIM yApam TOKa.

3TOT CIMBOA yka3bBAeT NOB3OBATEALO YCTPOINCTBa HA TO, YTO B INPAIARaEMOM PYKOBOACTBE NO 3KCNAYATAUHN HMEOTCBAXHbIy kka3AHN, KOTOpbIM O83aTeALHO HyXHO CaeDobATb.

He OTKpbIbAtb! OAnchocb 3Aektpnueckoro yapa!
YtobmyMeHbHTbOnaCHocTB Bo3rpaHn Hn 3Aektpnueckoro yapa, Heo6xoAnMo 3auuuaTb yctpOCTBO OTdoxra Hn BAaHn.
YKA3AHNIO YTNAN3AUHN
COraACHO EBOPEeCKOHNpeKTHBE 2012/19/EU Bce 3AEKTPnuecKHe N AEKTPoHHBe Pn6Opbl AAYTHN3auHNOxHb CaaBtcb OTeAbHO B MeCTHbI c6OpHbI pyHKbI. PoXaYnCTa, BblONHJte MeCTHbI pEaHncaHn H He Bbl6paCbBaTe CTapBc YEToNCTBa BmecTe CObHyHM DomaHMM Mycopom.
YTHAN3AUINB GATAPEH AKKYMAYTOPOB
Ctapbie 6atapen H akkymyaTOpby RAJyOTc ONaChbIMN OTXdAMn H He NOAdExnat yTHAn3aunm Bmte C 6bIbBIMN OTXdAMn, Hx Heo6XoHMO yTHAN3HPOBaT B COOTBETCTBN C DeiCTByOuMMn PpaBnAmn. Batape H akkymyaTOpbl CaeDyET CdaBabHa yTHAn3aunHO ToBko B pa3pkrHHom CoToHnn!
DAKLAAPAUNCAOTBETCTBNA

AaHbIM KOMnHaMg Mgnat Audio-Produkte GmH yOCTOBepaET, Yo yCTpoiCTBO Bulldog 7 OTBeuayet OCHOBHbIM TpeB0AHnM INpyHM peAEBaHTbHM Hopmam AnPeKTHbIy 2014/53/EU. DeKlapaunr COOTBETCTBn HaxoHITcH Ha caTte www.mgnat.de B pa3dEe Downloads (MaTePnaIbI DAckuBaHnR) KaKDoIy yCTpoiCTBa.
HADAEXAUEE HcNoB3OBAHNE
3To yCtpoCTBO PnepHa3HaueHO ToBko DA AOMaHHeO IcNoAb3OBaHH.
COADEPKHMOE:
(1)Bulldog7(aKTHBHyI rPOMKOrOBOPHTAe)
(2) CTeBOI Ka6eIb
Komnaek TpaHcnpTHbIX pOAnKOB C MOHTaXHBIMn PpHaAeXHOCTAMN:
(3)2Wt.TpaHcnpTbIe poAUNK
(4)2Wt.TpaHcnpTHbEpoANKCOCTOHOHbIMTOPMo3OM
(5)4wT.10aKaAaoHbIeKoAba
(6)4WIT.PpeOxpaHHTeAhBbIe Wai6bI
(7)1wT.MoHTaXHbIKAIOU
(8)1wt.OTBeptka
(9)PykoBOOCTBO NO 3KcNAYatauHn (BkAIOyra rapaHTnHHe cBnTeAeBCTBO)

(2)

(3)

(4)

(5)

(6)

(7)
(8)

(9)
PACNAKOBKA TPOMKOROBOPTEA
Octopokno paacnkyte rpoMKoROBOpHTe N npHnAdAeXHOCTN, npOBepTe coepxMoe opunHaBHNOKAPTOHHo Kopo6Kn Ha COOTBeCTBne C Bblweyka3aHbIM cnckOM. B cayae NOBpeJdeHn prnp TaHcnpTnPOBKe cJeYET o6paHTbcr K noCTaBnKy. XpaHnte ynaKoBOuHbI MATEpHaB HnadeXHom MeTe. OpiHnHaBnBaH yNAKOBA oecneuBaet be3onachyIO TpaHcnpTnPOBky B clyue 60lee No3dHero nepemeuen H B cayae 6cayxNBAHn.
YCTAHOBKA TPOMKOTOBOPTEA
- PpOMKOrOBoPHTeA BoXeH 6bITb yCTaHOBAn H pOBHOI uYcToUHBOI NOBepxHOCTM.
Okpykaoua cpea doxkha 6bItb cyXoI He coepKaTbIaI. - Icnoa3yHTe Ha OTkpBtOM BO3dyXe TObKO B Cyxyo noro.
- Y6eHNTecb, yTO coeHNHTaBHeIke Ka6eI npOAnxHeI HaDeXHO.
Caeyet n36eata nonaHn npMoro coHHO CBeta Hn HnocpeCTBeHHo 6An30tK NctouHnKam Tepaa.
He Kaadte Kacne-Imo npdeMetbHa rpoKorOBOpHTb,OC6eHHcOcCybl, HanoAHeHhie XnKocTbIO. - Camby npocToI cnoc6 ynpabAHTI rpmKOrOBOpTeAEM c3aHKOHOHN.
AnepeHockn Bulldog 7 cAeayet HcnoAsbOaBt ToAko 60KOBbIe pykn.
063aTeIbHo yHTHe cAeMyoOee:
Pn npemepmeenu rpoMKoROBOPHTA Hx xOAnHO rno meueH BTea Bnytpn yctpocTBA MoKetobcKaHecat. B 3om cayae noKAIOUeHHe rpoMKoROBOPHTA OcyuieCTBaIeTcHpe32 Yaca.
MOHTAX BXOДAIIIX B KOMIIAEKT TPAHCIOPTbIX POANKOB
Ha HxKHe CTOpOHe KOpNyCa yCTaHOBHeIyTeblpe dEmnHpyuOHe pe3oHOHC pe3IOHOBbIe HOxK. TpaHCnOpTHbIe pOAnK (3, 4), BxOaJHne B KOMIIeKT NocTABKN, TaKKe MOrYt 6bItyCTaHOBHeIbIa O6JIeUeHHra TpaHCnOpTHpOBKn rPOMKOrOBopHTae. DBa TpaHCnOpTHbIX POANKa OCHaSeHbI cTOHOUHbIM TOPMO30M (4). 3TN TOPMO3a BCERda DOANKHe IbIb aKTHBnPOBaHbI (pbHar B HHXHEm NOAOKeHH) n OTNYCKaTBcTOLbKO DA TpaHCnOpTHpOBKn.
Octopokno nooKte Bulldog 7 (1) Ha 60k.
- Ocaabe KpeKneKbIe BnHtbl YeTbipex pe3HOBbIX HOKe C NOMOaBIO OTBePTKn (8) n CHMnTe nx.
CHaHaa HAdeHbTe cTOnOpHyo 86 (6)AaKaJdoRo poNka (3,4), a 3aTeM 8a6y (5) Ha 6oTcpe3b60n BBHTTE KOaeca (3,4) B YeTbIpe OTBepCTIN Aa BnTOB. PoAnKu CO cToHOUHbIM TOpMO3OM (4) DOAnKbI bItbYctAHOBaeHbI C3aH.
- 3aTnHte KoLcA (3,4) Ha WeCTNRpaHHoR raiKe (Ha BepxHem KOHepe p3b6OBOrO 60tA) MoHTaxHBIM KAHOOM (7).

3AEMEHTbI YNPABAEHn HA 3ADHEI PAHEAN
BbIKaIOyateIb NHTAHN, BbIKIAOyateIb 3apAKN, NOKIAOyeHne K CeTH

110-240V~50/60Hz
FUSE:T3.15 AL/250V
POWER CONSUMPTION:200W
IoKAnHTe BxOaBnB KOMNKeT HHyp NtHaMn K p03eTke.
Pexim pa60tBb6npaetc nmoou bnopekauatee NPOWER n CHARGE.
AydmoBxoA DAA KaHana 1(Channel 1):
K KaHaIy 1 MoXHO NOkAIOOHHTb MOHOoHnueCKn HcTOuHnK 3Byka (MnKpOoHn nn rTapa).
Aa3TOrOdoCTyIeH KOM6HHnpoBaHHbpa3bEmXLR-6,3MM.
AynOBXoDAAKaHaa2 (Channel 2):
K KaHaIy 2 MoXHO IOAIAOHTb CTpeoOHHueckn ITOHIN 3Byka.
DocyHbDpa3bemaTnnaTIObHaR(RCA),pa3bemXLR npa3bEm6,3MM.
BTOPNHbI BXoA-NEPBNUHb BbIXOa
Yepe3 3TN pa3bembl DBA Bulldog 7 MOrT 6BtB NOKIAOHeHb Apyr K Apyr.
Aa 3toro cm. raby NEPBNUHbI / BTOPHbI pexm pa6oTbI (ctp. 50).
KoHTPOAb 3apraa aKKyMyAraTopa
CHARGE
CHARGING

FULL
LOW
3%

66%

100%
BATTERY LEVEL
RECHARGEABLE BATTERY INSIDE.
CHARGE THE BATTERY EVERY 30 DAYS EVEN IF NOT USED.
CBETOADHOHbI INHdNKATOP 3APJAKN:
Topn KpacbHIM, KOrda aAkkMyAANTop 3apxkaETc.
CBETOANDHOHBINHHANKATOPIOANHORO3APRAA:
TopHT3eAeHbIM,KoTdaakKMyAHTop3apJxHe
CBETOANDHbIE INHANKATOPbI YPOBHA 3APRA DA BATAPEN:
Poka3bIbaeTypoBeHb3apraDaakKMyAITopa(100%/66%/33%).
Ean ropnt kpaCHbI CBeToADHOd (LOW), aKKMyAHTOp nOHTn pa3pJKeH, H yCTPOINCTBO BCKope BbIKIOHTcR, YTO6bl N36eKaTb Iy60KoI paaprAKn AKKMyAHTopa.
3AEMEHTbI YNPABAEHn HA 3ADHe IIAHEAN
AkhBbI rPOMKOrOBOpHteB Bulldog 7 mMeET MKNHeP C TpeMg OTeALHo yipabAREmbIMn BXOaHbIMN KaHaAMn.
CHANNEL 1


KaHaMaMKwepa 1(Channel 1):
3TOT KaHaI NOxOaHT DA MoHOoHuecKHXNCTOUYHKOB 3ByKa, TAKHX KAK MHKPOoOH NIMrTaPa. AAN 3TOI Ho Ha 3aHei NaHei NMeetcBxoADHpa3bem (CM. cTp. 47).
CBETOHOADCLIP (HAnKaTOp neperpy3K):
Ekan Kaan neperpykeh, CBeToADHO ropHT kpaCHbIM. YMeHbWnte rPOMKoCTb (VOLUME) nn OTpermyte TEm6p (ymeHbWnte Hn3Ke H BbICKe HaCTObl C NOMouBIO peryAtoPoB BASS nnTREBLE)
MVKPOOHOH/TNTAPA:
C nomoubu 3toro nepekauateMaKHO Bb6paTb BXoAHyO yBCTBHTeAhoCTb DAA MKNPOOHa HnIHTapbl.
BASS, TREBLE:
C NOMOUBKOTINX peryAHTOPOB H3KNE BbICOKNE YACTOTbI AAR KaHAA1 MORY6bITb yCTAHOBHeBIBDnana3OHe+/-8δ.
TPOMKoCTb:
C nomoubu 3toro peryraTopa HactpanBaetc rpoMkOCTb KaHaA 1.
CHANNEL 2


VOLUME
KaHaMa MHKwepa 2 (Channel 2):
3TOT KAHA NOXOANT D A CTEpeoOHuecknx HCTOUYKOB 3Byka. HanpHMeP, MoxHO NOAOKUHTb NPOHpbATEAH KOMNAKT-DNCKOB, TOHEpbI, BHEWHNE MKNKHepe NtBtI HN HNCTpyMeHTbI, TaKHe KaK 3AEkTpHneCKEe NnHNO HN KABuHbIe. DA3STOro HA 3aDHeH NaHEH NMEcTc HECKOaBKO BXoAHbIX pa3BeMOB (CM.CTp.47).
CBETOAMOCLIP (HAnKaTOp neperpy3Kn):
Ekan Kaan neperpykeh, CBeToaHoa ropnt KpaChbIM. YmehbWNTe rpmKoCTb (VOLUME) nn Otperynpyte Tem6p (ymehbWNTe Hn3Kne N BbICOKne yactObl c nomoosbo peryAtoPob BASS nn TREBLE).
ANHNA/HHCTPYMENT:
C NOMOJIbIO 3TOrO nepeKIAOHTeAeM OMOHO BbIbpaB BXAOHYO YBCBTNBteABHc0B DAyAaONCTOCHNKOB CmHEHbIM yOBHM (HaNPmep, pOnpRpbTaEB KOMnATNCKOB) HN 3AEKTPOHHbIX INHCTpyMeHOTB (HaNPmep, kAbNaTpybl).
BASS, TREBLE:
C nomoubIO 3THX peryAToPOb Hn3Kne N BbICOKne aactotbl Aa KaHaa 2 Moryt 6bItb yCTaHOBaeHb B dana3oHe +-8d5.
「POMKOCTb:
C NOMOJIbIO 3tOro peryIaTopa HAcTppaBaETcRpOMKocTB KaHaAa 2.
KaHaA MmKwepa 3 (Channel 3):
3TOT KaHaM MoKHO NOAIAOHTb K HCTOHHky Bluetooth, a MOHbHOe ayHOyCTPOIcTBo MOKHO noAIOHTb uepe3 cTepeoKa6eAb co WTEkepOM 3,5 MM (BXOAHOe rHe3do AUX IN).
CBETOANOCLIP (HDAKATOP neperpy3kn):
Ecan KaHAn neperpyxeh, CBetoAoHO ropnKpachbIM. YMeHbIHTe rpmkOCTb (VOLUME) nn OTepynPyte TEM6p (YMeHbIHTe Hn3KHe N BbICOKHe qactOTbl c nomoIbOp peryAToPob BASS nn TREBLE).
BT/AUX:
C NOMO BIO 3Toro nepeKaIOUaTeA OCyUeCTBAHETC Bb6Op MEXy BXoDM Bluetooth n BXoDM AUX.
BASS, TREBLE:
C nOMOUIIO 3THX peryAITOPOB HN3KNE N BbICOKNE aactotbl AAN KaHAA 3 MOrYt 6bTb yCTaHOBaeHb B dana3oHe +/8d5.
TPOMKOCTb:
C nOMOUsbIO 3tOro peryAToTopa HAcTpaNBAeTcRpOMKocTb KaHaAa 3.
C83b c Bluetooth:
- YctahOBInTe nepeKAnOaTeAeB b noLoXeHne BT.
Tenepb rpoMKOROBOPHTA bABTOMaTHueeCKn nepeKaHOaETcB PEXKMM CnapNBAHn, Mmraet CHHn CBToAOHbH mHAnKATOp (PAIRING). ECan 30rO Ha npOHxCoNDt, KpATKO HAKMNTe KHONKY BT PAIR.
Tenepb BkIOUHTpe pEXHM Bluetooth yctpoCTBa- nctOuHnka. POMKOROBOPHTeB BbIOADTCB C nCNCke yctPOINCTB Bluetooth kak ,Magnat Bulldog 7." EcAn OH He BBIOADTCB C nCNCke yctPOINCTB, AKTHBNpyTe BpuyHynoNcK yctPOINCTB Bluetooth Ha yCTPOINCTBe-HTOUHNKe I npOBepBe, BKAQUEH AN Ha rPOMKOROBOPHTepe pEXM cnapHBnHa.
Ecayn yctaHOBAeHne CBA3n npoAIO ycNEuHO, CBETOHOADHy INAHKATOp (PAIRING) NOCTOHHO TOPHT CHHM.
CoeaHHeHne Bluetooth MoXHo npePbArb, Haxab KhoNk BT-PAIR.
Eca panbue cBra 3c 3TNM yctpoHCTBOM Bluetooth yye yctahabnBaIacb, npednpnhmmaetcABTOMaTHueckar NtblkTa BOCCTAHOBLeHn COeHNHeHn. PnH 30m MoKET nptpe6oBaTcBc BpyHyIOqTBePAnb BoCCTaHOBLeHne COeHNHeHn Ha yctpoCTBEHCTOHTNKe
ΦEIDEP(MHKwepHbI NToEHnOMeTp)
3TOT 3eMeHT ynpabHeHMOKET HcNOa3oBaTbCRAIpeXoDA MEXdy KaHaOM 1/2 n KaHaAM 3. B AEBOM NIOxOKeHH Ha MaCTep-KaHaH HApPABAE TcTOBKO CHTHAA OT KAHANOB 1n2 (B 3aBCHMOCTH OHT HAcPOH IprmKCTH COOTBEITCTBYOLOE KAHA),
B npabom nooXeHH ToIbKO CnHaAOT KaHaa 3. B npomexyTke MeJdy HmN KaHaBl HepepbIBHO MKNuHpyOTc.
MacTeP-KaHaA:
AynocnHaON3-KaHbHO MKNKepa HappaTcra Ha MacTepKaHa. 3Decb DOctynhbl CLeyoune npametpbHactpoKn HfHKuN:
CBETOHOADHBINHANKATOPLIMIT/ON(HnHKaTOp neperp3kn):
ECAN BbIXOAHBle CTyneHn NpeperpykeHb, CBeTOAHO rOpHT KpaCHbIM. YMeHBWITE rPOMKoCTb (MASTER) Hn OtperyAnpyte Tem6p (YMeHBWtE Hn3KHe, CpeHHe N BicOKHe qactOTbI c nmoosbpepyarTopOB BASS, MID n TREBLE).
CH1+CH2+CH3 IN /BTOPHHbI BXOa
3TOT nepekauateb Hcnoa3yetcA ABA Bb6opa Mexdy HopmaaHbIM paobum pexnMOM (CH1+CH2+CH3 IN) nEPBNUHbIM / BTOPUHbIM pexnMaM. ECAH ncoa3yctc OAnh Buldog 7, 3TOT nepekauateb DOJKeH 6BtB yCTaHOBaeB nOLOXeHc CH1 + CH2 + CH3 IN. POKAUHHe BTOPO Buldog 7 / oNcaHO B rabe NEPBUHAR / BTOPUHAR paObaHa cTpaHue 50.
BASS, MID, TREBLE:
C nomoubIO 3THX peryAHTOPOB Hn3KHe, CpeAHne H BblcOKHe qactObl DA MaCTep-KaHaMa MOrTy 6bIbYctahOBaHbI B Dnana3OHe +/-85.
MACTEP:
3TOTAEMeHTyipABaENHpeRpynpyetO6yUbIXoADHyrpoMKoCTb.
MOHUTop:
Bulldog 7 mMeT fHKUHO MOHToPA. AyIOcHnHa KaJIOrO OTeABoHO KAHaA MmKUepa MoXHO ppeBaPHTeABHO ppeBaPHTeABHO pOcMOTpebYepe3 HayuHKn.
3APRAKA USB: USB-pa3bem dA 3ap4kN. OT 3TOr THe3da MoXHO 3ap4KaTb BHeUHHe MOHbHHe yCTPOBCTBa (HaPIMep, CMAPTFOH Hn Hn HnHuet) (5 B / MaKc. 2 A).
CH1/CH2/CH3: 3TOT nepeKIOHATEb BbIbHpae TOn H3 Tpex KaHaOB Dn npocayuBaHHuee3 HayuHnKn.
HAYUHNK: He3doAa NOKAIOueHHaayuHKOB.
POMKOCTb: C nOMOsbIO 3TOro peryAITopa HAcTppaHbaeTc rPOMKocTB Ha BbIXOaDE AAR HayuHNKOB.
3AMEHA AKKYMAYRTOPA
AkkymayTop yctahOBaEN BOTcKe Ha 3aHNe IaHeI rPOMKOrOBOpHTeIA.
Pnne6xoAOMOCTN3aMeHbI AeJeCTByTe CaeyIOUIMo6pa30M:
CHIMHTe KpbIiKy aKKyMAYTOpHOro OTeKa, OcAa6HB YetbIpe BnHTa C HAKATAHHOJ TOnOBKOJ.
- Octopoxho H3BAeKHTe AKKyMaTOp HOTcOeAHnHtpe pa3bEm Ka6eA,OCBO6oAnB POKCHpyoum MEXAHn3M.
- YctahOBka akkmyAHTopa npOn3BOAnTcB O6patom nopRKe.
INPBNUHbI / BTOPNUHbI PEXIM PA50TbI - CBA3b CO BTOPbIM BULLDOG 7
BtpoB Bulldog 7 MoKHO NOA KIOHTb Aa OecneueHn 3ByKa B 6oBux nOmeuHnx.
OAnh Bulldog 7 cKoHfynypnoBaH KaK OCHOBHO (nepBnHyb) rPOMKOrOBOpHTeB, BTOPO KAK TAK Ha3bIBaEMbI DOONAHTEbHbI rPOMKOrOBOpHTeB.
Bce ayanoctoHNK, Bknoaay Bluetooth, noKaoueHb K OCHOBHOy rpmKOROBpTeAIO Hn CHHXPOH3npoBaHb C Hm. Kpme TOrO, Bce Hacpton Kaep He MaCTepKaHaAe BblNOAHOTc ToBko Ha OCHOBOM rpmKOROBpTeAe.
AnoHHTeBHyI rpoMkoOBOpHTeN oAIOAIOaETcC NOMOUsbIO Ka6eA XLR B CaeDyIOeM NoPRAKe
OchOBHO rpoMkoBOpHTAb DoNoAHHTAbHbI rpoMkoBOpHTAb


IpeKIOHateb MaTeP-kaHaA daKaHe bItb yTaHOBae H B NOOKeHne CH1 + CH2 + CH3 IN dA OCHOBHO rPOMKOROBOPTEa I B NOOKeHne SECONDARY IN dA DONoAHteABHO rPOMKOROBOPTEA. IocAE 3TOr NaHEb ynpBaEHn DONoAHTEbHbIM rPOMKOROBOPTEeM OTKAoHaETc, n rPOMKOROBOPTEAb BOCpPOn3BOAnT TO Jx ayDnOCHHa Ha To Jx rPOMKoCTH, TTO N OCHOBHOr rPOMKOROBOPTEb.
PpmeaHHe: 06a Bulldog 7 Bocnpo3BdoA T 3ByK B pexMe MoHO.
BHUMAHNE:PaepweHHe Ha 3KcNayatauHIO TepaET CBOO Hny npn BMeWateAeBCTBE B rPOMKOrOBOpTeb Nn pInHaAeXHOCTN. AAn 3KcNayatauCn CaeYer npmEHTb NOCTABAAReMbIe B KOMIIAEKeT E PnHaAeXHOCTN. PpeyCMOTpeHHBe Dn HCNOAb3OBAHNR DOIOANHTeBbIe PpHaADExHOctn DoxHbIb B6tB B 63ynpeHOM CoCToHHN.
TEXHNUECKNEXAPAKTEPNCNI
BULLDOG7
KoHpyaia:2,5-nOLOchbIΦa3OHBepTOp,aKTNBbI
OchaueneHrpoMKOROBOpHTae:2x250MMHN3KoactOTbI rpoMKOROBOpHTeA
1x 35 MM 3ByKOBOI CNHAA BbICOKOToHa
BbIXoHaH MaHocTb (RMS/MaKc): 260 / 520 BaTT
Hana30H yactot: 38 - 24.000 Fu
Congratulations! You have made a wise selection in becoming the owner of a MAGNAT HiFi equipment. Due to high quality MAGNAT products have earned an excellent reputation through the western world. And this high quality standard enables us to grant a 5-years warranty for MAGNAT HiFi speakers and a 2-years warranty for MAGNAT HiFi-electronic components.
The equipments are checked and tested continuously during the entire production process. In case you have problems with your MAGNAT HiFi equipment, kindly observe the following:
- The guarantee period commences with the purchase of the component and is applicable only to the original owner.
- During the guarantee period we will rectify any defects due to faulty material or workmanship by replacing or repairing the defective part at our discretion. Further claims, and in particular those for price reduction, cancellation of sale, compensation for damages or subsequential damages, are excluded. The guarantee period is not altered by the fact that we have carried out guarantee work.
- Unauthorized tampering with the equipment will invalidate this guarantee.
- Consult your authorized dealer first, if guarantee service is needed. Should it prove necessary to return the component to the factory, please insure that the component is packed in original factory packing in good condition the quality control card has been filled out and enclosed with the component, your enclose your receipt as proof of purchase.
-
Excld from the guarantee are: - Illuminates - Wear parts - Shipping damages, either readily apparent or concealed (claims for such damages must be lodged immediately with forwarding agent, the railway express office or post office). - Scratches in cases, metal components, front panels, etc. (You must notify your dealer directly of such defects within three days of purchase.) - Defects caused by incorrect installation or connection, by operation errors (see operating instructions), by overloading or by external force. Equipments which have been repaired incorrectly or modified or where the case has been opened by persons other than us. Consoquential damages to other equipments.
-
Reimbursement of cools, without our prior consent, when repairing damages by third parties.
F Toutes nos félicitations!
Name and address of the dealer/stamp
Käufer/Customer
Name/Name
StraBe/Street
PLZ, Ort/City
Land/Country
Kaufdatum/buying date
No warranty without receipt!


Maghat
Lise-Meitner-Str. 9 - D-50259 Pulheim - Germany
Tel. +49 (0) 2234/807 - 0 • Fax +49 (0) 2234/807 - 399
Internet: http://www.magnat.de
EAC