
STK 650 B2 - Electric kettle SILVERCREST - Free user manual and instructions
Find the device manual for free STK 650 B2 SILVERCREST in PDF.

| Product type | Electric tea kettle with infusion system |
| Brand | SilverCrest |
| Model | STK 650 B2 |
| Power consumption | 550 - 650 W |
| Mains voltage | 220 - 240 V ~, 50 - 60 Hz |
| Kettle material | Glass |
| Infusion system material | Plastic and stainless steel (not specified) |
| Infusion type | By infusion chamber with tube and strainer |
| Keep-warm function | Yes, automatic after boiling |
| Automatic shut-off | Yes, after boiling |
| Overheating protection | Yes, with Reset button |
| Removable infusion system | Yes (infusion chamber, tube, strainer) |
| Included accessories | Tube brush, user manual |
| Warranty | 3 years (France and Belgium) |
| After-sales service France | 0800 919270, kompernass@lidl.fr |
| After-sales service Belgium | Contact the service mentioned in the manual |
| Intended use | Preparation and keeping tea warm, domestic use |
| Maintenance | Cleaning with clear water and regular descaling |
Frequently Asked Questions - STK 650 B2 SILVERCREST
User questions about STK 650 B2 SILVERCREST
0 question about this device. Answer the ones you know or ask your own.
Ask a new question about this device
Download the instructions for your Electric kettle in PDF format for free! Find your manual STK 650 B2 - SILVERCREST and take your electronic device back in hand. On this page are published all the documents necessary for the use of your device. STK 650 B2 by SILVERCREST.
USER MANUAL STK 650 B2 SILVERCREST
Operating instructions
NL BE
ELEKTRISCHE THEEKOKER
Gebruksaanwijzing
CZ
ELEKTRICKÁ KONVICE NAČAJ
Návod k obsluze
IAN 337246_2001
DE AT CH
Before reading, unfold the page containing the illustrations and familiarise yourself with all functions of the device.
FR BE
KOMPERNASS HANDELS GMBH
BURGSTRASSE 21
44867 BOCHUM
DEUTSCHLAND
www.kompernass.com
Contents
Introduction 14
Intended use 14
Package contents 14
Technical data 14
Appliance description 15
Safety information 15
Before first use 18
Operation 18
Overheating protection 20
Cleaning and care 20
Dscaling 21
Storage 22
Disposal 22
Disposal of packaging materials 22
Kompernass Handels GmbH warranty 23
Service 24
Importer 24
Introduction
Congratulations on the purchase of your new appliance. You have selected a high-quality product. The operating instructions are part of this product. They contain important information about safety, usage and disposal. Before using the product, please familiarise yourself with all operating and safety instructions. Use the product only as described and for the range of applications specified. Retain these instructions for future reference. Please also pass these operating instructions on to any future owner.
Intended use
This appliance is designed for brewing tea and keeping it warm. It is intended exclusively for private domestic use; it is not designed for commercial or industrial applications.
Package contents
■ Electric Tea Maker
Riser pipe brush
Operating instructions
Technical data
| Power consumption 550 - 650 W | |
| Mains voltage 220-240 V ~ (alternating current), 50 - 60 Hz | |
| All parts of this appliance that come into contact with food are food-safe. | |
Appliance description
Lid
2 Handle
3 Jug
Control lamp
5 Base
Reset button
Power cable
On/Off switch
Riser pipe brush
10 Brewing chamber
Riser pipe
Sieve
Safety information

DANGER! RISK OF ELECTRIC SHOCK!
- Ensure that the base containing the electrical connections never comes into contact with water! Allow the base to dry completely if it accidentally becomes wet.
- Use the appliance only with the supplied base.
- Ensure that the power cable never becomes wet or damp when the appliance is in use. Route the cable so that it cannot be trapped or damaged in any way.
- Arrange for defective power plugs and/or cables to be replaced as soon as possible by a qualified technician or by our Customer Service Department to avoid the risk of injury.
Always remove the plug from the mains power socket after use. Switching the appliance off is not sufficient; it will remain live for as long as the plug is connected to the power socket.

DANGER! RISK OF ELECTRIC SHOCK!
- Do not allow any liquid to run over the appliance's plug connections.

Never immerse the appliance in water or other liquids. There is a risk of electric shock!

WARNING! RISK OF INJURY!
- Do not operate the appliance with the lid open, otherwise the automatic switch-off cannot work. Boiling water could then spray out over the rim.
- Bursts of hot steam may be released. The jug also becomes extremely hot during use. It is therefore always best to wear oven mitts when handling the jug.
- Ensure that the appliance is stable and vertical before switching it on. Boiling water can cause the appliance to fall over if it is not set up stably.
Treat the jug with great care. Broken glass can cause cuts. - Never fill it with more water than up to the MAX marking. Otherwise, boiling water may splash out and cause scalds.
- Do not open the lid while the water is boiling.
- Appliances may be used by persons with reduced physical, sensory or mental capabilities, or a lack of experience and/or knowledge only if they are supervised or have been instructed how to use the appliance safely and have understood the potential risks.
This appliance may be used by children aged 8 years or over, if they are supervised or have been told how to use the appliance safely and are aware of the potential risks. - Cleaning and user maintenance tasks must not be carried out by children unless they are aged 8 years or over and are supervised.

WARNING! RISK OF INJURY!
The appliance and its connecting cable must be kept away from children younger than 8 years old.
Do not allow children to play with the appliance.
Children should be supervised to ensure that they do not play with the appliance.
- Do not use an external timer switch or a separate remote control system to operate the appliance.
After use, the surfaces of the heating elements will still have some residual heat.
- Misuse may result in physical injury! Use the appliance only as described in the instructions!
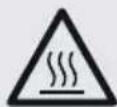
Caution! Hot surfaces!
CAUTION! PROPERTY DAMAGE!
- Never refill the appliance with cold water immediately after boiling. It can lead to stresses in the glass and even breakage.
Before first use
■ Remove all packaging materials from the appliance.
Rinse out all parts of the brewing system (brewing chamber 10, riser pipe 11, sieve 12) and the jug 3 carefully (see section "Cleaning and care").
Before first use, proceed as follows:
1) Remove the jug 3 from the base 5.
2) Fill the jug 3 up to the MAX mark and add a teaspoon of lemon juice (or lemon juice concentrate). If you have no lemon, you can add a teabag (or a teaspoon of loose leaf tea) directly to the water.
3) Insert the brewing system into the jug ③.
4) Close the lid 1 and place the jug 3 on the base 5.
5) Switch the appliance on with the On/Off switch 8. The control lamp 4 and the On/Off switch light up. Wait until the control lamp 4 goes off.
6) Switch off the appliance using the On/Off switch ③ and clean the appliance as described in "Cleaning and care".
The tea maker is now ready for use.
Operation
CAUTION! PROPERTY DAMAGE!
- Do not add any sugar to the tea maker. Do not heat any milk or alcohol in the tea maker. This will irreparably damage the appliance.
NOTE
- Green tea is not suitable for brewing in the tea maker. The ideal brewing temperature for green tea is around 70^ . At higher brewing temperatures, such as those used by the tea maker, tannins are released. This makes the tea taste bitter.
1) Remove the jug 3 from the base 5.
2) Open the lid 1 and remove the brewing system. Place the brewing system on a level system.
3) Add the required amount of water to the jug ③. Never fill water to more than the MAX marking or less than the MIN marking.
- To prevent scalds and electric shocks, ensure that the water in the jug ③ never overflows.
4) Remove the brewing system and pull the riser pipe with the sieve upwards.
5) Add the desired quantity of tea or teabags to the brewing chamber 10.
NOTE
Ensure that no tags or bag threads remain in the device.
6) Replace the brewing system in the jug ③. Ensure that the riser pipe ① fits into the recess on the floor of the jug ③. The brewing chamber ⑩ must be inserted with the recess facing towards the handle ②.
7) Close the lid ①.
8) Replace the jug 3 on the base 5.
9) Insert the mains plug into a mains power socket and set the On/Off switch 8 to the position "I". The control lamp 4 and the On/Off switch 8 light up.
The water is now boiled, pressed upwards through the riser pipe 11 and flows through the brewing chamber 10 back into the jug 3.
After the water is boiled, the appliance switches to the keep-warm function. The control lamp 4 goes out. Only the On/Off switch 8 remains lit up. As soon as the water cools down, the tea maker boils it again. The control lamp 4 lights up again during the boiling process.
NOTE
As the water is fed back through the brewing system when it is re-boiled, remove the brewing system from the jug ③ after the first brew.

WARNING! RISK OF INJURY!
The brewing system is very hot! There is a risk of burns! Use oven gloves when you touch the brewing system.
NOTE
The longer you keep the drink warm and the more liquid evaporates, the stronger the drink will become. We therefore recommend drinking the tea as quickly as possible after it is initially brewed.
■ You can interrupt the boiling process at any time. To do this, set the On/Off switch ⑧ to the "0" position. The boiling process stops.
Once you remove the jug 3 from the base 5 the boiling process stops.
CAUTION! PROPERTY DAMAGE!
Always allow the jug 3 to cool down before refilling it with cold water for another brewing cycle. Otherwise, excessive tension in the glass could cause the jug 3 to break.
Overheating protection
If the appliance overheats, the overheat protection automatically switches off the heating element inside the appliance. The On/Off switch remains lit, but the appliance no longer heats up.
The overheating protection is activated if the appliance is switched on if the jug ③ contains no or not enough water.
If the overheating protection has switched the heating element off, please proceed as follows:
Allow the appliance to cool down.
Press the reset button on the bottom of the jug 3. The appliance can now be used again.
Cleaning and care
Always remove the plug before cleaning the appliance. There is a risk of electric shock! Allow the appliance to cool down. Risk of burns!
Never immerse the appliance in water or other liquids. There is a risk of electric shock! The appliance may be irreparably damaged.
To achieve the best tea-brewing result every time, the appliance should always be cleaned after use. This prevents:
the combination of limescale and tannins, caused by boiling water and.
brewing tea, from affecting the functioning of the tea maker;
the jug from taking on the flavour of particularly aromatic teas and affecting other varieties of tea if the tea maker is used regularly.
Clean the jug 3 of the tea maker with a damp cloth. Add a little mild detergent to the cloth to remove stubborn dirt. Rinse out the jug 3 afterwards with plenty of clean water to remove any detergent residue. You can clean the recess on the bottom of the jug 3 well with a washing up brush.
CAUTION! PROPERTY DAMAGE!
Do not use abrasive, chemical or caustic cleaning agents. These can irreparably damage the appliance!
Clean the brewing system with hot water and washing-up liquid:
The brewing chamber 10 and the sieve 12 can be cleaned with a washing up brush. Clean the riser pipe 11 using the riser pipe brush 9. Rinse the entire brewing system after cleaning with clear water to ensure that no detergent residues remain.
Descaling
The hardness of the water will lead to a scaling up of the appliance over time. Limescale impairs the functionality of the appliance, reduces the quality of the tea and increases energy consumption.
NOTE
- Ask your local water utility for information about the hardness of the water. If your water is very hard, descaling is necessary sooner, with softer water later. Use a descaler suitable for household device and follow the usage instructions.
1) Use a standard commercial lemon-based descaler. Always follow the instructions on the packaging of the descaler.
2) Insert the brewing system into the jug 3.
3) Add the descaler solution to the jug ③. Never fill liquid to more than the MAX marking and never less than the MIN marking.
4) Wait 10 minutes and then switch the appliance on.
5) Allow the solution to boil and then wait until it has run through the brewing system.
6) If necessary, repeat the process. You can re-user the descaler solution but you will have to allow it to cool down first.
7) Once the limescale has been loosened, boil clear water and run it through the system. Repeat around 2 - 3 times.
8) Afterwards, clean the jug 3 and the brewing system as described in the section "Cleaning and care".
Storage
If you are not going to use the appliance for an extended period, wind the cable anticlockwise around the cable retainer on the underside of the base 5 and guide the end through the cable outlet on the base 5.
Store the appliance in a dust-free and dry location.
Disposal
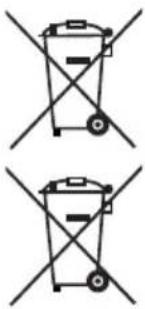
Do not dispose of the appliance in your normal domestic waste. This product is subject to the European directive 2012/19/EU.
Dispose of the appliance via an approved waste disposal company or your municipal waste disposal facility. Please comply with all applicable regulations. Please contact your waste disposal facility if you are in any doubt.

Your local community or municipal authorities can provide information on how to dispose of the worn-out product.

The product is recyclable, subject to extended producer responsibility and is collected separately.
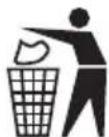
Disposal of packaging materials
The packaging protects the appliance from transport damage. The packaging materials are selected from the point of view of their environmental friendliness and disposal technology and are therefore recyclable.
The recirculation of packaging into the material circuit saves on raw material and reduces the amount of waste generated. Dispos of packaging material that is no longer needed according to the regionally established regulations.
Dispose of the packaging in an environmentally friendly manner.
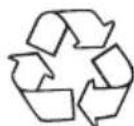
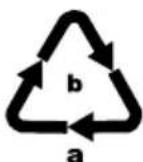
Note the labelling on the packaging and separate the packaging material components for disposal if necessary. The packaging material is labelled with abbreviations (a) and numbers (b) with the following meanings:
1-7:Plastics,
20-22: Paper and cardboard,
80-98: Composites.
This appliance has a 3-year warranty valid from the date of purchase. If this product has any faults, you, the buyer, have certain statutory rights. Your statutory rights are not restricted in any way by the warranty described below.
Warranty conditions
The warranty period starts on the date of purchase. Please keep your receipt in a safe place. This will be required as proof of purchase.
If any material or manufacturing fault occurs within three years of the date of purchase of the product, we will either repair or replace the product for you or refund the purchase price (at our discretion). This warranty service requires that you present the defective appliance and the proof of purchase (receipt) within the three-year warranty period, along with a brief written description of the fault and of when it occurred.
If the defect is covered by the warranty, your product will either be repaired or replaced by us. The repair or replacement of a product does not signify the beginning of a new warranty period.
Warranty period and statutory claims for defects
The warranty period is not prolonged by repairs effected under the warranty. This also applies to replaced and repaired components. Any damage and defects present at the time of purchase must be reported immediately after unpacking. Repairs carried out after expiry of the warranty period shall be subject to a fee.
Scope of the warranty
This appliance has been manufactured in accordance with strict quality guidelines and inspected meticulously prior to delivery.
The warranty covers material faults or production faults. The warranty does not extend to product parts subject to normal wear and tear or to fragile parts which could be considered as consumable parts such as switches, batteries or parts made of glass.
The warranty does not apply if the product has been damaged, improperly used or improperly maintained. The directions in the operating instructions for the product regarding proper use of the product are to be strictly followed. Uses and actions that are discouraged in the operating instructions or which are warned against must be avoided.
This product is intended solely for private use and not for commercial purposes. The warranty shall be deemed void in cases of misuse or improper handling, use of force and modifications / repairs which have not been carried out by one of our authorised Service centres.
Warranty claim procedure
To ensure quick processing of your case, please observe the following instructions:
Please have the till receipt and the item number (e.g. IAN 12345) available as proof of purchase.
■ You will find the item number on the type plate on the product, an engraving on the product, on the front page of the operating instructions (below left) or on the sticker on the rear or bottom of the product.
If functional or other defects occur, please contact the service department listed either by telephone or by e-mail.
You can return a defective product to us free of charge to the service address that will be provided to you. Ensure that you enclose the proof of purchase (till receipt) and information about what the defect is and when it occurred.
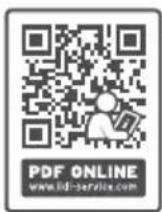
You can download these instructions along with many other manuals, product videos and installation software at www.lidl-service.com.
This QR code will take you directly to the Lidl service page (www.lidl-service.com) where you can open your operating instructions by entering the item number (IAN) 123456.
Service
GB Service Great Britain
Tel.: 0800 404 7657
E-Mail: kompernass@lidl.co.uk
IE Service Ireland
Tel.: 1890 930 034
(0,08 EUR/Min., (peak))
(0,06 EUR/Min., (off peak))
E-Mail: kompernass@lidl.ie
IAN 337246_2001
Importer
Please note that the following address is not the service address. Please use the service address provided in the operating instructions.
KOMPERNASS HANDELS GMBH
BURGSTRASSE 21
44867 BOCHUM
GERMANY
www.kompernass.com
Table des matieres
Introduction 26
Protection anti-surchauffe 32
Protection anti-surchauffe
Chere cliente, cher client,
Chere cliente, cher client,
KOMPERNASS HANDELS GMBH
BURGSTRASSE 21
44867 BOCHUM
ALLEMAGNE
www.kompernass.com
Inhoud
Inleiding 42
WAARSCHUWING! LETSELGEVAAR!
WAARSCHUWING! LETSELGEVAAR!
WAARSCHUWING! LETSELGEVAAR!
KOMPERNASS HANDELS GMBH
BURGSTRASSE 21
44867 BOCHUM
DUITSLAND
www.kompernass.com
Spistresci
Wstep. 54
KOMPERNASS HANDELS GMBH
BURGSTRASSE 21
44867 BOCHUM
NIEMCY
www.kompernass.com
Obsah
Uvod. 66
KOMPERNASS HANDELS GMBH
BURGSTRASSE 21
44867 BOCHUM
NEMECKO
www.kompernass.com
Obsah
Uvod. 78
KOMPERNASS HANDELS GMBH
BURGSTRASSE 21
44867 BOCHUM
NEMECKO
www.kompernass.com

KOMPERNASS HANDELS GMBH
BURGSTRASSE 21
44867 BOCHUM
GERMANY
www.kompernass.com
- ELEKTRISCHE THEEKOKER
- ELEKTRICKÁ KONVICE NAČAJ
- DE AT CH
- FR BE
- Contents
- Introduction
- Intended use
- Package contents
- Technical data
- Appliance description
- Safety information
- DANGER! RISK OF ELECTRIC SHOCK!
- WARNING! RISK OF INJURY!
- Caution! Hot surfaces!
- CAUTION! PROPERTY DAMAGE!
- Before first use
- Operation
- NOTE
- Overheating protection
- Cleaning and care
- Descaling
- Storage
- Disposal
- Do not dispose of the appliance in your normal domestic waste. This product is subject to the European directive 2012/19/EU.
- Disposal of packaging materials
- Warranty conditions
- Warranty period and statutory claims for defects
- Scope of the warranty
- Warranty claim procedure
- Service
- Importer
- Table des matieres
- Protection anti-surchauffe
- Inhoud
- WAARSCHUWING! LETSELGEVAAR!
- Spistresci
- Obsah
Brand : SILVERCREST
Model : STK 650 B2
Category : Electric kettle