Beef Butler - Grill plate OneConcept - Free user manual and instructions
Find the device manual for free Beef Butler OneConcept in PDF.

| Brand | OneConcept |
| Model | Beef Butler |
| Product type | Charcoal barbecue |
| Usage | Outdoor only |
| Main material | Metal with wooden and bakelite handles |
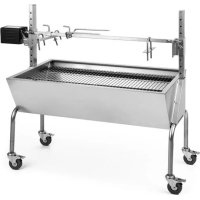
| Lid | Yes, with wooden handle |
| Cooking grate | Included, with handles |
| Charcoal grate | Included |
| Warming rack | Included |
| Side tables | 2 wooden boards, included |
| Front shelf | 3 wooden boards, included |
| Ash tray | Removable, with bakelite handle |
| Wheels | 2 wheels for mobility |
| Ventilation openings | 4 on the side, with ventilation rod |
| Assembly | Required (see manual) |
| Lighting | Firelighter complying with EN 1860-3 recommended |
| Safety | Do not use indoors; avoid alcohol or gasoline; constantly supervise; wear gloves; heat-resistant surface |
| Maintenance | Let cool completely; empty ashes; store in shelter |
| Spare parts | Available; list in manual (25+ parts including screws) |
| Warranty | 2 years (estimated) |
Frequently Asked Questions - Beef Butler OneConcept
User questions about Beef Butler OneConcept
0 question about this device. Answer the ones you know or ask your own.
Ask a new question about this device
Download the instructions for your Grill plate in PDF format for free! Find your manual Beef Butler - OneConcept and take your electronic device back in hand. On this page are published all the documents necessary for the use of your device. Beef Butler by OneConcept.
USER MANUAL Beef Butler OneConcept
Unit 6 Riverside Business Centre
Brighton Road
Shoreham-b-Sea
BN436RE
United Kingdom
SICHERHEITSHINWEISE
WARNING
Congratulations on the purchase of our appliance. Please read the following instructions carefully and follow them to prevent potential damage. We accept no liability for damage caused by disregarding the instructions or improper use. Please scan the QR code to access the latest operating instructions and for further information about the product.

CONTENTS
Safet instructions 16
Device overview 18
Accessories 19
Assembl 20
MANUFACTURER & IMPORTER (UK)
Manufacturer:
Chal-Tec GmbH, Wallstraße 16, 10179 Berlin, German.
Importer for Great Britain:
Chal-Tec UK limited
Unit 6 Riverside Business Centre
Brighton Road
Shoreham-b-Sea
BN436RE
United Kingdom

3
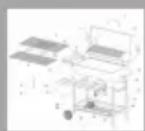
Insert the axle (19) through the holes of the short leg (14) and attach the wheels (20) to both sides of the axle. Attach the washer (K) to both ends of the axle and tighten with 2 M8 nuts (J).
4
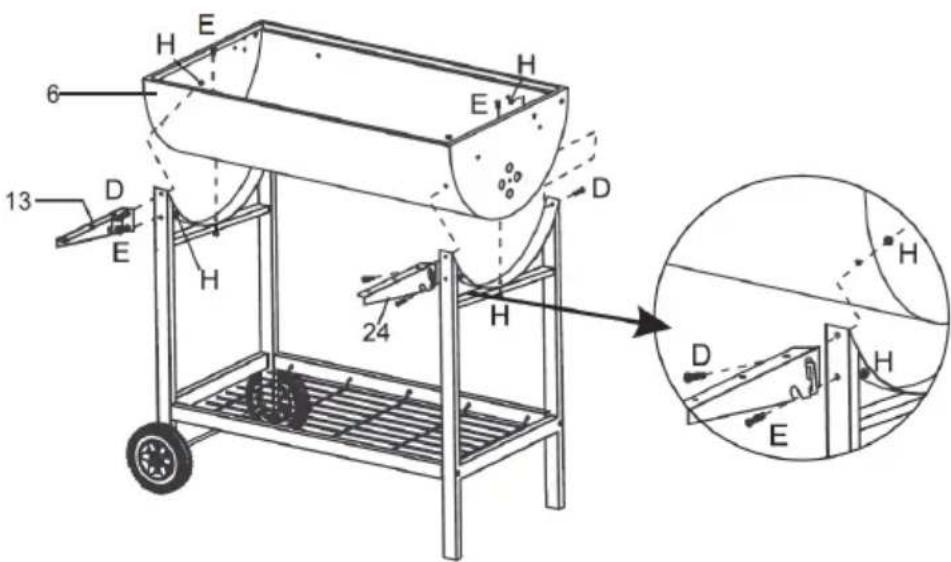
Attach the fire tray (6) and the front shelf support (13 & 24) to the legs using 4 screws (D), 4 pieces of bolts (E) and 8 M6 nuts (H).
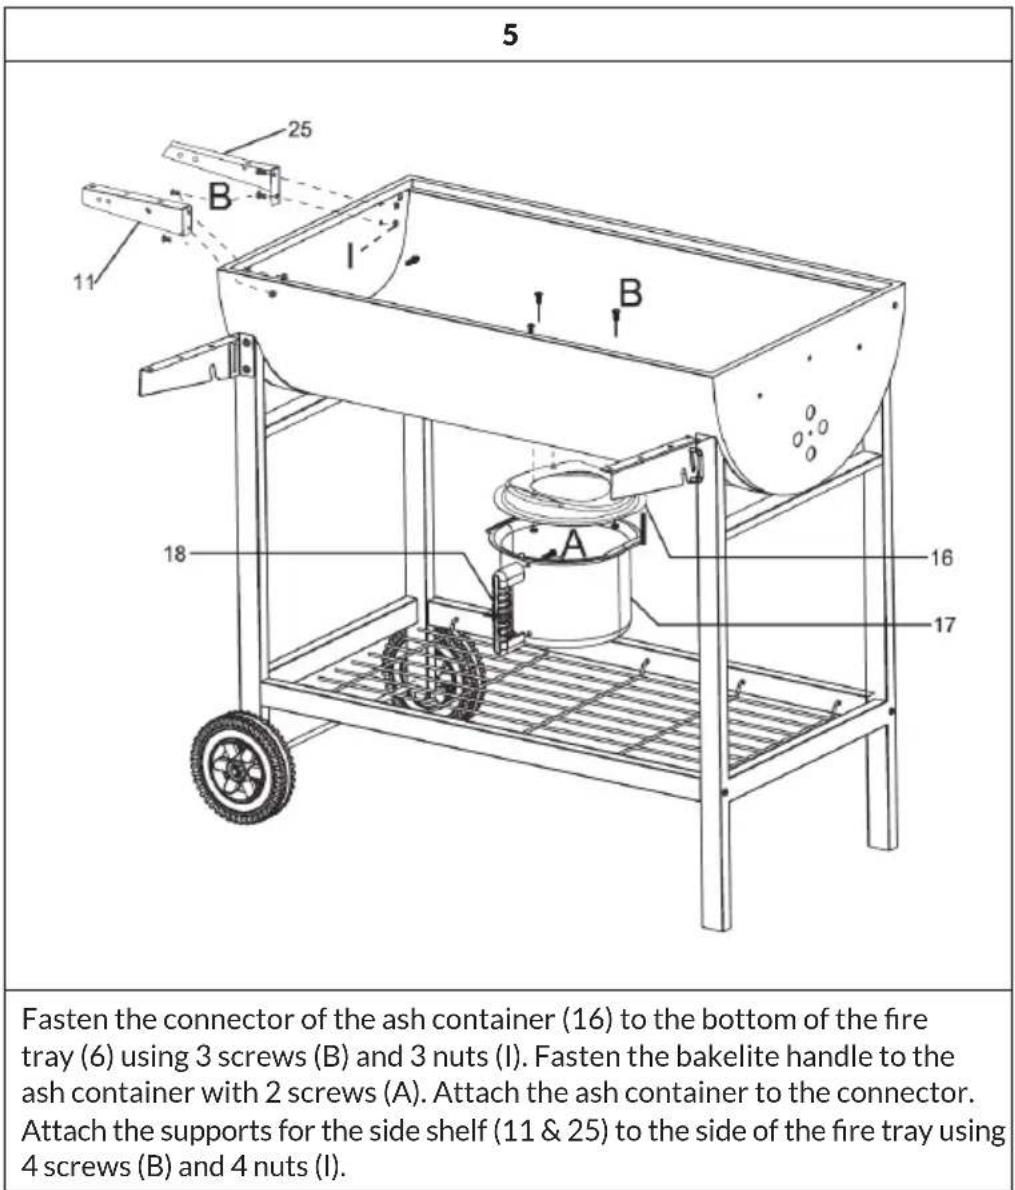
6
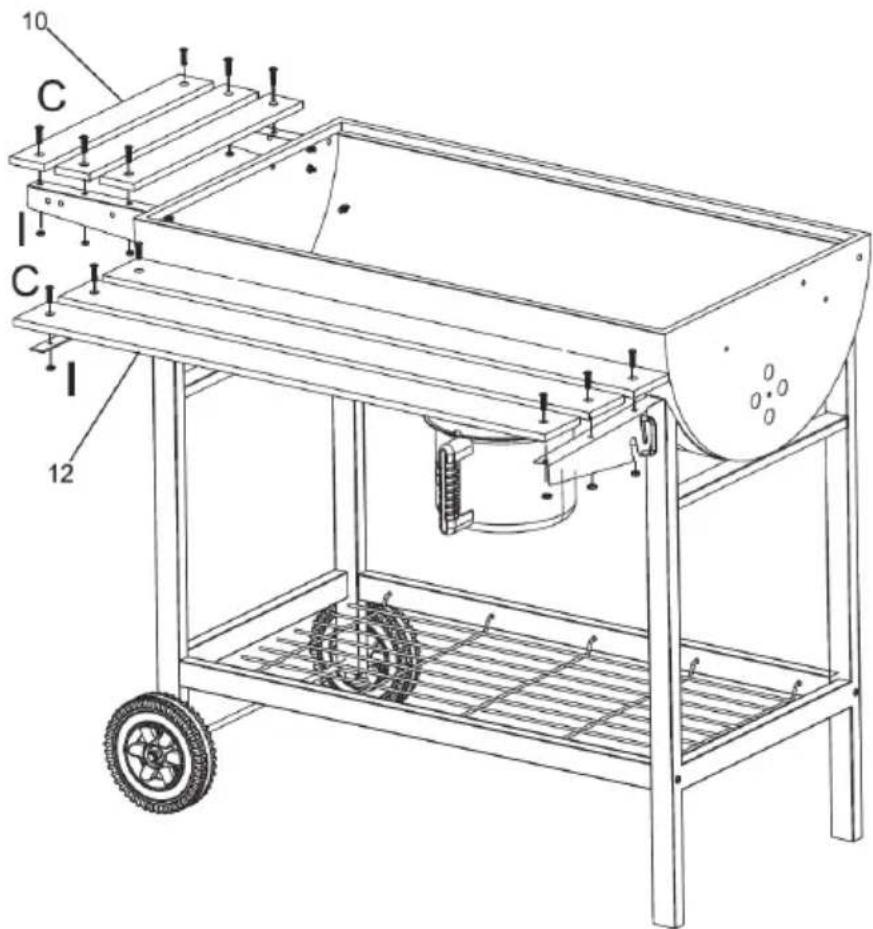
Attach the wooden parts of the front shelf (12) to the front shelf support (13) using 6 screws (C) and 6 nuts (I). Place the side shelves (10) on the side shelve supports (11) and fasten them with 6 screws (C) and 6 nuts (I).
8

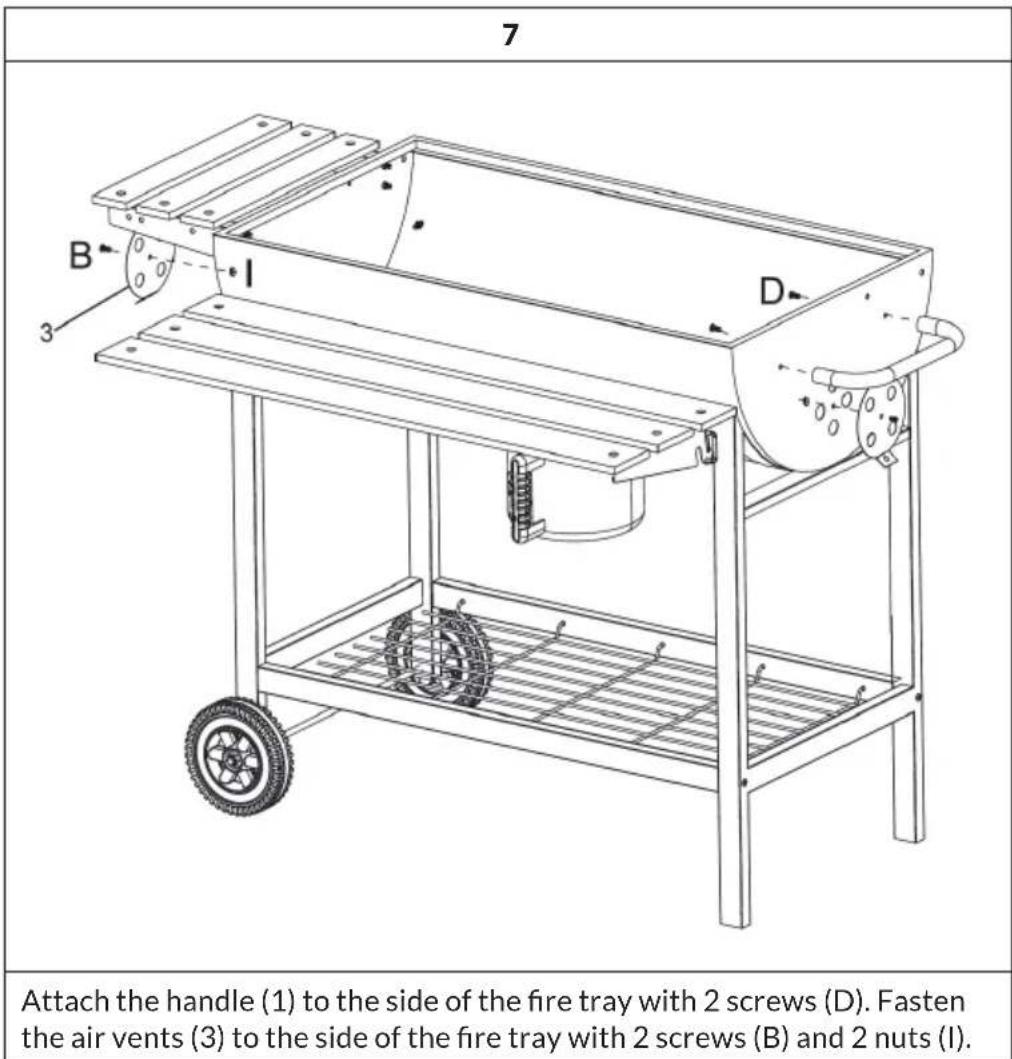
Place the cover (2) on the fire tray (6). Align the threaded hole at the back of the lid with the holes in the fire tray and secure the lid with 2 screws (D). Then fasten the air vents (3) to the side of the lid with 2 screws (B) and 2 nuts (I). Attach the metal handle (1) to the front of the lid with 2 screws (D).
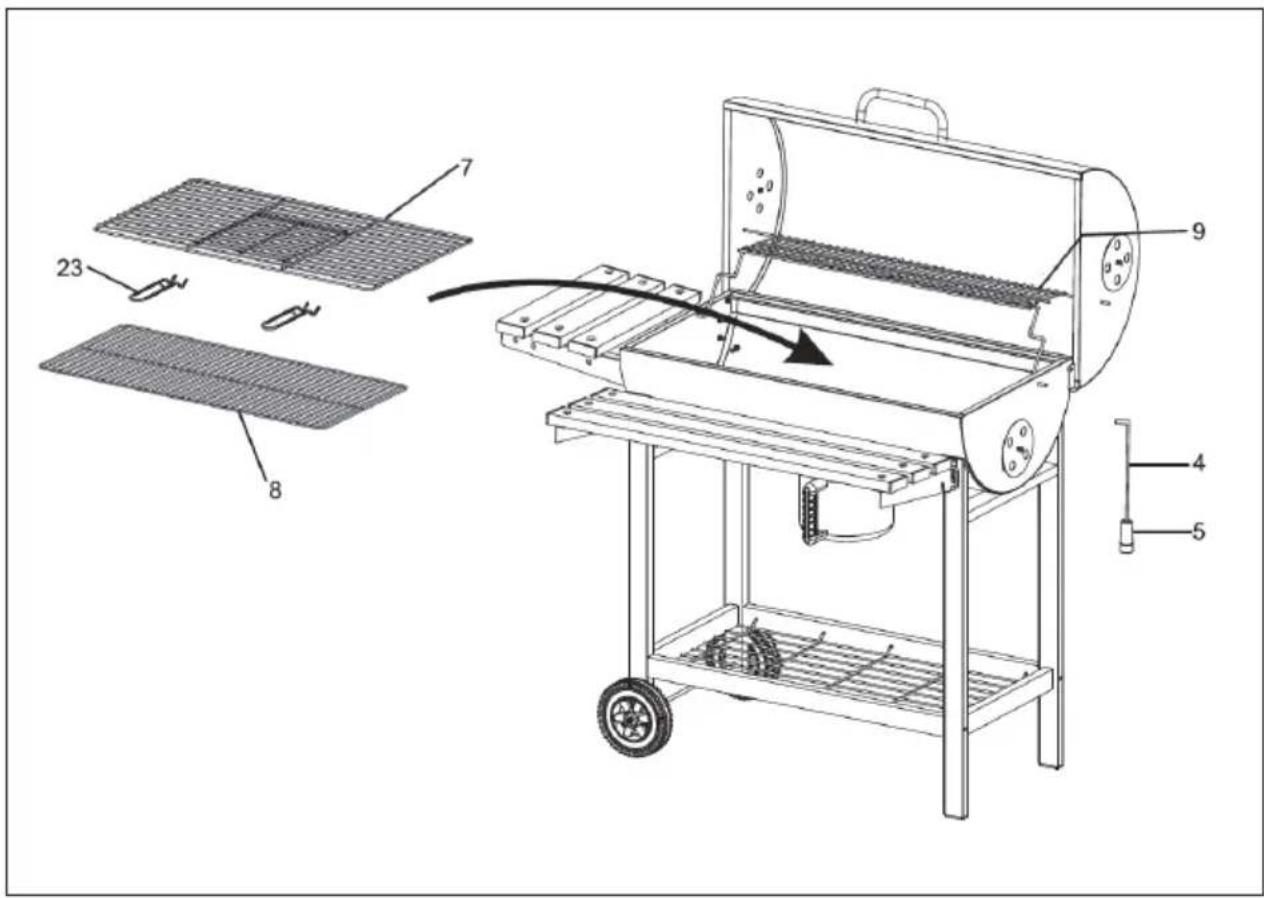
| 9 |
| When all parts are fully assembled, tighten all screws and nuts. Place the charcoal grate (8) in the fire tray. Place the grill grate (7) on the fire tray and attach the warming rack between the lid and the fire tray. Finally, attach the grate handles (23) to the grate. |
Estimado cliente:
Chal-Tec UK limited.
Unit 6 Riverside Business Centre
Brighton Road
Shoreham-by-Sea
BN436RE
Reino Unido

ADVERTENCIA
Cher client, chere clientele,
Unit 6 Riverside Business Centre
Brighton Road
Shoreham-by-Sea
BN436RE
Royaume Uni
CONSIGNES DE SECURITE

MISE EN GARDE
PRODUTTORE IMPORTATORE (UK)
Produtlore:
Chal-Tec GmbH, Wallstraße 16, 10179 Berlin, Germania.
Unit 6 Riverside Business Centre
Brighton Road
Shoreham-by-Sea
BN436RE
Regno Unito
AVVERTENZE DISICUREZZA