
OFR111385 - Heating Emerio - Free user manual and instructions
Find the device manual for free OFR111385 Emerio in PDF.
| Product type | Oil-free radiator |
| Brand | Emerio |
| Model | OFR111385 |
| Power supply | 220-240 V ~ 50/60 Hz |
| Power | 1500 W |
| Temperature range | 5 °C to 35 °C |
| Temperature display | Celsius or Fahrenheit degrees |
| Heating modes | Low, medium, high |
| ECO mode | Automatic adjustment according to ambient temperature |
| Timer | Automatic on/off from 1 to 24 hours |
| Child lock | Yes |
| Remote control | Yes (CR2025 battery included) |
| Wheel assembly | Yes, supplied with screws and wing nuts |
| Anti-tip safety | Yes |
| Overheat protection | Yes |
| Do not cover | Yes (warning symbol) |
| Cleaning | Wipe with a soft, damp cloth |
| Warranty | 2 years |
| Customer service | +49 (0) 3222 1097 600 / info.de@emerio.eu |
Frequently Asked Questions - OFR111385 Emerio
User questions about OFR111385 Emerio
0 question about this device. Answer the ones you know or ask your own.
Ask a new question about this device
Download the instructions for your Heating in PDF format for free! Find your manual OFR111385 - Emerio and take your electronic device back in hand. On this page are published all the documents necessary for the use of your device. OFR111385 by Emerio.
USER MANUAL OFR111385 Emerio
Oil free radiator (EN)
Thank you very much for purchasing our products. In order to ensure correct operation, please read this manual and instruction carefully before use.
This product is only suitable for well insulated spaces or occasional use.
IMPORTANT INSTRUCTIONS
When using electrical appliances, basic precautions should always be followed to reduce the risk of fire, electric shock, burns and other injuries.
- This appliance can be used by children aged from 8 years and above and persons with reduced physical, sensory or mental capabilities or lack of experience and knowledge if they have been given supervision or instruction concerning use of the appliance in a safe way and understand the hazards involved.
- Children shall not play with the appliance.
- Cleaning and user maintenance shall not be made by children without supervision.
- Children of less than 3 years should be kept away unless continuously supervised.
- Children aged from 3 years and less than 8 years shall only switch on/off the appliance provided that it has been placed or installed in its intended normal operating position and they have been given supervision or instruction concerning use of the appliance in a safe way and understand the hazards involved. Children aged from 3 years and less than 8 years shall not plug in, regulate and clean the appliance or perform user maintenance.
-
CAUTION — some parts of this product can become very hot and cause burns. Particular attention has to be given where children and vulnerable people are present.
-
If the supply cord is damaged, it must be replaced by the manufacturer, its service agent or similarly qualified persons in order to avoid a hazard.
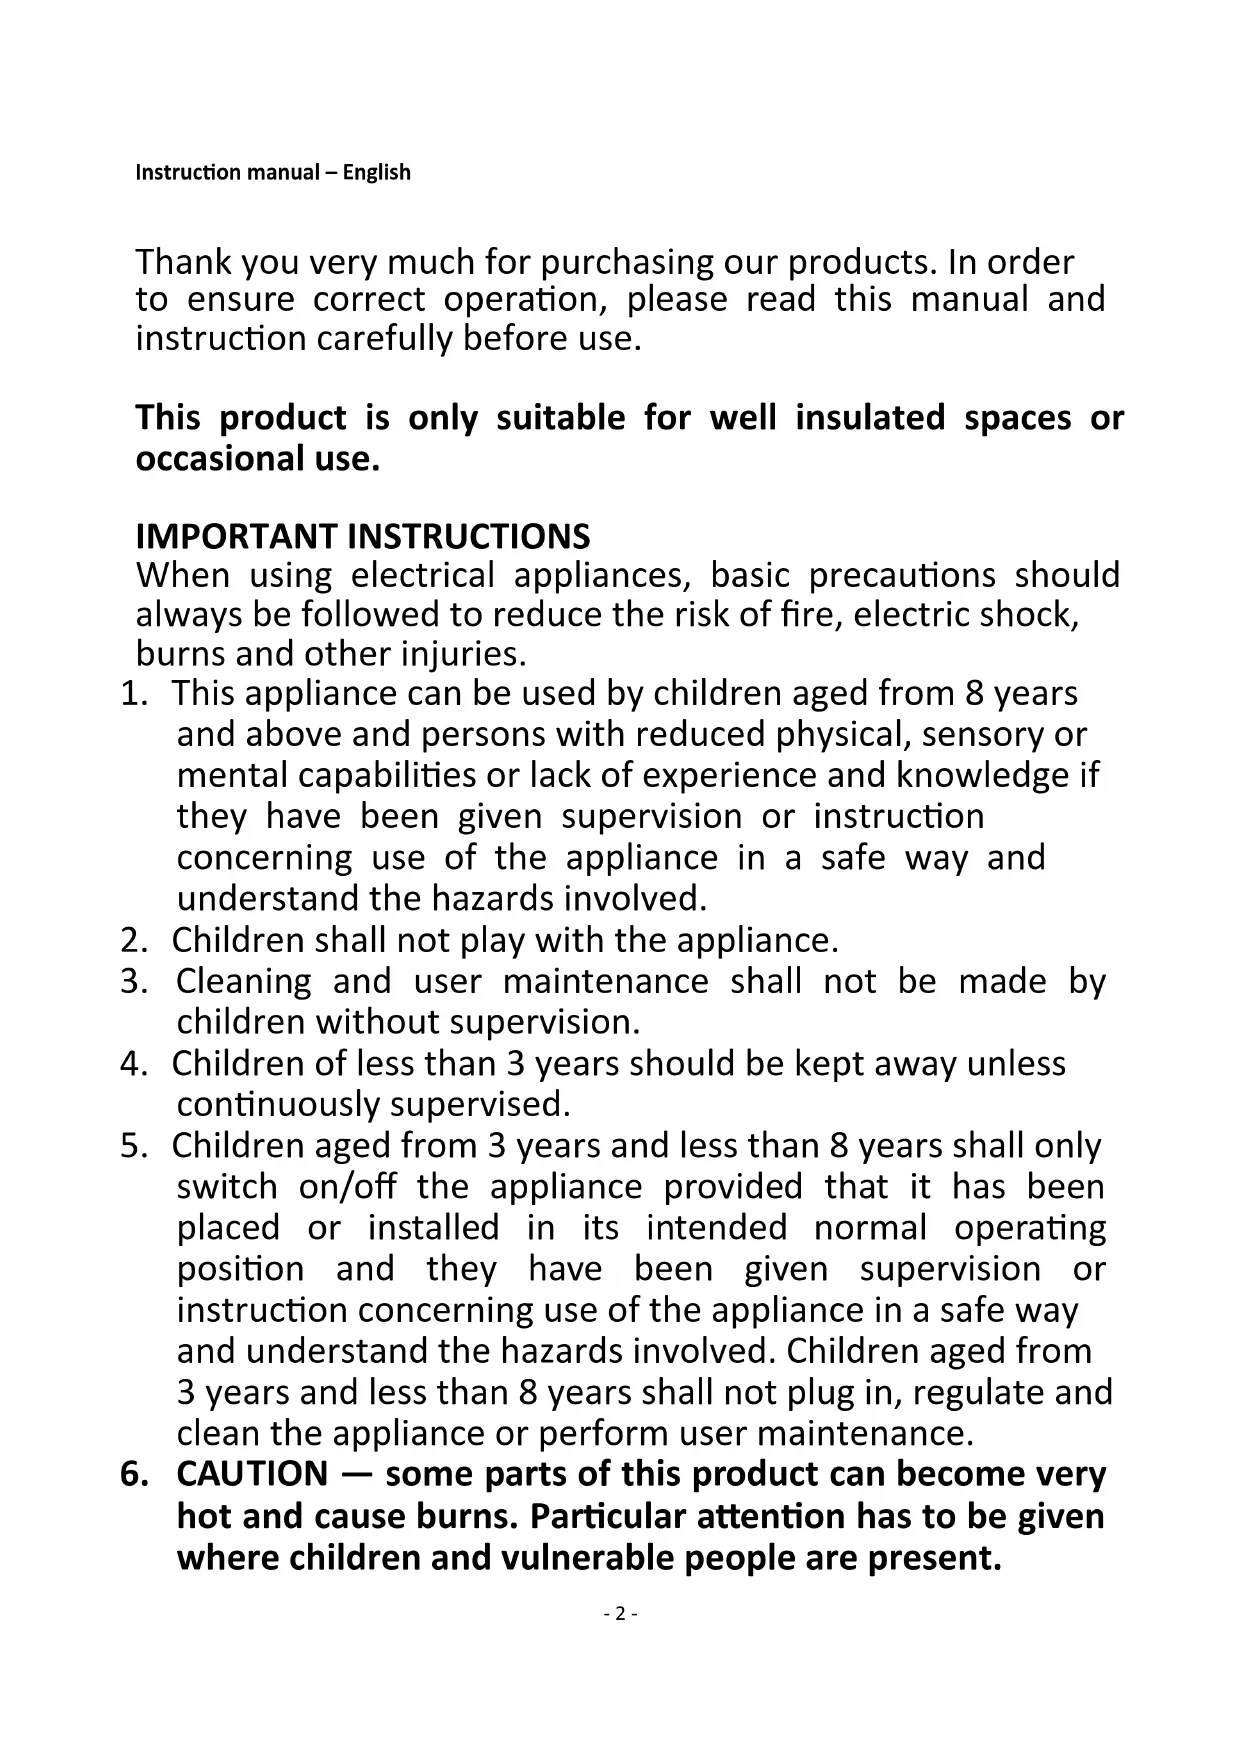
- WARNING: In order to avoid overheating, do not cover the heater.
- Do not use this heater in the immediate surrounding of a bath, a shower or a swimming pool.
- The heater must not be located immediately below a socket outlet.
- Means "DO NOT COVER".
- Before inserting the plug into the mains socket, please check that the voltage and frequency comply with the specifications on the rating label.
- Disconnect the mains plug from the socket when the appliance is not in use and before cleaning.
- Ensure that the mains cable is not hung over sharp edges and keep it away from hot objects and open flames.
- Do not immerse the appliance or the mains plug in water or other liquids. There is danger to life due to electric shock!
- To remove the plug from the plug socket, pull the plug. Do not pull the power cord.
- Do not touch the appliance if it falls into water. Remove the plug from its socket, turn off the appliance and send it to an authorized service center for repair.
- Do not plug or unplug the appliance from the electrical outlet with a wet hand.
- Never attempt to open the housing of the appliance, or to repair the appliance yourself. This could cause electric shock.
- Never leave the appliance unattended during use.
-
This appliance is not designed for commercial use.
-
Do not use the appliance for other than intended use.
- Do not wind the cord around the appliance and do not bend it.
- The heater may only be used in the upright position.
- The unit must be positioned away from flammable or easily deformable objects during use.
- Place the heater on the floor at least 90~cm away from the wall and any other objects, such as furniture, curtains or plants.
- The surface temperature of the appliance is high; do not touch it, only at the handle.
- This heating device is not suitable for assembling in vehicles and machines.
- Regarding the information for the assembly of base support, please refer to the below paragraph of the manual.
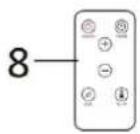
DESCRIPTION
- Handle
- Digital display screen
- Control panel
- Power switch
- Cord storage
- Fins
7.Wheel - Remote control
WHEELS ASSEMBLY
Remove the heater and all the accessories from the carton.
- Turn the heater upside down.(Fig.1)
- Position the wheelbase assemblies between the end fins.(Fig.2)
- Attach them to the heater using the screws and wing nuts supplied. Tighten the wing nuts. (Fig.3)
- Turn the heater the right way up.

Fig.1
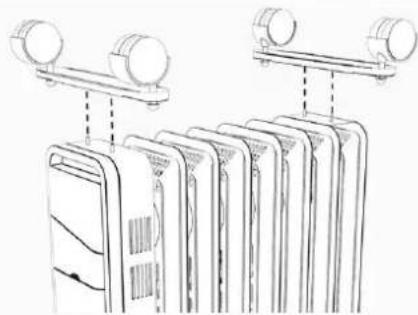
Fig.2
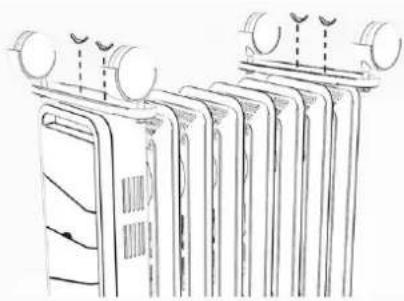
Fig.3
BEFORE USE
Place the heater on the floor at least 50cm away from the wall and 90~cm away from any other objects such as furniture, curtains or plant.
Make sure the power supply used corresponds to the one on the rating label.
USING THE OIL FREE RADIATOR
- Plug the appliance and press the power switch. The appliance will send a beep sound and a red icon will appear on the digital display screen.
- Press the button to turn on the heater. The icon turns to green on the screen. The default setting is 30^ C and high heat output.
- To adjust the heat output, press the " - " or "+" button to select from low heat (symbolized as on screen), medium heat (symbolized as on screen) and high heat (symbolized as on screen).
To select the desired temperature, press the " ^ C / ^ F " button. When the temperature numeral flash on
the screen, press the “-” or “+” button to increase or decrease the temperature. The selected temperature will flash for about 5 seconds and then stay still. Note that the temperature range is from 5^ C / 41^ F to 35^ C / 95^ F .
- When you have finished using the heater, press the button to turn off the heater, and the appliance will send out one beep sound. The icon on the screen will turn to red. Press the power switch to disconnect the power. Take out the plug from the power outlet.
NOTES:
- Long press the ^ C / F button is to switch between the Celsius and Fahrenheit display of temperature, and you will hear two beep sounds.
- The temperature setting can only be adjusted when the temperature numerals flash on the screen.
- If no press on the control panel for about 3 minutes, the screen will automatically shut down. Pressing any button once can make the screen back to work. Buttons will have their functions only when the screen is working.
Timer
Automatic turn-on: When power is connected, press the button to set the automatic turn-on time. Use the "+" or "-" button to set after how many hours the heater will automatically turn on.
Automatic turn-off: When the heater is on, you can press the button to set the automatic turn-off time. Use the "+" or "-" button to set after how many hours the heater will automatically turn off.
Notes:
One press of the button leads to one hour change. Time selection ranges from 1 hour to 24 hours.
After setting the timer for automatic turn-on or turn-off, there will be an icon appearing on the screen.
You can adjust the time only when the numerals flash. The time is set when numerals become still.
ECO Mode
- When the heater is on, press "ECO" button to enter into the ECO mode. Press the "ECO" button again, the heater will exit from ECO mode to the original setting.
- In ECO mode, the appliance will adjust the heat output automatically according to the environmental temperature. When the environmental temperature is higher than 28^ C , the heater will stop heating.
In ECO mode, you cannot adjust the temperature and heat output by yourself.
A leaf-like icon will appear on the screen to indicate the ECO mode.
Child Lock Mode
- When the heater is on, long press the button until you hear 3 beep sounds, the child lock mode is activated. The setting on the heater is thus locked. To exit from child lock mode, just long press the button again and you will hear 3 beep sounds again.
In child lock mode, a child-like icon will appear on the screen.
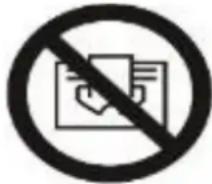
REMOTE CONTROL
This unit has a remote control. One piece of CR2025 battery should be used for it. The functions of the remote control buttons are the same as of the buttons on the control panel.
SAFETY SYSTEM
This heater is equipped with a tilt protection safety device. It has tilt protection safety functions and automatically switches off the power. For safety reasons, the unit will automatically switch off the power if it is put on unstable or uneven surfaces or if it is tilted accidentally.
MAINTENANCE AND CARE
Unplug the appliance from the power supply and allow the appliance to cool down.
- Wipe the appliance with a soft damp cloth. Do not use detergent or abrasives.
- Do not scratch the fin surfaces with sharp tools. Damages of the coat layer result in rusty spots.
The heater should be cleaned regularly; wipe the dust off the surface of the fins. This improves radiation.
STORAGE
- Ensure that the heater is completely cooled off.
- Roll up the power cord in the cord storage when the heater is not in use.
- Store the appliance in a cool and dry place.
Warning
If you have problem with your heater, please do not attempt to repair it yourself. Doing so may cause damage or personal injury.
TECHNICAL DATA:
Operating voltage: 220-240V ~ 50-60Hz
Power consumption: 1500W
GUARANTEE AND CUSTOMER SERVICE
Before delivery our devices are subjected to rigorous quality control. If, despite all care, damage has occurred during production or transportation, please return the device to your dealer. In addition to statutory legal rights, the purchaser has an option to claim under the terms of the following guarantee:
For the purchased device we provide 2 years guarantee, commencing from the day of sale. If you have a defective product, you can directly go back to the point of purchase.
Defects which arise due to improper handling of the device and malfunctions due to interventions and repairs by third parties or the fitting of non-original parts are not covered by this guarantee. Always keep your receipt, without the receipt you can't claim any form of warranty. Damage caused by not following the instruction manual, will lead to a void of warranty, if this results in consequential damages then we will not be liable. Neither can we hold responsible for material damage or personal injury caused by improper use if the instruction manual is not properly executed. Damage to accessories does not mean free replacement of the whole appliance. In such case please contact our service department. Broken glass or breakage of plastic parts is always subject to a charge. Defects to consumables or parts subjected to wearing, as well as cleaning, maintenance or the replacement of said parts are not covered by the warranty and are to be paid.
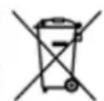
ENVIRONMENT FRIENDLY DISPOSAL

Recycling - European Directive 2012/19/EU
This marking indicates that this product should not be disposed with other household wastes. To prevent possible harm to the environment or human health from uncontrolled waste disposal, recycle it responsibly to promote the sustainable reuse of material resources. To return your used device, please use the return and collection systems or contact the retailer where the product was
purchased. They can take this product for environmental safe recycling.

BATTERY MUST BE RECYCLED OR DISPOSED OF PROPERLY. DO NOT OPEN. DO NOT DISPOSE
OR IN FIRE OR SHORT CIRCUIT.
Emerio Deutschland GmbH (no service address)
Hoffer Weg 14
51519 Odenthal
Germany
Customer service:
T: +49 (0) 3222 1097 600
E: info.de@emerio.eu

Brand : Emerio
Model : OFR111385
Category : Heating