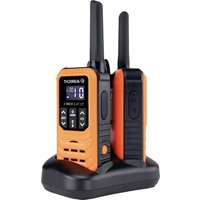
Tectalk Worker 3 - Talkie Walkie ALBRECHT - Free user manual and instructions
Find the device manual for free Tectalk Worker 3 ALBRECHT in PDF.
| Product Type | PMR446 Walkie-Talkie |
| Brand | ALBRECHT |
| Model | Tectalk Worker 3 |
| Frequency Range | 446.00625 – 446.19375 MHz |
| Number of Channels | 16 PMR446 channels |
| Power Supply | Rechargeable Lithium-Ion battery 2200 mAh / 3.7 V |
| Transmission Power | 500 mW ERP |
| Standby Autonomy | Approximately 20 hours (estimated) |
| Charging Time | Approximately 3 hours |
| Accessory Connectivity | Kenwood jack for headset/microphone |
| Main Functions | Adjustable squelch, VOX, Scrambler, Alarm, Scan, Monitor, CTCSS/DCS, Time-Out Timer, Battery saver |
| Protection | Not waterproof, rubber covers for jacks |
| Operating Temperature | -20 °C to +50 °C |
| Included Accessories | Desktop charger, power adapter, USB-C cable, belt clip, lanyard, battery pack |
| Maintenance and Cleaning | Clean contacts with a dry cloth; avoid dust, moisture, and prolonged exposure to sunlight |
| Safety | Do not disassemble, do not use in explosive areas, do not expose to extreme temperatures |
| Spare Parts | Battery, integrated antenna (non-replaceable), Kenwood accessories |
| Warranty | 2 years |
| Country of Manufacture | Not specified |
Frequently Asked Questions - Tectalk Worker 3 ALBRECHT
User questions about Tectalk Worker 3 ALBRECHT
0 question about this device. Answer the ones you know or ask your own.
Ask a new question about this device
Download the instructions for your Talkie Walkie in PDF format for free! Find your manual Tectalk Worker 3 - ALBRECHT and take your electronic device back in hand. On this page are published all the documents necessary for the use of your device. Tectalk Worker 3 by ALBRECHT.
USER MANUAL Tectalk Worker 3 ALBRECHT
| Kanal Frequenz (MHz) | Kanal Freqenz (MHz) |
| 1 446.00625 9 446.10625 | |
| 2 446.01875 10 446.11875 | |
| 3 446.03125 11 446.13125 | |
| 4 446.04375 12 446.14375 | |
| 5 446.05625 13 446.15625 | |
| 6 446.06875 14 446.16875 | |
| 7 446.08125 15 446.18125 | |
| 8 446.09375 16 446.19375 |
CTCSS (Continuous Tone Coded Squelch System) / DCS (Digital Coded Squelch)
1. Table of contents
- Table of contents 12
- Delivery content for single unit 12
- Delivery content for hard case sets 13
- Overview Radio 14
4.1. Controls 14
- Basic operations of the radio 15
5.1. Battery Charging 15
5.1.1. Low Battery Voltage Warning 15
5.2.Installing a headset / microphone 15
5.3. Selecting a Channel 15
- Transmitting and receiving 16
- Optional functions (via programming software) 16
7.1.Squelch 16
7.2. Voice Operated Transmission (VOX) 16
7.3. Programmable key 16
7.3.1.Monitor 16
7.3.2. Scan 17
7.3.3.Scrambler 17
7.3.4.Alarm 17
7.4. Battery save mode 17
7.5.Beep at end of reception 17
7.6.Roger Beep 17
7.7. Channel Busy Display (BCL - Busy Channel Lockout) 17
7.8.CTCSS/DCS 17
7.9. Transmit Time Limit (Time-Out Timer) 17
- Technical specification 18
- Safety instructions 19
- Trouble shooting 19
- Warranty and Recycling Information 20
12.WEEE and Recycling 20 - Service Address And Technical Hotline 20
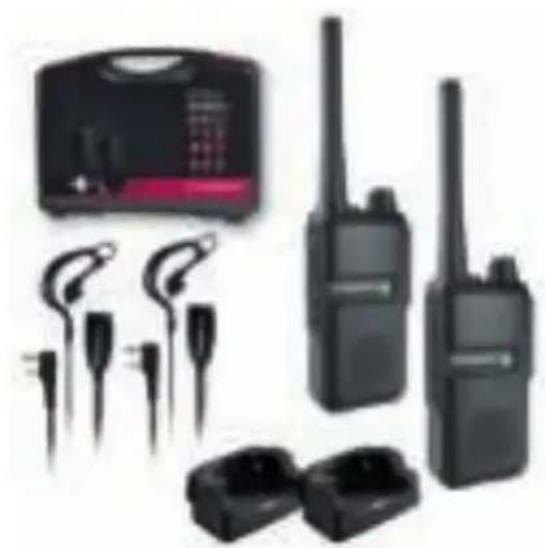
2. Delivery content for single unit
| Single Set |
| 1 Tectalk Worker 3 radio |
| 1 desktop charger incl. power adaptor and cable |
| 1 belt clip |
| 1 battery pack |
| 1 manual |
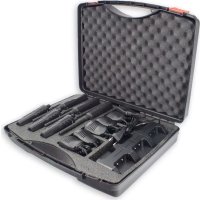
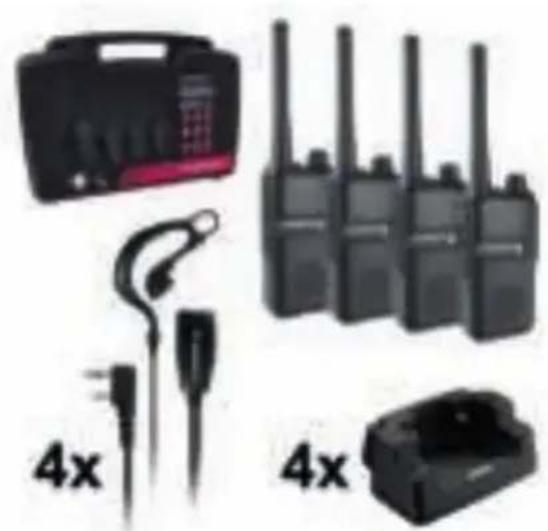
3. Delivery content for hard case sets
Please make sure that the hard case contains the following accessories:
| Small hard case with 2 PMR radios Big hard | case with 4 PMR radios |
| 2 Tectalk Worker 3 radios 4 Tectalk Worker 3 radios | |
| 2 desktop chargers incl. power adaptors and cables | 4 desktop chargers incl. power adaptors and cables |
| 2 headsets with PTT buttons 4 headsets with PTT buttons | |
| 2 battery packs 4 battery packs | |
| 1 hard case 1 hard case |
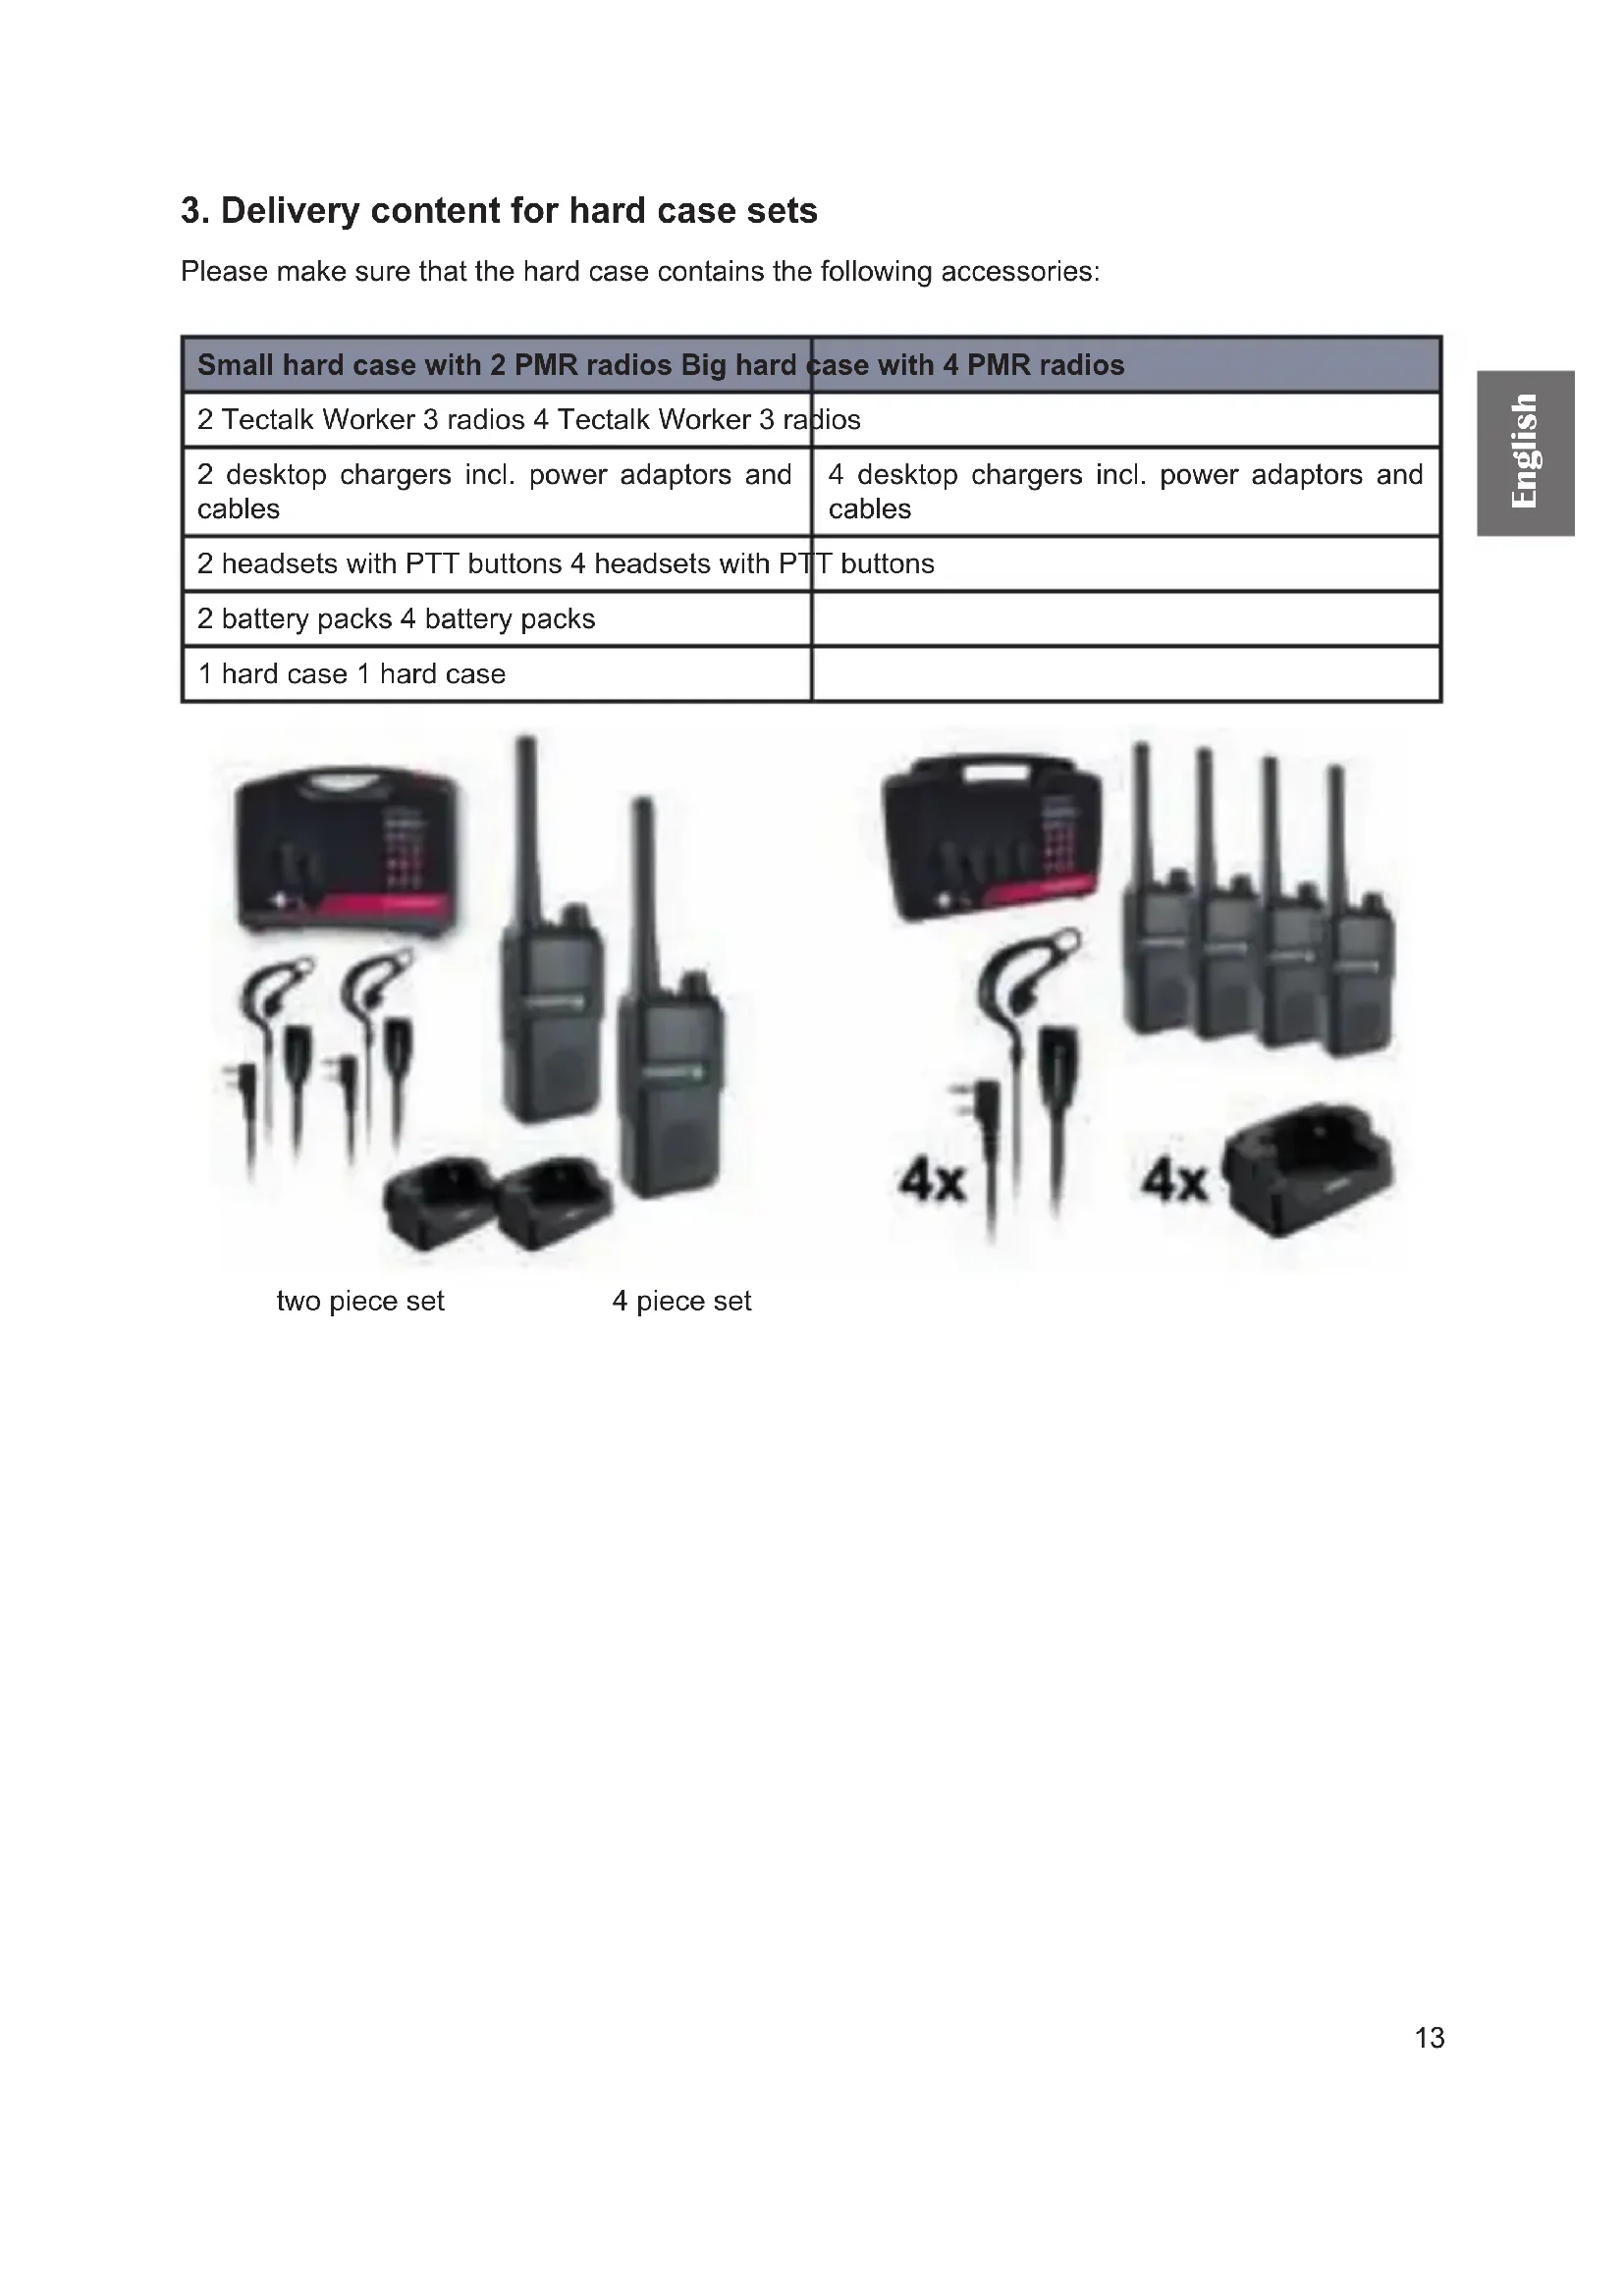
two piece set
4 piece set
4. Overview Radio
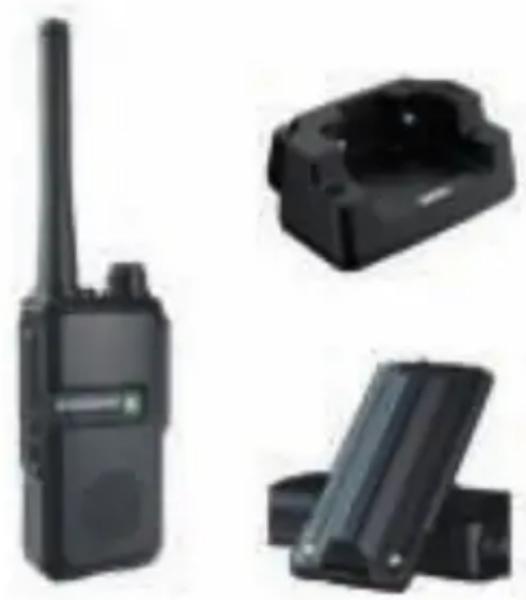
4.1. Controls
u
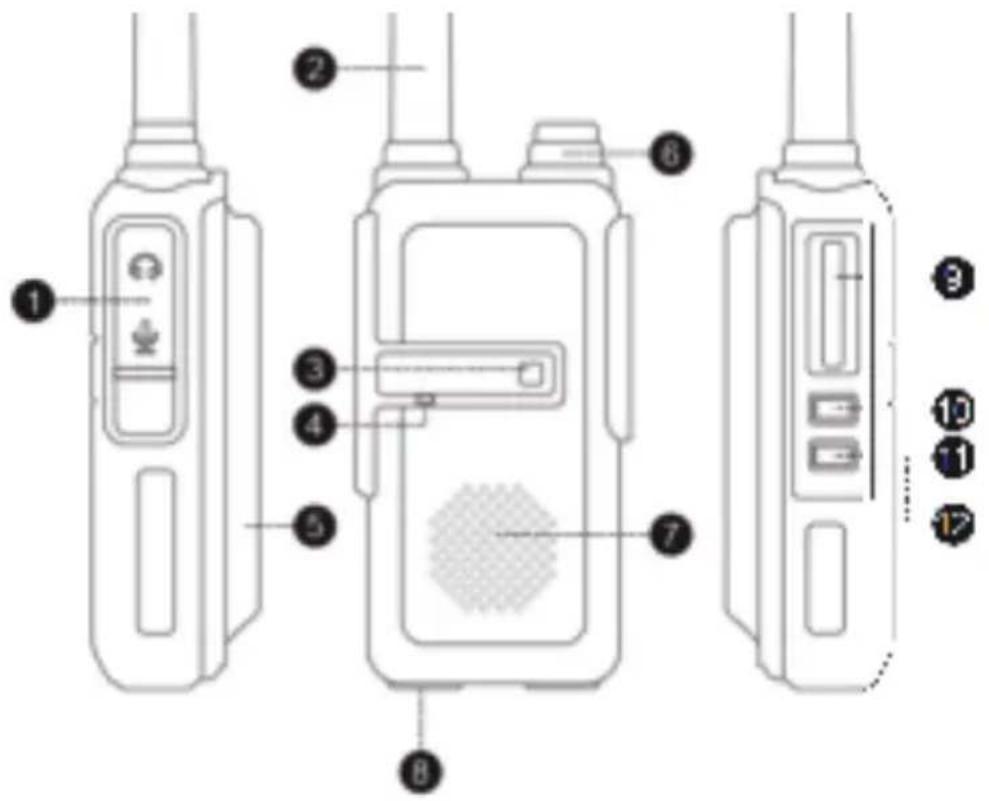
| Nr. Beschreibung Funktion | |
| 1 Headset socket For Kenwood headsets/earphones/microphones | |
| 2 Antenna Integrated antenna for maximal performance | |
| 3 Status LED Glows green on reception and red on transmission | |
| 4 Microphone Talk into the microphone from about 5 cm away | |
| 5 Battery 2200 mAh rechargeable Lithium-ion battery | |
| 6 On/Off/Volume Turn clockwise to increase volume | |
| 7 Speaker Audio output for incoming signals | |
| 8 Charging socket USB-C Charge via USB-C socket or the desktop charger | |
| 9 Push-to-Talk button (PTT) Press and hold to transmit | |
| 10 Channel + Short press to increase channel | |
| 11 Channel - | Short press to decrease channel |
| 12 Programmable button | Long press for multiple possible functions, see chapter 7 |
5. Basic operations of the radio
5.1. Battery Charging
Please charge the new battery pack before using it. You can either use the included desktop charger or charge the radios with the USB-C charging cable.

- Plug the power adaptor into an electric socket and connect it to the desktop charger with the USB-C cable.
- Insert the Tectalk Worker 3 or the battery alone into the drop-in charging tray.
- Ensure that the battery's contacts connect with the drop-in charging tray properly. While the charging is taking place, the LED will glow red.
- After about 3 hours charging, the LED will turn green to indicate that the battery is now fully charged.
Note: A new battery pack will not reach its full capacity after the first recharge. It will take two or three charges and discharges to reach full capacity.
5.1.1. Low Battery Voltage Warning
When the voltage is low, the warning "Please charge the battery" is played every 20 seconds. No more transmissions are possible and the PTT button will sound an alarm tone.
5.2.Installing a headset / microphone
Insert the plug of the headset into the speaker/mic socket on the right side of the radio unit. All accessories with "Kenwood" wiring may be used.
Note: The Tectalk Worker 3 is not water resistant when using external accessories. Close the rubber cover over the sockets if an external headset is not used.
5.3. Selecting a Channel
This radio features 16 real PMR446 channels. These 16 channels have been made available by the authorities just recently. Older PMR446 radios only support 8 PMR channels. If you plan to use the Albrecht Tectalk Worker 3 with older 8 channel radios, only the first eight channels are available.

| Channel number | Frequency / MHz | Channel number | Frequency / MHz |
| 1 446.00625 9 446.10625 | |||
| 2 446.01875 10 446.11875 | |||
| 3 446.03125 11 446.13125 | |||
| 4 446.04375 12 446.14375 | |||
| 5 446.05625 13 446.15625 | |||
| 6 446.06875 14 446.16875 | |||
| 7 446.08125 15 446.18125 | |||
| 8 446.09375 16 446.19375 |
6. Transmitting and receiving
When the radio is switched on, it is automatically in receive mode as long as you are not transmitting. When a radio message is received, the status indicator lights up green.
To transmit, press and hold the PTT (Push-to-Talk) button and speak into the microphone at normal volume and about 5 cm distance. The status indicator lights up red during transmission. Release the PTT button at the end of your transmission.

7. Optional functions (via programming software)
The following options can be changed via programming software (not included, optionally available). The preset values of the radios are:
- Squelch: level 3
- VOX: off
- Programmable button: monitor
- Battery saving mode: off
- Beep at end of reception: on
- Scrambler: off
- Roger Beep: off
- Transmit time limit: on (90 seconds)
7.1. Squelch
The squelch can be set to 9 different levels.
The squelch mutes the speaker when no signal is being received. If the squelch is set correctly, you will only hear noise during reception. If the squelch is set too low, you will constantly hear a slight hiss. If the level is set too high, weak radio transmissions are suppressed.
7.2. Voice Operated Transmission (VOX)
The VOX function allows you to send radio messages without having to press the PTT button. The Tectalk Worker 3 automatically goes into transmission mode when the VOX function detects that someone is speaking into the microphone.
The VOX sensitivity can be selected in 8 different levels: Level 1 means that VOX is activated at very low noise levels. Level 8 means that you have to speak very loudly into the microphone to activate VOX.
With the VOX delay, you set the time after which the automatic transmission mode is terminated without speech. You can set the delay between 0.3 sec. and 3.0 sec.
7.3. Programmable key
The programmable side key of the Tactalk Worker 3 can be assigned to various functions.
7.3.1.Monitor
If you hold down the side button for a long time, the squelch is deactivated temporarily and you can hear all signals including noise.
The monitor function is very useful when you want to adjust the volume or receive weak signals (which would be suppressed by the squelch).
7.3.2. Scan
Press and hold the side button to use the SCAN function.
The unit will then automatically scan all channels for signals. Each channel can be individually programmed to be included in the scan process or not.
If a signal is found during the SCAN process, the radio will automatically stop on that channel.
7.3.3. Scrambler
Use the side button to turn the scrambler on and off. This function distorts the transmitted voice transmission in such a way that it can only be understood by another Tectalk Worker 3 with activated scrambler.
7.3.4. Alarm
Use the side button to send an alarm tone (siren). The alarm tone will be transmitted for 20 seconds on the currently selected channel before the unit switches to receive mode for 10 seconds. Press the PTT button to exit alarm mode.
7.4. Battery save mode
The battery saving mode can be set in 3 levels. It reduces power consumption during use. If no activity (transmitting/receiving) is registered for 20 seconds, the unit automatically switches to battery saving mode (if activated). Depending on the level, the unit then automatically alternates one second of ready-to-receive standby with 2/3/4 seconds of deep standby. No reception is possible during the deep stand-by interval, therefore very short transmissions may be missed.
7.5. Beep at end of reception
Set whether the radio beeps to indicate the end of a received message.
7.6. Roger Beep
Set whether the radio beeps at the end of a transmitted message to indicate the end of the message.
7.7. Channel Busy Display (BCL - Busy Channel Lockout)
The channel busy indicator can be turned on or off for each channel. When activated, the function prevents you from making radio calls on a channel that is already busy. If you press the PTT key in this case, a warning tone is emitted and your transmission is blocked.
7.8.CTCSS/DCS
CTCSS (Continuous Tone Coded Squelch System) / DCS (Digital Coded Squelch)
There are 44 CTCSS and 211 DCS tones available: CTCSS is a non-audible subtone, while DCS is a digital code.
The CTCSS or DCS allow you to block unwanted radio transmissions and only receive messages from people with the same tone or code.
7.9. Transmit Time Limit (Time-Out Timer)
The transmit time-out timer prevents the radio from accidentally blocking a channel permanently. You can set the transmission time limit between 90 and 520 seconds (in 15 second increments). The transmission is automatically interrupted after the set time.
8. Technical specification
| General | |
| Frequency Range PMR446: 446.00625 - 446.19 | 375 MHz |
| Channels 16 | |
| Battery 2200 mAh / 3.7 V | |
| Frequency stability ± 2.5 ppm | |
| Operation temperature -20 °C to +50 °C |
| Transmitter | |
| Transmission Power (ERP) 500 mW | |
| Maximum frequency deviation ≤ 2.5 kHz | |
| Spurious emission ≤ 7.5 uW | |
| Adjacent channel power ≤ -60 dB | |
| SNR ≥ -45 dB | |
| QT/DQT 0.4 ± 0.1 kHz | |
| Modulation sensitivity 8-12 mV | |
| Transmission current ≤ 400 mA |
| Receiver | |
| Sensitivity -122 dBm (12 dB SINAD) | |
| Audio power | 0.4 W (at 8 Ω Load) |
| Audio distortion | ≤ 10 % |
| Intermediation | ≥ 60 dB |
| Adjacent channel selectivity | ≥ 60 dB |
| Clutter suppression | ≥ 65 dB |
| Receiver Current | ≤ 70 mA |
9. Safety instructions
- Service must only be done by qualified technicians.
- Do not disassemble or modify the transceiver for any reason.
- Do not expose the transceiver to direct sunlight or to extremely hot conditions for a long time.
- Do not place the transceiver on any unstable surface.
- Keep the transceiver away from dust, moisture, and water.
- Do not operate the transceiver or charge the battery pack in explosion-endangered areas.
10. Trouble shooting
| The unit does not switch on or switches off automatically. | 1. Charge the battery or insert a spare battery. 2. Is the battery inserted correctly? 3. Clean the battery contacts before charging. |
| I cannot communicate with other group members. | 1. Make sure you are on the same channel and subchannel (CTCSS/DCS). 2. You are outside the transmission range of the other radios. |
| You can hear the other participant, but they cannot hear you. | Check that you are using the same channel as the person you are talking to. If the person you are talking to uses a CTCSS or DCS code, you must also use this code to be heard. |
| Others hear you only with interruptions. 1. The s | gnal is too weak - they are too far apart. 2. Is the microphone defective? Please contact a specialist dealer. |
| I hear radio calls from other groups.. 1. Another | Group is using the same channel as you do - change the channel. |
11. Warranty and Recycling Information
We are legally obliged to include disposal and warranty information as well as EU declaration of conformity with the use instructions in different countries for every unit. Please fi nd this information on the following pages.
2-Year Warranty from Date of Purchase
The manufacturer/retailer guarantees this product for two years from date of purchase. This warranty includes all malfunctions caused by defective components or incorrect functions within the warranty period excluding wear and tear, such as exhausted batteries, scratches on the display, defective casing, broken antenna and defects due to external effects such as corrosion, over voltage through improper external power supply or the use of unsuitable accessories. Defects due to unintended use are also excluded from the warranty.
Please contact your local dealer for warranty claims. The dealer will repair or exchange the product or forward it to an authorized service center. You can also contact our service partner directly. Please include your proof of purchase with the product and describe the malfunction as clearly as possible.
12. WEEE and Recycling

The European laws do not allow any more the disposal of old or defective electric or electronic devices with the household waste. Return your product to a municipal collection point for recycling to dispose of it. This system is fi nanced by the industry and ensures environmentally responsible disposal and the recycling of valuable raw materials.
13. Service Address And Technical Hotline
(for units sold in Germany)
Contact our service hotline by phone +49 (0) 6103 9481 66 (regular costs for German fixed network) or e-mail at service@albrecht-midland.de
Declaration of Conformity
Hereby, Alan Electronics GmbH declares that the radio equipment type Tectalk Worker 3 is in compliance with Directive 2014/53/EU. The full text of the EU declaration of conformity
is available at the following internet address:
http://service.alan-electronics.de/CE-Papiere/

Printing errors reserved.
Information in this user manual are subject to change without prior notice.
CTCSS (Continuous Tone Coded Squelch System) / DCS (Digital Coded Squelch)
7.2. Transmissione a comando vocale (VOX - Voice Operated Transmission)
CTCSS (Continuous Tone Coded Squelch System) / DCS (Digital Coded Squelch)
Street 25th Martiou 13,17778
Tavros, Attiki, Greece
25nsMapriou 13,17778
Taúpoc, Attiké, Eλλδα
Tel: +30 210.4829801-5 / Fax: +30 210.4826528
e-mail: sales@cobra-center.gr
www.cobra-center.gr