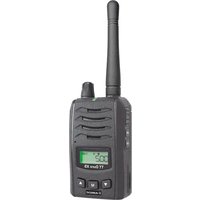
Tectalk Duro XS - Walkie-talkie ALBRECHT - Free user manual and instructions
Find the device manual for free Tectalk Duro XS ALBRECHT in PDF.


| Product type | Walkie-talkie |
| Brand | Albrecht |
| Model | Tectalk Duro XS |
| Category | PMR446 |
| Dimensions (L x H x D) | 130 x 60 x 40 mm |
| Weight | 250 g (with battery) |
| Power supply | Rechargeable Li-Ion battery 3.7 V / 1500 mAh |
| Battery life | About 12 h standby, 8 h in use |
| Maximum range | Up to 10 km in open field |
| Number of channels | 16 PMR446 channels |
| Sub-codes | 38 CTCSS tones, 83 DCS codes |
| Transmission power | 0.5 W (ERP) |
| Main functions | VOX, scanning, monitor, power saver |
| Display | Backlit LCD screen |
| Resistance / Protection | IP67 (waterproof and shockproof) |
| Frequency | 446.00625 – 446.19375 MHz |
| Included accessories | Belt clip, USB cable, battery, manual |
| Maintenance and cleaning | Clean with a dry or slightly damp cloth, avoid solvents |
| Safety | Do not expose to extreme temperatures, do not open the device |
| Spare parts and repairability | Battery, antenna, clips available separately |
| General information | 2-year warranty, professional and leisure use |
Frequently Asked Questions - Tectalk Duro XS ALBRECHT
User questions about Tectalk Duro XS ALBRECHT
0 question about this device. Answer the ones you know or ask your own.
Ask a new question about this device
Download the instructions for your Walkie-talkie in PDF format for free! Find your manual Tectalk Duro XS - ALBRECHT and take your electronic device back in hand. On this page are published all the documents necessary for the use of your device. Tectalk Duro XS by ALBRECHT.
USER MANUAL Tectalk Duro XS ALBRECHT
Netzteil
6 Deutsch
| 1 446.00625 | 5 | 446.05625 |
| 2 446.01875 | 6 | 446.06875 |
| 3 446.03125 | 7 | 446.08125 |
| 4 446.04375 | 8 | 446.09375 |
Manual
English
1. Inhalt
- Instructions for Use.... 27
- Fitting the Battery pack.... 29
- Battery Charging.... 30
- Radio Controls.... 31
4.5. Down Button 32
4.6. Menu(Mode) Button 32
4.7. Up Button.... 32 - LCD Display.... 33
- Menu mode.... 34
- Basic Radio Operation.... 35
- Radio Features Explained 36
8.1. Privacy Codes (CTCSS and DCS Tone Codes)...... 36
8.2. Selecting an Analogue Privacy Code 36
8.3. Selecting a Digital Privacy Code 36
8.4.DTMF TONE 37
8.5. Compander 37
8.6. Scrambler 38
8.7. VOX(Handsfree) Mode 38
8.8. Squelch Level Adjustment 38
8.9. Roger Beep 39
8.10.Key Tone....39
8.11. Call Tone 40
8.12. Dual Watch Mode 40 - Radio Cloning 41
- Radio ID Editing.... 41
- Technical Specifications 42
- European 2 years warranty 46
- CE- Declaration of Conformity.... 47
- Where to find service hints and documentation...... 48
2. Instructions for Use
Note: Please read these user instructions carefully before using the equipment and retain for future consultation!
Specific Recommendations:
If you carry any kind of personal medical device, consult a doctor before use.
Do not use the device in a potentially explosive setting (e.g. around petrol pumps, on the lower deck of a boat or around a fuel storage installation or chemical products).
Switch off the device if on an aeroplane or in a hospital.
Remove the batterie if the device is not in use for an extended period of time.
Position the transmitter and antenna at least 5 cm from your face. Direct the antenna upwards and speak normally.
Clean the device with a damp cloth. Don't use agents and solvent for cleaning.
Do not modify the device in any way. In the event of damage occurring, ensure that the device is checked by a qualified professional.
The device cannot be used to contact the emergency services.
Controls
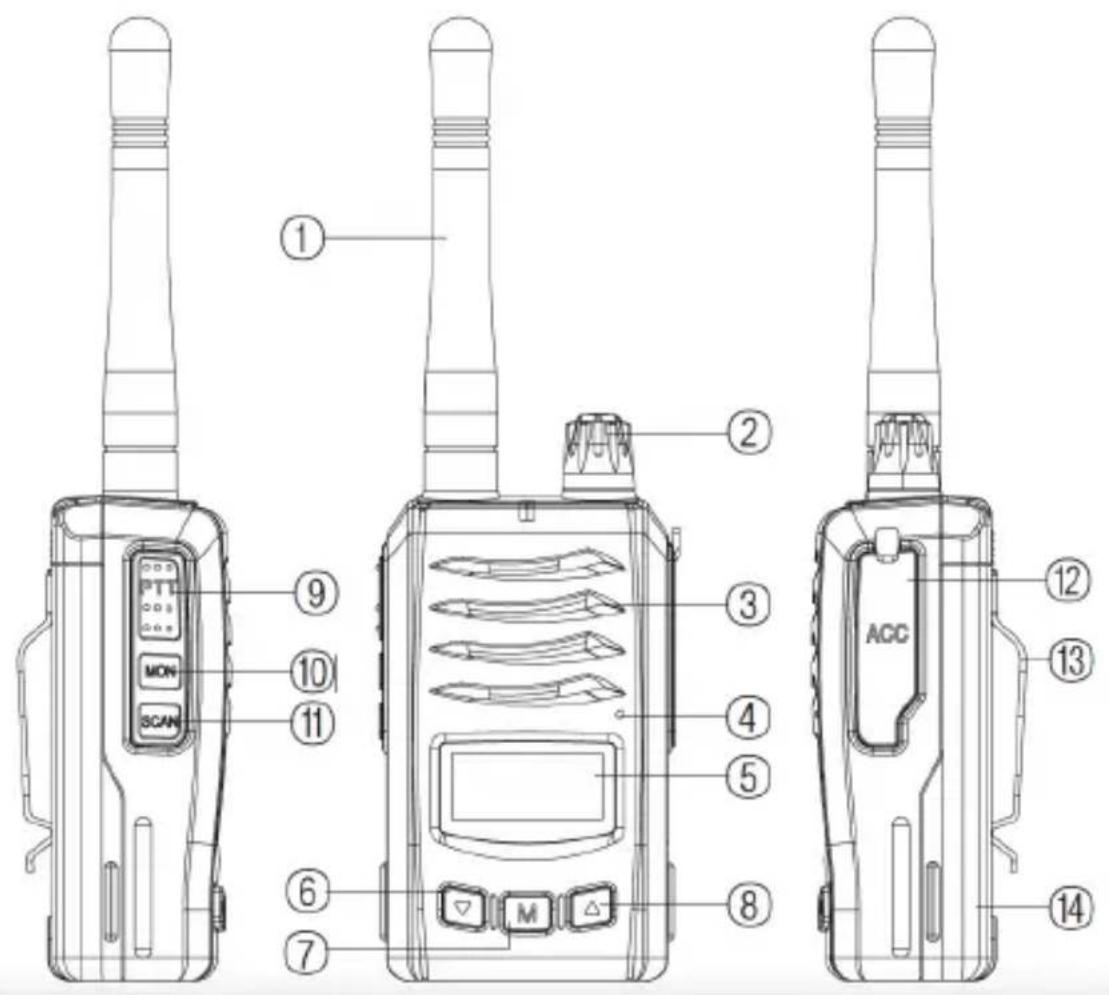
| 1 Antenna 8 UP Button | ||
| 2 Power On/Off, Volume 9 PTT Button | ||
| 3 Speaker 10 Monitor/Lock Button | ||
| 4 Microphone 11 Scan Memory/Scan | ||
| 5 LCD 12 Accessory Jack | ||
| 6 DOWN Button 13 Belt Clip | ||
| 7 Menu button 14 Battery Pack | ||
28 English
3. Fitting the Battery pack
Fitting
- Ensure that your radio is switched off.
- Align the bottom of the battery pack with the securing slots at the back of the radio.
- Press the top of the battery into the back of the radio until it "clicks" home.
Removal
- Ensure that your radio is switched off.
- Press down on the battery release catch and separate the battery pack from the radio.


4. Battery Charging
To charge your radio, carefully follow these instructions:
- Connect the power adaptor to the mains power supply and connect the adaptor charger jack to the charging cradle.
- Disconnect any radio accessories and ensure the radio is switched off.
- Insert the radio into the charging cradle until it, Clicks' home. The charger LED will glow red and charging will start. If the charger LED blinks red or green or the charger LED does not light, re-insert the radio into the charging cradle.
- The battery charging time is about 4\~5 hours. When the battery is fully charged the green LED (Full) will be turned on.

5. Radio Controls
5.1. Power On/Off/Volume Control
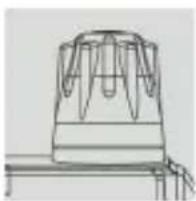
Turn the knob clockwise to switch on and increase the volume and counter-clockwise to decrease the volume and switch off the radio. The radio will emit a confirmation tone when it switches on.
5.2. Push-To-Talk (PTT) Button

Press and hold this button to speak (transmit) and release the button to hear (receive) messages. You can only communicate with other radios when the channel and privacy code are the same as that of yours. The red LED lights during the PTT press.
Note : The green or orange LED lights during receive. The green lights on the basic channels and the orange lights on the channel with privacy codes.
5.3. Monitor/Lock Button

Monitor Momentarily press this button to activate the monitor function. To deactivate this function, momentarily press this button again.
pad lock.
Lock Press and hold this button to activate the key-
5.4. Scan Memory and Scan button

Scan Memory As factory default your radio has all channels memorized for channel scanning. To delete a certain channel stay on the channel and press the function button momentarily.
channel is now deleted from the scanning list.
The scan icon will disappear on the LCD and the
Scan Press and hold this button to activate the scan.
5.5. Down Button

Pressing this button will decrease the channel number. In some modes this button is used to adjust the function setting.
5.6. Menu(Mode) Button
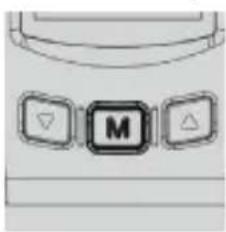
Press and hold for about 2 seconds to enter the menu mode. Then briefly press to step down through the menus.
5.7. Up Button

Pressing this button will increase the channel number. In some modes this button is used to adjust the function setting.
- LCD Display
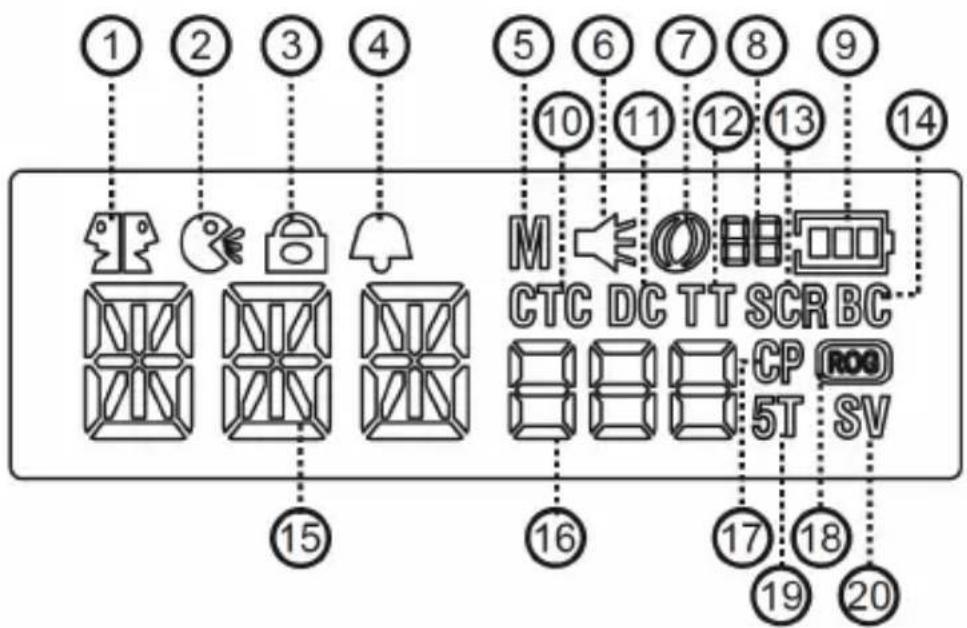
| No. | Description No. | Description | |
| 1 | Dual Watch 11 DCS | ||
| 2 | VOX 12 Time-out Timer | ||
| 3 | Lock 13 Scrambler | ||
| 4 | Key Tone 14 Busy Channel Lock-out | ||
| 5 | Scan Memory 15 ChannelScan Memo | ||
| 6 | Monitor 16 Tone Code | ||
| 7 | Scan 17 Compander | ||
| 8 | Battery Balance Status | 18 Roger Beep | |
| 9 | Battery Level 19 5 Tone | ||
| 10 | CTCSS | 20 Power Save |
7. Menu mode
The menu mode allows you to set-up and edit the basic functions. To access this menu mode press and hold the menu.button.
Each press of this button steps the radio sequentially through the different functions.
The radio display indicates the current functions. The current setting and associated icon display. Use the up or down button to change the value of any selected menu.
Press the PTT button or wait for about 5 seconds to confirm the change
| Display | Function | Setting |
 | Change Privacy Tone Code (CTCSS) | 1 to 73 , of |
 | Change Digital Privacy Tone code (DCS) | 1 to 208 , of |
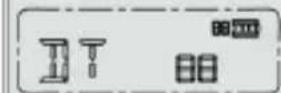 | DTMF Tone On / Off | on , of |
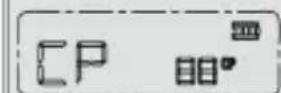 | Compander On / Off | on , of |
 | Scramble On / Off | on , of |
 | Vox Activation and Level Selection | 1, 2, 3, 4 , of |
 | Squelch level Selection | 1,2,3,4,5 , of |
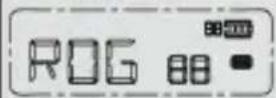 | Roger Beep On/Off | on, of |
 | Key Tone On/Off | on, of |
 | Call(Page) Tone Selection | of, 1, 2, 3, 4, 5 |
 | Backlight On/Off | on, of |
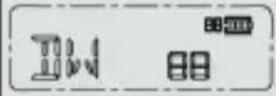 | Dual Watch Activation & Channel Selection | I to 8, of |
8. Basic Radio Operation
The PMR-446 Radio service which this radio uses shares channels on a , take turns' basis. This means that other users and groups may be using any channel and privacy code combination. To communicate with other PMR446 radios, all units must be switched to the same frequency and privacy code.
If the combination you have chosen is already in use, please make an alternative selection.
- Switch on your radio.
- Check and if necessary change the channel or frequency and privacy code settings.
- To speak, hold the radio upright, about 5 cm from your mouth and press the PTT. Speak slowly and clearly towards the radio.
Release the PTT when you fi nish speaking.
You will hear messages from other radios that are within range and have the same channel and privacy code setting.
The appropriate icon will appear in the radio display when you receive or transmit a message.
9. Radio Features Explained
9.1. Privacy Codes (CTCSS and DCS Tone Codes)
This radio is fitted with 73 Analogue Privacy codes (also known as CTCSS, sub-codes or sub-channels) and 208 Digital Privacy codes (also known as DCS codes).
Only one type of Privacy code can be used on each channel. Selecting a Digital Privacy code will override any Analogue Privacy code settings. If the other unit(s) do not have privacy codes ensure your units privacy codes (analogue and digital) are set to 'Off'. Please note that privacy codes do not prevent other radio users from hearing your conversation. They simply allow you to ignore messages that are using a different privacy code.
9.2. Selecting an Analogue Privacy Code

To change the Analogue Privacy Code, press the MODE(Menu) button until the CTCSS icon and privacy code number flash. Use the UP or DOWN button to select the desired code. Press the PTT or MODE button or wait for 5 seconds to store your choice. The CTCSS icon will appear when an Analogue Privacy Code is selected.
9.3. Selecting a Digital Privacy Code

To change the Digital Privacy Code, press the MODE(Menu) button until the DCS icon and privacy code number flash. Use the UP or DOWN button to select the desired code.
Press the PTT or MODE button or wait for 5 seconds to store your choice. The DCS icon will appear when a Digital Privacy Code is selected.
Once a CTCSS or DCS code has been selected, you can conveniently deactivate or re-activate the tone function.
Press and hold the monitor key to deactivate or re-activate the tone function. The tone function can only be activated if a tone code has been selected.
9.4. DTMF TONE
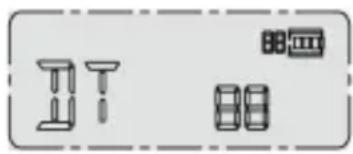
The DTMF tone is a kind of combinations of short tones. The DTMF tone can preamble to the message upon every press of the PTT button.
Selecting this allows the other party never to miss your initial message that might arrive before the audio of the other party's is open to receive. This can be activated or de-activated.
9.5. Compander

If the commander is activated, your radio will eliminate the background noise and generate clearer sound by cutting off the high and low.frequencies. The users who prefer the unrefi ned sound are recommended to use the radio with this compander unactivated.
To change the setting, press the MODE button until the Compander icon and current setting display. Use the UP or DOWN button to change the setting. Press the PTT or MODE button or wait for 5 seconds to store your choice.
The Compander icon will appear when Compander is active.
9.6. Scrambler

Your radio incorporates a voice scrambler using band inversion method.
The scrambler is compatible with many scramblers used by other manufacturers,
allowing you to enjoy scrambled communications with radios. This can be activated or deactivated.
To change the scrambler icon appears. Use the UP or DOWN button to change the setting. Press the PTT or MODE button or wait for 5 seconds to store your choice.
The scrambler icon will appear.
9.7. VOX(Handsfree) Mode

When Hands Free (VOX) MODE is selected the radio will automatically transmit when the microphone detects your voice (or other noise).
It can be used with the internal microphone or a suitable audio accessory (available separately). To avoid accidental operation and reduce the effect of background noise, there are 3 microphone sensitivity settings and off.
To select the VOX sensitivity level, press the MODE button until the VOX icon and current setting. Use the UP or DOWN button to change the sensitivity level (3 is the most sensitive). Press the PTT or MODE button or wait for 5 seconds to store your choice.
9.8. Squelch Level Adjustment

This function allows you to adjust the squelch level of your radio.
To change the squelch level, press the MODE button until the squelch mode dis-
plays.
The current squelch setting will flash. Use the UP or DOWN but-
38 English
ton to change the setting. Press the PTT button or wait for 5 seconds to store your choice.
There are 5 squelch levels. Level 1 is the most sensitive (open) and level 5 is the least sensitive (closed). Auto is the optimum factory setting and ,Off' is fully open, with constant static noise.
9.9. Roger Beep
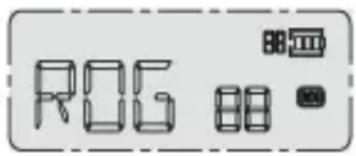
The Roger Beep is a short tone that is automatically added to the end of your transmissions to tell other users that you have fi nished speaking. You can activate or deactivate the Roger Beep as required.
To change the Roger Beep setting, press the MODE button until the Roger Beep icon and current setting displays. Use the UP or DOWN button to change the setting. Press the PTT or FUNCTION button or wait for 5 seconds to store your choice.
The Roger Beep icon will appear when Roger Beep is active.
9.10. Key Tone
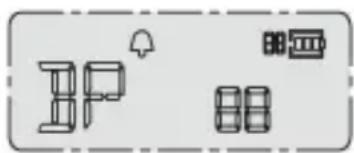
If the Key Beep is activated, your radio will emit a confirmation tone whenever you use the keypad. You can activate or deactivate the key Beep as required. To change the
Key Beep setting, press the MODE button until the Key Beep icon appears. Use the UP or DOWN button to change the setting. Press the PTT or FUNCTION button or wait for 5 seconds to store your choice.
The Key Beep icon will appear when Key Beep is active.
9.11. Call Tone
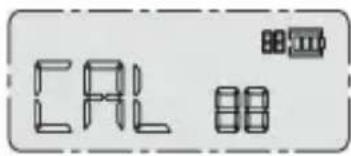
To alert other users to your message and gain their attention you can send a Call Alert melody by pressing the PTT button twice in quick succession. There are five different
call alert tones and off.
To change the Call Alert melody, press the MODE button until the Call icon displays.
Use the UP or DOWN button to change the setting. Press the PTT or FUNCTION button or wait for 5 seconds to store your choice.
9.12. Dual Watch Mode
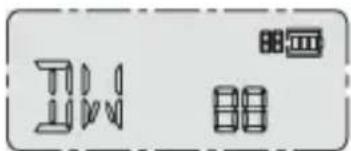
Dual Watch mode allows you to monitor two channels; a primary channel and the dual watch channel. When a signal is received on either channel the unit willpause for 5 seconds before resuming the dual watch. To activate the dual watch mode. first select a radio channel as the primary channel.
To select the dual watch channel press the MODE button until the Dual Watch icon and current setting appear Use the UP or DOWN button to select the desired dual watch channel. Press the PTT or MODE button or wait for 5 seconds to store your choice and activate the dual watch.
The radio display will alternate between the primary and dual watch channels and the dual watch icon will appear.
To deactivate the dual watch press the SCAN button after the FUNCTION button press.
If you press the PTT button whilst receiving a signal in Dual Watch mode the radio will transmit on the currently displayed channel. If you press the PTT button when no signal is present the radio will transmit on the primary channel.
10. Radio Cloning
- Connect two radios (the master and the slave) using a cloning cable.
- Turn on the master radio pressing PTT button and Mode(M) button simultaneously.
The radio LED blinks green.
- Turn on the slave radio or radios pressing PTT button and Mode(M) button simultaneously.
The radio(radios) LED blinks green too. - Press and hold the master radio until the master radio LED lights green as well as the slave radio(s) lights green. During cloning, the slave radio(s) blinks among green, orange and red.
- Turn off your radios and disconnect the cloning cable from the radios.
11. Radio ID Editing
An up to 3 digit Radio ID can be programmed when the radio is switched on. You can customise this Radio ID to identify your radio.
To enter the Radio ID edit mode, switch on the radio whilst pressing the Menu button.
- The first digit is blinking.
- Use the UP or DOWN button to change the character.
- Press the Menu button to select the next digit.
- Repeat the step 2 and the step 3.
- Turn off the radio to finish editing.
Troubleshooting
If you experience problems with your Tectalk Duro XS first check the battery power level as low batteries can cause problems such as poor transmission, weak reception and reduced sound quality.
Then check the manual and radio display to ensure that a function (such as VOX or Lock) has not been activated by accident.
12. Technical Specifications
1) Operating Frequencies (frequency shown in MHz):
| Channel | Frequency | Channel | Frequency | |
| 1 | 446.00625 | 5 | 446.05625 | |
| 2 | 446.01875 | 6 | 446.06875 | |
| 3 | 446.03125 | 7 | 446.08125 | |
| 4 | 446.04375 | 8 | 446.09375 |
2) Channel Spacing: 12.5kHz
3) Power Source: 1 x Li-Ion battery 1200 mAh 7.4 V
4) Privacy Codes (CTCSS Tone Codes) Table (in Hz):
| No Hz | No Hz | No Hz | No Hz | ||||
| 1 67 | 0 21 13 | 6.5 41 1 | 83.5 61 | 110.7 | |||
| 2 71 | 9 22 14 | 1.3 42 1 | 89.9 62 | 120.0 | |||
| 3 74 | 4 23 14 | 6.2 43 1 | 96.6 63 | 131.1 | |||
| 4 77 | 0 24 15 | 1.4 44 1 | 99.5 64 | 141.1 | |||
| 5 79 | 7 25 15 | 6.7 45 2 | 06.5 65 | 150.7 | |||
| 6 82 | 5 26 16 | 2.2 46 2 | 29.1 66 | 160.8 | |||
| 7 85 | 4 27 16 | 7.9 47 2 | 54.1 67 | 171.4 | |||
| 8 88 | 5 28 17 | 3.8 48 1 | 65.5 68 | 181.4 | |||
| 9 91 | 5 29 17 | 9.9 49 1 | 71.3 69 | 190.6 | |||
| 10 94 | .8 30 18 | 6.2 50 1 | 77.3 70 | 201.3 | |||
| 11 97 | 4 31 19 | 2.8 51 6 | 0.7 71 2 | 11.6 | |||
| 12 10 | 0.0 32 2 | 03.5 52 | 62.5 72 | 221.5 | |||
| 13 10 | 3.5 33 2 | 10.7 53 | 64.7 73 | 230.3 | |||
| 14 10 | 7.2 34 2 | 18.1 54 | 40.8 | ||||
| 15 11 | 0.9 35 2 | 25.7 55 | 51.0 | ||||
| 16 11 | 4.8 36 2 | 33.6 56 | 61.0 | ||||
| 17 11 | 8.8 37 2 | 41.8 57 | 71.2 | ||||
| 18 12 | 3.0 38 2 | 50.3 58 | 80.8 | ||||
| 19 12 | 7.3 39 6 | 9.3 59 9 | 1.1 | ||||
| 20 13 | 1.8 40 1 | 59.8 60 | 101.3 |
5) Digital Privacy Codes Table (DCS Tone Codes):
| NO Code | NO Code | NO | Code NO | Code NO | NO Code | ||||
| 1 23 46 | 346 91 | 252 136 | I226 181 | I712 | |||||
| 2 25 47 | 351 92 | 255 137 | I243 182 | I723 | |||||
| 3 26 48 | 364 93 | 266 138 | I244 183 | I731 | |||||
| 4 31 49 | 365 94 | 274 139 | I245 184 | I732 | |||||
| 5 32 50 | 371 95 | 325 140 | I251 185 | I734 | |||||
| 6 43 51 | 411 96 | 332 141 | I261 186 | I743 | |||||
| 7 47 52 | 412 97 | 365 142 | I263 187 | I754 | |||||
| 8 51 53 | 413 98 | 446 143 | I265 188 | I053 | |||||
| 9 54 54 | 423 99 | 452 144 | I271 189 | I122 | |||||
| 10 65 55 | 431 100 | 454 145 | I306 | I90 I036 | |||||
| 11 71 56 | 432 101 | 455 146 | I311 | I91 I145 | |||||
| 12 72 57 | 445 102 | 462 147 | I315 | I92 I212 | |||||
| 13 73 58 | 464 103 | 523 148 | I331 | I93 I225 | |||||
| 14 74 59 | 465 104 | 526 149 | I343 | I94 I246 | |||||
| 15 114 | 466 105 | I023 | I346 | I95 I252 | |||||
| 16 115 | 503 106 | I025 | I351 | I96 I255 | |||||
| 17 116 | 506 107 | I026 | I364 | I97 I266 | |||||
| 18 125 | 516 108 | I031 | I365 | I98 I274 | |||||
| 19 131 | 532 109 | I032 | I371 | I99 I325 | |||||
| 20 132 | 546 110 | I043 | I411 | I200 I332 | |||||
| 21 134 | 565 111 | I047 | I412 | I201 I365 | |||||
| 22 143 | 606 112 | I051 | I413 | I202 I446 | |||||
| 23 152 | 612 113 | I054 | I423 | I203 I452 | |||||
| 24 155 | 624 114 | I065 | I431 | I204 I454 |
| 25 156 | 70 627 | 115 I071 | 160 I432 | 205 I455 | ||||
| 26 162 | 71 631 | 116 I072 | 161 I445 | 206 I462 | ||||
| 27 165 | 72 632 | 117 I073 | 162 I464 | 207 I523 | ||||
| 28 172 | 73 654 | 118 I074 | 163 I465 | 208 I526 | ||||
| 29 174 | 74 662 | 119 I114 | 164 I466 | |||||
| 30 205 | 75 664 | 120 I115 | 165 I503 | |||||
| 31 223 | 76 703 | 121 I116 | 166 I506 | |||||
| 32 226 | 77 712 | 122 I125 | 167 I516 | |||||
| 33 243 | 78 723 | 123 I131 | 168 I532 | |||||
| 34 244 | 79 731 | 124 I132 | 169 I546 | |||||
| 35 245 | 80 732 | 125 I134 | 170 I565 | |||||
| 36 251 | 81 734 | 126 I143 | 171 I606 | |||||
| 37 261 | 82 743 | 127 I152 | 172 I612 | |||||
| 38 263 | 83 754 | 128 I155 | 173 I624 | |||||
| 39 265 | 84 53 | 129 I156 | 174 I627 | |||||
| 40 271 | 85 122 | 130 I162 | 175 I631 | |||||
| 41 306 | 86 36 | 131 I165 | 176 I632 | |||||
| 42 311 | 87 145 | 132 I172 | 177 I654 | |||||
| 43 315 | 88 212 | 133 I174 | 178 I662 | |||||
| 44 331 | 89 225 | 134 I205 | 179 I664 | |||||
| 45 343 | 90 246 | 135 I223 | 180 I703 |
13. European 2 years warranty
The distributor, dealer or retail shop warrants to the original retail purchaser of this product that should this product or any part of it, under normal use and conditions, be proven defective in material or workmanship within 2 years from the date of original purchase, such defect(s) will be repaired or replaced with new or reconditioned product (at the company's option) without charge for parts and repair labor. To obtain repair or replacement within the terms of this warranty, the product is to be delivered with proof of warranty coverage (e.g. dated bill of sale), specification of defect(s), to the distributor, dealer or his authorized repair center.
The Company disclaims liability for communications range of this product. The warranty does not apply to any product or part there of which, in the opinion of the company, has suffered or been damaged through alteration, improper installation, mishandling, misuse, neglect, accident, or by removal or defacement of the factory serial number/bar code label(s). The warranty does not apply to accessory parts or problems caused through not authorized or not recommended accessories like of the units like batteries, external power supplies and over voltage caused through external power supplies, light bulbs, broken antennas, broken swivel belt clips, broken or damaged acrylic glass windows and cabinet parts.
Please contact the dealer or person where you have purchased your radio. Alternatively, if you bought the radio in Germany, you can send the radio directly to our service partner (address on the last page)
14. CE- Declaration of Conformity
CE
This unit complies to all relevant European Standards and Regulations for PMR 446 radio service. This radio may be used only in EU and other states applying the R&TTE directive of the European Community. However, there is still a restriction for users in Italy: (as of date of this user manual) a one-time payment is requested before using the radio the first time, but this payment is not requested from tourists who use the radio only during holidays.
This unit complies to the European R&TTE, EMC and LVD Directives and harmonized standards EN 300 296-2 V1.4.1, EN 301 489-1 V1.9.2, EN 301 489-05 V1.3.1 and EN 60 950-1:2006 2nd ed. The unit can be used in following countries:
AT, BE, BG, CH, CY, CZ, DE, DK, EE, ES, FI, FR, GR, HR, HU, IE, IS, IT, LI, LT, LU, LV, MT, NL, NO, PL, PT, RO, SE, SI, SK, SM, UK
15. Where to find service hints and documentation
Our technical documentation is updated regularly. You can download the latest versions of user manuals, technical documents and also the dual language original declaration of conformity, as well as service hints or FAQ's any time from our server under
http://www.service.alan-electronics.de
Disposal of defective electronic items
The European WEEE Directive does not any more allow to dispose any used electronic items via household trash bins. The local communities will provide containers for disposal of electronic waste. Please use these facilities, it will be your contribution to proper recycling of electronic material, and it is free of charge for you.
Service partner in Germany (only for radios sold in Germany):
Alan Service
c/o Transerv 2000 Repair Service GmbH & Co. KG
Robert-Bosch-Str. 35,
64625 Bensheim
Tel: +49 (0) 6251 9856 0 55
e-mail: service.alan@transerv2000.de
In other countries please contact your local distributors in case of technical problems.
Printing errors reserved.
© 2015 Alan Electronics GmbH

ALBRECHT®
Tectalk Duro XS

Guide d'utilisation
Français
Inhalt
1 446.00625 5 446.05625
2 446.01875 6 446.06875
3 446.03125 7 446.08125
4 446.04375 8 446.09375
Manual
Español
Inhalt
4. Controles de la radio
1 446.00625 5 446.05625
2 446.01875 6 446.06875
3 446.03125 7 446.08125
4 446.04375 8 446.09375
Manuale
Italiano
Inhalt
4. Radiocomandi
1 446.00625 5 446.05625
2 446.01875 6 446.06875
3 446.03125 7 446.08125
4 446.04375 8 446.09375




- 6 DEUTSCH
- INHALT
- INSTRUCTIONS FOR USE
- SPECIFIC RECOMMENDATIONS
- 28 ENGLISH
- FITTING THE BATTERY PACK
- FITTING
- REMOVAL
- BATTERY CHARGING
- RADIO CONTROLS
- POWER ON/OFF/VOLUME CONTROL
- PUSH-TO-TALK (PTT) BUTTON
- MONITOR/LOCK BUTTON
- SCAN MEMORY AND SCAN BUTTON
- DOWN BUTTON
- MENU(MODE) BUTTON
- UP BUTTON
- MENU MODE
- BASIC RADIO OPERATION
- RADIO FEATURES EXPLAINED
- PRIVACY CODES (CTCSS AND DCS TONE CODES)
- SELECTING AN ANALOGUE PRIVACY CODE
- SELECTING A DIGITAL PRIVACY CODE
- DTMF TONE
- COMPANDER
- SCRAMBLER
- VOX(HANDSFREE) MODE
- SQUELCH LEVEL ADJUSTMENT
- 38 ENGLISH
- ROGER BEEP
- KEY TONE
- CALL TONE
- DUAL WATCH MODE
- RADIO CLONING
- RADIO ID EDITING
- TROUBLESHOOTING
- TECHNICAL SPECIFICATIONS
- EUROPEAN 2 YEARS WARRANTY
- CE- DECLARATION OF CONFORMITY
- CE
- WHERE TO FIND SERVICE HINTS AND DOCUMENTATION
- DISPOSAL OF DEFECTIVE ELECTRONIC ITEMS
- ALAN SERVICE
- C/O TRANSERV 2000 REPAIR SERVICE GMBH & CO. KG
- ALBRECHT®
- TECTALK DURO XS
- CONTROLES DE LA RADIO
- RADIOCOMANDI
Brand : ALBRECHT
Model : Tectalk Duro XS
Category : Walkie-talkie