
Futura - Coffee machine Klarstein - Free user manual and instructions
Find the device manual for free Futura Klarstein in PDF.
| Brand | Klarstein |
| Model | Futura |
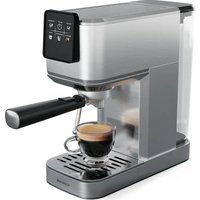
| Product type | Espresso coffee maker |
| Power supply | 220-240 V ~ 50/60 Hz |
| Power | 1250-1450 W |
| Water tank | Removable, capacity not specified (MAX level indicated) |
| Coffee filter | Removable filter, pods not compatible |
| Main functions | Single espresso, double espresso, hot water, steam for cappuccino |
| Settings | Adjustable dispensed quantity (25-60 ml for one cup, 70-110 ml for two) |
| Automatic shut-off | Yes, after 29 minutes of inactivity |
| Milk frother | Integrated steam wand with steam accessory |
| Safety | Automatic shut-off, overheating protection, do not immerse |
| Cleaning | Removable parts washable with water, descaling required |
| Descaling | Descaling alarm, use citric acid (5%) or special descaler |
| Included accessories | Dosing spoon, coffee filter, filter holder, water tank |
| Item numbers | 10035183, 10035184 |
Frequently Asked Questions - Futura Klarstein
User questions about Futura Klarstein
0 question about this device. Answer the ones you know or ask your own.
Ask a new question about this device
Download the instructions for your Coffee machine in PDF format for free! Find your manual Futura - Klarstein and take your electronic device back in hand. On this page are published all the documents necessary for the use of your device. Futura by Klarstein.
USER MANUAL Futura Klarstein
Unit 6 Riverside Business Centre
Brighton Road
Shoreham-by-Sea
BN436RE
United Kingdom
Dear Customer,
Congratulations on purchasing this device. Please read the following instructions carefully and follow them to prevent possible damages. We assume no liability for damage caused by disregard of the instructions and improper use. Scan the QR code to get access to the latest user manual and more product information.

CONTENT
Safety Instructions 18
Product Overview 19
Before the First Use 20
Espresso Preparation 22
Hot water dispensing 22
Froth Milk / Cappucchino Preparation 23
Setting the Desired Output Quantity 24
Automatic Power Off 24
Cleaning and Care 25
Frequently Asked Questions 26
Troubleshooting 28
Hints on Disposal 30
Producer 30
TECHNICAL DATA
| Item number 10035183, 10035184 | |
| Power supply 220-240 V ~ 50/60 Hz | |
| Power 1250-1450 W |
SAFETY INSTRUCTIONS
- Read this booklet thoroughly before using the device to protect against damage to the device, fire, electric shock and injury to persons or property.
- Save this manual for future reference.
- This device is intended to prepare coffee using high pressure ("Espresso") and to be used in indoors household, only.
- Do not use the device for purposes other than its intended use.
- This device may be only used by children 8 years old or older and persons with limited physical, sensory and mental capabilities and / or lack of experience and knowledge, provided that they have been instructed in use of the device by a responsible person who understands the associated risks.
- Refer all servicing to qualified personnel. Servicing is required when the appliance has been damaged in any way, such as when the power supply cord or plug is damaged, liquid has been spilled over the appliance or objects have fallen into the appliance, or when it has been exposed to rain or humidity, when it does not operate normally, or has been dropped.
- Please, only use accessories recommended by the manufacturer of this device to prevent danger of physical damage, fire or electrical shock to the device or injury to persons.
- Make sure that the water tank of the device is always filled with the amount of water needed for the intended operation to prevent damage to the device.
- Stay away from hot steam escaping from the unit. Only use the handles or levers attached to the unit or its components if you want to move hot components of the unit, such as the frother or the coffee fiiter.
- Do not immerse the device into water or other liquids to avoid shock damage to the device and harm to you.
- Do not touch the plug of the device with wet hands. Water drops from your hands may drip on the plug and cause an electrical shock when in contact with the power socket.
Monitor the device during operation, since it needs manual operation. - Store the device in a dry, clean place out of the reach of unauthorised persons.
- Monitor children while they play near the device to protect them from damage.
- Unplug the unit when not in use.
CAUTION
Risk of injury! To avoid the risk of burns from hot surfaces and scalding by hot liquid leave the device to cool off completely before taking of or attaching components to it, before cleaning or moving the device or its components.
| 1 | On/Off (button/display) | 9 | Drip tray |
| 2 | Single cup (button/display) | 10 | Tank lid |
| 3 | Double cup (button/display) | 11 | Handle |
| 4 | Steam (key/display) | 12 | Water tank |
| 5 | Coffee sieve | 13 | Control knob |
| 6 | Sieve holder | 14 | Steam pipe handle |
| 7 | handle | 15 | Steam pipe |
| 8 | Drip plate | 16 | Measuring spoon |
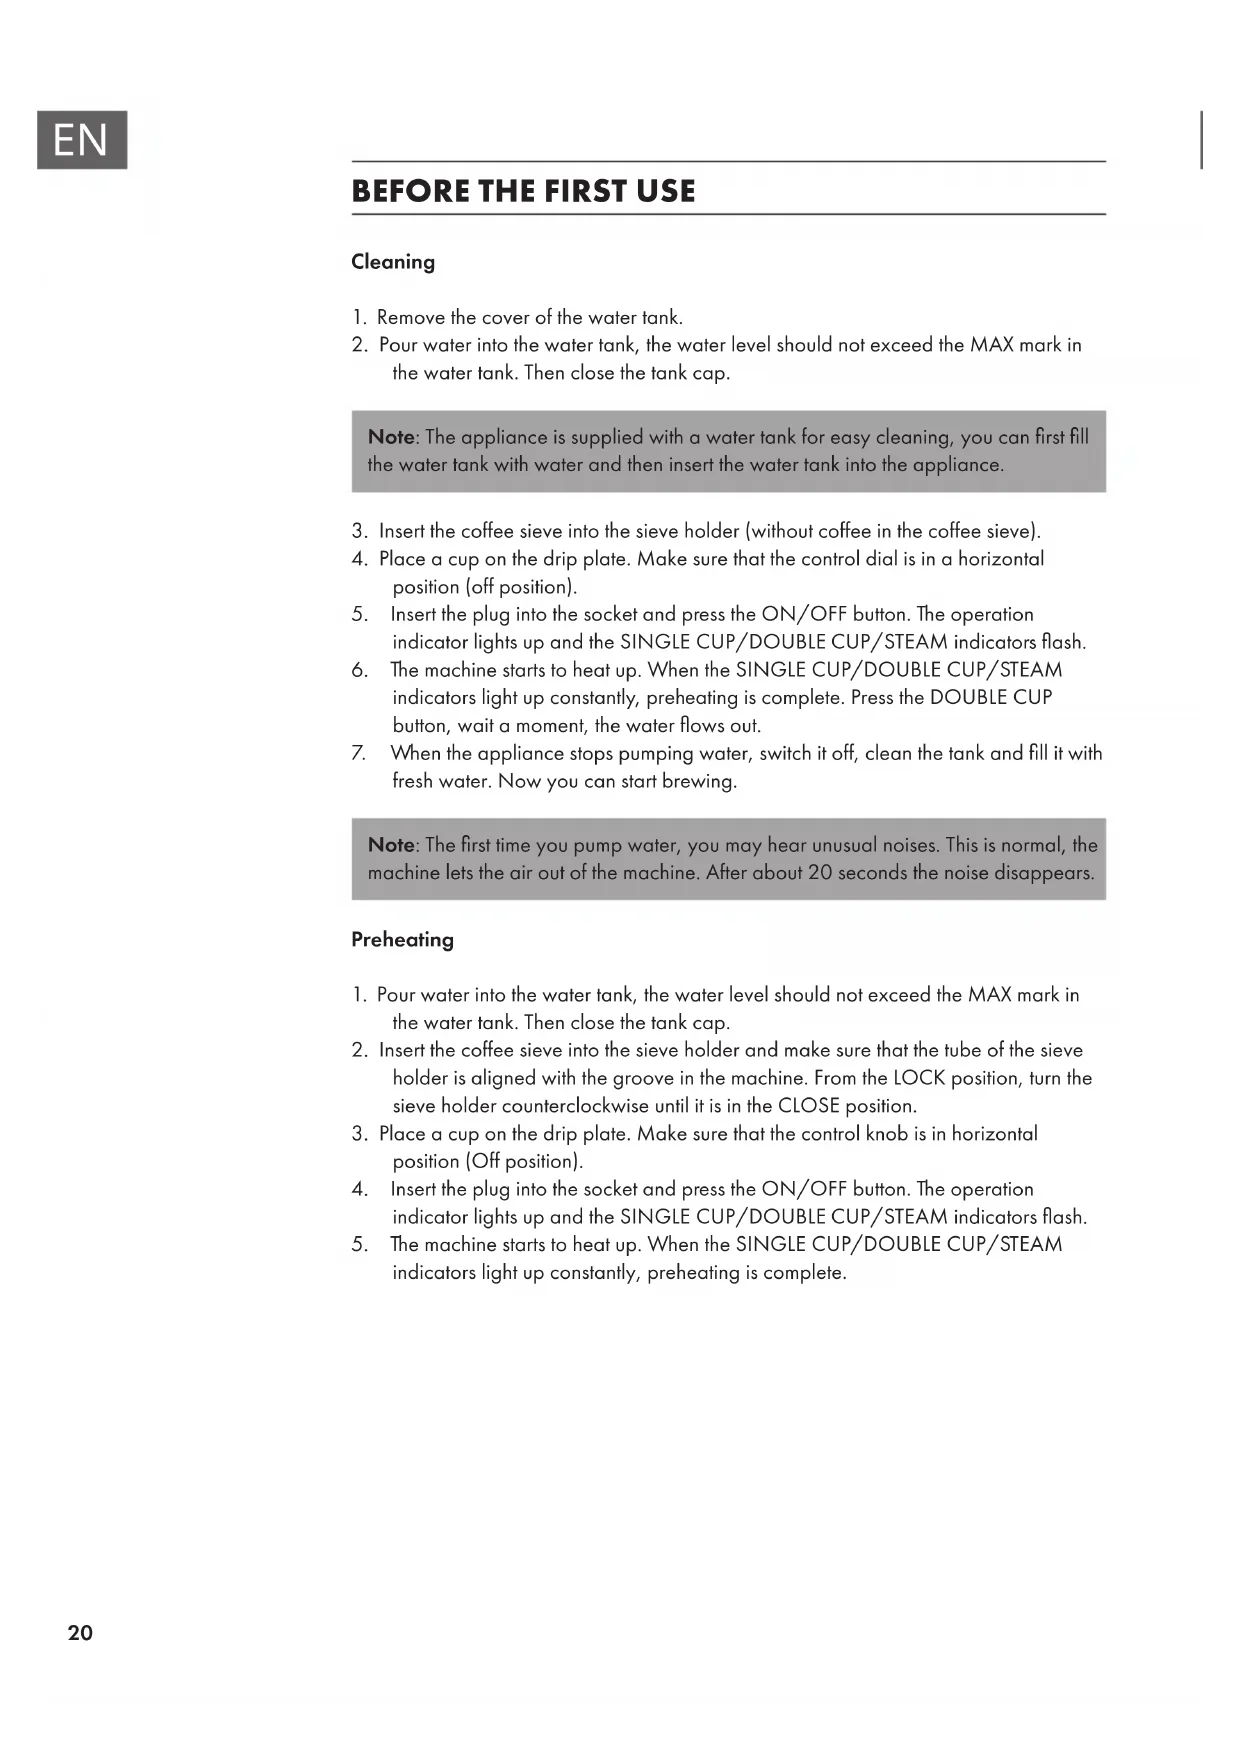
BEFORE THE FIRST USE
Cleaning
- Remove the cover of the water tank.
- Pour water into the water tank, the water level should not exceed the MAX mark in the water tank. Then close the tank cap.
Note: The appliance is supplied with a water tank for easy cleaning, you can first fill the water tank with water and then insert the water tank into the appliance.
- Insert the coffee sieve into the sieve holder (without coffee in the coffee sieve).
- Place a cup on the drip plate. Make sure that the control dial is in a horizontal position (off position).
- Insert the plug into the socket and press the ON/OFF button. The operation indicator lights up and the SINGLE CUP/DOUBLE CUP/STEAM indicators flash.
- The machine starts to heat up. When the SINGLE CUP/DOUBLE CUP/STEAM indicators light up constantly, preheating is complete. Press the DOUBLE CUP button, wait a moment, the water flows out.
- When the appliance stops pumping water, switch it off, clean the tank and fill it with fresh water. Now you can start brewing.
Note: The first time you pump water, you may hear unusual noises. This is normal, the machine lets the air out of the machine. After about 20 seconds the noise disappears.
Preheating
- Pour water into the water tank, the water level should not exceed the MAX mark in the water tank. Then close the tank cap.
- Insert the coffee sieve into the sieve holder and make sure that the tube of the sieve holder is aligned with the groove in the machine. From the LOCK position, turn the sieve holder counterclockwise until it is in the CLOSE position.
- Place a cup on the drip plate. Make sure that the control knob is in horizontal position (Off position).
- Insert the plug into the socket and press the ON/OFF button. The operation indicator lights up and the SINGLE CUP/DOUBLE CUP/STEAM indicators flash.
- The machine starts to heat up. When the SINGLE CUP/DOUBLE CUP/STEAM indicators light up constantly, preheating is complete.
Choosing the right type of coffee
- The coffee should be freshly ground and dark roasted. You might want to try a French or Italian roast for your espresso. Pre-ground coffee only retains its flavour for 7-8 days if it is stored in an airtight container in a cool place.
- Do not store coffee in a fridge or freezer.
- We recommend that you grind whole beans only shortly before use. Coffee beans stored in an airtight container retain their flavour for up to 4 weeks.
Note: Do not use sugar-roasted ground coffee or sugar-roasted coffee beans, as these can clog the filter and damage the machine. If sugar-roasted coffee is accidentally used, stop using the machine immediately and take it to an electrician for servicing.
Choosing the right grind
- The coffee must be finely ground. When ground correctly, the coffee powder should look like salt.
- If the grinding is too fine, the water cannot flow through the coffee even under pressure. In this case, the coffee powder looks like powder and feels like flour when rubbed between your fingers.
- If the grinding is too coarse, the water flows through the coffee too quickly, preventing a full-bodied extraction.
- Make sure you use a quality grinder for an even consistency.
ESPRESSO PREPARATION
- Remove the sieve holder by turning it clockwise. Add ground coffee with the measuring spoon into the coffee sieve, making about one spoon of coffee powder per cup. Press the ground coffee powder firmly together with the measuring spoon.
- Insert the coffee sieve into the sieve holder and make sure that the tube of the sieve holder is aligned with the groove in the machine. From the LOCK position, turn the sieve holder counterclockwise until it is in the CLOSE position.
- Place a cup on the drip plate. Place a cup on the drip plate. Make sure that the knob is in a horizontal position (Off position).
- Select SINGLE/DOUBLE CUP by pressing the corresponding button. After you have waited a moment, the coffee will flow out.
- The machine stops working when the coffee preparation is finished.
- When the coffee preparation is finished, remove the sieve holder by turning it clockwise and dispose the coffee grounds.
Note: Do not leave the coffee machine unattended during the coffee preparation, because sometimes you have to intervene manually!
HOT WATER DISPENSING
After you have preheated the appliance, place a cup under the steam pipe. Turn the rotary control to the hot water symbol and hot water comes out of the steam pipe. When you have tapped the desired amount, turn the knob back to the horizontal position (off position).
FROTH MILK / CAPPUCCHINO PREPARATION
Note: While you are producing steam, the sieve holder must be in its position in the device. Let off steam for 10 seconds before frothing the milk. To do this, press the STEAM button. The steam indicator fl ashes. If the steam indicator is permanently lit, preheating is complete.
- Prepare espresso fi rst, as described in the ESPRESSO PREPARATION chapter.
- Pour 100ml of milk (per cappucchino) into a cup. Use cool milk from the refrigerator. Make sure that the cup is large enough, as the milk doubles its volume during frothing.
- Insert the steam pipe about two centimeters into the milk and then turn the knob to the position . Steam comes out of the steam tube. Foam the milk by moving the cup up and down.

CAUTION
Danger of injury! Take care to work carefully, as the hot steam can cause scalding.
- When the milk is frothed up, turn the control knob back to the horizontal position (off position).
Note: Clean the steam pipe with a wet sponge immediately after the end of steam generation.
- Pour the frothed milk into the prepared espresso, the cappuccino is now ready. Sweeten to taste and, if desired, sprinkle the foam with some cocoa powder.
Important notes
- With the steam pipe you can also simply foam milk to make hot drinks like drinking chocolate.
- After foaming, you can immediately press the SINGLE/DOUBLE CUP button to brew coffee again. The cup display flashes quickly if the temperature is too high. To reduce the temperature, turn the controller to the hot water setting to dispense hot water. When the temperature goes down, the pump will stop automatically and you should turn the knob off, then you can brew coffee again.
- If you do not want to brew coffee when the high temperature warning appears, you can press the SINGLE/DOUBLE CUP button again to cancel the process.
SETTING THE DESIRED OUTPUT QUANTITY
Set output quantity for individual cups
Press and hold the SINGLE CUP button for 3 seconds to enter the dispensing amount setting mode. Then press the SINGLE CUP button again. The coffee will start dispensing and the SINGLE CUP indicator will flash. When the desired dispensing quantity is reached, press the SINGLE CUP button again and the machine stops dispensing. At this point, the single cup output quantity setting is finished and will be saved for the next operation. The adjustable output quantity for single cups is between 25 - 60ml .
Setting the output quantity of the double cup
Press and hold the DOUBLE CUP button for 3 seconds to enter the output quantity setting mode. Then press the DOUBLE CUP button again. The coffee will start dispensing and the DOUBLE CUP indicator will flash. When the desired serving quantity is reached, press the DOUBLE CUP button again and the machine stops serving. At this point, the setting for the output quantity of the single cup is finished and is saved for the next operation. The adjustable output quantity for double cups is between 70ml and 110ml .
Restoring the factory setting
Press and hold the SINGLE CUP and DOUBLE CUP buttons simultaneously for 3 seconds to restore the factory preset dispensing quantity.
AUTOMATIC POWER OFF
- If there is no operation within 29 minutes after pressing the power button, the device will switch off automatically.
- If there is no operation after pressing the power switch after pumping approx. 215ml of water, the pump switches off automatically.
After pressing the power button, the pump switches off automatically if it is not in operation for 180 seconds during milk frothing.
CLEANING AND CARE
Water outlet, steam pipe and steam cap
- After frothing the milk, turn the steam knob all the way up so that the steam outlet releases steam for a few seconds and cleans the steam pipe and steam attachment.
- Allow the steam pipe and steam cap to cool after milk frothing. Clean the steam tube and steam cap immediately with a damp cloth. This will prevent milk residues from accumulating.
Removable appliance parts and housing
Clean the sieve and the sieve support with water. Clean the appliance surface, drip tray and drip tray cover with a damp cloth.
Descending
When the machine needs to be descaled, all indicators flash 5 times and then the machine returns to normal. The descending warning is displayed each time the appliance is switched on if you do not cancel the descending process. The frequency of cleaning depends on the hardness of the water used. The following table lists the suggested cleaning intervals:
| Water hardness Cleaning interval | |
| Soft (filtered water) Every 80 brewing | brewing cycles |
| Hard (from the tap) Every 40 brewing | brewing cycles |
Fill the tank with water and descending solution to about 35mm above the lowest water level (MIN). The proportion of descending solution used depends on the operating instructions on the descending solution. Only use special descaler solution for coffee machines. If you do not have a descending solution, you can use citric acid instead. The ratio of water to citric acid is 100:5 (5% citric acid). Fill the water tank with the mixture and run the mixture through the machine once. Then fill the tank with fresh, clean water up to the MAX mark and let the water run through again.
Note: When the descending process is complete, you must cancel the descending warning: Press and hold the single cup button and the double cup button and the steam button simultaneously for 3 seconds.
Frequently Asked Questions
Which powder is right for the espresso machine?
The right powder can be identified by the shape of the powder after it has been compressed in the sieve:
- If the powder is mushy, it is too fine.
- If the powder crumbles, it is too coarse.
- If the powder holds firmly together, it is suitable.
What is the right amount of powder?
- If you are preparing 1 teaspoon, put a spoon (about 8g ) of espresso powder in the small sieve.
- If you are preparing 2 teaspoons, put two spoons (about 16g ) of espresso powder in the large sieve.
What is the function of the steam cap on the steam tube?
It ensures that the milk is swirled by the steam. This makes the milk foam firmer and finer.
Why can't the milk be frothed?
Make sure that the milk used is cold.
- Do not froth the milk for too long. If it gets too hot, no milk foam can form.
What can you do if the bubbles in the milk foam are unevenly large?
Knock on the milk cup to remove large bubbles. Then shake the milk cup horizontally to completely mix the milk and milk foam.
Which milk is suitable for frothing?
Low-fat milk is easy to foam, but the bubbles and foam are slightly larger and looser.
Whole milk is more difficult to foam, but the milk foam becomes thick and tough.
What to do if no steam comes out of the steam attachment?
- This is usually because the steam pipe and the steam cap have not been cleaned after milk frothing and milk residues block the steam pipe.
- Try cleaning the pipe with a small cleaning brush.
- If this does not help, add vinegar and water to the water tank at a ratio of 1:1. Then start the steam function to clean the hose. Then top up with fresh water and restart the steam function.
- If the problem persists, contact your service representative.
TROUBLESHOOTING
| Problem Possible cause Suggested solution | |
| Liquid runs out of the top of the fastened strainer carrier. | Residues on the seal. Remove the residue. |
| The powder is too fine. Use coarser powder. | |
| The powder has been compressed too much. Do not press the powder too hard into the sieve. | |
| The seal is old. Contact a specialist company. | |
| The strainer support cannot be properly locked and liquid will run out of the top of the fastened strainer support. | Too much powder in the sieve. Adjust the amount of powder (see: Frequently Asked Questions). |
| Residues on the seal. Remove the residues. | |
| The powder is too fine. Use coarser powder. | |
| Cold espresso. The unit has not been preheated. | Wait for the appliance to heat up before starting the preparation. |
| The pump makes unusual noises. | No water in the tank. Fill the tank with water. |
| The tank does not sit properly. Insert the tank correctly. | |
| The espresso is too light. The powder in the sieve has not been flattened. | Press the powder firmly next time. |
| Too little powder. Adjust the amount of powder (see Frequently Asked Questions). | |
| The powder is too coarse. Use finer powder. |
| Problem Possible cause Suggested solution | ||
| The espresso is too dark. The powder in the sieve was pressed too hard. | Next time don't squeeze the powder so hard. | |
| Too much powder. Adjust the amount of powder (see Frequently Asked Questions). | ||
| The sieve is dirty. Clean the sieve. | ||
| The powder is too fine. Use coarser powder. | ||
| The device is calcified. Descalé the machine (see: Cleaning and Care). | ||
| The sieve holder cannot be locked properly even though there is no powder in the sieve. | The holder is defective. Contact a specialist company. | |
| The SINGLE CUP/Double CUP indicators flash rapidly. | The knob was not reset after cooling down. | Turn the knob to the Off position. |
| Too little water in the water tank. | Fill up with water. | |
| The STEAM indicator flashes quickly. | The knob was not reset after steam was released. | Turn the controller to the Hot Water setting to dispense hot water. When the temperature drops, the pump stops automatically and you should set the knob to the off position |
| All displays light up simultaneously 5 times in succession. | The appliance must be descaled. | Descale the appliance. |
DISPOSAL CONSIDERATIONS
If there is a legal regulation for the disposal of electrical and electronic devices in your country, this symbol on the product or on the packaging indicates that this product must not be disposed of with household waste. Instead, it must be taken to a collection point for the recycling of electrical and electronic equipment. By disposing of it in accordance with the rules, you are protecting the environment and the health of your fellow human beings from negative consequences. For information about the recycling and disposal of this product, please contact your local authority or your household waste disposal service.
MANUFACTURER & IMPORTER (UK)
Manufacturer:
Chal-Tec GmbH, Wallstrasse 16, 10179 Berlin, Germany.
Importer for Great Britain:
Chal-Tec UK limited
Unit 6 Riverside Business Centre
Brighton Road
Shoreham-by-Sea
BN436RE
United Kingdom
Estimado cliente,
Unit 6 Riverside Business Centre
Brighton Road
Shoreham-by-Sea
BN436RE
United Kingdom
Chere cliente, cher client,
Unit 6 Riverside Business Centre
Brighton Road
Shoreham-by-Sea
BN436RE
United Kingdom
Gentile cliente,
PRODUTTORE IMPORTATORE (UK)
Produtlore:
Chal-Tec GmbH, Wallstraße 16, 10179 Berlin, Germania.
Unit 6 Riverside Business Centre
Brighton Road
Shoreham-by-Sea
BN436RE
United Kingdom


KLARSTEIN
- Dear Customer,
- CONTENT
- TECHNICAL DATA
- SAFETY INSTRUCTIONS
- CAUTION
- BEFORE THE FIRST USE
- Cleaning
- Preheating
- Choosing the right type of coffee
- Choosing the right grind
- ESPRESSO PREPARATION
- HOT WATER DISPENSING
- FROTH MILK / CAPPUCCHINO PREPARATION
- Important notes
- SETTING THE DESIRED OUTPUT QUANTITY
- Set output quantity for individual cups
- Setting the output quantity of the double cup
- Restoring the factory setting
- AUTOMATIC POWER OFF
- CLEANING AND CARE
- Water outlet, steam pipe and steam cap
- Removable appliance parts and housing
- Descending
- Frequently Asked Questions
- What is the right amount of powder?
- What is the function of the steam cap on the steam tube?
- Why can't the milk be frothed?
- TROUBLESHOOTING
- DISPOSAL CONSIDERATIONS
- MANUFACTURER & IMPORTER (UK)
- Manufacturer:
- Importer for Great Britain:
- Estimado cliente,
- Chere cliente, cher client,
- Gentile cliente,
- PRODUTTORE IMPORTATORE (UK)
Brand : Klarstein
Model : Futura
Category : Coffee machine