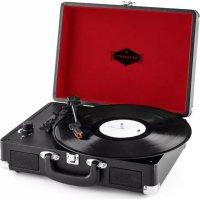
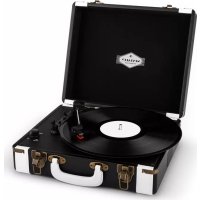
Peggy Sue - Media player Auna - Free user manual and instructions
Find the device manual for free Peggy Sue Auna in PDF.


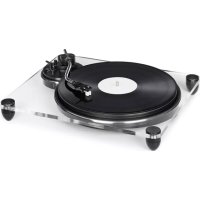
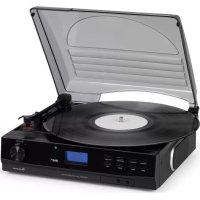
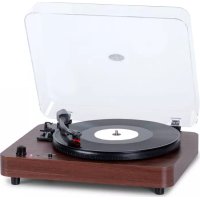
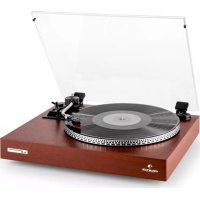
| Product type | Turntable |
| Brand | Auna |
| Model | Peggy Sue |
| Power supply | 220-240 V ~ 50/60 Hz or DC 5 V (adapter included) |
| Speeds | 33, 45, 78 RPM |
| Drive type | Belt |
| Outputs | USB (for digitization), RCA (left/right) |
| Input | AUX (3.5 mm jack) |
| Built-in speaker | Yes |
| Auto stop | Yes (ON/OFF switch) |
| Dimensions (approx.) | 45 x 36 x 13 cm |
| Weight (approx.) | 5 kg |
| Article numbers | 10031595, 10030311, 10031389, 10031390, 10031391, 10031493 |
| Main functions | Vinyl playback, USB digitization, line output |
| Maintenance and cleaning | Clean the stylus with a soft brush; clean the casing with a soft cloth and mild detergent; do not use harsh solvents |
| Safety | Unplug during storms or long periods of non-use; do not open; keep away from liquids; do not attempt self-repair |
| Spare parts and repairability | Replacement stylus, 45 RPM adapter, protective cap |
| General information | Suitable for children aged 8 and above under supervision; recycle at collection points |
Frequently Asked Questions - Peggy Sue Auna
User questions about Peggy Sue Auna
0 question about this device. Answer the ones you know or ask your own.
Ask a new question about this device
Download the instructions for your Media player in PDF format for free! Find your manual Peggy Sue - Auna and take your electronic device back in hand. On this page are published all the documents necessary for the use of your device. Peggy Sue by Auna.
USER MANUAL Peggy Sue Auna
INHALTSVERZEICHNIS
Member of Berlin Brands Group
Handwerkerstr. 11
15366 Dahlwitz-Hoppegarten
Deutschland
Berlin Brands Group UK Ltd
PO Box 1145
Oxford, OX1 9UW
United Kingdom
Dear customer,
Congratulations on the purchase of your device. Please read the following instructions carefully and follow them to prevent potential damage. We accept no liability for damage caused by disregarding the instructions and improper use. Please scan the QR code to access the latest operating instructions and further information about the product.

CONTENTS
Safety Instructions 14
TechnicalData 15
Before the first use 16
Device overview 17
Operation 18
Care and Maintenance 19
Disposal Considerations 20
Manufacturer & Importer (UK) 20
SAFETY INSTRUCTIONS
General instructions
- Lightning strike - If you are not using the unit for a longer period of time or if there is a thunderstorm, pull the plug out of the mains socket or disconnect the unit from the antenna connection. This prevents damage to the product due to lightning and overvoltage.
• Overloading - Do not overload electrical outlets, extension cords or integral sockets as this may result in a fire or electric shock. - Foreign objects and liquid entry - Never push objects of any kind into the unit through openings as they may touch dangerous voltage points or short out parts that could cause a fire or electric shock. Never spill liquids of any kind on the unit.
- Repair and maintenance - Do not attempt to service this product yourself as opening or removing covers may expose you to dangerous voltages or other hazards. Leave all maintenance work to qualified service personnel.
- Damage requiring servicing - Unplug the appliance from the wall outlet and refer servicing to qualified service personnel when any of the following situations occur:
a) If the mains cable or plug is damaged.
b) If liquid has been spilled or objects have fallen onto the product.
c) If the product has been exposed to rain or water.
d) If the product has been dropped or damaged.
e) If the product has a significantly reduced performance.
- Spare parts - If spare parts are needed, make sure that the specialist company replacing the parts only uses spare parts that are approved by the manufacturer or have the same characteristics as the original part. Unauthorised substitutions may result in fire, electric shock or other hazards.
- Heat - Do not install near any heat sources such as radiators, heat registers, stoves, or other products (including amplifiers).
Special notes
- Children over 8 years as well as mentally, sensory and physically impaired persons may only use the device if they have been informed in detail about the functions and safety precautions by a supervisor responsible for them beforehand and understand the associated risks.
- Children should be supervised to ensure that they do not play with the device. Make sure that children and babies do not play with plastic bags or other packaging materials.
- Make sure that the mains adapter/mains plug always remains easily accessible so that the unit can be quickly disconnected from the mains in an emergency.
- When you are no longer using the device, switch it off and pull the plug out of the socket.
TECHNICALDATA
| Product code | 10031595, 10030311, 10031389, 10031390, 10031391, 10031493 |
| Power supply | 220-240 V ~ 50/60 Hz or DC 5V power supply (included) |
| Type of drive Belt drive | |
| Playback speeds | 33, 45, 78 rpm (revolutions per minute) |
BEFORE THE FIRST USE
- Remove adhesive tape and transport locks from the appliance. Be careful not to damage the tone arm or other moving parts.
• Also remove the cover from the pick-up.
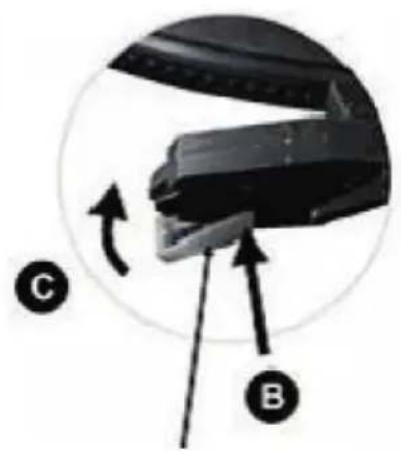
- When inserting or changing the needle: use a screwdriver to gently push down the tip of the holder (A). Remove the bracket by pulling it forward and down. Insert a new needle by holding the holder and pushing the needle in direction B. Then push the holder upwards as illustrated at C until the needle locks into place.


- Closure
- Cover
- Adapter for 45 rpm plates (Puck)
- Tone arm lever
- Turntable
- Auto-stop switch
- Speed switch (33.3/45/78 rpm)
- Power/Volume
- Speaker
- Pickup
- Handle
- USB output
- Aux input
- Left channel
- Right channel
- DC adapter input
OPERATION
- Connect the appliance to the USB port of a computer using the USB cable supplied or plug the power supply unit supplied into the wall socket.
- Place a record on the turntable. If necessary, do not forget to remove the puck from its anchorage and apply it to the plate.
- Select the appropriate speed using the speed switch.
- Turn the volume control (on/off switch at the same time). The power LED indicates the status of the appliance.
- Lift the tone arm slightly and guide it over the first grooves of the record. The record player will now automatically start spinning the record.
- Now carefully lower the tone arm so that the needle gently touches down on the record.
- Enjoy your music selection!
- When a record comes to its end, the turntable stops automatically, provided the Auto Stop switch (5) is set to ON. If it is set to OFF, the turntable continues to turn until the tone arm is put back.
- Protect the needle with the supplied protective cap when the record player is not in use.
Connecting and digitising LPs
With the record player, you can enjoy music on the move - but for home use, there are also outputs for the home stereo system.
Simply connect the rear RCA outputs with a suitable cable to the AUX input of your existing system.
If you want to digitise your records, use the rear USB output and connect the record player to the USB port of your computer. With the supplied AUDACITY music software, you can set the USB input of the computer as the signal source for the recording (is preset during installation). Please refer to the software manufacturer's information for further instructions on the respective procedure.
CARE AND MAINTENANCE
Cleaning
- Open and close the lid carefully.
- Do not touch the needle tip with your fingers and avoid bumping the needle against the turntable or the edge of the record.
- Clean the needle tip frequently. Use a soft brush for this.
- If you must use a needle cleaning fluid, use it very sparingly.
- Carefully wipe the housing of the turntable with a soft cloth. Use only a small amount of dishwashing detergent to clean the record player.
- Never use harsh cleaners or solvents for cleaning.
Transport
Before transporting the unit, carry out the following steps:
- Put the protective cap on the needle.
- Insert the retaining clip into the tone arm.
DISPOSAL CONSIDERATIONS
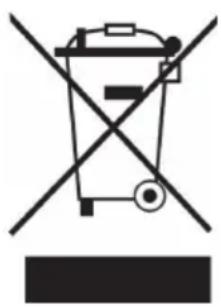
If there is a legal regulation in your country regarding the disposal of electrical and electronic equipment, this symbol on the product or on the packaging indicates that this product must not be disposed of with household waste. Instead, it must be taken to a collection point for the recycling of electrical and electronic equipment. By disposing of this product in accordance with the regulations, you protect the environment and the health of those around you from negative consequences. For information on recycling and disposal of this product, contact your local government or household waste disposal service.
MANUFACTURER & IMPORTER (UK)
Manufacturer:
Chal-Tec GmbH, Wallstraße 16, 10179 Berlin, Germany.
Importer for Great Britain:
Berlin Brands Group UK Ltd
PO Box 1145
Oxford, OX1 9UW
United Kingdom
Estimado cliente:
ÍNDICE
Berlin Brands Group UK Ltd
PO Box 1145
Oxford, OX1 9UW
United Kingdom
Cher client, chère cliente,
SOMMAIRE
Berlin Brands Group UK Ltd
PO Box 1145
Oxford, OX1 9UW
United Kingdom
Gentile cliente,
INDICE
PRODUTTORE E IMPORTATORE (UK)
Produttore:
Chal-Tec GmbH, Wallstraße 16, 10179 Berlino, Germania.
Berlin Brands Group UK Ltd
PO Box 1145
Oxford, OX1 9UW
United Kingdom


- INHALTSVERZEICHNIS
- MEMBER OF BERLIN BRANDS GROUP
- HANDWERKERSTR. 11
- 15366 DAHLWITZ-HOPPEGARTEN
- DEUTSCHLAND
- DEAR CUSTOMER
- CONTENTS
- SAFETY INSTRUCTIONS
- GENERAL INSTRUCTIONS
- SPECIAL NOTES
- BEFORE THE FIRST USE
- OPERATION
- CONNECTING AND DIGITISING LPS
- CARE AND MAINTENANCE
- CLEANING
- TRANSPORT
- DISPOSAL CONSIDERATIONS
- MANUFACTURER & IMPORTER (UK)
- MANUFACTURER
- IMPORTER FOR GREAT BRITAIN
- ESTIMADO CLIENTE
- ÍNDICE
- CHER CLIENT, CHÈRE CLIENTE
- SOMMAIRE
- GENTILE CLIENTE
- INDICE
- PRODUTTORE E IMPORTATORE (UK)
Brand : Auna
Model : Peggy Sue
Category : Media player